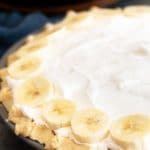
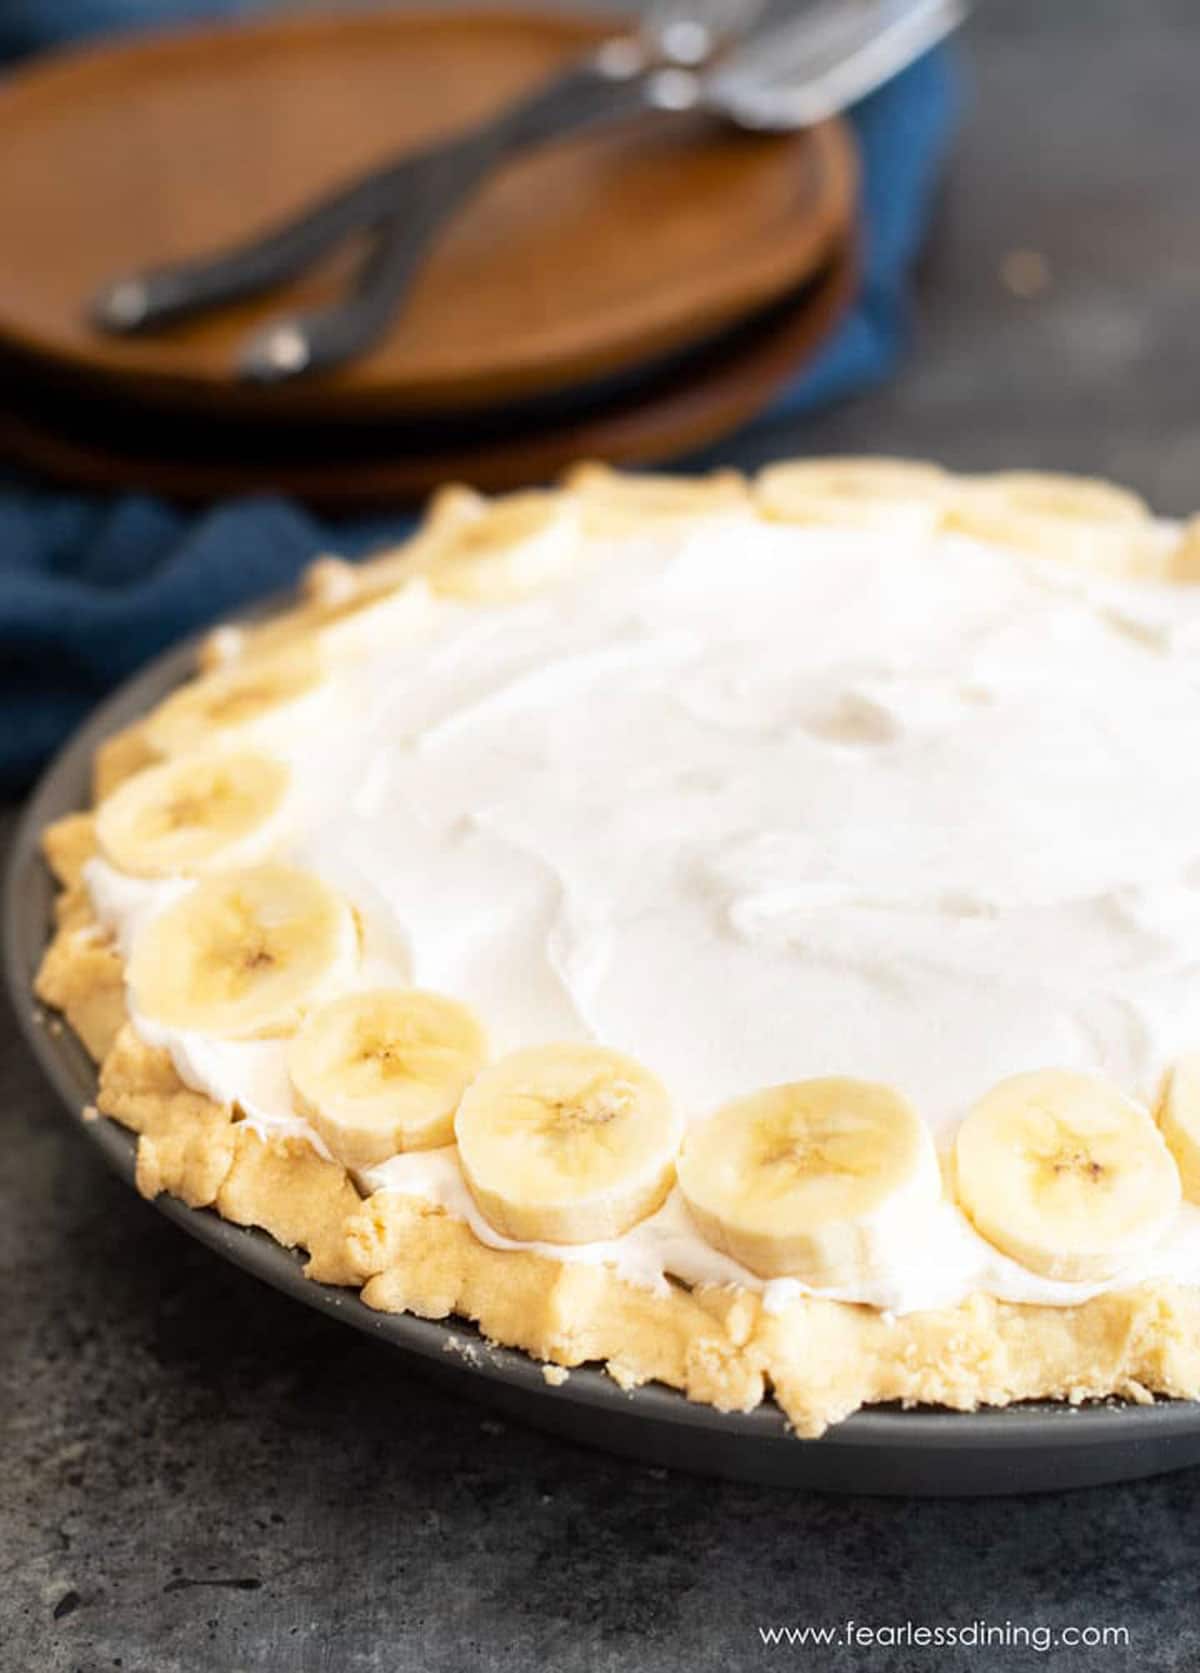
Get ready for a delicious banana flavor explosion when you take a bite of this gluten free banana cream pie. Homemade vanilla pudding and fresh ripe banana slices in a flaky gluten free pie crust. It is the ultimate dessert!
When is the last time you made a cream pie? I honestly can’t remember the last time I made one. I was shooting a tutorial video today to teach everyone how to make a flaky gluten free pie crust, and I needed to come up with a filling for the pie crust.
We had 4 overripe bananas on the counter, which pretty much sealed the deal! If your bananas aren’t ripe, don’t worry. You can still easily make this recipe!! If you have a lot of ripe bananas, why not try this banana flambe sundae recipe?
If you love bananas as much as we do, you will want to check out these gluten free banana bars too. They are moist and delicious…and full of chocolate chips.
Best ways to ripen bananas:
- Place your bananas on a baking sheet and bake at 225º F for 20 minutes.
- If you are not in a rush, you can place your bananas in a brown paper bag and let them sit on the counter for a few days. (Don’t forget to close the bag!)
- You can grill the bananas. Use a knife to slit down the peel. Place the bananas on the grill. Close the lid and cook at 300º F for 15 minutes.
Why Make This Recipe:
- The sweet ripe bananas and vanilla pudding are nestled in a flaky gluten free pie crust.
- This is a classic dessert that is delicious all year long! You can use my simple gluten free pie crust recipe or a store-bought gluten free crust.
- This recipe also works with gluten free graham cracker crusts.
- Making this gluten free banana cream pie recipe from scratch is easy, and I will walk you through every step.
Serve this with my delicious Gluten Free Nilla Wafers!
How to temper eggs:
It is easy to learn how to temper eggs. It is important that your eggs don’t cook in the hot liquid before mixing them in. To temper your egg yolks, add them to a small dish. Add a small amount of the hot liquid and stir quickly. Repeat 3x to add enough liquid to warm the eggs to the liquid’s temperature. Pour into the milk mixture.
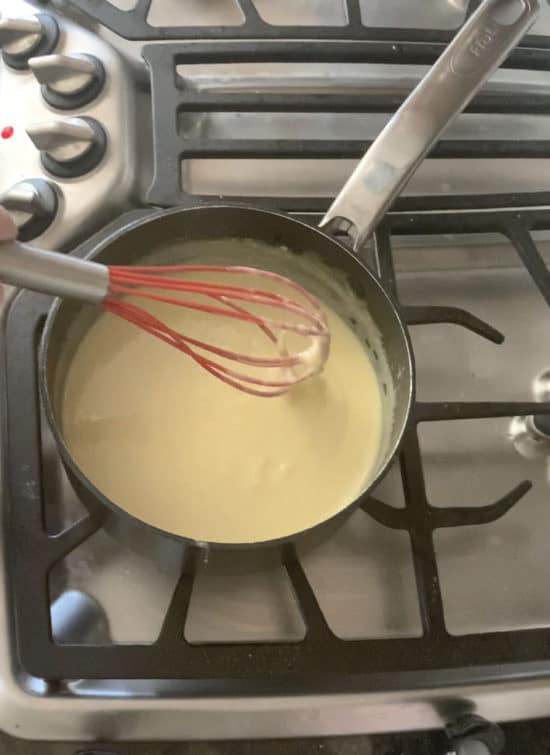
Don’t forget to keep whisking the whole time; this will prevent burning on the bottom of the pot and prevent lumps!
How To Make Gluten Free Banana Cream Pie:
The first step is to make the pudding pie filling. This will allow cooling time while you make the pie crust.
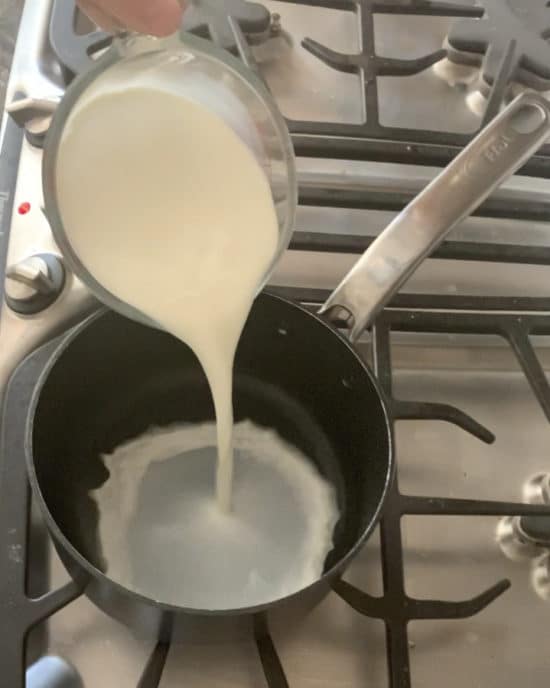
Step 1: Put a saucepan onto the stove and turn the heat to medium. Pour in your milk. (Note: it is important to use whole milk or a milk and half and half combination in this recipe. Non-dairy milk does not set as well, and 2% and skim kinds of milk often don’t set enough, leaving your pie filling “runny.”)
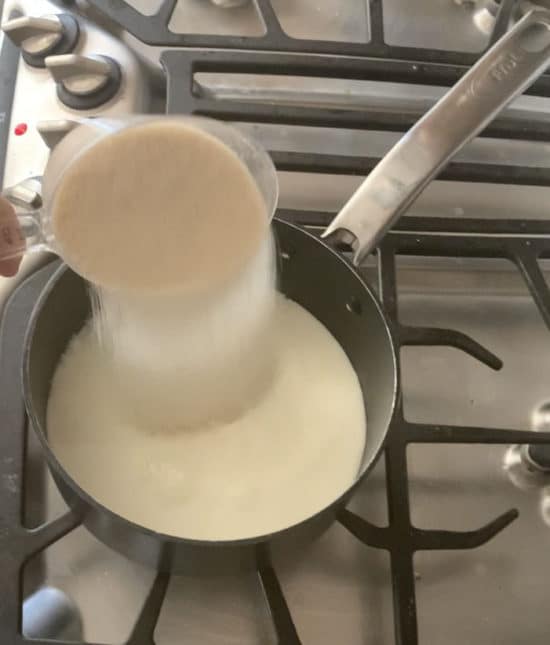
Step 2: Add the sugar. Bring to a gentle, slow boil, whisking the whole time so it doesn’t get foamy. Turn the heat down to simmer.
Step 3: Make a slurry with the cornstarch by adding a splash of cold milk to a cup. Dissolve your cornstarch in it. Set this slurry aside.
Step 4: Next, add the slurry, butter, and vanilla. You will want to simmer (low-boil) this until the mixture is thick. Low and slow is the secret to this thickening up.
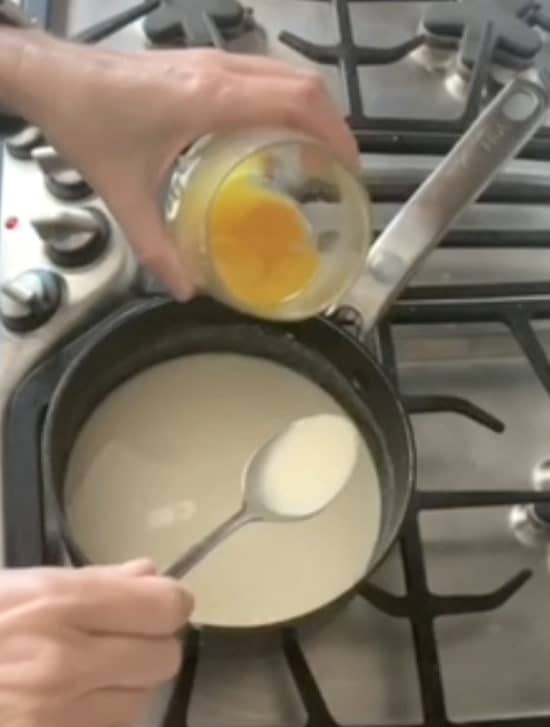
Step 5: Temper the eggs with some of the hot milk mixtures. If you haven’t tempered eggs, scroll down to my tips and recipe FAQ for instructions.
Step 6: If you use a premade crust, bake it according to directions. If you are using a premade graham cracker crust, you do not have to bake it.
You can also make my flaky gluten free pie crust recipe. That link will take you to a full video, the recipe, and step-by-step directions! You will want to bake the pie crust at 350º F to bake the crust before adding the pie filling and bananas.
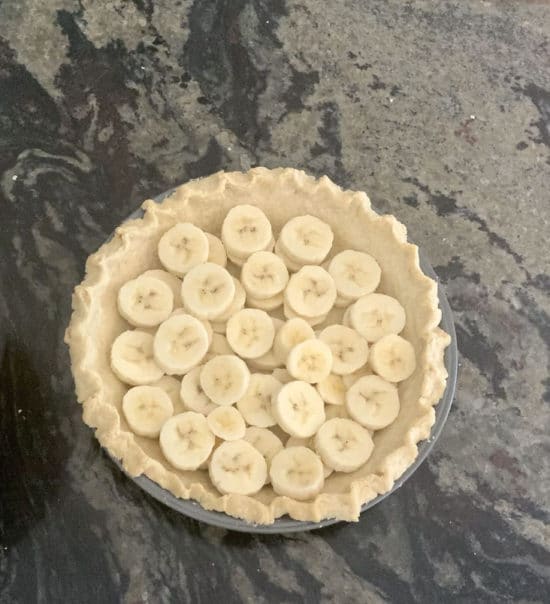
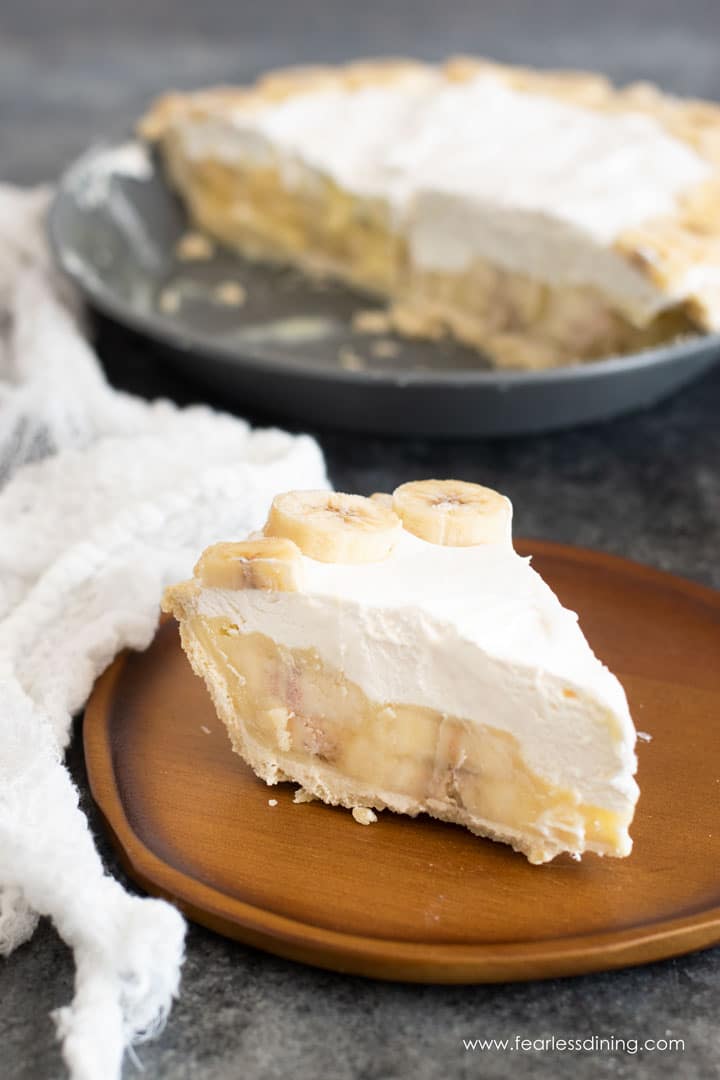
Step 7: Slice 2-3 bananas and layer into the pie crust. This doesn’t have to be perfect because they will move around a little in step 6.
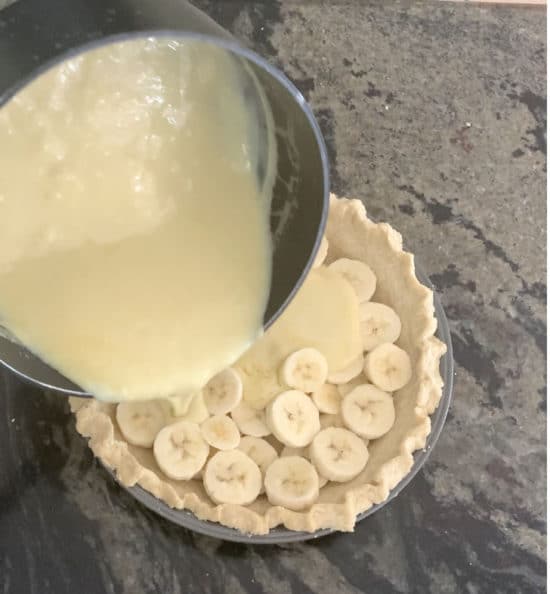
Step 8: Pour the cooled pudding batter over the bananas. Cover with plastic wrap. Put in the refrigerator to cool. Cool for 3 hours minimum.
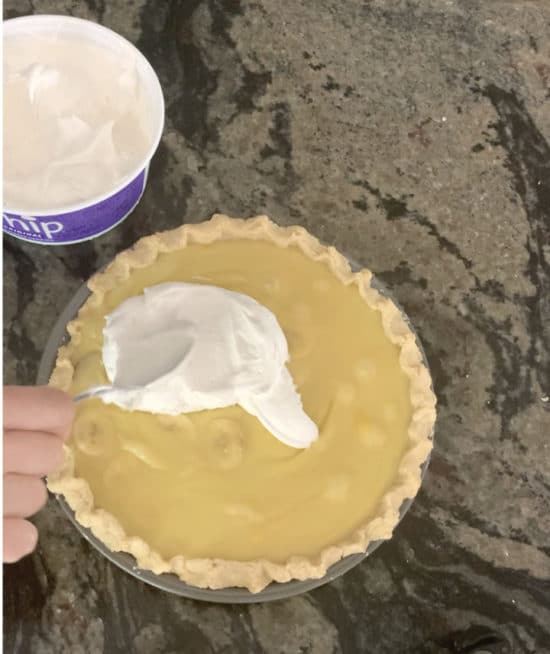
Step 9: Spread whipped cream (homemade, store-bought, or non-dairy) over the top of the pie. Refrigerate until you are ready to serve the pie.
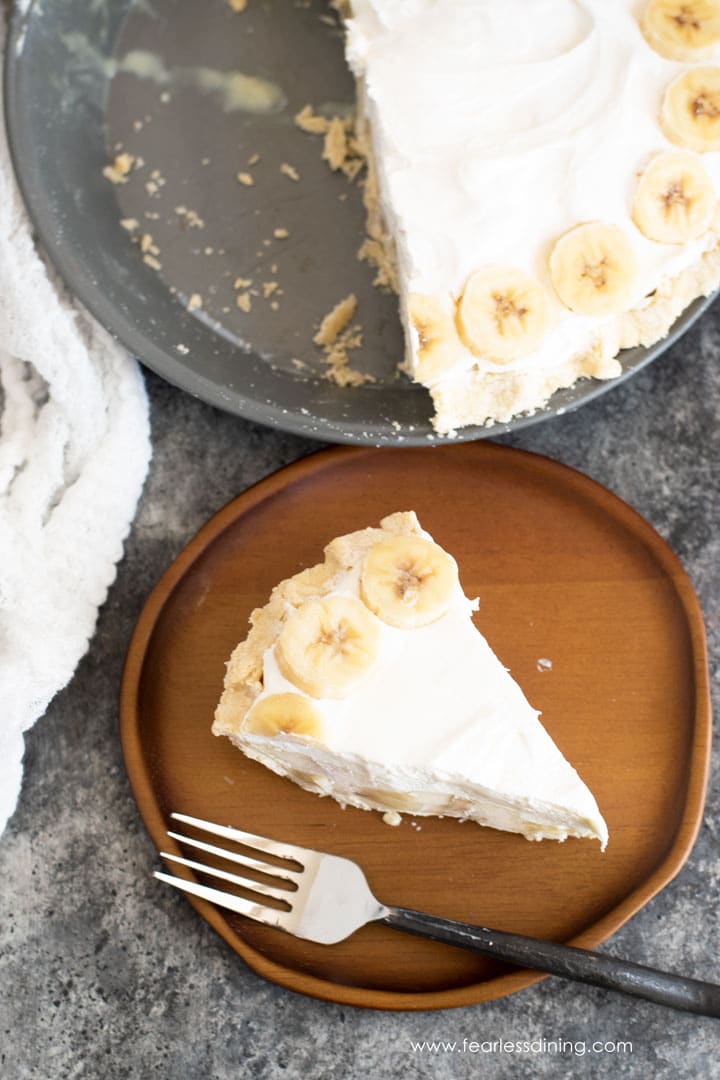
Step 8: Optional: decorate the pie with banana slices from a 4th banana. Enjoy! You can freeze the pie for a cold treat on a hot summer day!
Expert Tips and Recipe FAQ:
The biggest reason why banana cream pie turns out runny is that the pudding didn’t cook long enough to set. If it is runny, it is either overcooked (too high a heat) or under-stirred. Custard creams can lose their structure with high heat. Undercooking and under-stirring can also be a problem.
This gluten free banana cream pie should be stored in the refrigerator to prevent molding.
I used a gluten free flour blend to thicken my banana cream pie. You could use cornstarch or tapioca starch to thicken this pie.
The best way to prevent the crust from getting soggy is to store the pie in the refrigerator or freezer. The crust will absorb moisture from the pie because it is a wetter filling.
This banana cream pie will keep up to 3 days in the refrigerator.
This recipe can easily use a store-bought pie crust or graham cracker crust.
If you love pie as much as we do, give my popular Gluten Free Mixed Berry Pie recipe a try, too!
More Delicious Gluten Free Banana Recipes:

Gluten Free Banana Cream Pie
Ingredients
- gluten free pie crust * see note
- ¾ cup cane sugar
- ⅓ cup cornstarch or a starchy gluten free flour blend
- ⅛ teaspoon salt
- 2 cups whole milk *See note
- 3 egg yolks
- 2 tablespoons unsalted butter
- 1 teaspoon pure vanilla extract
- 4 ripe bananas
- 2 cups whipped cream topping *See note
Instructions
- Make or use a store-bought gluten free pie crust. (*See note) Preheat your oven to 350º F.
- If you are using regular pie crust, and it is not baked, bake the crust for 15 minutes. If you are using a graham cracker crust, you do not have to pre-bake the crust.
- Add your milk, sugar, and salt to a pan and bring to a very slow boil, stirring so it doesn't get foamy. Make a slurry with the cornstarch by adding a splash of cold milk to a cup. Dissolve your cornstarch in it. Set this slurry aside. Once your milk is to temp, start whisking and slowly pour in your slurry…..the milk will INSTANTLY start to thicken.
- Turn the heat to low. This can take time. Cook it until it thickens. Custard creams can lose their structure with high heat. Undercooking and under-stirring can result in this pie not setting.
- Put the 3 egg yolks in a mug or heat-safe container (not plastic). Take a spoon and add a spoonful of hot liquid to the eggs and mix quickly. Repeat 3x with the hot liquid to temper your eggs. Once the eggs are tempered you can pour them into the pot of hot liquid and whisk.
- Add the butter and vanilla and keep whisking for 1 minute. Turn the stove off and move the pan to a cool burner to allow it to cool for 15 minutes. Whisk and make sure the mixture is thick.
- Slice 3 bananas (the fourth banana is for the top of the pie). Layer the banana slices in the pie crust.
- Pour the pudding mixture over the bananas.
- Cover with plastic wrap and put the pie into the refrigerator to cool for 3 hours.
- Add a layer of whipped cream on top and decorate with the remaining sliced bananas.
Notes
SPECIAL NOTE
Please know that every gluten free flour blend has a different starch to grain ratio. If you use a blend I didn’t test, you may need to adjust your moisture levels in your baked goods.
Nutrition
Nutrition Disclaimer
Nutritional information is an estimate provided to you as a courtesy. You should calculate the actual nutritional information with the products and brands you are using with your preferred nutritional calculator.

It never thickened or set for me. Ideas?
What kind of gluten free flour did you use?
Or is there multiple that work for this recipe?
Hi Samantha. Cup4Cup is my favorite, but King Arthur Measure for Measure is also good.
This was amazing! My husband ate 2 large slices and licked the plate. It was a little runny though. How do you know when it is the right consistently? To no not over stir or under? Is there a temperature to use and also is it 1/4 cup or 1/3 cup cornstarch? It states both.
I am so glad you and your husband loved this recipe. It is a fine line but I suspect humidity also plays a little part. You can definitely add more cornstarch to make it firm up more.
egg replacement?
Hi Merry, the way this recipe sets, I do not think an egg replacement would work.
Is this runny after baking? Will it firm up in fridge?
Mine was a little jiggly and firmed up. How did yours turn out after chilling?
Do you think I use half and half or heavy cream instead of the whole milk?
This should work, I haven’t used those myself but I don’t see why it wouldn’t work. Enjoy 🙂
This looks like something I would absolutely love. Can’t wait to try this one!!
Enjoy Katie 🙂
LOVED this pie! So fresh and creamy. Thanks for great gluten free recipes. This one is another five star winner!
That is great…glad you loved it. Have a great weekend.