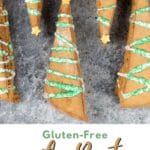
This is for my gingerbread fanatics! Give this new recipe a try because these homemade Gluten-Free Gingerbread Biscotti are really amazing! They are crunchy with a kick of delicious spice; this easy gingerbread biscotti is perfect for the holidays.
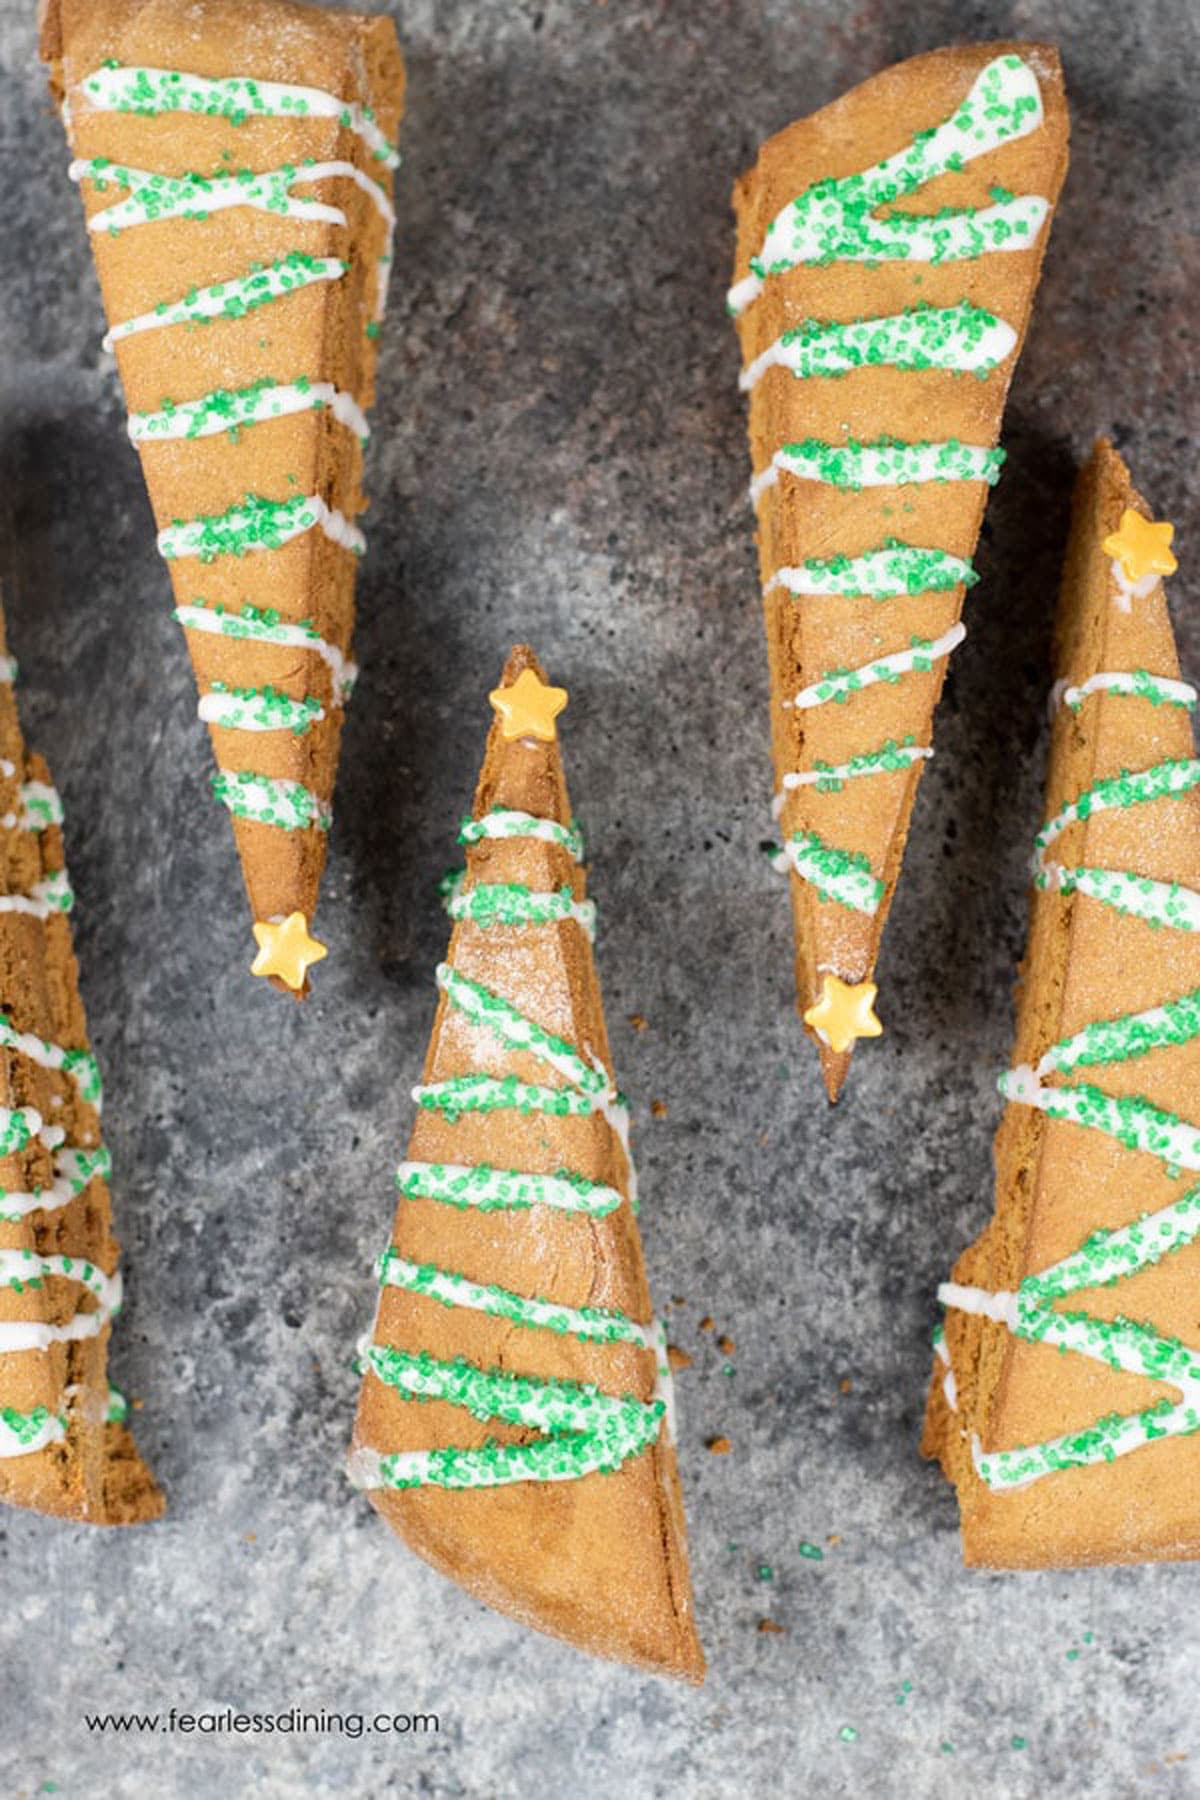
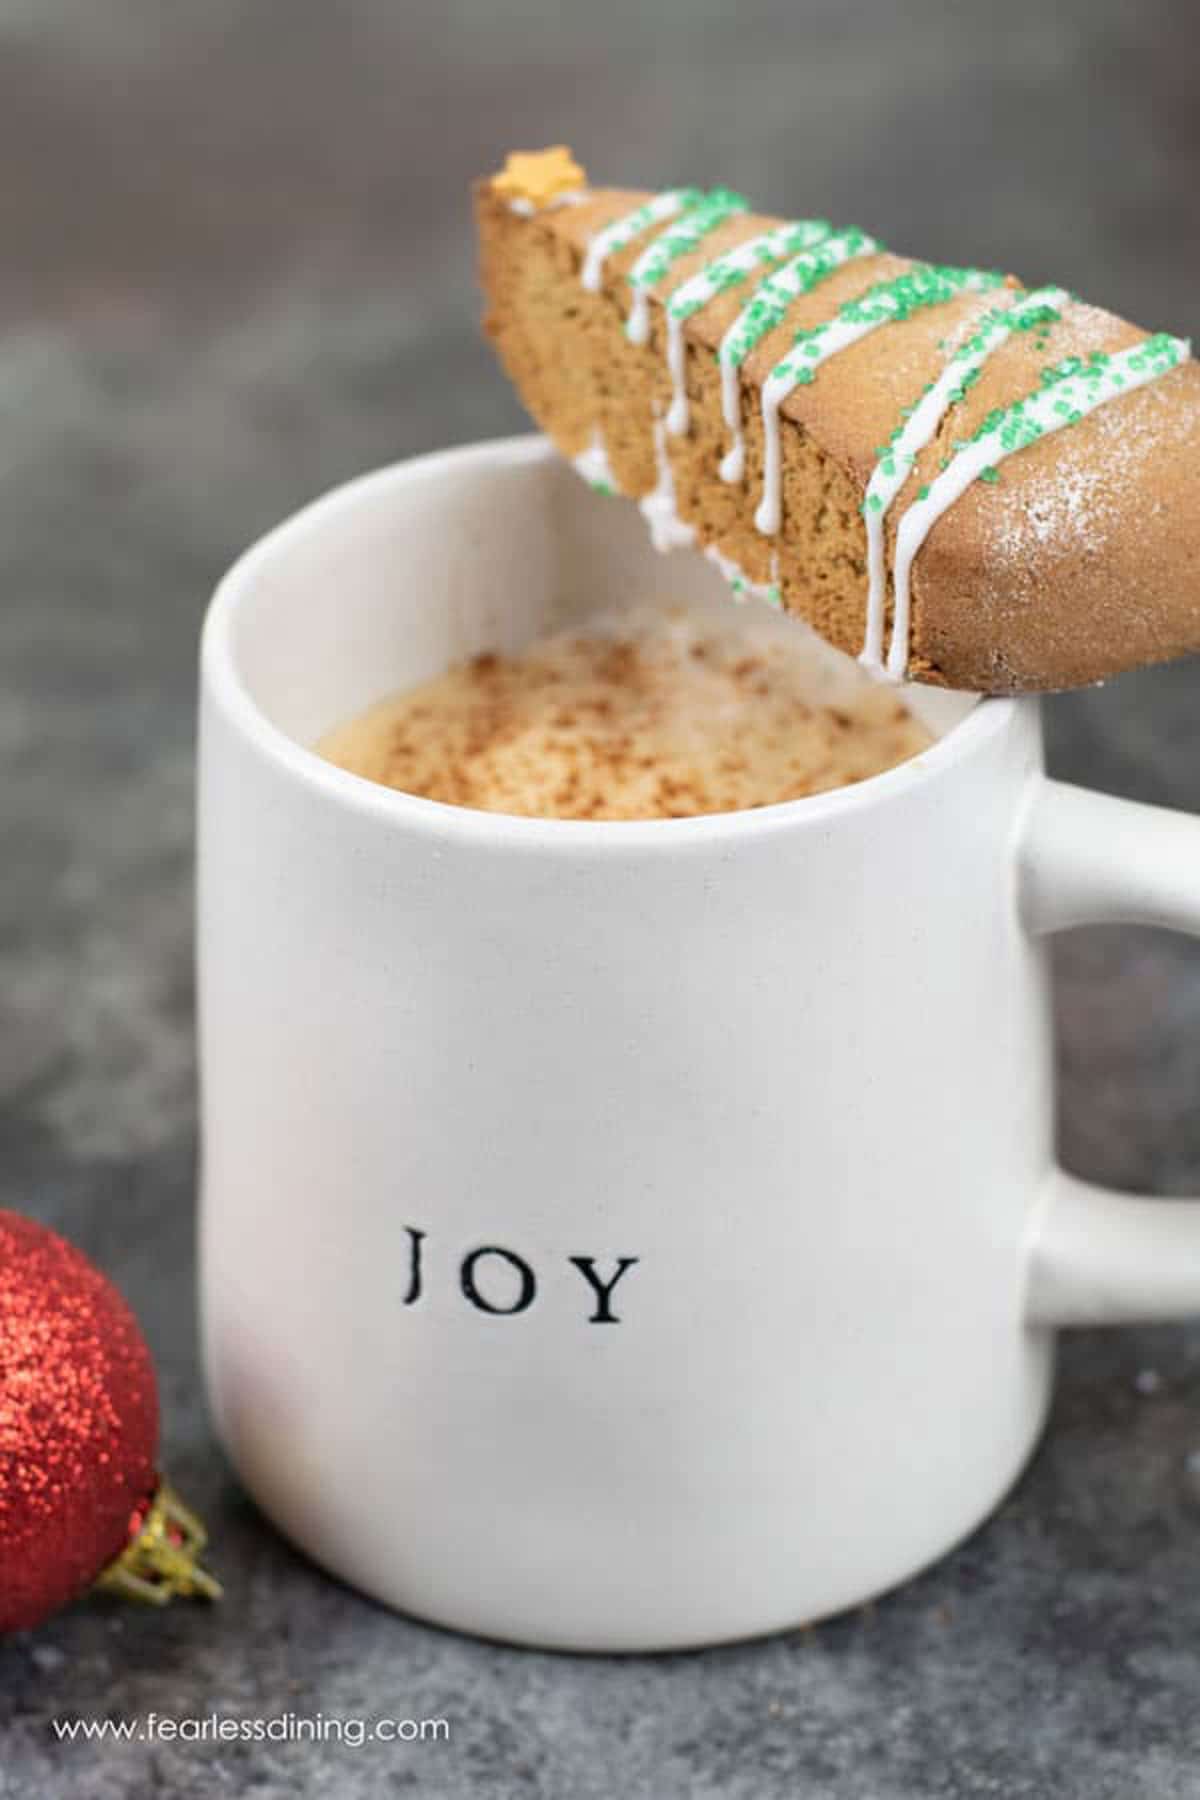
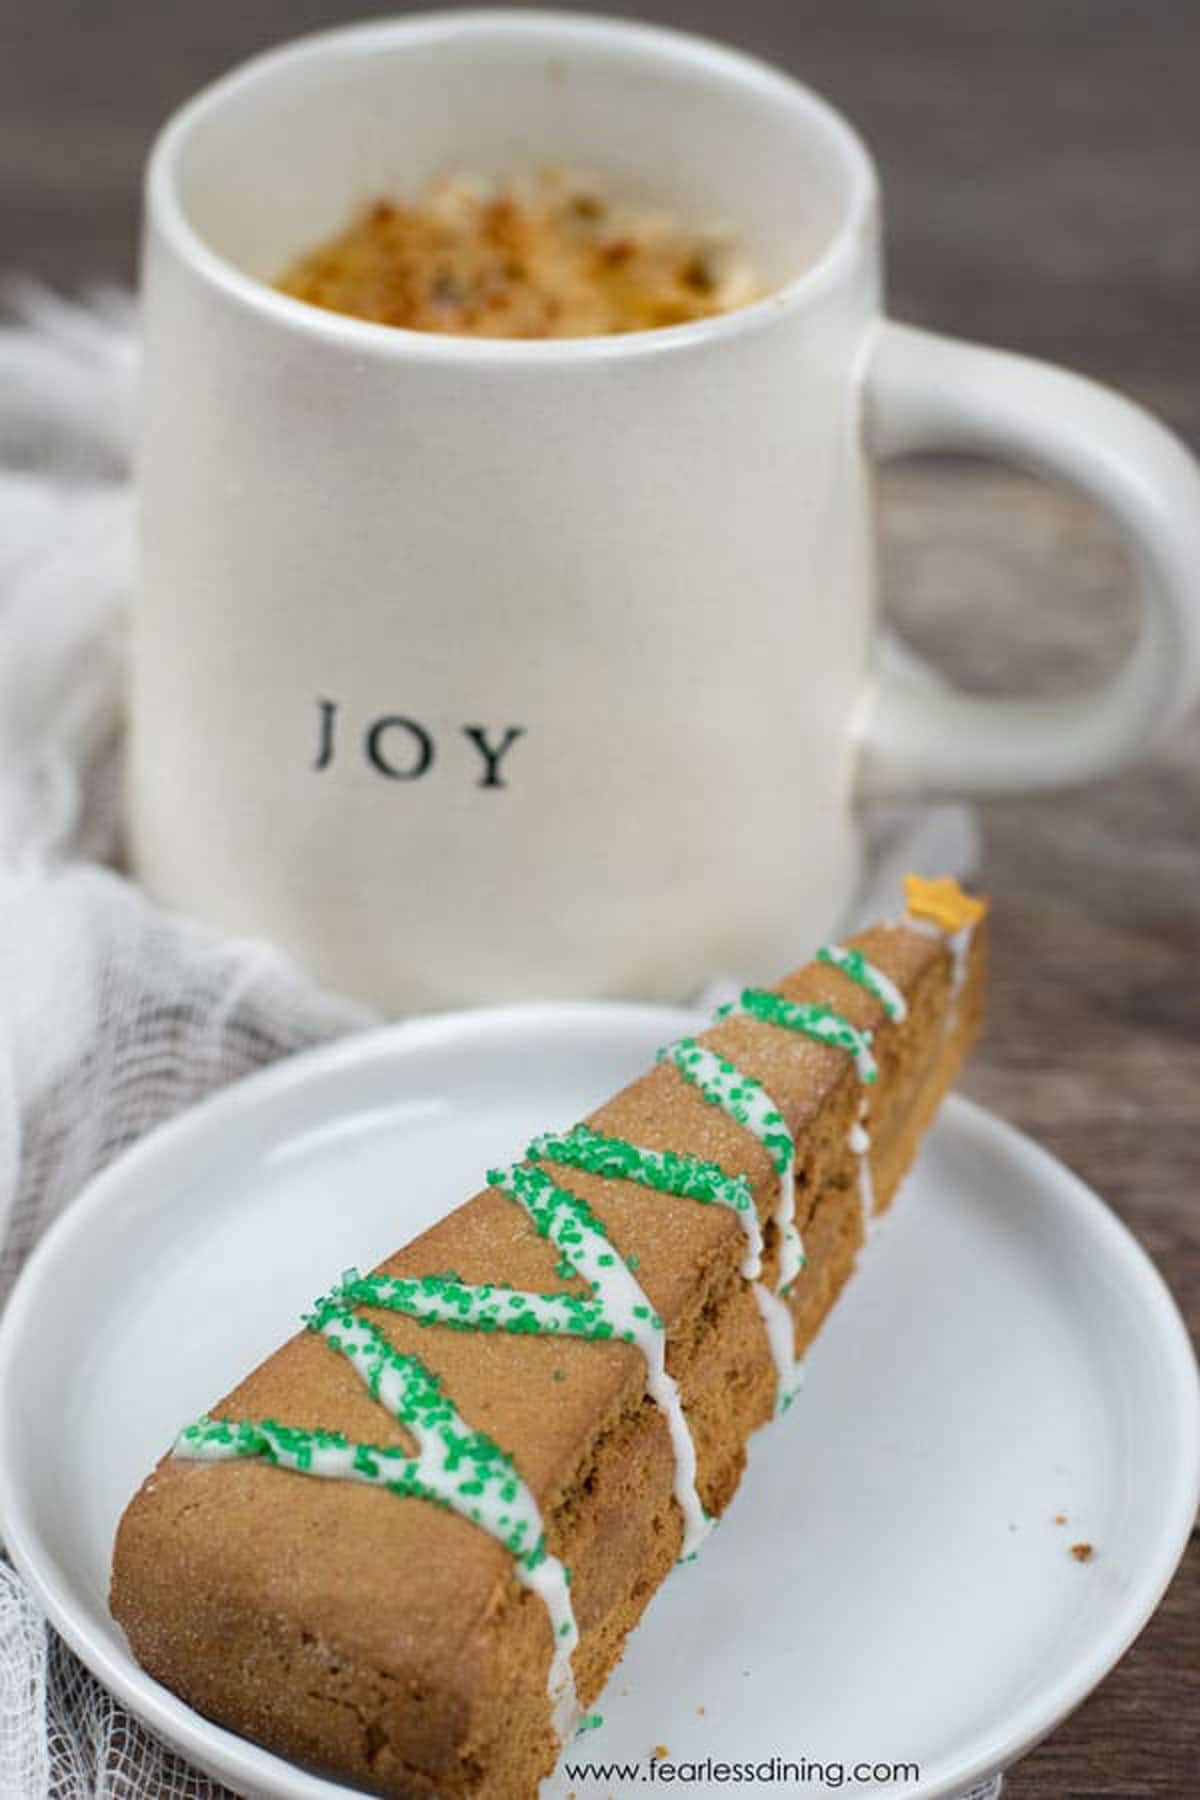
These crunchy, gluten-free gingerbread biscotti are fun to make and cut into these cute Christmas tree shapes over the holidays! The kids loved decorating these, even though they think the idea of biscotti dipping into coffee is gross. LOL. I include a dairy-free option, too, so anyone can enjoy this biscotti!
This homemade gluten free gingerbread biscotti is full of holiday flavors. This is a great baking project to make with your kids! These biscotti also make great holiday gifts!
After making this biscotti recipe, your biggest choice will be whether to dunk it in coffee or milk! If you love biscotti as much as we do, you will also love this Gluten-Free Mandelbrot recipe! It is a fun twist on biscotti!
Allergen Information:
This biscotti recipe is gluten-free, nut-free, and soy-free. You can make this recipe dairy-free by using vegan butter instead of regular butter.
You will also want to try this Gluten Free Candied Ginger Biscotti soon…it is drenched in white chocolate and is so good dipped in coffee!
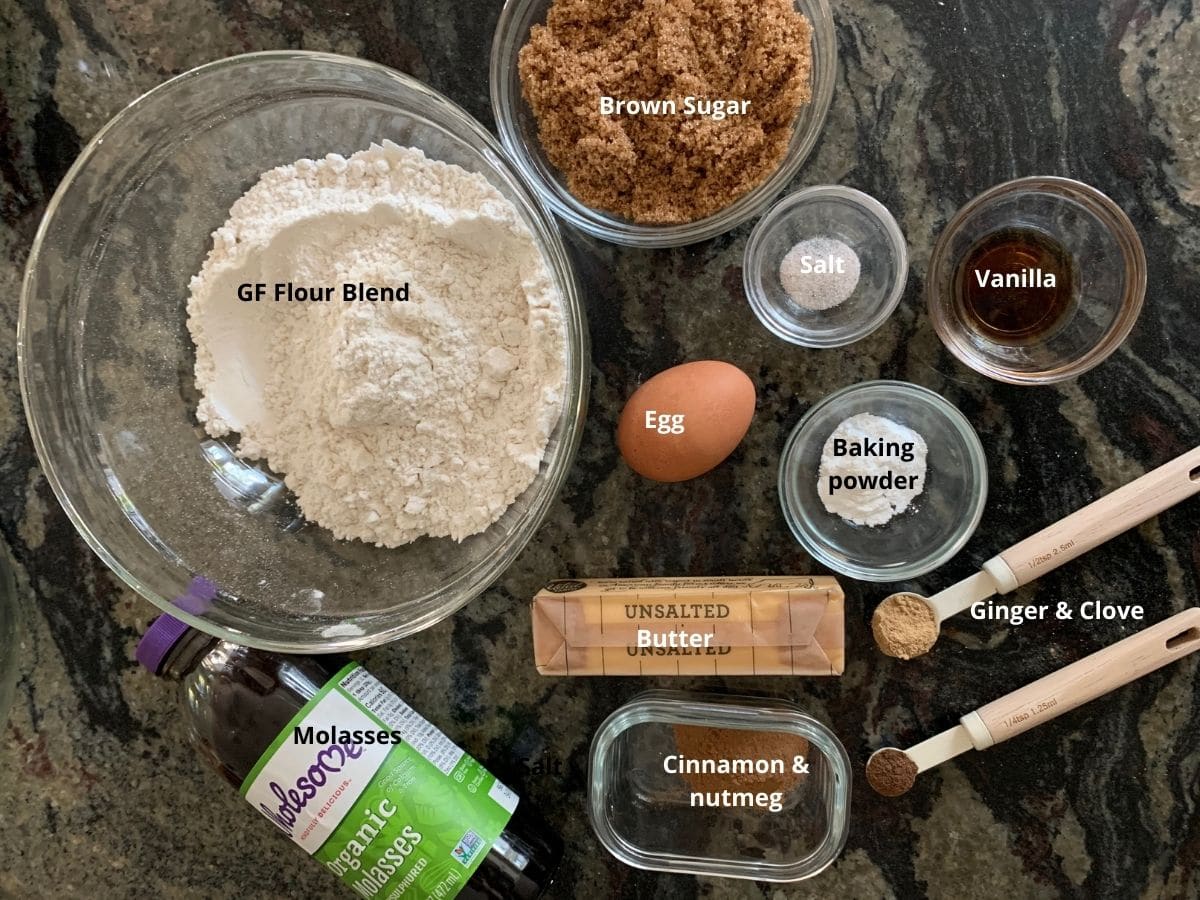
Ingredient Notes:
- Gluten Free Flour Blend – I used King Arthur’s Measure for Measure Flour for this recipe, but Bob’s Red Mill 1 to 1 Gluten Free Blend and Authentic Foods MultiBlend all work wonderfully, too!
- Brown Sugar – Swap and use coconut sugar if you would like these to have a lower glycemic level. (Great for preventing a sugar buzz!)
- Baking Powder and Salt – Use aluminum-free baking powder.
- Butter – Use unsalted butter.
- Eggs – Use size large.
- Vanilla Extract – Use pure vanilla extract and not imitation vanilla.
- Molasses – I love using blackstrap molasses in this recipe. It makes the flavor a bit richer.
How To Make Gluten Free Gingerbread Biscotti:
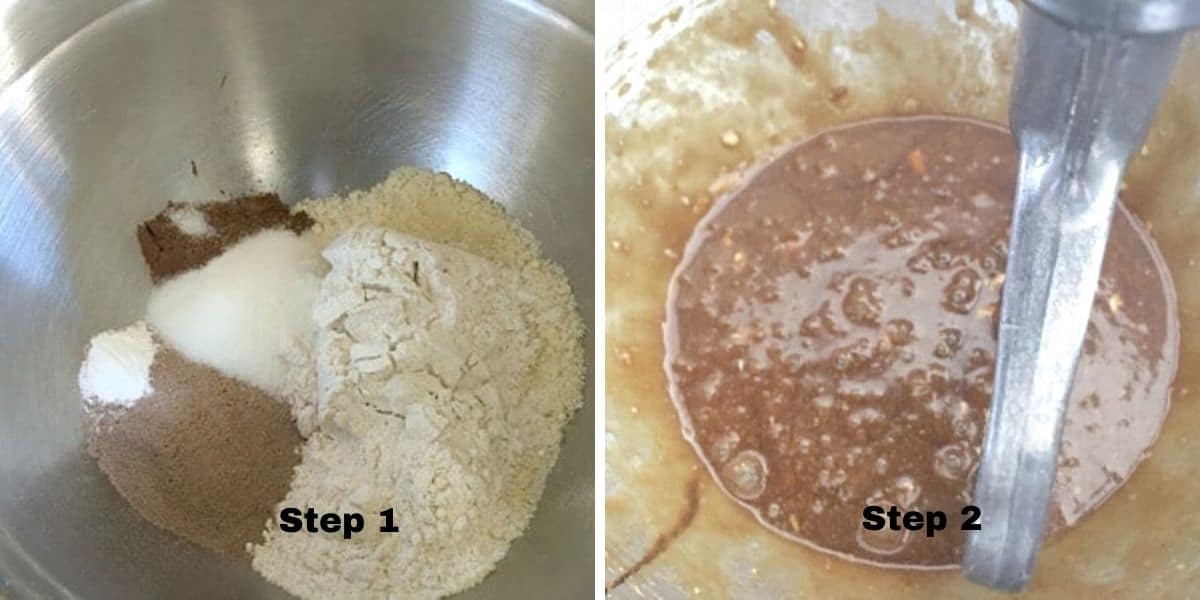
Step 1: Add your dry ingredients to a large
Step 2: Add your wet ingredients to a standing mixer. Add a paddle attachment. Mix on low speed and gradually increase the speed to medium. Slowly add the dry ingredients a little at a time. When you are done, your dough will be somewhat stiff.
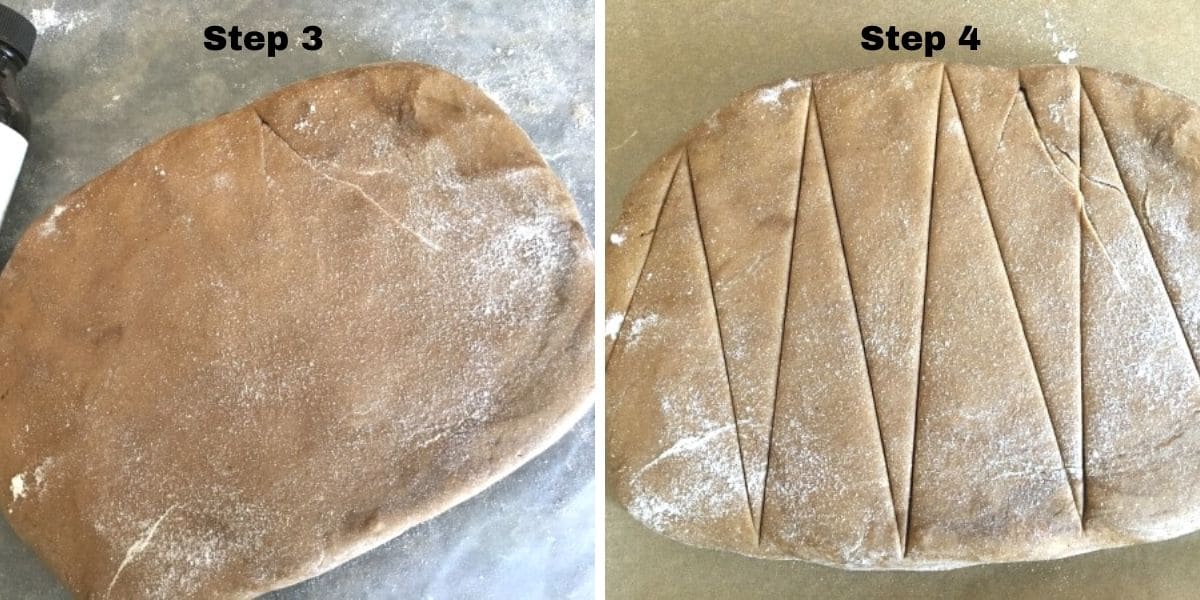
Step 3: Roll your biscotti dough into a rectangle (or as close as you can get.) Mine sort of turned out more oval-shaped. You want your dough to be 1- -inch thick, depending on how thick you want your biscotti.
Now, you get to make a decision. Do you want to shape your biscotti like Christmas trees or like long oval-shaped biscotti? We are making tree-shaped biscotti 🙂
Step 4: Make very light cut lines in your unbaked biscotti dough. I cut through maybe 2 millimeters. It is so that you have lines to follow when you are partway through baking the biscotti.
Step 5: The next step is to bake the gingerbread biscotti for 20 minutes at 350º F. Remove the biscotti from the oven and use a sharp knife to cut all the way through the cut lines.
Lay each piece of the biscotti on its side so they stand tall (not on the top or bottom). Bake on its side for 8 minutes, then remove the pan from the oven. Flip the biscotti to the other side and bake for an additional 8 minutes.
Decorating Ideas:
This biscotti is really fun to decorate. Just make sure your sprinkles are gluten free!
- Drizzle on icing and sprinkle
- Drizzle on melted white chocolate
- Dip the biscotti in white chocolate
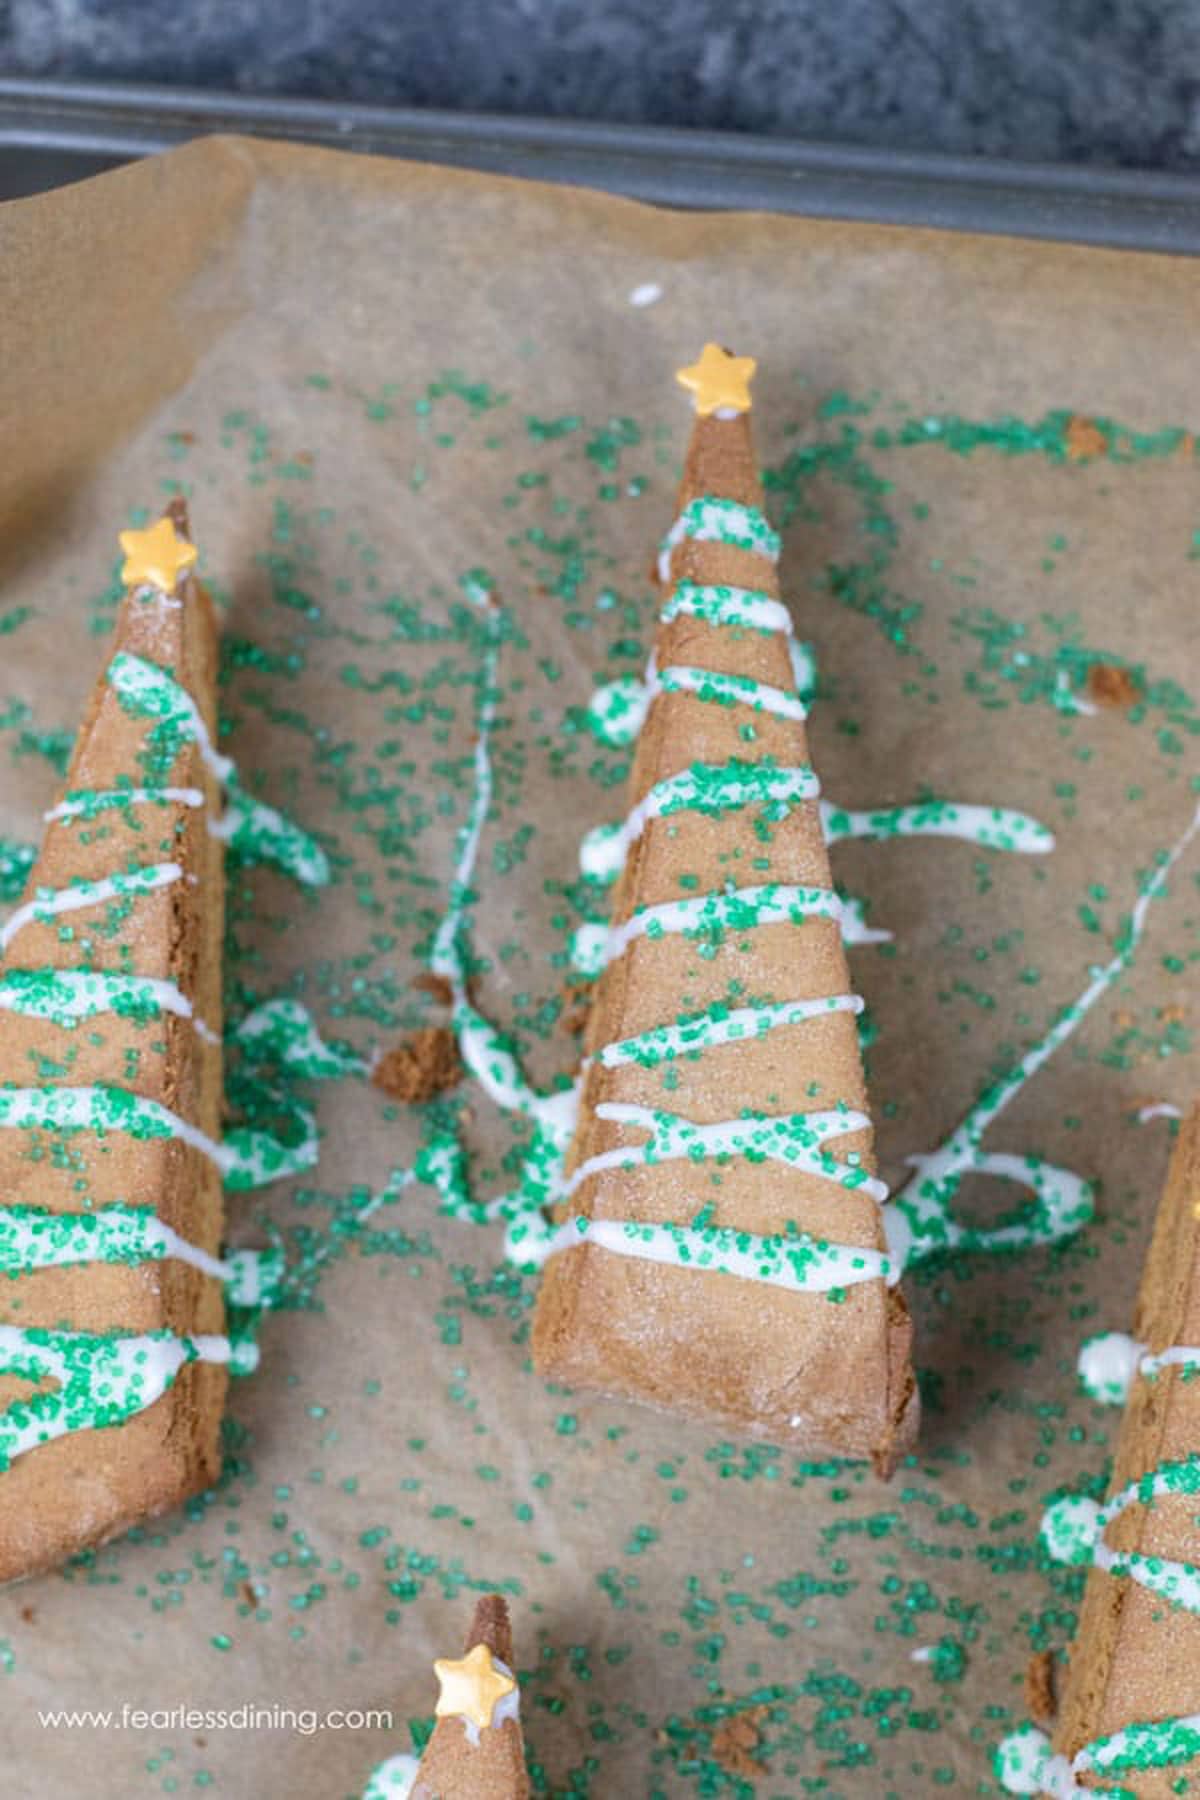
Remove from the oven and allow to cool on a cooling rack. You will know your biscotti is finished baking when it is hard and crunchy. When the biscotti are cooled, decorate with cookie icing, sprinkles, or dip in white chocolate! You may also love this easy Gluten Free Almond Biscotti!
Recipe FAQ:
Biscotti is traditionally a hard cookie, so you bake each side separately. It was made to dip in coffee or milk to soften it.
If your biscotti turned out soft, you didn’t bake the biscotti long enough on both sides.
This biscotti will keep fresh for up to 5 days in an airtight container or up to 4 months in the freezer.
More Gluten Free Holiday Desserts:
- Gluten Free Gingerbread Cheesecake Bars
- Gluten Free Gingerbread Bundt Cake with Cream Cheese Frosting
- Gluten Free Ginger Cookies
- Easy Gluten Free Stollen
Love This Recipe?
If you made and enjoyed this recipe, I would be incredibly grateful if you could leave a comment below. Include which flour blend you used. This helps others know this recipe is delicious. Thank you!

Gluten Free Gingerbread Biscotti
Ingredients
- 2 cups gluten free flour blend *see note
- ½ cup brown sugar or substitute coconut sugar
- 1 teaspoon baking powder aluminum-free
- ⅛ teaspoon salt
- 1 ½ teaspoons ground cinnamon
- 1 ½ teaspoons ground ginger
- ¾ teaspoon ground allspice
- ¼ teaspoon ground cloves
- 6 tablespoons unsalted melted butter *see note
- 1 large egg
- 2 teaspoons pure vanilla extract
- 2 tablespoons blackstrap molasses
Instructions
- Preheat the oven to 350º F.
- In a standing mixer, add the wet ingredients and mix on low. Gradually turn up the speed to medium until the wet ingredients are creamy.
- Turn the speed back to low and gradually add the dry ingredients ¼ cup at a time. Keep on low so the flour doesn’t go flying!
- Remove the dough from the mixer and place on wax paper.
- Roll the dough to a rectangular shape about 1 to 1 ¼ inch thick. Use a knife to lightly make cut lines on the dough. (I made Christmas tree shaped cut lines.) Transfer from wax paper to parchment paper on a baking sheet.
- Bake the biscotti for 20 minutes. Remove from the oven and use a sharp knife to cut through each cut line.
- Turn each slice of biscotti on its side and bake 8 minutes. Remove from the oven and flip to bake on the other side for another 8 minutes.
- Remove from the oven and cool in a cooling rack.
- Decorate and enjoy!
Notes
- I have tested this recipe with King Arthur Measure for Measure GF, Bob’s Red Mill 1 to 1 GF blend, and Authentic Foods Multi Blend in this recipe. That doesn’t mean others will not work, I just have not tested other flours.
- If your gluten free flour blend doesn’t contain Xanthan Gum or Guar Gum, please add ¾ teaspoon.
- To make this recipe dairy-free, substitute the butter for vegan butter.
- This gluten free biscotti will keep up to 3 days in an airtight container, or up to 4 months in the freezer.
- Variation: Dip the biscotti in melted white chocolate.
SPECIAL NOTE
Please know that every gluten free flour blend has a different starch to grain ratio. If you use a blend I didn’t test, you may need to adjust your moisture levels in your baked goods.
Nutrition
Nutrition Disclaimer
Nutritional information is an estimate provided to you as a courtesy. You should calculate the actual nutritional information with the products and brands you are using with your preferred nutritional calculator.

I’ve mixed all ingredients to your instructions and the dough is not sticking together. What to do?
Hi Darlene, what gluten free flour blend are you using? Some blends are starchy and probably need more flour (as it sounds like what you are describing.)
Why is my dough so crumbly?
Hi Sherry, I would need more information to answer your question. What gluten free flour blend did you use? Did you substitute any of the ingredients?
Would love some high altitude adjustments 🙂 Recipe looks so great – dough was too dry, but left hands oily at my altitude.
Still looks delicious though!!!
Hi Susan, I wish I could help with high altitude adjustments, but honestly, I have never lived in a high altitude and I wouldn’t know how to advise on this.
We love to make homemade biscotti at home. I have never thought to make gingerbread flavor.
Enjoy :-).
These are SO fun! Love biscotti so much!!
Awww, thanks Tawnie!
Pretty and festive. Perfect for a December breakfast.
I like how you think Andrea 🙂
I love all things gingerbread. I’m going to have to try making these.
I hope you like them as much as we do :-).
These look so good! Perfect for an afternoon treat with a mug of tea.
These do make a great afternoon treat 🙂