
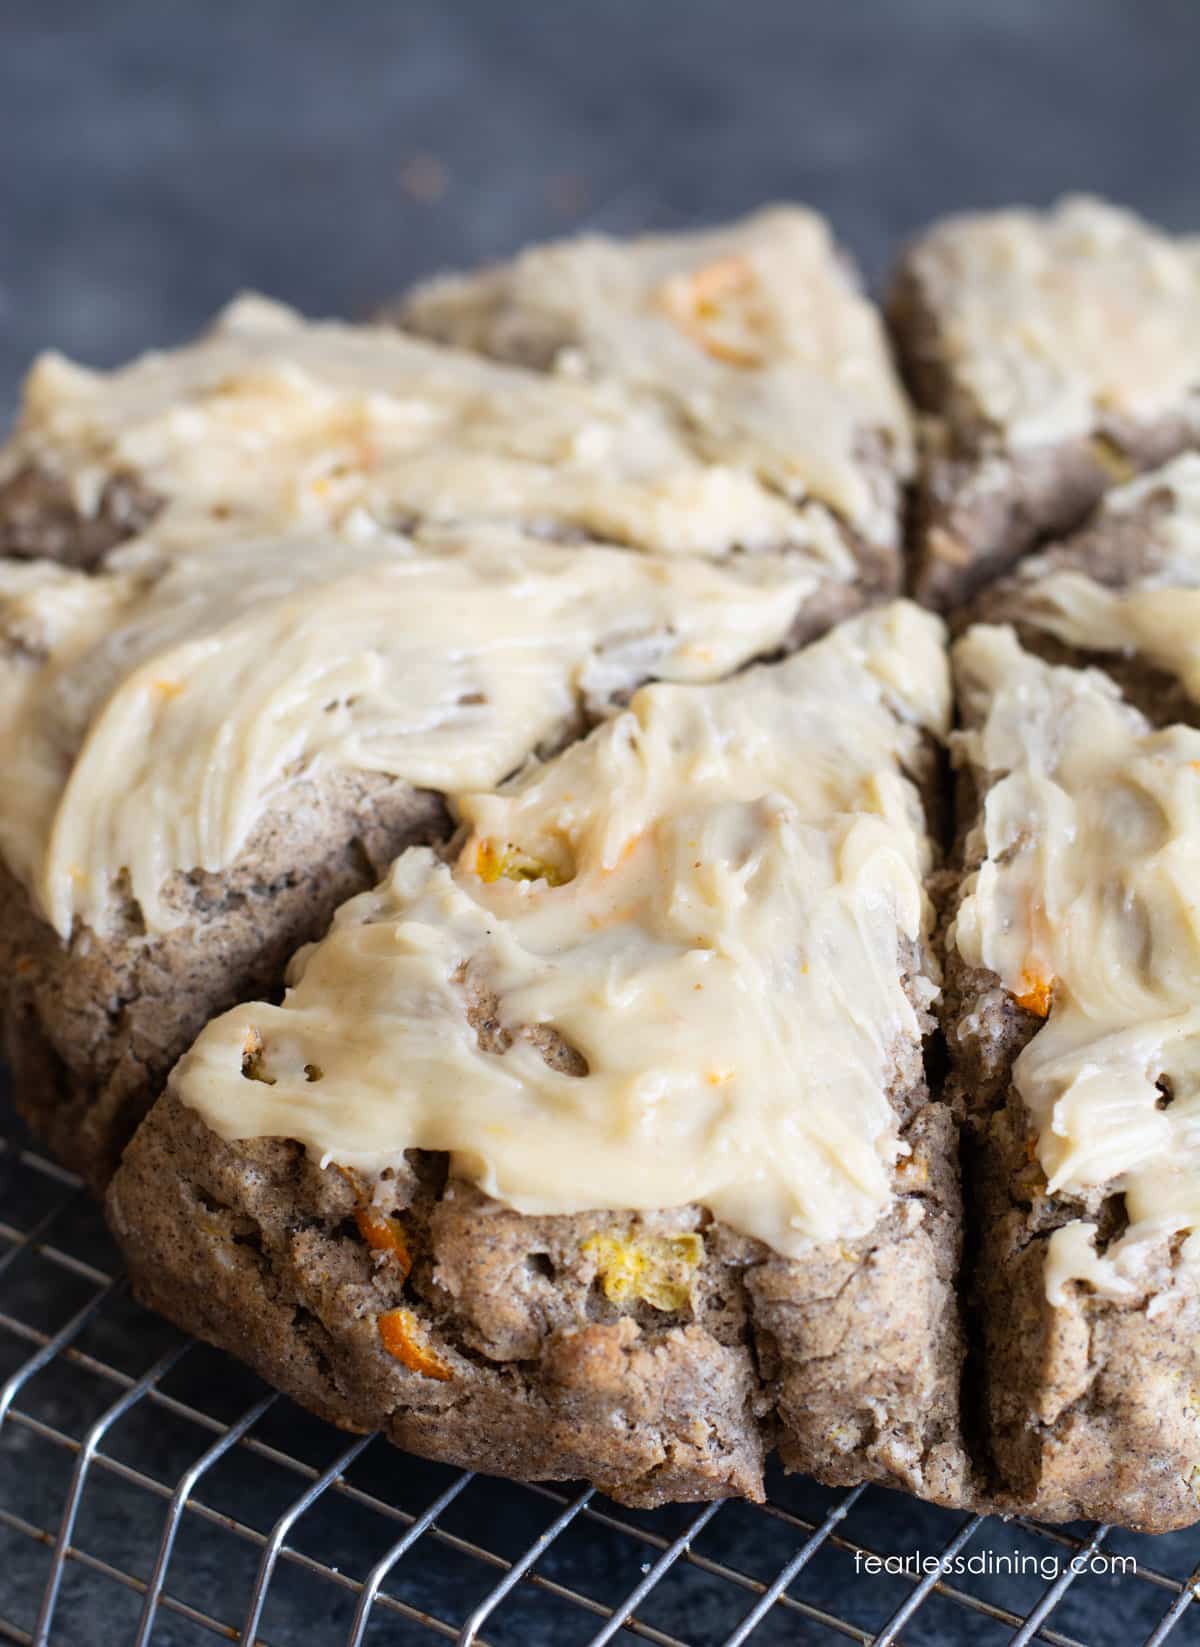
These homemade gluten free buckwheat scones are full of delicious whole grain flavor. They are flavored with honey and kumquats, which accent the nutty buckwheat flavors. Serve them with breakfast, brunch, or at tea time for a citrusy treat. Make a batch in under an hour.
This post may contain affiliate links. Please read our Disclosure Policy.

❤️ Sandi’s Recipe Summary
The Quick Bite: These gluten free buckwheat scones have crisp edges and tender, flaky layers with a subtle whole grain flavor. Honey softens the earthy buckwheat flavor while chopped kumquats add citrus flavor throughout. This is an easy scone recipe to serve with breakfast, brunch, or tea time.
Scones are one of those things I probably bake the most. There is something about their flaky layers that makes them so good with my cup of coffee. We are in the middle of kumquat season, and you are going to love how their flavor pairs with buckwheat! You can make the kumquat icing to top these scones, or spread this homemade Kumquat Butter onto the scones.
For those who have never tried kumquats, they are tiny, oval-shaped oranges. They are eaten whole, with the rind. You can also eat the seeds, though many people remove them, as I do in this recipe. They have a distinct, sweet-tart flavor and add delicious flavor to baked goods.
Buckwheat is naturally gluten-free, despite its name, and adds a deep, nutty whole grain flavor to these delicious scones. If you want to try more scone recipes, I have a lot of delicious, sweet, and savory gluten free scone recipes. I also have a great Gluten Free Sourdough Scone recipe if you have some discard to use up.
Ingredient Notes:
For the full list of ingredients and amounts, please go to the recipe card below.
- Gluten Free Flour Blend – I tested this recipe with King Arthur Measure for Measure. Other blends should work, but you may need to add more flour or milk to get the right scone dough consistency. Read Why Gluten Free Flour Blends Vary to learn more.
- Buckwheat Flour – Don’t let the name buckwheat worry you; buckwheat is naturally gluten free! Buckwheat flour adds an earthy, delicious flavor to the scones.
- Binder – If your gluten free flour blend does not have a binder included, add 3/4 teaspoon of xanthan gum. This helps to hold the scones together. Read more about Why Binders are Important in Gluten Free Baking to learn more.
- Baking Powder – I recommend using aluminum-free baking powder to avoid any metallic aftertaste.
- Kumquats – Kumquats are delicious in this scone recipe, but if you can’t find them, use chopped mandarin oranges without the peel.
- Honey – I use honey to naturally sweeten these scones. (If you want them sweeter, you can add 2-3 TBSP of brown sugar as well.)
- Eggs – Use large eggs.
- Butter – I prefer unsalted butter to better control salt levels in my baking.
- Milk or Non-Dairy Milk – I tested my recipe using Oatly Super Basic, but any milk or non-dairy milk type will work. Do not use canned coconut milk because it is too thick.
How to Make Gluten Free Buckwheat Scones (Step-By-Step)
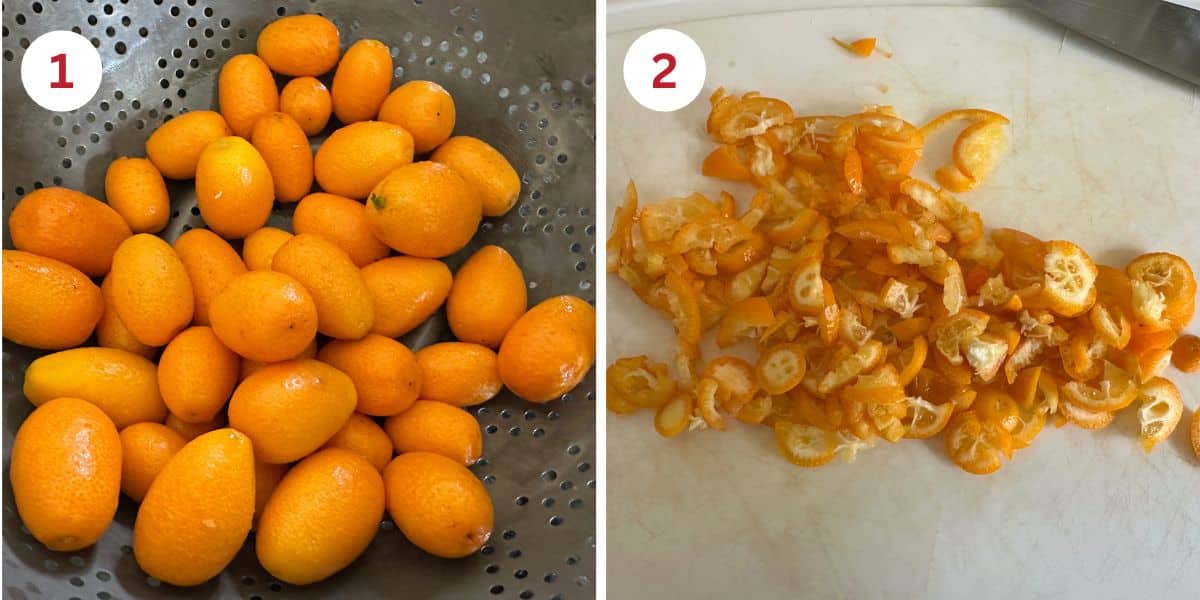
Step 1: Place the kumquats in a colander and rinse them off. Remove any stems.
Step 2: Use a knife to chop the kumquats into small pieces. Remove any seeds you find.
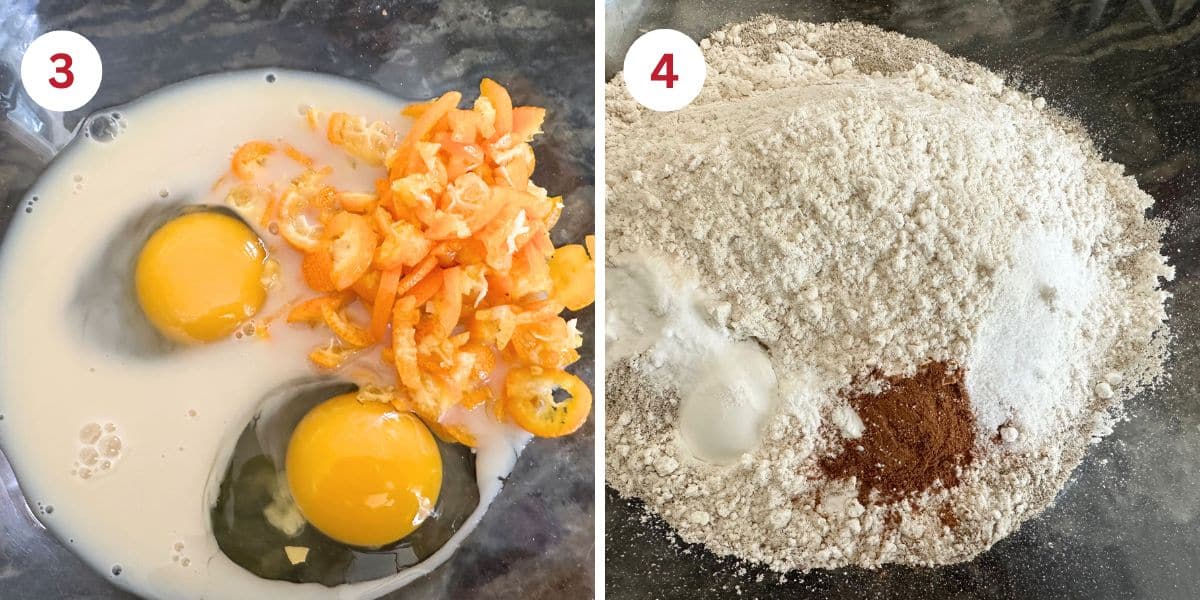
Step 3: In a small mixing bowl, add the eggs, honey, vanilla, chopped kumquats, and milk. Whisk to blend.
Step 4: In a large mixing bowl, add the buckwheat flour, gluten free flour, baking powder, salt, and ground cinnamon. Whisk to blend.
Email This Recipe To Me!
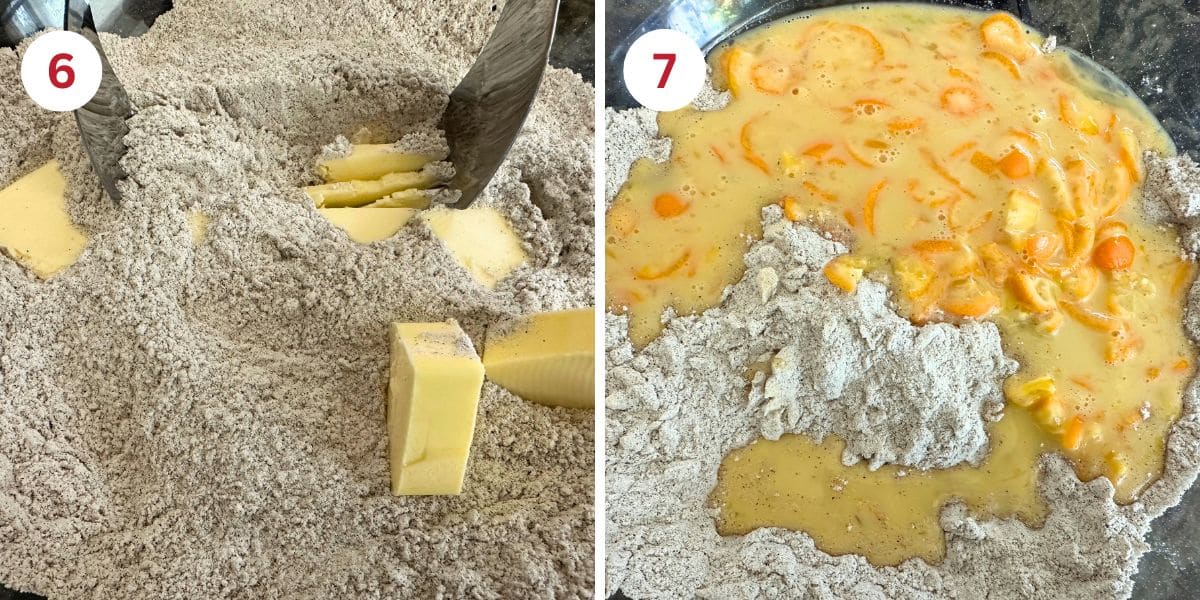
Step 5: Chop the cold butter into the dry ingredients. Use a pastry blender to cut the butter into small bits in the flour. You want the final mixture to look like it has crumbles in the flour. These become steam pockets during baking to create the flaky layers.
👀 Sandi Says: If you do not own a pastry blender, freeze the butter, then use a large cheese grater to shred it into the flour. Spoon some flour over the butter to prevent it from sticking together before mixing.
Step 6: Pour the wet ingredients into the dry ingredients and mix into a dough.
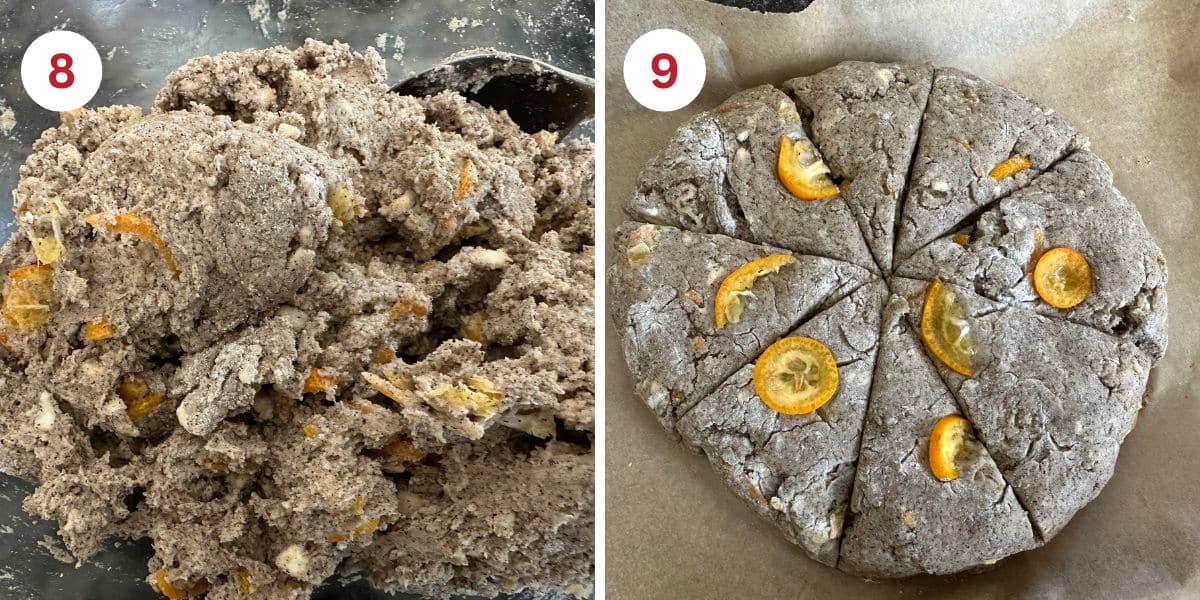
Step 8: This is a photo to show you the consistency of the scone dough. It should be easy to shape with your hands and not too sticky. If your dough is wetter, add more gluten free flour blend, 1 tablespoon at a time, until the dough is workable. If your dough is too firm, add more milk, 1 tablespoon at a time.
If the butter bits appear to soften or melt, wrap the dough in plastic wrap and put it into the refrigerator to chill for 15-20 minutes.
Step 9: Place the dough onto a piece of parchment paper and shape it into a disc about 2 inches thick. There are two ways to bake the scones, in the disc or as wedges:
Use a bench scraper to partially make cut lines into the dough. Move the disc to a parchment paper-covered cookie sheet. Bake in the disc. Or place the dough on a silicone mat and use the bench scraper to cut fully through the scones. Place the scones on a parchment paper lined baking sheet.
Step 10: Bake at 350ºF for 25-30 minutes, depending on whether they are in a disc or individual. The scones are finished baking when they are firm to the touch and are slightly golden.
Brown Butter Icing:
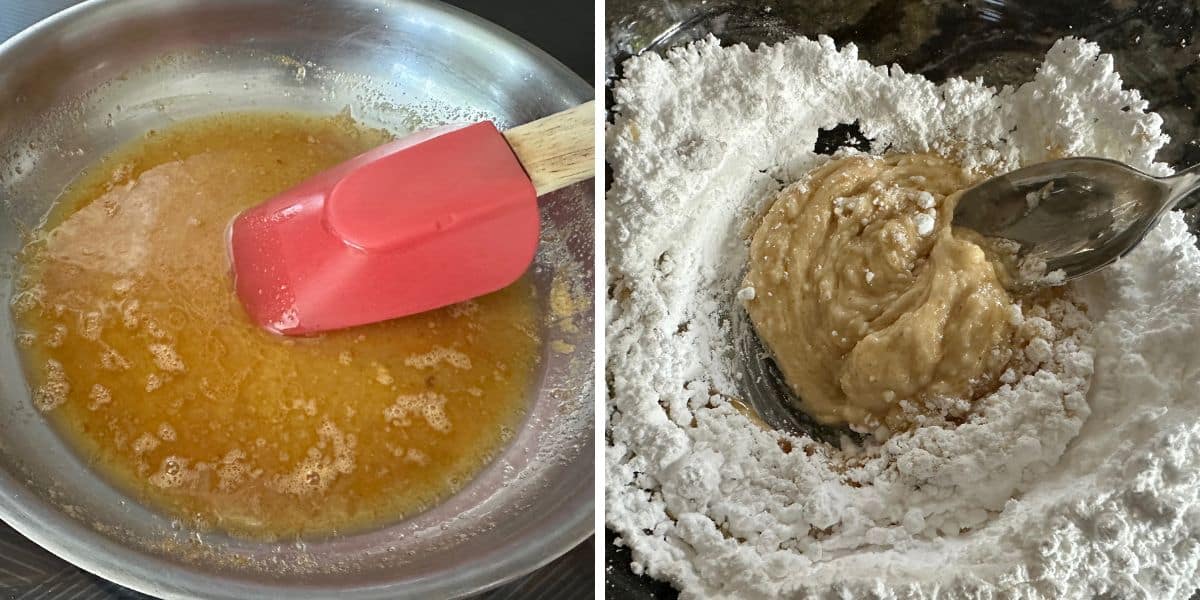
- Heat 3 tablespoons of butter over medium-low heat. Stir frequently.
- Cook for 5-8 minutes until the butter starts to brown. Turn down to a simmer until the butter is fully browned.
- Whisk in the orange juice and zest.
- Let the mixture cool, then mix with the powdered sugar.
- Spread over the warm scones.
- This orange brown butter icing also tastes great on my Gluten Free Orange Scones.
Frequently Asked Questions:
Yes, you can make this scone recipe dairy-free by using plant-based butter and non-dairy milk.
Store the scones in an airtight container. Gluten free tends to spoil quickly, so I recommend freezing uneaten scones in a freezer-safe zipper bag. They can be thawed in the microwave oven in 25 seconds.
More Gluten-Free Scone Recipes:
If you want to try more scone recipes, I have tons. Here are a few of my favorites:
Love This Recipe?
Drop a comment below, and let me know how it turned out! ⭐⭐⭐⭐⭐ Please include which flour blend you used. This will help others know this recipe is delicious. Thank you!
Gluten Free Buckwheat Scones with Honey and Kumquats
Equipment
- Whisk
- Cookie sheet
Ingredients
- 1 cup buckwheat flour 145.7g
- 1 cup gluten free flour blend 156.4 g (KA brand)
- 2 teaspoons aluminum-free baking powder
- ½ teaspoon ground cinnamon
- ¼ teaspoon salt
- 6 tablespoons unsalted butter COLD
- ¼ cup honey 85g
- 2 large eggs
- 1 teaspoon pure vanilla extract
- ⅔ cup non-dairy or regular milk
- ½ cup kumquats
Brown Butter Glaze
- 3 tablespoons unsalted butter
- 1 cup powdered sugar
- 3 tablespoons orange juice
- 1 teaspoon orange zest
Instructions
- Preheat the oven to 350ºF. Move the oven rack to the middle position in the oven.
- Place the 1/2 cup kumquats in a colander and rinse them off. Remove any stems.
- Use a knife to chop the kumquats into small pieces. Remove any seeds you find.
- In a small mixing bowl, add 2 large eggs, 1/4 cup honey, 1 teaspoon pure vanilla extract, chopped kumquats, and 2/3 cup non-dairy or regular milk. Whisk to blend.
- In a large mixing bowl, add 1 cup buckwheat flour, 1 cup gluten free flour blend, 2 teaspoons aluminum-free baking powder, 1/4 teaspoon salt, and 1/2 teaspoon ground cinnamon. Whisk to blend.
- Chop the cold 3 tablespoons unsalted butter into the dry ingredients. Use a pastry blender to cut the butter into small bits in the flour. You want the final mixture to look like it has crumbles in the flour. These become steam pockets during baking to create the flaky layers.
- If you do not own a pastry blender, freeze the butter, then use a large cheese grater to shred it into the flour. Spoon some flour over the butter to prevent it from sticking together before mixing.
- Pour the wet ingredients into the dry ingredients and mix into a dough.
- The dough should be easy to shape with your hands and not too sticky. If your dough is wetter, add more gluten free flour blend, 1 tablespoon at a time, until the dough is workable. If your dough is too firm, add more milk, 1 tablespoon at a time.
- If the butter bits appear to soften or melt, wrap the dough in plastic wrap and put it into the refrigerator to chill for 15-20 minutes.
- Place the dough onto a piece of parchment paper and shape it into a disc about 2 inches thick. There are two ways to bake the scones, in the disc or as wedges: Use a bench scraper to partially make cut lines into the dough. Move the disc to a parchment paper-covered cookie sheet. Bake in the disc. Or place the dough on a silicone mat and use the bench scraper to cut fully through the scones. Place the scones on a parchment paper lined baking sheet.
- Bake at 350ºF for 25-30 minutes, depending on whether they are in a disc or individual. The scones are finished baking when they are firm to the touch and are slightly golden.
Icing:
- Heat 3 tablespoons of butter over medium-low heat. Stir frequently.
- Cook for 8 minutes until the butter starts to brown. Turn down to a simmer until the butter is fully browned.
- Whisk in the orange juice and zest.
- Let the mixture cool, then mix with the powdered sugar. Spread the icing over the warm scones.
Notes
- I tested this recipe using King Arthur Measure for Measure. Other blends should work, but each has a different starch-to-grain ratio. You may need to add more flour or milk to get the right dough consistency.
- Store leftovers in an airtight container, but you will want to freeze them soon because gluten-free food tends to spoil quickly.
- To make this recipe dairy-free, use plant-based butter and milk.
Email This Recipe To Me!
SPECIAL NOTE
Please know that every gluten free flour blend has a different starch to grain ratio. If you use a blend I didn’t test, my rule of thumb is to add more flour if your dough or batter is wet and add more liquid if the dough or batter is too dry!
Nutrition
Nutrition Disclaimer
Nutritional information is an estimate provided to you as a courtesy. You should calculate the actual nutritional information with the products and brands you are using with your preferred nutritional calculator.
I truly hope you enjoy this recipe. I have been testing and creating gluten-free recipes for over 15 years. Creating gluten-free recipes that do not taste gluten-free is my goal for every recipe. Sometimes I only have to test a new recipe a couple of times, and others it takes multiple times. I do this so you get reliable, delicious results every time!
