
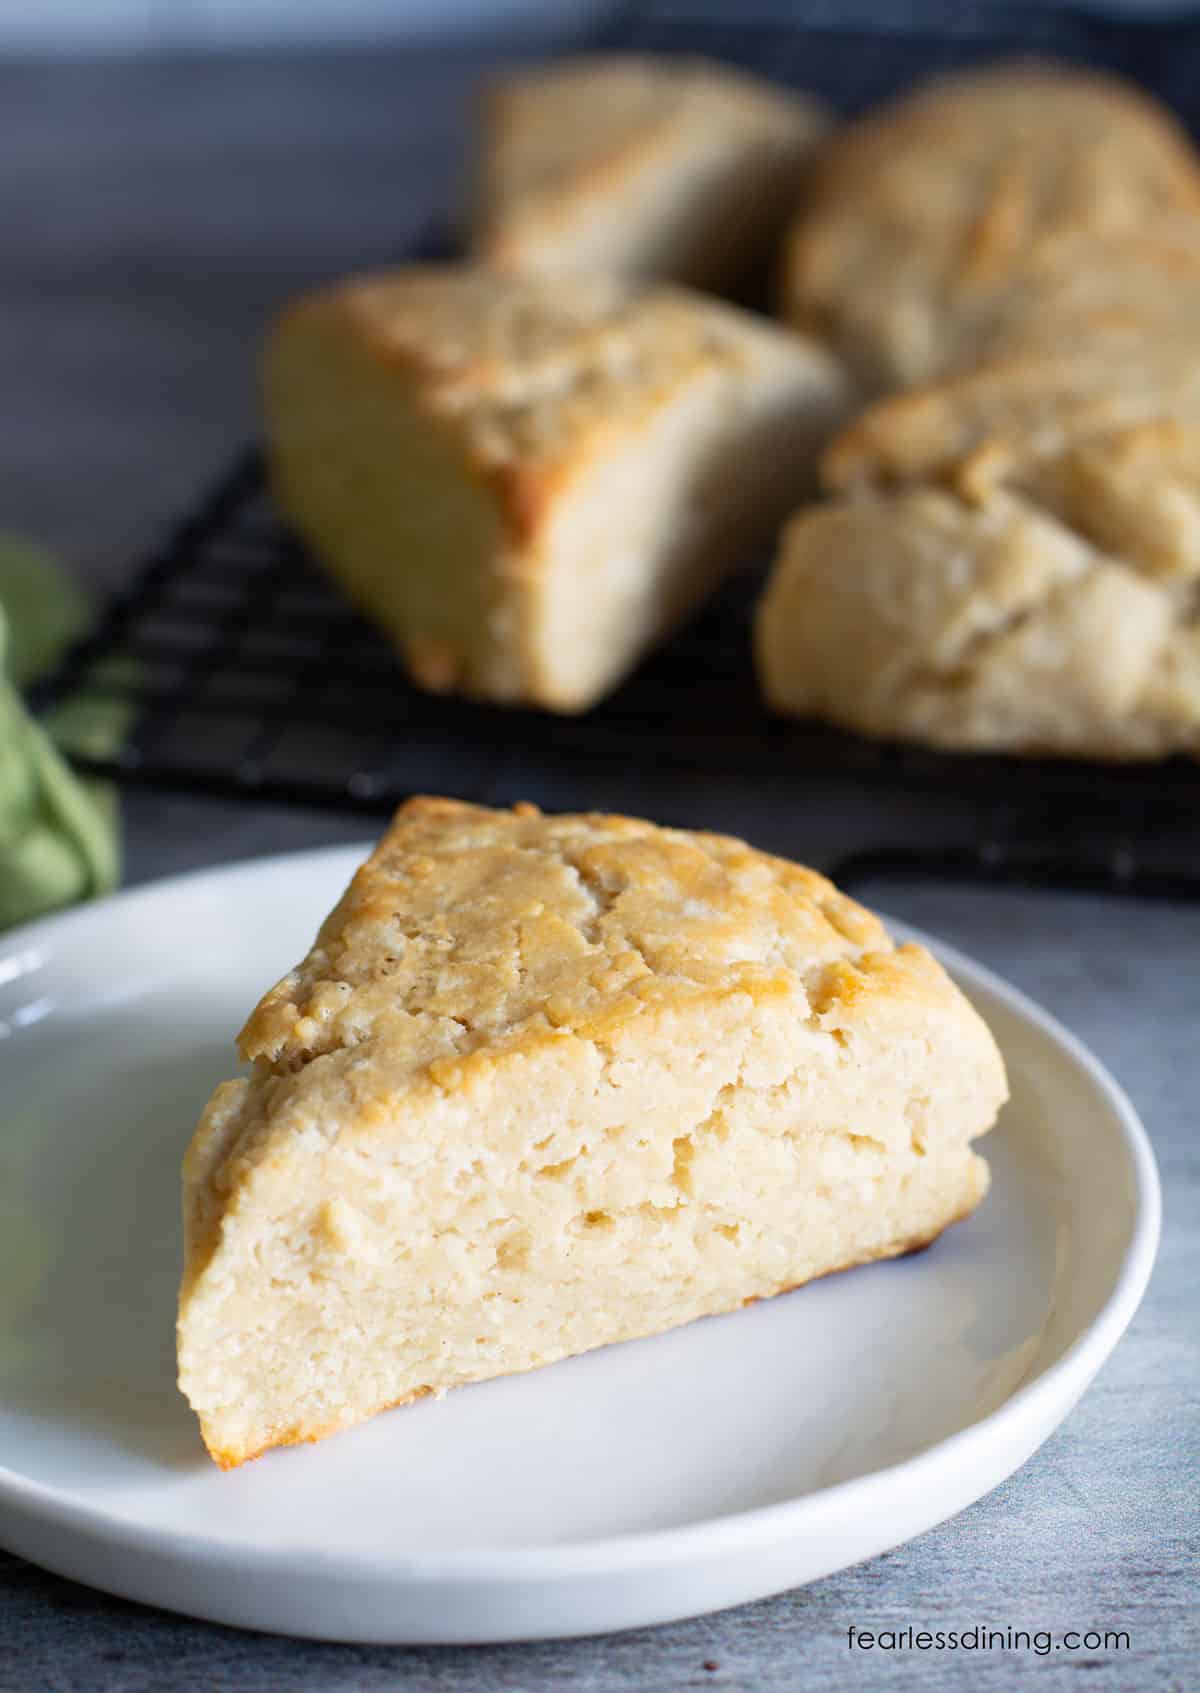
These gluten free buttermilk scones are light, flaky, and easy to make! Whether you’re avoiding gluten or have Celiac disease, these scones are sure to satisfy your cravings. I include tips to make these either a sweet or savory treat. Follow along with the steps below to make a batch of these yummy scones!
This post may contain affiliate links. Please read our Disclosure Policy.
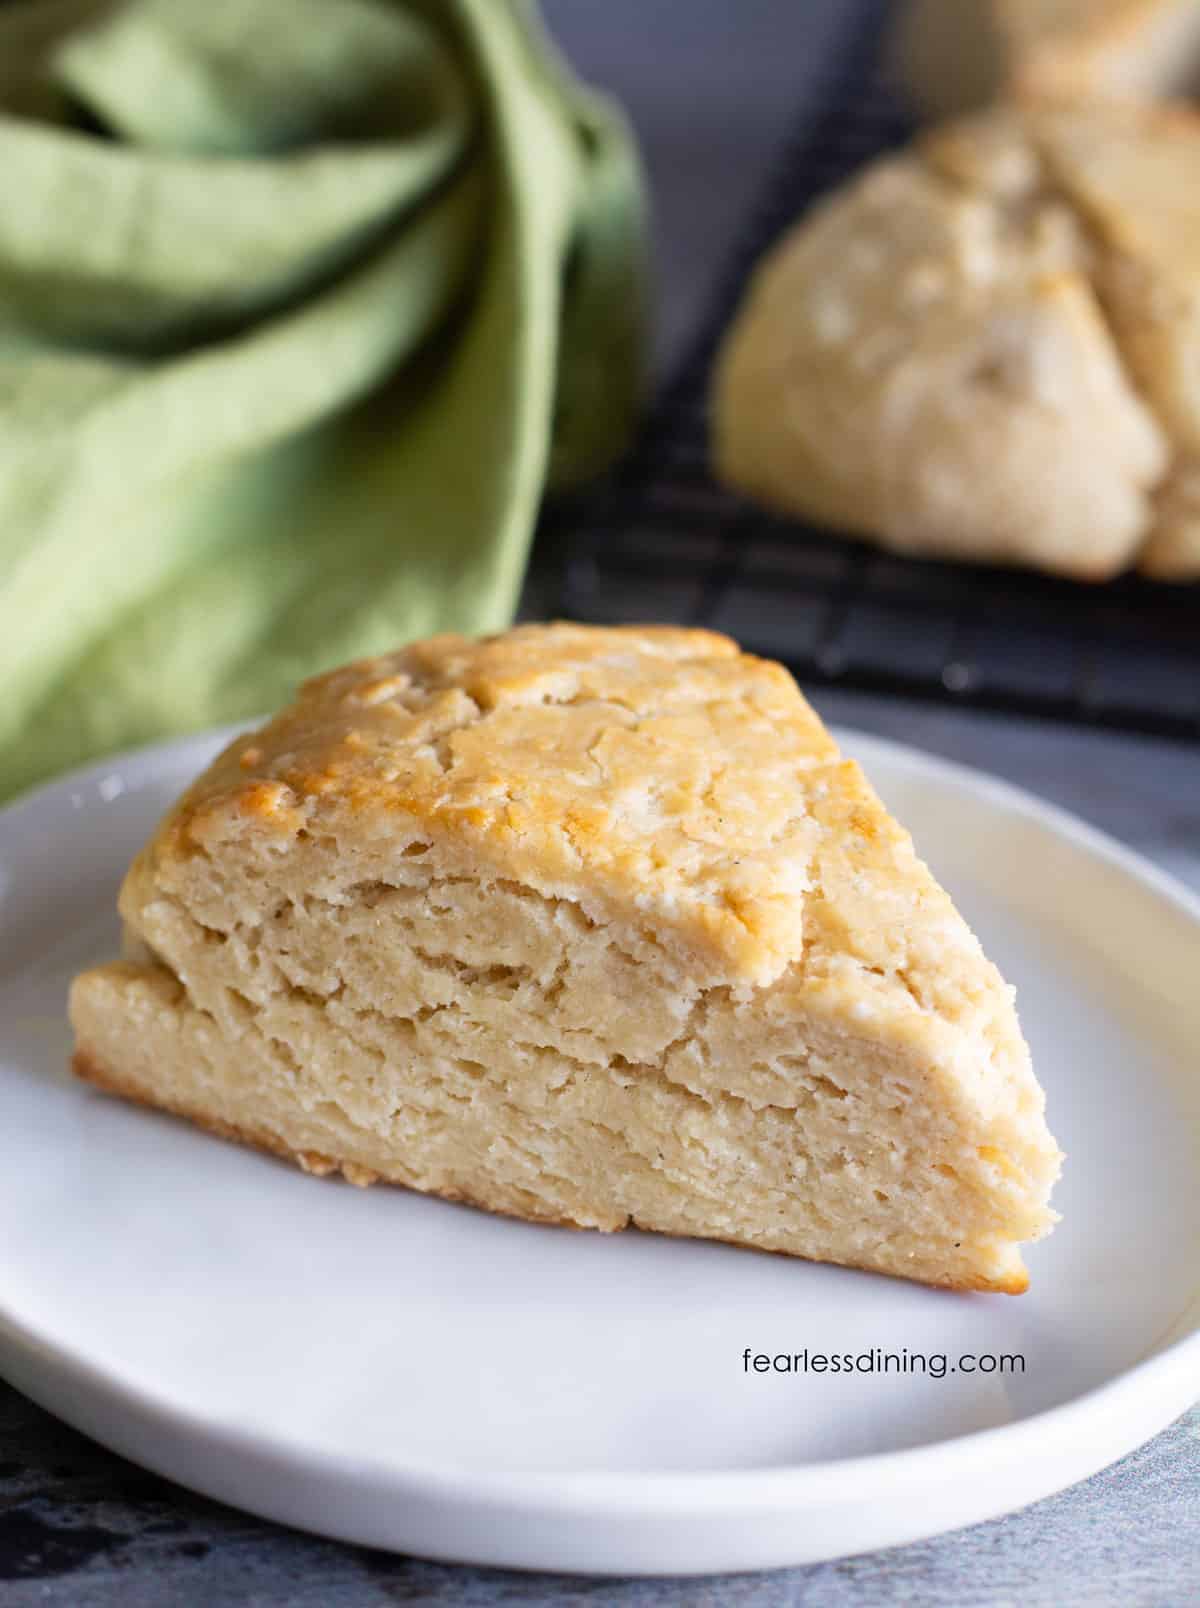
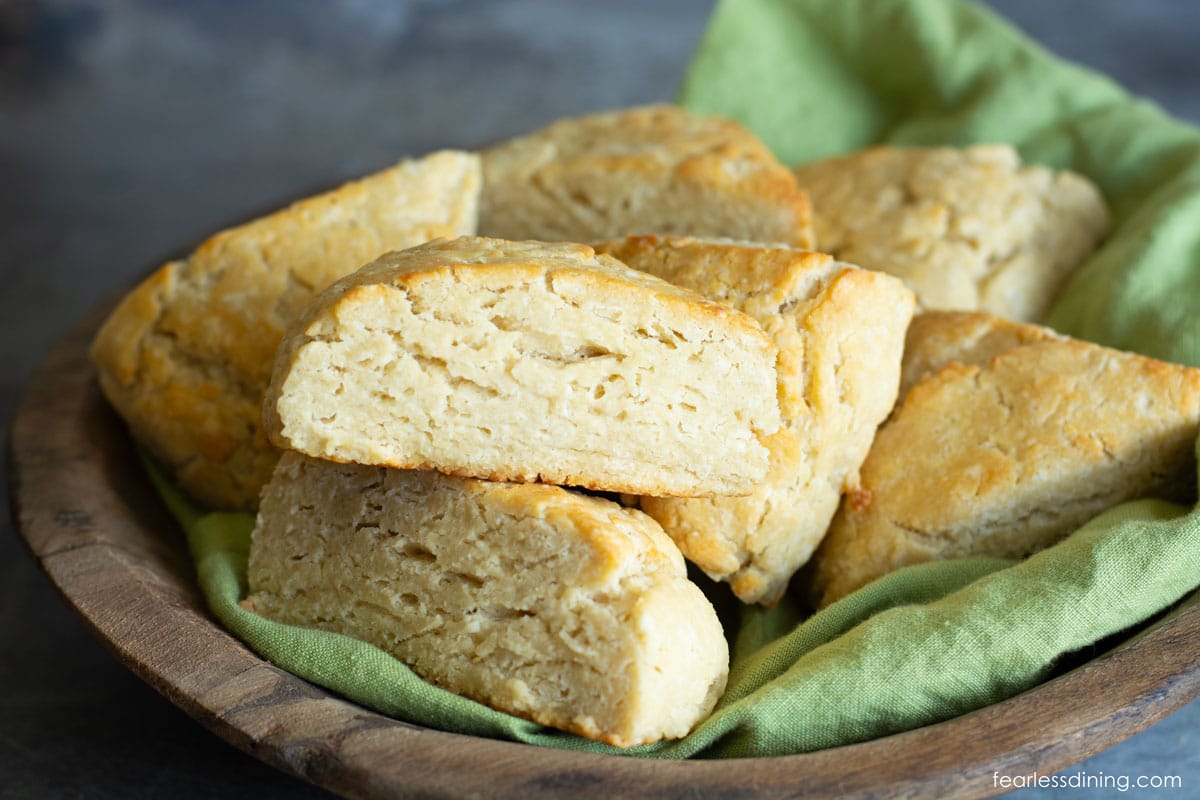
This recipe is very versatile and can be used as a scone-based recipe. Use it to make these scones sweet or savory! These buttery scones are full of flaky layers, and they rise so nicely! Serve a batch with a cup of coffee or at tea time. You can also enjoy these scones instead of biscuits in this Gluten Free Strawberry Shortcake recipe.
I have tons of incredible, flaky, gluten-free scone recipes on the blog. Both savory and sweet, like these Gluten Free Buckwheat Kumquat Scones! Drop a comment below and let me know which of my recipes you have tried! If you are new to making scones, check out my Gluten-Free Scones Guide for more tips and 20+ recipes.
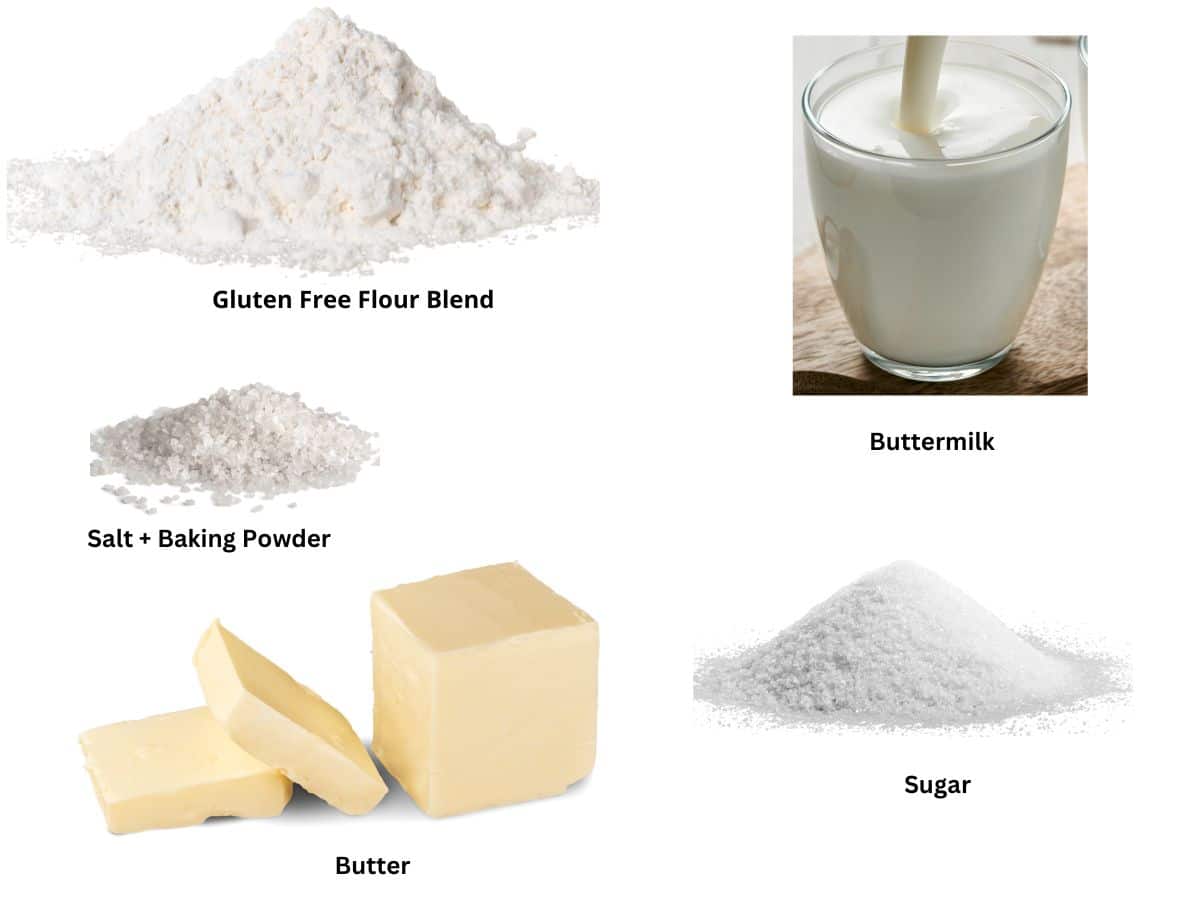
Ingredient Notes:
For the full list of ingredients and amounts, please go to the recipe card below.
- Gluten Free Flour Blend – I tested this recipe using King Arthur Measure For Measure, but other gluten free flour blends will also work. You will need to keep an eye on the dough’s moisture and add more flour or liquid if needed. If you are wondering why, check out my article on why gluten free blends vary.
- Cane Sugar
- Xanthan Gum – If your flour blend doesn’t contain a binder to hold your baked goods together, add 1/2 teaspoon of xanthan gum.
- Baking Powder – Use aluminum-free baking powder.
- Sea Salt
- Buttermilk – You can use fresh buttermilk or the powder I use pictured above.
- Butter – Use unsalted butter. If you prefer to use salted butter, omit the sea salt.
Substitutions:
- Make these gum-free by using my DIY Gluten Free Flour Blend. This blend uses psyllium husk instead of xanthan or guar gum.
- Make this recipe rice-free by using my Gluten Free Rice Free Flour Blend.
- To make them dairy-free, you could use plant-based butter and make this vegan buttermilk by combining lemon juice with dairy-free milk.
How To Make Gluten Free Buttermilk Scones:
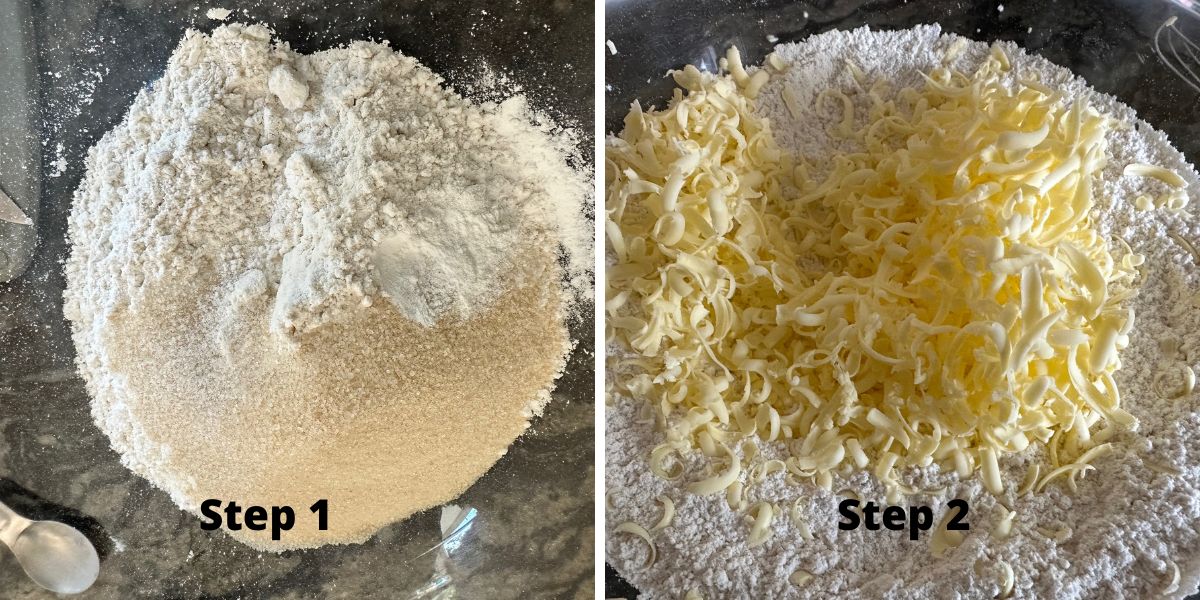
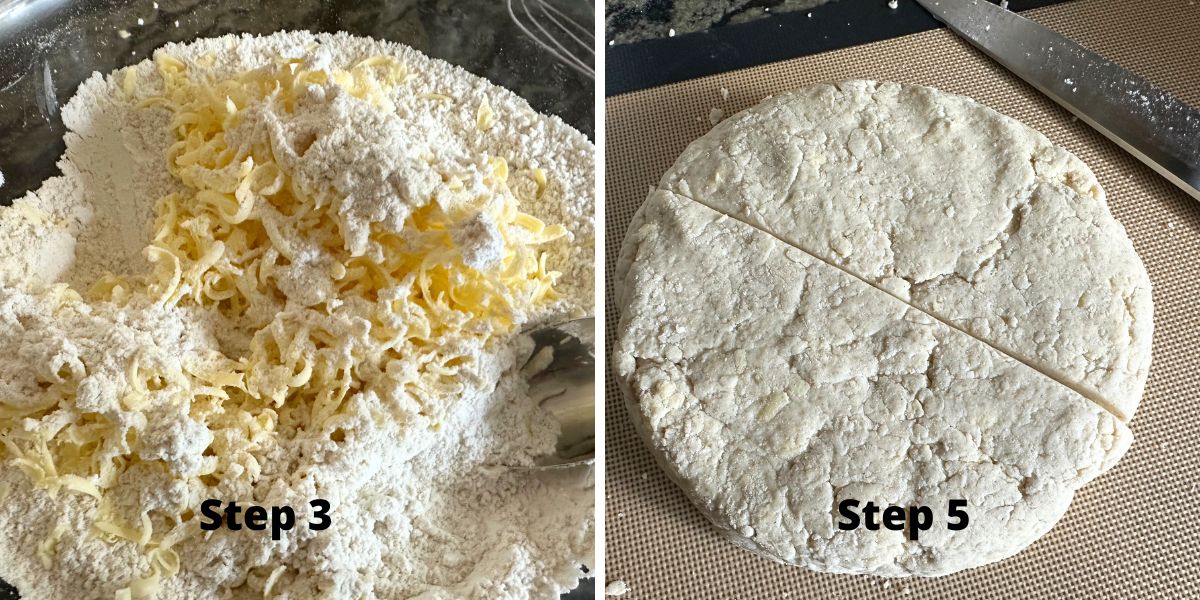
Step 1: Add the flour, sugar, baking powder, and salt to a large bowl. Use a whisk to blend the dry ingredients.
Step 2: Remove the butter from the freezer and take a large cheese grater to grate the cold butter into the dry ingredients. You can also use a pastry blender to chop the butter into the flour.
Email This Recipe To Me!
Step 3: My favorite way to prevent the frozen butter shreds from sticking together is to use a spoon to grab some flour from the bowl and sprinkle it over the butter. This helps the shreds stay separate when you mix the flour mixture with the butter.
Step 4: In a small bowl, add the buttermilk or buttermilk powder with water. The buttermilk powder I use is 1/4 cup buttermilk powder to 1 cup of water.
Pour this buttermilk mixture into the dry ingredients. Mix into a nice soft dough. The scone dough can be chilled or shaped the scones now, depending on how gritty the flour blend you use is.
Step 5: Place the dough on a silicone mat or a lightly floured surface. With most flour blends, you will not need to flour the surface, but if you use a starchy blend and your dough is sticky, go ahead and sprinkle some gluten free flour under the dough.
Step 6: Form a circle with the scone dough, about 1 1/2 to 2 inches thick. Use a sharp knife to cut the dough into 8 wedges. They should be equally sized.
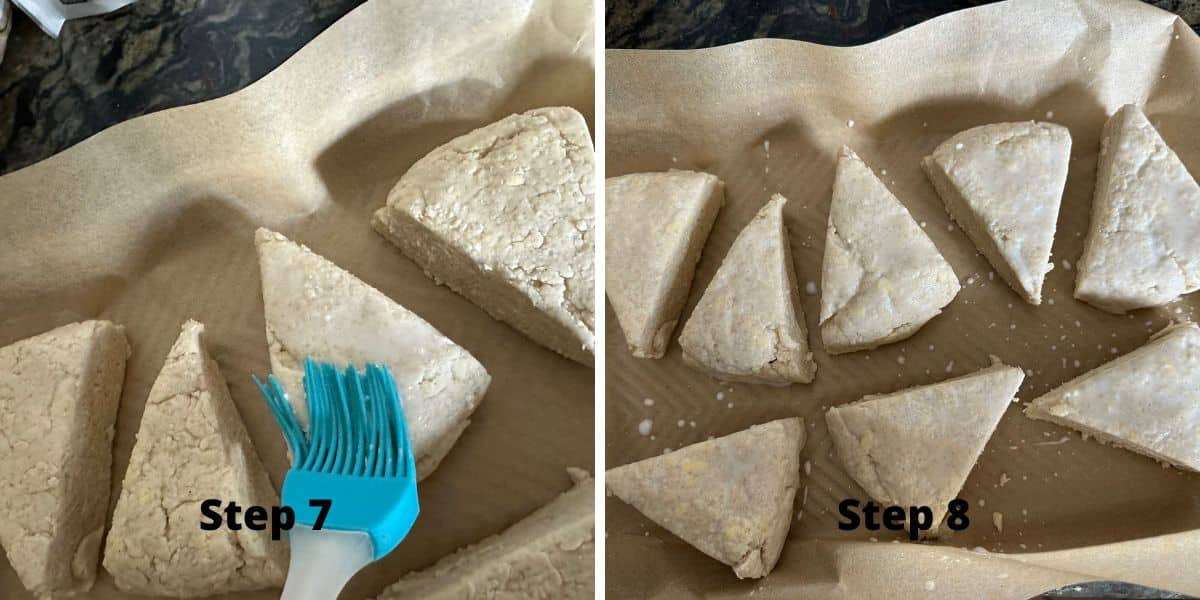
Step 7: Move each wedge to a prepared baking tray. I like to line my pan with parchment paper, but you can also spray the
Brush the top of each scone with either buttermilk or milk. This will help the scones bake with a beautiful golden brown color.
Step 8: Bake the scones at 350º F for 25-30 minutes. The actual baking time can vary depending on how thick you make your scones and how big the wedges you cut out are.
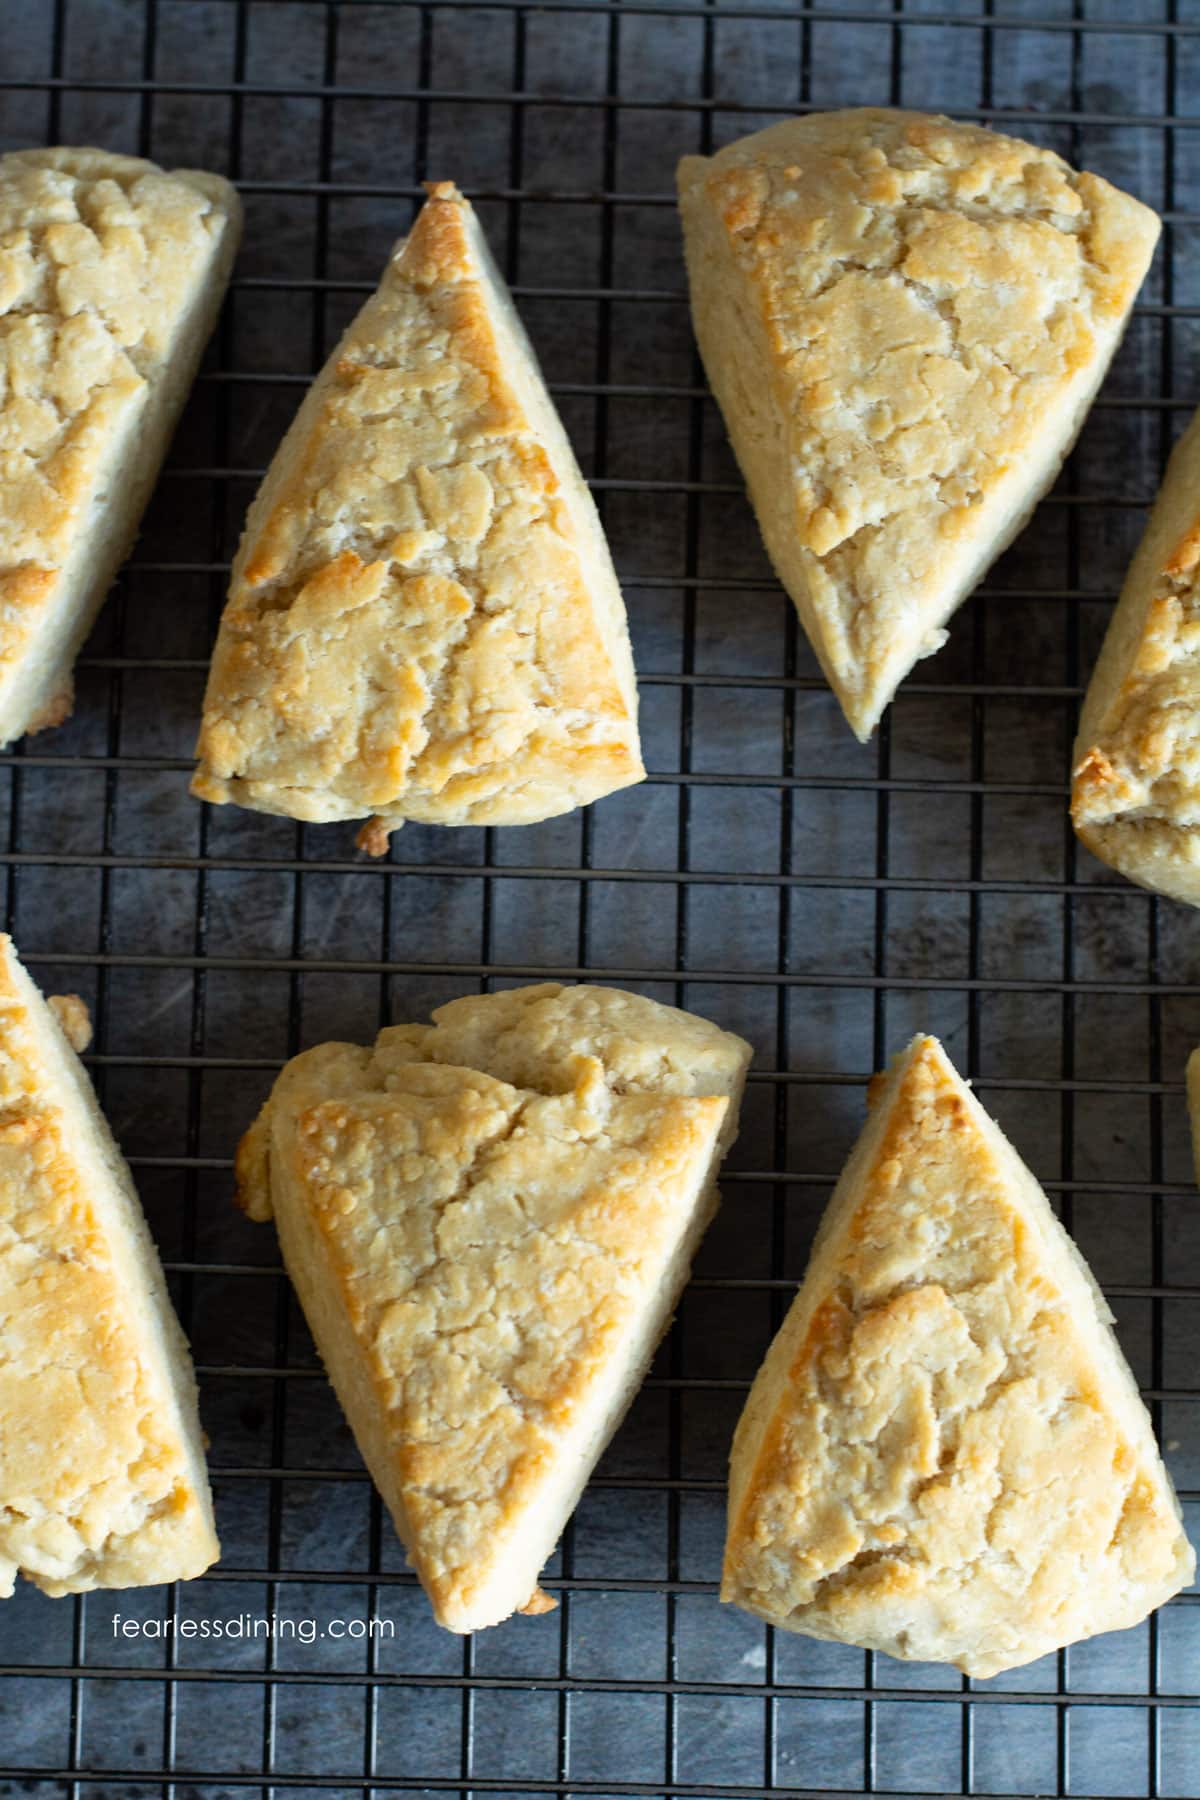
Step 9: Remove the scones from the oven and place them onto a wire rack to cool. It is a good thing to wait until the scones are cooled before eating them. If you love this scones recipe, you will want to try my personal favorite, these Gluten Free Pumpkin Scones. If you love sweeter scones, try my new Gluten-Free Snickerdoodle Scones recipe!
Scone Baking Tips:
- Freeze the butter for 30-45 minutes so that it is very cold.
- If you want to make these fancy, sprinkle coarse sugar over the tops of the scones after brushing them with buttermilk.
- Let the scone batter sit for 15-20 minutes (best wrapped in plastic wrap in the fridge) so the rice in the flour can soften, eliminating any grit.
Frequently Asked Questions:
Store your buttermilk scones in an airtight container. Gluten free tends to spoil quickly, so I always recommend storing them in the freezer if you don’t plan to eat them within two days.
You can easily freeze these gluten free scones. Place the room-temperature scones into a freezer-safe zip bag and squeeze out the extra air. Zip the bag to seal it. To thaw the scones, microwave them for 35 seconds.
More Gluten Free Scone Recipes:
- Gluten Free Blueberry Scones
- Decadent Gluten Free Chocolate Scones
- Gluten Free Oat Scones
- Easy Gluten Free Orange Scones
- Gluten Free Maple Walnut Scones
- Gluten-Free Scones with Sourdough Discard
Love This Recipe?
If you made and enjoyed this recipe, I would be incredibly grateful if you could leave a comment below. Please include which flour blend you used. This will help others know this recipe is delicious. Thank you!
Easy Gluten Free Buttermilk Scones (Delicious Base Recipe!)
Ingredients
- 2 ¼ cups gluten free flour blend * see notes
- 2 teaspoons baking powder aluminum-free
- ½ cup cane sugar
- ½ teaspoon salt
- 6 tablespoons unsalted butter frozen
- 1 cup buttermilk
Equipment
Method
- Preheat the oven to 350º F.
- Add the 2 ¼ cups gluten free flour blend, ½ cup cane sugar, 2 teaspoons baking powder, and ½ teaspoon salt to a large bowl. Use a whisk to blend the dry ingredients together.
- Remove 6 tablespoons unsalted butter from the freezer and take a large cheese grater to grate the cold butter into the dry ingredients. (You can also use a pastry blender to chop the butter into the flour.)
- To prevent the frozen butter shreds from sticking together use a spoon to grab some flour from the bowl and sprinkle it over the butter. This helps the shreds stay separate when you mix the flour mixture with the butter.
- If you are using powdered buttermilk, add the 1 cup buttermilk or buttermilk powder with water to a large bowl. (The buttermilk powder I use is 1/4 cup buttermilk powder to 1 cup of water.)
- Pour this buttermilk mixture into the dry ingredients. Mix into a nice soft dough. The scone dough can be chilled or shaped the scones now, depending on how gritty the flour blend you use is.
- Place the dough on a silicone mat or a lightly floured surface. With most flour blends, you will not need to flour the surface, but if you use a starchy blend and your dough is sticky, go ahead and sprinkle some gluten free flour under the dough.
- Form a circle with the scone dough, about 1 1/2 to 2 inches thick. Use a sharp knife to cut the dough into 8 wedges. They should be equally sized.
- Move each wedge to a prepared baking tray. I like to line my pan with parchment paper, but you can also spray the cookie sheet with gluten free baking spray. (If you have a scone pan, you can use that instead.)
- Brush the top of each scone with either buttermilk or milk. This will help the scones bake with a beautiful golden brown color.
- Bake the scones at 350º F for 25-30 minutes. The actual baking time can vary depending on how thick you make your scones and how big the wedges you cut out are.
- Remove the scones from the hot oven and place them onto a wire rack to cool. It is a good thing to wait until the scones are cooled before eating them.
Nutrition
Notes
- I tested this recipe with King Arthur Measure For Measure. Other blends should work, but you need to keep an eye on the moisture level of the dough. Some blends have a higher grain-to-starch content, and you may need to add more liquid or flour, depending on what you use.
- If your blend doesn’t contain xanthan gum, add 1 teaspoon.
- To make this recipe dairy-free, use a dairy-free buttermilk and plant-based vegan butter.
- Store your buttermilk scones in an airtight container. Gluten free tends to spoil quickly, so I always recommend storing them in the freezer if you don’t plan to eat them within two days.
- You can easily freeze these gluten free scones. Place the room-temperature scones into a freezer-safe zip bag and squeeze out the extra air. Zip the bag to seal it. To thaw the scones, microwave them for 35 seconds.
Private Notes
Tried this recipe?
Let us know how it was!
I truly hope you enjoy this recipe. I have been testing and creating gluten-free recipes for over 15 years. Creating gluten-free recipes that do not taste gluten-free is my goal for every recipe. Sometimes I only have to test a new recipe a couple of times, and others it takes multiple times. I do this so you get reliable, delicious results every time!

The recipe was fantastic. We just started on our gluten free journey a few months ago and this is a great substitute for our traditional scones. My kids loved it and it makes my journey to gluten free even better. Thank you!
I am so glad you loved this scone recipe. I have a lot of sweet and savory scone recipes to try next.
This was my first attempt at scones. I used the new Cup4Cup, added a little extra sugar & blueberries, brushed the top with buttermilk as directed. They came out so good! I really think the buttermilk helps them from becoming too dense and dry. I will definitely try again with other flavors.
I am so glad you loved these scones, Jenn. Thank you for coming back to let me know.
I thought I would never have a scone since going gluten free over 12 years ago! These are every bit as good as the ones I grew up with.
Thank you!!
Jan
Thank you so much for coming back to let me know you loved this scone recipe, Jan. I really appreciate it and I hope you get a chance to try some of my other yummy scone recipes.
Loving the new website design! So easy to navigate and highlight all of your best recipes. These scones would not last long in our household! Yum
Thank you so much, Bobbi. That means a lot to me.