
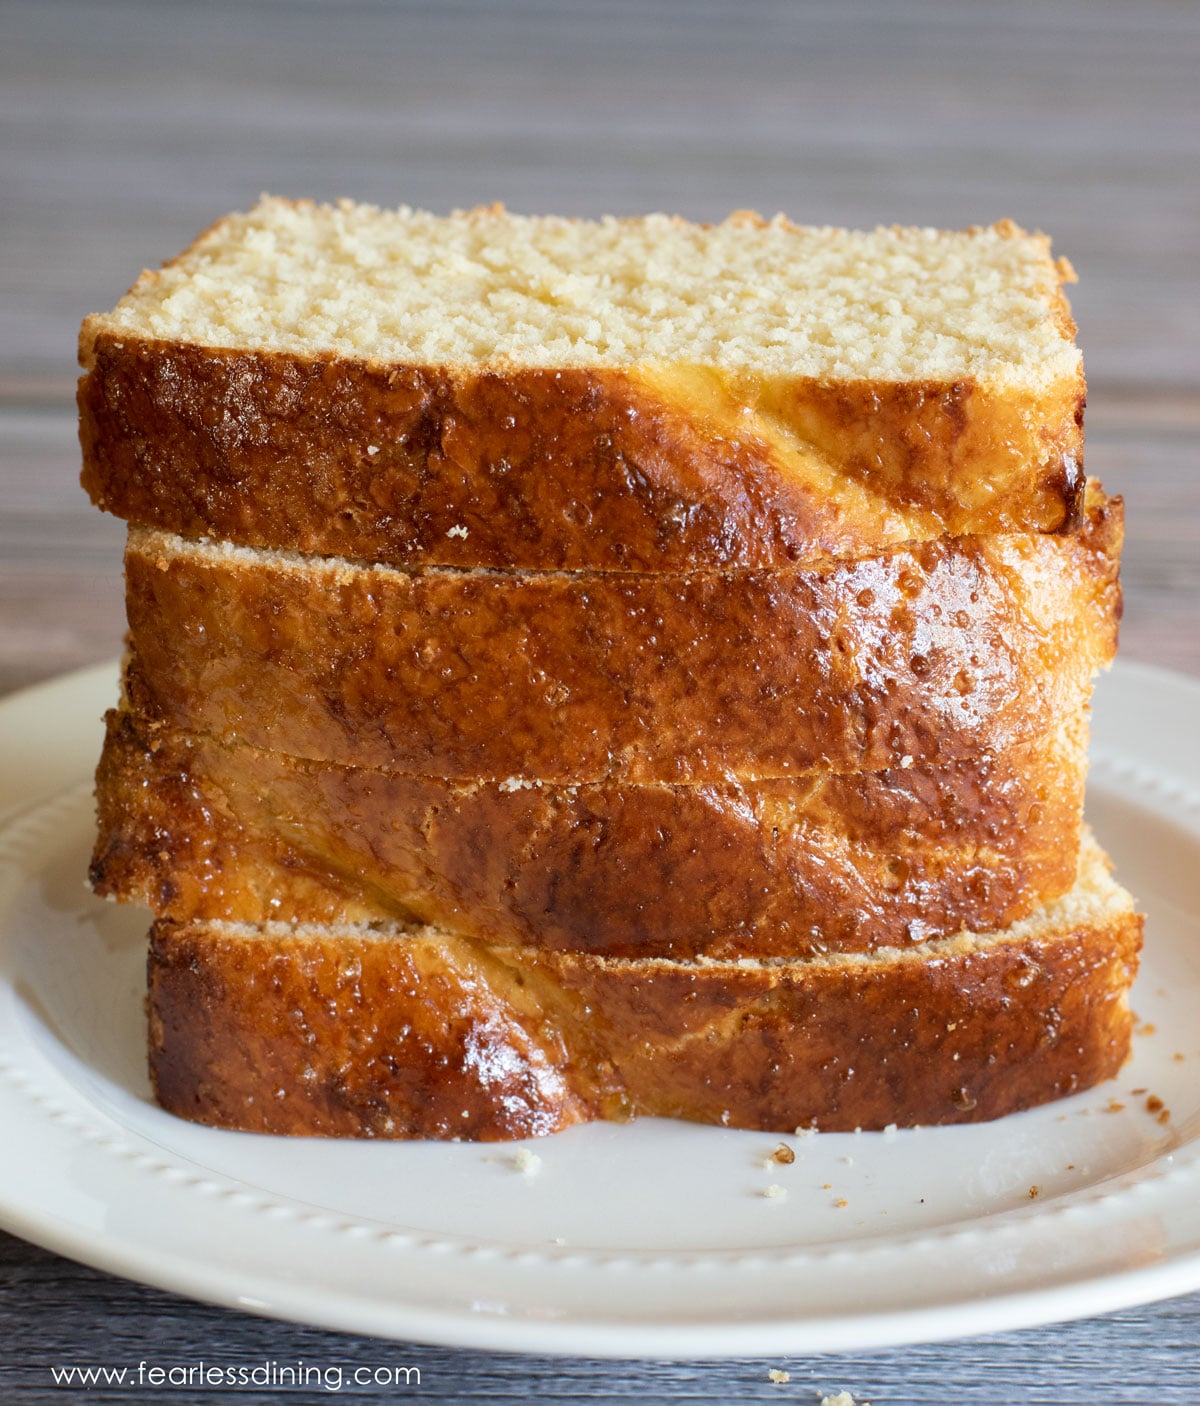
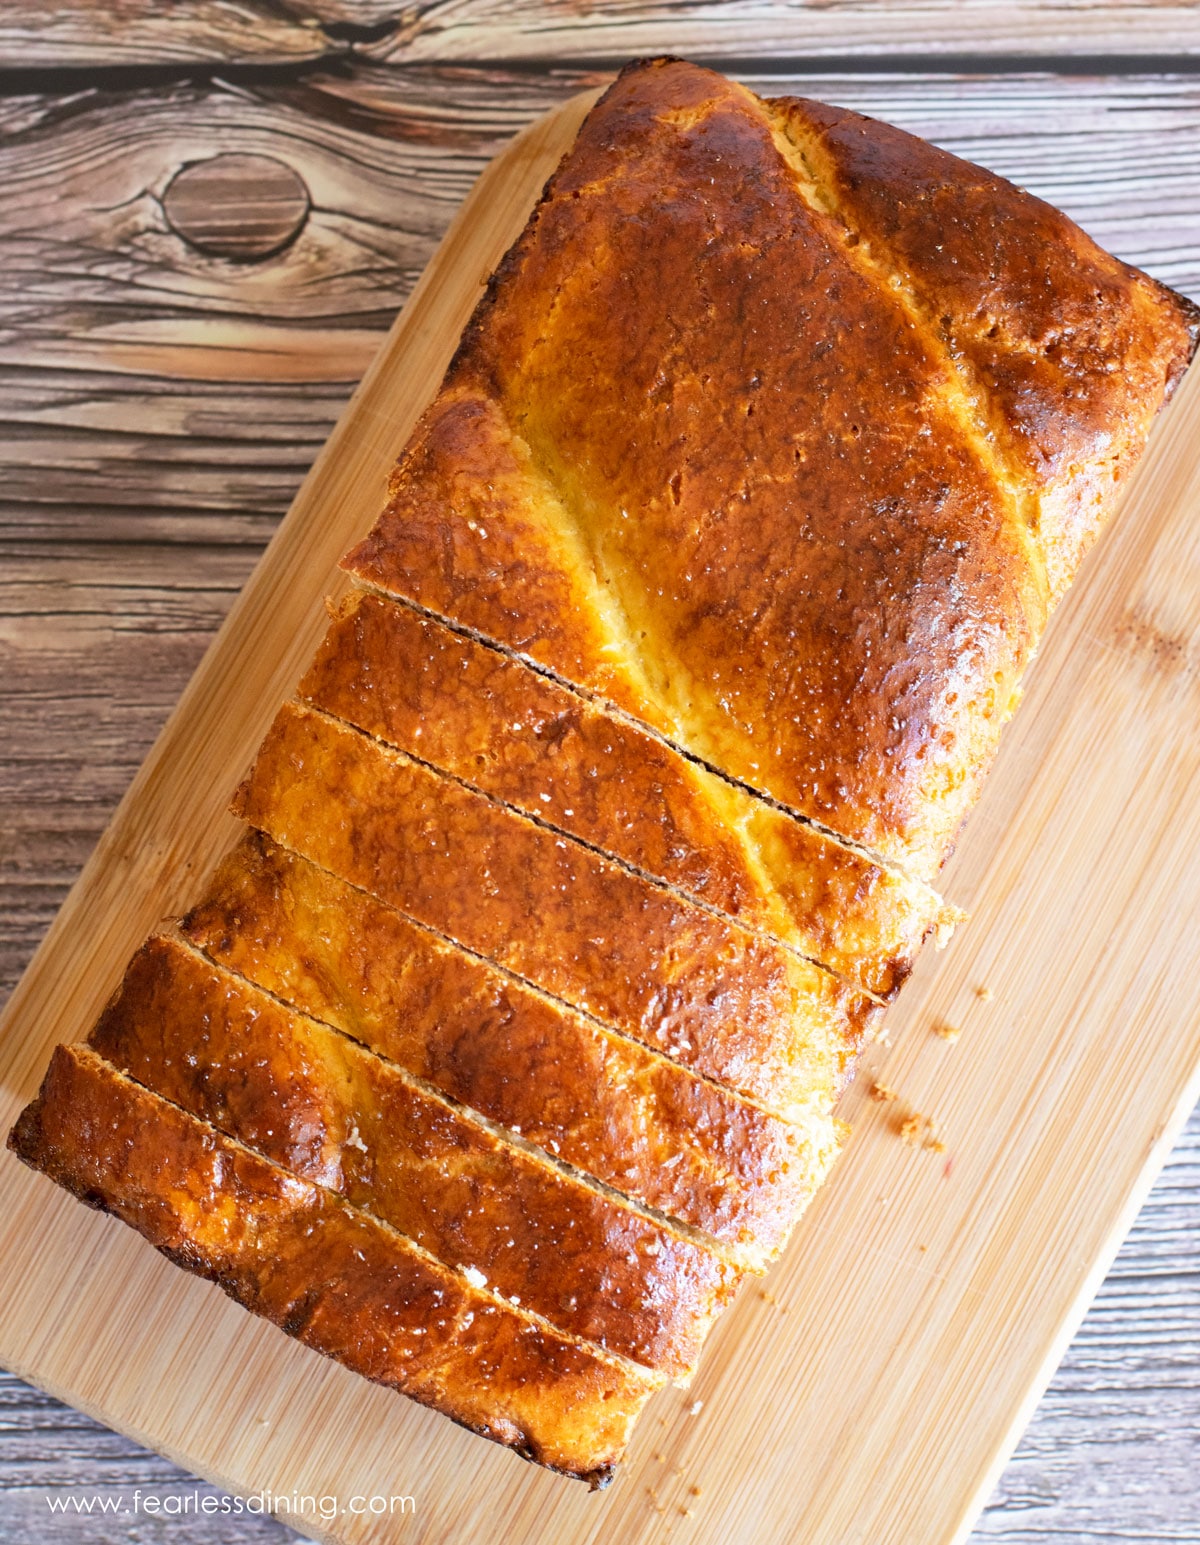
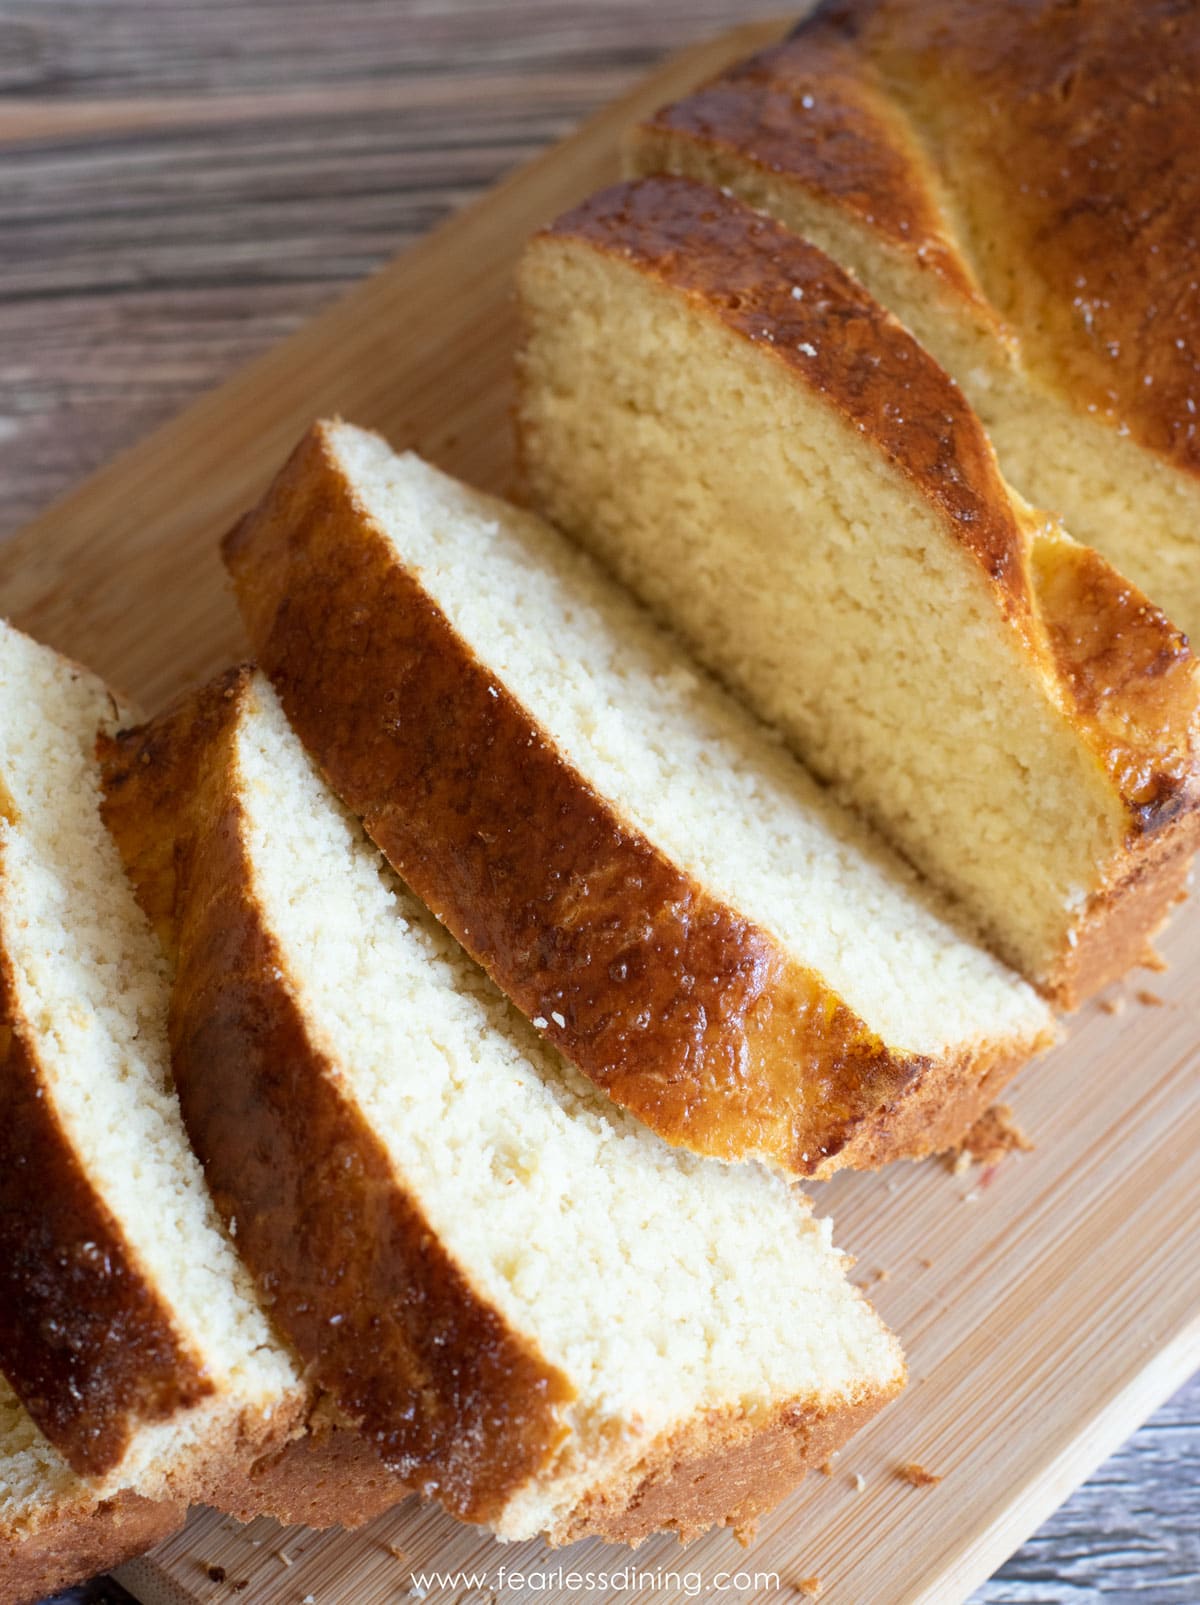
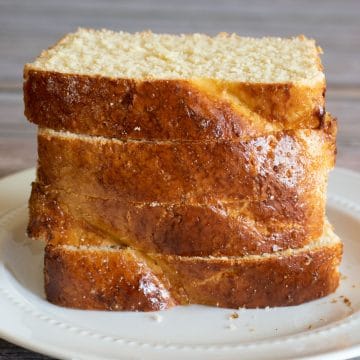
This gluten-free brioche is rich and buttery with a soft, springy crumb that slices cleanly and holds together beautifully. It is made with simple ingredients, such as gluten-free flour, yeast, butter, eggs, and milk, and works just as well for French toast and brunch as it does toasted with warm butter.
This post may contain affiliate links. Please read our Disclosure Policy.
Brioche has been a favorite of mine for years. When I first started recipe testing to create this recipe, it was a challenge. It took dozens of tests to get this recipe right. I really wanted it to be perfect for you. I highly recommend that you use my favorite gluten-free flour brand to make this brioche. The results are 100% worth it.
Brioche is more than just bread. It has lots of butter and eggs, which gives it a richness that regular bread doesn’t have. My recipe will guide you through all of the steps to make a soft, fluffy gluten-free brioche loaf that is better than store-bought.
This homemade bread is gluten-free, nut-free, soy-free, and oat-free. Want more gluten-free yeast breads that feel like the real deal? Try my Gluten-Free Cinnamon Raisin Bread next. It is also soft and fluffy!
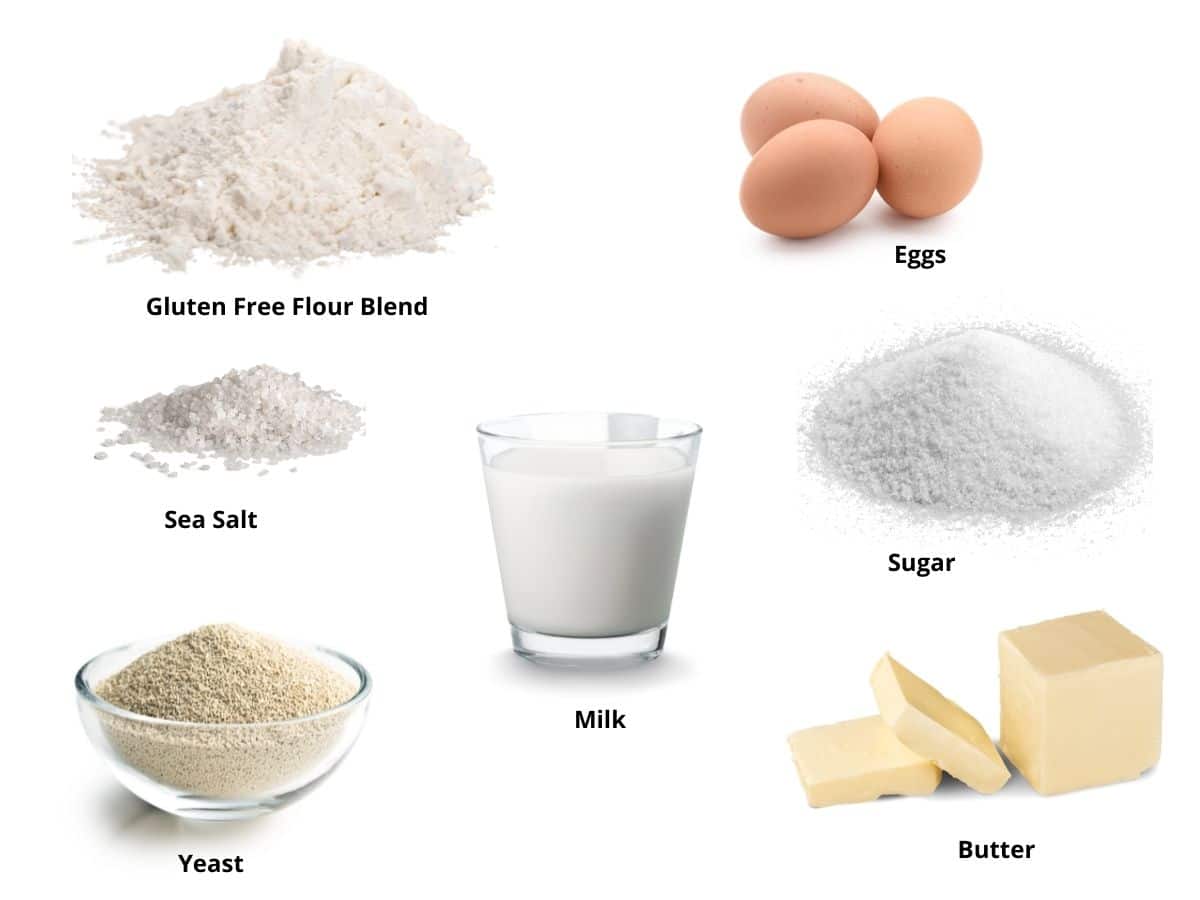
Ingredient Notes:
For the full list of ingredients and amounts, please see the recipe card below. My homemade brioche recipe has a few ingredients, but I do not recommend substitutions if you want your bread to be exactly as mine turned out. Flour blend matters!
- Gluten-Free Flour Mix – I used Authentic Foods Steve’s GF Bread Blend for this recipe. It is the best. This flour brand is light years ahead of other gluten-free flour blends because you can work this dough with your hands, and it bakes up beautifully. If you try another gluten-free flour blend, be sure it works with yeast recipes. If you use a different flour blend, you WILL need to use less liquid. The blend I tested needs more liquid than other blends. See the recipe for quantities.
- Milk – I tested this recipe with regular milk; however, dairy-free milk can also work.
- Yeast – I used regular, active, dry yeast, not rapid-rise yeast. Double-check that the brand you use is gluten free. Red Star Platinum is not gluten-free.
- Eggs – Use large eggs.
- Butter – Use room-temperature unsalted butter. If your butter isn’t very soft, warm it in the microwave for 20-25 seconds.
Check out all of my recipes using Authentic Foods Steve’s Gluten-Free Bread Blend Flour. One of my favorites is this Gluten-Free Monkey Bread.

A Note From My Kitchen
Making homemade gluten-free brioche can seem intimidating, but I created this recipe and included a lot of photos of every step. I have tested it repeatedly, so the dough is workable and the bread turns out soft, fluffy, and delicious, just like traditional brioche. Do not worry if the dough feels a little stickier than you are used to. This is totally normal for gluten-free bread. I’ve included lots of tips to help you shape and rise this bread to give you confidence.
How to Make Gluten-Free Brioche (Step-By-Step)
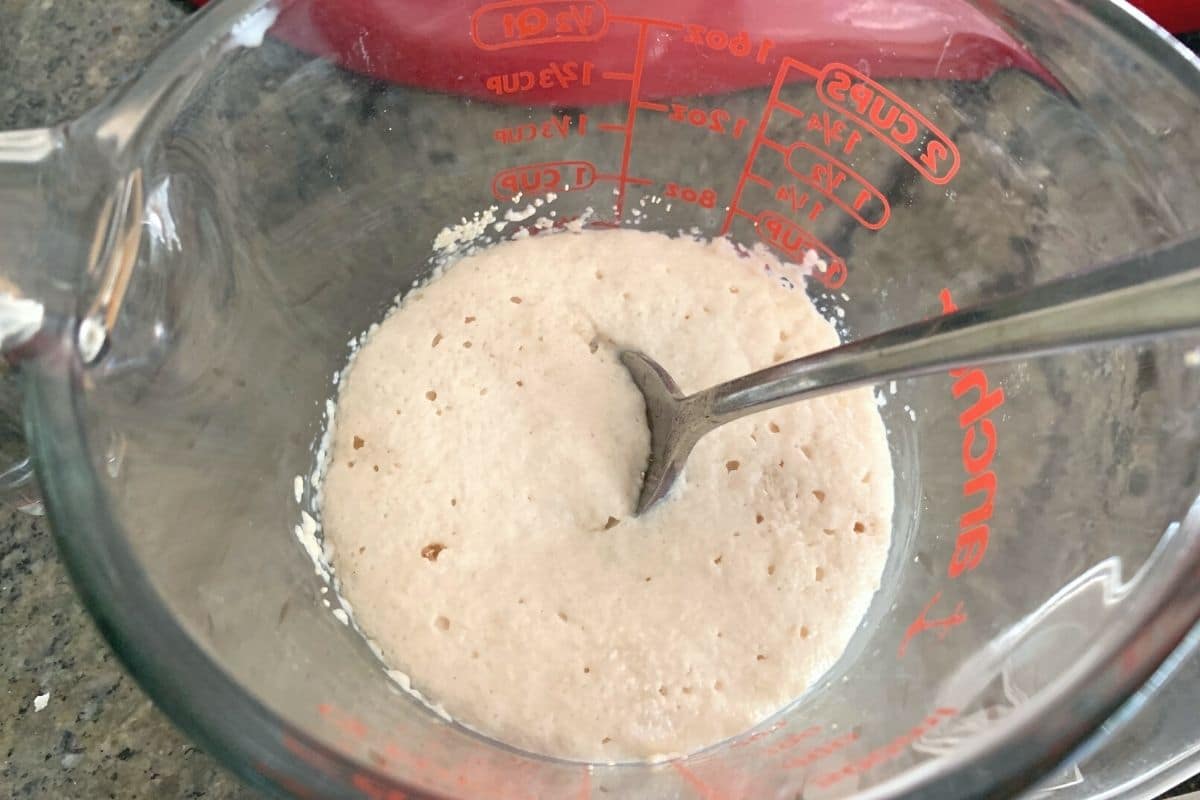
Step 1: In a small bowl, heat the milk to 110ºF. This is about 25-30 seconds in your microwave oven. Add in the sugar and yeast and mix them into the warm milk. Let the mixture sit for 5-10 minutes until it is frothy.
👀 Sandi Says: Don’t overheat your milk, or it can kill the yeast. If you use rapid yeast, add it to the dry ingredients and skip adding it to warm milk.

Step 2: Put the paddle attachment onto your standing mixer. Add the eggs and melted butter, and beat on low for 30 seconds. Add the gluten-free flour, sea salt, and sugar to the bowl of the standing mixer. Pour on the foamy yeast mixture.
Step 3: Mix on a low speed, gradually increasing as the flour is incorporated into the mixture. Turn off the mixer when the dough has formed.
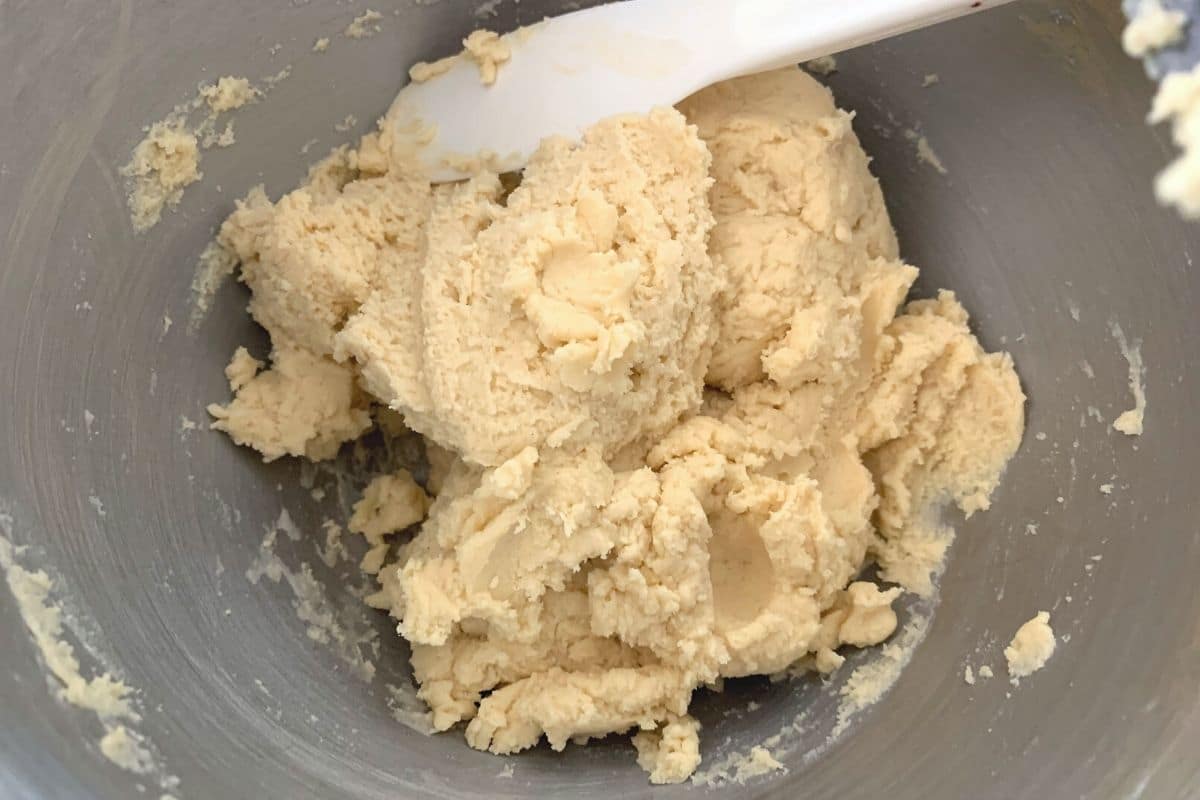
This is what your dough should look like. Note that if you used a different flour blend, your batter may need to be wetter.
📢 Sandi says: Every gluten-free flour blend has a different starch-to-grain ratio. The brand of gluten-free flour you use will affect the moisture of the batter. If your cake batter is too runny, add more flour; if it is too thick, add more liquid.
🔑 Sandi says: With gluten free, you want to shape your bread before the first rise. Gluten-free dough really only gets one good rise. Work the dough and then let it rise.
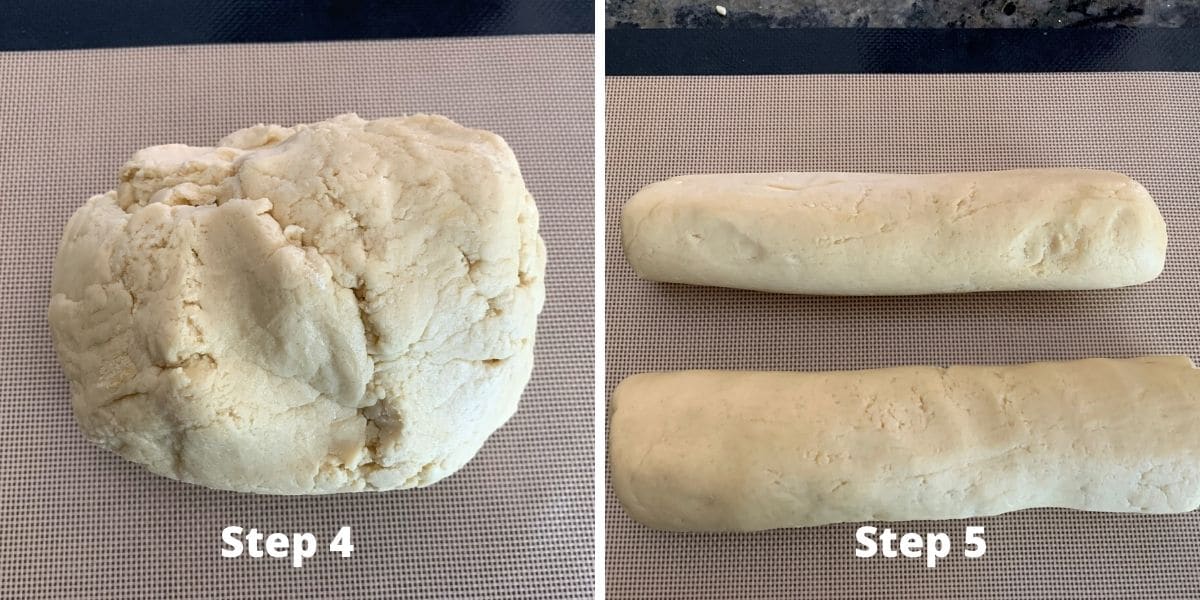
Step 4: Place the brioche dough onto a silicone mat or on a clean work surface. Gently press the dough into a ball. You should not need any extra flour for this part if you use Steve’s bread flour blend as I did.
Step 5: Split the dough into two pieces. Gently roll the dough into two ropes. Keep the length the same as the bread loaf pan. You can also do a three-plait braid if you prefer.
Email This Recipe To Me!
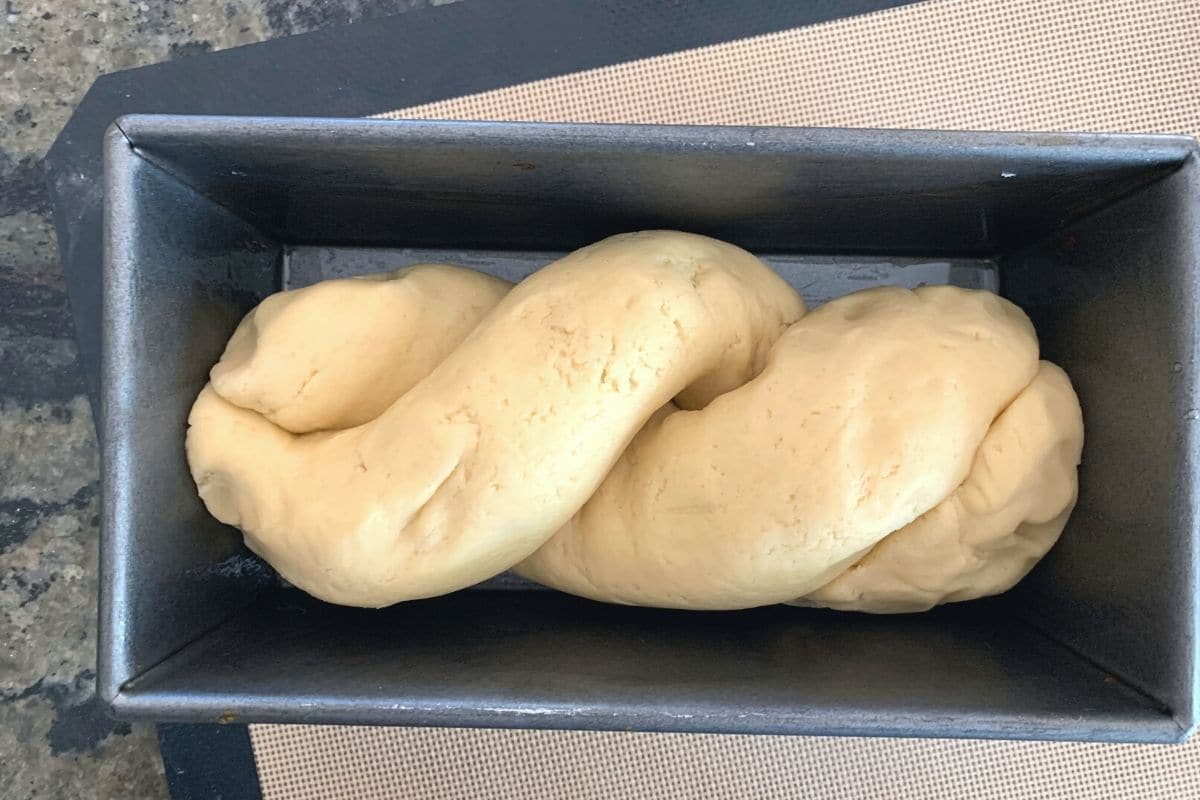
Step 6: Twist the two gluten free bread ropes into one and place it in the baking tin.
Quick Dough Check:
- Your gluten-free brioche dough should be soft and slightly tacky, but firm enough to roll and braid. It will not be stretchy like wheat dough, but you should be able to shape it without it collapsing or sticking to everything.
- If your dough feels too soft, sticky, or wet to roll into ropes, it means your flour blend may need a little more support. Mix in an extra tablespoon of flour at a time until the dough is workable.
- On the flip side, if the dough feels dry or crumbly, add a little more milk, one tablespoon at a time, until it comes together smoothly.
Rising gluten-free dough is tough. The best way I have found is to preheat your oven to 175º F, then turn the oven off. Rise the dough with the oven door cracked open.
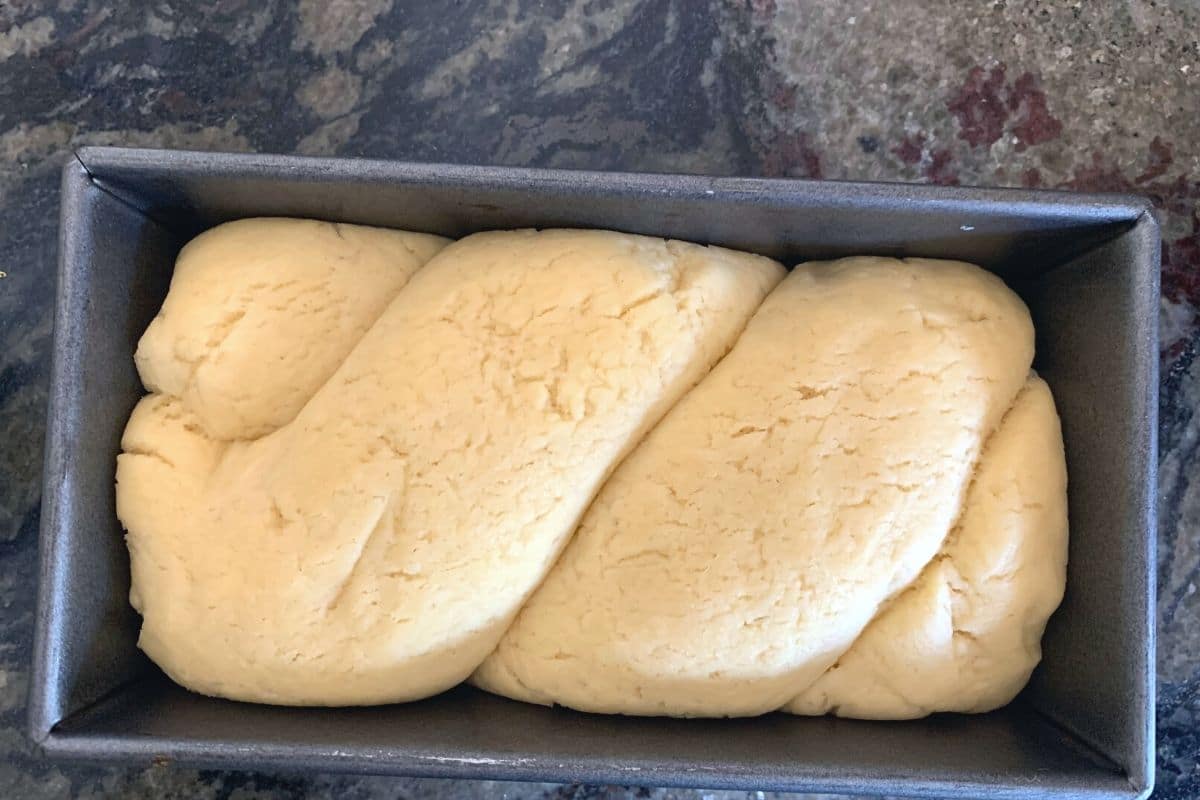
Step 6: Cover with plastic wrap and place it in a warm spot to rise. For best results, place the bread loaf pan in the oven and let the bread rise for 45 minutes. Remove the bread from the oven. Preheat the oven to 350º F.
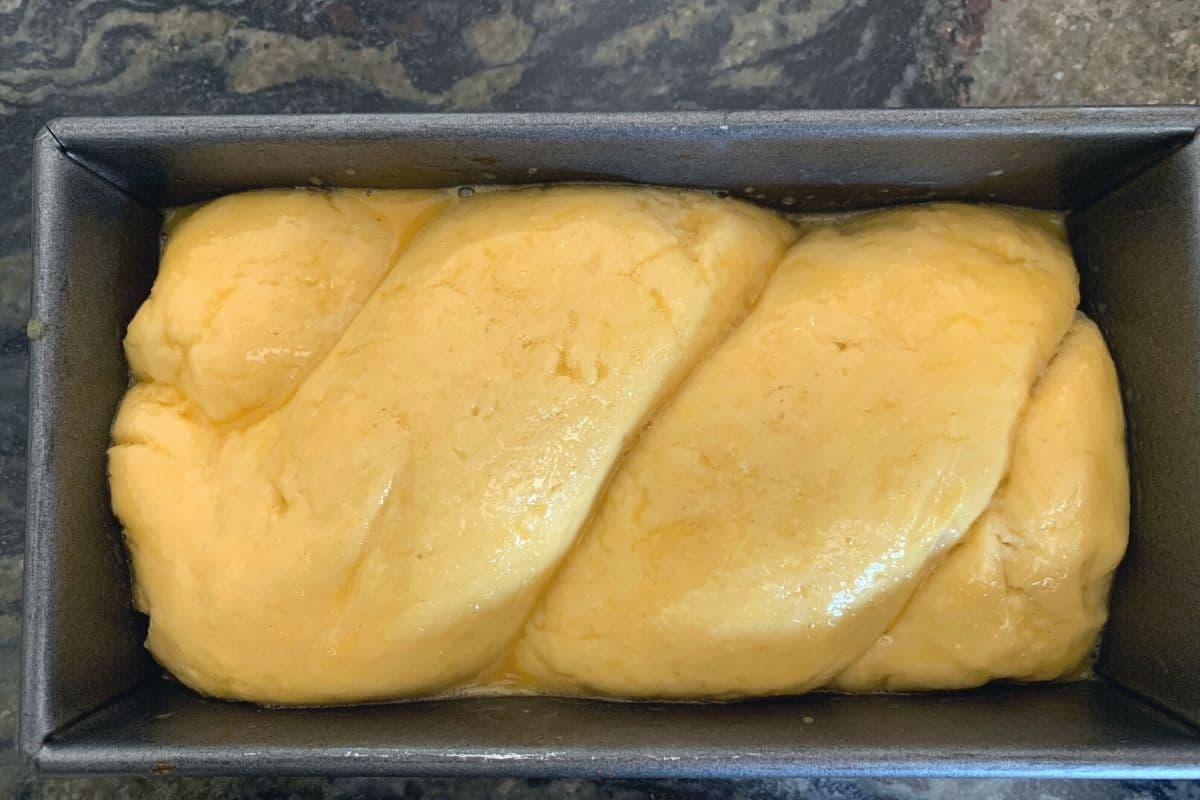
Step 7: To get that golden color, you want to do an egg wash over the top of the dough. Scramble an egg in a small bowl and use a pastry brush to brush the egg over the top of the loaf. I did a double coating of the egg wash, so my loaf got a deep golden color.
Step 8: Bake the brioche for 30 to 40 minutes until the top is golden brown and it has an internal temperature of 190º F. To measure the temperature, insert a digital thermometer down to the bottom of the loaf. Baking time will vary depending on the size and material of your pan.
Step 9: Remove the loaf from the oven and let it sit in the pan for 5 minutes. Gently remove the gluten-free brioche and put it on a wire rack to cool.
🔑 Sandi says: Try not to cut into the bread for 2 hours. It should be fully cooled before slicing. It will give the bread the time to set and turn out nice and fluffy.
Frequently Asked Questions:
If you notice your gluten-free bread dough is too sticky, it usually means you have too much liquid in the dough or didn’t bake it long enough. The best way to fix sticky dough is to add more gluten-free flour or bake it for longer. Some gluten free flour blends are very starchy, and you need to use more flour with these blends than with other blends.
There are three potential reasons why your gluten-free bread didn’t rise.
Was the yeast expired? What temperature was the water in which you proofed the yeast? It should be no hotter than 110º F. Did you use purified water? Chlorine and other chemicals in tap water can kill yeast.
Yes, several readers commented that rapid yeast works in this recipe.
Yes, several readers wrote comments that they used plant-based butter and milk and the recipe worked perfectly.
For more bread troubleshooting, read my Gluten-Free Bread Troubleshooting Guide for more information and tips. Also, be sure to store your bread properly. Read How to Store Gluten-Free Bread to see how I store my gluten-free bread to keep it fresh the longest.
Storage and Freezing Instructions:
- Store this brioche in an airtight container for 2 days in the refrigerator. Gluten free baked goods tend to get moldy quickly, so you definitely want to move them in the fridge or freezer.
- To freeze the loaf, you can freeze it whole or sliced. To freeze whole, wrap the bread in plastic wrap tightly, then place it in a freezer-safe container or zipper bag.
- To freeze slices, place them on a baking sheet and flash-freeze for 30-45 minutes. Move the frozen slices to a freezer-safe zipper bag. This will prevent the slices from sticking together.
Learn all of my tips about storing bread in this guide: How to Store Gluten-Free Bread.
I made the mistake of making one loaf of bread. My family LOVED it! It’s all gone in 5 minutes. Now I’m doubling the recipe and remaking it. This is going to be a staple in my home. Thanks!”
Tif B., Pinterest comment
More Gluten-Free Bread Recipes To Try:
For more recipes, see all of the incredible gluten-free bread recipes on my blog! I have many different gluten-free bread recipes on my blog for you to try. Here are some of my favorites:
- Easy Gluten-Free Challah
- Soft and Fluffy Gluten-Free Nutella Breakfast Twist
- Simple Gluten-Free Bread Machine Bread Recipe
- The Best Gluten-Free Bagels
Love This Recipe?
💬 Did you make this gluten-free brioche recipe? Drop a comment below, and let me know how it turned out! ⭐⭐⭐⭐⭐ Please include which flour blend you used. This will help others know this recipe is delicious. Thank you!
Easy-Gluten Free Brioche Recipe
Ingredients
Yeast Proofing
- ⅔ cup milk or non-dairy milk * see note
- 2 /12 teaspoons dry active yeast One packet!
- 1 tablespoon cane sugar
For the Brioche
- 2 ¾ cups gluten free flour blend * See notes!
- ¼ cup cane sugar
- 1 teaspoon sea salt
- 3 large eggs
- ½ cup melted unsalted butter
Instructions
Activate the Yeast
- In a small bowl, heat the 2/3 cup milk or non-dairy milk to 110º F. This is about 25-30 seconds in your microwave oven. Add in the 1 tablespoon cane sugar and 2 /12 teaspoons dry active yeast and stir to mix them together in the warm milk. Let the mixture sit for 5-10 minutes until it is frothy.
- HINT: It is important that your milk is not too hot or the yeast will die.
Mix the Dough
- Put the paddle attachment onto your standing mixer. Add the 3 large eggs and 1/2 cup melted unsalted butter and beat on low for 30 seconds. Add the 2 3/4 cups gluten free flour blend, 1 teaspoon sea salt, and 1/4 cup cane sugar to the bowl of the standing mixer. Pour on the foamy yeast mixture.
- Mix at low speed, gradually increasing the speed as the flour incorporates into the mixture. Turn off the mixer when the dough has formed. Do not overmix your dough.
- NOTE: Gluten free dough really only gets one good rise. Work the dough and then let it rise.
Shaping the Dough
- Place the brioche dough onto a silicone mat or on a clean work surface. Gently press the dough into a ball. You should not need any extra flour for this part if you use the same gluten free flour blend as I did.
- Split the dough into two pieces. Gently roll the dough into two ropes. Keep the length the same as the bread loaf pan. You can also do a three plait braid if you prefer.
- Grease the loaf pan and preheat your oven to 175º F. Move the oven rack to the middle setting. Once the oven reaches that temperature, turn off the oven.
- Twist the two gluten free bread ropes into one and place it in the baking tin. Cover with plastic wrap and place it in the oven with the door cracked open or another warm spot to rise.
- When the dough has doubled in size, preheat the oven to 350º F.
- Scramble an egg in a small bowl and use a pastry brush to brush the egg over the top of the loaf. I did a double coating of egg wash so my brioche loaf would get a deep golden color.
Bake the Brioche
- Bake the brioche for 30-40 minutes until the top is golden brown and it has an internal temperature of 190º F. To measure the temperature, insert a digital thermometer down to the bottom of the loaf.
- Remove the loaf from the oven and let it sit in the pan for 5 minutes. Gently remove the gluten free brioche and put it on a wire rack to cool.
- Try not to cut into the bread for 2 hours. It will give the bread the time to finish cooking and set.
Notes
- I tested Authentic Foods Steve’s GF Bread Blend for this recipe. This flour is light years ahead of other gluten free flour blends because you can work this dough with your hands, and it bakes up beautifully. If you try another gluten-free flour blend, be sure the one you use has xanthan gum or guar gum, or you add 3/4 teaspoon separately.
- I am saying it again….the flour blend you use matters! If your bread turns out dense, didn’t rise, etc., the chances are you used a gluten free flour blend that doesn’t work with yeast or your yeast is expired.
- Yeast – double-check the brand you use is gluten free. Red Star Platinum is NOT gluten free!
- I tested this recipe using Oatly Super Basic and almond milk. Other types should work, but do not use canned coconut milk.
- This bread will keep fresh for up to 3 days in an airtight container in the refrigerator or up to 4 months in the freezer. To soften it up, microwave the slice of brioche for 20-25 seconds.
Email This Recipe To Me!
SPECIAL NOTE
Please know that every gluten free flour blend has a different starch to grain ratio. If you use a blend I didn’t test, my rule of thumb is to add more flour if your dough or batter is wet and add more liquid if the dough or batter is too dry!
Nutrition
Nutrition Disclaimer
Nutritional information is an estimate provided to you as a courtesy. You should calculate the actual nutritional information with the products and brands you are using with your preferred nutritional calculator.
I truly hope you enjoy this recipe. I have been testing and creating gluten-free recipes for over 15 years. Creating gluten-free recipes that do not taste gluten-free is my goal for every recipe. Sometimes I only have to test a new recipe a couple of times, and others it takes multiple times. I do this so you get reliable, delicious results every time!

it said in the recipe about non milk alternatives to see the notes, yet there’s nothing in the notes about it.
Hi Rachel, You can use any. I used Oatly Super Basic Oat Milk, I have also used almond milk in this recipe.
Two questions…the first time I printed your recipe it called for 1 Tablespoon dry active yeast One packet. This updated version calls for 2/12 teaspoons dry active yeast One packet! How does one measure 2/12 teaspoons….Or should I use a whole packet as it says “One packet!” ??Also, what size loaf pan do you use for this recipe? Thank you!
Hi, just use one packet. The teaspoon measurement is for folks who buy yeast in a container, not packets. For the brioche, my loaf pan is a one pound, 9 inch loaf pan. If you are not using the Authentic Foods Steve’s GF Bread Blend, please be sure to read my notes and use a gluten-free flour blend that works with yeast. Also start with less water. Steve’s blend has a much higher water need than other blends.