
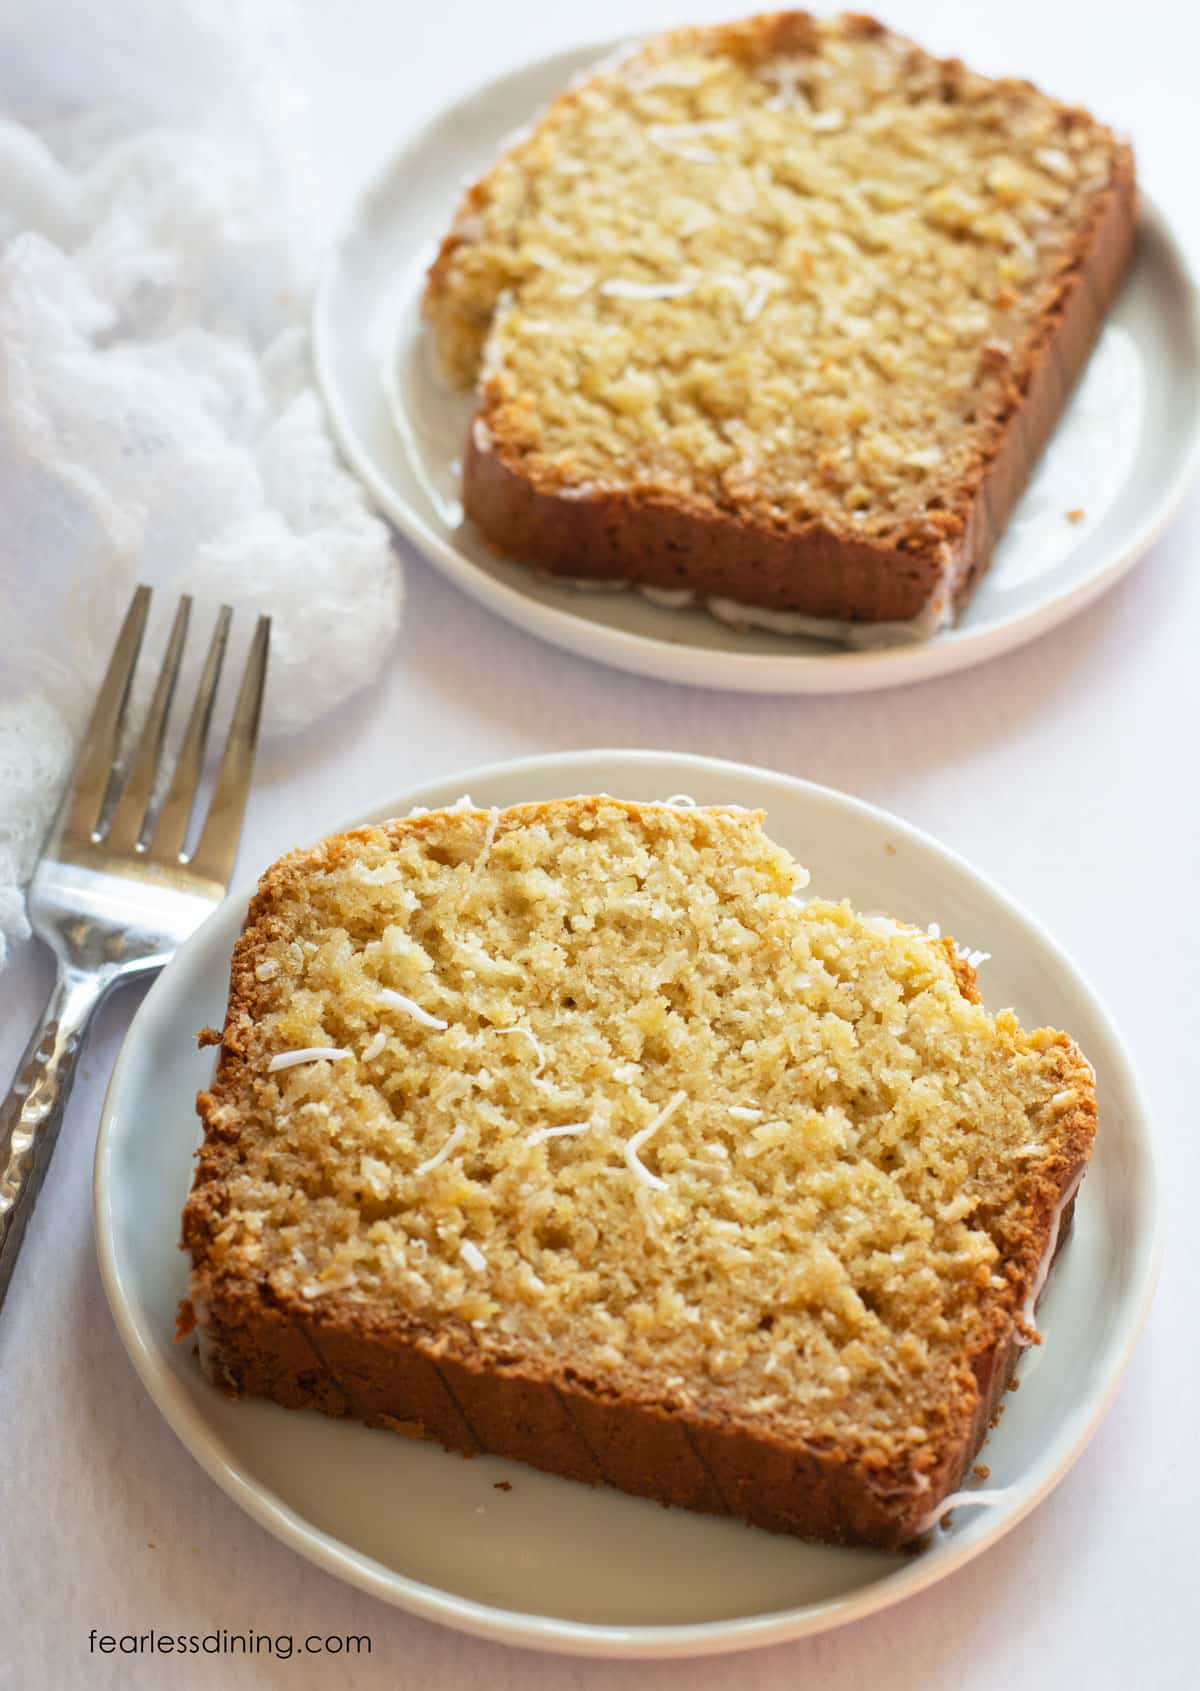
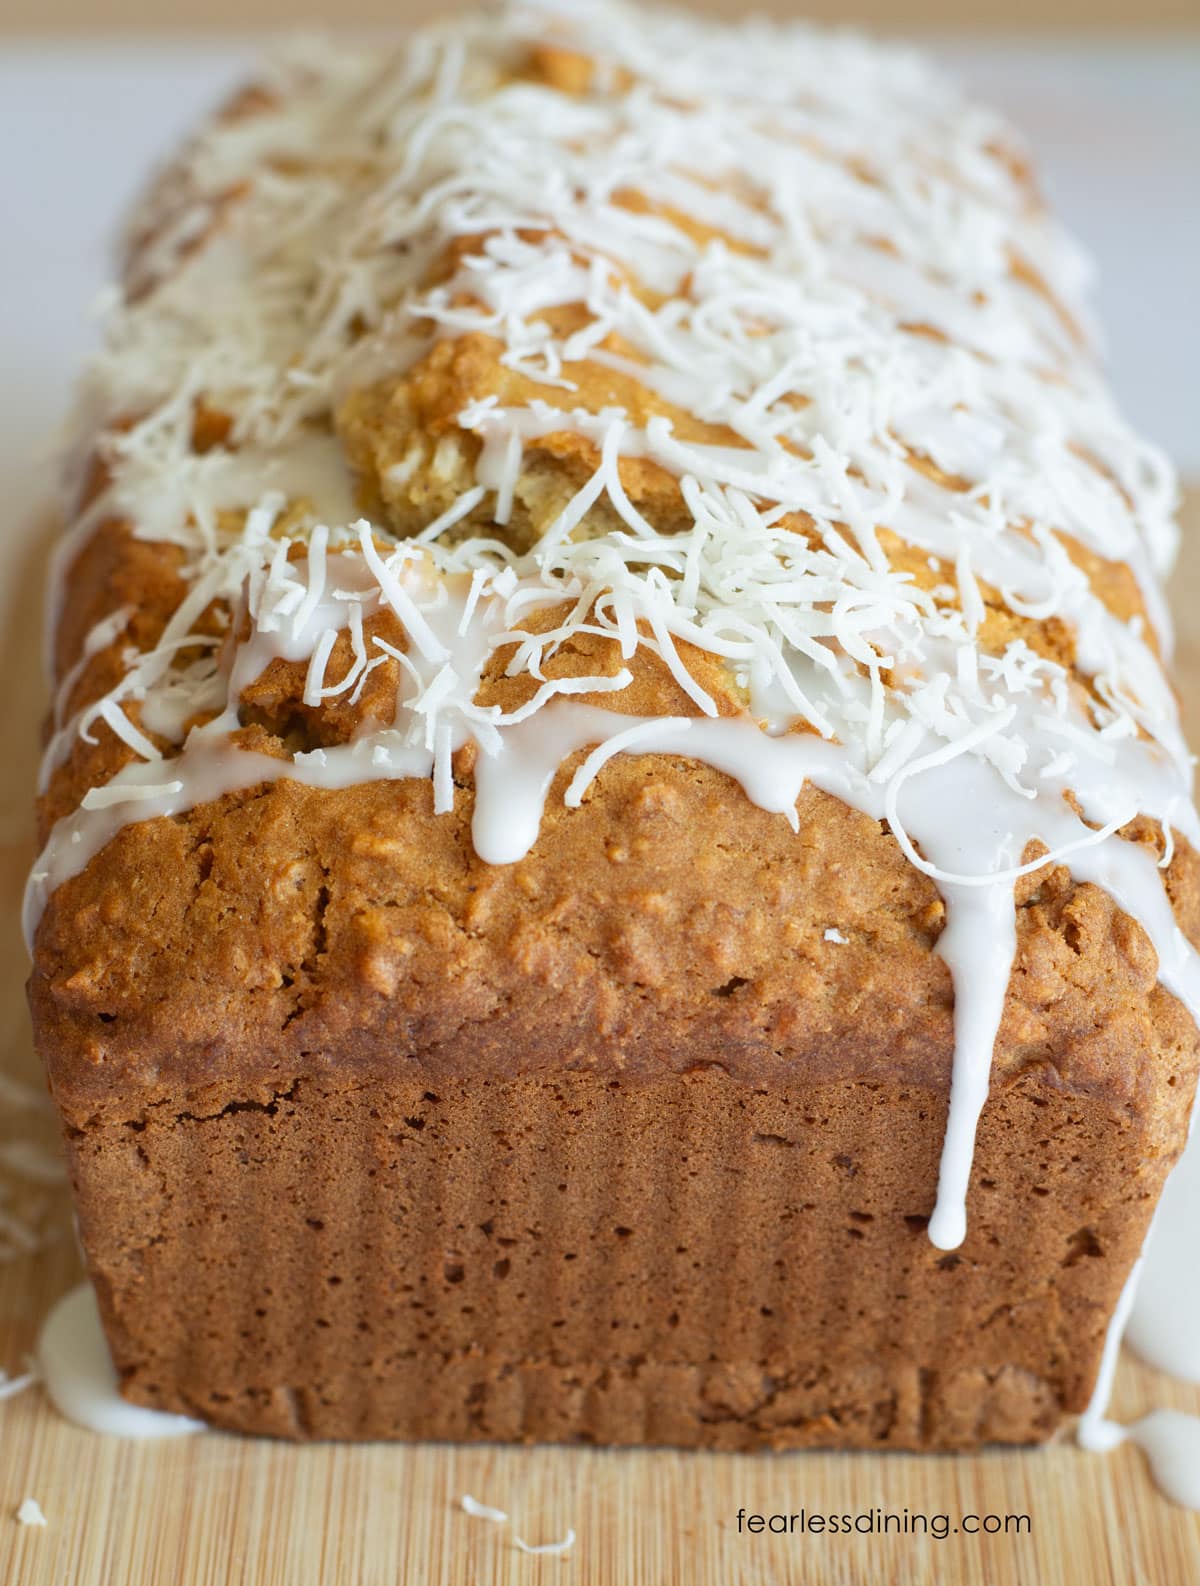
This tender gluten-free pineapple coconut cake is full of tropical flavor in every bite. The sweet pineapple keeps the crumb moist, while the shredded coconut adds just the right texture and flavor. It is an easy, crowd-pleasing cake you can bake in a loaf pan, round cake pan, or even as cupcakes. Top it with a creamy vanilla icing and shredded coconut.
This post may contain affiliate links. Please read our Disclosure Policy.
This recipe came together after a recent pantry dive. Once a year, I empty out my kitchen pantry and pull out the expired foods. I found a can of crushed pineapple that only had a month left, so I came up with a cake to put this can to use. If you have a can of crushed pineapple in your pantry, you will want to make this gluten-free coconut cake with canned pineapple.
If you love baking cake, I have over 100 incredible gluten-free cake recipes for you to try. Drop a comment and let me know which one you try next!
Ingredient Notes and Swaps:
For the full list of ingredients and amounts, please go to the recipe card below.
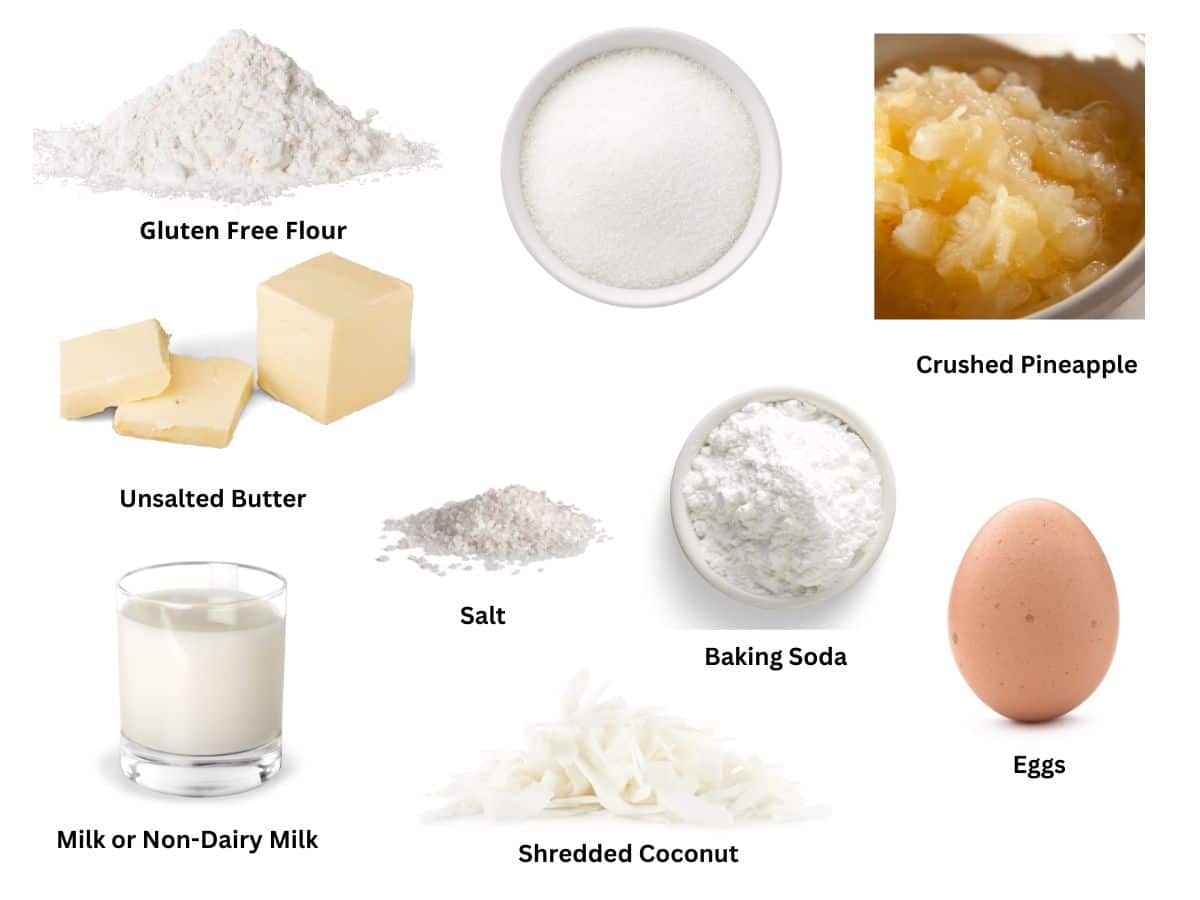
- Gluten-Free Flour Blend – I tested this gluten-free cake recipe with King Arthur Measure for Measure, my DIY Gluten-Free All Purpose Flour Blend, and Bob’s Red Mill 1:1 Blend. Both worked great. Other blends will work, but you may need to tweak the batter. My rule of thumb is if your batter or dough is too runny, add more flour; if it is too thick, add more liquids.
- Binder – If your flour blend doesn’t contain a binder, add 3/4 teaspoon of xanthan gum to the dry ingredients. Learn more by reading why binders matter in gluten-free baking.
- Cane Sugar – Cane sugar adds sweetness and helps create a tender crumb by locking in moisture. You can substitute coconut sugar, but note that it will cause your cake to turn brown.
- Baking Soda – Baking soda is needed when there are acidic ingredients to help the cake rise.
- Coconut – Use unsweetened shredded coconut for the best texture and to avoid making the cake overly sweet.
- Pineapple – I used canned crushed pineapple, but fresh pineapple can be used. Be sure to chop it finely if using fresh.
- Eggs – Use large eggs. Eggs help bind the cake together and keep it moist.
- Butter – Butter adds richness and helps keep the cake moist. Use unsalted butter so you can control the salt level. Use plant-based butter if you are dairy-free.
- Milk or Non-Dairy Milk – Use any unflavored milk or non-dairy milk. I used Oatly Simple, but almond, soy, or regular milk all work.

A Note From My Kitchen
This cake has been on my schedule to make for at least a year. I often get distracted by other recipes I am testing, which is normal for me. This cake is delicious, and I tested baking it as a loaf cake and as a sheet cake. I also tested it using freshly pureed pineapple and canned pineapple bits. I found the canned pineapple was a little sweeter, so if you use fresh pineapple, be sure it is very ripe.
Note that every gluten-free flour blend absorbs liquid a little differently. If your batter looks thicker or thinner than mine, add 1 to 2 tablespoons of milk or flour to adjust. This is totally normal in gluten-free baking and will help you get consistent results.
How to Make Gluten-Free Pineapple Coconut Cake (Step-By-Step)
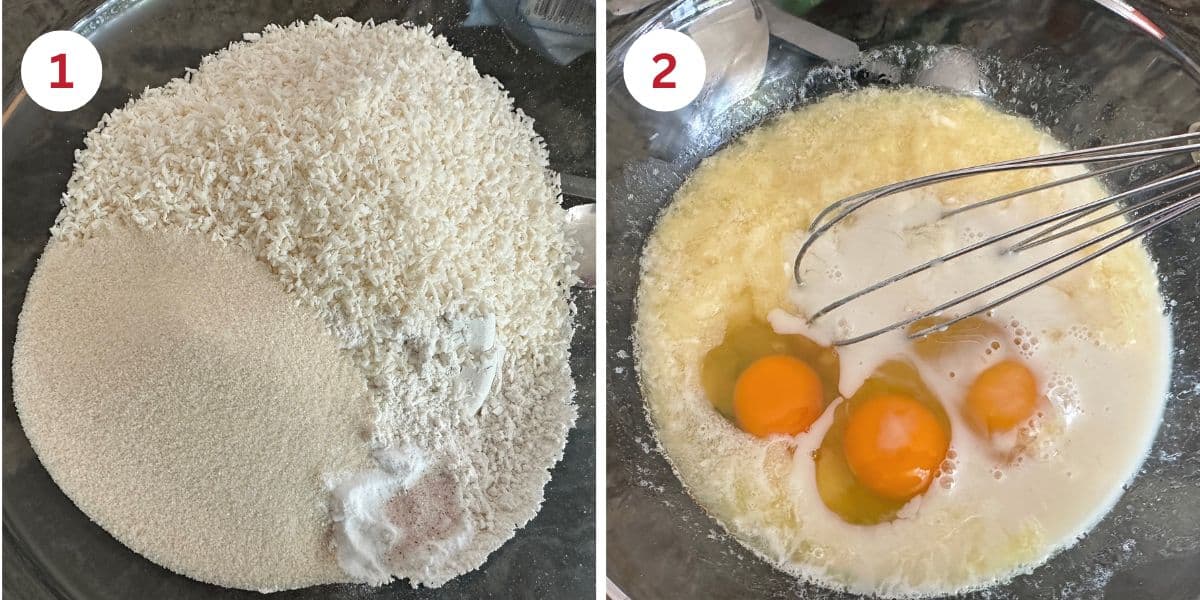
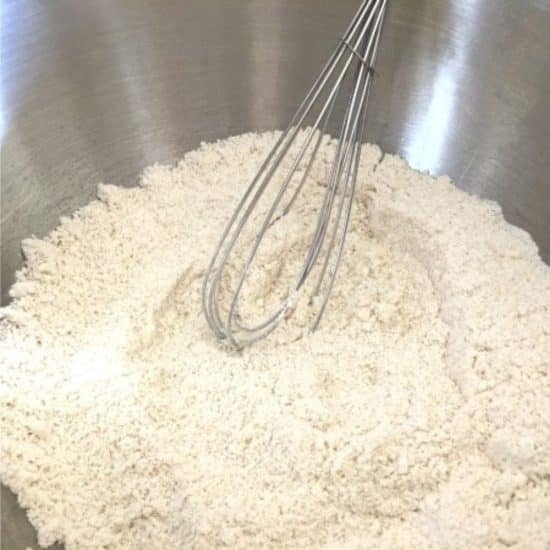
Step 1: Preheat the oven to 350º F on the bake setting. Combine the flour, shredded coconut, sugar, baking soda, and salt in a large mixing bowl. Use a whisk to thoroughly mix.
Step 2: Partially melt the butter. Add the eggs, pineapple, and milk. Whisk to blend.
Email This Recipe To Me!
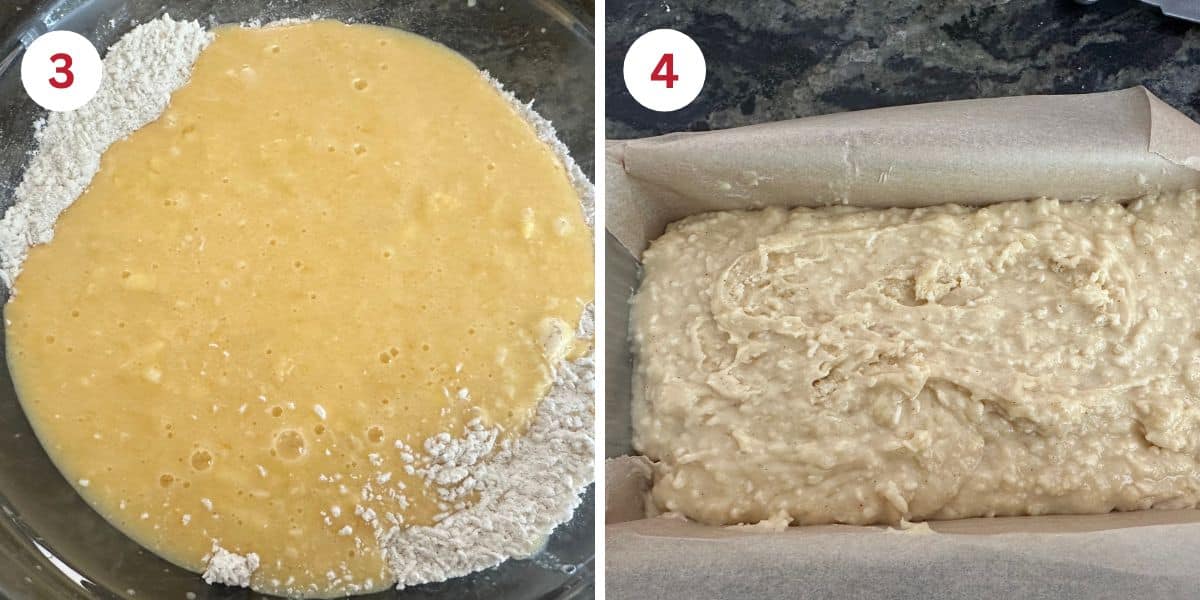
Step 3: Pour the wet ingredients into the dry ingredients and gently mix until a smooth batter forms.
Step 4: Line a loaf pan with parchment paper. Pour the batter into the pan and use a rubber spatula to smooth the batter evenly in the pan.
Step 5: Bake the gluten-free pineapple coconut cake for 40 to 42 minutes. The actual baking time will vary depending on the size and type of pan you use.
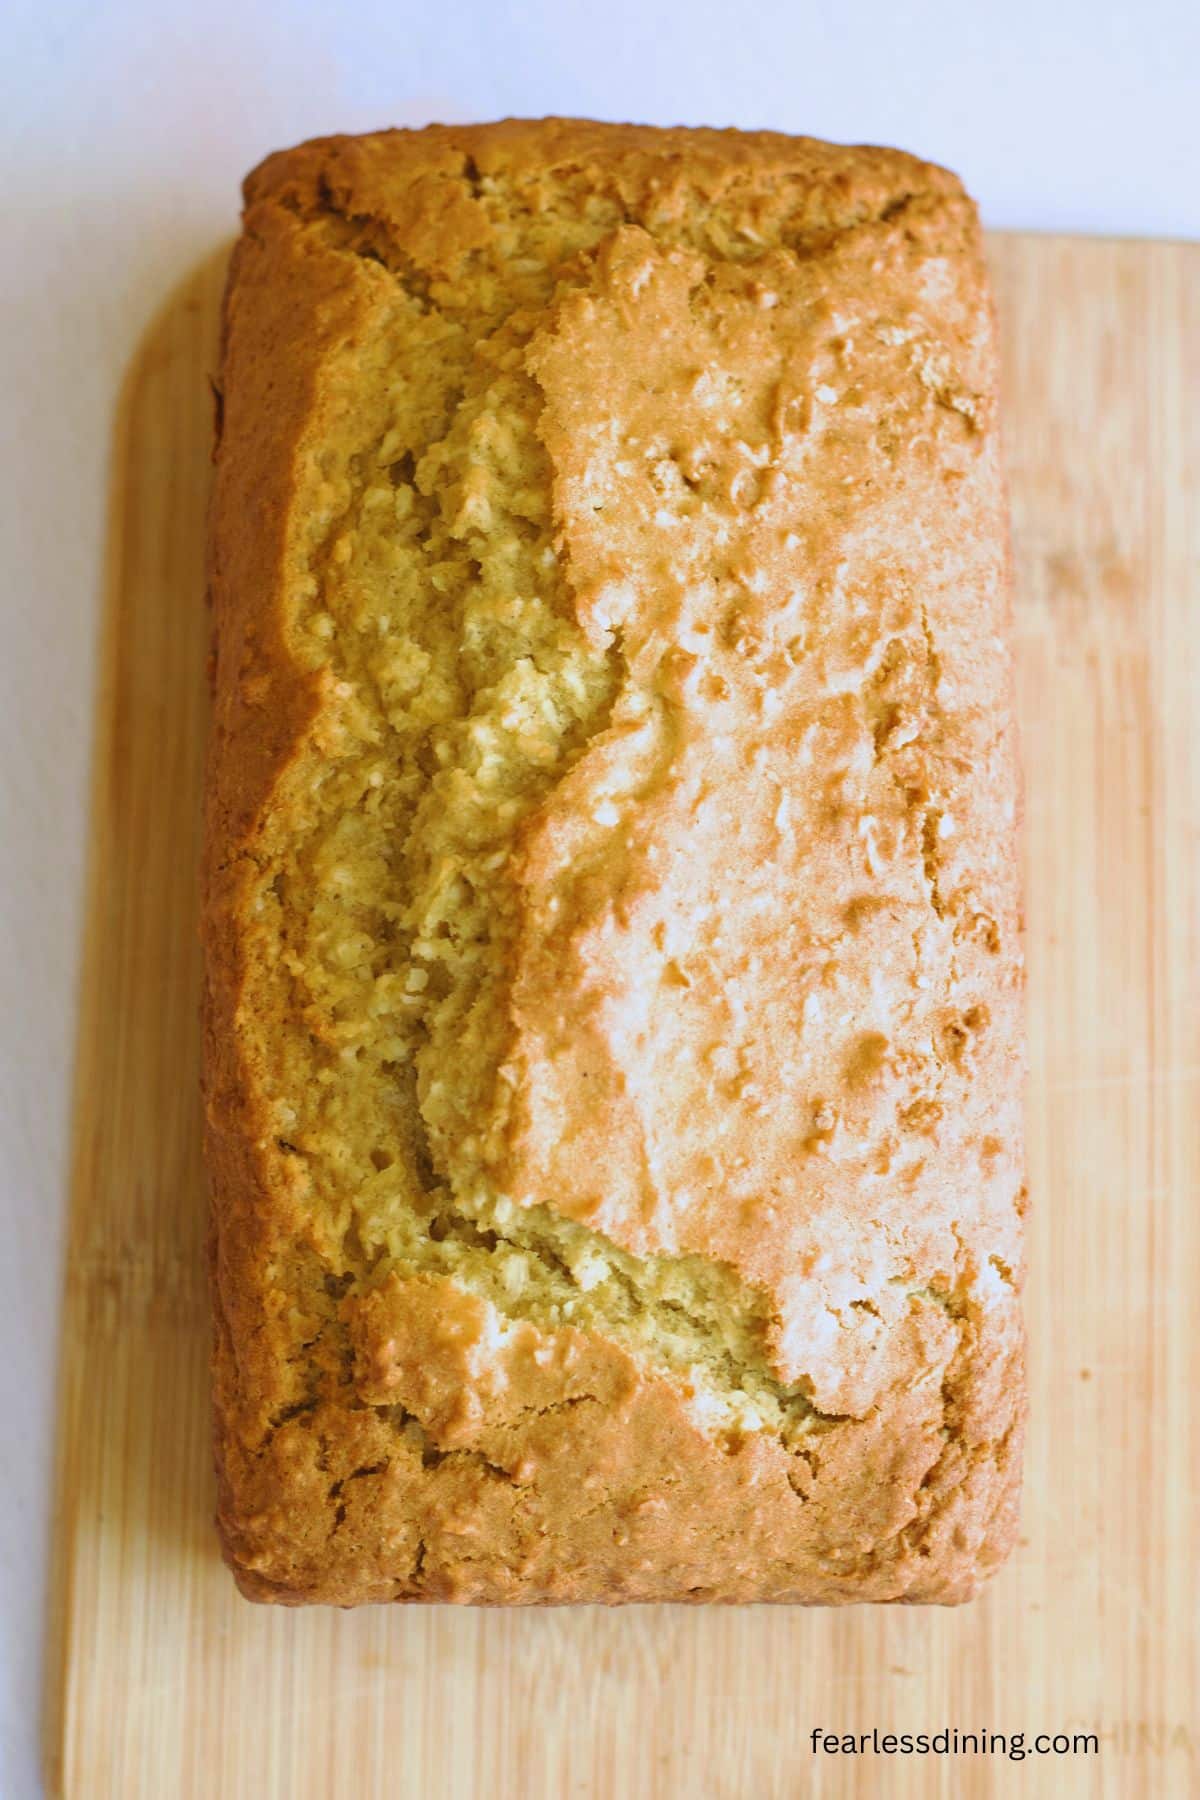
The cake is finished baking when the top is golden. Insert a toothpick into the top of the cake. If it comes out clean, the cake is finished baking. If you see batter or crumbs, it needs to be baked longer.
Step 6: Move the cake to a cooling rack. Let it sit in the pan for 5 minutes, then use the parchment paper to gently lift the cake out of the pan and onto a cooling rack.
Do not slice the cake until it is cooled. If you slice it when it is hot, the cake will crumble because it hasn’t set. When the cake is cooled, mix the icing ingredients and drizzle the icing over the cake.
Easy Gluten-Free Cake Tips:
- Do not overmix the cake batter; the cake will turn out denser.
- Partially melt the butter, but do not make it too hot, or it can cook the eggs when mixing the wet ingredients.
- I prefer to line the loaf pan with parchment paper so the cake is easy to lift out of the pan.
This easy gluten-free pineapple cake with coconut is a winner recipe that everyone will love. Add in blueberries, chocolate chips, or any other mix-ins you like!
Frequently Asked Questions:
This recipe will make 12 cupcakes.
I haven’t tested this recipe with an egg replacer. If you bake this cake with an egg replacer, please drop a comment.
Yes! Just chop it finely and drain any excess juice. The texture may be slightly different, but it will still taste great.
More Gluten-Free Loaf Cake Recipes:
We love making loaf cakes for easy slicing. If you enjoy baking, here are a few of my favorite cake recipes:
- Fluffy Gluten-Free Banana Pineapple Bread
- Gluten-Free Pineapple Upside Down Cake
- Gluten-Free Hummingbird Cake (A Fan Favorite!)
- Quick and Easy Gluten-Free Coconut Cupcakes
Love This Recipe?
💬 Did you make this gluten-free pineapple coconut cake recipe? Drop a comment below, and let me know how it turned out! ⭐⭐⭐⭐⭐ Please include which flour blend you used. This will help others know this recipe is delicious. Thank you!
Tropical Gluten-Free Pineapple Coconut Cake
Ingredients
- 2 ¼ cups gluten free flour blend * see notes
- 1 ½ cups unsweetened shredded coconut
- ¾ cup sugar
- 1 teaspoon baking soda
- ¼ teaspoon salt
- 3 large eggs
- ½ cup melted unsalted butter
- 1 cup crushed pineapple
- ¼ cup pineapple juice
- ½ cup milk or non-dairy milk
- 2 cups powdered sugar
- 2-3 tablespoons milk
Method
- Preheat the oven to 350º F on the bake, not convection, setting.
- Combine the 2 1/4 cups gluten free flour blend, 1 1/2 cups unsweetened shredded coconut, 3/4 cup sugar, 1 teaspoon baking soda, and 1/4 teaspoon salt in a large mixing bowl. Use a whisk to thoroughly mix.
- Combine the 1/2 cup melted unsalted butter 3 large eggs, 1 cup crushed pineapple, 1/4 cup pineapple juice, and 1/2 cup milk or non-dairy milk. Whisk to blend.
- Pour the wet ingredients into the dry ingredients and gently mix to make the batter. Do not over mix or you can end up with a denser cake.
- Line a loaf pan with parchment paper. Pour the batter into the pan and use a rubber spatula to smooth the batter evenly in the pan.
- Bake the gluten-free pineapple coconut cake for 40 to 45 minutes. The actual baking time will vary depending on the size and type of pan you use.
- The cake is finished baking when the top is golden. Insert a toothpick into the top of the cake. If it comes out clean, the cake is finished baking. If you see batter or crumbs, it needs to bake longer.
- Transfer the cake to a cooling rack. Let it sit in the pan for five minutes, then gently lift it out of the pan onto the rack using the parchment paper.
- Do not slice the cake until it is cooled. If you slice it when it is hot, the cake will crumble because it hasn't set. When the cake is cooled, mix the icing ingredients and drizzle the icing over the cake.
Nutrition
Notes
- I tested two flour blends in this recipe, King Arthur Measure for Measure and Bob’s Red Mill 1:1. Other blends will work, but you may need to tweak the ingredients. My rule of thumb is if your batter or dough is too runny, add more flour, and if it is too thick, add more liquids.
- If your blend doesn’t contain a binder, add 3/4 teaspoon of xanthan gum.
- Swap plant-based butter to make this recipe dairy-free.
- I drain a tiny bit of the juice from the crushed pineapple, but not much. I supplemented the pineapple juice from a can of pineapple juice.
- You can use fresh pineapple, but the texture may vary slightly.
- Store leftovers in an airtight container. It should stay fresh for up to 4 days. (3 days in the summer if your house is hot.) I recommend freezing the cake in freezer-safe zipper bags.
Private Notes
Tried this recipe?
Let us know how it was!
Gluten-Free Related Reading
Gluten-free baking is like a science experiment. There are so many things you need to understand the different components of baking without gluten. My Gluten-Free Resources Section is here to help teach you the tools you need to know to become a confident gluten free baker.
My Best Gluten-Free Baking Tips For Better Baking!
Why Binders Are Important In Gluten-Free Baking

The Best Gluten Free Flour Blends – And how to use them!
I truly hope you enjoy this recipe. I have been testing and creating gluten-free recipes for over 15 years. Creating gluten-free recipes that do not taste gluten-free is my goal for every recipe. Sometimes I only have to test a new recipe a couple of times, and others it takes multiple times. I do this so you get reliable, delicious results every time!

can you add rum to this recipe?
Sure! Maybe 2 TBSP?
Can the loaf be made without the cocnut??
Hi Helen, Coconut absorbs a LOT of liquid, and omitting it will throw off the wet to dry ingredient ratio quite a bit. You can definitely experiment using less liquid. If you like ripe bananas, I have an awesome gluten-free pineapple banana bread that is incredible, and definitely could pass as a cake. https://www.fearlessdining.com/gluten-free-pineapple-banana-bread/