These gluten-free chocolate truffles are made using a classic ganache method, which is what gives them their smooth, creamy texture and clean chocolate flavor. When done correctly, ganache-style truffles melt softly as you bite into them; rich, balanced, and not overly sweet.
This post may contain affiliate links. Please read our Disclosure Policy.
Email This Recipe To Me!
❤️ Sandi’s Recipe Summary
The Quick Bite: These ganache-style homemade chocolate truffles use three simple ingredients, such as chocolate, heavy cream, and orange liquor, plus any topping you want to roll them in. They taste like they were purchased in a high-end chocolate shop.
This recipe uses just a few ingredients, such as high-quality chocolate, heavy cream, and a touch of orange liqueur…just to let the chocolate shine. I will walk you through the key steps, including how to melt the chocolate and emulsify the ganache so your truffles turn out silky and stable every time. Homemade truffles are simple to make, elegant enough for gifting, and perfect when you want a truly special chocolate treat at home.
This recipe comes from a new chocolate cookbook I bought by Alice Medrich titled “Seriously Bitter Sweet. The Ultimate Dessert Makers Guide to Chocolate.” (I want to be clear that this is NOT a gluten free cookbook, but it has many recipes that are gluten-free. If you are intrigued and love chocolate, it is well worth buying a copy.) I am excited to share this with you so you can make artisan chocolate truffles from scratch!
If you love chocolate as much as we do, you will love these gluten-free chocolate recipes!
Ingredient Notes:
For the full list of ingredients and amounts, please go to the recipe card below.
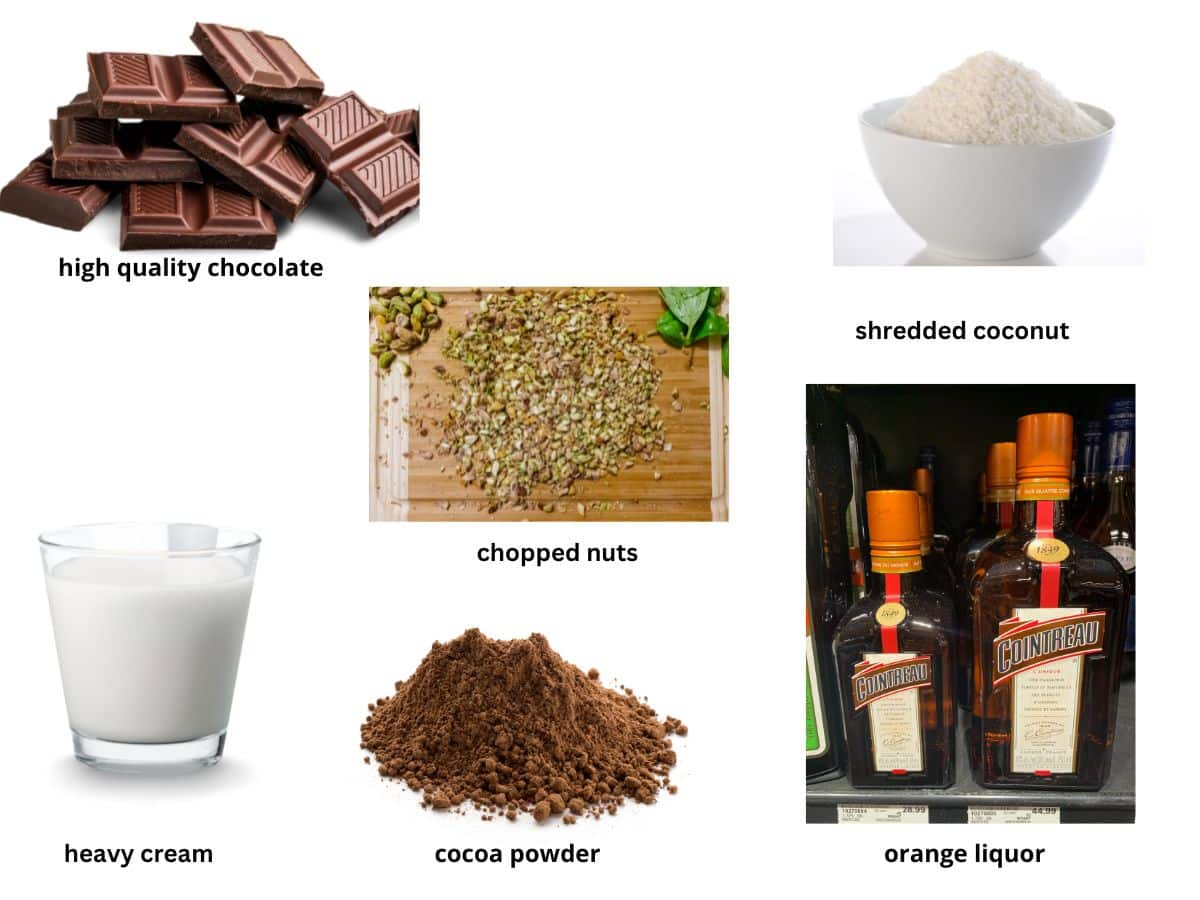
- Chocolate – High-quality chocolate is essential for smooth, well-set truffles. This recipe works best with dark, bittersweet, or milk chocolate bars made with a short ingredient list. Look for chocolate where cocoa is listed first, followed by sugar, and an emulsifier such as soy or sunflower lecithin. Avoid chocolate chips, which contain stabilizers that can prevent proper melting and can result in grainy ganache.
- Heavy Cream – Use full-fat heavy whipping cream. The fat content is necessary to create a rich, stable ganache that sets properly while staying soft when chilled.
- Grand Marnier or Cointreau – Grand Marnier or Cointreau adds subtle citrus notes that enhance the chocolate flavor. If you prefer an alcohol-free option, you can substitute a 1/2 teaspoon of orange extract.
- Salt – I recommend a pinch of kosher salt to help enhance the chocolate flavor.
- Cocoa Powder – One of my favorites to roll the truffles in. Use a high-quality cocoa powder such as Ghirardelli.
- Toppings – You can roll your truffles in so many toppings. I like to use cocoa powder and chopped nuts. There is a full list of fun options below.
What Chocolate is Best for Making Truffles?
- Ghirardelli Dark Chocolate Melting Wafers or Dark Chocolate Bars.
- Valrohna Dark Chocolate (King Arthur sells this type of quality chocolate, as do other high-quality chocolate brands.)
- This Belgian Chocolate also works beautifully in this homemade chocolate truffle recipe.
- Trader Joe’s One-Pound Chocolate (a great budget option)
How to Make Gluten-Free Truffles (Step-By-Step)

Step 1: Add the chocolate to a double boiler. I don’t own a double boiler, so I set a metal bowl over a pan of boiling water to melt my chocolate. You can also use two pots, a smaller one that sits in a larger pot (large enough that it can’t fall in or get water in it).
👀 Sandi Says: Do not microwave the chocolate; I discuss this further in the recipe FAQ below.
Step 2: Remove the bowl of melted chocolate from the double boiler and set it aside. Let the chocolate cool to 115 to 125ºF. Chocolate that is too hot can cause the ganache to separate when the cream is added.
Step 3: Making the ganache. In a saucepan, heat the heavy cream and a pinch of salt over medium-high heat until it begins to boil. Pour in the orange liqueur and whisk to quickly incorporate it into the cream.
Step 4: Remove the cream mixture from the stove and pour the chocolate into the cream mixture.
Step 5: Mix together with a large spoon or spatula.
Step 6: Use an immersion blender to blend the chocolate and cream until the mixture is completely smooth and creamy.
(I love, love, love my Cuisinart Immersion Blender. The immersion blender creates a stable emulsion, which gives the truffles their silky texture and prevents graininess.)
Step 7: Pour the chocolate mixture into a mixing bowl and cover it with plastic wrap. You want the plastic wrap to touch the top of the chocolate. This will help to prevent any condensation. Place the bowl in the refrigerator and let it chill for at least 1 1/2 to 2 hours, or until firm enough to scoop.
Step 8: Add your chosen toppings for the gluten free truffles into small bowls.
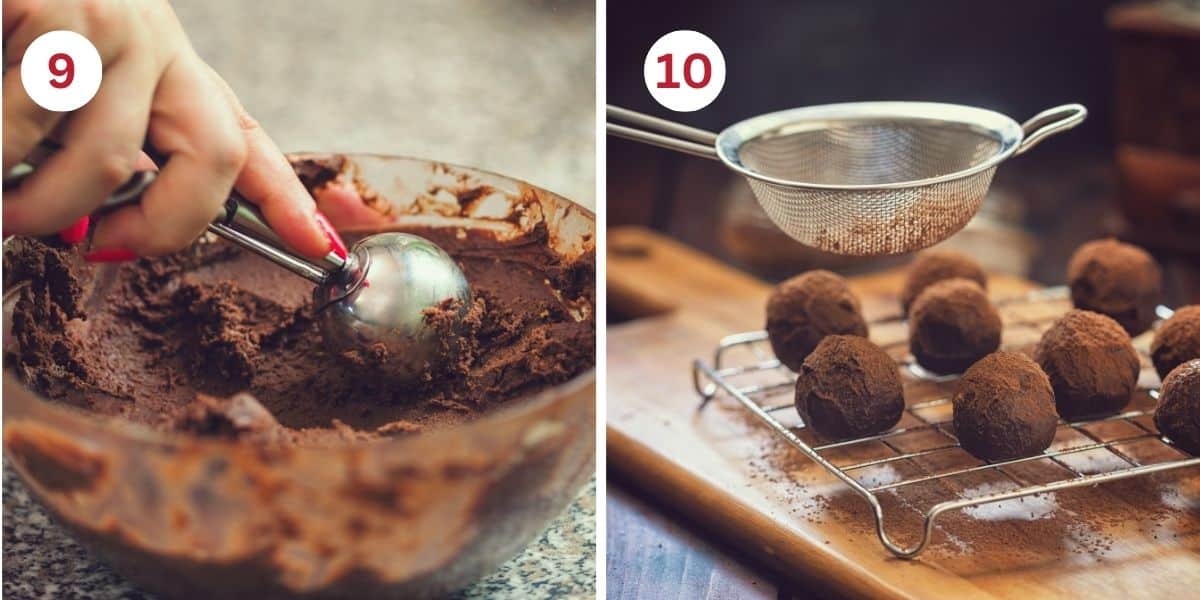
Step 9: Use a small cookie scoop to scoop up some of the chocolate. These are an indulgence, so using a smaller scoop is best when making fudgy chocolate truffles. Scoop out some of the chocolate and then use your hands to roll the ganache into a ball. Set it on a tray.
Work quickly because ganache softens as it warms.
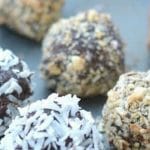
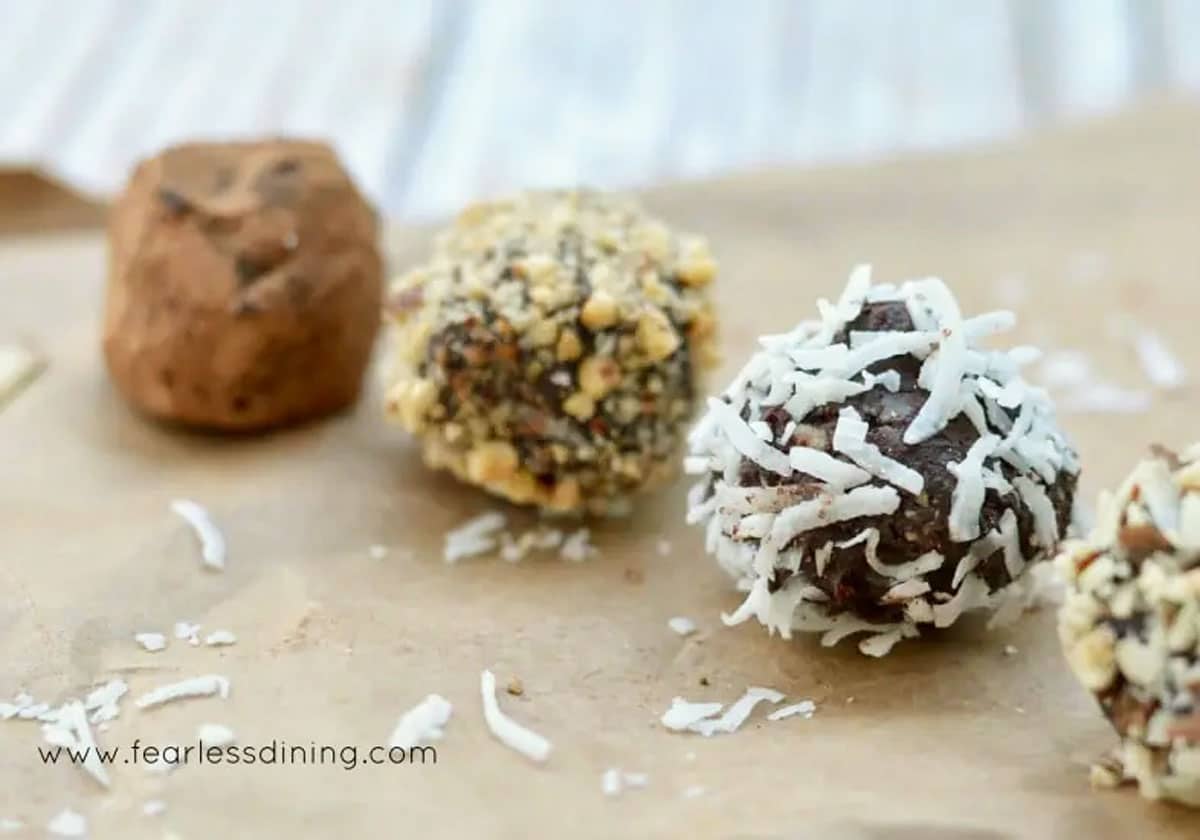
Step 10: Decide which topping you want to roll the truffle in. I rolled some in coconut, some in finely chopped almonds, and the rest I dusted in cocoa powder. Ensure the entire surface of the chocolate ball is coated. Place it in a pan.
Step 11: Place the chocolates in the refrigerator until you are ready to serve them or wrap them up to gift. These truffles will keep fresh in an airtight container for up to 2 weeks in your refrigerator.
Truffle coating ideas:
- cocoa powder
- coconut
- chopped nuts
- shaved chocolate
- dip in chocolate that hardens
- cinnamon

Frequently Asked Questions:
No, do not microwave the chocolate. Microwaving chocolate increases the risk of overheating and scorching, which can cause bitterness and make it difficult to form a smooth ganache. Gentle, indirect heat allows the chocolate to melt evenly and keeps the cocoa butter stable, which is essential for silky truffles.
Using your hands is the best way to roll the chocolate into balls. Place the chocolate in your palm and roll it with your other hand into a small ball.
Ganache can break and be grainy if the chocolate is too hot, the cream is too cold, or the mixture is not properly emulsified. Using an immersion blender helps create a stable emulsion, preventing separation and ensuring a smooth, glossy texture.
An immersion blender creates a finer, more stable emulsion than stirring alone. This results in truffles that set evenly, feel creamy on the palate, and resist breaking or weeping when chilled.
Store in an airtight container in the refrigerator.
More Easy Gluten-Free Candy Recipes:
Love This Recipe?
If you made and enjoyed this recipe, I would be incredibly grateful if you could leave a comment below. This will help others know this recipe is delicious. Thank you!
Gluten-Free Chocolate Truffles
Ingredients
- ¾ cup heavy cream
- 10 ounces dark chocolate * high quality
- 2 tablespoons Grand Marnier * see notes
- pinch of kosher salt
- nuts, cocoa, coconut, etc for rolling.
Method
- Add the chocolate to a double boiler. If you don't own a double boiler, set a metal bowl over a pan of boiling water. You can also use two pots, one smaller than the other. (The smaller pan should be large enough that it can't fall in or get water in it).
- Do not microwave the chocolate!
- Remove the bowl of melted chocolate from the double boiler and set it aside. Let the chocolate cool to 115 to 125ºF.
- Making the ganache. In a saucepan, heat the heavy cream and a pinch of salt over medium-high heat until it begins to boil. Pour in the orange liqueur and whisk to quickly incorporate it into the cream.
- Remove the cream mixture from the stove and pour the chocolate into the cream mixture. Mix together with a large spoon or spatula.
- Use an immersion blender to blend the chocolate and cream until the mixture is completely smooth and creamy.
- Pour the chocolate mixture into a mixing bowl and cover it with plastic wrap. You want the plastic wrap to touch the top of the chocolate. This will help to prevent any condensation. Place the bowl in the refrigerator and let it chill for at least 1 1/2 to 2 hours.
- Fill small bowls with your chosen toppings.
- Use a small cookie scoop to scoop up some of the chocolate. These are an indulgence, so using a smaller scoop is best when making fudgy chocolate truffles. Scoop out some of the chocolate and then use your hands to roll the ganache into a ball. Set it on a tray.
- Decide which topping you want to roll the truffle in. I rolled some in coconut, some in finely chopped almonds, and the rest I dusted in cocoa powder. Ensure the entire surface of the chocolate ball is coated. Place it in a pan.
- Place the chocolates in the refrigerator until you are ready to serve them or wrap them up as a gift. These truffles will keep fresh in an airtight container for up to 2 weeks in your refrigerator.
- (* Please know the book goes into an enormous amount of detail to make these, and gives a lot of options. These directions are what I did to make my truffles.)
Nutrition
Notes
- Make sure the chocolate is cool before starting to roll it into balls.
- I recommend using high-quality chocolate. Use Ghirardelli, Valrohna Dark Chocolate, or another artisan chocolate brand. The better the chocolate used, the better your truffles will turn out. If you are on a budget, use Trader Joe’s One Pound Dark or Milk Chocolate Bars.
- Use full-fat heavy cream.
- If you want to skip the Grand Marnier orange liquor, swap 1/4 teaspoon of orange extract.
- Store in an airtight container in the refrigerator. They will last for up to 2 weeks.
Private Notes
Tried this recipe?
Let us know how it was!
I truly hope you enjoy this recipe. I have been testing and creating gluten-free recipes for over 15 years. Creating gluten-free recipes that do not taste gluten-free is my goal for every recipe. Sometimes I only have to test a new recipe a couple of times, and others it takes multiple times. I do this so you get reliable, delicious results every time!

How many truffles does your recipe make using a small scoop. Thanks, Nancy
Hi Nancy, using the small scoop, you should get around 24 truffles.
I’m soooooooooooo making these! And, yes, I love using my immersion blender too! 😉
Thanks for stopping by Byron. I can’t wait to hear how they turn out 🙂