
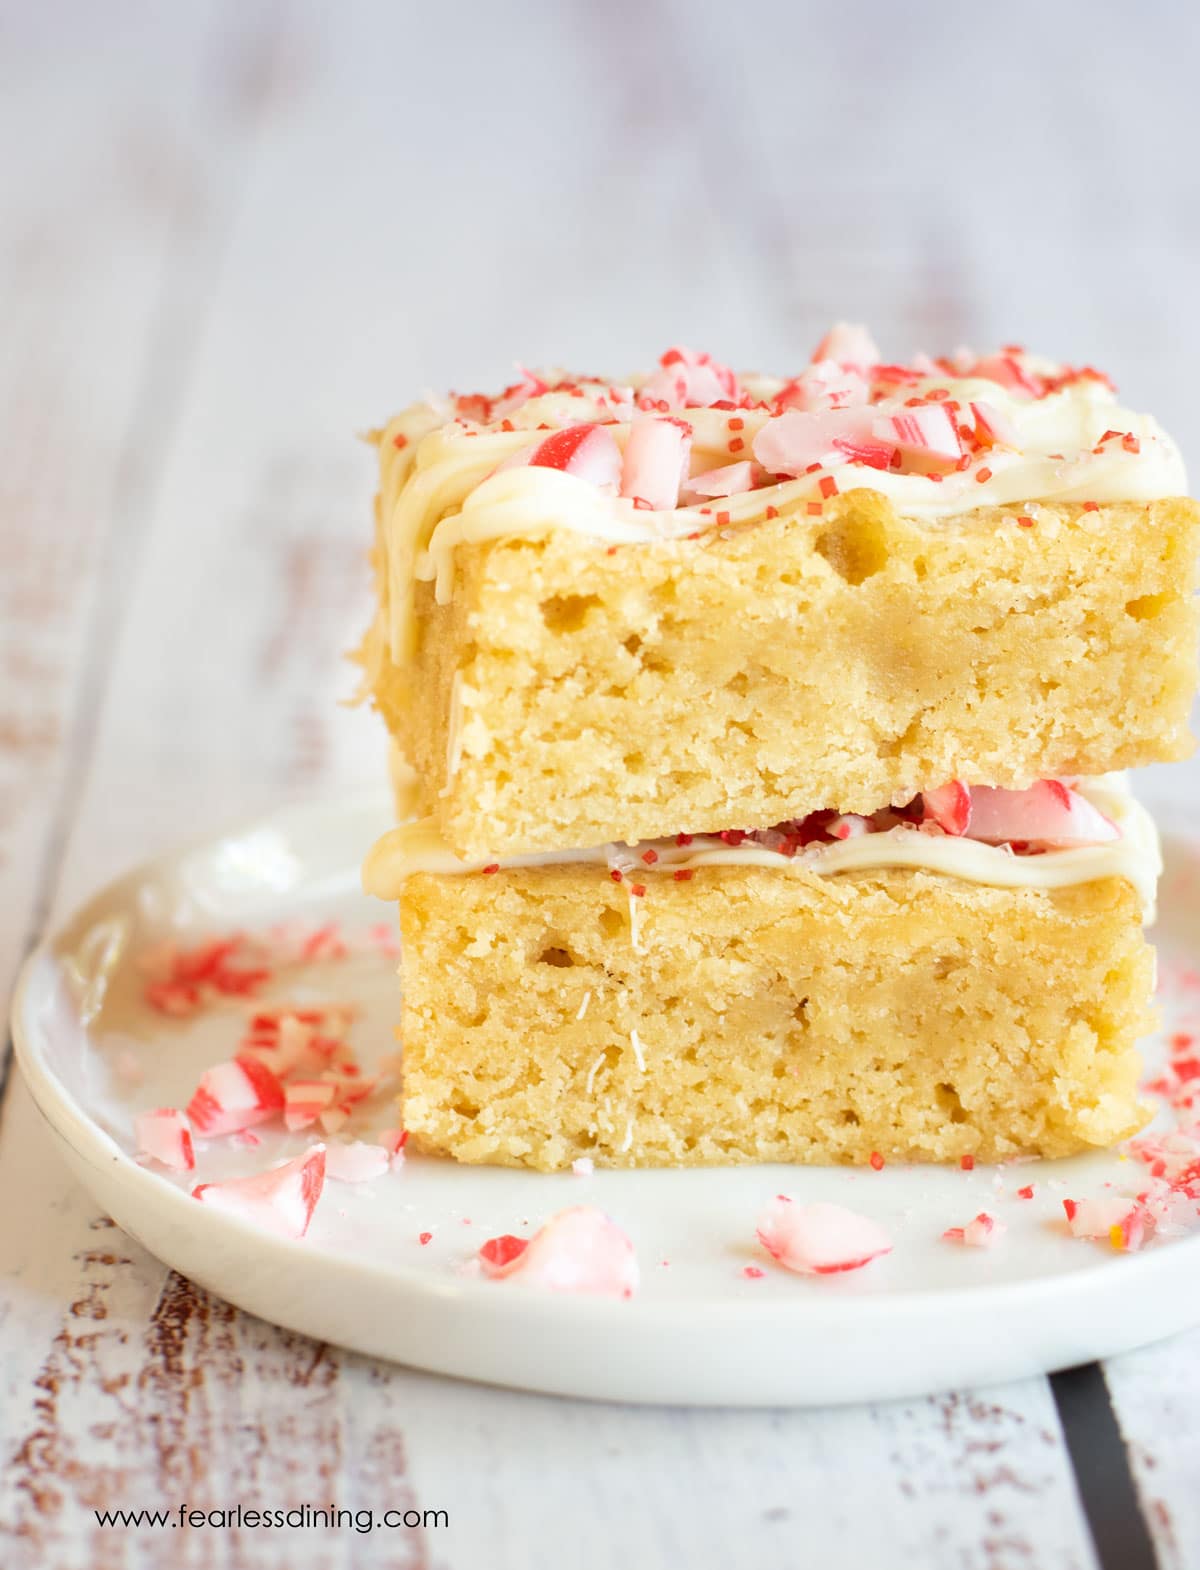
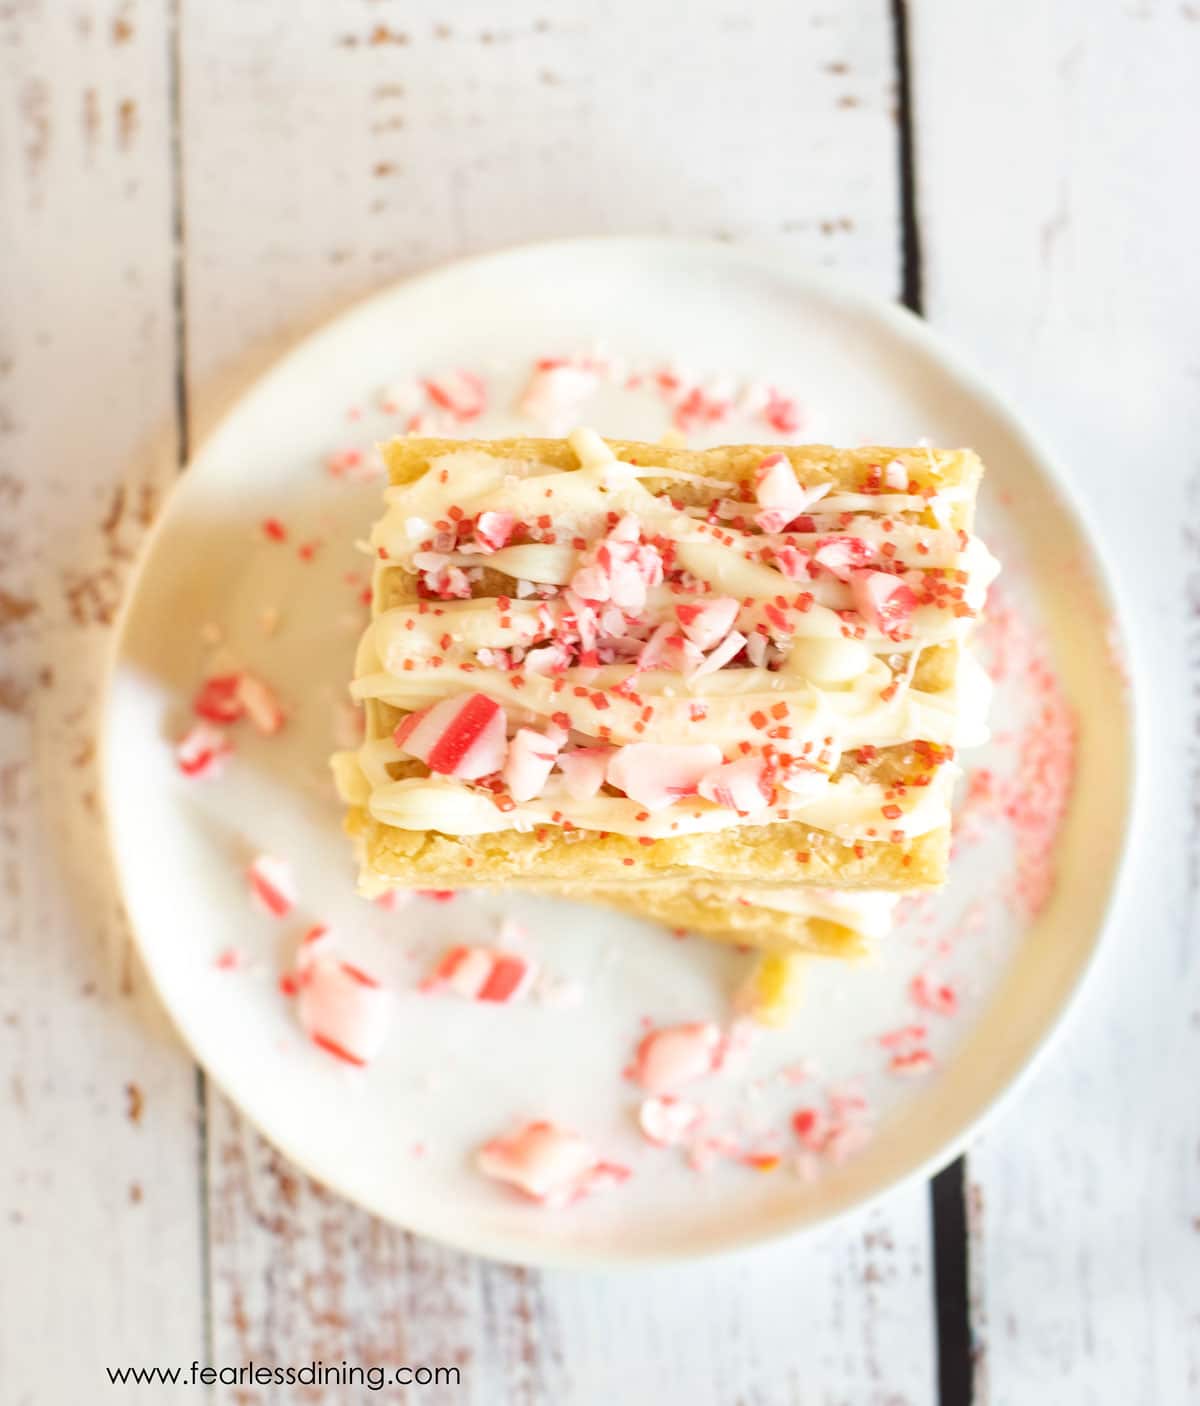
Get ready for some fun because these Gluten Free Peppermint White Chocolate Brownies are about to become your new favorite!! This new Christmas brownie recipe has lots of minty flavor, white chocolate, and crushed candy canes on top.
This post may contain affiliate links. Please read our Disclosure Policy.
❤️ Sandi’s Recipe Summary
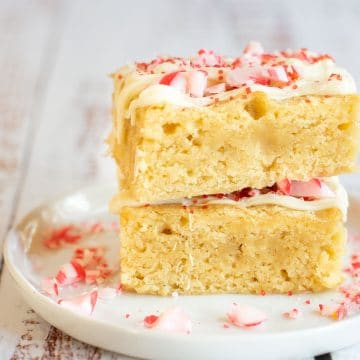
The Quick Bite: These peppermint brownies are full of peppermint flavor. They are perfect for Christmas or any time you want a minty fresh dessert. They are made with easy-to-find, simple ingredients and freeze well. They have the look of a blondie, but have the crinkly top of a brownie.
I am really excited about this new brownie recipe. This recipe was adapted from my gluten free white chocolate brownies recipe, with some minty flavors added in for the holidays! If you are looking for a minty gluten free holiday dessert, these homemade brownies are a great option.
These delicious gluten free brownies are perfect for a bake sale or any holiday party! If you are looking for another holiday brownie recipe, try these fun gluten free brownie bites.
I haven’t made white chocolate brownies before and we were surpised at how good they were!
pamela c., facebook comment

Ingredients Notes:
For the full list of ingredients and amounts, please go to the recipe card below.
- Gluten Free Flour Blend – I tested this recipe using Bob’s Red Mill 1 to 1 and King Arthur Measure for Measure. Other blends will also work, but you may need to tweak the moisture level.
- Binder – If your gluten free flour blend doesn’t contain xanthan gum or guar gum, please add 3/4 teaspoon.
- Baking Powder – I recommend using aluminum-free baking powder.
- Butter – Use unsalted butter.
- Oil – Use a light-flavored oil such as avocado or canola.
- Eggs – Use large eggs.
- White Chocolate – I prefer using Ghirardelli white chocolate melting squares or chocolate chips because they melt really smoothly. Other brands work well, but I don’t like how the Guittard melts.
- Peppermint Candy – Use crushed candy canes or crushed peppermint candies.
If you prefer a chocolate mint version, try my Gluten Free Chocolate Mint Brownies.
How to Make Peppermint Brownies (Step-By-Step)
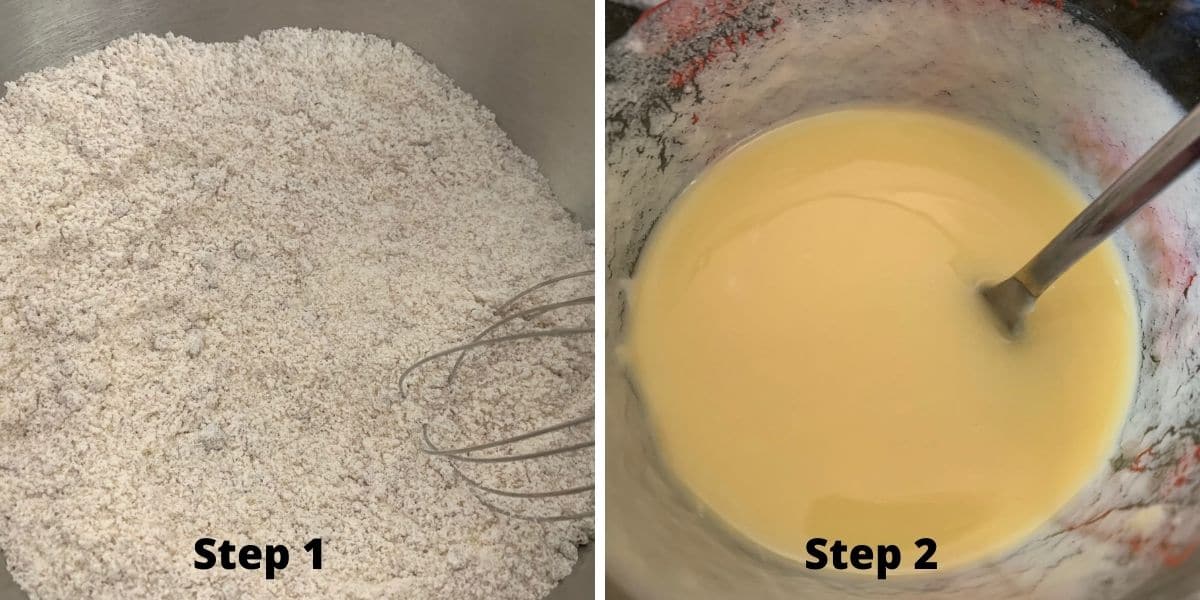
Step 1: Add your dry ingredients to a bowl and whisk to blend.
Step 2: Melt your butter and white chocolate chips until they are warm and the chocolate is melted (not hot!) If the mixture is hot, allow it to cool before adding the eggs. Add the rest of the wet ingredients. Whisk to blend.
Email This Recipe To Me!
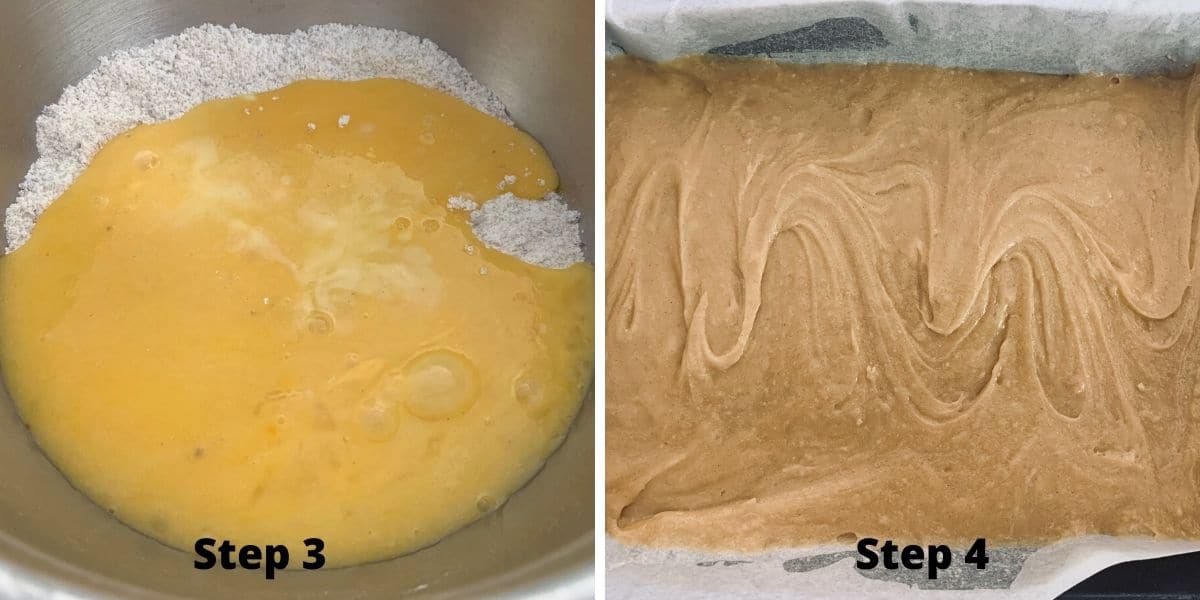
Step 3: Pour the wet ingredients into the dry ingredients and mix.
📢 Sandi says: Every gluten-free flour blend has a different starch-to-grain ratio. The brand of gluten-free flour you use will affect the moisture of the batter. If your cake batter is too runny, add more flour, and if it is too thick, add more liquid.
Read Why Gluten-Free Flour Blends Vary to learn more about this.
Step 4: Pour the peppermint brownie batter into a prepared 9×13 pan or this special brownie pan that lets everyone get those yummy edges!. I like to use this gluten-free baking spray. Please note that PAM baking spray is not gluten-free!
HINT: You can also line your pan with parchment paper to make lifting the brownies from the pan easier!
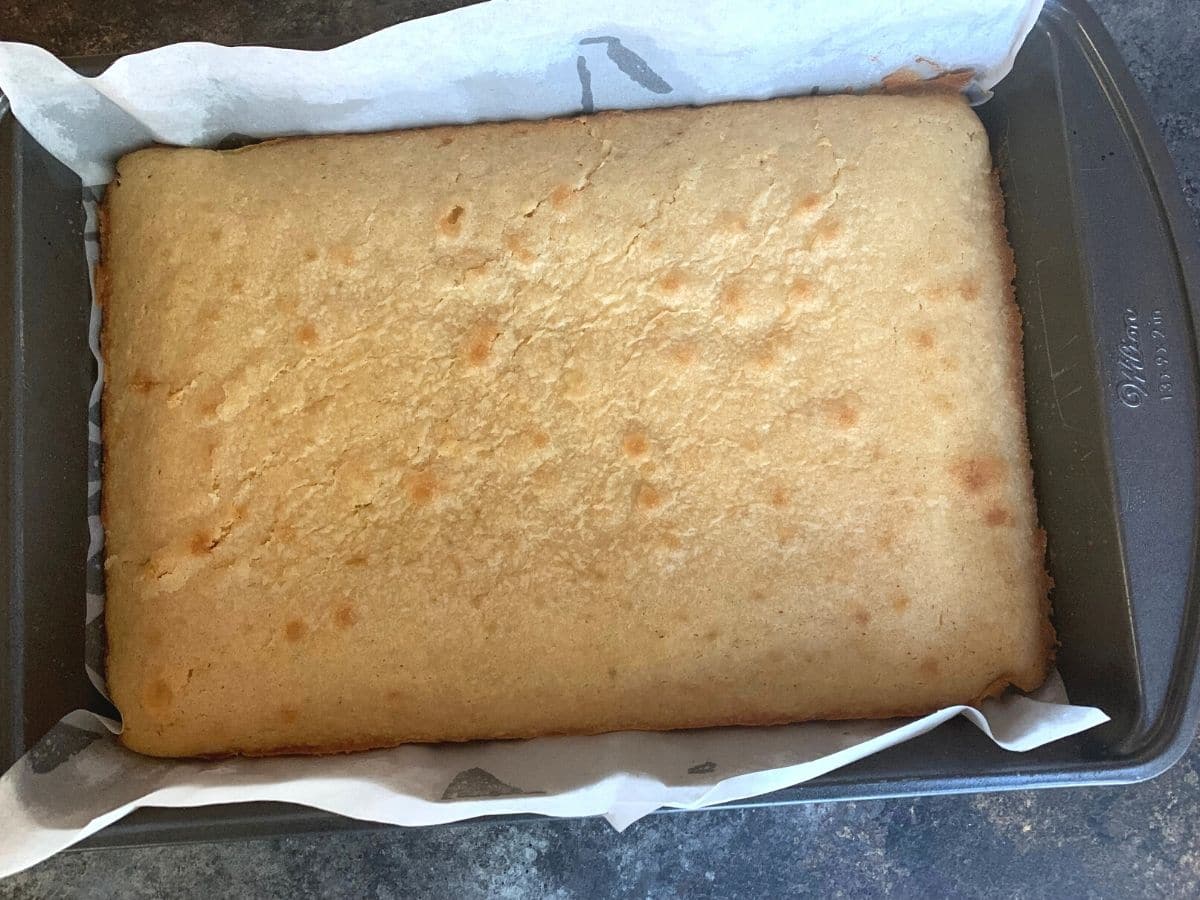
Step 5: Bake at 350º F for 30-35 minutes. To test for doneness, insert a toothpick into the center. You will want to see a few moist crumbs on the toothpick with brownies. If you see batter, it needs to be baked longer.
Allow the brownies to cool completely on a cooling rack.
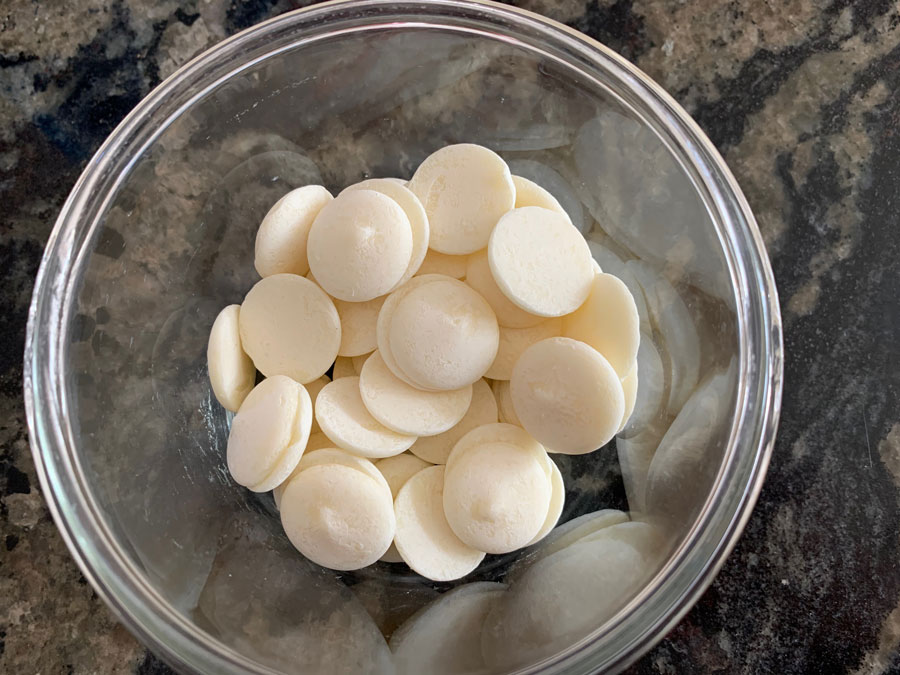
Step 6: Melt your white chocolate in the microwave at 30-second intervals. Stir between intervals and adjust the time for the final melting so the white chocolate chips don’t burn.
Step 7: Place your candy canes on plastic wrap or in a zip-style bag. Smush them with a hammer or the bottom of a pot to crush them.
Step 8: Drizzle the white chocolate over the brownies, then quickly sprinkle the peppermint candies on top.
Fun flavor variations to try:
- Add white chocolate chips to the brownie batter!
- Have some fun, and add colored sprinkles, too! Check my list to make sure you use gluten free sprinkles.
- Swirl in some milk chocolate!
Frequently Asked Questions:
The easiest way to crush candy canes is to unwrap them and put them into a zippered plastic bag. Press the air out and seal it. Use a wooden or rubber hammer to crush the candy canes.
The secret to melting white chocolate without burning it is to use a double boiler or microwave it in short 20-second intervals. Always stir frequently.
These brownies will keep fresh for up to 4 days in an airtight container or up to 4 months in the freezer.
More Gluten Free Peppermint Recipes:
- Easy Gluten Free Chocolate Mint Cake
- Gluten Free Mint Chocolate Chip Cake
- Gluten Free Peppermint 7 Layer Bars
Love This Recipe?
If you made and enjoyed this recipe, I would be incredibly grateful if you could leave a comment below. Please include which flour blend you used. This will help others know this recipe is delicious. Thank you!
Soft and Chewy Gluten Free Peppermint Brownies
Ingredients
- 2 cups gluten free flour blend * see note
- 1 teaspoon baking powder aluminum free
- ¼ teaspoon salt
- 1 cup sugar
- ¼ cup brown sugar
- 5 large eggs
- 8 tablespoons unsalted butter melted
- ¼ cup light oil
- 2 teaspoons peppermint extract
- 8 ounces white chocolate chips melted
Topping:
- ⅓ cup candy canes crushed
- ½ cup white chocolate chips melted
Instructions
- Preheat the oven to 350º F.
- In a large bowl, mix 2 cups gluten free flour blend, 1 teaspoon baking powder, 1/4 teaspoon salt, 1 cup sugar, and 1/4 cup brown sugar. Whisk to blend.
- In a smaller bowl, add 8 tablespoons unsalted butter and 8 ounces white chocolate chips and heat in the microwave until the white chocolate is melted. Allow to cool until it is warm. Add the 5 large eggs, 1/4 cup light oil, and 2 teaspoons peppermint extract and mix well.
- Pour the wet ingredients into the dry ingredients and mix.
- Line a 9×13 baking pan with parchment paper and pour the brownie batter into the pan. Smooth the top so that the batter is evenly dispersed around the whole pan.
- Bake for 30 minutes.
- Remove the brownies and insert a toothpick into the middle. If the toothpick comes out with just a few moist crumbs, it is finished baking. If you see batter, you will need to bake them a little longer.
- Allow the brownies to cool on a cooling rack.
- In a microwave, melt 1/2 cup white chocolate chips at 30-second intervals, stirring between each interval to prevent burning.
- Place the 1/3 cup candy canes into a zip-style bag and crush them with a hammer or pot.
- Drizzle the white chocolate over the brownies, then sprinkle the crushed candy canes. Enjoy!
Notes
- I have tested this recipe with King Arthur Measure for Measure and Bob’s Red Mill 1 to 1. That doesn’t mean others will not work; I just have not tested other flours. You may need to add more flour or liquid, depending on the flour blend you use. Make adjustments 1 tablespoon at a time.
- Xanthan Gum – If your gluten free flour blend doesn’t contain xanthan gum or guar gum, please add 3/4 teaspoon.
- To test for doneness, insert a toothpick into the center of the brownies. If the toothpick comes out with a few moist crumbs, it is done baking. If you see batter, the brownies need to bake longer.
- These brownies will keep up to 4 days in an airtight container or up to 4 months in the freezer.
Email This Recipe To Me!
SPECIAL NOTE
Please know that every gluten free flour blend has a different starch to grain ratio. If you use a blend I didn’t test, my rule of thumb is to add more flour if your dough or batter is wet and add more liquid if the dough or batter is too dry!
Nutrition
Nutrition Disclaimer
Nutritional information is an estimate provided to you as a courtesy. You should calculate the actual nutritional information with the products and brands you are using with your preferred nutritional calculator.
I truly hope you enjoy this recipe. I have been testing and creating gluten-free recipes for over 15 years. Creating gluten-free recipes that do not taste gluten-free is my goal for every recipe. Sometimes I only have to test a new recipe a couple of times, and others it takes multiple times. I do this so you get reliable, delicious results every time!

These are fabulous!
I am so happy you loved these brownies! Thank you for coming back and leaving a review, Carrie.
I made these with Namaste perfect flour blend, and they indeed turned out perfect. Very delicious with the right amount of minty-ness for me. Rich and moist, you can’t even tell that they’re gluten free.
I am so glad to hear Namaste worked well. I just bought a bag of that flour to start testing some recipes.