It is time to get ready for the holidays! Wait until you try this delicious gluten-free chocolate mint cake recipe. I created this recipe after minty hot chocolate, one of my favorite winter treats. This gluten free hot cocoa cake is perfect for sharing with friends and family.
This post may contain affiliate links. Please read our Disclosure Policy.
This cake turned out perfectly for me! I added the mint to the frosting instead of the cake, and it was fantastic. Thanks for the recipe!”
Rachel, blog comment
(*This post is sponsored by Nielsen-Massey Vanillas. All opinions are my own.)
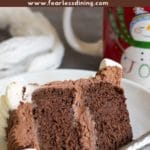
This chocolate mint cake is full of deep flavors, topped with homemade chocolate and vanilla buttercream frosting and lots of mini marshmallows!! You will love this delicious, gluten-free take on our favorite cold-weather treat, hot cocoa! You can make it as a layer cake, sheet cake, cupcake, or in a roll.
This delicious gluten-free chocolate mint cake is not only a showstopper for a dessert table but an incredible recipe to share because NOBODY will know it is gluten-free!! Take it to any gathering; it tastes that good.
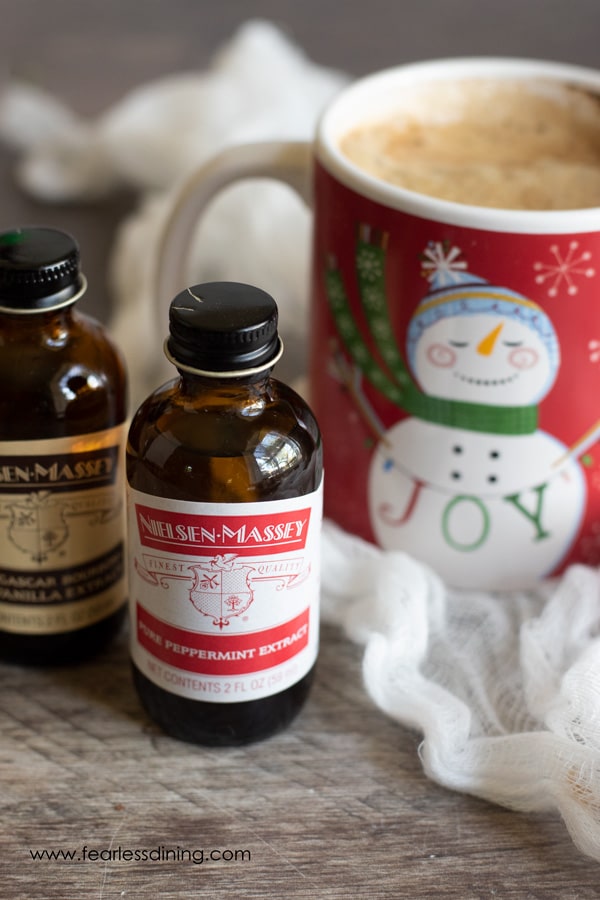
I love Nielsen-Massey because their extracts are gluten-free, so I know there are no weird hidden gluten ingredients! All Nielsen-Massey products are all-natural, allergen-free, non-GMO Project Verified, and certified Kosher and gluten-free.
If you haven’t tried their extracts in your baking, I highly recommend them. Their crisp and pure flavor adds depth to the flavors in your desserts. They are perfect for the holidays or any time!
Ingredient Notes:
For the full list of ingredients and amounts, please go to the recipe card below.
- Gluten Free Flour Blend – I have tested my recipe with King Arthur Measure for Measure. It doesn’t mean others won’t work; I just haven’t had a chance to test other blends.
- Xanthan Gum – if your gluten free flour blend doesn’t contain this, you will need to add 1 teaspoon to help hold your cake together.
- Baking Powder – Use aluminum-free baking powder.
- Cocoa Powder – You can use several great gluten-free cocoa powder brands. I like to use Ghirardelli, Anthony’s, and Hershey’s.
- Butter – Use unsalted butter.
- Eggs – Use size large.
- Pure Vanilla Extract – I do not recommend using imitation vanilla.
Step-By-Step Photos and Directions:
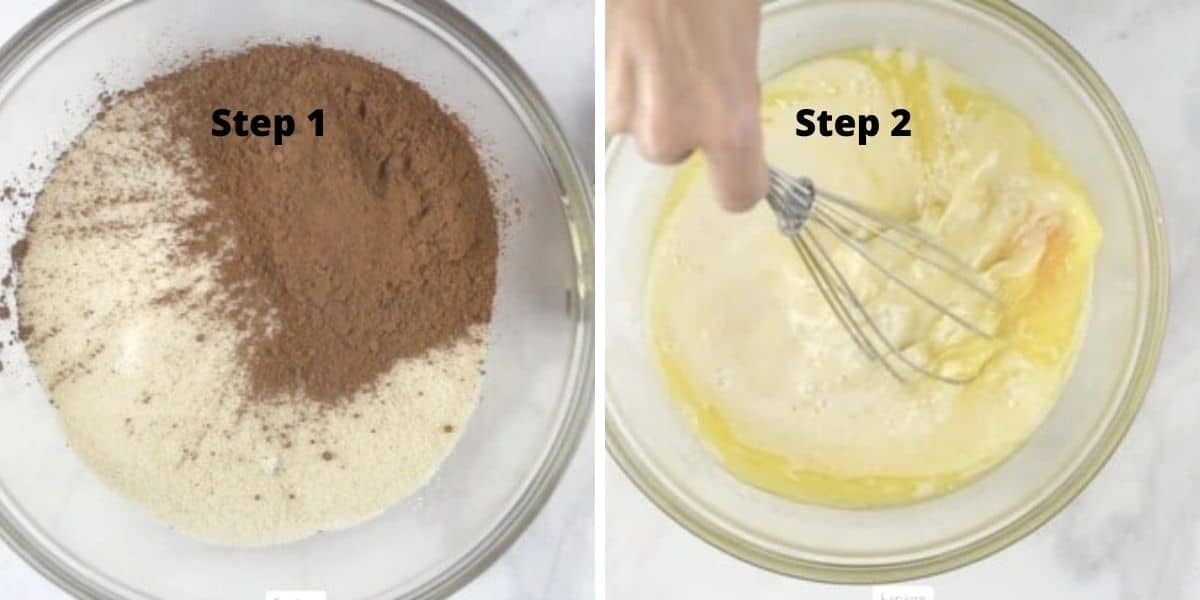
Step 1: Add all of your dry ingredients to a large
Step 2: Partially melt the butter for 25 seconds in the microwave oven so it will mix in easily. Don’t make it too hot, or it could cook the eggs. Add the wet ingredients to a smaller bowl. Add 2 teaspoons of the Nielsen-Massey Madagascar Bourbon Pure Vanilla Extract and 1 teaspoon of the Pure Peppermint Extract. Whisk the wet ingredients to mix.
Email This Recipe To Me!
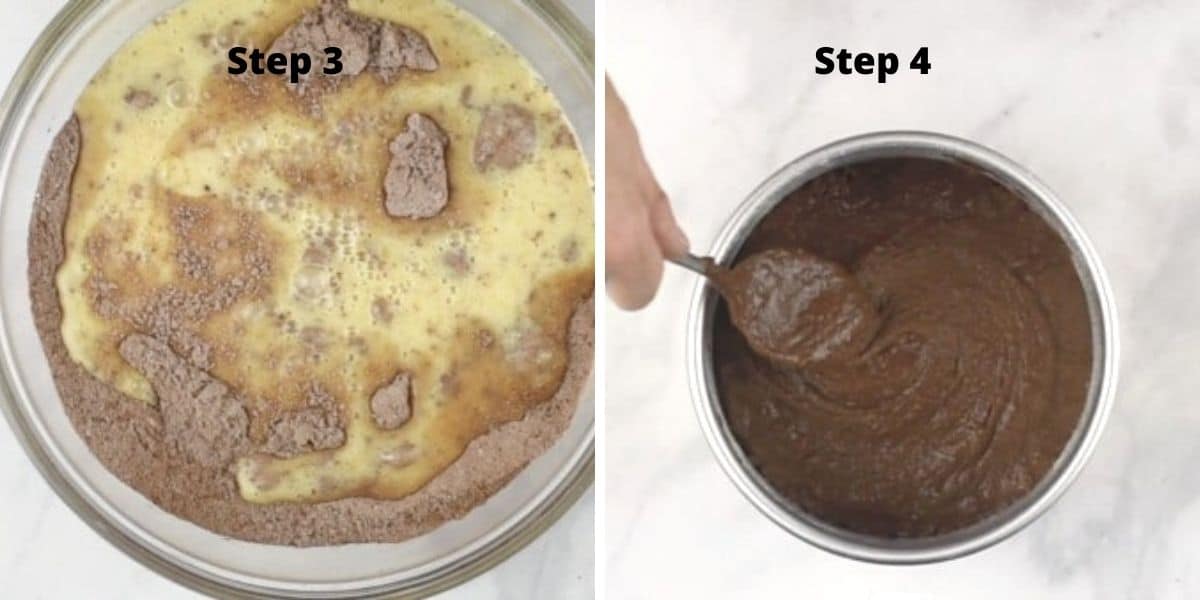
Step 3: Mix the wet ingredients into the dry ingredients. Grease your cake pans and add the cake batter to the pans. I like using this gluten free baking spray to grease my pans and prevent the cake batter from sticking to the pan. Overmixing the cake batter can lead to a dense cake, so I always recommend mixing the batter until it is just barely mixed.
📢 Sandi says: Every gluten-free flour blend has a different starch-to-grain ratio. The brand of gluten-free flour you use will affect the moisture of the batter. If your cake batter is too runny, add more flour, and if it is too thick, add more liquids.
Read Why Gluten-Free Flour Blends Vary to learn more about this.
Step 4: Smooth the cake batter in each pan with a spoon. Bake at 350º F for 40 minutes (baking time will depend upon the size and depth of the cake pans you use). I baked my cakes in two 8-inch round cake pans.
To test if the cakes are finished baking, insert a toothpick into the middle of each cake. If the toothpick comes back clean, the cakes are finished baking. If you see crumbs or batter, the cakes need to bake a little longer. Remove the cakes from the oven and let them sit in the pan for 5 minutes. After, carefully slide the cakes from the pan to a cooling rack.
Now it is time to make your frosting while the cake cools!
Step 5: Add the butter, vanilla, powdered sugar, and water to your stand mixer. Add the whisk attachment.
🔑 Sandi says: Add the powdered sugar a little at a time so that it doesn’t go flying all over the counter. Don’t forget to watch the video to see how I frosted this cake!
Step 6: Divide the frosting into parts. Leave 3/4 of the frosting in the
Step 7: Frost your cake, using a spatula to smooth the sides and top. You can frost between the 2 cake layers and the top of the cake, keeping the sides in the popular “naked cake” style, or frost the sides as well. For more cake frosting tips, see my Gluten-Free Wedding Cake recipe.
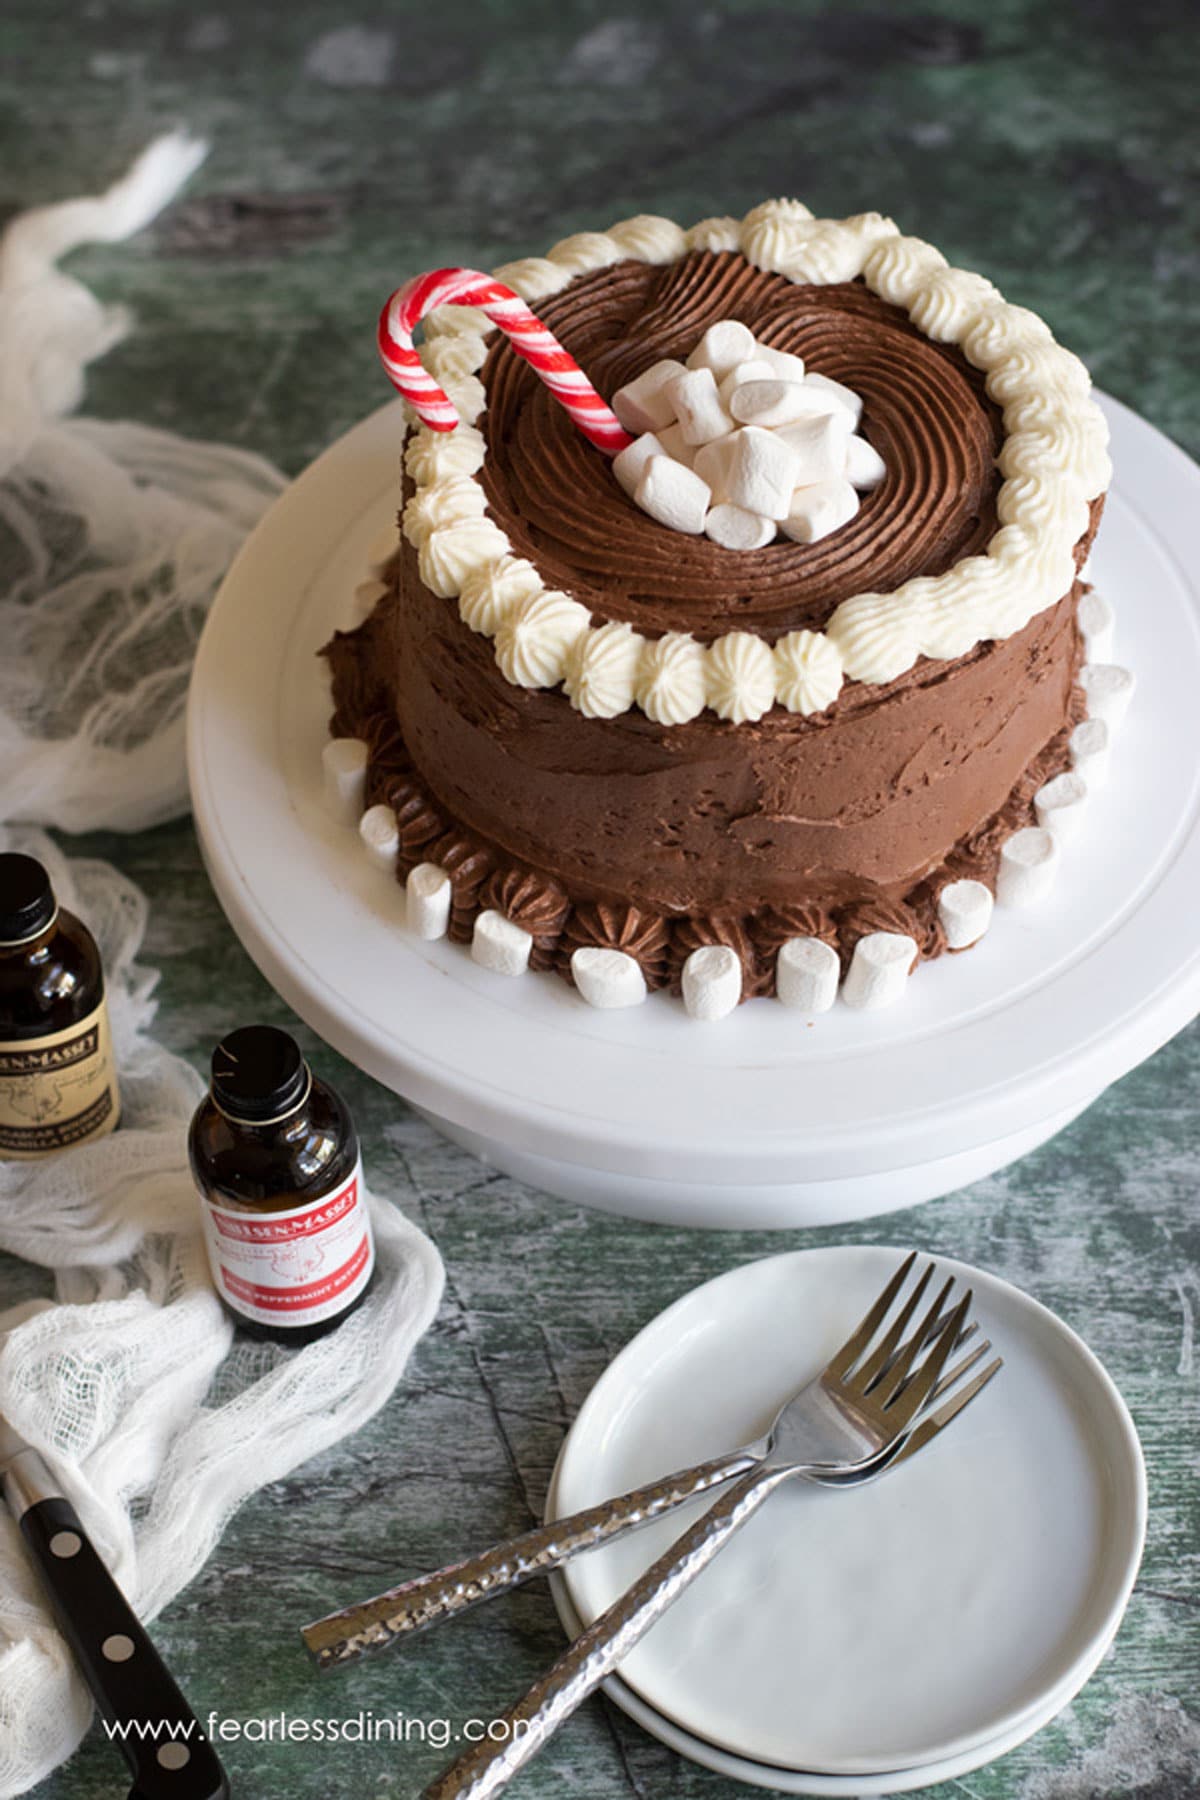
Add the white frosting to a piping bag with a star-shaped tip. Pipe detailing around the top edge of the cake. Top with mini marshmallows and a candy cane. 🙂
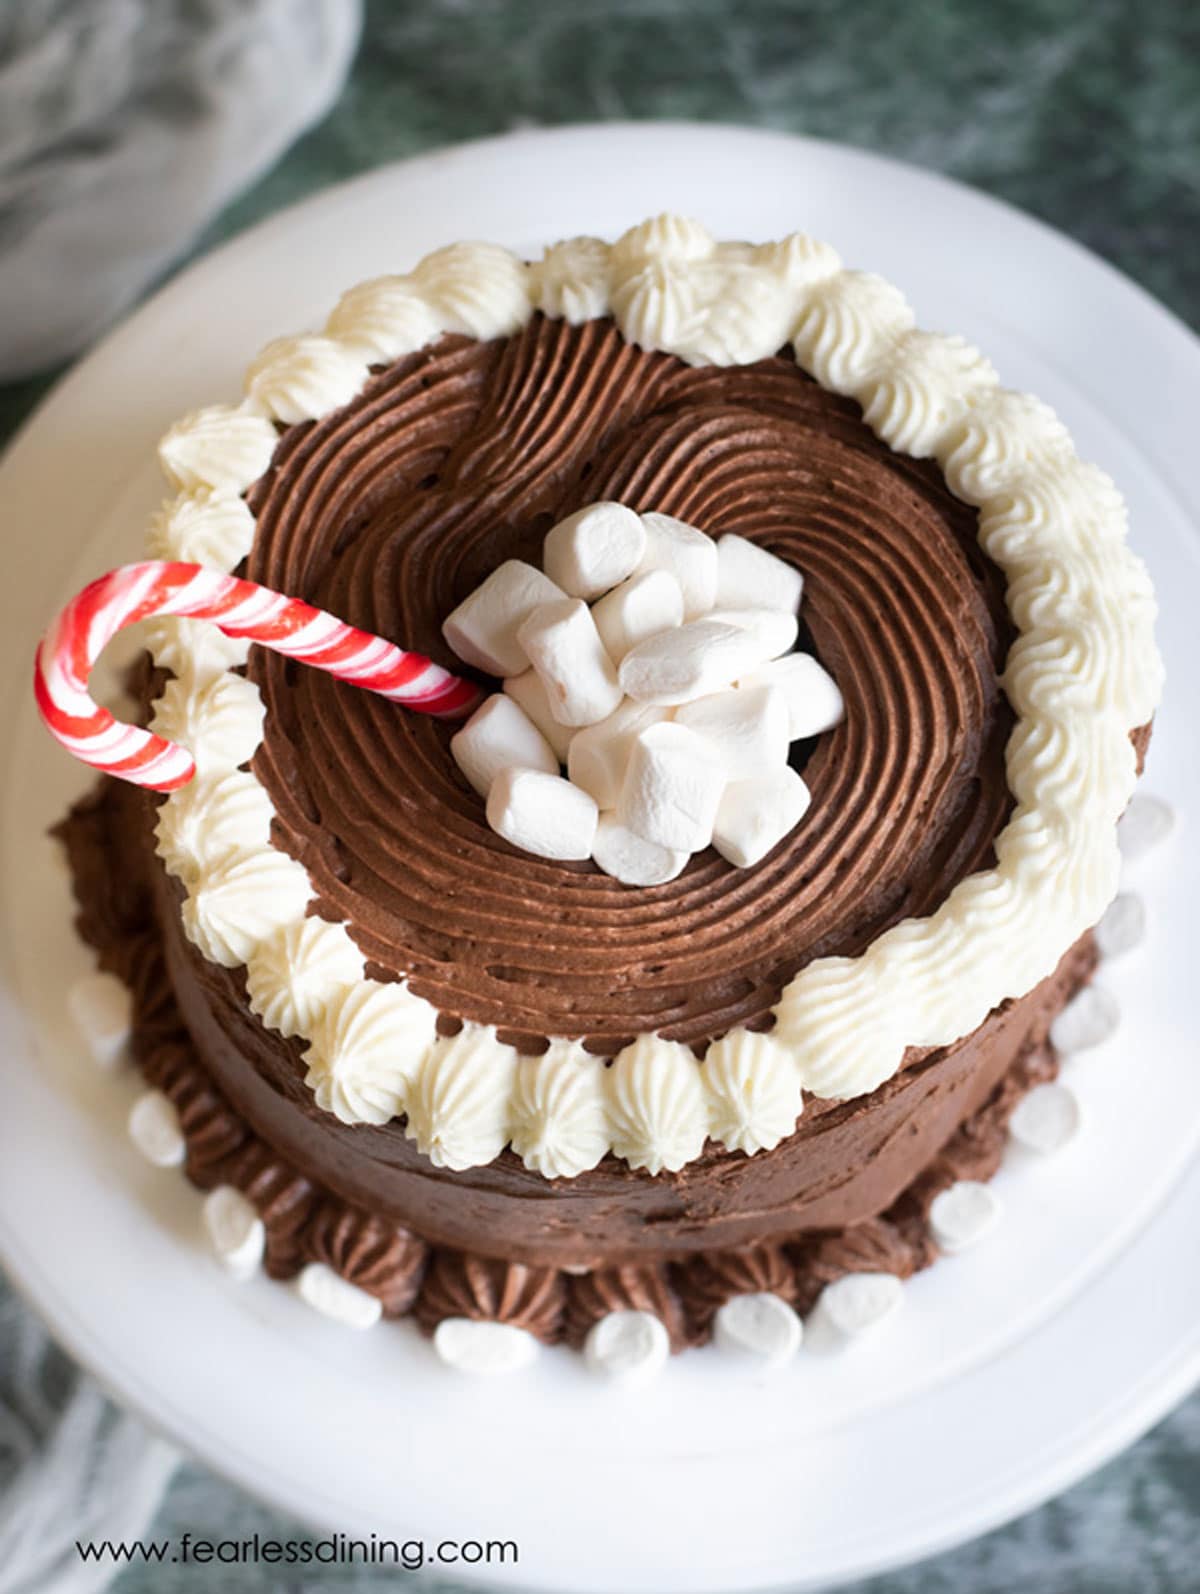
Here is a picture of the top of the cake. I tried to decorate it like a mug of hot chocolate by putting marshmallows on top and swirling the chocolate frosting like the liquid.
Frequently Asked Questions:
You can definitely use a hand mixer to make the frosting. You will want to make sure your bowl is deep so that bits of butter and sugar don’t go flying. I do not recommend a mixer for the cake as that could overmix the batter and leave you with a dense cake.
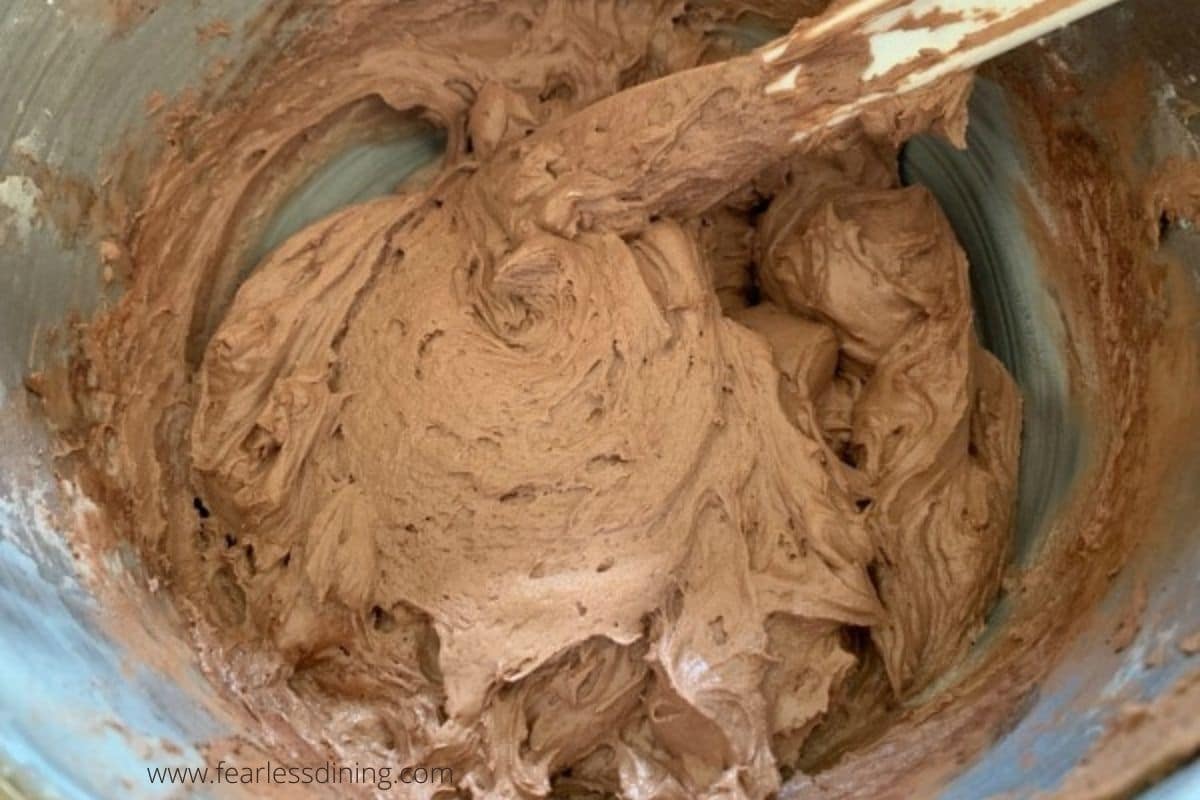
Often, if a cake is too dry, it will crack or crumble. This can happen with gluten free baking, especially if you use a starchy gluten free flour blend. Make sure you keep the moisture level balanced so that your batter is similar in consistency to the cake batter I show pictured above.
Always wait until your cake is completely cooled before you frost it. If your cake is still warm, your frosting will melt on the cake.
This cake should keep fresh for up to 4 days in an airtight container in your refrigerator. You can freeze cake slices by placing them on a cookie sheet. Freeze for 2 hours, then transfer the frozen slices to a freezer bag.
More Gluten Free Cake Recipes:
- Gluten Free Lemon Bundt Cake
- Easy Gluten Free Apple Cider Cake
- Decadent Gluten Free Chocolate Cake
- Bakery Style Gluten Free Apple Cake
Love This Recipe?
If you made and enjoyed this recipe, I would be incredibly grateful if you could leave a comment below. Please include which flour blend you used. This will help others know this recipe is delicious. Thank you!
Gluten-Free Chocolate Mint Cake (Fluffy and Moist)
Ingredients
- 2 cups gluten free flour blend * see note
- 1 cup cane sugar
- ½ cup cocoa powder unsweetened, see note
- ¼ teaspoon salt
- 1 ½ teaspoons baking soda aluminum-free
- ½ cup unsalted butter melted
- 1 ¼ cup milk *see note
- 2 large eggs
- 2 teaspoons pure vanilla extract
- 1 teaspoon peppermint extract
- ½ cup unsalted butter room temperature
- 4 cups powdered sugar
- ½ cup cocoa powder
- 3-4 tablespoons water
Method
- Preheat the oven to 350º F.
- In a large mixing bowl, add 2 cups gluten free flour blend, 1 cup cane sugar, 1/2 cup cocoa powder, 1/4 teaspoon salt, and 1 1/2 teaspoons baking soda. Use a whisk to blend.
- In a smaller bowl, add the partially melted 1/2 cup unsalted butter, 1 1/4 cup milk, 2 large eggs, 2 teaspoons pure vanilla extract, and 1 teaspoon peppermint extract. Whisk to blend.
- Pour the wet ingredients into the dry ingredients and mix with a large spoon. Try not to overmix the batter so the cake can turn out fluffier. (I do not suggest a stand mixer.)
- Add the cake batter to two greased 8-inch round cake pans. Spread the batter evenly in the pan and bake for 40 minutes. (Actual baking time will vary depending on the actual size of the pan you use.)
- Remove the cakes from the oven to a cooling rack.
- Insert a toothpick into the cakes to test if they are done. If the toothpick comes back clean, the cakes are ready. If there are crumbs or batter on the toothpick, you will need to bake a bit longer.
- Allow the cake to fully cool before frosting. Making the frosting while the cake cools is helpful.
- In a standing mixer, add 1/2 cup unsalted butter, 4 cups powdered sugar, and 3-4 tablespoons water, except cocoa powder.
- Mix well.
- Separate 1/4 of the frosting and move it to another bowl. Leave 3/4 of the frosting in the bowl and add 1/2 cup cocoa powder. Mix on low speed.
- Spread the batter onto the cake's first layer. Add the top layer over the frosting, and frost the top and sides of the cake.
- Decorate with marshmallows and candy cane.
- For piping directions, see the blog post for step by step directions.
Nutrition
Notes
- I have tested this recipe with King Arthur Measure for Measure GF and Bob’s Red Mill 1 to 1 GF blend. That doesn’t mean others will not work, I just have not tested other flours.
- If your gluten free flour blend doesn’t contain Xanthan Gum or Guar Gum, please add 3/4 teaspoon.
- To make this recipe dairy-free, substitute the butter for vegan butter and use non-dairy milk.
- To test for doneness, insert a toothpick into the center of the cake. If the toothpick comes out clean, it is done baking. If you see batter or crumbs, the cake needs to bake longer.
- When you add the powdered sugar a little at a time so that it doesn’t go flying all over the counter. Don’t forget, you can watch the video to see how I frosted this cake!
- This cake will keep up to 4 days in an airtight container, or up to 4 months in the freezer.
- To freeze this cake, put cake slices on a cookie sheet and freeze for 2 hours. Once the slices are frozen, you can add them to a freezer bag.
Private Notes
Tried this recipe?
Let us know how it was!
I truly hope you enjoy this recipe. I have been testing and creating gluten-free recipes for over 15 years. Creating gluten-free recipes that do not taste gluten-free is my goal for every recipe. Sometimes I only have to test a new recipe a couple of times, and others it takes multiple times. I do this so you get reliable, delicious results every time!

Can this be made with honey in place of the sugar?
Hi Katy, I haven’t tested swapping honey for the sugar. If you do try it, you will need to readjust the dry ingredients because you are replacing with a liquid and this will change the liquid to dry ratio.
Have you tried this in a Bundt pan? If so, how long did you bake it?
Hi Susan, I haven’t tried baking it in a bundt pan. Baking time will vary depending on the size of the bundt pan.
This cake turned out perfectly for me! I added the mint to the frosting instead of the cake, and it was fantastic. Thanks for the recipe!
I am so glad you loved this cake Rachel. I can’t wait to hear what you make next!
Could I swap the cocoa powder for more flour to make a vanilla cake, do you think?
Hi Rachel, I have not tested this so if you do, you will need to adjust moisture content. You could make my vanilla cake recipe, which is really popular and add some mint extract if you are trying for a white peppermint cake. https://www.fearlessdining.com/gluten-free-vanilla-cake-with-cream-cheese-frosting/
1-1/2 teaspoons? Tablespoons? Pls reply
Hi Judy, you need to add 1 1/2 teaspoons of baking soda. I think this is what you are asking?