
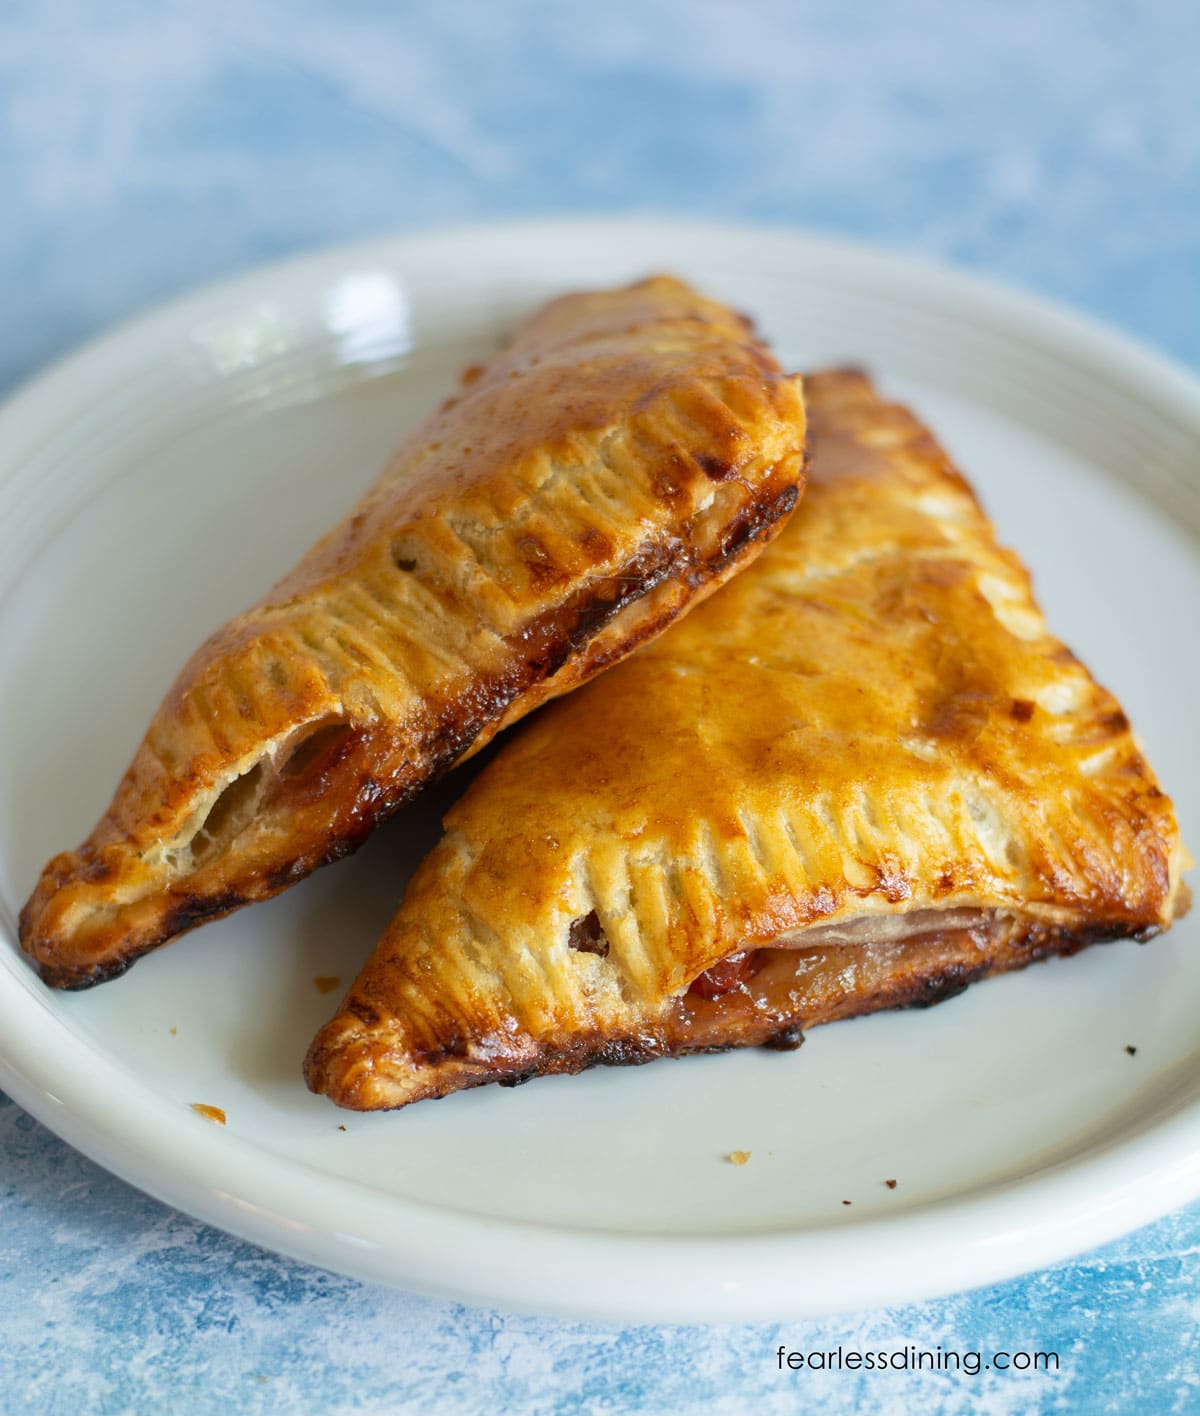
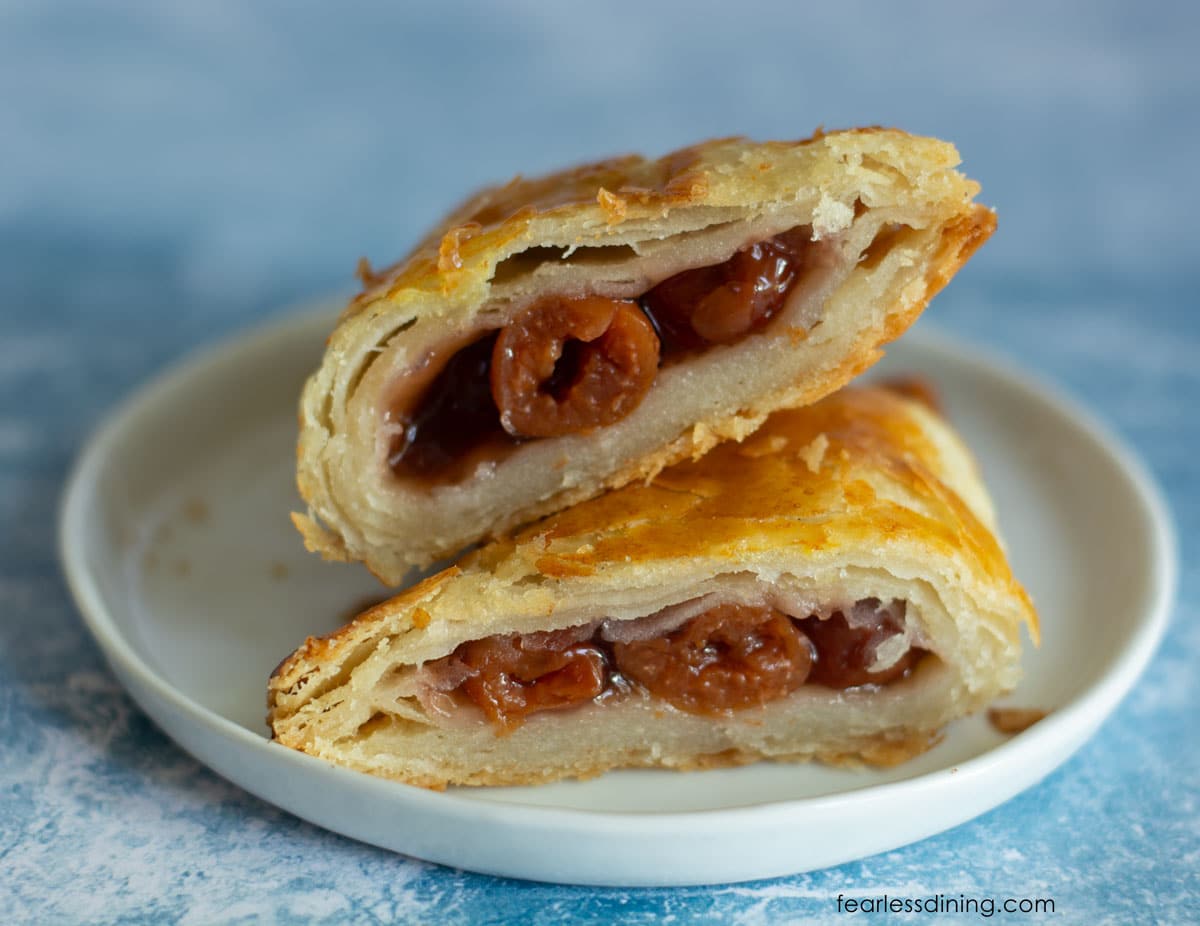
These flaky gluten-free turnovers have crisp, buttery layers and a juicy, fruit-filled center. Whether you remember biting into flaky fruit pastries from your favorite bakery or you have never had the chance to try a gluten-free turnover due to dietary restrictions, this recipe is a winner.
This post may contain affiliate links. Please read our Disclosure Policy.
❤️ Sandi’s Summary
Have you ever walked past a bakery display and sighed, wishing you could grab one of those golden, flaky fruit turnovers, only to remember they are off-limits? This gluten-free turnover recipe will change that because I am going to show you how to make them. They look and taste just like the real thing!
I will walk you through every step of making these fruity gluten-free puff pastry turnovers, from start to finish, using my easy gluten-free rough puff pastry dough. These turnovers are versatile enough to fill with your favorite fruits, chocolate, or savory fillings. I love filling them with this roasted strawberry basil compote.
And the best part? This gluten-free rough puff dough actually works, with no cracking, no crumbling, just light, golden layers you can count on. You may also love these Gluten-Free Apple Turnovers.
What gluten-free pastry flour blend is best for pastry?
Gluten-free baking is tricky, and the flour blend you use can make or break a recipe, especially in delicate pastries. That is why I created a special gluten-free pastry flour blend that is lighter than traditional all-purpose blends but still sturdy enough to roll and shape. It helps create a soft, pliable dough that doesn’t fall apart and bakes into pastries with a tender, flaky bakery-style crumb.
When creating and testing my new flour blend, I found that reducing the amount of whole grains made a significant difference, as whole grains tend to make pastry heavier. I also increased the starches for more fluffiness for cakes and flakiness for pastries.
This blend is made with easy-to-find ingredients and is specifically designed for recipes like pastries and cakes. I’ve tested it side by side with two store-bought blends, and in almost every case, this DIY version performs better. (The other blends were good, but my blend improved the texture.)
Key Benefits of My Homemade Blend:
- It has a lighter texture for delicate pastries.
- There is a lower whole grain content for a better rise.
- Better results vs. most store blends in tests
First, make the gluten-free rough puff pastry dough.
These delicious turnovers begin with my homemade gluten-free rough puff pastry dough, which has become a favorite among those who miss traditional, flaky bakery-style pastries. This gluten-free dough bakes up incredibly flaky and golden, with all the crisp, tender layers you would expect in classic puff pastry.
There are a lot of steps, but they are easy…roll, fold, chill. I use an approachable folding method that makes this rough puff dough beginner-friendly. There is no need for special equipment. Just grab a rolling pin, plastic wrap, a little fridge time, and a few simple folds.
It is perfect for turnovers, tarts, hand pies, pie crusts, pastries, and cheese Danishes.
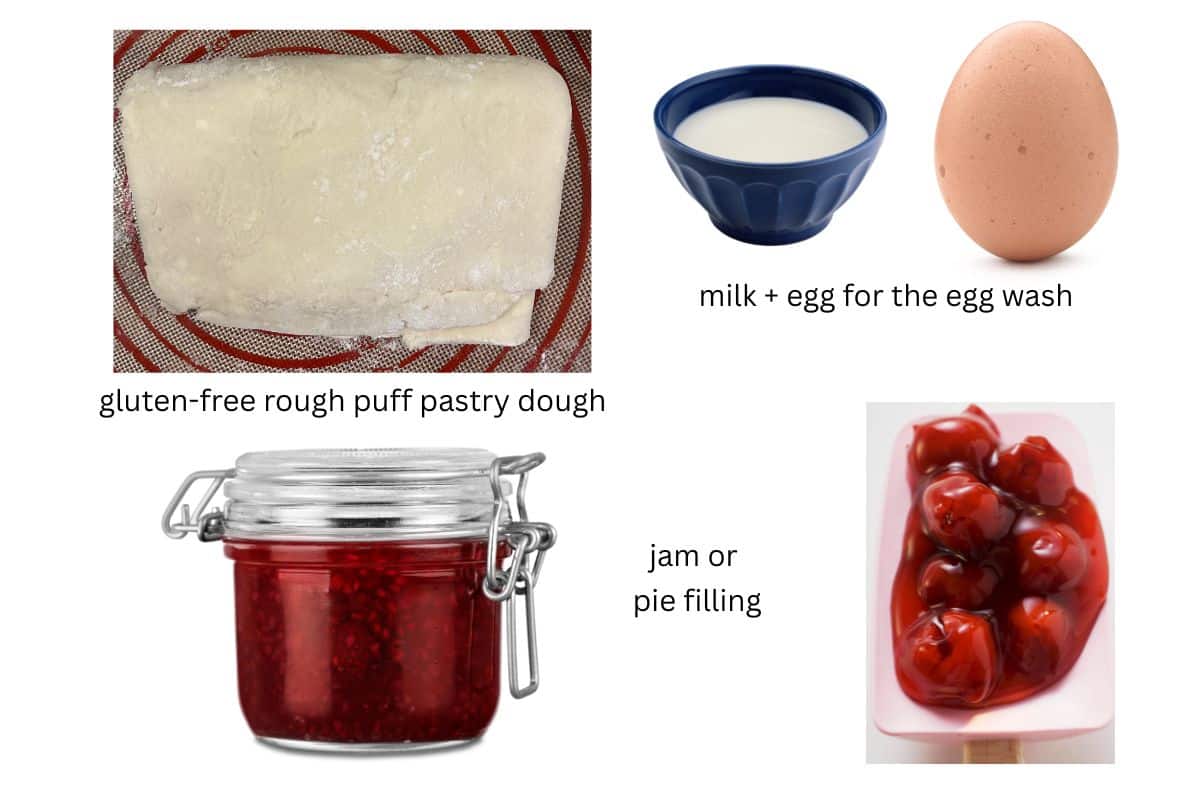
Ingredient Notes:
For the full list of ingredients and amounts, please go to the recipe card below. Before you start, grab my gluten-free pastry flour and rough puff pastry dough recipes and follow the instructions to make them. You need one rough puff pastry to make these gluten-free fruit turnovers.
- Gluten-Free Rough Puff Pastry Dough – I highly recommend my recipe, but if you are short on time, Sweet Loren’s makes a puff pastry you can find at some Target stores. See above to get my recipe.
- Filling – You can fill these delicious turnovers with fruit, jam, pie filling…or use something savory.
- Egg and Milk – The egg wash will give your turnovers a golden, shiny look.

A Note From My Kitchen
As I wrote this recipe for you, my kitchen was trashed, and I had fruity filling and a few pastry flakes on my chin. It is hard to resist these gluten-free turnovers, even when trying to finish this recipe for you. I know the puff pastry recipe can sound more advanced, but this recipe is actually quite easy…it just takes a long time due to all the rolling, folding, and chilling. Take your time, don’t rush, and you will be rewarded with the flakiest pastry layers.
How to Make Gluten-Free Turnovers (Step-By-Step Photos)
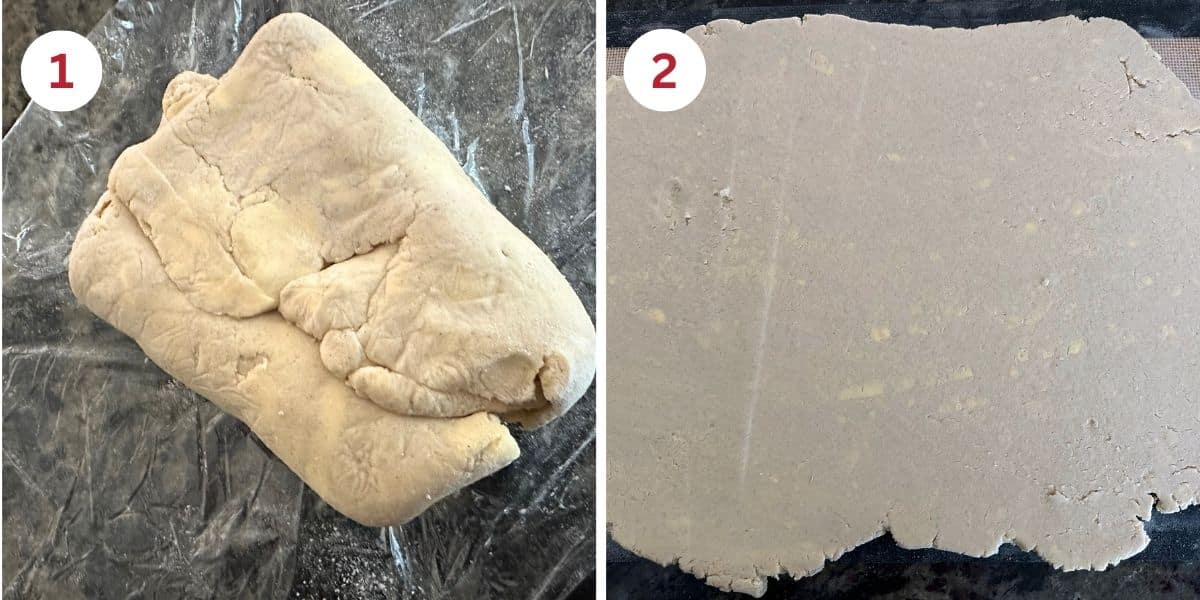
Step 1: Remove the rough puff pastry from the refrigerator and discard the plastic wrap. Place it onto a silicone mat. I like using a silicone mat because it is easy to roll the dough on. It doesn’t slip while rolling the dough, and it is easy to clean.
Step 2: Use a rolling pin to roll the dough to 1/4 inch thick. Do not roll it thinner, or it will be more difficult to get the flaky layers. If the dough is sticking slightly, dust with a bit of gluten-free flour—don’t overdo it.
You should see bits of butter from the laminating process when making the rough puff pastry. This is important because they will create steam pockets and form the flaky layers.
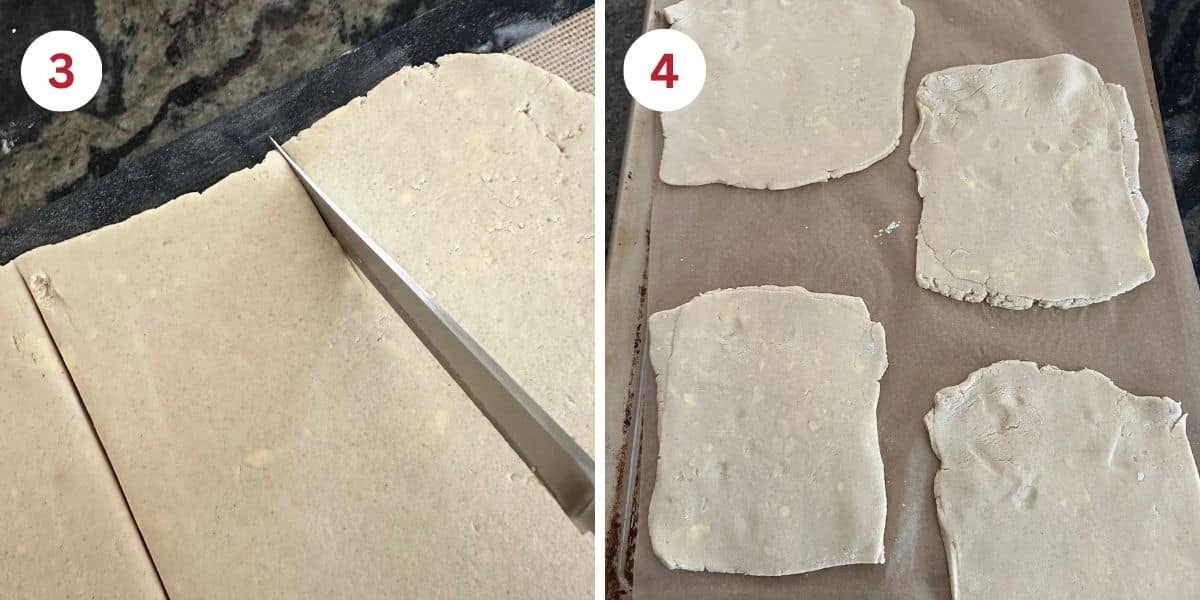
Step 3: Use a sharp knife to cut out square shapes. Do not drag the knife or move it side to side in the dough. Cut down, remove the knife carefully, then cut down again. If you drag the knife, it can seal the edges, making it more difficult for the flaky layers to rise.
Sandi’s TIP: You can also use a pizza cutter or bench knife for cleaner cuts.
Step 4: Carefully move each square to a parchment paper-lined baking sheet. If you have difficulty getting the dough up, use a bench scraper to slide under the dough and lift it off the silicone mat.
Email This Recipe To Me!
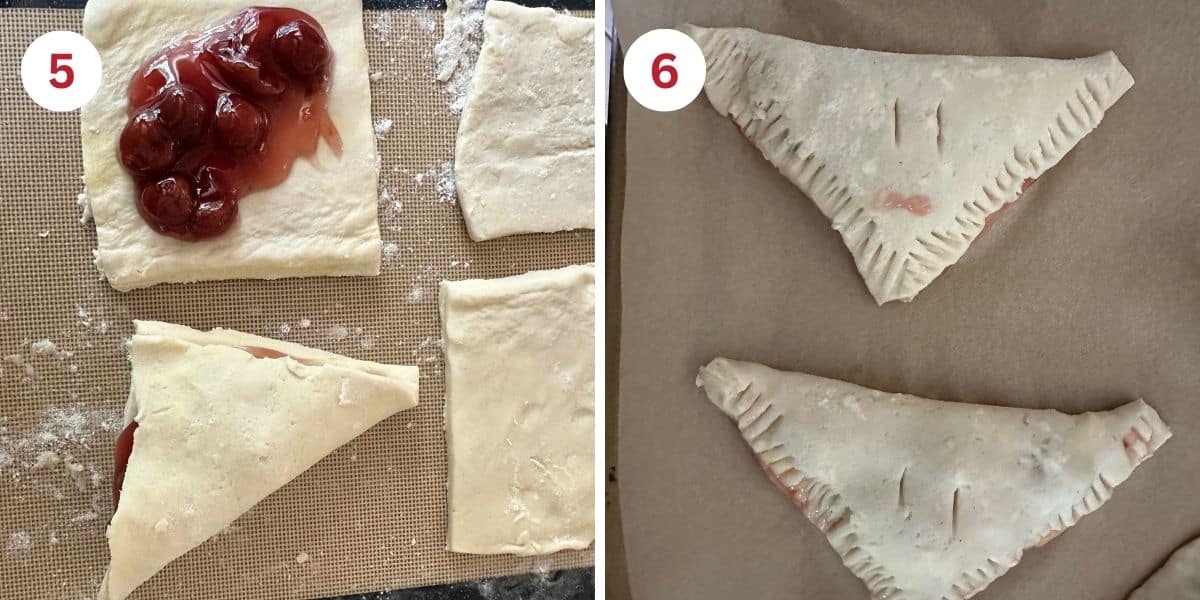
Step 5: Add pie filling, fruit, or jam to the square cut pieces of dough. Carefully fold the dough over the fruit filling. If you add too much fruit filling, some may leak out a little. To lower this risk, you can use more fruit in the pie filling and less of the thick syrup.
👀 Sandi Says: If you assemble these on your silicone mat, move the pastries to a parchment paper-lined baking sheet. You can use the bench scraper or a flat metal spatula to scoop under each pastry to lift it.
Step 6: Use a fork to crimp down the edges of the pastry. Use a sharp knife to make two air holes for the hot steam to vent during baking.
Step 7: Place the turnovers in the freezer until the oven is preheated to 425°F. High heat is best when making rough puff pastries like these turnovers, as it helps the butter steam more quickly. This will help prevent any butter leakage by allowing the butter to steam in the dough pockets, creating flaky layers.
Step 8: Mix the egg wash, then use a pastry brush to coat the tops of each turnover.
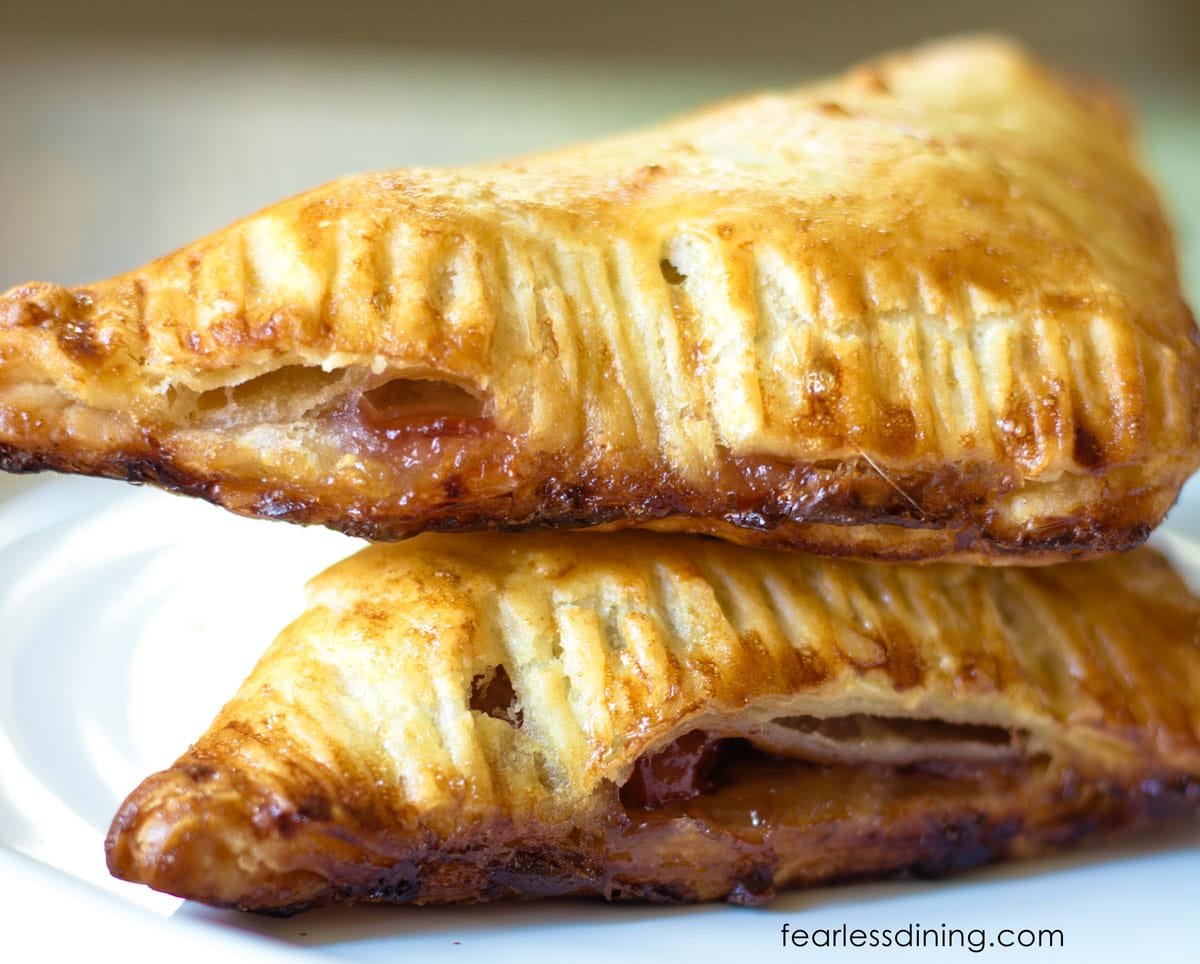
Step 9: Bake the turnovers for 20 to 25 minutes until golden and flaky. The actual baking time can vary depending on the size of the turnovers you make.
Step 10: Remove the turnovers from the oven and slide the parchment paper with the turnovers onto a wire cooling rack. I do not recommend eating them hot. The filling is very hot, and the pastries need to cool to set the flaky layers. The layers may be too moist if you cut into them too soon.
Tips For Success
1. Always make sure the butter is cold. If the dough feels sticky because the butter is warming, place it back in the refrigerator.
2. Do not roll the pastry dough too thin, or the dough will not make all the flaky layers.
3. If the dough is a little damp when you roll it out, dust it with gluten free flour.
Storage and Freezing Tips:
- Storage: Store cooled turnovers in an airtight container at room temperature for up to 2 days, or refrigerate for 4 to 5 days.
- Freezing: Freeze unbaked or baked turnovers for up to 3 months. Reheat baked turnovers in the oven at 350ºF until warm and crisp. (Don’t microwave the turnovers to thaw them, or they will get soggy.)
Frequently Asked Questions:
If your dough is cracking, it is either too dry or too cold. Let the dough sit out for a few minutes to see if it softens.
Yes! These turnovers freeze very well before baking. Thaw them on the counter, brush with an egg wash, and then bake them when you are ready.
Yes, you can use pre-made rough puff pastry dough. There are two brands that I know of that sell this: Sweet Loren’s and Schar, both of which make this premade dough.
More ways to use gluten-free rough puff pastry:
Once you master making the puff pastry, the sky is the limit on what you can make with it!! Try a few of these recipes:
- Super Flaky Gluten-Free Pastries
- Easy Gluten-Free Cheese Danish
- Use this puff pastry to make my Gluten-Free Pop Tarts or my Gluten-Free Hand Pies.
Love This Recipe?
💬 Did you make this recipe? Drop a comment below, and let me know how it turned out! ⭐⭐⭐⭐⭐ Please include which flour blend you used. This will help others know this recipe is delicious. Thank you!
Flaky Gluten-Free Turnovers
Equipment
Method
- Remove the rough puff pastry from the refrigerator and remove the plastic wrap. Place it onto a silicone mat. I like using a silicone mat because it is easy to roll the dough on. It doesn't slip while rolling the dough and is easy to clean.
- Use a rolling pin to roll the dough out to 1/4 inch thickness. Do not roll it thinner, or it will be more difficult to get the flaky layers. If the dough is sticking slightly, dust with a bit of gluten-free flour. Don't overdo it.
- You should see bits of butter from the laminating process when making the rough puff pastry. This is good because they will steam and form the flaky layers.
- Take a sharp knife, pizza wheel, or bench scraper to cut out square shapes in the dough. Do not drag the knife or move it side to side in the dough. Cut down, remove the knife carefully, then cut down again. If you drag the knife, it can seal the edges, making it more difficult for the flaky layers to rise.
- Carefully move each square to a parchment-paper-lined baking sheet. If you have difficulty lifting the dough, use a bench scraper to slide under it and lift it off the silicone mat.
- Add pie filling, fruit, or jam to the square-cut pieces of dough. Carefully fold the dough over the fruit filling. If you add too much fruit filling, some can spill out a little bit. To lower this risk, you can use more fruit from the pie filling and less of the thick syrup.
- Use a fork to crimp down the edges of the pastry. Use a sharp knife to make two air holes for the hot steam to vent during baking.
- Place the turnovers in the freezer until the oven is preheated to 425º F. High heat is best when making rough puff pastries like these turnovers because it helps the butter steam quicker. This will help prevent any butter leakage by allowing the butter to steam in the dough pockets and make the flaky layers.
- Mix the egg wash and brush the top of each turnover using a pastry brush.
- Bake the turnovers for 20 to 25 minutes until they look golden and flaky. The actual baking time can vary depending on the size of your turnovers.
- Remove the turnovers from the oven and slide the parchment paper with the turnovers onto a wire cooling rack. I do not recommend eating them hot. The filling is very hot, and the pastries need to cool to set the flaky layers. The layers may be too moist if you cut into it too soon.
Nutrition
Notes
- I tested this blend with my Gluten-Free Pastry Flour Blend, Cup4Cup (old formulation), and King Arthur Measure for Measure. All three blends worked well. Due to the milk powder in the Cup4Cup blend, you need 2 TBSP of additional flour.
- My blend performed the best because I formulated it specifically for pastry and cakes. The others also turned out great.
- If your flour blend does not contain xanthan gum, add 1/2 teaspoon.
- If you don’t have time to make my gluten-free rough puff pastry, you can use store-bought puff pastry.
- Storage: Store cooled turnovers in an airtight container at room temperature for up to 2 days, or refrigerate for 4 to 5 days.
- Freezing: Freeze unbaked or baked turnovers for up to 3 months. Reheat baked turnovers in the oven at 350ºF until warm and crisp. (Don’t microwave the turnovers to thaw them or they will get soggy.)
Private Notes
Tried this recipe?
Let us know how it was!
I truly hope you enjoy this recipe. I have been testing and creating gluten-free recipes for over 15 years. Creating gluten-free recipes that do not taste gluten-free is my goal for every recipe. Sometimes I only have to test a new recipe a couple of times, and others it takes multiple times. I do this so you get reliable, delicious results every time!
