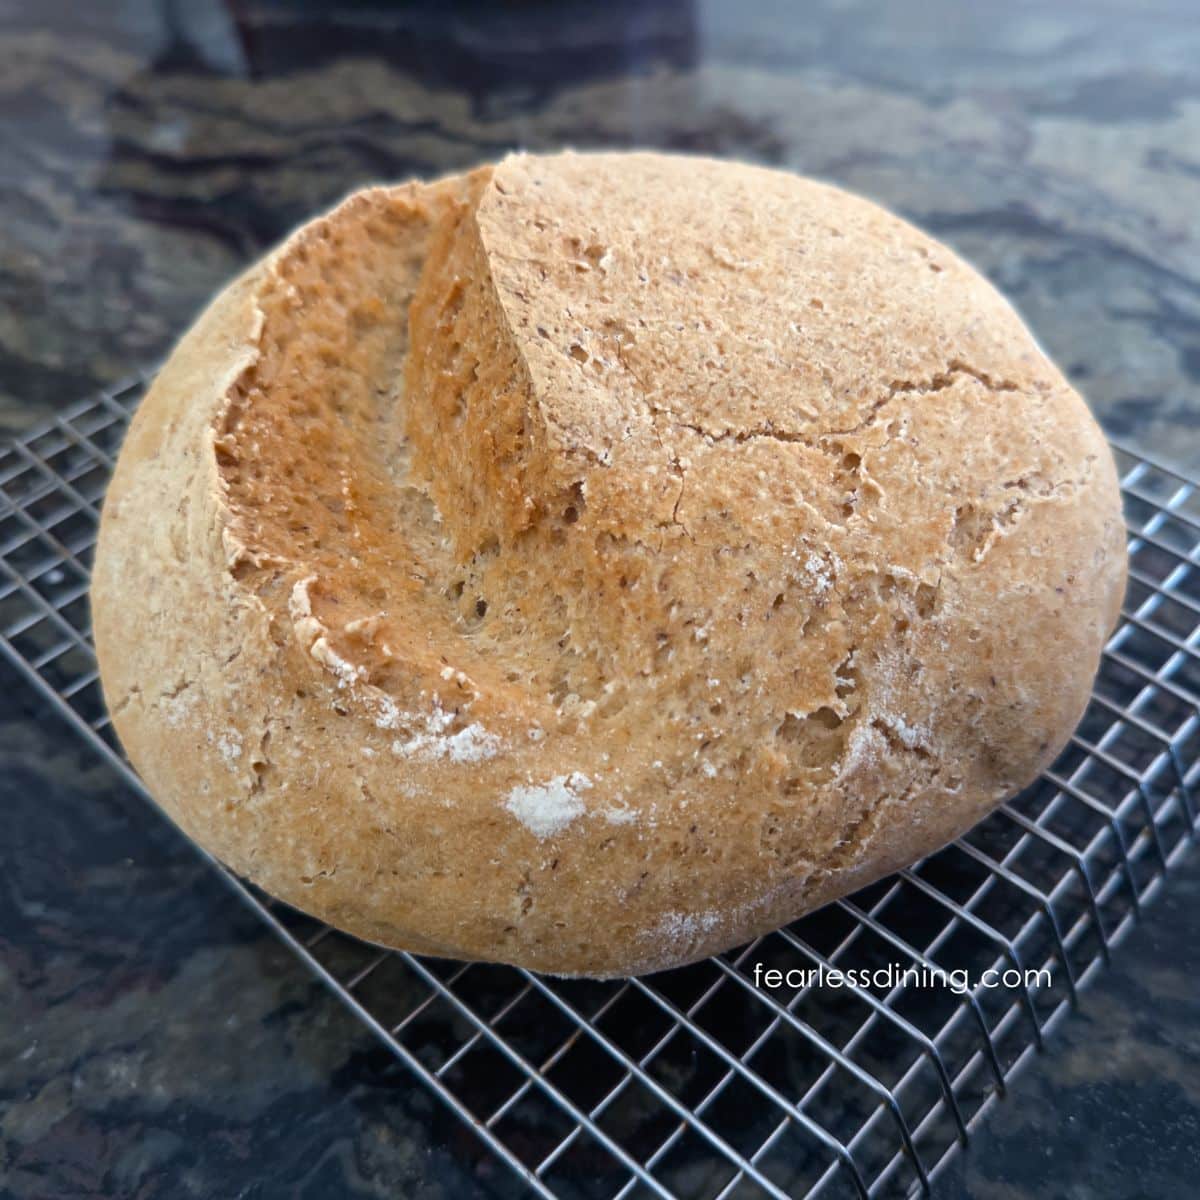
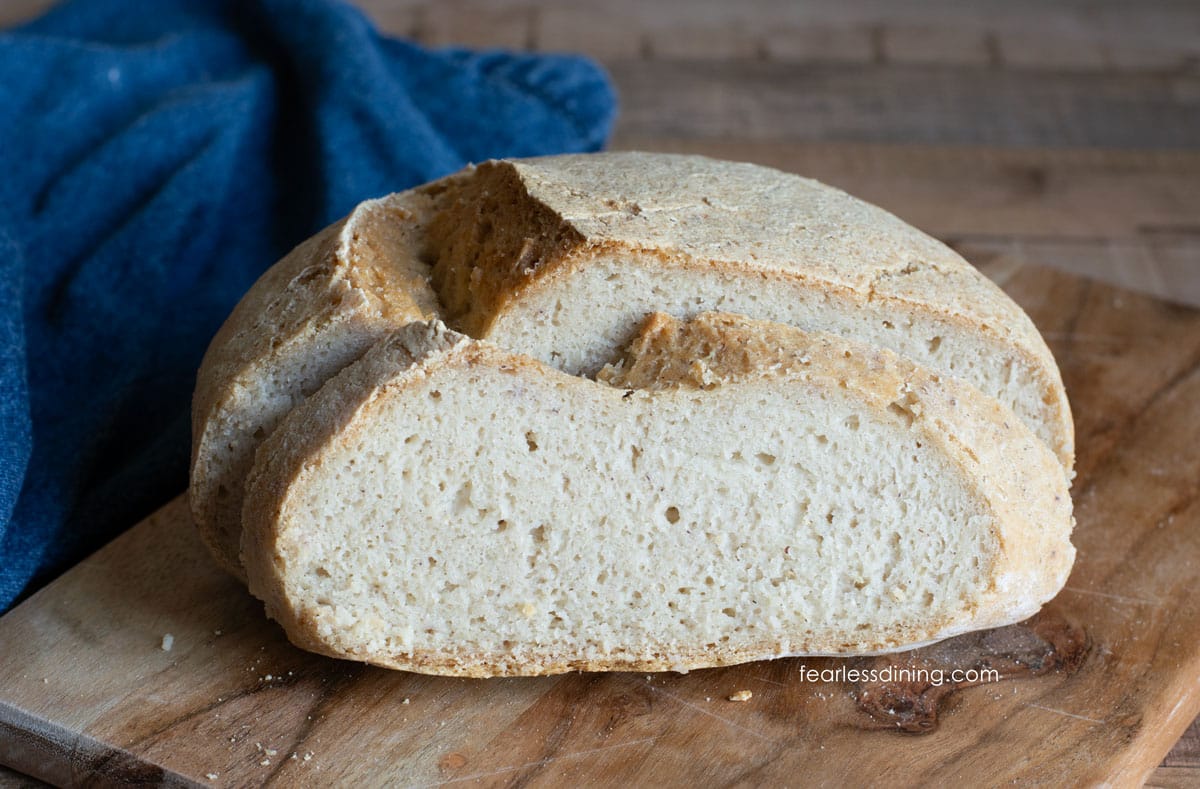
This crusty gluten free artisan bread is a delicious homemade bread you can make in under two hours. This bread is made with simple ingredients, including gluten free flour, sugar, yeast, and purified water. This artisan loaf can be used for sandwiches, toast, or dipped into a soup or stew.
This post may contain affiliate links. Please read our Disclosure Policy.
❤️ Sandi’s Recipe Summary
The Quick Bite: This recipe teaches you how to make a delicious, crusty loaf of artisan gluten-free bread. It has 5 simple ingredients and can be made in under 2 hours.
If you have tried to bake gluten-free artisan bread before and ended up with a dense, gummy loaf, this recipe is going to change that for you. The psyllium husk gel is what makes the difference. It gives the dough a structure and elasticity that most gluten-free breads simply do not have, and it is what allows you to actually shape this dough by hand the way you would a traditional loaf.
This new crusty bread recipe looks like a bakery-style loaf of sourdough, but it is much quicker to make because it uses yeast for rising. This recipe was inspired by my new Gluten-Free Artisan Cinnamon Raisin Loaf recipe, which has been getting rave reviews from my readers on Facebook.
If you want to learn how to bake bread, this Gluten Free Bread Guide has lots of helpful tips, or you can see all of my gluten-free bread recipes. If you prefer a sourdough version of this loaf, my Gluten-Free Sourdough Artisan Bread recipe will walk you through every step.
Ingredient Notes and Easy Swaps:
For the full list of ingredients and amounts, please go to the recipe card below.
- Gluten-Free Flour Blend – I tested this recipe using my DIY Gluten-Free Flour Blend (omit the psyllium husk powder!). I trust this flour blend because it works. It works in yeast recipes and rises beautifully. I only tested this recipe with my DIY blend, so I recommend using it for your first bake before experimenting with other blends. Not all gluten-free flour blends work in yeast recipes. If you use a store-bought blend and the dough does not rise, or the texture is off, the flour blend is the most likely cause. You may also need to tweak the wet or dry ingredients a little to get the right dough texture. Read Why Gluten-Free Flour Blends Vary to learn more about this.
- Psyllium Husks – This recipe uses psyllium husks to make a gel. This helps the dough perform and hold together. Do not use husk powder. Also, some psyllium husk brands turn the bread purple. Use Anthony’s Psyllium Husks. I trust this brand, and it will not make your bread purple. Learn more about Binders in Gluten Free Baking.
- Yeast – I tested this recipe with rapid yeast. Most brands are gluten-free, but do not use Red Star Platinum. It isn’t gluten-free.
- Purified Water – When making yeast recipes, it is important to use purified water. Chlorine and other chemicals in water can prevent the yeast from growing.

Testing Notes From My Kitchen
This artisan loaf took a few tries to get right. My first test, there was just a little too much moisture, which affected the rise. You can tell when there is too much moisture because the crusty outside softens as the loaf cools. With each test, I reduced the water a little more until I had the right dough consistency.
You will know you have the right dough consistency when it pulls cleanly away from the sides of the mixer bowl, and you can work it by hand to shape it into a smooth ball. The dough should feel smooth and slightly tacky, but it should not stick to your hands or feel wet. If it clings to your palms when you try to roll it, it likely needs a small amount of additional flour worked in before shaping.
I only tested my homemade gluten free flour blend in this recipe, because I know it is reliable and works in yeast recipes. My Gluten Free Whole Grain Flour Blend should also work very well
How to Make Gluten Free Artisan Bread (Step-By-Step)
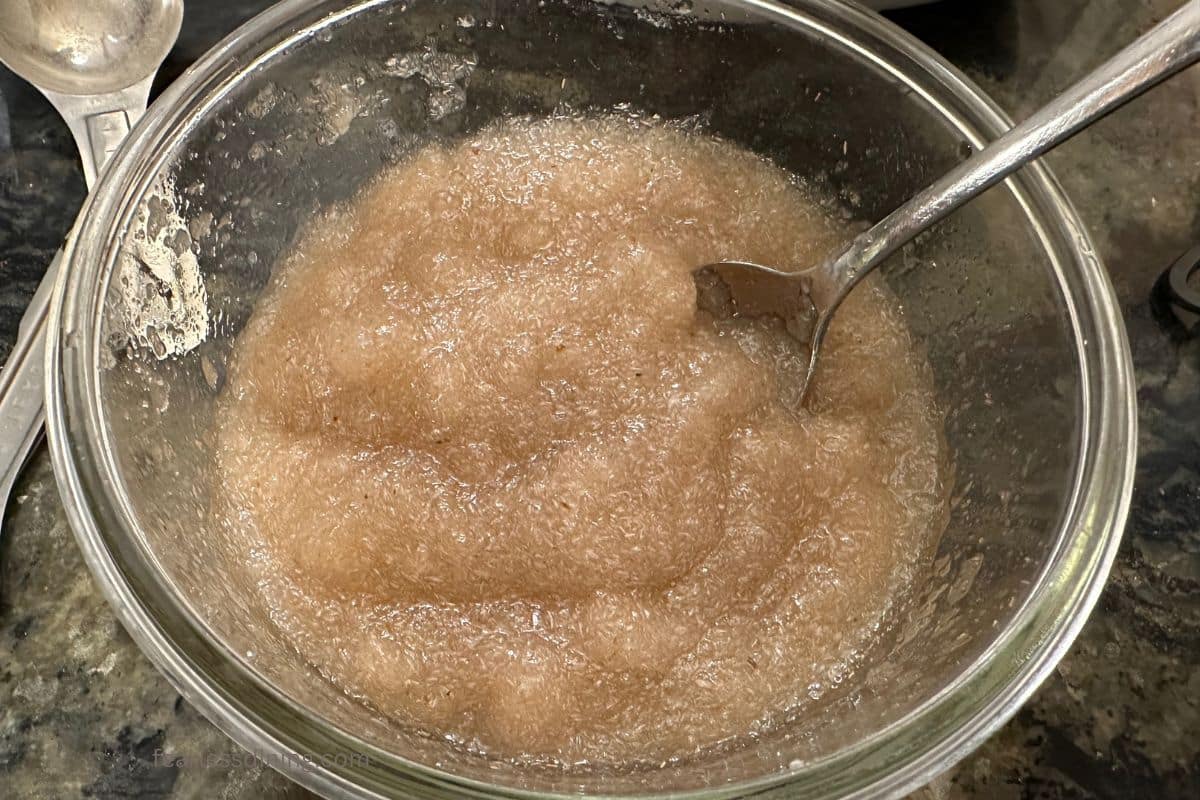
Before you make this bread, prepare your psyllium husk gel. This is what will give the gluten free crusty bread a realistic texture. Measure the psyllium husks using a digital scale and place them into a small bowl. Add the water and mix. Let it sit for 5 minutes until it forms a gel.
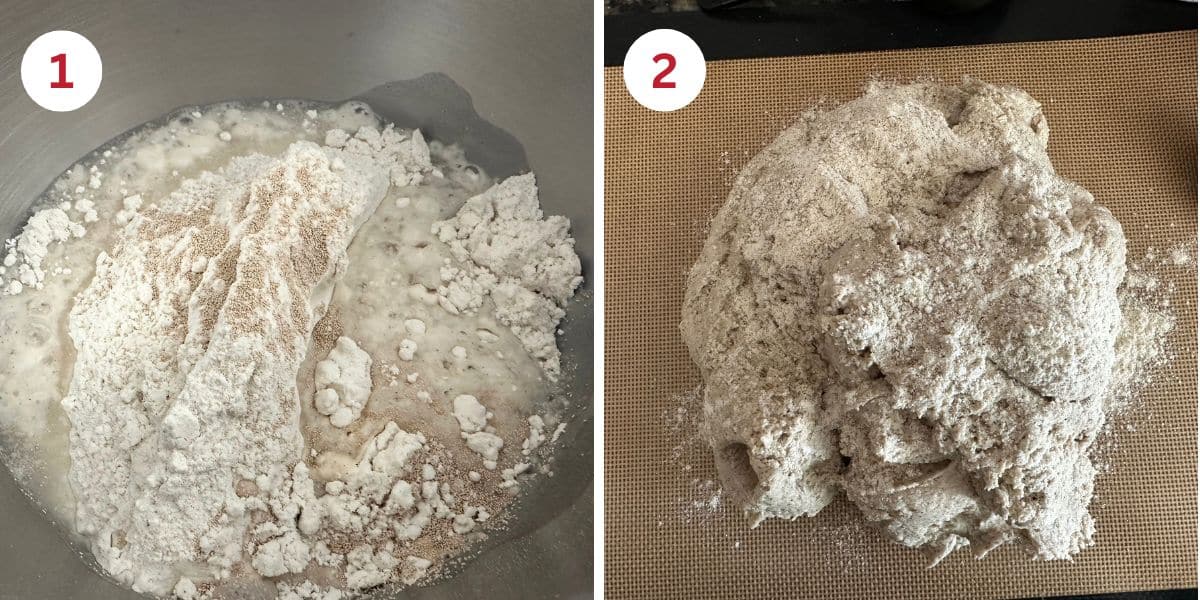
Step 1: In the bowl of a stand mixer, add the water, psyllium gel, flour, sugar, and rapid yeast. Add a paddle attachment and turn the mixer on low to incorporate the ingredients. Turn the speed up to medium and let the dough mix well. It is finished mixing when it pulls away from the edges of the mixer bowl.
Step 2: Remove the dough and place it onto a flour-dusted silicone mat.
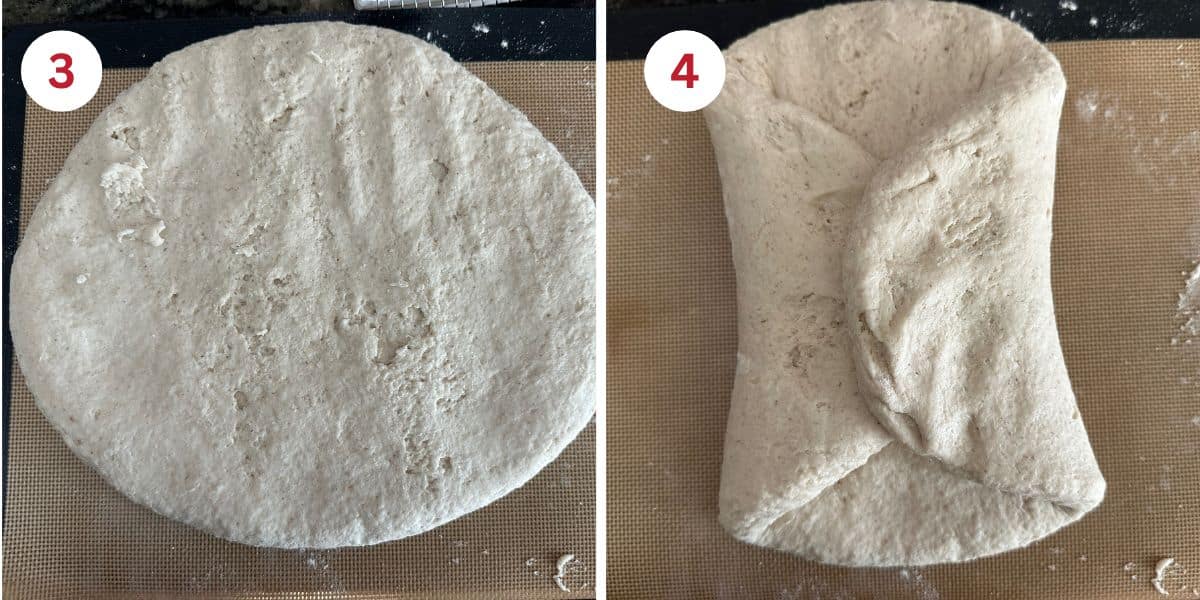
Step 3: Roll the dough into a ball, then press it into a large circle.
Step 4: Fold over the ends. I do this to give the dough a bit of structure so the dough rises upward better.
Email This Recipe To Me!
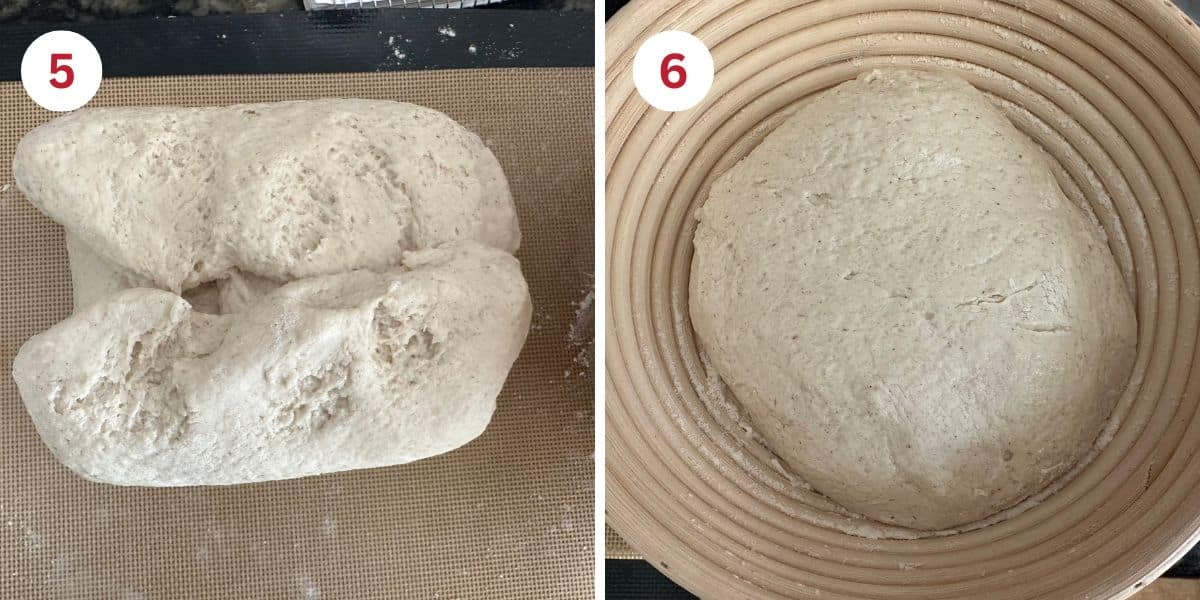
Step 5: Fold the other ends over. Flip the dough over and shape it into a ball.
Step 6: Place the dough into a round banneton or bowl. This will allow the dough to rise in a round shape. You can also make it oval-shaped using this oval banneton basket. (I used the oval-shaped basket to make my gluten free Artisan Cinnamon Raisin Bread linked in the introduction.
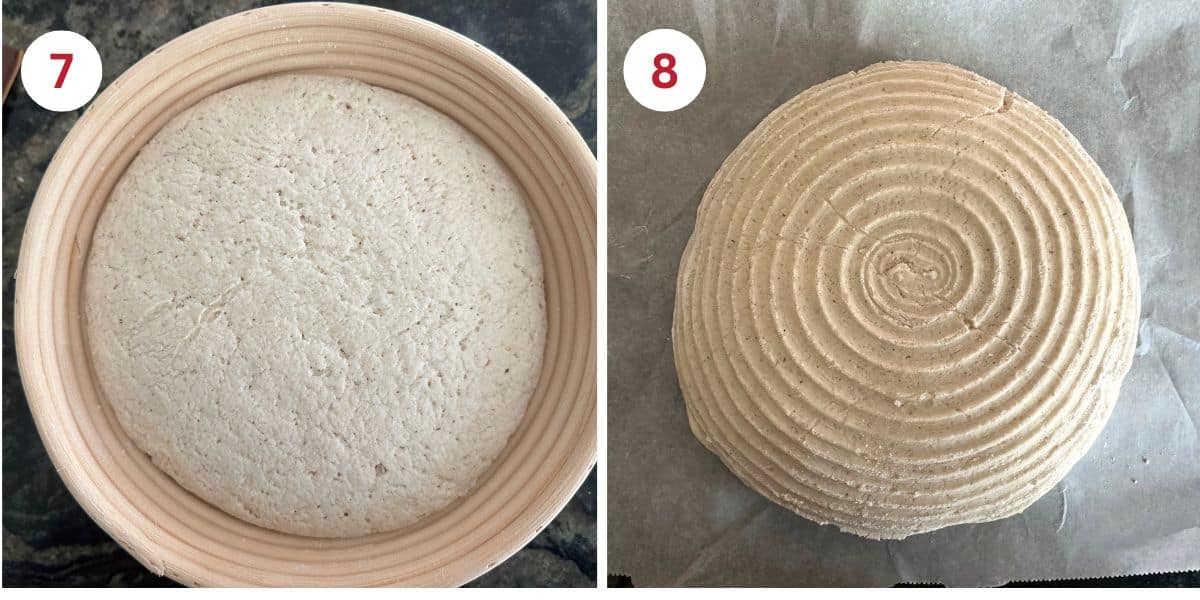
Step 7: Cover the banneton loosely with plastic wrap, or use a disposable shower cap and wrap it over the basket, and put the dough in a warm spot to rise. The dough should double in size, about 45 minutes, if it is warm. If it is cooler, the rise time will take longer.
Step 8: Preheat the oven to 450ºF with a Dutch oven with the lid on in the oven. You can bake the bread in a Dutch oven as I did, or place the dough onto a parchment paper-lined baking sheet. If using a baking sheet, place a baking dish or cast-iron skillet on the bottom rack. Let the oven and pan heat up.
Step 9: Use a bread lame to make a slash in the dough. Some people make intricate designs, but I prefer to make a rounded slash. This helps control the bread shape as it bakes and rises more.
Step 10: Carefully remove the Dutch oven or baking sheet from the oven. If using a Dutch oven, drop the dough in and put the lid on. Return it to the oven. If you are using the baking dish and pan method, quickly place the bread on the baking sheet and drop 4-5 ice cubes into the hot pan below.
This will make steam to help form the crust on the outside of the bread.
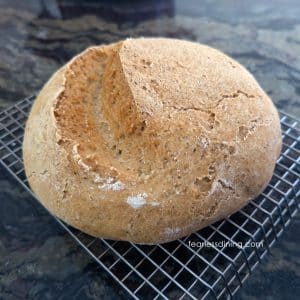
Step 11: Bake the bread for 45 minutes. The bread should look golden brown on the outside, and have an internal temperature of 210ºF.
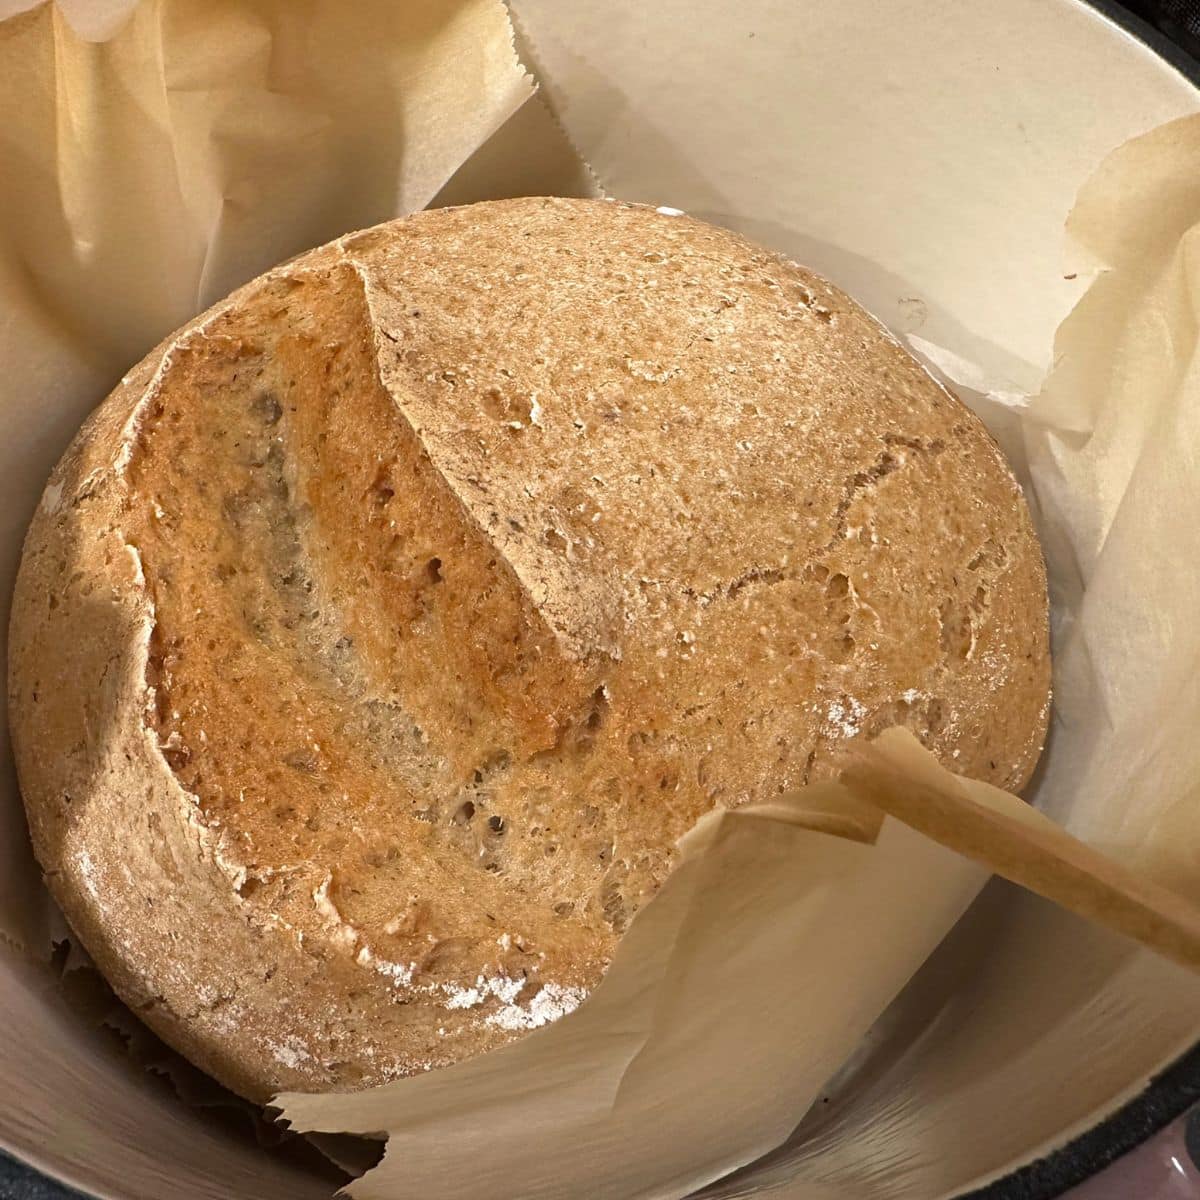
Step 12: Put on oven mitts and carefully remove the Dutch oven from the oven. Use the parchment paper to lift the bread out and transfer it to a cooling rack. If you used the cast-iron skillet method, lift the bread directly onto the rack using oven mitts or a spatula.
👀 Sandi Says: Do not slice the bread until it is fully cooled. The bread continues to set while it cools. If you slice it while it is warm, the bread will be a little gummy.
Store the bread in a container on the counter. If you do not plan to finish the loaf in a couple of days, I recommend slicing the bread and freezing it in a freezer-safe zipper bag. Do not freeze or put the bread in a container unless it is room temperature.
Have any questions? You can leave a comment, and I will respond quickly. You can also check out this Gluten-Free Bread Troubleshooting Guide for more bread-baking tips.
Tips For Success:
I have talked about all of these important tips in the directions, but I want to highlight them again because they are all important and can make or ruin your bread:
- If your dough feels too wet to shape after mixing, add one tablespoon of your gluten-free flour blend at a time and work it in by hand until the dough holds together smoothly. Gluten-free doughs can vary slightly depending on your kitchen humidity and the specific flour blend you use, so small adjustments are normal.
- If your bread does not rise enough during the proofing stage, the most common causes are expired yeast, water that was too hot or too cold when making the dough, or your proofing spot that was not warm enough. Check the expiration date on your yeast before you start, use purified water, and find the warmest spot in your kitchen for the rise. Have questions beyond these tips?
More Gluten-Free Bread Recipes:
- Gluten-Free Sandwich Bread – Made with xanthan gum or psyllium husk.
- Fluffy Gluten-Free Hawaiian Bread – Make it in the bread machine or oven.
- Gluten-Free Oat Bread – Use gluten-free oats!
- Gluten-Free Challah – Easy braidable dough
Love This Recipe?
💬 Did you make this gluten-free artisan bread recipe? I would love to hear how it turned out. Your feedback helps others (and helps me keep improving these recipes for you). ⭐⭐⭐⭐⭐
Crusty Gluten-Free Artisan Bread
Ingredients
- 488.5 grams gluten free flour blend * See Notes
- 2 ½ teaspoons rapid yeast 1 packet
- 16 grams psyllium husks * See Notes
- 2 ½ cups purified water * See Notes
Instructions
- Before you make this bread, prepare your psyllium husk gel. This is what will give the gluten free crusty bread a realistic texture. Measure the psyllium husks using a digital scale and place them into a small bowl. Add the husks to 1 1/2 cups of water and mix. Let it sit for 5 minutes until it forms a gel.
- In the bowl of a stand mixer, add the remaining water, psyllium gel, flour, sugar, and rapid yeast. Add a paddle attachment and turn the mixer on low to incorporate the ingredients. Turn the speed up to medium and let the dough mix well. It is finished mixing when it pulls away from the edges of the mixer bowl.
- Remove the dough and place it onto a flour-dusted silicone mat. Your dough should be tacky but easy to work.
- Roll the dough into a ball, then press it down into a large circle.
- Fold over the ends. I do this to give the dough a bit of structure so the dough rises upward better. Fold the other ends over. Flip the dough over and shape it into a ball.
- Place the dough into a round banneton. This will allow the dough to rise in a round shape. You can also make it oval-shaped using this oval banneton basket.
- Cover the banneton loosely with plastic wrap, or use a disposable shower cap and wrap it over the basket, and put the dough in a warm spot to rise. The dough should double in size, about 45 minutes, if it is warm. If it is cooler, the rise time will take longer.
- Preheat the oven to 450ºF with a Dutch oven with the lid on in the oven. You can bake the bread in a Dutch oven as I did, or place the dough onto a parchment paper-lined baking sheet. If using a baking sheet, place a baking dish or cast-iron skillet on the bottom rack. Let the oven and pan heat up.
- Use a bread lame to make a slash in the dough. Some people make intricate designs, but I prefer to make a rounded slash. This helps control the bread shape as it bakes and rises more.
- Carefully remove the Dutch oven or baking sheet from the oven. If using a Dutch oven, drop the dough in and put the lid on. Return it to the oven.
- If you are using the baking dish and pan method, quickly place the bread on the baking sheet and drop 4-5 ice cubes into the hot pan below and quickly close the oven door. This will make steam to help form the crust on the outside of the bread.
- Bake the bread for 40-45 minutes. The bread should look golden brown on the outside, and have an internal temperature of 210ºF.
- Put on oven mitts and carefully remove the Dutch oven from the oven. Use the parchment paper to lift the bread out and transfer it to a cooling rack. If you used the cast-iron skillet method, lift the bread directly onto the rack using oven mitts or a spatula.
- Do not slice the bread until it is fully cooled. The bread continues to set while it cools. If you slice it while it is warm, the bread will be a little gummy.
Notes
- I only tested this recipe with my Gluten Free All Purpose Flour (without the psyllium powder/xanthan gum, since you will be making a husk gel in this recipe). My homemade blend and my Gluten Free Whole Grain Flour Blend work in yeast recipes, and they perform the best.
- Other blends may work, but you must verify on the flour blend website that it works in yeast recipes. Many 1:1 blends do not.
- If your blend has a binder, you do not want to use the psyllium husk gel I use in my recipe. This will affect the texture of the bread, which is why I recommend my blends. King Arthur All Purpose GF Flour has no binder, so I would recommend this so that you can use the psyllium gel. Note: I will NOT test any wheat starch blend in my recipes.
- I recommend Anthony’s Psyllium Husks. Many brands will turn your baked goods purple. This brand is tried and true and will not affect the color of your bread.
- I recommend purified water. Chlorine in tap water inhibits yeast growth, and you will not get as good of a rise using tap water.
- Store the bread in a container on the counter. If you do not plan to finish the loaf in a couple of days, I recommend slicing the bread and freezing it in a freezer-safe zipper bag. Do not freeze or put the bread in a container unless it is room temperature.
Email This Recipe To Me!
SPECIAL NOTE
Please know that every gluten free flour blend has a different starch to grain ratio. If you use a blend I didn’t test, my rule of thumb is to add more flour if your dough or batter is wet and add more liquid if the dough or batter is too dry!
Nutrition
Nutrition Disclaimer
Nutritional information is an estimate provided to you as a courtesy. You should calculate the actual nutritional information with the products and brands you are using with your preferred nutritional calculator.
I truly hope you enjoy this recipe. I have been testing and creating gluten-free recipes for over 15 years. Creating gluten-free recipes that do not taste gluten-free is my goal for every recipe. Sometimes I only have to test a new recipe a couple of times, and others it takes multiple times. I do this so you get reliable, delicious results every time!

Hello.
I am excited to try and make this but I have a question. Do use all the water mentioned in the ingredient list to the psyllium husks or do you add that in addition to water put in with them? If the latter, how much water to the husks to create the gel? Thank you.
Hi Beth, I responded via FB as well. Use 1 1/2 cups water with the psyllium and the remainder can go in the stand mixer. I hope this helps. I also clarified in the recipe.