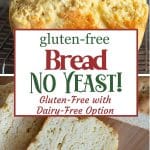
One bite of this fluffy gluten free bread without yeast, and you will want more. This homemade yeast-free bread is so easy to make and makes the best sandwich bread. All you need are a few simple ingredients! There is also a tested vegan version!
This post may contain affiliate links. Please read our Disclosure Policy.
Many of my readers have asked if I could create a yeast-free, gluten-free bread recipe. Many with Celiac and gluten intolerance can also not eat recipes baked with yeast. I hate for people to go without foods they love, so I created this recipe.
This new bread recipe is based on my Gluten-Free Biscuit recipe. The biscuits are so big and fluffy that I knew if I could tweak this recipe, it would make excellent baked gluten free bread.
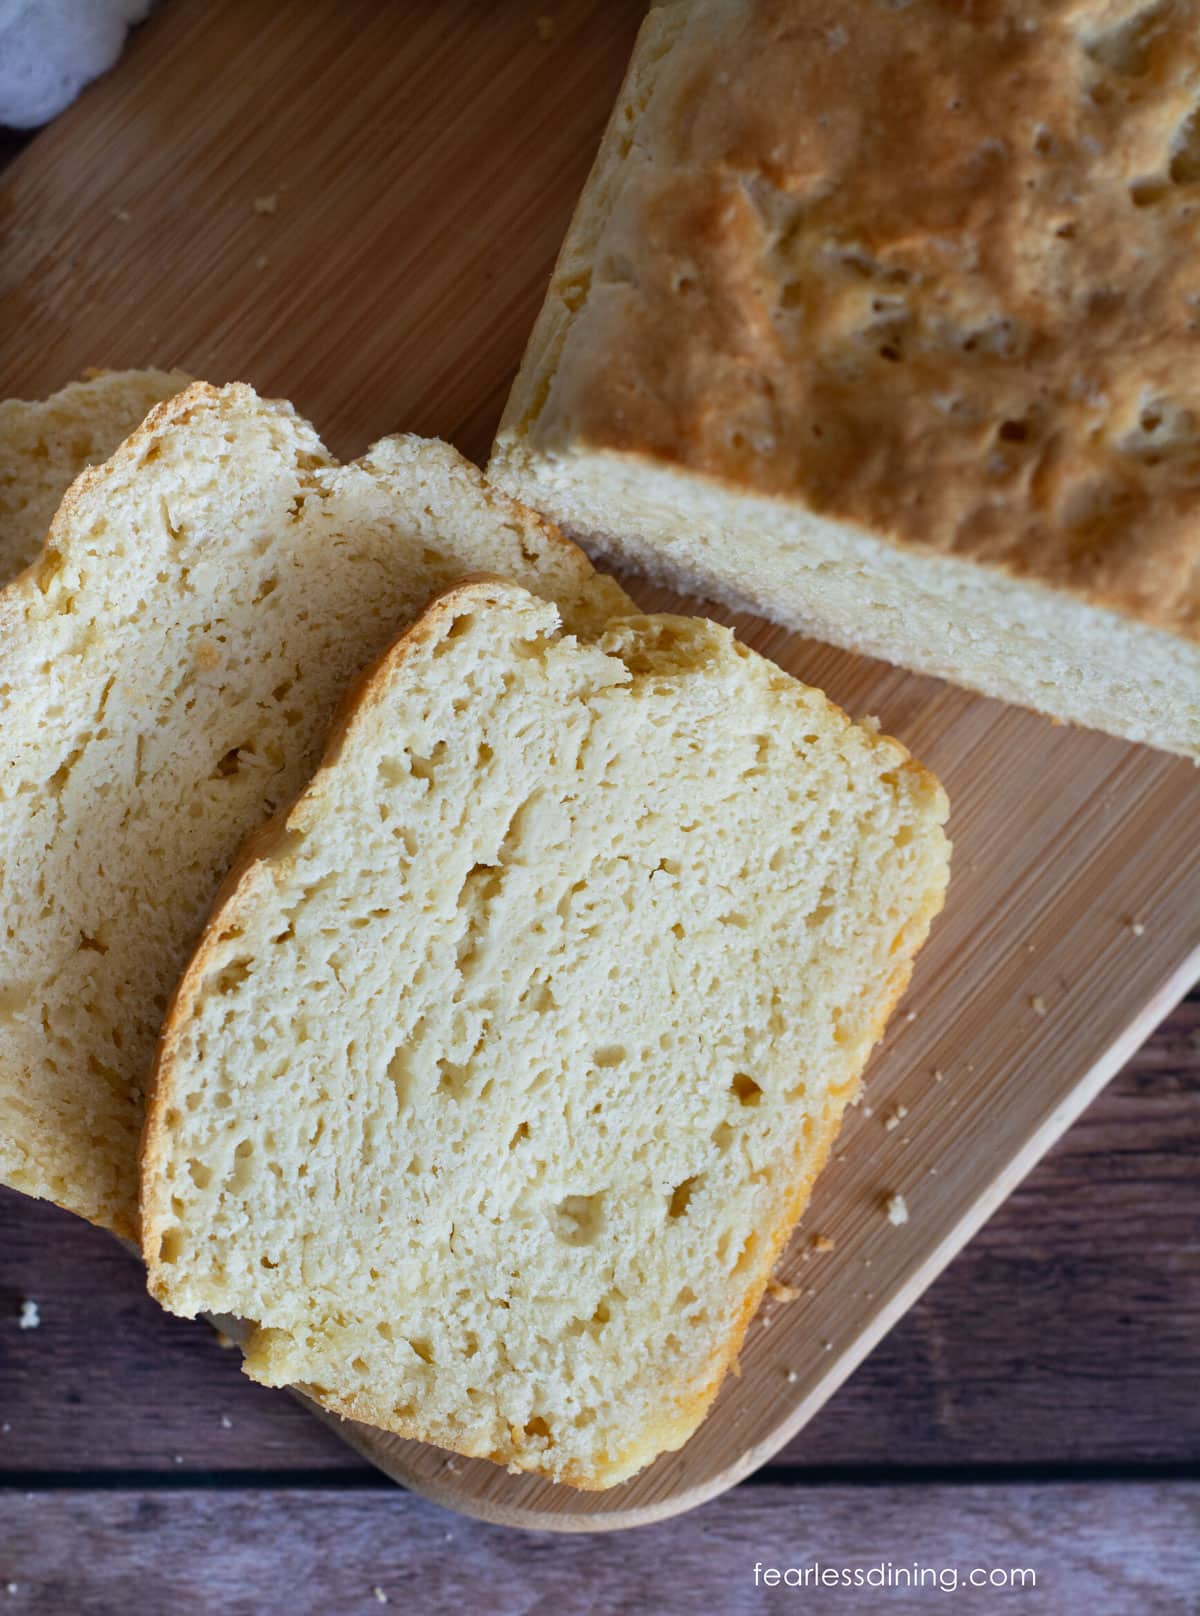
This bread turned out so fluffy that you would never know it was made without yeast. This gluten-free yeast-free bread recipe is the ultimate sandwich bread! My family devoured this new gluten-free, yeast-free bread in record time!
If you love to bake bread, I have some incredible gluten-free bread recipes for you to make. Gluten free baking has never been easier! Try my Gluten-Free Irish Soda Bread recipe if you want another no-yeast bread recipe.
UPDATE 7/30/25 – This recipe has over 180 comments. I went through each and every one and listed successful reader ingredient substitutions and flour blends below the Ingredient Notes section to help you know what swaps work in this bread recipe.
Ingredient Notes:
For the full list of ingredients and amounts, please go to the recipe card below.
- Gluten-Free Flour Blend – I tested this recipe with King Arthur Measure for Measure, Bob’s Red Mill 1:1, and Cup4Cup. All three blends worked well. You may need to adjust the moisture level by adding more flour or milk, depending on the blend you use. See the Reader-Tested Swaps below for more flour blends that work in this recipe.
- Baking Powder – It is important to use aluminum-free baking powder. Regular baking powder will leave a metallic taste.
- Butter – Use salted or unsalted butter. The butter must be cold. See the Reader-Tested Substitutions below for easy butter swaps.
- Eggs – Use large eggs. See the below Reader Tested Swaps for tested egg-free options.
- Milk – I used Oatly Simple Basic gluten-free oat milk. You can also use another plant-based milk or regular milk. See Reader-Tested Substitutions below for more tested swaps.
You can find the ingredients for this quick bread at any grocery store.
Reader-Tested Substitutions:
Quite a few readers have written to me via the comment section, email, and social media to tell me how this recipe has allowed them to eat bread again and which swaps they used that work. I am adding these to the post because I know these swaps will help so many more of my readers.
Flour Blends:
Namaste, Walmart Great Value, Freee Gluten-Free Bread Flour (Ireland), Pillsbury GF, and Cloud9 GF.
Egg Swaps:
Duck eggs, Flax Eggs (ratio is 1 T flax meal and 3 T water), and Applesauce.
Butter Swaps:
Avocado Oil, Sunflower Oil, Goat Butter, Earth Balance, and Miyoko’s.
NOTE: If you make this bread dairy-free, this bread does not get as golden on top. You can add an egg wash over the top to get a more golden color.
The easiest, efforless (can’t stress that enough), delicious GF bread. I just made it for the first time and felt like making it focaccia style (drowned it in olive oil and rosemary) and it worked!Thank you for the recipe, Fearless Dining!🙂”
Aleksandra B., Pinterest comment.
Step-By-Step Photos and Directions:
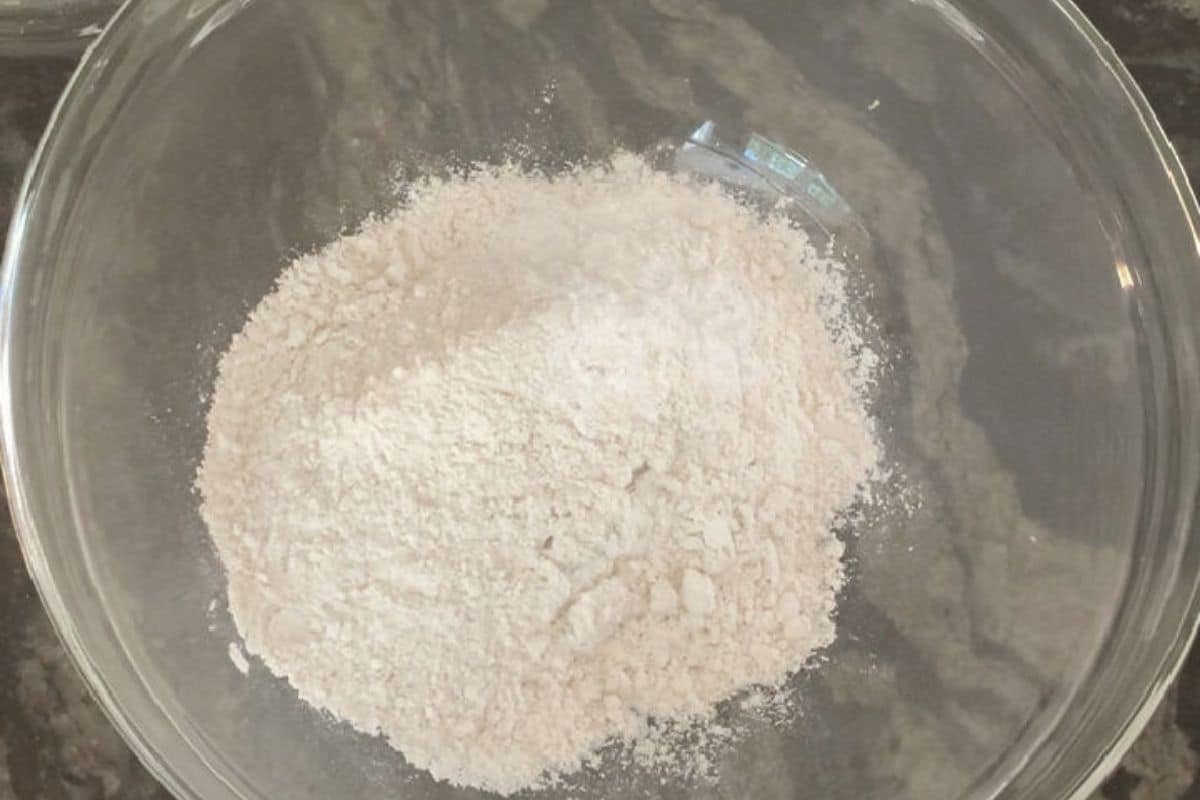
Step 1: Add the gluten free flour, baking powder, and salt into a large
Email This Recipe To Me!
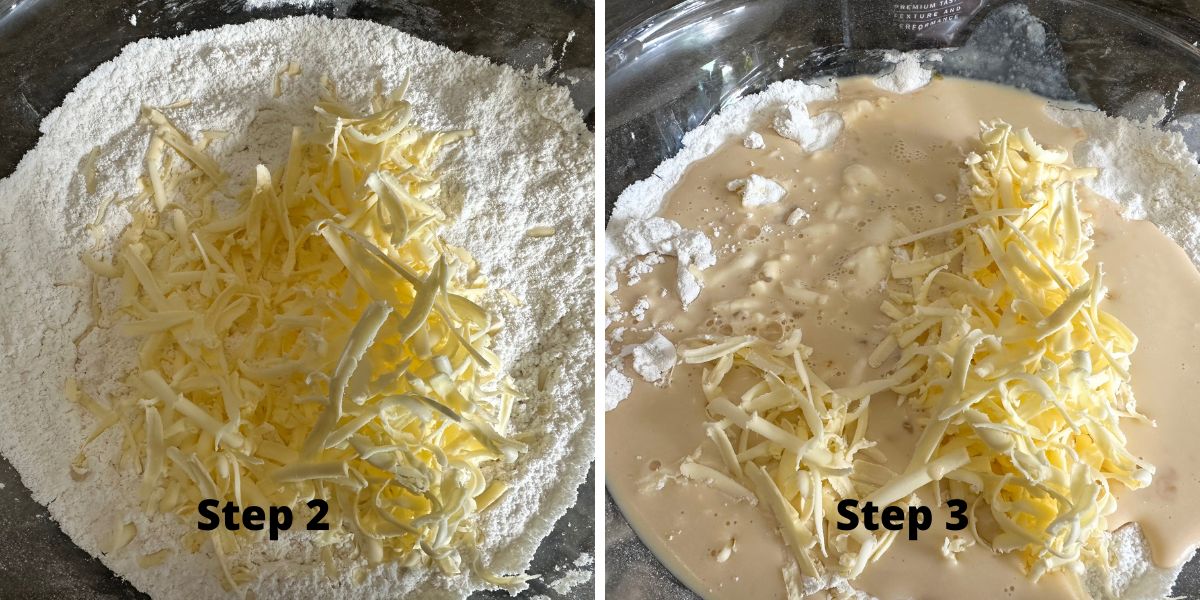
Step 2: Use a cheese grater to shred the cold butter into the dry ingredients.
Step 3: Add the cold milk or non-dairy milk to the bowl.
If you use a stand mixer, you will want to add the eggs and milk to the mixer bowl, then add the flour and cold butter shreds. Use a paddle attachment. Since this dough is wetter than other bread dough recipes, a dough hook doesn’t mix it as well.
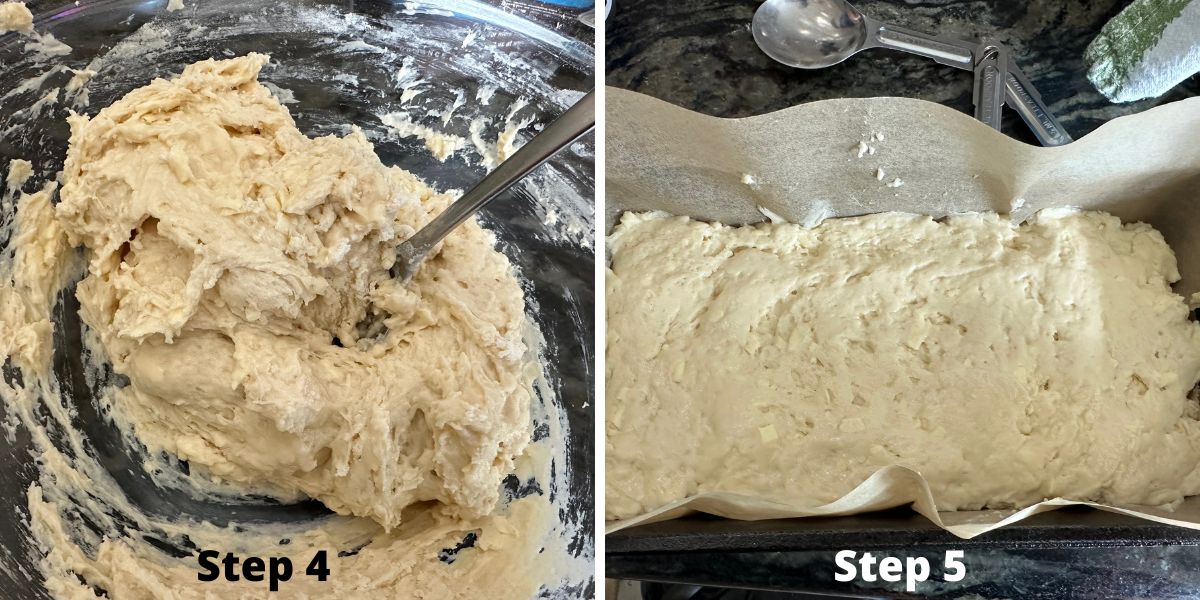
Step 4: Mix the wet and dry ingredients into a dough with a large spoon.
Step 5: If you are lining the loaf pan with parchment paper, do this now. If you are not using parchment paper, spray the loaf pan with a gluten free baking spray. Add the dough and spread it out in the pan. The dough should be soft but thick, but not pourable.
👀 Sandi Says: If your bread dough is wetter, add more flour one tablespoon at a time until it looks like my dough photo above.
I like to wet my fingers to smooth the top of the bread out so it isn’t lumpy. Optional: Sprinkle the top of the bread with sesame seeds.
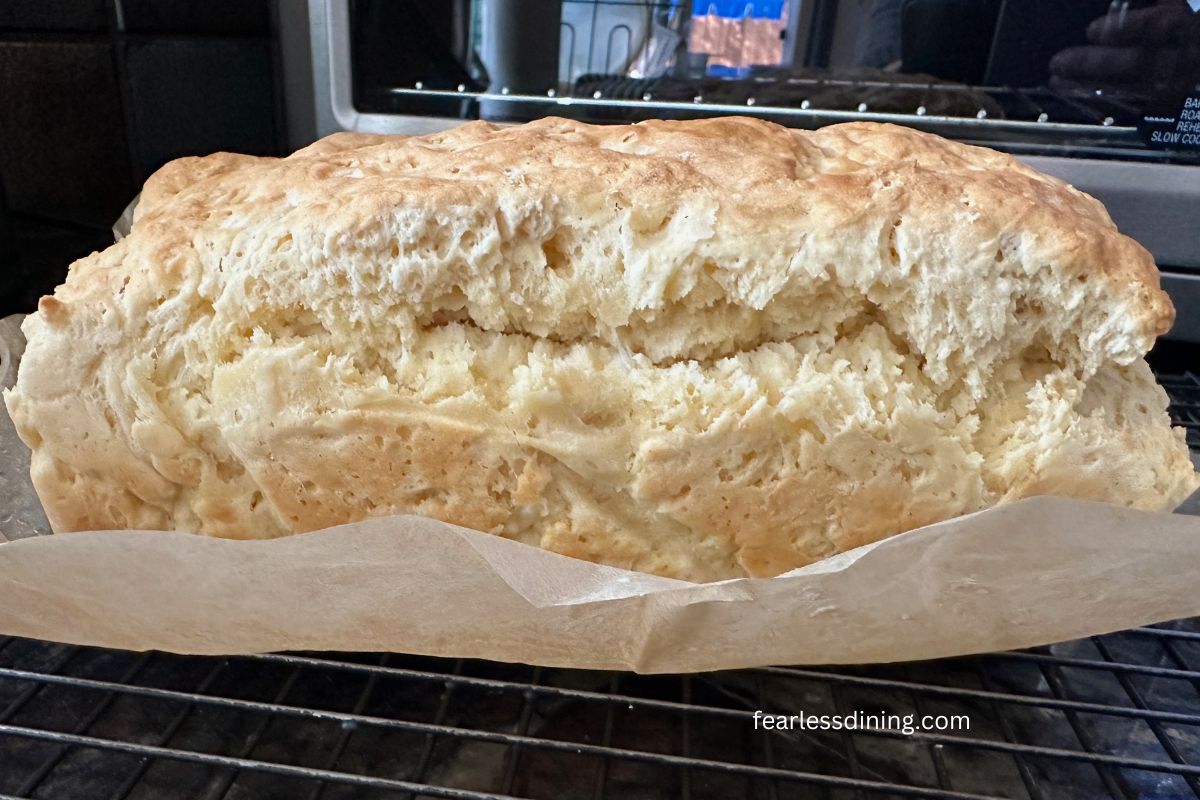
Step 6: Bake the bread at 350º F for 40 to 50 minutes. The actual baking time can vary depending on the size and depth of your loaf pan. The top of the bread will be golden brown. If the bread becomes too dark, cover the loaf with aluminum foil toward the end of baking.
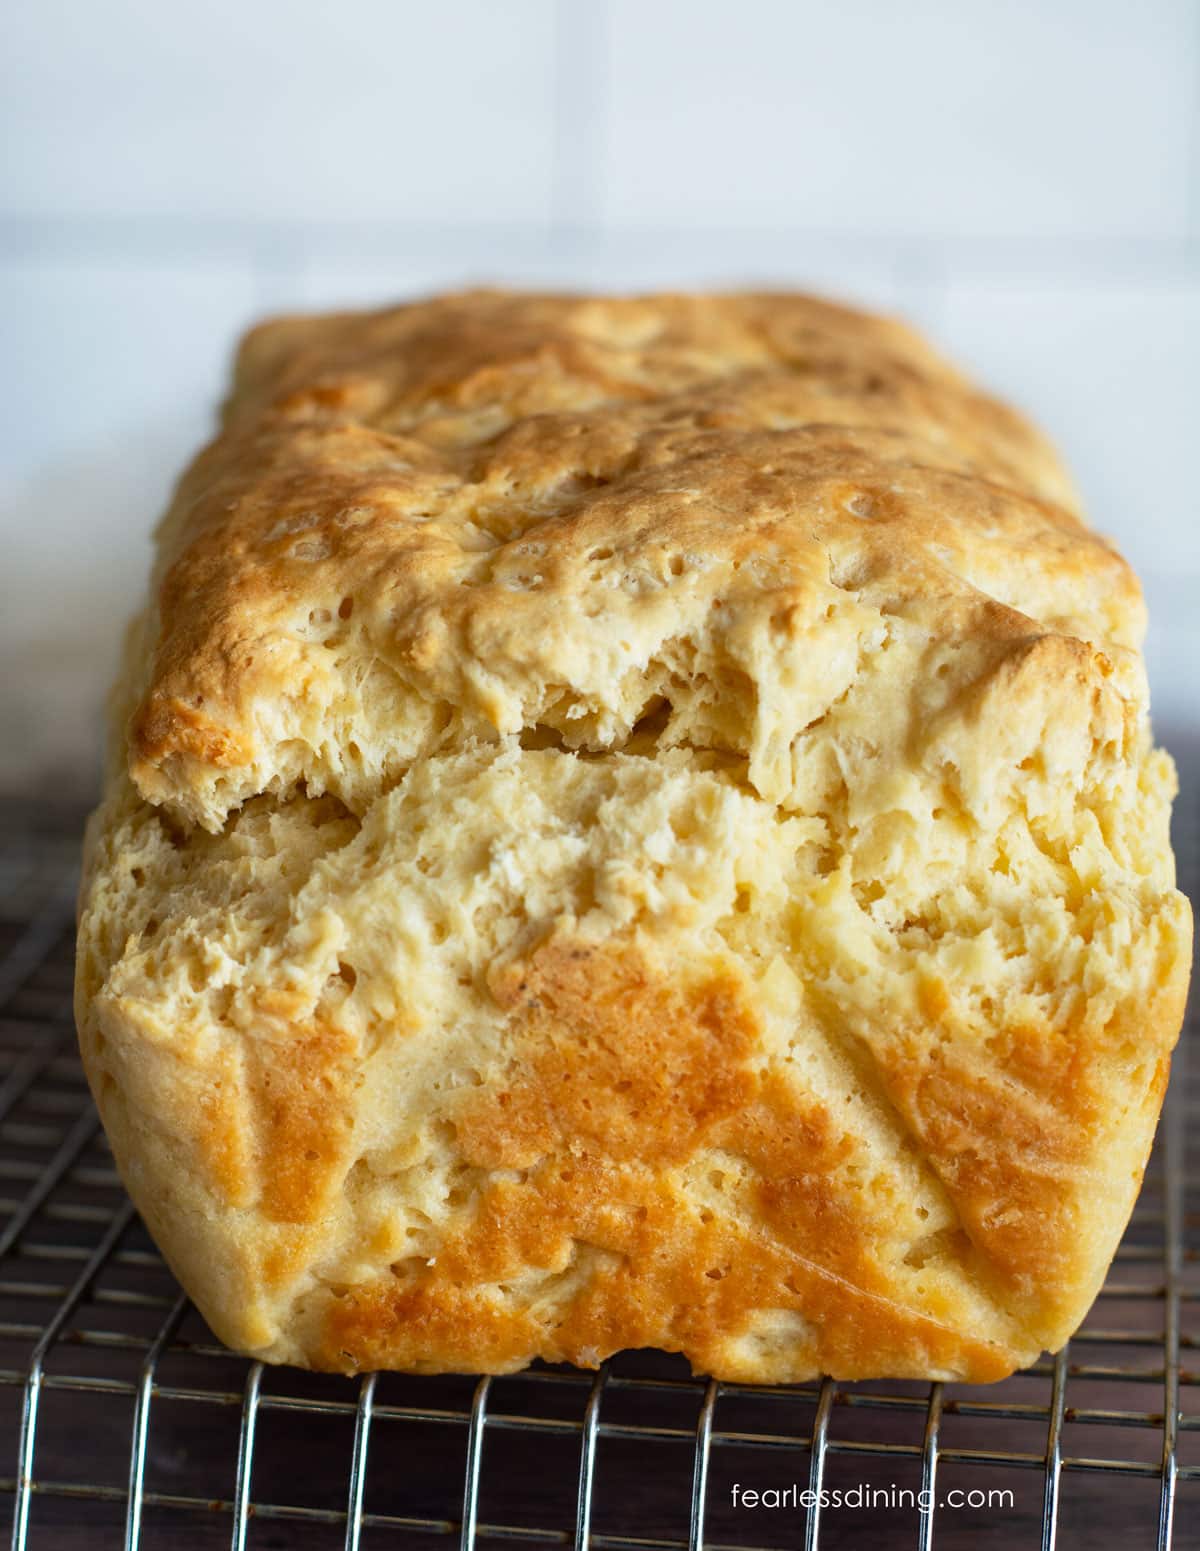
Step 7: Remove the loaf from the oven. Insert a toothpick in the loaf. If the toothpick comes out clean, your bread is finished baking. If you see batter or crumbs, the bread will need to bake a little longer. Carefully remove the bread loaf from the loaf pan and place it on a cooling rack to cool.
Wait until the loaf is thoroughly cooled before you slice the bread. Use a serrated bread knife. This is a great recipe for gluten free sandwich bread.
Tips For Success
1. Use VERY cold butter. Trust me, it is worth it, and this bread recipe is even more amazing.
2. I lined my bread tin with parchment paper, but this is optional. For some reason, my cast-iron loaf pan leaves a little black on my bread. I didn’t want that on this loaf, so I lined the pan to prevent this. 3. I will say it makes lifting the bread out of the pan nice and easy!
Store it the right way! Learn How to Store Gluten Free Bread so you can keep it fresh.
Frequently Asked Questions:
This recipe relies on aluminum-free baking powder to get its rise.
Yes, you read the quantity correctly. This is what gives the bread its rise without yeast.
If you notice an off flavor of metal, this means you did not use aluminum-free baking powder.
Store the bread in an airtight container. I recommend slicing and freezing the bread if you don’t use it all within two days. Gluten free baked goods tend to spoil quickly. I freeze my bread in a freezer bag with wax paper between each slice.
Thank you so much for this recipe! I used King Arthur Measure for Measure because it was what I had. It turned out great! I did have to cook 10 minutes longer that what you recommended. For those who can’t have yeast or added sugar, this is a great bread!”
Cheryl D., Blog comment
More Gluten-Free Bread Recipes
- This easy Gluten Free Naan is a great beginner-level yeast recipe to try.
- My Gluten Free Seedy Nut Bread is based on a European seed bread recipe my mother-in-law loved.
- If you prefer to use a bread machine, this Gluten Free Bread Machine Bread Recipe is well-loved by readers.
- Use fresh or dried herbs in this Gluten Free Focaccia Bread recipe.
- We love how fluffy these Gluten Free Honey Dinner Rolls turn out. They also make great slider buns.
- This Gluten Free Hawaiian Bread can be made in your bread machine, or baked in the oven.
Love This Recipe?
If you made and enjoyed this recipe, I would be incredibly grateful if you could leave a comment below. Please include which flour blend you used. This will help others know this recipe is delicious. Thank you!
The Fluffiest Gluten Free Bread Recipe (No Yeast!)
Ingredients
- 2 ½ cups gluten free flour blend * See notes
- 2 tablespoons baking powder Aluminum-free!!
- 1 teaspoon salt
- 2 large eggs
- 5 tablespoons butter Salted or unsalted depending on your preference
- 1 ½ cup milk or non-dairy milk * See notes.
Method
- Preheat the oven to 350º F. Set the oven rack to the middle setting.
- Add 2 ½ cups gluten free flour blend, 2 tablespoons baking powder, and 1 teaspoon salt to a large mixing bowl. Whisk to blend the dry ingredients.
- Use a cheese grater to shred the cold 5 tablespoons butter into the dry ingredients and then add 2 large eggs into the dry ingredients. You can also cut the cold butter into the flour mixture with a pastry blender.
- Add the 1 ½ cup milk or non-dairy milk to the bowl.
- Note: If you use a stand mixer, you will want to add the eggs and milk to the mixer bowl, then add the flour and cold butter shreds. Use a paddle attachment. Since this dough is wetter than other bread dough recipes, a dough hook doesn't mix it as well.
- Mix the wet and dry ingredients into a dough with a large spoon.
- If you are lining the loaf pan with parchment paper, do this now. If you are not using parchment paper, spray the loaf pan with a gluten free baking spray. Add the dough and spread it out in the pan. (I used an 8.5 inch cast iron loaf pan.)
- I like to wet my fingers to smooth the top of the bread out so it isn't lumpy. Optional: sprinkle the top of the bread with sesame seeds.
- Bake the bread at 350º F for 30-35 minutes. The actual baking time can vary depending on the size and depth of your loaf pan. The top of the bread will be golden brown. If the bread gets too dark, you can put a piece of aluminum foil over the loaf towards the end of baking.
- Remove the loaf from the oven. Insert a toothpick in the loaf. If the toothpick comes out clean, your bread is finished baking. If you see batter or crumbs, the bread will need to bake a little longer. Carefully remove the bread loaf from the loaf pan and place it on a cooling rack to cool.
- Wait until the loaf is thoroughly cooled before you slice the bread. Use a serrated bread knife to cut the bread.
Nutrition
Notes
- I tested this recipe with Cup4Cup. Note: Cup4Cup recently changed its flour blend formulation, and it doesn’t behave as the old formulation. I haven’t had a chance to retest this recipe with the new flour blend formulation.
This bread recipe is based on my gluten-free biscuit recipe, and this flour worked the best in that recipe. You can also use other blends; I tested ten different flour blends in my biscuit recipe. - It is critical to use aluminum-free baking powder, or your bread will taste metallic.
- Add 1 tsp xanthan gum if your flour blend doesn’t contain a binder.
- I used Oatly gluten free oat milk to make this recipe. Any milk or non-dairy milk will work.
- To make this bread dairy-free, use plant-based butter like Smart Balance.
- Store in an airtight container. If you don’t eat it in two days, slice and freeze the remaining bread. I store mine in a freezer-safe zipper bag.
Private Notes
Tried this recipe?
Let us know how it was!
I truly hope you enjoy this recipe. I have been testing and creating gluten-free recipes for over 15 years. Creating gluten-free recipes that do not taste gluten-free is my goal for every recipe. Sometimes I only have to test a new recipe a couple of times, and others it takes multiple times. I do this so you get reliable, delicious results every time!

Mine came out very pale,not browned at all. However the taste was delicious. Definitely like like a biscuit.
Any suggestions on what to do to help with the browning? Have you tried brushing with an egg wash?
Hi Stephanie, You can definitely brush the top with egg. Where was your oven rack positioned? I keep mine in the middle, maybe that has something to do about the golden color?
Just made the GF/Yeast free bread ! We live in Colorado at 7200 ft. It turned out great ! I used goat kifer as the liquid and cooked at 400 degrees! Thank you so much !
That is great to hear, Jeanne. I don’t have experience with high altitude baking, so I am always glad when people post how they do it. It is also good to know that goat kifer worked so well.
I have King Arthur gluten free bread flour will that work with the recipe
Hi Liane, wheat starch blends are the only ones I can’t test because they make me really sick. Please keep me posted if you try this blend.
I want to try this but I don’t see anything about xanthan gum. My gf flour blend does not contain it, how much do I add? I’m guessing about 3/4 teaspoon? thanks!
Hi Elle, 1 tsp is what I would add since it turns out more a cross between a biscuit and bread.
Hi…please could let me know how much flour you use in grams? Thank you 🤩
Hi Sam, That is pretty tough because every gluten free flour blend has a different weight. Which one are you using? If it is one I have on hand, I can measure the weight.
Hi, I’ll make my own usually using sorghum flour, brown rice flour and doves farm rice flour (blend of white and brown). Thank you
You are very welcome. I haven’t tested this recipe with a starch free blend, so please keep me posted how it turns out.
Finding a gluten-free bread that actually tastes good can be a challenge, but this recipe nailed it! It turned out incredibly fluffy and delicious. My daughter is celiac and is super picky about GF bread, but she and her husband both raved about it. It was so good that I’m already whipping up my second batch. Highly recommend!
I am so glad your daughter loves this bread recipe. Thank you so much for coming back and leaving a review.
can you use bobs red mill gluten free flour blend for this recipe?
Hi Barb. Which one? The Bob’s 1:1 in the light blue bag doesn’t work with yeast recipes. Their red bag blend does, but it has bean flour, which may have a little aftertaste.
Just made this bread. I sprinkled Everything Bagel seasoning over the top. It took over 50 minutes to bake through. It’s good, but definitely more like a biscuit ..which isn’t a bad thing!
That is a great idea to use the Everything Bagel topping. It sounds delicious.
I finally broke down and bought the flour to make this. Now kicking myself for waiting so long! This was easy to make and absolutely delicious! I cut and froze slices and took them out as needed. I took out 4 slices and used over a week and they were still soft. Thanks for this amazing recipe!
Hi Brenda, You made my day. I am so glad you love this no-yeast bread. I have been thinking to add more no-yeast recipes to the blog since so many readers seem to prefer not using it. Do you think folks would want a no-yeast naan recipe? What other no yeast recipes would you like to see me create?
yes, please! a focaccia would be great.
It is on my list!
Easy to make and taste is good but was more the consistency of biscuits not loaf bread. I may try again with some almond oil. Do you think that would help?
Hi Deb, Yes, the bread is a cross between a biscuit and bread. I haven’t tested the recipe using oil, so I am unsure. There are a ton of reader comments, it is possible someone mentions using oil as a swap for the butter.