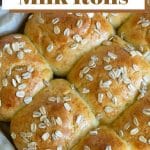
These honey-sweetened, gluten-free dinner rolls are pillowy-soft and almost melt in your mouth. They make the best dinner rolls or slider rolls. I share easy step-by-step directions with photos to walk you through making this incredible recipe.
This post may contain affiliate links. Please read our Disclosure Policy.
❤️ Sandi’s Recipe Summary: In a Nutshell
The Quick Bite: These gluten free honey dinner rolls are pillowy, yeast-risen rolls designed for dinner sides or slider buns. Unlike dessert “honey buns,” these are savory-leaning rolls with a soft, springy crumb that holds up perfectly to slider fillings. They are much easier to make than traditional milk-and-honey recipes, requiring only a single rise.
This new recipe is for my readers who love fluffy, soft dinner rolls and slider buns. I am talking game-day sliders that taste incredible. I tested this recipe multiple times to get it right, so you don’t have to waste ingredients. These rolls freeze well, so you can make a big batch and have some for later.
I was inspired to create a gluten-free version of this recipe after seeing these Milk Honey Rolls in an old issue of Better Homes and Gardens. Their recipe is complex; some ingredients must be cooked. I simplified the recipe, making it much easier to make in less time. These rolls are lightly sweetened with honey, but are not dessert rolls or honey buns.
If you enjoy baking gluten-free yeast breads for meals, you may also like these other gluten-free bread recipes. If you are looking for a faster, neutral-flavored roll with air fryer instructions, try these everyday Gluten-Free Dinner Rolls.

Testing Notes From My Kitchen
I only tested this recipe with Authentic Foods Steve’s Gluten-Free Bread Blend. It is my go-to flour blend for bread and rolls that require shaping. (Plus, it is like magic in a bag.) Several readers did test Bob’s Red Mill 1:1 and King Arthur Measure for Measure in this recipe. Unfortunately, these brands don’t say these blends don’t work with yeast on the bags, but these blends clearly state on their websites that they are not made for yeast recipes.
Readers using these blends commented that the buns turn out dense. If you want to use a 1:1 blend, I recommend Namaste or Cup4Cup, and start with 1/4 cup less milk. Check the dough consistency and add more flour if needed.

Ingredient Notes:
For the full list of ingredients and amounts, please go to the recipe card below.
- Gluten-Free Flour Blend – I have only tested this blend with the Authentic Foods Steve’s GF Bread Blend. Every flour blend performs differently, and many 1:1 blends do not work in yeast recipes. Two important notes: Ensure the blend you use is compatible with yeast, and if you use a different flour blend, start with less water. The Steve’s Bread Blend has a much higher moisture need than typical flour blends. Read Why Gluten-Free Flour Blends Vary to learn more. That being said, several readers left comments that they used Bob’s Red Mill 1:1, and it worked, though the rolls were not quite as fluffy.
- Binder – If your blend doesn’t contain a binder, you will need to add 1 teaspoon xanthan gum.
- Yeast – Use active dry yeast. I have not tested instant yeast, but it should work as well. Not all yeast is gluten-free. Avoid using Red Star Platinum.
- Honey – I highly recommend using inexpensive honey. There is no need to use expensive artisanal honey in this recipe.
- Milk – I used regular milk in this recipe. I have not tested plant-based milk, but a few readers have and had great success.
- Butter – Use unsalted butter.
- Eggs – Size large.
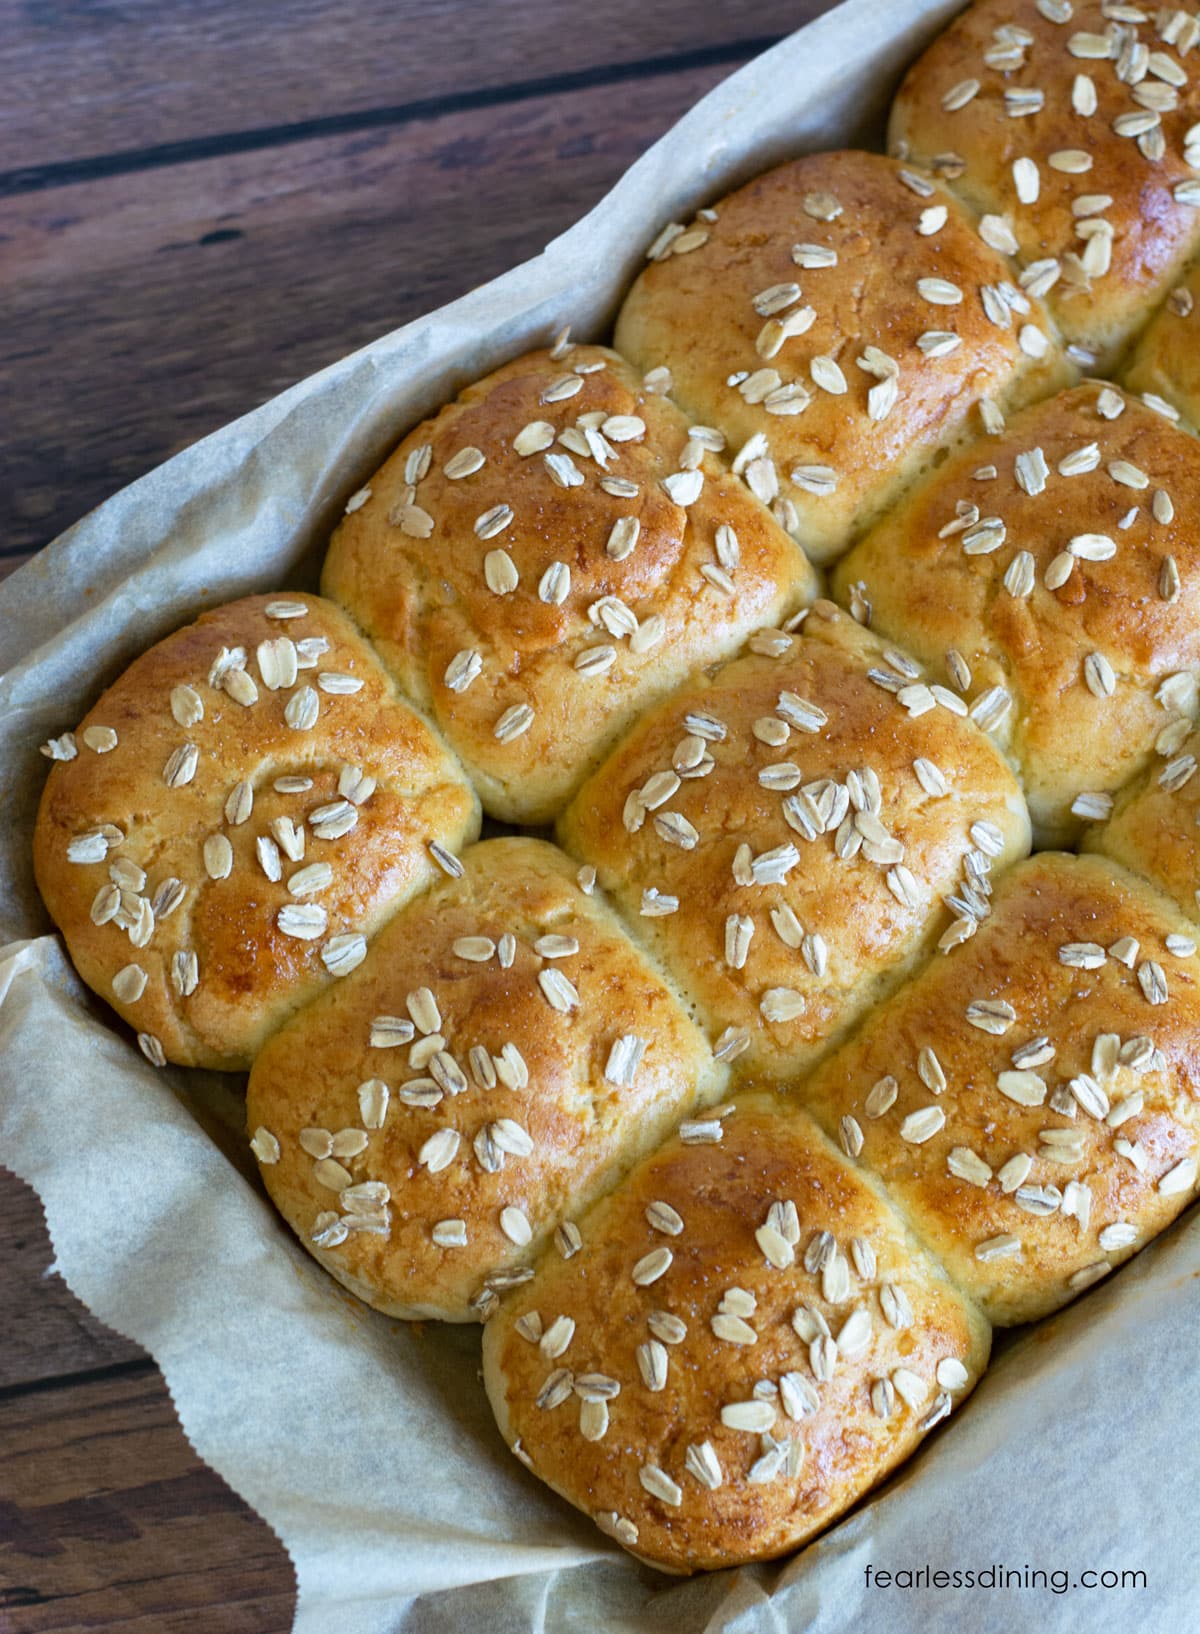
- Topping – Certified gluten-free rolled oats. I think sesame or poppy seeds would be even better.
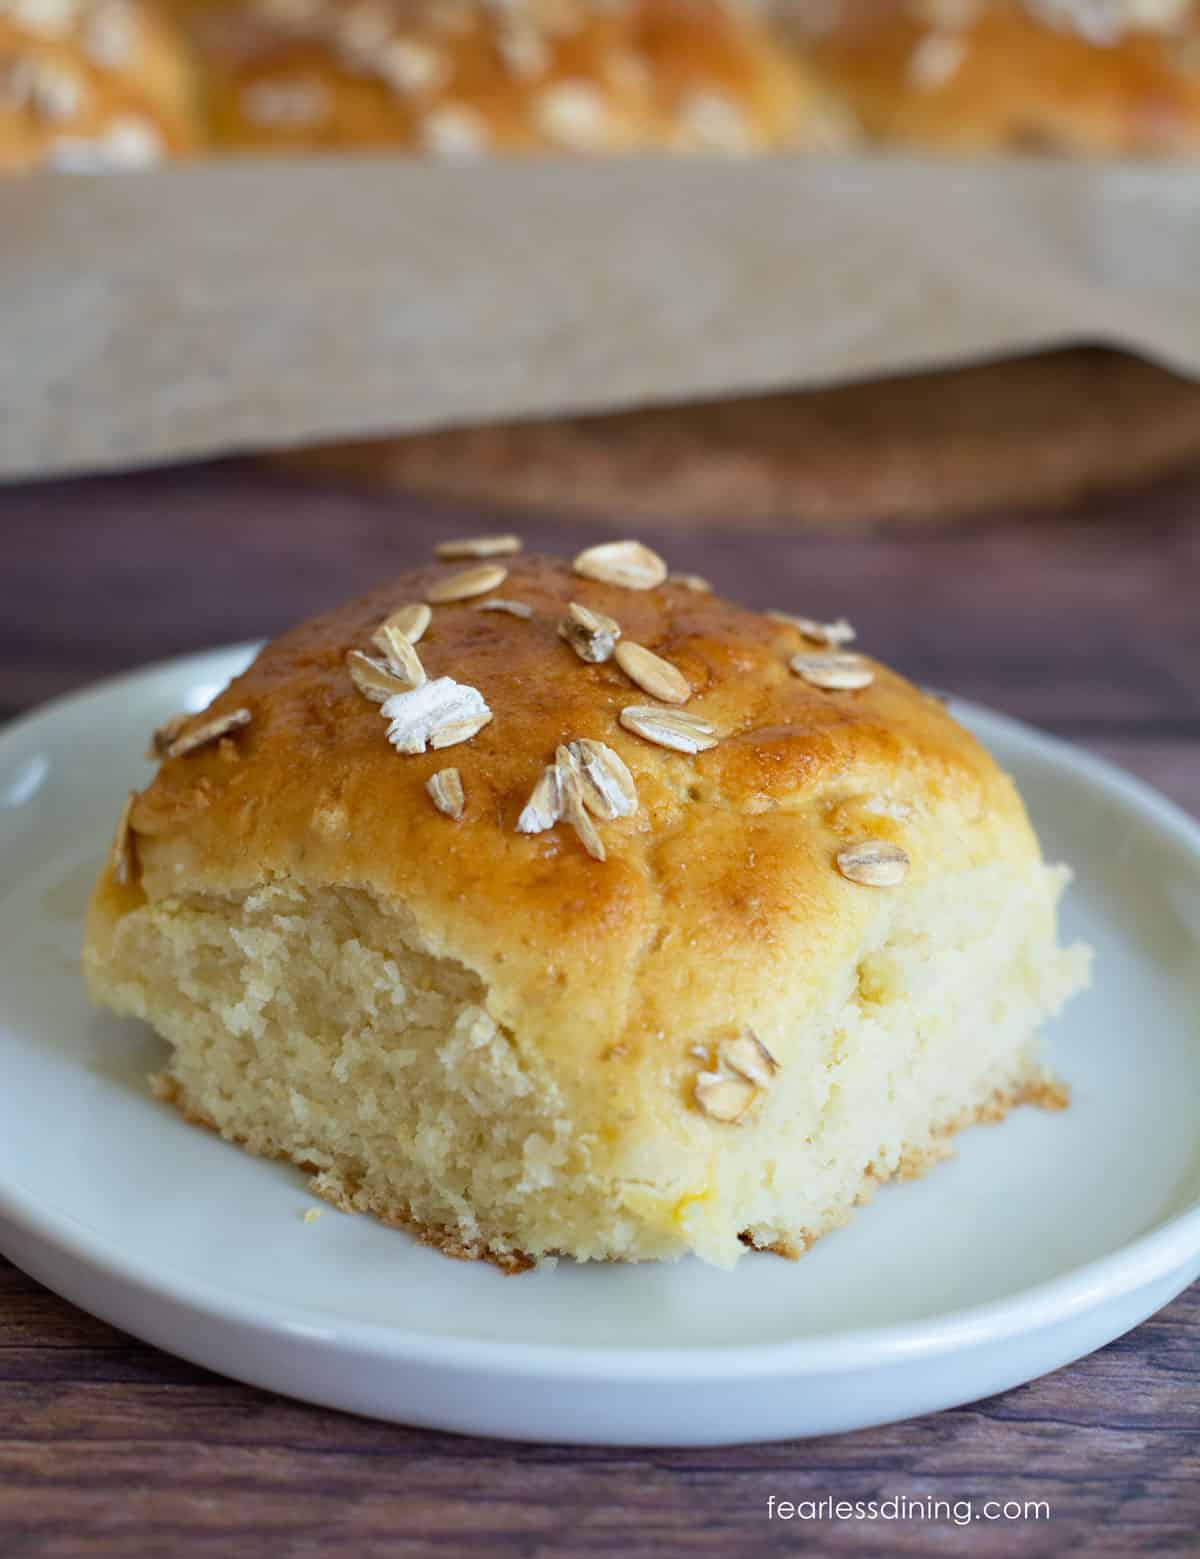
These rolls are fluffy and springy. If you press down on them, they puff right back up! If you need a no-yeast recipe, try this easy Gluten-Free Bread Without Yeast.
How to Make Gluten-Free Dinner Rolls (or Slider Buns)
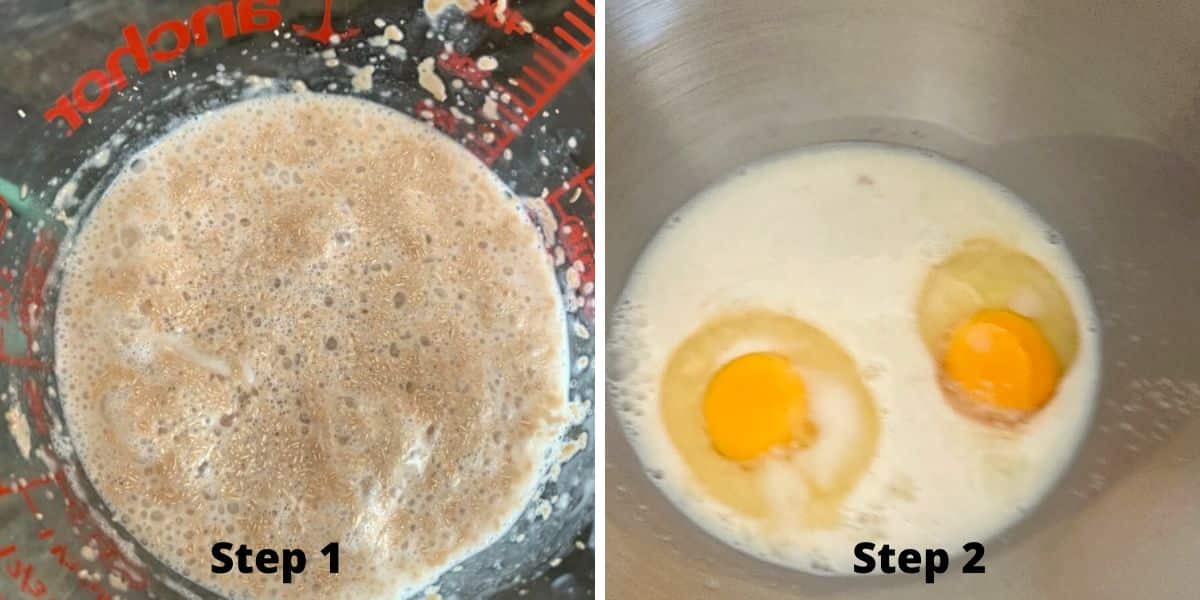
Step 1: Add the milk and honey to a glass dish or measuring cup. Heat in the microwave for 25 seconds. Do not allow the liquid to exceed 110°F. Stir to combine the honey and milk. Add the yeast and let it sit for 5 minutes until it gets bubbly.
Step 2: Add the yeast mixture, melted butter, and eggs to the stand mixer. Mix on low speed until they are blended.
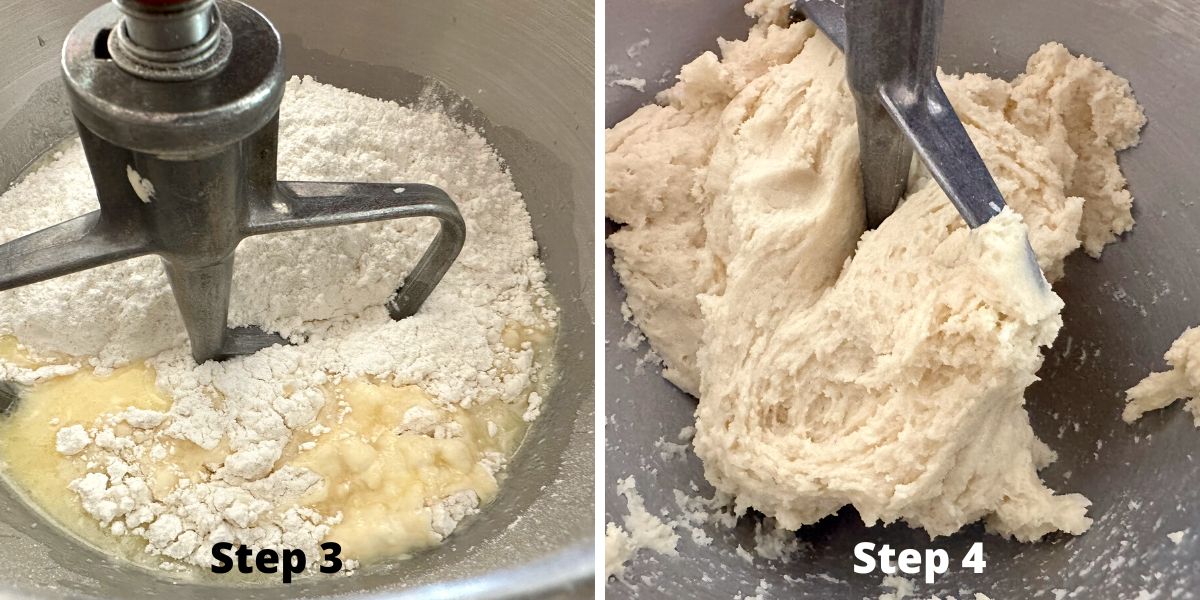
Step 3: Add the flour and salt to the stand mixer. Mix on low and gradually increase to medium speed.
Every gluten free flour blend will be different due to its grain-to-starch ratio. Always use your best judgment and add more flour if your dough is wet and hard to shape.
Step 4: The dough forms well with this flour blend.
Email This Recipe To Me!
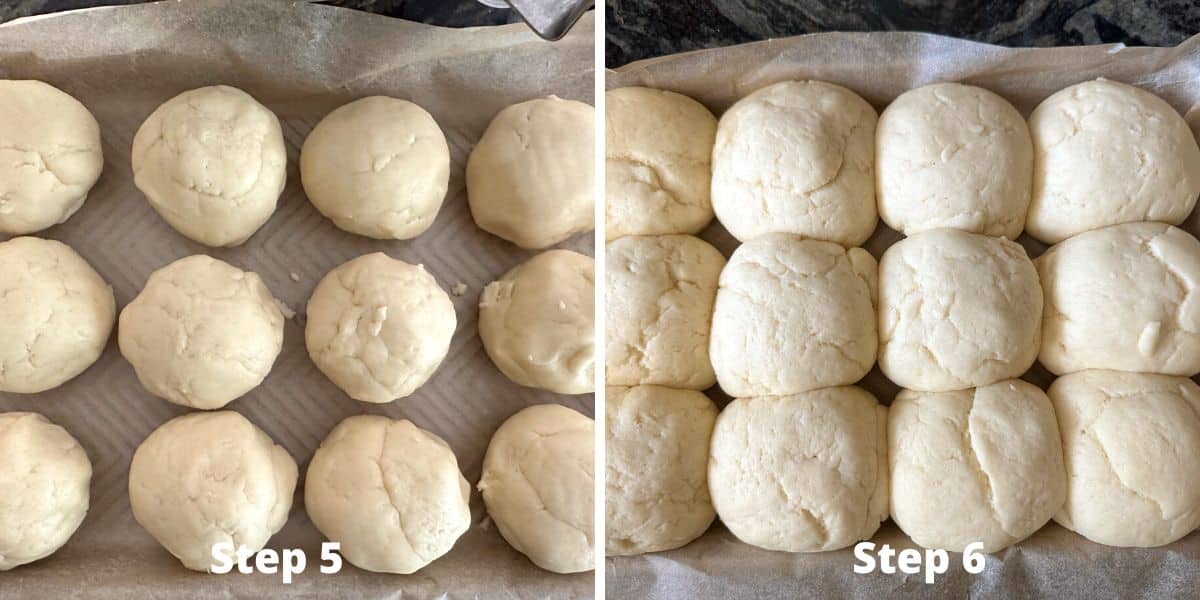
Step 5: Use your hands to tear off some of the dough and roll it into balls. Place the dough balls on a parchment paper lined baking sheet. I used a 1/4 sheet pan, but a 9×13 pan will also work well.
Step 6: Loosely cover the rolls with plastic wrap and allow them to rise. As mentioned in the Tips for Success section. I let my rolls rise in a warm oven. Rise the rolls for 40-45 minutes. You can see how much my rolls rose.
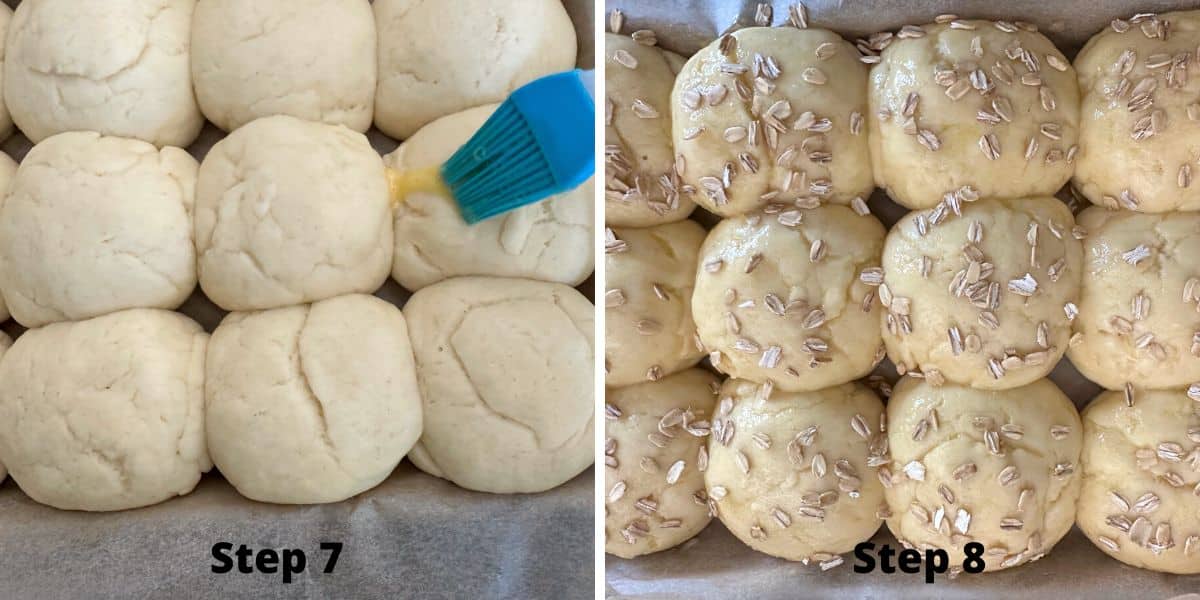
Step 7: Use a whisk to mix the remaining egg in a small dish. Use a pastry brush to brush each roll with the egg wash.
Step 8: The original recipe called for rolled oats in the topping. I would recommend using sesame seeds instead. The rolled oats were slightly crunchy, taking away from the rolls. If you do use rolled oats, use certified gluten free oats only.
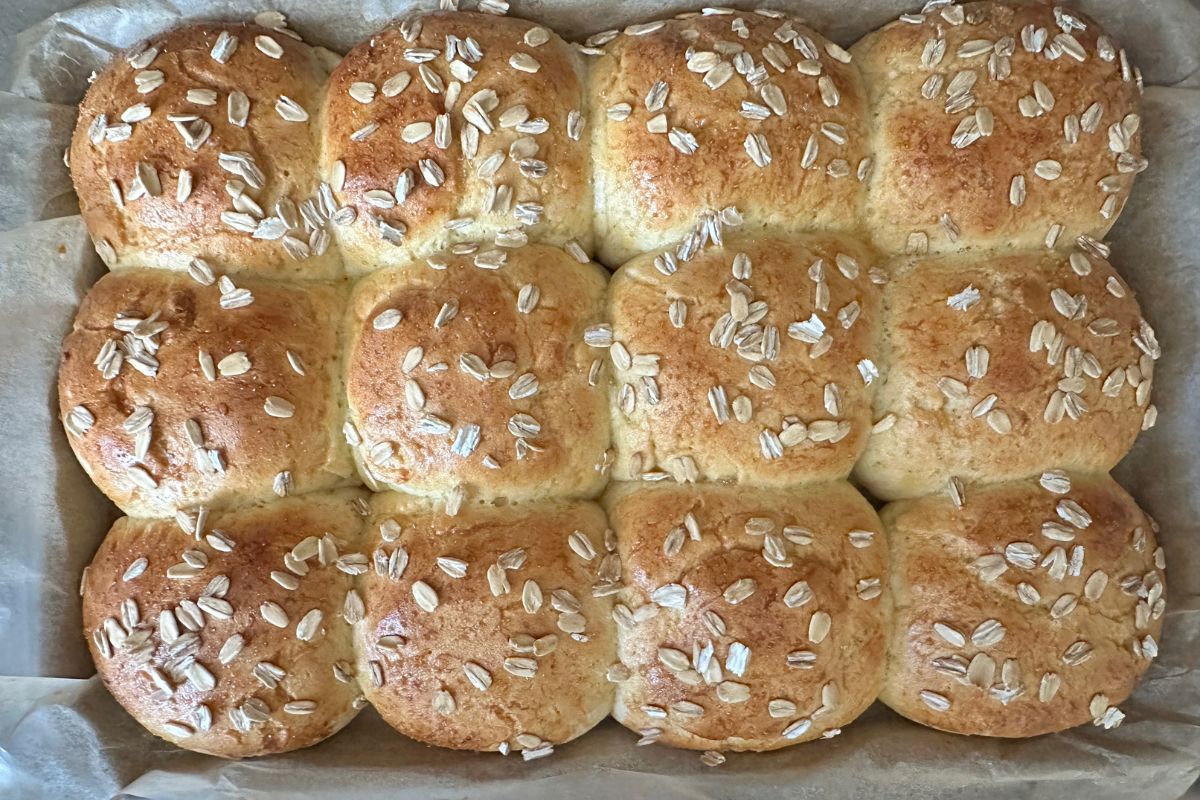
Step 9: Bake the honey rolls at 350º F for 20-25 minutes. The final baking time will vary depending on the size of the rolls you make.
Step 10: Transfer the rolls to a cooling rack and let cool slightly before serving.
Tips For Success:
- You only get one good rise when baking gluten free. It is important to shape your rolls before you rise the dough.
- Rise your rolls in a warm oven. I preheat the oven to 200º F. I then turn the oven off, loosely cover the rolls with plastic wrap, and place them in the warm oven. This may not be needed in the hotter summer months, but this is how I tested the recipe.
- Always ensure you are using a gluten free flour blend that works with yeast. Many brands do not and will state this on the bag or their website. This gluten-free flour blends article talks more about this, and I share a list of blends that will work with yeast.
- Store it the right way! Learn How to Store Gluten-Free Bread so you can keep it fresh.
I have a lot of resources to help you make incredible gluten free rolls and bread. If you need more tips, read my Gluten-Free Bread Troubleshooting Guide.
Slider Filling Ideas:
If you are making sliders, you want delicious filling ideas! Try some of these:
- Crispy Pulled Pork – Makes great slider filling!
- Pickled Onions – Easy to make, and they add so much flavor!
- Cheese – Always verify that your shredded cheese is gluten-free.
- Barbecue Sauce
- Sourkraut
- BBQ Chicken Sliders
Frequently Asked Questions:
You can swap the honey for maple syrup at a 1:1 ratio, though it will slightly alter the flavor profile. I do not recommend swapping honey for granulated sugar in this specific recipe. Honey attracts moisture, which gives these gluten-free rolls their signature “melt in your mouth” texture and helps prevent drying out.
Most yeast is gluten-free. It is still best to double-check the brand you use to ensure it is gluten-free. Note that Red Star “Platinum” is NOT gluten-free!
While these are incredible as a side for holiday dinners, their sturdy structure makes them the perfect gluten-free slider buns. They hold up beautifully to pulled pork, BBQ chicken, or even small burger patties without crumbling.
Store the leftover rolls in an airtight container. Gluten-free doesn’t keep fresh for long, so I highly recommend storing leftover rolls in a freezer-safe zip bag in the freezer. Microwave the rolls for 30 seconds to thaw them.

Serve these rolls with Apple Butter or this Kumquat Honey Butter.
More Gluten-Free Bread Recipes:
If you want gluten-free rolls with flavors like whole wheat, try these Gluten-Free Yeast Rolls.
- The best Gluten-Free Bread Machine Bread – This recipe makes a fluffy loaf of sandwich bread.
- Easy Gluten-Free Oat Bread – This dough would make great oat rolls, too!
- Fluffy Gluten-Free Hamburger Buns – These are perfect for hamburgers and sandwiches.
- Gluten-Free Garlic Knots – These buttery rolls are perfect for any meal.
Love This Recipe?
If you made and enjoyed this recipe, I would be incredibly grateful if you could leave a comment below. Please include which flour blend you used. This will help others know this recipe is delicious. Thank you!
Fluffy Gluten Free Milk Honey Rolls
Ingredients
- 4 cups gluten free flour blend (563 grams) * See Notes! (Weight for Steve's Blend Only!)
- 1 ¼ cup milk or non-dairy milk * See Notes
- 2 teaspoons active dry yeast *See Notes
- ⅓ cup honey
- ½ cup unsalted butter melted
- 2 large eggs
- 1 teaspoon salt
- 1 egg for the eggwash
Method
- Add the 1 ¼ cup milk or non-dairy milk and ⅓ cup honey to a small glass dish. Heat it in the microwave for 25 seconds. You do not want the liquid hotter than 110º F. Stir to mix the honey and milk. Add the 2 teaspoons active dry yeast and let it sit for 5 minutes until it gets bubbly.
- Add the yeast mixture, melted ½ cup unsalted butter, and 2 large eggs to the stand mixer. Mix on low speed until they are blended.
- Add the 4 cups gluten free flour blend (563 grams) and 1 teaspoon salt to the stand mixer. Mix on low and gradually increase to medium speed.
- Note, you can also mix this all by hand.
- Use your hands to tear off some of the dough and roll it into balls. Place the dough balls on a parchment paper-lined baking sheet. I used a 1/4 sheet pan, but a 9×13 pan will also work well.
- Loosely cover the rolls with plastic wrap and allow them to rise. Rise the rolls for 40-45 minutes. You can see how much my rolls rose.
- Rise your rolls in a warm oven. I preheat the oven to 200º F. I then turn the oven off, cover the rolls loosely with plastic wrap, then place them in the warm oven. This may not be needed in the hotter summer months, but this is how I tested the recipe.
- Use a whisk to mix the remaining egg in a small dish. Use a pastry brush to brush each roll with the egg wash.
- Bake the honey rolls at 350º F for 20-25 minutes. The final baking time will vary depending on the size of the rolls you make.
- Move the rolls to a cooling rack and allow them to cool a little before serving.
- Store the leftover rolls in an airtight container. Gluten free doesn't keep fresh for long, so I highly recommend storing leftover rolls in a freezer-safe zip bag in the freezer. Microwave the rolls for 30 seconds to thaw them.
Nutrition
Notes
- I only tested this recipe with Authentic Foods Steve’s GF Bread Blend. I will test other blends, but note this is by far the best blend to use. Note: Cup4Cup and Namaste should work, but start with 1/4 cup less milk and add more flour as needed.
- I used whole milk; I haven’t tested any plant-based milk yet.
- I have not tested rapid yeast in this recipe.
- Verify your yeast is gluten free. Note: Red Star Platinum is not gluten free.
- It is critical to shape your rolls before the rise. Gluten free dough only gets one good rise.
- Store in an airtight container. Freeze if you don’t finish them; they will stay fresh longer in the freezer.
Private Notes
Tried this recipe?
Let us know how it was!
I truly hope you enjoy this recipe. I have been testing and creating gluten-free recipes for over 15 years. Creating gluten-free recipes that do not taste gluten-free is my goal for every recipe. Sometimes I only have to test a new recipe a couple of times, and others it takes multiple times. I do this so you get reliable, delicious results every time!

I made this recipe using King Arthur GF Bread Flour that is 1:1 and they turned out great! The rolls might not have been as fluffy as yours but they were great consistency. The next time I make these I am going to make 10 rolls instead of 12 and flatten then a little so that they will be like a slider bun as they were the perfect consistency/texture for slider buns. I will also bake them on a cookie sheet rather than in a pan.
I am glad to hear the KA Bread Flour worked in this recipe. I can’t test it because I seem to react to wheat starch, even though it is gluten free. You may want to add a little more milk to the dough to see if they rise a little more.
Not sure how to remedy the issue I had. Made these for Christmas. The flavor was marvelous, but they came out pretty dense. Definitely not light and fluffy. I followed the recipe except for the rise. I let mine rise for 1 hour. I live at 6000 feet, so it always needs a few extra minutes.
Thank you for your recipes.
Hi Debbie, I am happy to troubleshoot. What flour blend did you use?
Steve’s Blend, and I weighted it.
This is my first time baking gluten free rolls so I’m not sure how fluffy they should be but mine are a little dense. Not sure if I over proofed them since I lost track of time and proofed for about an hour.
The recipe didn’t say how long to mix the dough and mine was very wet and had to add about 3/4 more flour.
I used King Arthur GF Measure to Measure and coconut milk (So Delicious) in the carton not canned and vegan butter. I sprinkled them with Everything Bagel Seasoning instead of oats.
I wish I could post a photo but they are tasty and look amazing.
Hi Stacy, Thank you for your note. Unfortunately, King Arthur Measure for Measure and some of the other 1:1 blends do not work in yeast recipes. I wish they put this on the bag, but they do state this on their website. This blend doesn’t rise well, so it makes sense you had denser rolls. You did the right thing to add more flour. I have a huge resources section and I wrote a few articles about flour blends, etc. that will be helpful for you. https://www.fearlessdining.com/gluten-free-resources/
Very easy instructions to follow. The taste is good but my version did not render fluffy rolls. They are a tad denser than expected. My plan is to try again with a different flour blend (I used Bobs Red Mill GF 1:1). I’m also at 4k ft elevation so wondering if that impacted rising of dough. give this recipe a shot. It’s worth the little time it takes to have pretty tasty rolls. I’ll give it more stars if I can get a tad lighter texture.
Hi Kate, you have a lot of things going on, so let’s take this step by step. First, Bob’s 1:1 does not work well in yeast recipes. I wish it stated it on the bag, but they do list this on their website. It is important to use a flour blend that works with yeast recipes. You can read a lot more about which blends in this article https://www.fearlessdining.com/the-best-gluten-free-flour/ Altitude does play a big roll. I do not have experience with high altitude baking, but I did ask my Facebook group for their tips. I put them all together. I hope some of these are helpful for you: My cakes and cookies need to be baked at 375 not 350. What works best where I am is the 25/25 method. Bake at 25 degrees higher than the recipe – this helps the outside cook faster as it rises and the middle won’t sink in later. Also, bake for 20-25minutes less. Depending on what you’re making you can also add a little extra flour or baking soda. But for baked goods like cakes, muffins etc I add a little extra liquid and usually an extra egg and I cut back a little on baking powder or soda (so if it says 1 1/2 tsp baking soda I’ll do 1 tsp). I also bake at a slightly higher temperature so instead of 350F I’ll do 370F for the first part then drop it back down to 350F.
Ingredients say, 3 large eggs but that one is for egg wash then directions say to add 3 large eggs to recipe. Is it two eggs in the batter and one for egg wash? Or three eggs in the batter?
Hi Shawna, if you look down in the recipe directions, it specifies two eggs go into the mixer. Maybe you printed this recipe a long time ago to make?
This is by far the best gluten free roll recipe I have tried! I used King Arthur 1:1 flour, had to add a little extra flour, around half a cup, to get a manageable dough. They freeze great also. Thank you for this recipe!
Hi Shawna, That is so interesting you had good luck with KA 1:1. That blend typically doesn’t work well with yeast recipes. I am truly glad it worked out.