
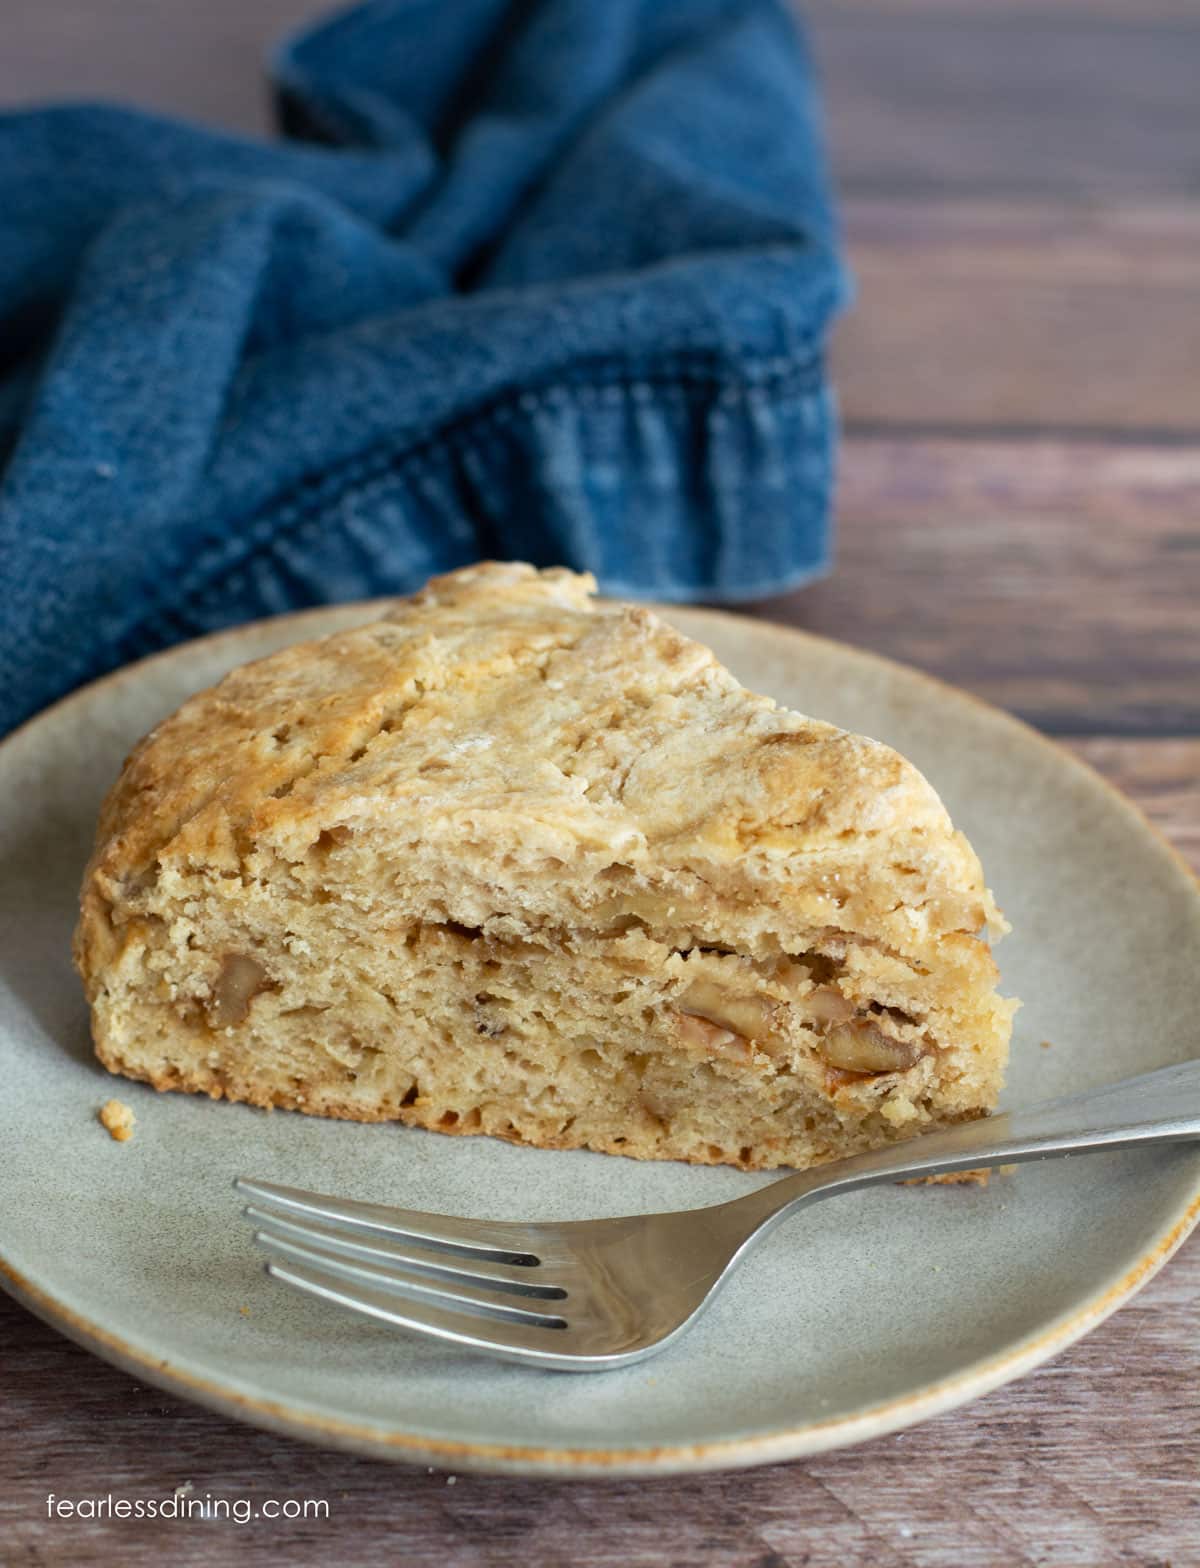
These big, gluten-free maple walnut scones are filled with fresh, buttery maple flavor. They are flaky and delicious, making them the perfect recipe to celebrate the fall season. Serve them with tea, coffee, breakfast, or brunch. The sky is the limit with this incredible gluten-free scone recipe. I include a dairy-free version as well.
This post may contain affiliate links. Please read our Disclosure Policy.

If you have been reading my blog, you know I have a love affair with scones. They are my go-to choice for serving with breakfast and brunch; I have loaded them into my kids’ lunchboxes and snacked on them with a cup of coffee in the afternoon.
I have so many fun flavors of scones that it is hard to pick a favorite. These gluten free maple walnut scones are at the top of my favorites list, with these Gluten-Free Orange Scones and these Gluten-Free Strawberries and Cream Scones. I can’t wait to hear what you think of this new recipe!
If you want more of my incredible scone recipes, I have them all on this gluten-free scone recipes page. If you are new to making scones, check out my Gluten-Free Scones Guide.
Ingredient Notes:
For the full list of ingredients and amounts, please go to the recipe card below.
- Gluten-Free Flour Blend – I tested this recipe with King Arthur Measure for Measure and Bob’s Red Mill 1:1 Blend. Other blends should also work well, but you may need to adjust the amount of liquid or flour depending on the moisture level of your scone batter.
- Xanthan Gum – If your blend doesn’t contain a binder, add 3/4 teaspoon of xanthan gum. If you prefer a gum-free option, use my Gluten-Free All Purpose Flour Blend recipe, which uses psyllium husk powder.
- Baking Powder – Use aluminum-free baking powder.
- Butter – Use unsalted butter.
- Maple Syrup – For this recipe, please use 100% natural maple syrup.
- Egg – Use a large egg.
- Milk or Non-Dairy Milk – I used Oatly Simple oat milk to make this recipe. Milk and other types of non-dairy milk will also work well.
If you love baking with maple syrup, you will also want to try my Gluten-Free Maple Pecan Loaf Cake or these Gluten-Free Maple Cookie Bars recipes.

A Note From My Kitchen
This gluten-free scone recipe went a little viral on Facebook over the fall, and I know why. I test my scones extensively to make sure they turn out perfectly every time. The most important takeaways are that you need very cold butter to make steam pockets in the dough. These flaky up while the scones bake. The second piece of advice is to monitor your dough before shaping and baking. Every blend varies, and I share tips on how to adjust your dough consistency if you use a blend I haven’t tested.
How to Make Gluten-Free Maple Scones (Step-By-Step)
Place the butter in the freezer for 15 to 20 minutes before making this recipe. Preheat the oven to 350°F and ensure the oven rack is positioned in the middle of the oven.
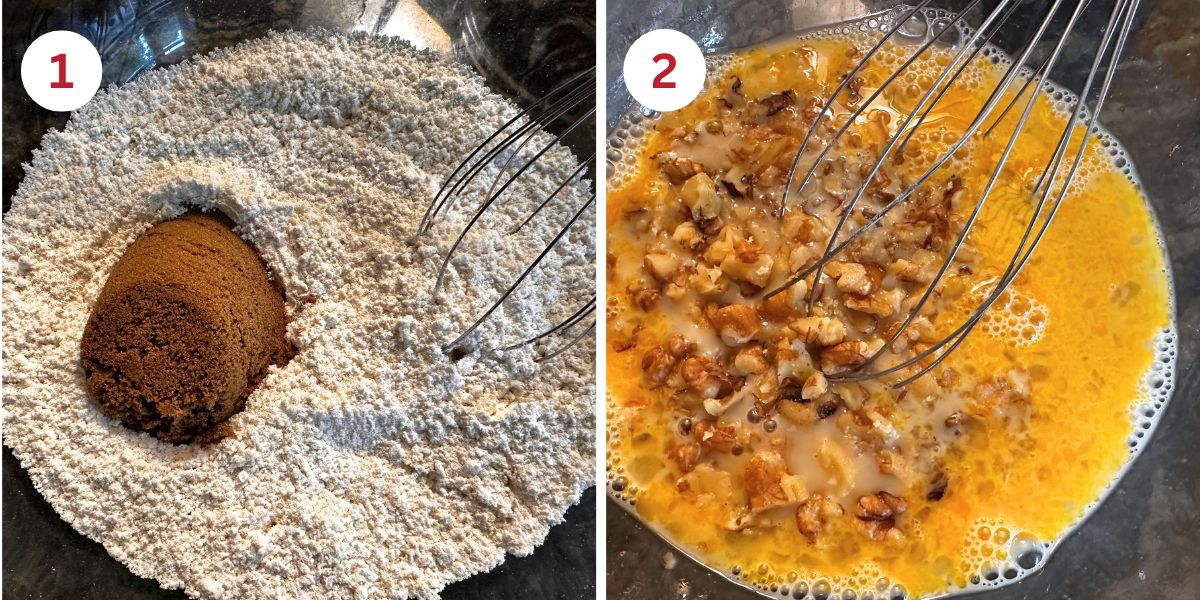
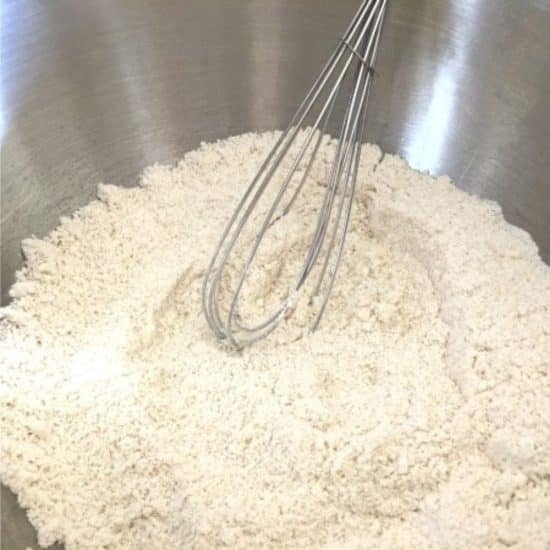
Step 1: Add the dry ingredients to a large mixing bowl. This includes gluten free flour, brown sugar, baking powder, and salt.
Step 2: In a medium-sized mixing bowl, add the egg, non-dairy milk or milk, maple syrup, and walnuts. Whisk to blend.
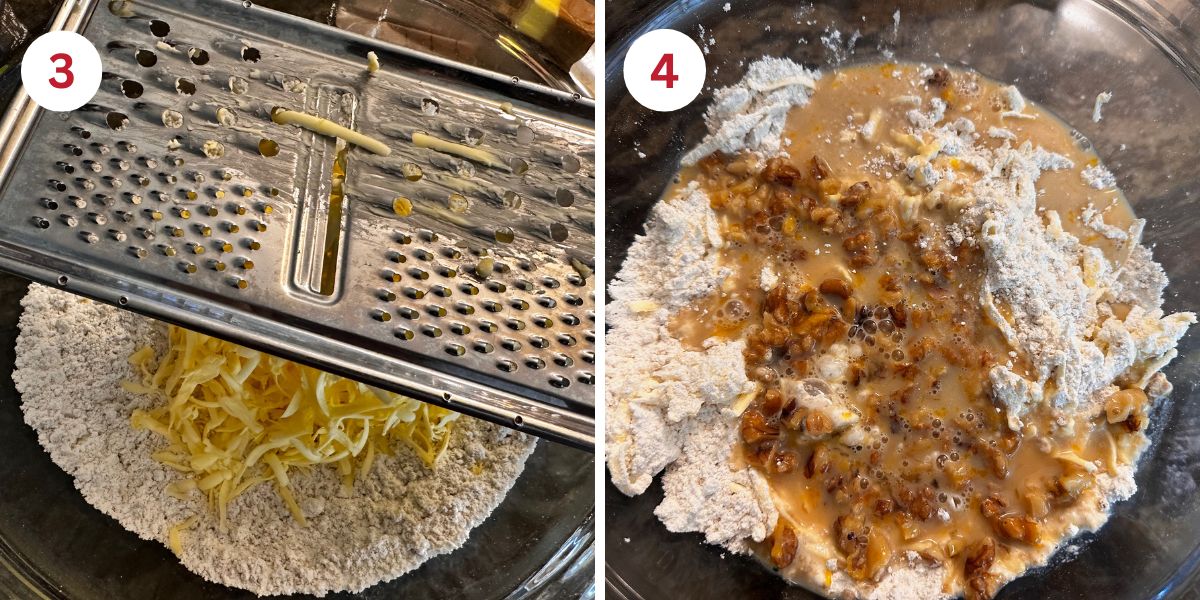
Step 3: Grate the frozen butter into the dry ingredients using a cheese grater. Use a large spoon to scoop and drop flour on the butter shreds. This will help coat them so they don’t all stick together when you mix them into the flour mixture. A pastry blender is another great way to cut the butter into the dry ingredients.
Step 4: Pour the wet ingredients into the dry ingredients. Mix them into scone dough. If your dough seems wet, add more flour, and if your dough seems dry, add more milk. Each flour blend has a different ratio of grain and starch, so adjustments are often needed. Read Why Gluten-Free Flour Blends Vary to learn more about this.
Email This Recipe To Me!
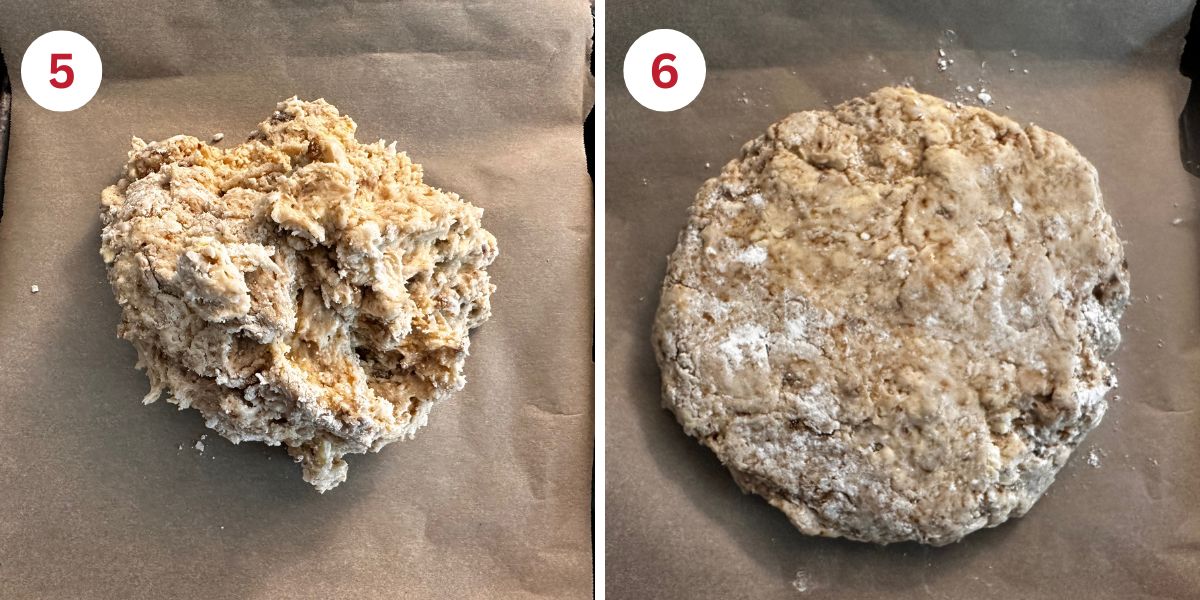
Step 5: Place the scone dough onto a piece of parchment paper. I prefer to use parchment paper instead of a greased cookie sheet because it keeps the dough from getting oily on the bottom.
Step 6: Shape the dough into a 1 1/2 to 2-inch disc. Place the parchment paper with the dough onto a cookie sheet.
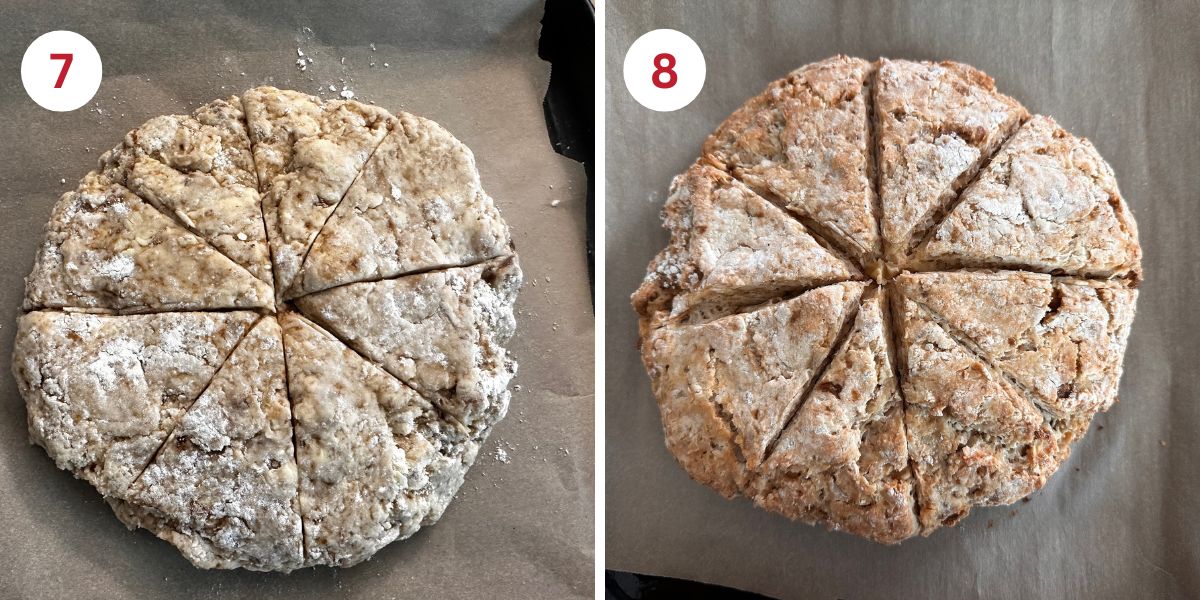
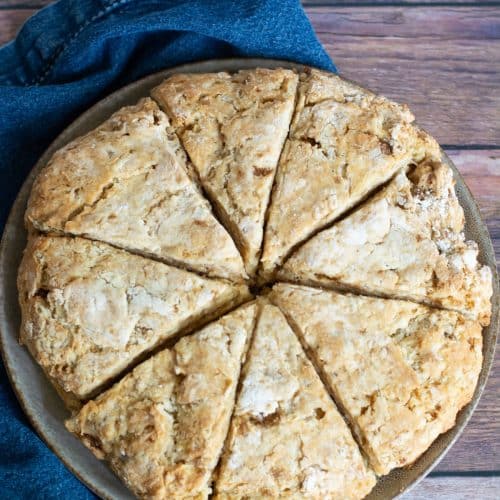
Step 7: Use a sharp knife to score the scone dough. I cut about 1/4 way into the dough. Place the scones into the oven. Bake for 25 to 30 minutes, depending on the thickness of your scone dough circle.
Step 8: The scones are done when they are slightly golden on top and firm to the touch. Remove them from the oven and let them sit on the pan for five minutes.
Step 9: Use a sharp knife to cut each score line through to make the scone wedges. Place each biscuit onto a wire cooling rack. When they have cooled, enjoy.
Tips For Success
1. Use frozen butter. It helps make steam pockets so you get lots of those flaky layers that scones are famous for.
2. You can make these scones wedge-shaped as I did, or use biscuit cutters to make them round. If you use biscuit cutters, do NOT twist the cutter. This will seal the edges and prevent your scones from rising.
Frequently Asked Questions:
This maple walnut scone recipe can be adapted to use any type of nut you prefer. You can also make them nut-free and omit the walnuts.
You can add raisins, chocolate chips, or other dried fruits to this scone recipe.
Gluten-free tends to spoil quickly, so if you don’t eat them all, store them in an airtight container in the refrigerator.
Yes! My gluten free scones freeze extremely well. I place cooled scones into a quart-sized freezer-safe zipper bag. They thaw on the counter or in the microwave for 30 seconds.
These Gluten Free Buckwheat Scones with Honey are a nice cross between a sweet and savory scone.
More Gluten-Free Scone Recipes:
Need more scones in your life? I have lots of great gluten-free scone recipes to make. They are delicious with breakfast!
- Gluten Free Cinnamon Apple Scones
- Easy Gluten Free Blueberry Scones
- Gluten Free Pumpkin Scones
- Gluten Free Oat Scones Recipe
- Holiday Gluten-Free Fruitcake Scones
Love This Recipe?
If you made and enjoyed this recipe, I would be incredibly grateful if you could leave a comment below. Please include which flour blend you used. This will help others know this recipe is delicious. Thank you!
Easy Gluten-Free Maple Walnut Scones
Ingredients
- 2 cups gluten free flour blend see notes
- ½ cup brown sugar
- 2 teaspoons baking powder aluminum-free
- ¼ teaspoon salt
- 6 tablespoons unsalted butter frozen or very cold
- ⅓ cup maple syrup use pure maple syrup
- 1 large egg
- ¾ cup dairy-free or regular milk
- ⅓ cup walnuts roughly chopped
Instructions
- Place the butter in the freezer for 15-20 minutes before making this recipe. Preheat the oven to 350º F and ensure the rack is set in the middle position.
- Add the dry ingredients to a large mixing bowl. This includes 2 cups gluten free flour blend, 1/2 cup brown sugar, 2 teaspoons baking powder, and 1/4 teaspoon salt.
- In a medium-sized mixing bowl, add the 1 large egg, 3/4 cup dairy-free or regular milk, 1/3 cup maple syrup, and 1/3 cup walnuts. Whisk to blend.
- Grate the frozen 6 tablespoons unsalted butter into the dry ingredients using a cheese grater. Use a large spoon to scoop and drop flour on top of the butter shreds. This will help coat them so they don't all stick together when you mix them into the flour mixture.
- Note: If you prefer, you can also use a pastry blender to cut the butter into the dry ingredients.
- Pour the wet ingredients into the dry ingredients. Mix them into scone dough. The dough should be soft, but not too wet or sticky. Every flour blend varies. If your dough is too wet, add more flour. If the dough is too dry, add more milk and then chill the dough again.
- Place the scone dough onto a piece of parchment paper. I prefer to use parchment paper instead of a greased cookie sheet because it keeps the dough from getting oily on the bottom.
- Shape the dough into a 1 1/2 to 2-inch thick disc. Place the parchment paper with the dough onto a cookie sheet.
- Use a sharp knife to score the scone dough. I cut about 1/4 way into the dough. Place the scones into the oven. Bake for 25-30 minutes, depending on how thick you make your scone dough circle.
- The scones are done when they are slightly golden on top and firm to the touch. Remove them from the oven and let them sit on the pan for five minutes.
- Use a sharp knife to cut each score line through to make the scone wedges. Place each biscuit onto a wire cooling rack. When they have cooled, enjoy.
Notes
- I tested this recipe with both King Arthur Measure for Measure and Bob’s Red Mill 1:1 flour blends. Other blends should work, but you may need to tweak the amount of liquid or dry ingredients depending on the dough.
- If your flour blend doesn’t contain a binder, add 3/4 teaspoon of xanthan gum.
- I tested this recipe using oat milk. Regular milk and other types of non-dairy milk will work.
- Gluten-free tends to spoil quickly, so if you don’t eat them all, store them in an airtight container in the refrigerator. Yes! My gluten free scones freeze extremely well. I place cooled scones into a quart-sized freezer-safe zipper bag.
- They thaw on the counter or in the microwave for 30 seconds.
Email This Recipe To Me!
SPECIAL NOTE
Please know that every gluten free flour blend has a different starch to grain ratio. If you use a blend I didn’t test, my rule of thumb is to add more flour if your dough or batter is wet and add more liquid if the dough or batter is too dry!
Nutrition
Nutrition Disclaimer
Nutritional information is an estimate provided to you as a courtesy. You should calculate the actual nutritional information with the products and brands you are using with your preferred nutritional calculator.
Gluten-Free Related Reading
Gluten-free baking is like a science experiment. There are so many things you need to understand the different components of baking without gluten. My Gluten-Free Resources Section is here to help teach you the tools you need to know to become a confident gluten free baker.
My Best Gluten-Free Baking Tips For Better Baking!
Why Binders Are Important In Gluten-Free Baking

The Best Gluten Free Flour Blends – And how to use them!
I truly hope you enjoy this recipe. I have been testing and creating gluten-free recipes for over 15 years. Creating gluten-free recipes that do not taste gluten-free is my goal for every recipe. Sometimes I only have to test a new recipe a couple of times, and others it takes multiple times. I do this so you get reliable, delicious results every time!

Came out pretty good! I used King Arthur 1:1 four. But baked it 35 mins. The top was browned a bit and inside was moist. I would use more walnuts next time though. Not too sweet and perfect for morning coffee!!
Hi Sara, I am glad you loved these scones. Bake time can really vary, depending on how tall your disc is. Some people make the disc smaller so the scones can be taller, and that will take more baking time.
I’d love to try making these – any suggestion to replace the egg?
Hi Carrie, I looked at my spreadsheet of reader swaps and I do not see any for replacing eggs in my scone recipes. I do have a lot of readers who swap Bob’s Red Mill Egg Replacer in other baked goods recipes on my blog…so if you decide to try it, that is what I would suggest trying. Please come back and let me know how it turns out.
I made these using my own blend of white and brown rice flour, tapioca starch and potato starch. The batter was very soupy and I was panicking that I messed up but reread the ingredients and couldn’t see where I went wrong so just kept adding the flour blend until the dough was dry enough. They turned out delicious! More muffin-like than the orange and cranberry scones I usually make but I’ll be making these again! Yum!
Hi Wendy, It is hard for me to troubleshoot when you use a different gluten free flour blend then what I have tested. Your blend is very starch heavy and this affects the moisture level a LOT. Every single gluten free flour blend has a different starch to grain ratio. You did the right thing, to add more flour and I am glad they turned out great.
This was very very good. A few notes. (I used KAF-GF AP), lactose free milk, and frozen non-dairy butter. Came together great. More wet than scone recipes that I have made previously. I cooked as per the recipe – as one round disk. Took about 10 minutes longer to cook than in the recipe – I did check temp to ~205. Let sit for 5, cut perfectly…and tasted so good. May also add some maple flavoring the future. And, I did add turbinado sugar to top before baking.
I am so glad you loved my new scone recipe. I haven’t tried the KAF GF AP flour in this recipe, but if the batter was wet, you can add a little more flour.
Sounds and looks DELICIOUS! Before I make these: Step # 6 says: “Shape the dough into a 1 1/2 to 2-inch disc. Place the parchment paper with the dough onto a cookie sheet.” My question is: do I use a rolling pin to make the disc larger? Or does that 2 inch disc expand all by itself to make larger sized scones? Thank you! Cannot WAIT to make these!
Hi, Sorry, that is how thick to make the scones. I corrected this. Thank you!
I am going to try this recipe tomorrow. I am newly gluten free,
only 6 months and I Have been struggling to learn recipes.And what I can and can’t eat even something is simple as mustard
Hi Sharon, it can be really hard when you are just starting out. I have a huge resources section that can help you learn more and you will be a pro in no time!! I hope this helps! https://www.fearlessdining.com/gluten-free-resources/