
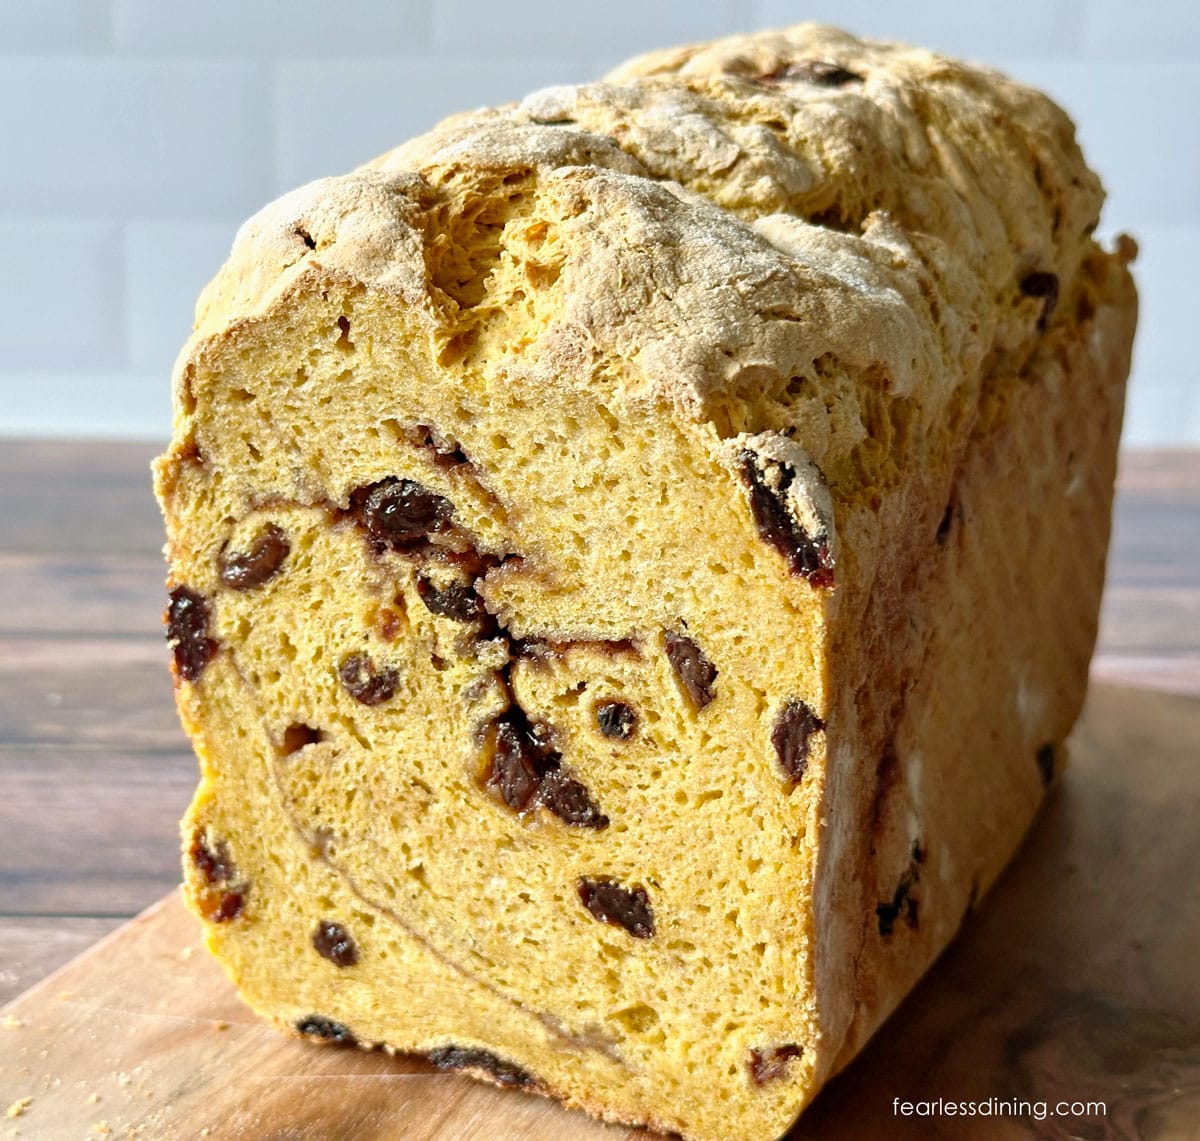
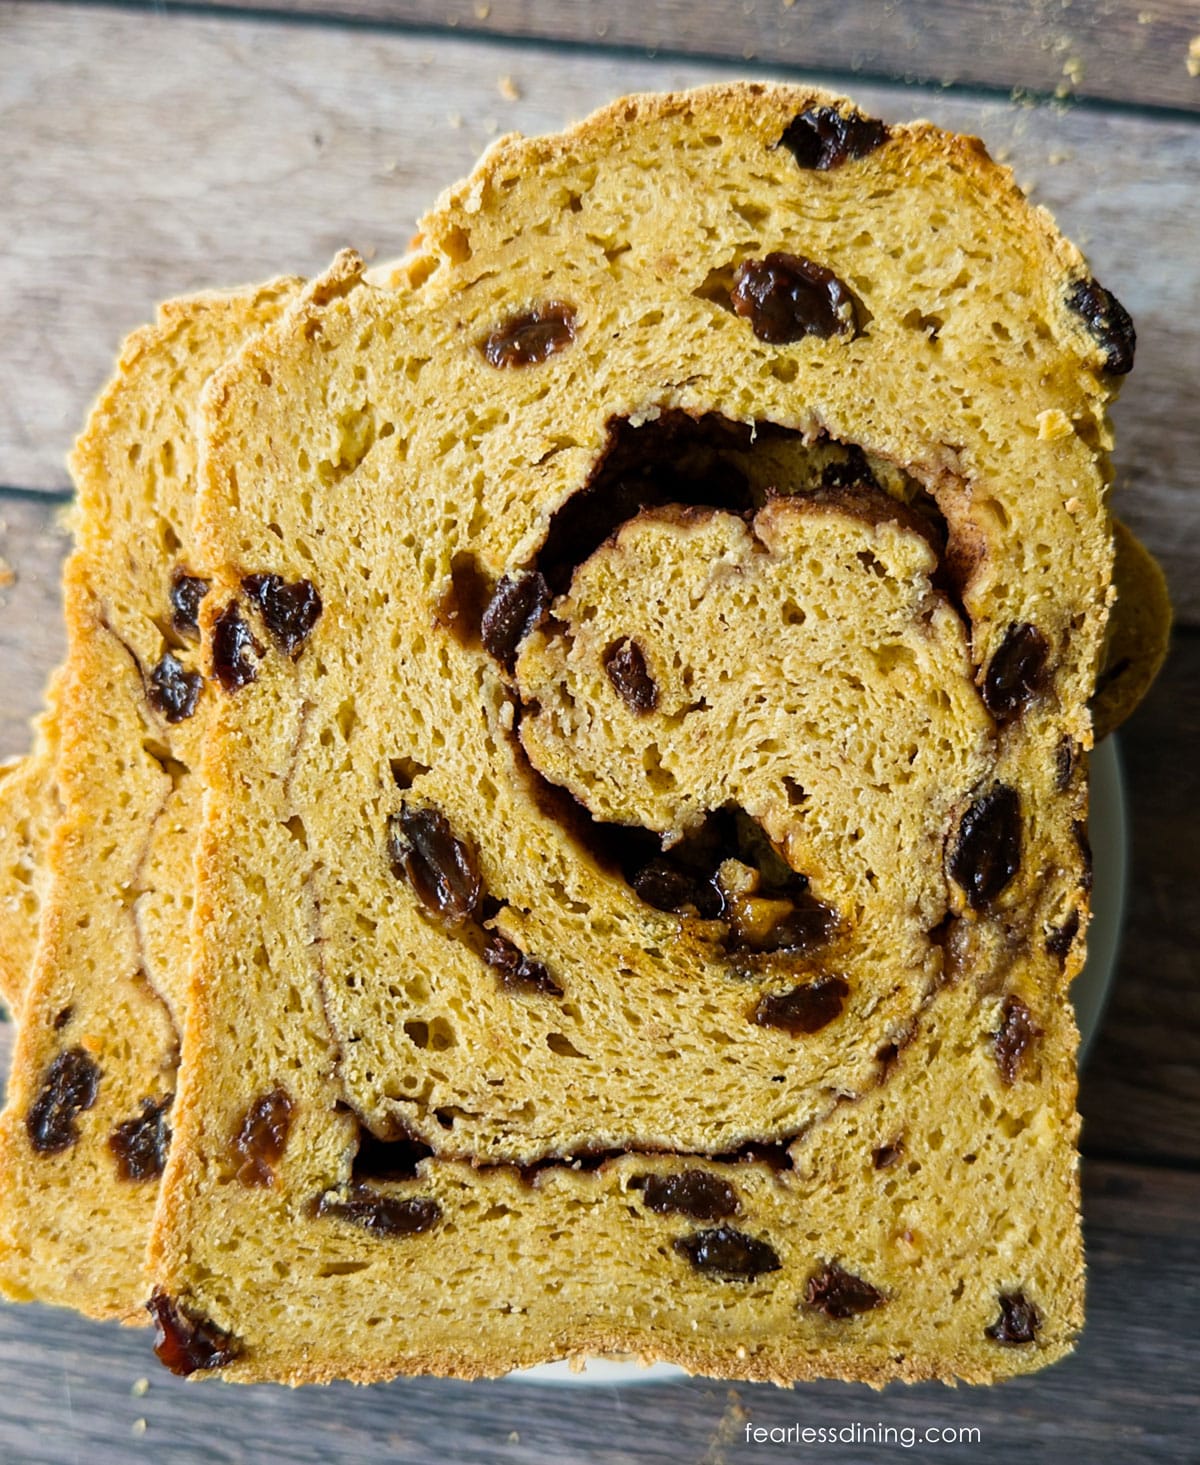
This gluten-free pumpkin raisin bread bakes up soft and fluffy, with a hint of sweetness and a tender crumb. Add the cinnamon swirl for a delicious fall treat, or keep it simple for everyday sandwiches and toast. Either way, every slice is full of fall flavors, fresh from the oven.
This post may contain affiliate links. Please read our Disclosure Policy.
❤️ Sandi’s Recipe Summary
If you are looking for a delicious gluten-free sandwich bread for fall, this homemade gluten-free pumpkin raisin bread is the recipe you will want to make. It has a similar sweetness to raisin bread, but with a pumpkin spice twist!
This is an easy dairy-free yeasted pumpkin bread recipe, but as I explain below, it is important to use a gluten-free flour blend that works in yeast recipes. I will share all of my gluten-free yeast baking tips, so you can easily make this recipe. After testing this recipe, I discovered that yeast loves pumpkin. Pumpkin purée adds natural sugar, which feeds yeast. Make this recipe in a Pullman loaf pan because it will rise up high.
See more gluten-free bread recipes, or learn more about gluten-free baking in my extensive gluten-free resources section.
Ingredient Notes and Easy Swaps:
For the full list of ingredients and amounts, please go to the recipe card below.
- Gluten-Free Flour Blend – I tested this recipe using both versions of Cup4Cup. The new Cup4Cup version is free of the top 9 allergens, and the older Cup4Cup version includes milk powder. Both versions are available on Amazon. Other blends can work, but it is important to use the right gluten-free flour blend for the type of baked good you are making. Read Why Gluten-Free Flour Blends Vary to learn more about this.
- Binder – If your flour blend doesn’t contain a binder, you will need to add 1 teaspoon of xanthan gum. Learn Why Binders are Important in Gluten-Free Baking.
- Yeast – I tested this recipe using rapid yeast. Most brands of yeast are gluten-free. Avoid using Red Star Platinum, which is not gluten-free.
- Brown Sugar – I tested this recipe using light brown sugar, but either will taste great.
- Canned Pumpkin Puree – I used canned pumpkin. You can use fresh roasted, but add 1-2 TBSP of water to your roasted pumpkin mash so it has a similar consistency as canned.
- Light Oil – I used avocado oil, but any mild light cooking oil will work.
- Purified Water – Yeast hates chlorine and chemicals in water. I recommend using purified water for the best rise.
- Raisins – Totally optional, but add delicious sweetness.

Testing Notes From My Kitchen
This recipe was a lot of fun to test. I had no idea how much yeast would rise the dough with pumpkin…I was worried it would spill over the sides of the pan! Luckily, it didn’t, and I can’t wait to hear what you think of this new recipe.
I tested this blend with the old and new versions of Cup4Cup. They both performed similarly. I didn’t test this with Authentic Foods Steve’s GF Bread Blend, so if you do decide to use that blend, you will need to add more water. It has a higher moisture need than the starchier Cup4Cup blend.
How to Make Gluten-Free Pumpkin Raisin Bread (Step-By-Step)
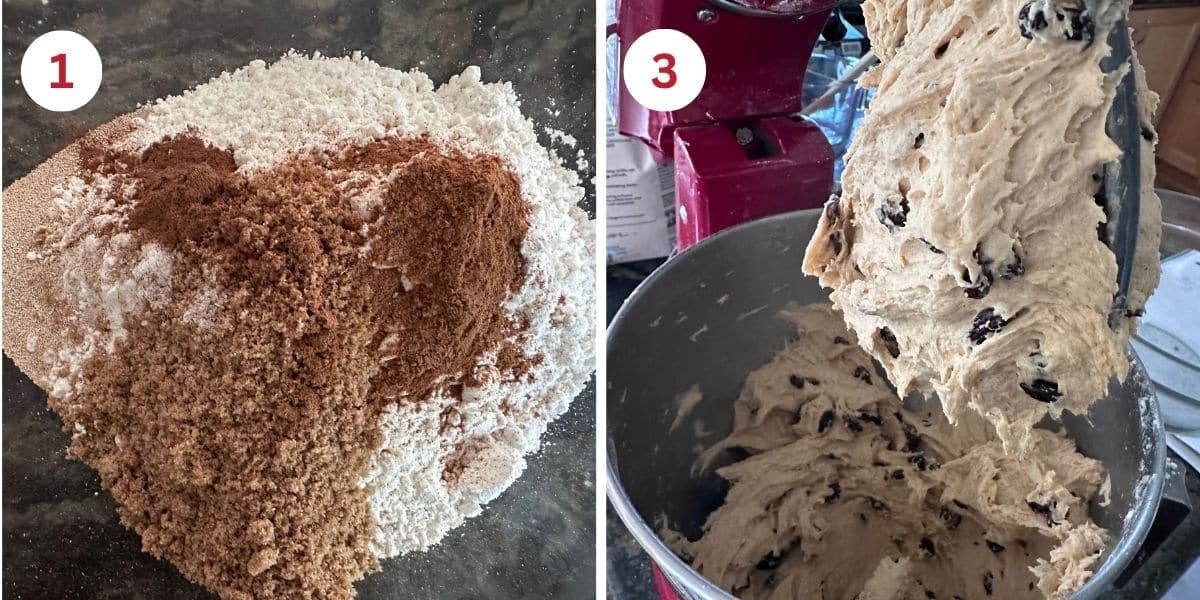
Step 1: Although I make my bread dough in a stand mixer, I suggest mixing the dry ingredients first so that they are thoroughly blended. Use a whisk to blend them together.
Step 2: Add the wet ingredients to a stand mixer with a paddle attachment. Blend on medium speed for 30 seconds. If you do not have a stand mixer, you can mix the dough by hand.
Step 3: Once the wet ingredients are mixed, add the dry ingredients, one cup at a time. Turn on the stand mixer to low speed until the flour is incorporated, preventing it from flying out. Add the raisins. Mix the dough for 1 minute on high. The dough should pull away from the side of the bowl.
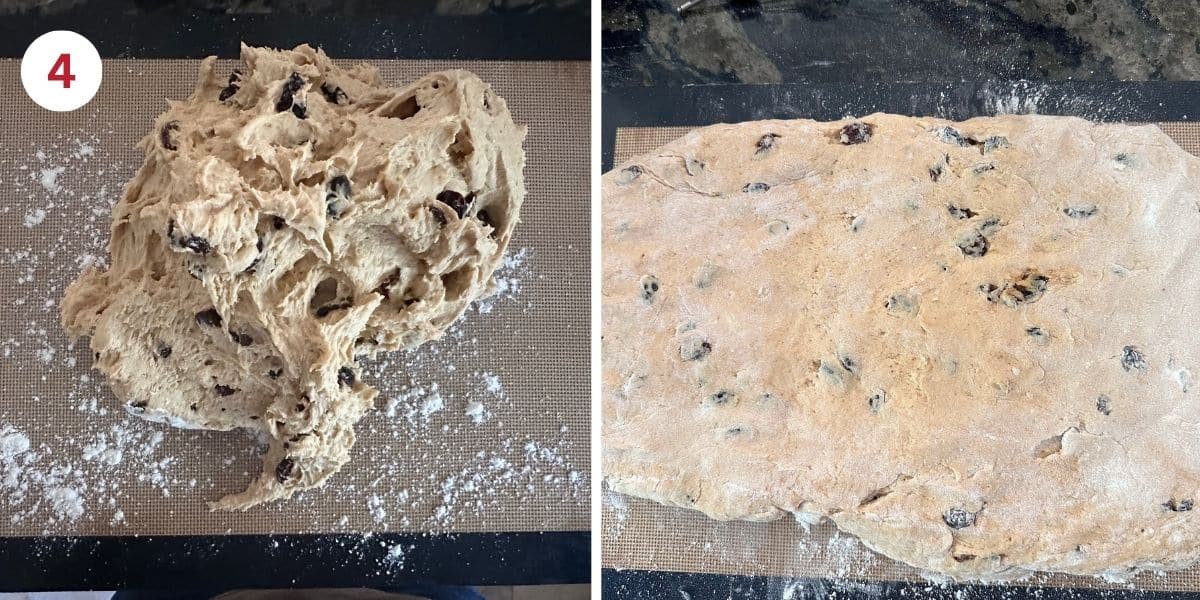
Step 4: If you are adding a cinnamon swirl, dust a silicone mat with flour and place the dough on the mat. The dough will be slightly sticky, and it is okay to dust it liberally with flour to make it workable.
Use your hands to flatten the dough into an oval shape about 1 1/2 inches thick. Make sure the oval is the same width as the Pullman loaf pan. This dough rises a lot. I highly recommend using a Pullman loaf pan, or splitting the dough into two smaller loaf pans. They won’t be as big, but at least the dough won’t spill over the top.
👀 Sandi Says: If you don’t want the cinnamon swirl, line your Pullman loaf pan with parchment paper and place the dough inside.
Email This Recipe To Me!
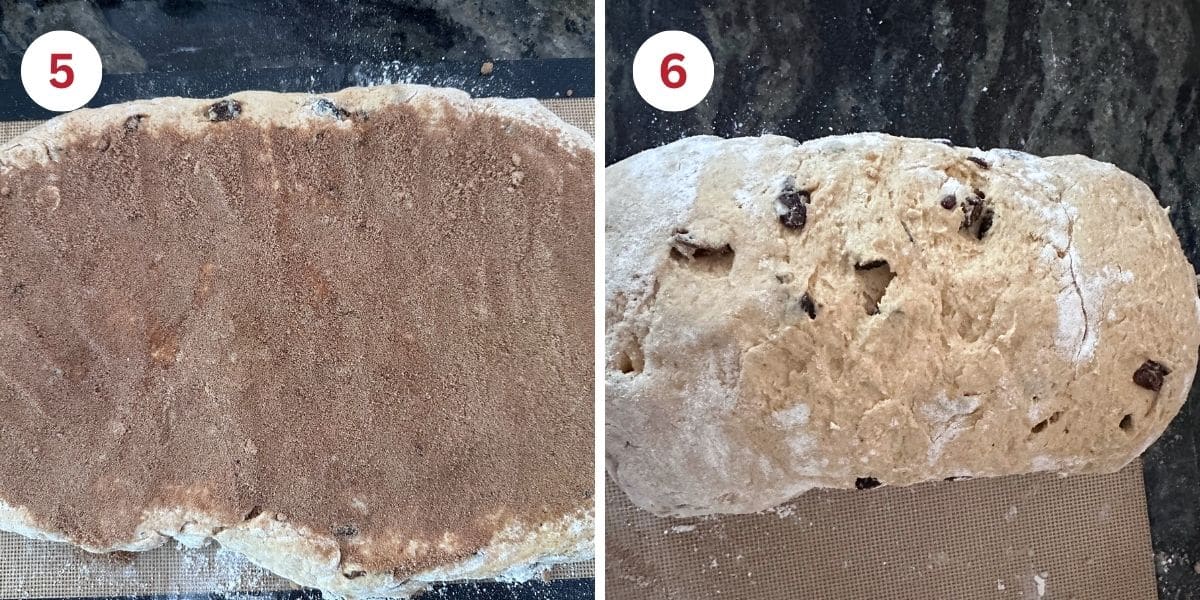
Step 5: Mix the brown sugar and cinnamon (if using) and spread it evenly over the dough, pressing down gently so the mixture adheres to the dough.
Step 6: Gently roll the dough up tightly. Use a dough scraper if it sticks in any spot to your silicone mat.
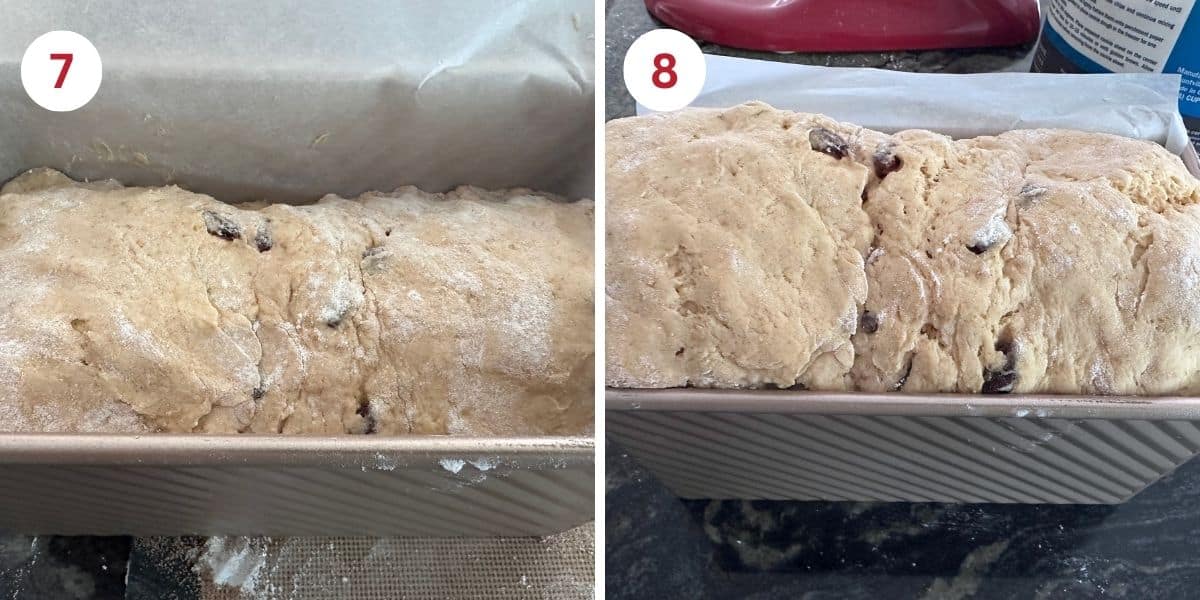
Step 7: Line the Pullman loaf pan with parchment paper and carefully place the rolled dough into the pan. (Again, if you didn’t make the cinnamon swirl, you would have just scooped up the dough from the stand mixer bowl and placed it into the loaf pan.
Cover with plastic wrap and place in a warm place to rise. I preheated my oven to 175ºF, put the loaf in the oven, then let the dough rise there with the oven door cracked open.
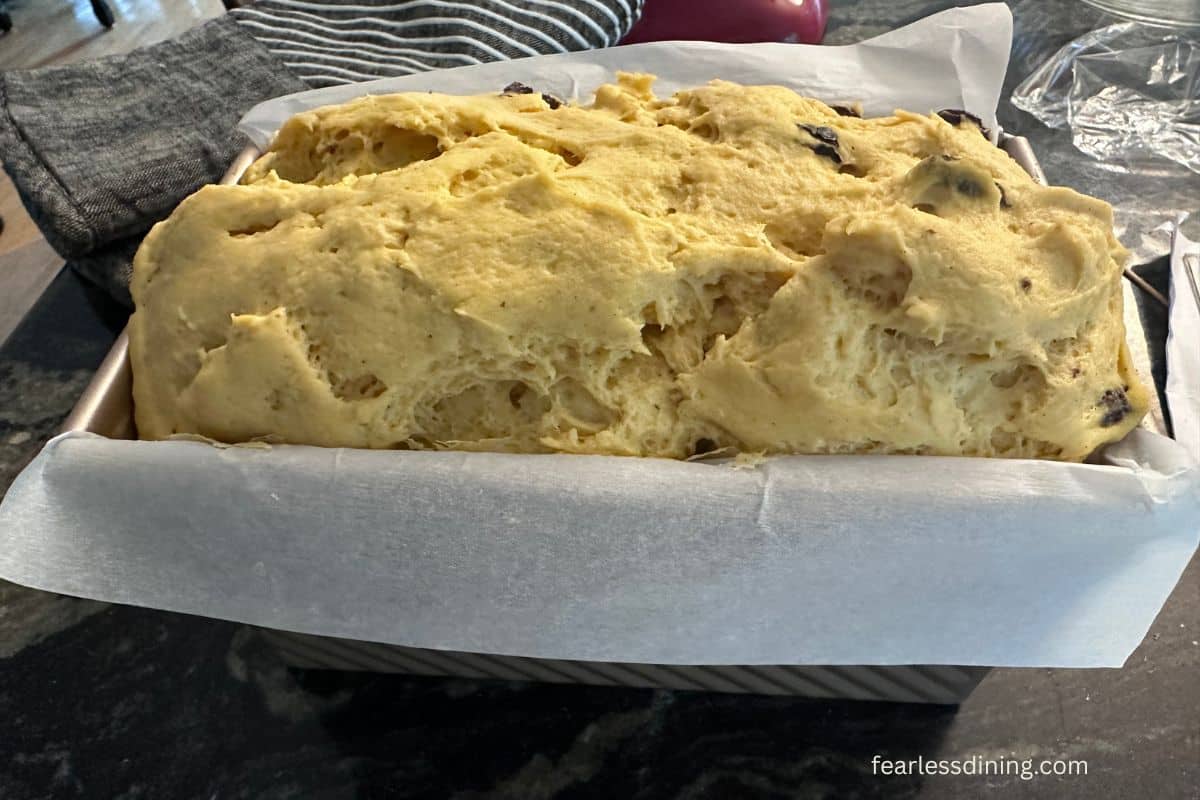
Rise the dough until it doubles in size. Keep an eye on it, but it should rise well, as shown in the photos above.
Tips For Success:
Yeast baking with gluten-free dough can be tricky. The number one issue I hear is that someone used a flour blend that doesn’t work well in yeast recipes. Many brands, like Bob’s 1:1 and King Arthur Measure for Measure, do not include this information on the back of the bag. You often need to visit the website to see.
- Rise the dough in a warm place. This can vary depending on the time of year and how cool you keep your kitchen.
- Use the right pan for the recipe. As I mentioned above, a Pullman is the best choice for this recipe due to how much this loaf rises.
- Check the expiration of your yeast before adding it to the mixer.
If you run into any issues, you can learn much more about baking gluten-free bread in my Gluten-Free Bread Troubleshooting Guide.
Frequently Asked Questions:
I store my bread sliced in the freezer. Gluten-free bread spoils a lot quicker than regular bread. Learn How to Store Gluten-Free Bread.
Yes, this will work well and add a little more sweetness.
Yes, you can easily omit the raisins or swap dried cranberries.
More Gluten-Free Sandwich Bread Recipes:
For even more delicious gluten-free bread recipes, check out the best gluten-free bread guide. If you primarily use a bread machine, here is a collection of all of my gluten-free bread machine bread recipes.
- The Best Gluten-Free Bread Machine Bread
- Easy Gluten-Free Buckwheat Bread
- Gluten-Free Whole Grain Bread
- Fluffy Gluten-Free Hawaiian Bread
- Gluten-Free Sourdough Sandwich Bread
Love This Recipe?
💬 Did you make this gluten-free pumpkin sandwich bread recipe? I would love to hear how it turned out. Your feedback helps others (and helps me keep improving these recipes for you). ⭐⭐⭐⭐⭐
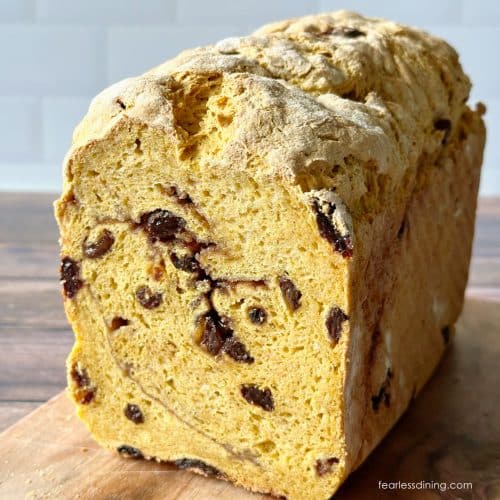
Fluffy Gluten-Free Pumpkin Raisin Bread
Ingredients
- 4 ½ cups gluten free flour blend * SEE NOTES (758.79 g Cup4Cup)
- 2 ¼ teaspoons rapid yeast (1 packet) 7.9 g
- ⅓ cup brown sugar 48 g
- ½ teaspoon salt
- 1 ½ cups warm purified water
- 7.5 ounces pumpkin puree * see notes
- ¼ cup light oil
- 2 large eggs
- 1 ½ teaspoons pumpkin pie spice 2.29 g
- ½ teaspoon ground cinnamon 1.1 g
- ½ cup raisins
Optional Brown Sugar Swirl
- ½ cup brown sugar
- 1 teaspoon ground cinnamon
Instructions
- Whisk together the gluten-free flour blend, binder (if needed), yeast, salt, and sugar in a large bowl. It is important to premix the dry ingredients so they are thoroughly blended.
- Add the wet ingredients to a stand mixer with a paddle attachment. Blend on medium speed for 30 seconds. If you do not have a stand mixer, you can mix the dough by hand.
- Once the wet ingredients are mixed, add the dry ingredients, one cup at a time. Turn on the stand mixer to low speed until the flour is incorporated, preventing it from flying out. Add the raisins. Mix the dough for 1 minute on high. The dough should pull away from the side of the bowl.
- If you are not adding a cinnamon swirl, line a Pullman loaf pan with parchment paper and put the dough in the pan
Optional Cinnamon Swirl:
- If you are adding a cinnamon swirl, dust a silicone mat with flour and place the dough on the mat. The dough will be slightly sticky, and it is okay to dust it liberally with flour to make it workable.
- Use your hands to flatten the dough into an oval shape about 1 1/2 inches thick. Make sure the oval is the same width as the Pullman loaf pan. This dough rises a lot.
- I highly recommend using a Pullman loaf pan, or splitting the dough into two smaller loaf pans. They won't be as big, but at least the dough won't spill over the top.
- Mix the brown sugar and cinnamon (if using) and spread it evenly over the dough, pressing down gently so the mixture adheres to the dough.
- Gently roll the dough up tightly. Use a dough scraper if it sticks in any spot to your silicone mat.
- Line the Pullman loaf pan with parchment paper and carefully place the rolled dough into the pan. (Again, if you didn't make the cinnamon swirl, you would have just scooped up the dough from the stand mixer bowl and placed it into the loaf pan.
- Cover loosely with plastic wrap and place in a warm place to rise. I preheated my oven to 175ºF, put the loaf in the oven, then let the dough rise there with the oven door cracked open.
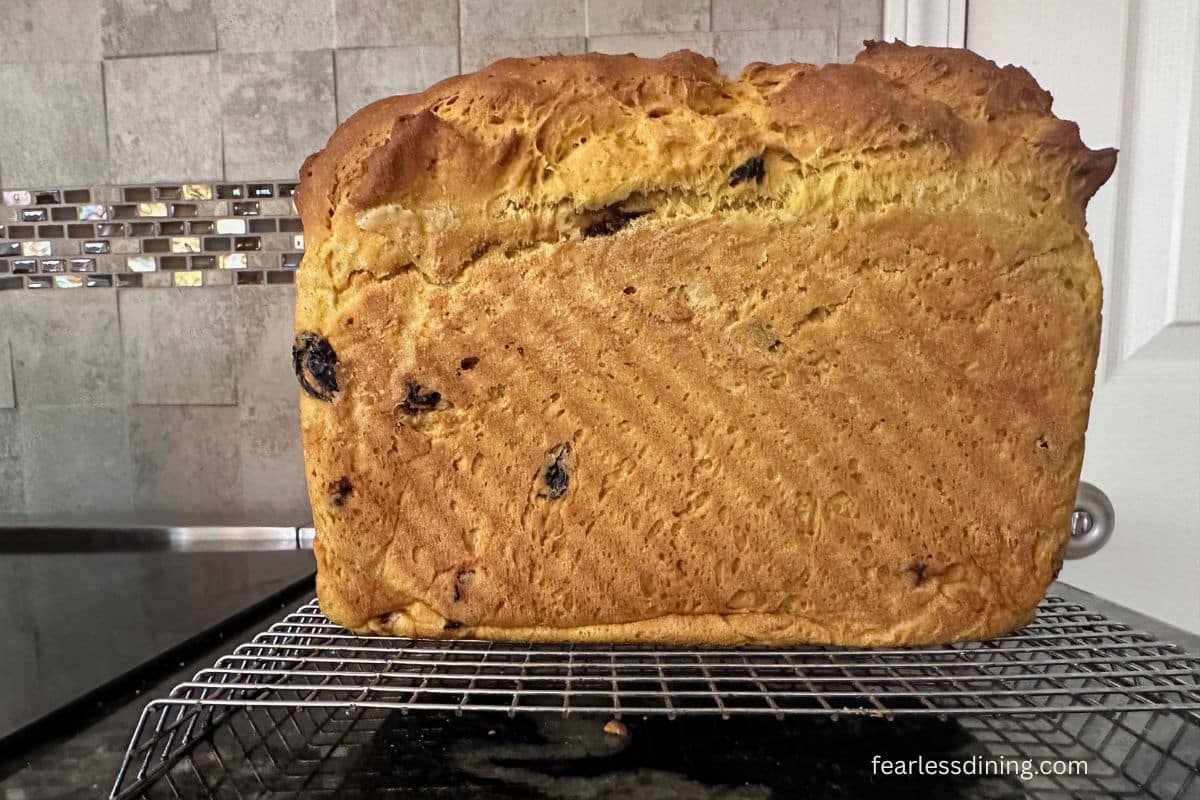
- Bake at 350ºF until golden and baked through (about 40–50 minutes). The bread should sound hollow when tapped. Cool completely before slicing.
Notes
- I tested both versions of Cup4Cup (free of the top 9 allergens and the one with dried milk powder). Both worked pretty much the same. If you use a flour blend I didn’t test, you need to make sure you adjust the moisture levels if needed.
- It is very important to use a flour blend that works with yeast. If it doesn’t say if it works with yeast on the bag of the brand you have, visit their website.
- Store slices in the freezer. Gluten-free bread doesn’t keep fresh for long, so freezing this bread and either microwaving or toasting it to thaw is best.
Email This Recipe To Me!
SPECIAL NOTE
Please know that every gluten free flour blend has a different starch to grain ratio. If you use a blend I didn’t test, my rule of thumb is to add more flour if your dough or batter is wet and add more liquid if the dough or batter is too dry!
Nutrition
Nutrition Disclaimer
Nutritional information is an estimate provided to you as a courtesy. You should calculate the actual nutritional information with the products and brands you are using with your preferred nutritional calculator.
I truly hope you enjoy this recipe. I have been testing and creating gluten-free recipes for over 15 years. Creating gluten-free recipes that do not taste gluten-free is my goal for every recipe. Sometimes I only have to test a new recipe a couple of times, and others it takes multiple times. I do this so you get reliable, delicious results every time!

Hi Sandi, I just made this bread, thank you for sharing. It came out lovely in texture and flavour, I will be diffinitely making again. I used Bob’s Red Mill gluten free all purpose flour, hence I added 1 tsp xanthan gum to the batter. It had a lovely rise, however it deflated a little bit while baking, I believe its because I used 11g of yeast rather than the 7.9g you listed. The batter was a bit sticky and I wanted the cinnamon swirl, so to save on GF flour which is very expensive where I live, I scooped some batter in the pan, flaten with a wet spatula and covered with spiced sugar, repeated till my batter was finished. I also split the dough into 2 and used my regular bread pans 9×12 and they both came out huge.
I am so glad you loved this bread. I love your tip for those using a different flour blend to layer the cinnamon the way you did. This bread is so good, but wiht two loaves, you will want to freeze some. Gluten-free doesn’t keep fresh for long. As to the sinking slightly, it may be because you used a different flour blend. Try adding 1-2 TBSP of additional flour.
Yes, 2 loaves is plenty, I’ve gifted one away and I’ve sliced and frozen the balance of mines to be reheated. Thanks for the extra flour tip, I will do so the next time I bake it.
Please keep me posted.