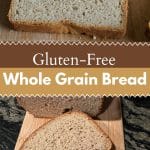
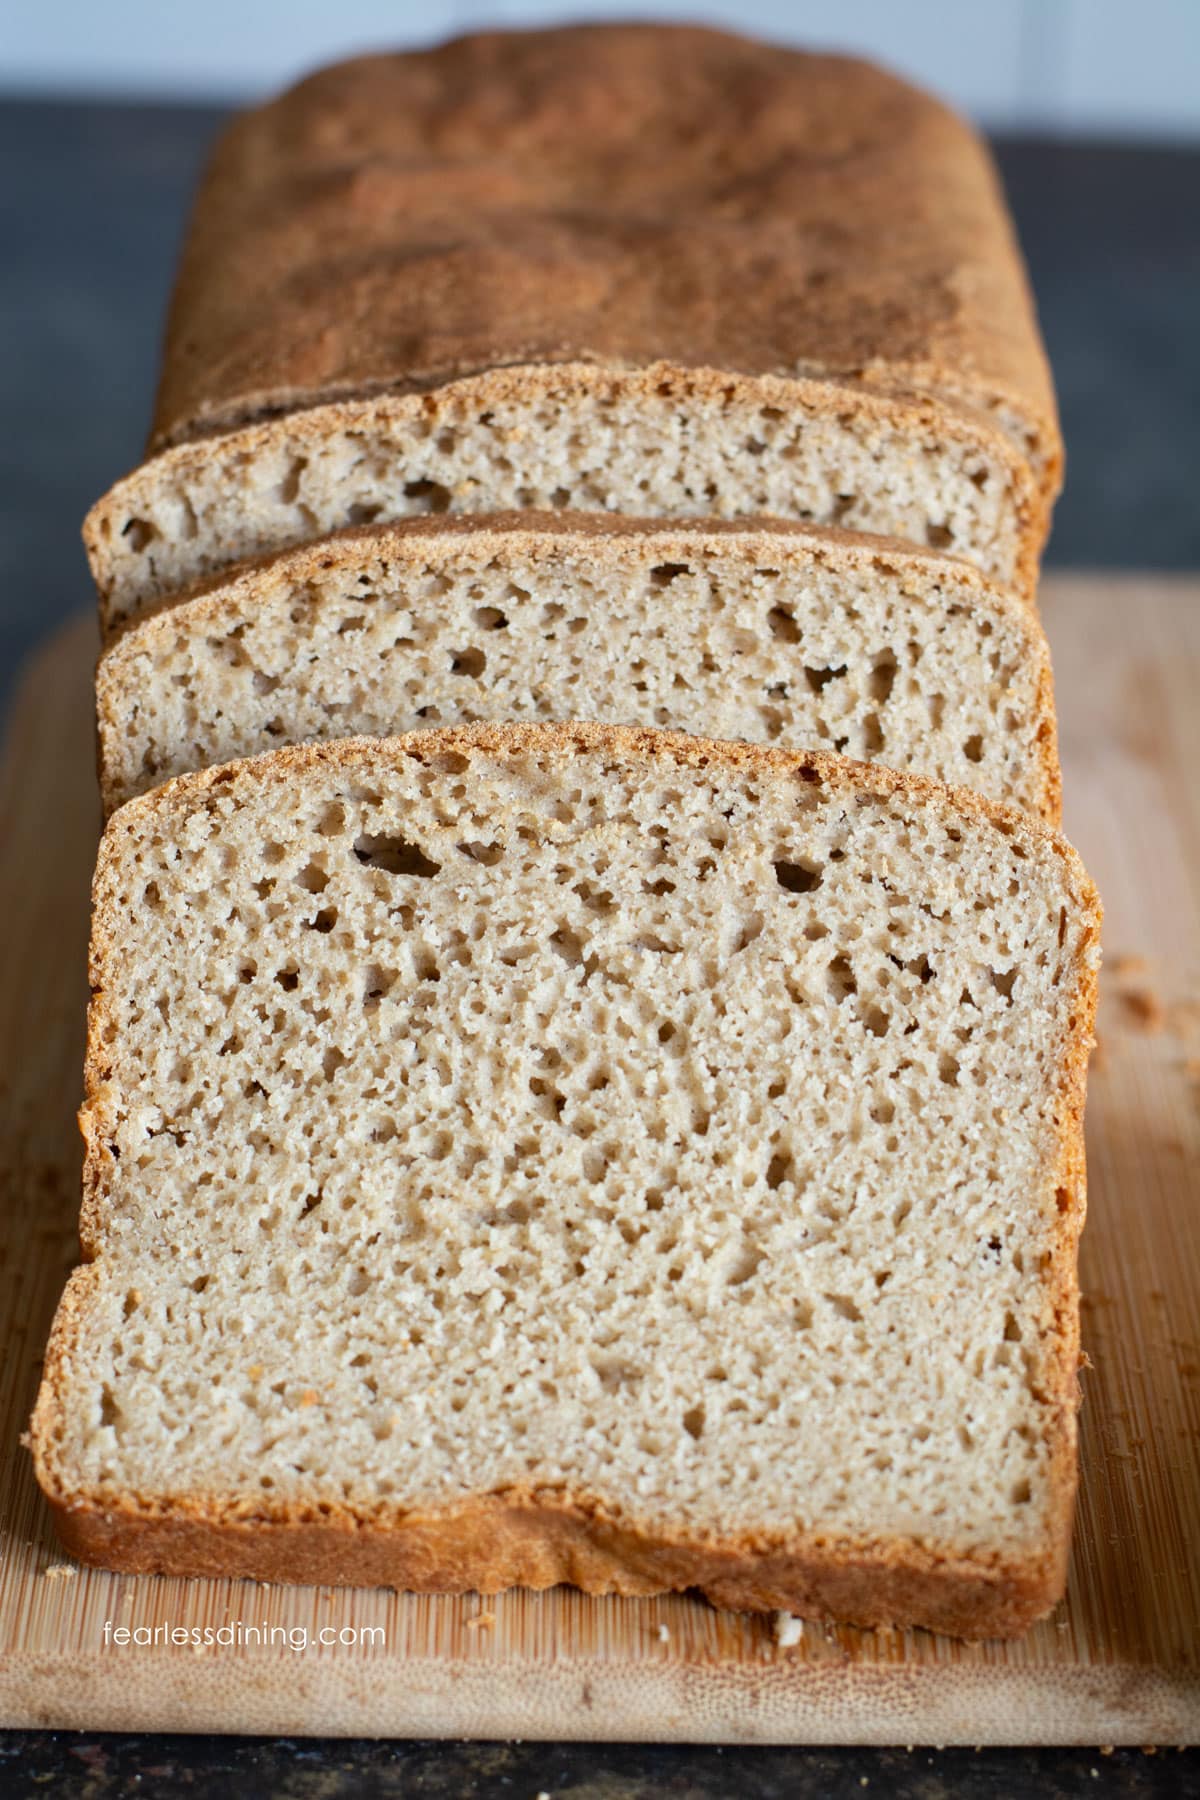
Most gluten-free bread is made with white rice flour and tastes flat. This whole gluten free grain bread recipe uses sorghum, millet, buckwheat, and brown rice. These ancient grains that give it a nutty flavor and a sandwich crumb that actually holds together. Bake it in the oven or your bread machine, and slice the whole loaf for the freezer.
This post may contain affiliate links. Please read our Disclosure Policy.
❤️ Sandi’s Recipe Summary
The Quick Bite: This is the whole grain gluten-free sandwich bread I bake most often in my own kitchen. It uses a blend of ancient grain flours, including sorghum, millet, buckwheat, and brown rice. This blend gives it a slightly nutty flavor and a real bread crumb rather than the flat, pale texture you get from regular flour blends. It bakes in the oven or a bread machine, it is completely dairy-free, and it freezes beautifully in slices.
If you are looking for a celiac safe, more wholesome bread, this gluten free whole grain bread recipe is the recipe we make the most. I use my homemade Gluten Free Whole Grain Flour Blend in this recipe, which has been tested multiple times. This gluten free bread recipe can be baked in the oven or made in a bread machine. It is also dairy-free, and I include lots of easy swaps so you can tailor this bread to avoid any allergens you can’t tolerate.
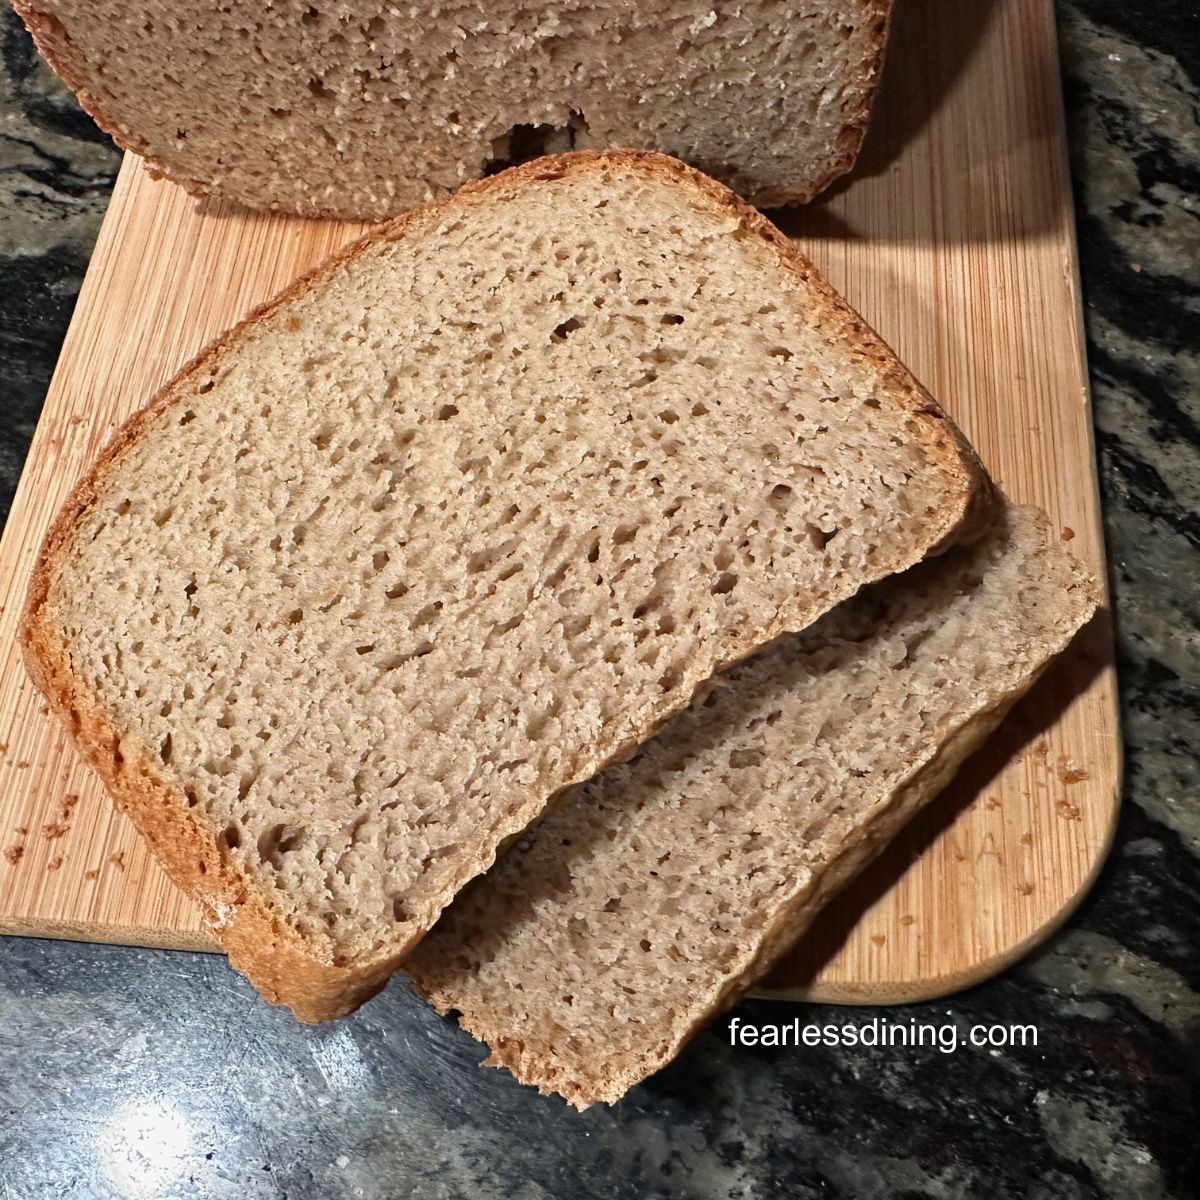
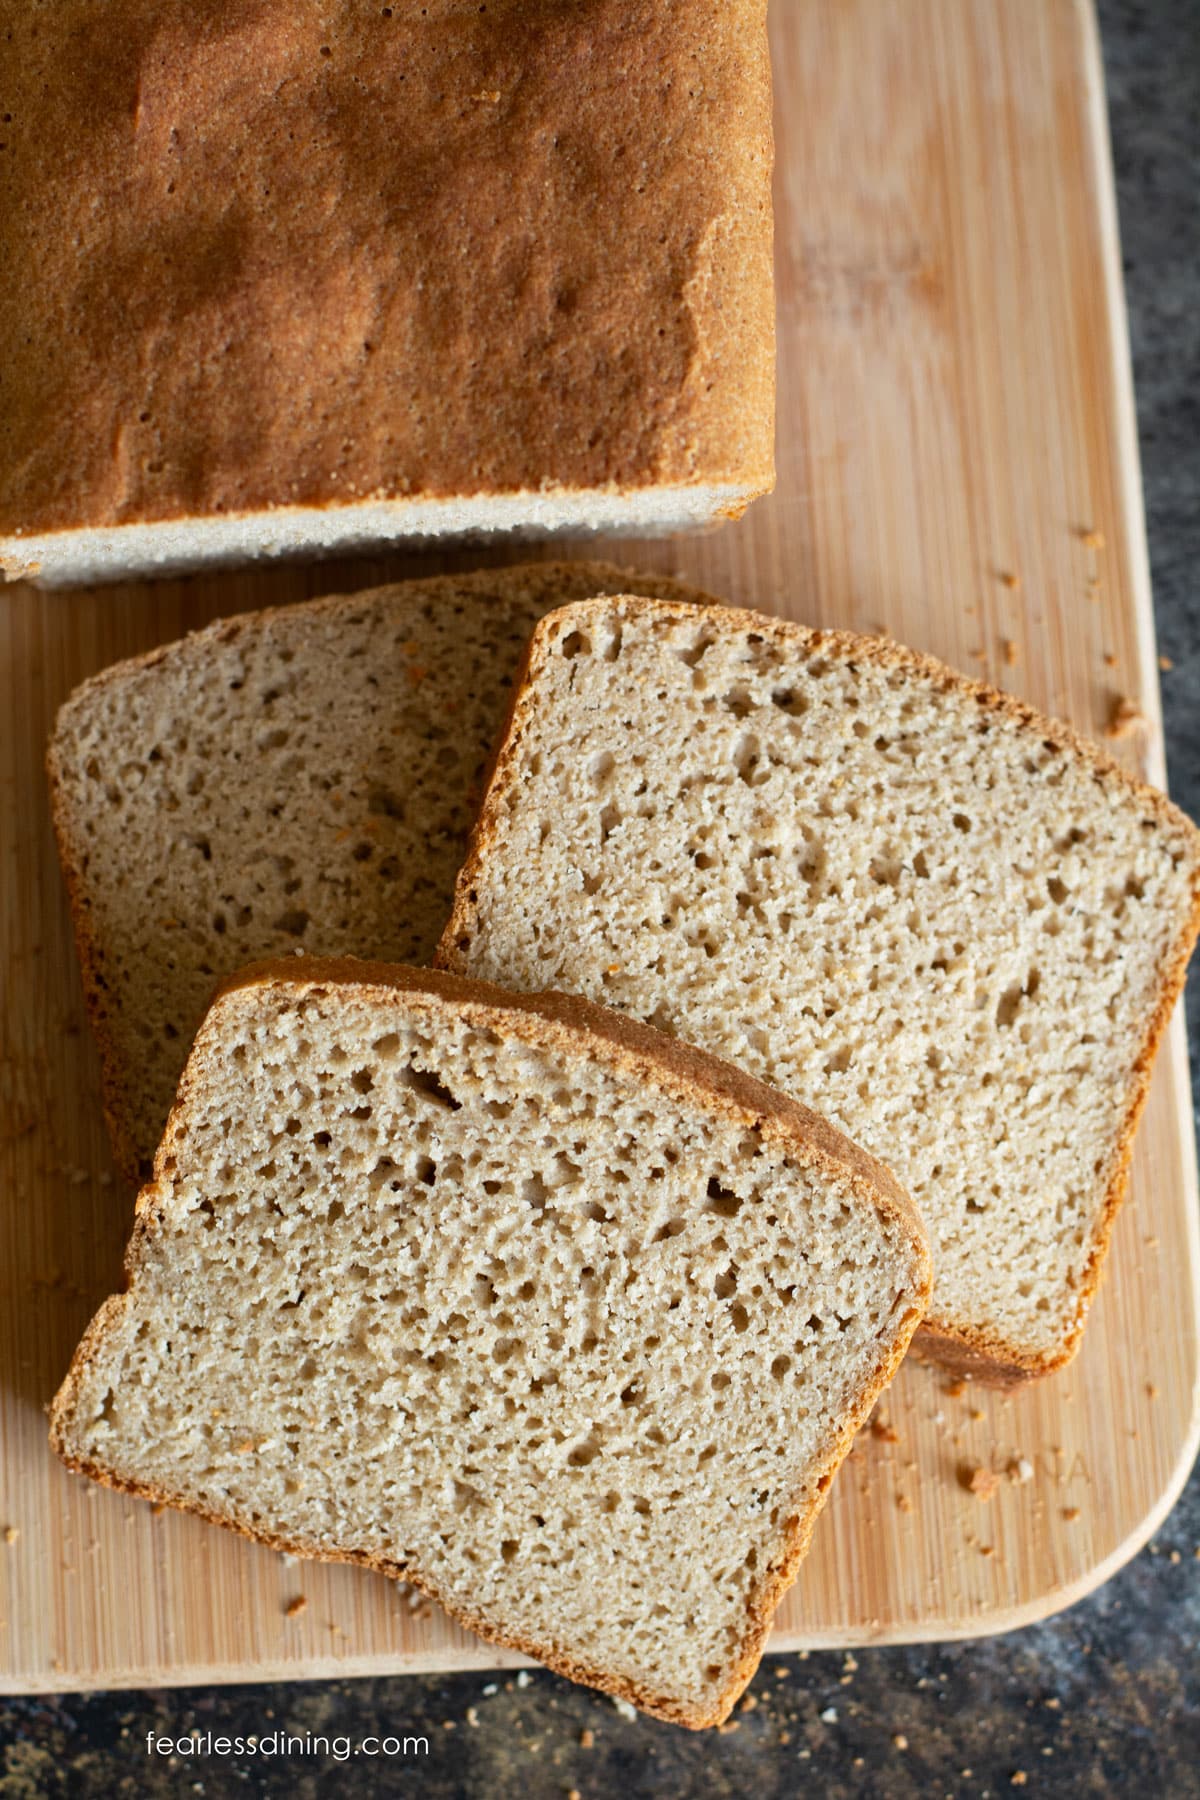
Most gluten-free bread recipes use white rice flour as the base, which produces a pale, soft crumb that tastes a little flat. This loaf uses a combination of brown rice, sorghum, millet, and buckwheat, which are ancient grains that give the bread a slightly nutty flavor and a more substantial crumb. It is the bread I make most often in my own kitchen because it actually tastes like bread.
My first test used only whole grain flours with no starch, and the loaf came out so dense it was difficult to slice. Adding potato starch softened the crumb without losing the nutty flavor from the whole grains.
Fabulous recipe. Yields a light, tasty whole grain bread with excellent crumb. It really stands out against all the dense, insipid-tasting gluten-free bread recipes. Thank you so much for putting it out! This bread will be life-changing.”
Shelah, blog comment
If you love using whole grains and seeds, this Gluten Free Brown Seed Bread recipe is another family favorite. You may also want to try these bread recipes: Gluten Free Buckwheat Bread, Gluten-Free Sandwich Bread, or this Gluten Free Boston Brown Bread.
Ingredient Notes:
For the full list of ingredients and amounts, please go to the recipe card below.
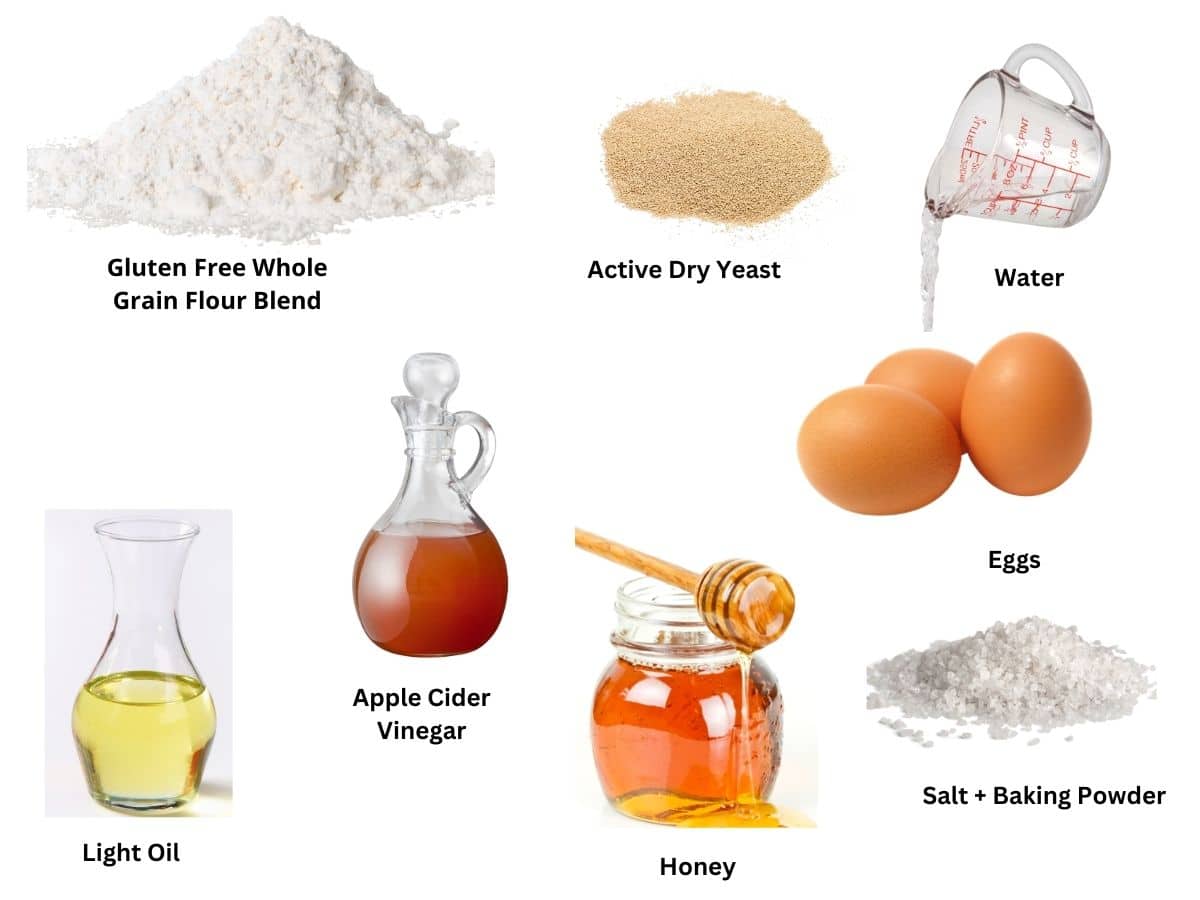
- Gluten Free Whole Grain Flour – This blend uses my custom gluten free whole grain flour blend recipe, which includes brown rice, buckwheat, sorghum, millet flours, and potato or tapioca starch. The recipe is linked above and in the recipe card.
- Salt and Baking Powder – Use aluminum-free baking powder.
- Active Dry Yeast – Double-check your yeast expiration date to ensure it hasn’t expired. Note: Red Star “Platinum” is not gluten-free.
- Apple Cider Vinegar – The acid in vinegar helps work with the baking powder to help the bread rise. You will not taste the vinegar in the finished loaf.
- Light Oil – I tested this recipe using canola oil, but avocado oil also works well. Use an oil without a strong flavor. You can also use butter or plant-based butter if you prefer.
- Eggs – Use large. Let the eggs sit on the counter until they are at room temperature.
- Water – I recommend using filtered water. Chlorine can inhibit yeast growth, so try to avoid tap water in your yeast recipes.
If you are sensitive to specific flours, I make other flour blends that avoid different grains, including this Gluten Free Flour Blend Without Rice and this Gluten Free Flour Blend Without Sorghum Flour. I also make a pretty awesome classic DIY Gluten Free Flour Blend, which is also gum-free.
How to Make Gluten Free Whole Grain Bread (Step-By-Step)
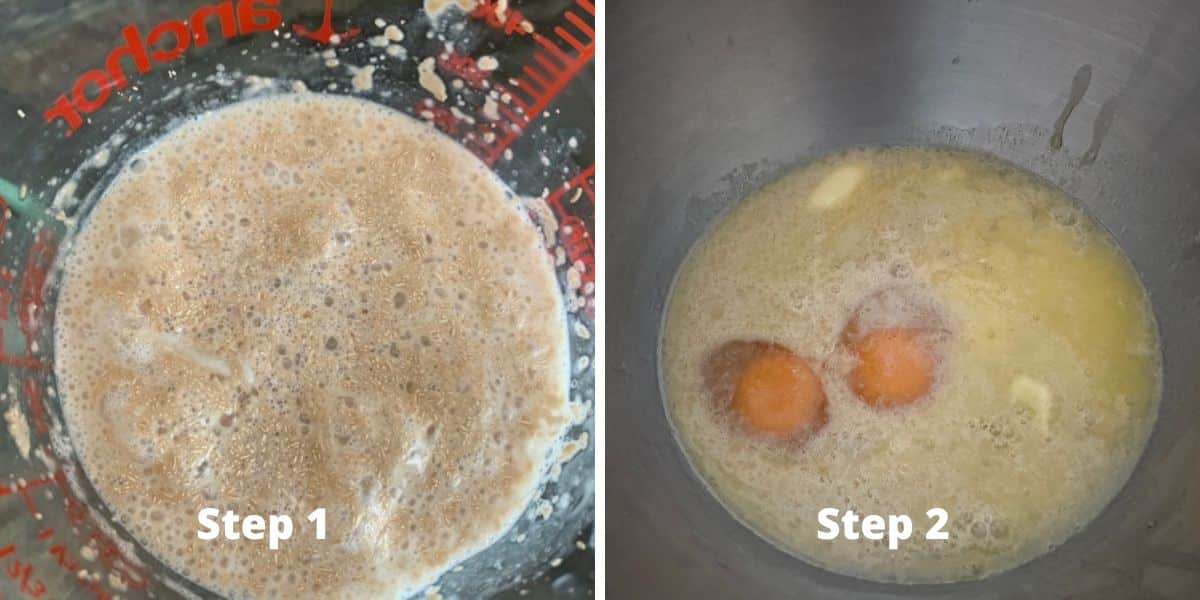
Step 1: Warm the purified water to no hotter than 110º F. Add the honey and stir until dissolved in the water. Add the active dry yeast and let it sit for 5-10 minutes until it is bubbly.
Step 2: Add the room-temperature eggs, oil or butter (I have tested both in this recipe), apple cider vinegar, and the yeast mixture to the bowl of a stand mixer. For best results, use a paddle attachment. Mix on medium-low speed.
If you are mixing by hand, use a whisk to blend them. Don’t forget, the bread machine instructions are below the oven baking instructions.
Step 3: Turn off the mixer and add the flour, salt, and baking powder to the wet ingredients in the stand mixer bowl. Turn the mixer on low speed until the flour is incorporated into the wet ingredients. Set the mixer speed to medium and mix for 30 seconds.
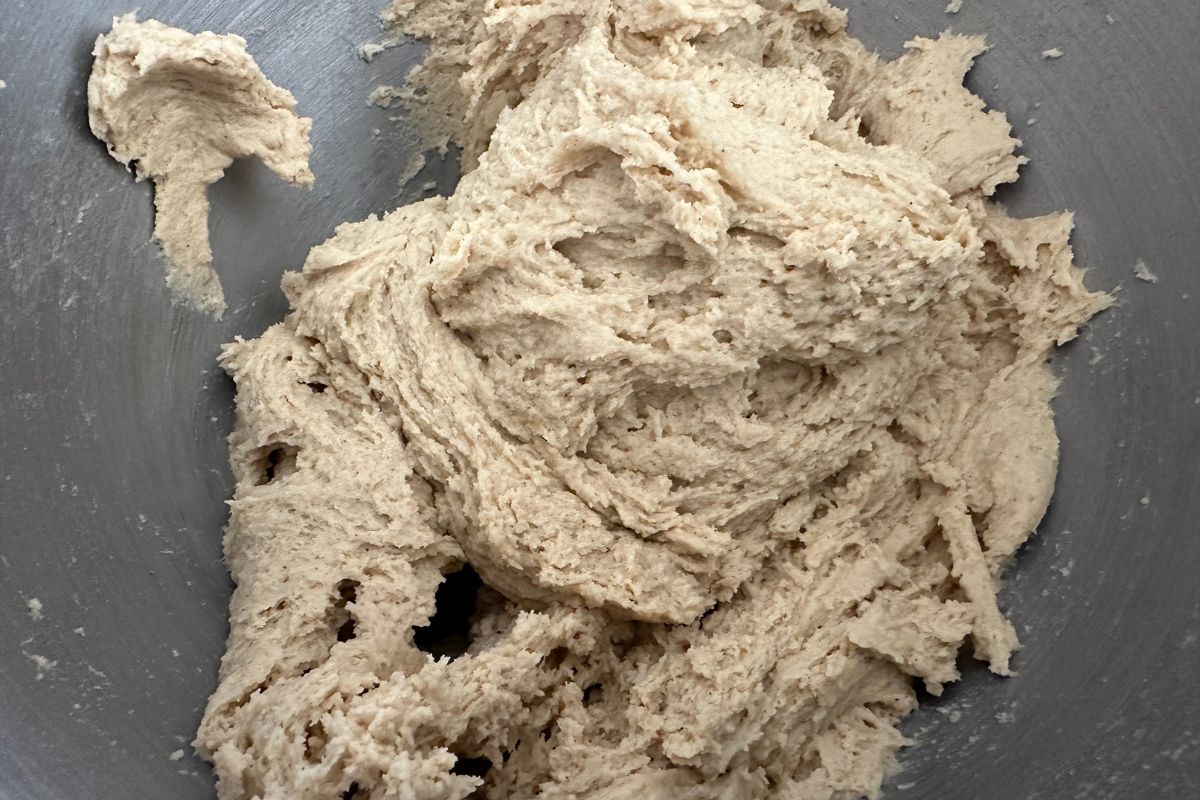
Step 4: Your dough will look similar to the photo above. Notice it is a lot softer than typical bread doughs. You should not be able to work the dough. It should not be too sticky. You only get one good rise in gluten free, so it is important to rise the dough in the loaf pan.
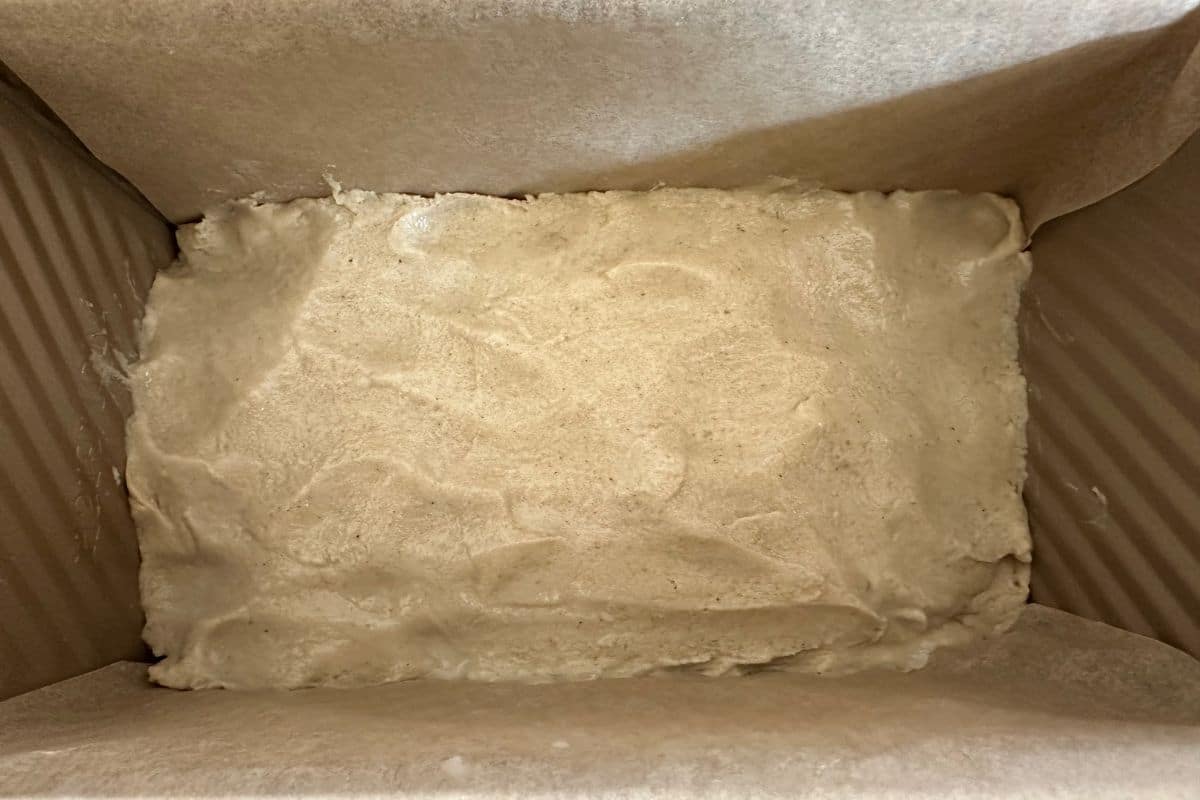
Step 5: Line your Pullman or bread loaf pan with parchment paper or spray it with a gluten free baking spray. Note: Pam Baking Spray is NOT gluten free! Add the dough, then wet your fingers to spread it around. You want the dough to be even throughout the pan.
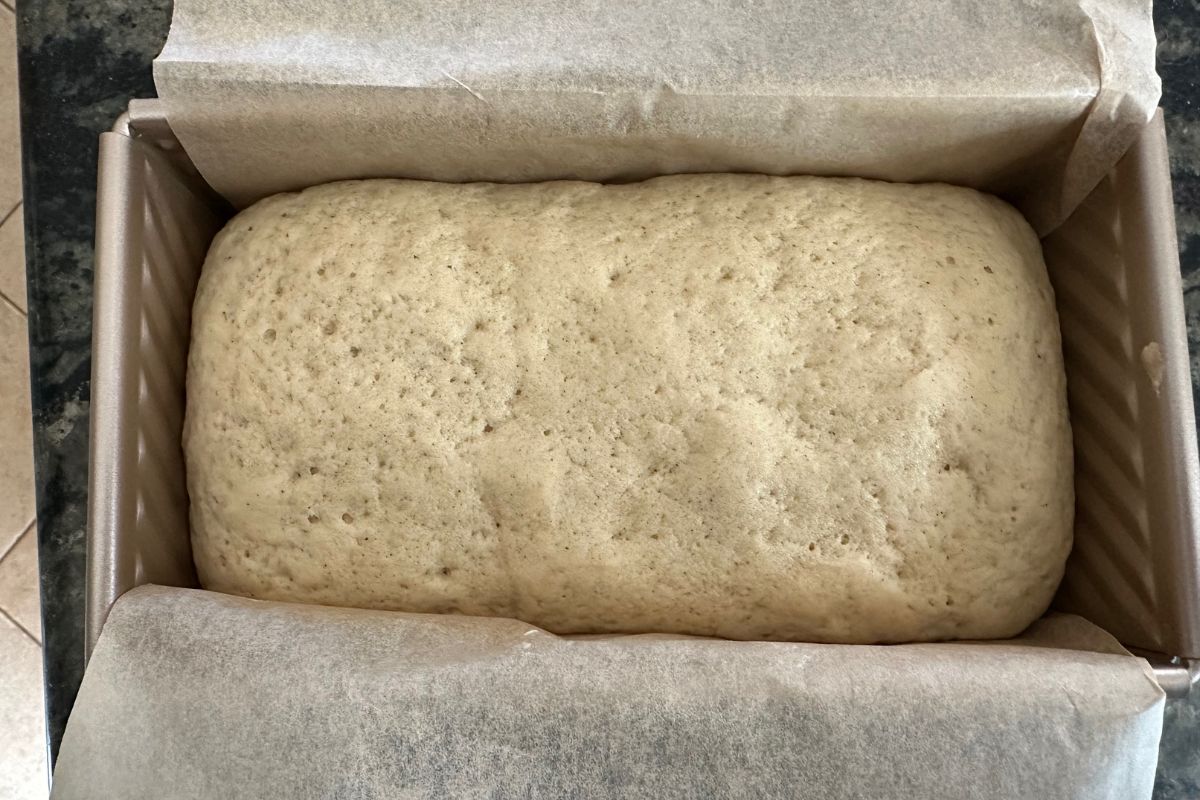
Step 6: Cover the pan loosely with plastic wrap and let it rise. I rise my dough in a warm oven. Preheat the oven to 175ºF and turn off the oven. Rise the dough in the oven with the door cracked open.
Email This Recipe To Me!
Step 7: Remove the loaf pan and preheat your oven to 350º F. Let the bread dough sit on the counter until the oven is the right temperature for baking.
Step 8: Bake the bread for 40-50 minutes. The actual baking time can vary depending on the size of your Pullman or loaf pan and the material it is made of.
Use a digital thermometer to test the internal temperature of the bread. You will know the bread is finished baking when it is golden on top and has an internal temperature of 205º F.
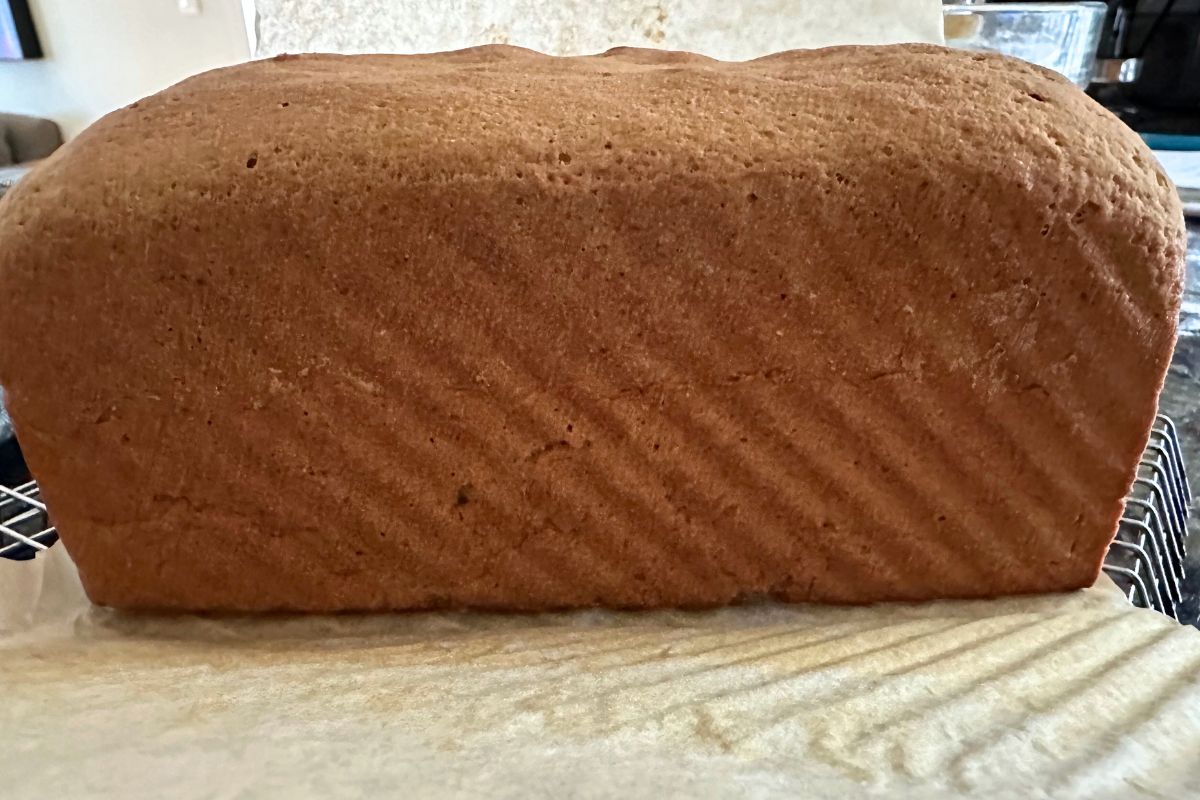
Step 9: Use the parchment paper to pull the loaf out of the baking pan. Set it onto a cooling rack. Slice the loaf when the bread is completely cooled.
👀 Sandi Says: I recommend slicing the whole loaf of bread when it is cooled. Store this bread in the freezer. I put small pieces of wax paper between the bread slices and store the slices in a freezer-safe zipper storage bag.
Gluten free bread spoils quickly, so the freezer is the best way to store the bread. To thaw slices, microwave them for 25-30 seconds or toast them in your toaster. For more storage tips, read my Guide to Storing Gluten Free Bread.
How to Make Gluten-Free Whole Grain Bread in a Bread Machine
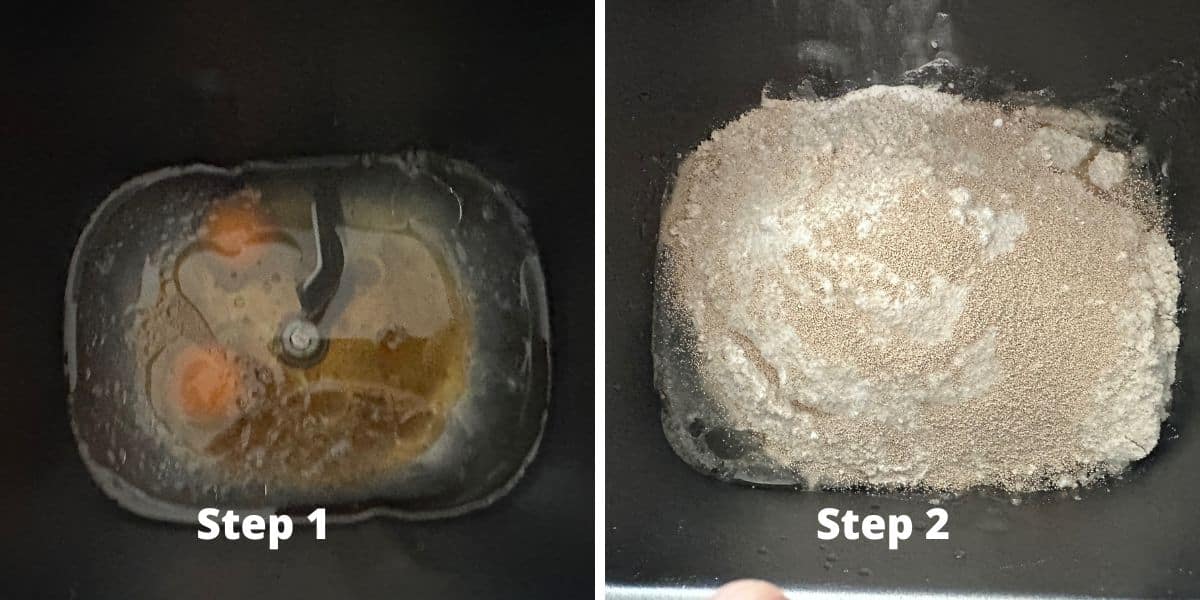
Step 1: Ensure your paddle is set up at the bottom of the bread machine. I use a Hamilton Beach Bread Machine. Add the warm water, eggs, apple cider vinegar, oil, and honey to the bread machine.
Step 2: Add the flour, baking powder, and salt over the liquid ingredients. Sprinkle the active dry yeast on top of the flour.
Step 3: Close your breadmaker lid and set it to bake on the gluten free setting. The machine will do the rest and beep when the bread is finished baking.
Step 4: Carefully remove the bread from the bread machine. Use pointy tongs to remove the paddle from the underside of the bread. Let the bread cool completely on a wire rack. You can slice it when it is fully cooled.
Read my Gluten Free Bread Troubleshooting Guide for more bread-baking tips! I also wrote a review of my favorite gluten-free bread-baking tools if you need suggestions.
What to do if your bread maker doesn’t have a gluten free setting:
- Some breadmakers do not have a gluten free cycle, or the cycle isn’t long enough. If this is the case, use the “Home Made” custom cycle, programming in about 20 minutes Mix, 45 minutes Rise, 90 minutes Bake for 60 minutes until done.
- If your gluten free bread machine loaf pale on top, it can be that the gluten free setting didn’t bake the bread long enough. If this happens, you can run a short “bake-only” cycle to brown the bread more.
Note: The gluten free time/cycle settings differ on EVERY machine and model number.
Frequently Asked Questions:
Yes, you can make rolls out of this bread dough, but you may need to add some extra flour to dust the dough so that you can shape it into rolls. If you do, I recommend an egg wash on top so they have a nice shiny top. You can also use a silicone roll pan.
If your bread didn’t rise, check the expiration date of your yeast. This is usually the reason. Other reasons include using tap water, not rising your dough in a warm location and losing the main rise by moving it to a pan after a rise.
If your bread turned out dense, it most likely didn’t rise. Please review the steps above in why didn’t my whole grain bread rise.
No, whole grain bread is not gluten free unless the manufacturer specifically says the loaf is gluten free.
If you enjoy this recipe, check out more of my gluten-free bread machine recipes. You will also find lots of helpful tips and reliable recipes in my Gluten-Free Bread Guide.
More Gluten Free Bread Recipes:
For more baking inspiration, here is an easy way to find all of my gluten free bread recipes.
- Gluten Free Challah
- Easy Gluten Free Hawaiian Bread
- Gluten Free Honey Rolls (They make great sliders too!)
- Gluten Free Oat Bread
- Easy No-Yeast Gluten-Free Irish Soda Bread
Love This Recipe?
If you made and enjoyed this recipe, I would be incredibly grateful if you could leave a comment below. Please include which flour blend you used. This will help others know this recipe is delicious. Thank you!
Gluten Free Whole Grain Bread (Made in the Oven or Bread Machine)
Ingredients
- 2 ¼ teaspoon active dry yeast
- 1 ½ cups water use filtered water!
- 3 tablespoons honey
- 3 ½ cups gluten free whole grain blend * see notes!
- 1 teaspoon baking powder aluminum-free
- 1 teaspoon salt
- 2 large eggs room temperature
- ¼ cup light oil or butter
- 1 teaspoon apple cider vinegar
Method
- 1 ½ cups water to 110º F. Add the 3 tablespoons honey and stir to dissolve the honey in the water. Add the 2 ¼ teaspoon active dry yeast and let it sit for 5-10 minutes until it is bubbly.
- Add the room-temperature 2 large eggs, ¼ cup light oil or butter (I have tested both in this recipe), 1 teaspoon apple cider vinegar, and the yeast mixture to the stand mixer bowl. For best results, use a paddle attachment. Mix on medium-low speed.
- Turn off the mixer and add the 3 ½ cups gluten free whole grain blend, 1 teaspoon salt, and 1 teaspoon baking powder to the wet ingredients in the stand mixer bowl. Turn the mixer on low speed until the flour is incorporated into the wet ingredients. Set the mixer speed to medium and mix for 30 seconds.
- Line your Pullman or bread loaf pan with parchment paper or spray it with a gluten free baking spray. Note: Pam Baking Spray is NOT gluten free! Add the dough and wet your fingers to spread the dough around. You want the dough to be even throughout the pan.
- To rise my dough in the right environment, I preheat my oven to 200º F and then turn off the oven. Cover the pan loosely with plastic wrap and let it rise for 45 minutes or until it doubles in size.
- Remove the loaf pan and preheat your oven to 350º F. Let the bread dough sit on the counter until the oven is the right temperature for baking. Remove the plastic wrap.
- Bake the bread for 40-50 minutes. The actual baking time can vary depending on the size of your Pullman or loaf pan and the material it is made of.
- You will know the bread is finished baking when it is golden on top and has an internal temperature of 205º F.
- Use the parchment paper to pull the loaf out of the baking pan. Set it onto a cooling rack. Slice the loaf when the bread is completely cooled.
Nutrition
Notes
- Use this recipe for my Homemade Gluten-Free Whole Grain Flour Blend. The ingredients are 1 cup brown rice flour, 1/2 cup buckwheat flour, 1/2 cup sorghum flour, 1/4 cup millet flour, and 3/4 cup of either tapioca OR potato starch. 2 TBSP psyllium husk powder OR 1 teaspoon Xanthan Gum.
- I haven’t tested this recipe with rapid yeast. Use potato starch or tapioca starch.
- Some breadmakers do not have a gluten free cycle, or the cycle isn’t long enough. If this is the case, use the “Home Made” custom cycle, programming in about 20 minutes Mix, 45 minutes Rise, 90 minutes Bake.
- Often, the gluten free setting does not bake the bread long enough. If this happens, you can run a short “bake-only” cycle to brown the bread more.
Private Notes
Tried this recipe?
Let us know how it was!
I truly hope you enjoy this recipe. I have been testing and creating gluten-free recipes for over 15 years. Creating gluten-free recipes that do not taste gluten-free is my goal for every recipe. Sometimes I only have to test a new recipe a couple of times, and others it takes multiple times. I do this so you get reliable, delicious results every time!

Hi Sandi,
Can I make this bread without a bread mixer?
Hi Tracyann, yes, you can mix the dough by hand. You just need mixing bowls :-).
This recipe makes delicious bread! I make just a few adjustments for my setup. I use 1 3/4 cup of water. I add an extra 1/2 cup of sorghum flour. I do 1/4 cup of hulled millet plus 2 tablespoons instead of millet flour to the flour blend. I bloom the yeast in the water/honey mixture for 5 minutes and pour that over the top of all the other ingredients in my bread machine pan. The GF cycle on my machine does the rest. It is the best GF bread. Thank you for the recipe!
Hi Julie, I am so glad you love this bread recipe. I appreciate your sending over your method, I am sure your tips can help other readers as well. Thank you!
We are always looking for another “go to” GF bread recipe. We used your gf flour blend recipe in the notes with all Bob’s Red Mill flours. We did adjust the amounts a bit to get 3 1/2 cups of blend.
The bread turned out excellent on our first try. The taste and texture were spot on!
Hi Jeff, I am so glad you loved the bread recipe, and thank you so much for sending me a photo. The loaf turned out beautifully!
Can I make buns with this recipe?
Hi Sandi, The short answer is yes, you could. I would recommend using one of those silicone or metal hamburger molds (I see them on Amazon). The dough is a lot softer and isn’t really workable like some of my other bread recipes.
This was my second recipe I tried. It was Fantastic!! Will be making it again and again
Can Swerve Granular be used instead of sugar?
Hi Oneida, as far as I can see, yeast can’t feed from artificial sweeteners.
I had to find a recipe that used less white rice flour, more whole grain. I loved the taste of this bread and the texture was fine. Although my mix was a bit thinner. I will adjust the dry ingredients next time.
I am glad you enjoyed the recipe. Keep me posted, adding more flour should help.
Hello Sandi,
I was wondering if you could clarify the adjustment for your gluten free blend — in earlier comments you suggested to add an extra 1/2 cup sorghum flour to make the 3 1/2 cups of flour, and then more recently you suggested 1/4 cup sorghum flour and 3 Tbsp potato starch to make up the difference. Which is better? My first loaf sunk in the middle because I hadn’t made up the difference and I’d like to try your loaf again. Thanks.
Hi Jennifer, I am happy to. If the loaf sunk in the middle, it needs more flour. I would do just the sorghum if your middle sank a bit. I hope that helps.