
If you want a gluten-free bread recipe that’s wholesome, hearty, and 100% delicious, my gluten-free buckwheat bread recipe is incredible for making sandwiches! With its earthy flavor, soft texture, and simple ingredients, this bread holds up well for sandwiches, toast, or French toast. Whether you’re a seasoned gluten-free baker or just starting out, this recipe is easy to follow and delivers incredible results every time.
This post may contain affiliate links. Please read our Disclosure Policy.
❤️ Sandi’s Recipe Summary
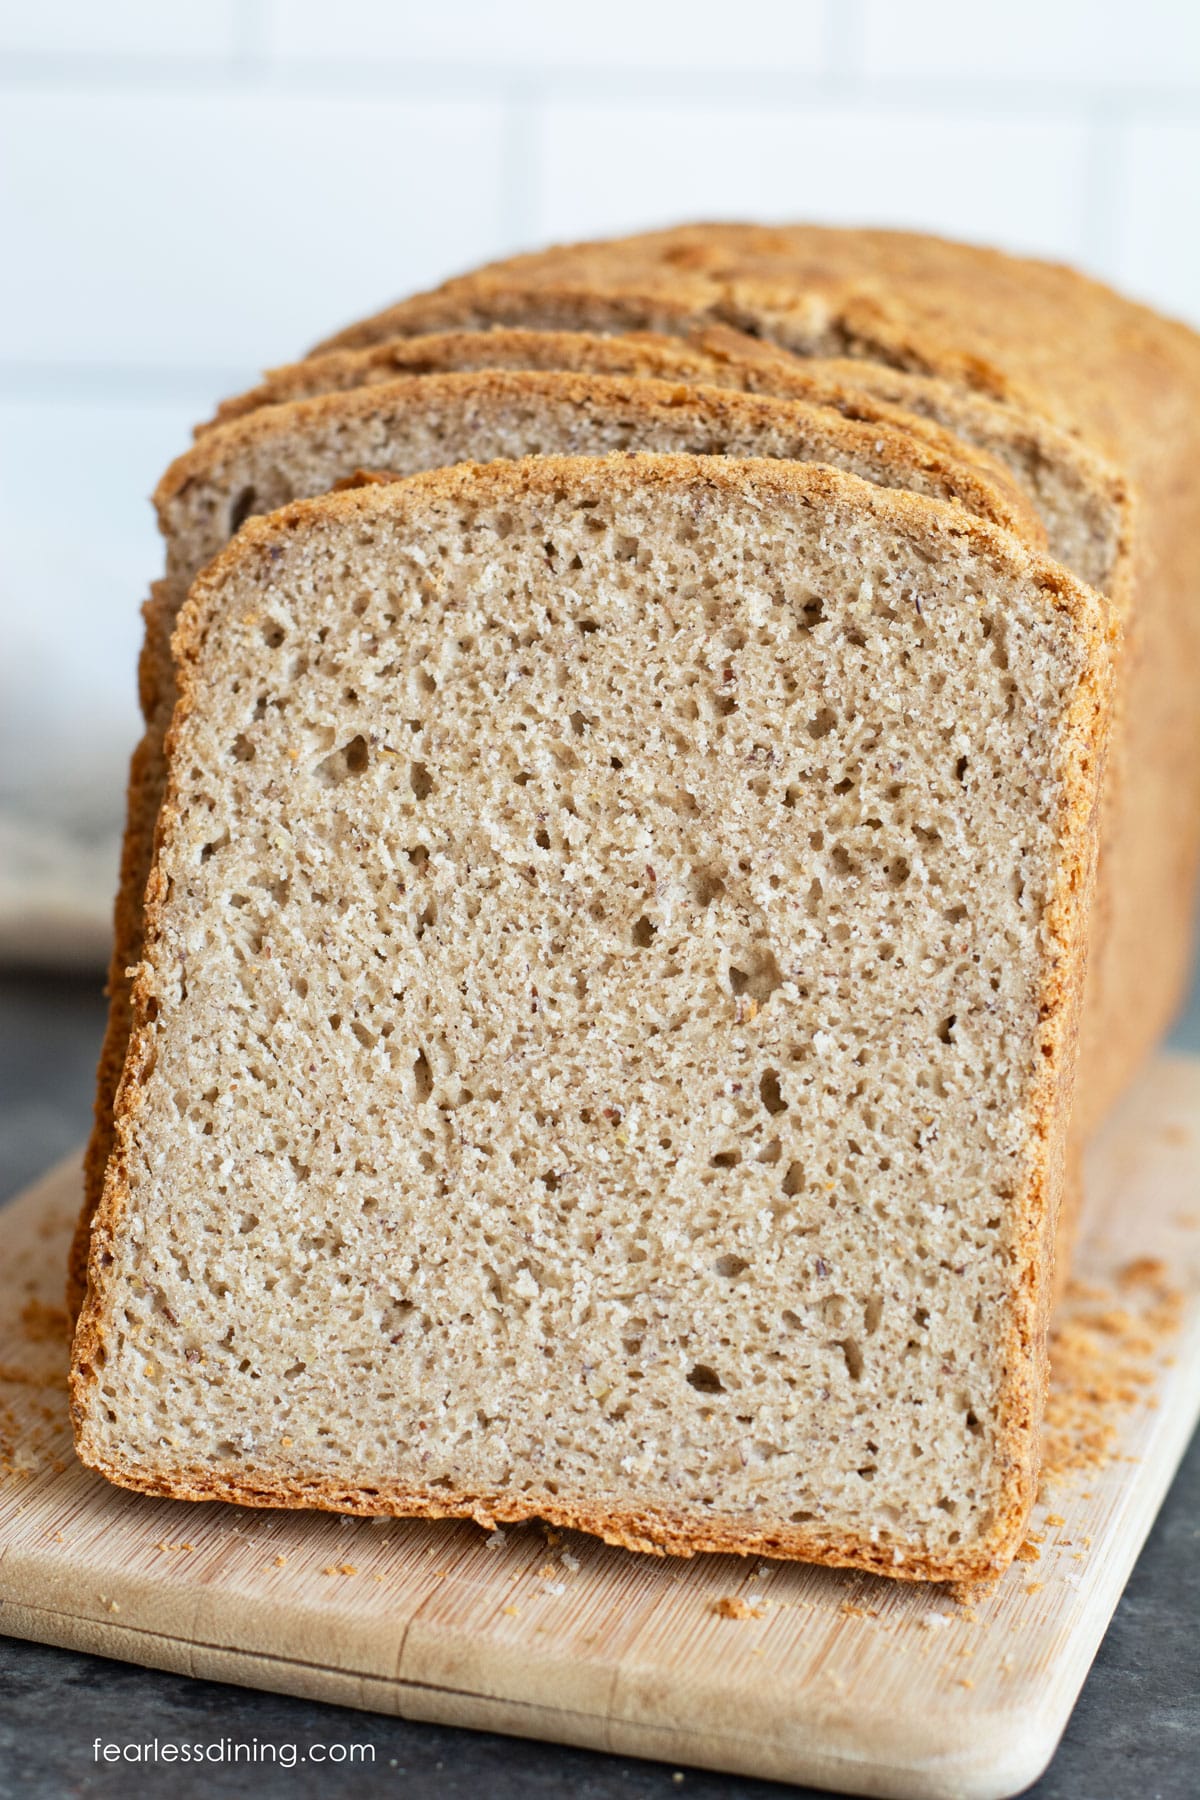
The Quick Bite: Most gluten-free buckwheat bread is too dense for sandwiches. I tested this recipe three times to get the buckwheat-to-sorghum ratio right, and the final version passed the real test…I made a sandwich, put it in my bike jersey pocket, and went for a 30-minute ride. The bread held up. It rises high in a Pullman pan and does not crumble when you slice it thinly.
I have been on a roll creating gluten free bread recipes for sandwiches lately. This homemade gluten free buckwheat bread is my newest bread recipe. This bread bakes up tall in a Pullman loaf pan and is the perfect size for a big sandwich! This bread is light, fluffy, and has that a soft texture.
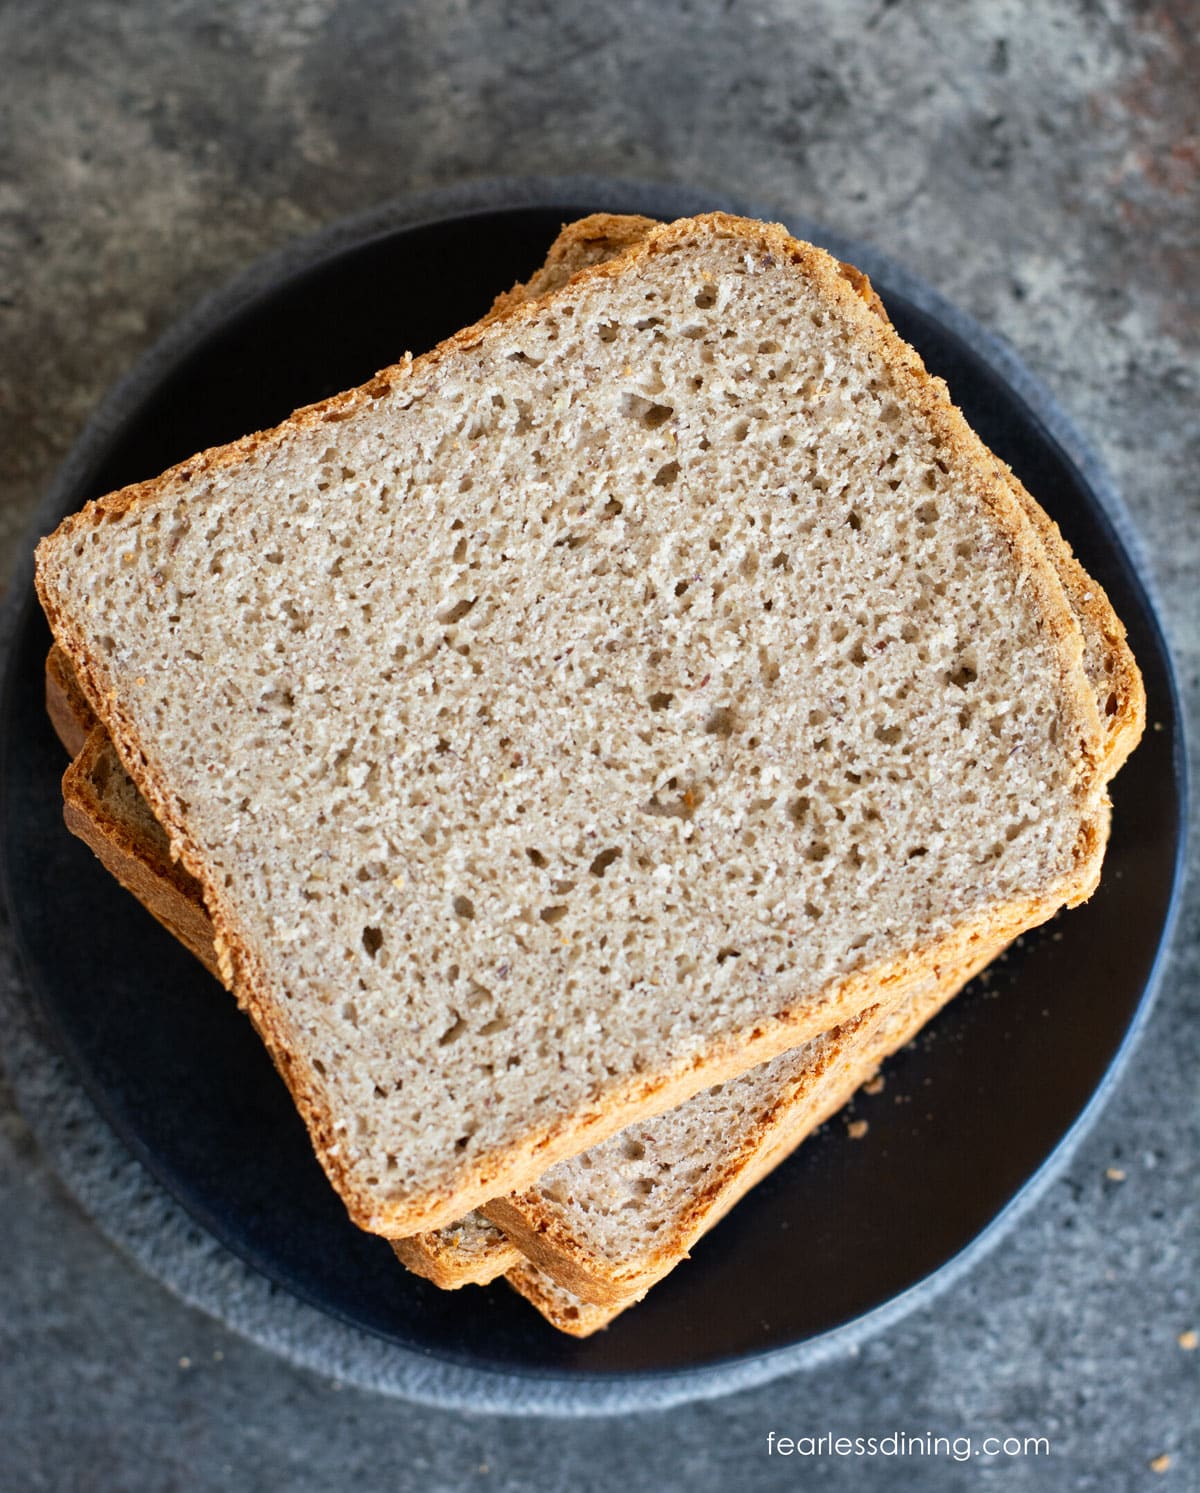
I put it through the ultimate gluten free sandwich bread test. I made a sandwich using this bread and put it in the back pocket of my bike jersey. I went on a 30-minute bike ride on my road bike. The bread didn’t break apart or crumble, which is a sign it will hold up to getting packed in a lunchbox as well.
This bread took some time to test because I struggled with getting the right balance of flour and buckwheat. Most gluten free buckwheat bread recipes turn out dense, and I wanted to make sure this bread was fluffy enough to make sandwiches with. I first trialed using primarily buckwheat flour with just a little added flour and starch. As I suspected, that loaf was too dense.
I tried a 35% blend of buckwheat and flour/starch next, but this loaf didn’t have a strong enough whole-grain buckwheat flavor. When I came up with my 2 1/4 cups of buckwheat flour to 2 cups of the sorghum potato starch blend, I knew I nailed this recipe.
If you love baking bread, try this Gluten-Free Whole Grain Bread or this Gluten-Free Oat Bread.
Ingredient Notes:
For the full list of ingredients and amounts, please go to the recipe card below.
- Buckwheat Flour – Don’t let the name fool you. Buckwheat flour is 100% gluten free. I used Anthony’s buckwheat flour because they test their products to ensure they are gluten-free. Other brands should also work; always check labels to ensure the brand you buy isn’t made on shared equipment.
- Sorghum Flour – You can use any brand; just ensure the one you use isn’t made on shared equipment. I used Authentic Foods sorghum because they mill their flours extra fine.
- Potato Starch – I use Anthony’s potato starch because it is non-GMO and tested to ensure it is gluten-free. Other brands will also work. You can usually find Bob’s Red Mill GF Potato Starch in grocery stores.
- Psyllium Husks – I highly recommend using whole psyllium husks, not the powder. Many brands will turn your baked goods purple, so I encourage you to use Anthony’s brand psyllium husks, which will not change the color of your bread. If this is out of stock, my second favorite is by Now Foods.
- Active Dry Yeast – Always check your yeast to verify it is gluten-free. Red Star Platinum is NOT gluten-free! I have not tested rapid yeast, but it should work as well.
- Flaxseed Meal – I use ground flaxseed meal for this recipe. I have not tested this recipe using whole flaxseeds. That will work if you want to mill whole flaxseeds into a meal.
- Baking Powder – Use aluminum-free baking powder if possible. Using aluminum-free will avoid any metallic aftertaste.
- Light Oil – I used avocado oil to make this bread; any type of light oil will work.
- Eggs – Use large eggs.
- Honey – Feel free to use an inexpensive pure honey to make this recipe. There is no need to use an expensive specialty honey.
- Apple Cider Vinegar – This helps the bread rise more. It will not affect the flavor of your bread.
- Water – It is important to use filtered water. Chlorine can kill yeast, which will significantly reduce the rise.
Psyllium husks form a gel that mimics the extensibility of gluten better than xanthan gum, and it produces a better structure for gluten free bread. You can use xanthan gum, just know it may alter the texture a little bit.
Ingredient Swaps:
- You can substitute tapioca starch for the potato starch.
- If you substitute sorghum or starch for a 1:1 gluten-free flour blend, use one that does not already contain xanthan or guar gum. You also MUST ensure it is a 1:1 that works in yeast recipes. I recommend King Arthur All-Purpose flour (not the bread flour, which is made of wheat starch)
- You can swap the honey for pure maple syrup.

Sandi’s Pick:
I love this Pullman bread pan because it works so well! The taller walls give the dough room to rise and produce a loaf that is the right height for standard sandwich slices
It is also easy to clean with just a sponge. I mostly use mine without the lid, but if you want a perfectly flat top, use the lid.
You may also want to try my new Gluten Free Boston Brown Bread recipe!
How to Make Gluten-Free Buckwheat Sandwich Bread (Step-By-Step)

Email This Recipe To Me!
Step 1: Add 1 cup of warm water and honey to a measuring cup. Warm the water to no hotter than 110º F and stir to dissolve the honey. (I microwaved mine for 25 seconds.) Yeast needs a warm environment to grow. Pour the active dry yeast over the water and stir it in gently. Let the mixture sit for 5 minutes until it is bubbly.
Step 2: Prepare the psyllium husk gel while the yeast is activating. Add 3 tablespoons of psyllium husks to 1/2 cup of remaining water. Mix into a gel. (I recommend using psyllium husks rather than powder because it gives the bread a better texture.)
Add the yeast mixture, psyllium husk gel, oil, apple cider vinegar, and eggs to a stand mixer with a paddle attachment. Mix on low speed and gradually increase it to medium speed until blended.
👀 Sandi’s Tip: You can also mix this bread dough by hand. To do this, add the wet ingredients to one bowl and the dry ingredients to another. Pour the wet ingredients into the dry ingredients and mix into the bread dough.

Step 3: Add the dry ingredients, including buckwheat flour, sorghum flour, potato starch, baking powder, soda, salt, and ground flaxseed meal, to a large bowl and whisk for about 25 seconds to blend. I highly recommend mixing the dry ingredients before adding them to the stand mixer. This will help your ingredients mix thoroughly.
Step 4: Add one cup of the dry ingredients to the wet ingredients and turn the mixer on at a low speed. Gradually add the remaining dry ingredients until all have been incorporated. Turn the mixer up to medium speed and mix for 4 minutes.
Note: The dough is soft, which is normal for this bread recipe. If your dough is too firm or wet, you must tweak it a little. My rule is that if your batter or dough is too runny, add more flour; if it is too thick, add more liquids.

Step 5: Line a Pullman loaf pan with parchment paper and pour the bread dough into the pan. I recommend using parchment paper because you can gently lift the bread out of the pan after baking it and move it to your cooling rack.
👀 Sandi Says: If you do not have a Pullman loaf pan, you can use a regular loaf pan.
Step 6: Use a spatula or large spoon to smooth the top of the bread dough. The dough is going to be softer than non-gluten-free dough. It is more like a very thick batter, and it should hold its shape but spread easily when poured into the pan.
Cover the pan loosely with plastic wrap, leaving room for the bread to rise. This will help prevent the dough from drying out, and place the bread in a warm spot to rise. I preheat my oven to the lowest setting, 175º F, and then turn the oven off. I place my bread in the oven to rise.

Step 7: Rise the gluten free buckwheat bread dough. Let the dough rise for 45 minutes or until it has doubled in size. Preheat the oven to 350º F. I use the regular oven bake setting, not the convection setting. Optional: Brush the top of the dough with melted butter. Try adding seeds like sunflower or sesame to the top for extra flavor before baking.
Step 8: Bake the bread for 45-50 minutes. If you are baking in a regular loaf pan, your bread may bake quicker than in the Pullman pan. When the bread is finished baking, it should have a golden-brown crust and feel firm to the touch.
Remove the bread from the oven and insert a digital thermometer into the middle of the loaf. You want the internal temperature to read between 205-210º F.
Let the bread sit in the pan for 5 minutes, then gently lift the loaf by the parchment paper and transfer it to a cooling rack. Please do not cut the bread until it is fully cooled!! Cutting it too early can affect the texture of the bread, making it crumbly.
Tips For Success:
- You only get one good rise in gluten-free bread baking, so be sure to rise the dough in the loaf pan!
- Check the expiration date to ensure your yeast, baking powder, and soda are not expired.
- Rise the bread in a warm place. I preheat my oven to 150°F, which is the lowest temperature setting, and then turn it off. I place plastic wrap over the pan and rise it in this warm space.

Gluten-Free Bread Troubleshooting:
Why is my gluten-free bread sticky or gummy?
If you notice your gluten-free bread dough is too sticky, it usually means you have too much liquid in the dough, or you didn’t bake the bread long enough. The best way to fix sticky dough is to add more gluten-free flour or bake it for longer. Some gluten free flour blends are very starchy, and you need to use more flour with these blends than with other blends.
Why did my gluten-free bread fall apart?
If your gluten-free bread is falling apart, it is likely that you didn’t include a binder in the flour blend. Gluten in wheat is the “glue” that holds regular baking together. Gluten-free flour doesn’t have the same “glue,” so you have to add it. Here is a good article on gluten-free binders and how they work.
For more bread troubleshooting, read my Gluten-Free Bread Troubleshooting Guide for more information and tips. Also, be sure to store your bread properly. I have tested many gluten-free bread recipes over the years. You can check out my Ultimate Gluten-Free Bread Guide for even more options and troubleshooting help.
Storage/Freezing Instructions:
This bread is easy to store and freeze for further use. Please note that gluten-free baked goods tend to spoil more quickly than their gluten counterparts. If you don’t plan to use up the bread within two days, I recommend freezing it.
- Store the bread in an airtight container, either whole or in slices.
- To freeze this bread, slice the fully cooled bread into sandwich bread slices. You can cut the bread as thick or thin as you like. Lay the slices on a pan and flash-freeze them. Move the slices into a freezer-safe container or freezer bag. Squeeze out any excess air if using a freezer bag, then seal it.
For more tips about how to How to Store Gluten-Free Bread read my guide. You can see how I store my gluten-free bread to keep it fresh for the longest.
More Gluten-Free Bread Recipes:
If you love baking, I have a lot of incredible gluten-free bread recipes to try, including Gluten-Free Challah, traditional Gluten-Free Bread, and Gluten-Free Sourdough Sandwich Bread. Here are a few more recipes to try:
Love This Recipe?
If you made and enjoyed this recipe, I would be incredibly grateful if you could leave a comment below. Please include any swaps you used. This will help others know this recipe is delicious. Thank you!
Gluten Free Buckwheat Bread (Fluffy for Sandwiches!)
Ingredients
- 2 ½ teaspoons active dry yeast
- 1 cup warm water
- 2 tablespoons honey
- 18 grams whole psyllium husks * see notes
- ½ cup water
- 2 ¼ cups buckwheat flour (346.1 g)
- 1 ¼ cups sorghum flour (140.09 g)
- ¾ cup potato starch * see notes
- 1 teaspoon baking powder aluminum-free
- ½ teaspoon baking soda
- 2 tablespoons ground flaxseed meal
- ½ teaspoon salt
- ¼ cup light oil avocado or canola
- 1 tablespoon apple cider vinegar
- 2 large eggs
- ¼ to ½ cup water Add as needed so the dough isn't dry.
Equipment
- measuring cup
Method
- Add 1 cup warm water and 2 tablespoons honey to a measuring cup. Warm the water to no hotter than 110º F and stir to dissolve the honey. (I microwaved mine for 25 seconds.) Yeast needs a warm environment to grow. Pour the 2 1/2 teaspoons active dry yeast over the water and stir it in gently. Let the mixture sit for 5 minutes until it is bubbly.
- Note: If your yeast doesn't get bubbly, check the expiration date of the yeast. Also, ensure you use filtered water and that the water isn't too hot.
- Prepare the psyllium husk gel while the yeast is activating. Add the 18 grams of whole psyllium husks to 1/2 cup of remaining water. Mix into a gel. (I recommend using psyllium husks rather than powder because it gives the bread a better texture.)
- Add the yeast mixture, psyllium husk gel, 1/4 cup of light oil, 1 tablespoon of apple cider vinegar, and 2 large eggs to a stand mixer with a paddle attachment. Mix on low speed and gradually increase it to medium speed until blended.
- Tip: You can also mix this bread dough by hand. To do this, add the wet ingredients to one bowl and the dry ingredients to another. Pour the wet ingredients into the dry ingredients and mix them into the bread dough.
- Add the dry ingredients, including the 2 1/4 cups buckwheat flour (346.1 g), 1 1/4 cups sorghum flour (140.09 g), 3/4 cup potato starch, 1 teaspoon baking powder1/2 teaspoon baking soda, 1/2 teaspoon salt, and 2 tablespoons ground flaxseed meal, to a large bowl and whisk for about 25 seconds to blend. I highly recommend mixing the dry ingredients before adding them to the stand mixer. This will help your ingredients mix in thoroughly.
- Add one cup of the dry ingredients to the wet ingredients and turn the mixer on at a low speed. Gradually add more dry ingredients until all of the dry ingredients are added. Turn the mixer up to medium speed and mix for 4 minutes.
- Note: The dough is soft, which is normal for this bread recipe. If your dough is too firm or too wet, you will need to tweak it a little. My rule of thumb is if your batter or dough is too runny, add more flour; if it is too thick, add more liquids.
- Line a Pullman loaf pan with parchment paper and pour the bread dough into the pan. I recommend using parchment paper because you can gently lift the bread out of the pan after baking it and move it to your cooling rack.
- Use a spatula or large spoon to smooth the top of the bread dough. The dough should hold its shape but spread easily when poured into the pan. Cover the pan loosely with plastic wrap, leaving room for the bread to rise. This will help prevent the dough from drying out and place the bread in a warm spot to rise. I preheat my oven to the lowest setting, 175º F, and then turn the oven off. I place my bread in the oven to rise.
- Let the dough rise for 45 minutes or until it has doubled in size. Preheat the oven to 350º F. I use the regular oven bake setting and NOT the convection. Optional: Brush the top of the dough with melted butter. For extra flavor, try adding seeds like sunflower or sesame to the top before baking.
- Bake the bread for 45-50 minutes. If you bake in a regular loaf pan, your bread may bake quicker than the Pullman pan. When the bread is finished baking, it should have a golden-brown crust and feel firm to the touch.
- Remove the bread from the oven and insert a digital thermometer into the middle of the loaf. You want the internal temperature to read between 205-210º F. If you don't have a digital thermometer, you can insert a long cocktail-sized toothpick into the middle of the bread. If it comes out clean, the bread should be baked through.
- Let the bread sit in the pan for 5 minutes, then gently lift the loaf by the parchment paper and move the bread to a cooling rack.
- Do not cut the bread until it is fully cooled!! Trust me, the bread is easier to slice and so much better if you wait. Cutting it too early can affect the texture of the bread and make it crumbly.
Nutrition
Notes
- Many brands of psyllium husk will turn your baked goods purple. My go-to, trusted brand is Anthony’s Whole Psyllium Husks. It is found on Amazon. My second favorite is by Now Foods.
- If you don’t have potato starch, you can swap tapioca starch.
- This bread is easy to store and freeze for further use. Please note that gluten free baked goods tend to spoil quicker than their gluten counterparts. If you don’t plan to use up the bread within two days, I recommend freezing it.
- For more bread troubleshooting, read my Gluten-Free Bread Troubleshooting Guide for more information and tips.
2. Check the expiration date to ensure your yeast, baking powder, and soda are not expired.
3. Rise the bread in a warm place. I preheat my oven to 150ºF, which is the lowest temperature setting on my oven, and then turn it off. I place plastic wrap over the pan and rise it with the oven door cracked open.
Private Notes
Tried this recipe?
Let us know how it was!
I truly hope you enjoy this recipe. I have been testing and creating gluten-free recipes for over 15 years. Creating gluten-free recipes that do not taste gluten-free is my goal for every recipe. Sometimes I only have to test a new recipe a couple of times, and others it takes multiple times. I do this so you get reliable, delicious results every time!

Hi Sandi, can this recipe be made into hamburger buns? I love that recipe but was looking for a different taste for a while.
Hi Melissa, This recipe will work for burger buns, but you will need to buy one of those hamburger bun molds. I use a silicone one I got on Amazon. The bread dough is too soft to realy shape, so the mold helps them keep their shape.
This bread is very good. It’s the first time I ground flour from buckwheat groats. I wasn’t sure what to expect.. The bread was soft and flavorful.. The only thing I would change next time is adding the extra 1/4 cup of water with the husk. The husk was so firm it was difficult mixing it with the other ingredients.. I will being making this bread again. Great recipe!
Hi Linda, I am so glad you loved this bread recipe. You can easily use more of the water to make the husk gel, it is a good idea. Thank you so much.
Very happy with my loaf. Looks like the photos and tastes good. Only substitute I made was for tapioca starch since I couldn’t find any potato starch at any local stores. I will be making again.
I am so glad to hear that the swap with tapioca starch worked out nicely. Thank you for coming back to let me know you loved this recipe.
Question Sandi, can this be made as hamburger buns with a little tweak to the baking time?
Hi Melissa, that is a great question. This dough is wetter and may be difficult to shape. If you have a hamburger bun pan (they make them!) it should work really well.
I just made this bread today. I weighed and measured all ingredients (some of which I purposely bought for this recipe) according to directions. The dough was very stiff so I added an extra 3 Tablespoons of water. I waited to cut it until it was cooled. I was quite disappointed in the finished product – very dense and rather dry, not light and fluffy as mentioned at the top of the recipe. Any suggestions of what to do different next time?
Hi Judy, There is always some variance by brand of gluten free flours, moisture or lack of moisture if you are in a dry environment will also slightly affect weights. Did you swap any ingredients? How long did you rise the dough, and where did you rise the bread dough? I am happy to troubleshoot, but it sounds like your dough was too dry so it couldn’t rise up enough.
Hi Sandy, I used the brands of products you recommended and did not swap any ingredients. None of the ingredients were out of date. I let the dough rise for 60 minutes. I had just used the oven for making muffins so it was too warm inside the oven so set it on the counter right next to the oven where it was still warm. I wonder if I should have added more water as after adding 3 tablespoons, it was still quite stiff. We did use it for sandwiches but it was breaking apart.
I think you needed more water so the bread could expand with the rise. Did you snap a photo of the dough by any chance? How firm was it? I would recommend more water. You can see in my photos that the dough should be pretty soft.
Hi.
Quick question. I haven’t baked bread with buckwheat flour before so maybe there is something I don’t know…. the above recipe calls for 2 1/2 Tbsp. yeast. That seems like so much more than what I would usually add.
Can you confirm that it is supposed to be 2 1/2 Tbsp yeast and not 2 1/2 tsp? Thank you!
It is teaspoons. Thank you for the note. I fixed it.
Bread looks very good. What size pan did you use?
Hi Patricia,
It is a Pullman loaf pan. I talk about it in the post. Here are the dimensions. (8.5X4.7.5X 4.375 INCH) I like this pan because it is a lot taller.
Do you think I could substitute something for the Eggs?
Hi Donna, I haven’t tested an egg replacer in this recipe. I tend to have good luck with Bob’s Egg Replacer, but again, I haven’t tested it in this bread. If you try it, please come back and let us know how it turned out.