
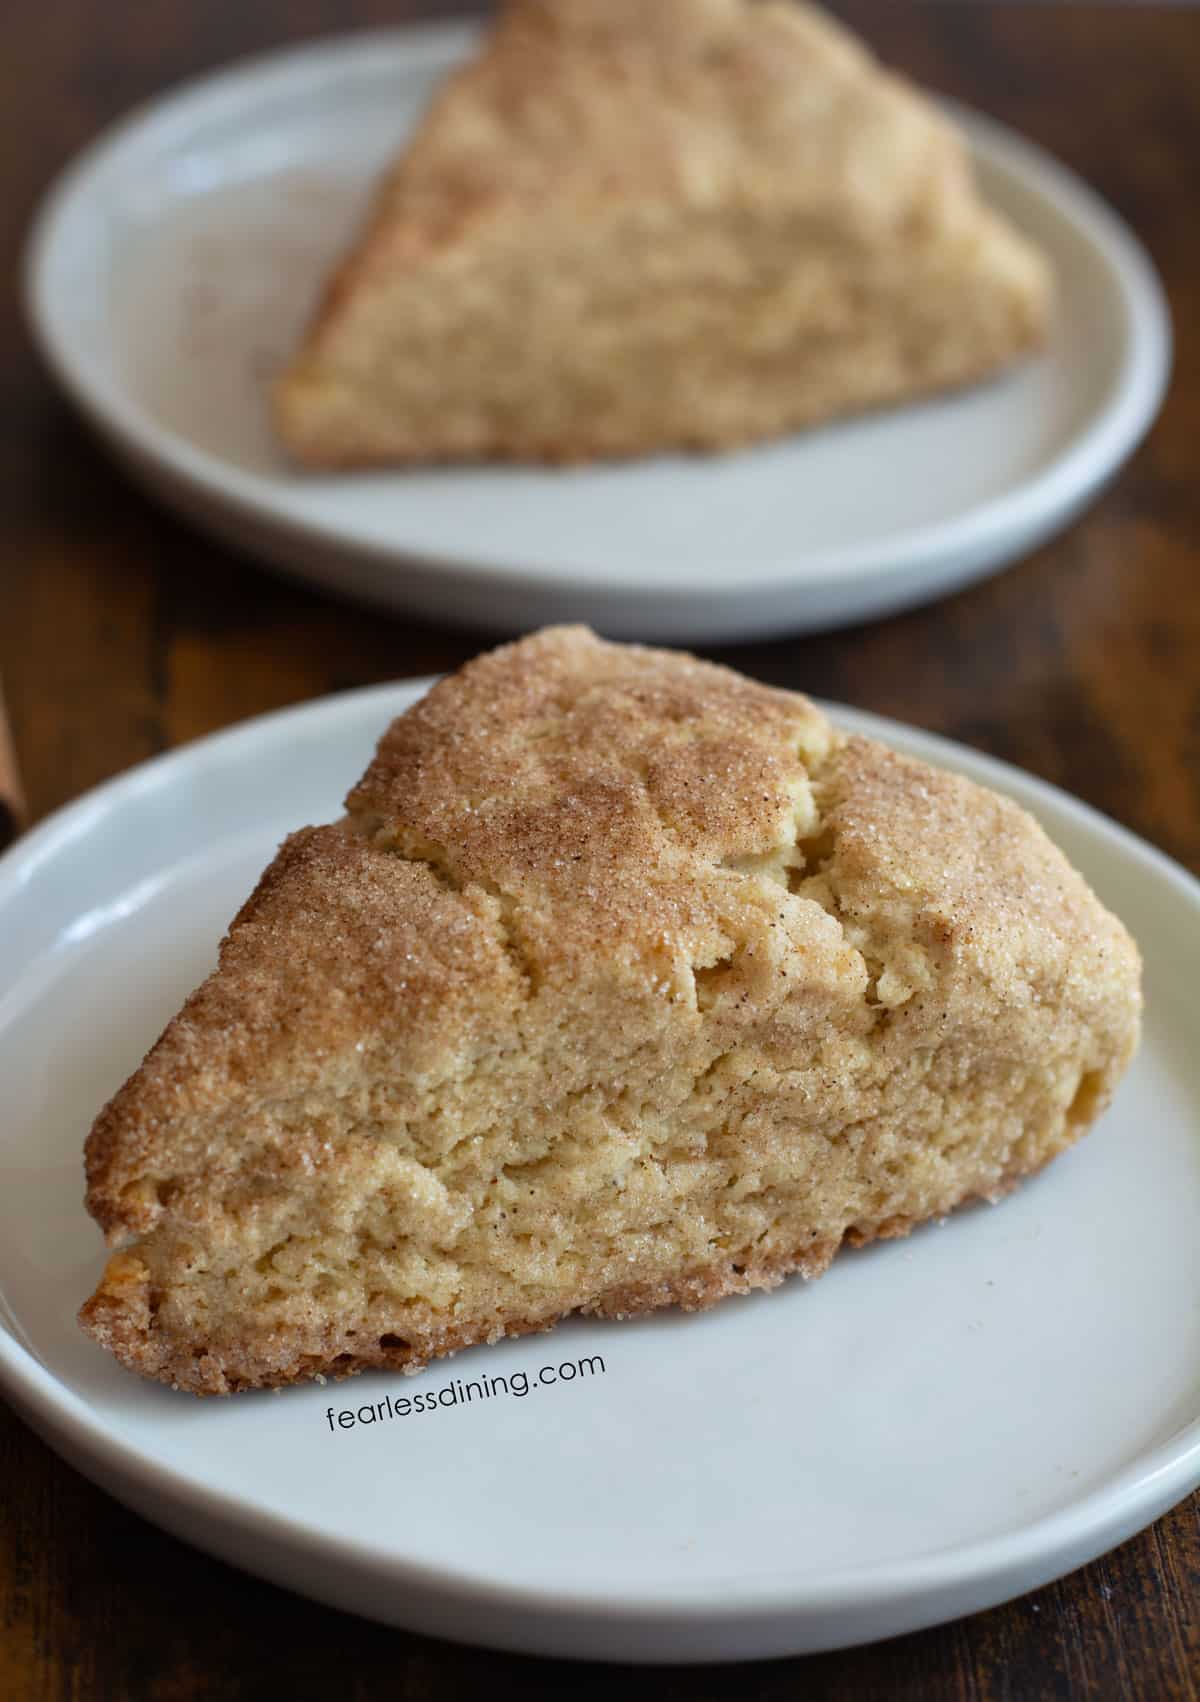
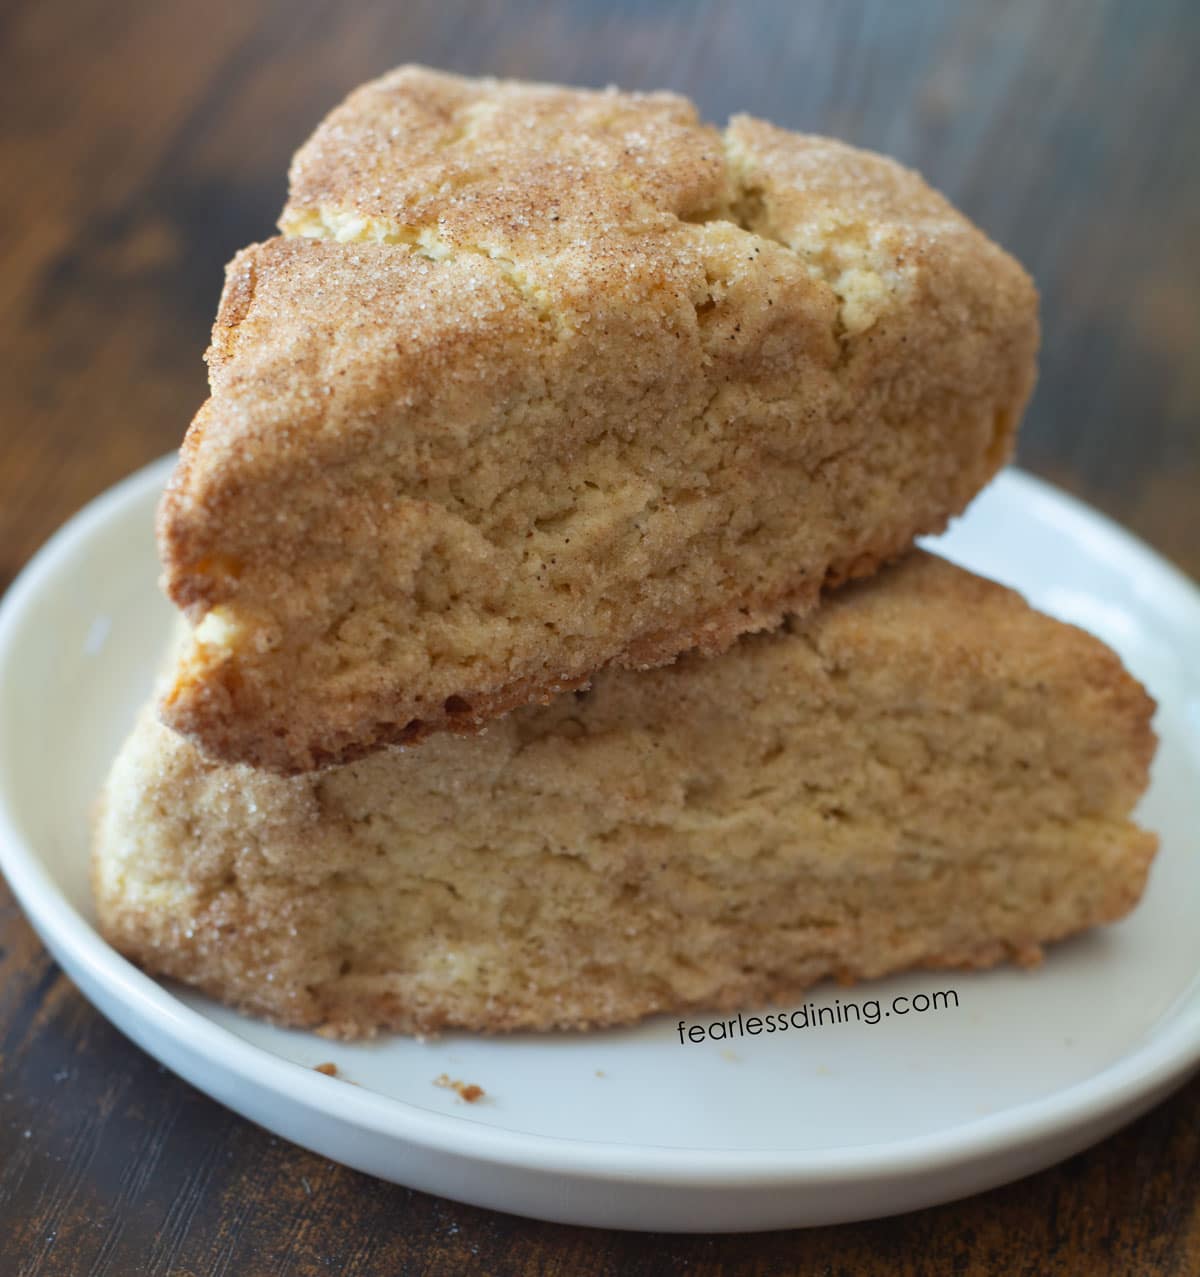
These gluten-free snickerdoodle scones are flaky, with buttery layers and a golden, crinkly cinnamon-sugar coating. Each bite is tender on the inside with just the right amount of crunch on the edges. Whether you are baking scones for brunch, a weekend treat, or just because you love anything snickerdoodle, these homemade gluten-free scones are a must-try.
❤️ Sandi’s Recipe Summary
If you have been reading my blog for a while, you know I have many tasty, sweet, and savory scone recipes. I also have delicious holiday scone recipes. I can’t wait to hear your thoughts on my newest gluten-free snickerdoodle scone recipe. Please drop a comment and let me know!
Check out all of my gluten-free scone recipes or try one of my favorites like these Gluten-Free Orange Scones, Gluten-Free Oat Scones, or these Gluten-Free Blueberry Scones. If you are new to making scones, check out my Gluten-Free Scones Guide for more tips and 20+ recipes.
Ingredient Notes:
For the full list of ingredients and amounts, please go to the recipe card below.
- Gluten-Free Flour Blend – I tested this recipe with Bob’s Red Mill 1:1 Blend and King Arthur Measure for Measure. My readers have written that these flour blends work in my scone recipes: Divided Sunset Flour Blend, Dove’s Farm, Better Batter Flour Blend, and El Faro GF Flour Artisan Blend (Canada). I have not personally tested their list.
- Sugar – Sugar sweetens the dough and also helps with light browning. The cinnamon sugar coating brings most of the sweetness, so this amount in the dough is just right for balance.
- Baking Powder – Use aluminum-free baking powder for a clean flavor. Baking powder serves as the leavener, helping to create a rise and structure in the dough, which gives the scones their classic layered look.
- Butter – Use unsalted butter. Use cold, unsalted butter (or plant-based butter if dairy-free). Cold butter is what gives scones their signature flaky texture. As it melts during baking, it releases steam that forms those tender layers.
- Eggs – Use large eggs. Eggs help bind the dough, add richness, and contribute to a tender crumb. They also support the rise and structure of these scones.
- Milk or Non-Dairy Milk – You can use either regular or non-dairy milk. I used oat milk. The milk provides moisture to help bring the dough together and soften the inside.
- Ground Cinnamon – Adds warmth and the signature snickerdoodle flavor. You also coat the scones in a cinnamon sugar mix for a sweet, spiced crust on the outside.

A Note From My Kitchen
If you have followed my blog for some time, you know I have a huge weakness for scones. I have worked hard to perfect my scone recipes so they always turn out those big, flaky layers. The layers come from the steam pockets you make when cutting cold butter into the dry ingredients. I have tested my scone recipes with multiple flour blends and regular and dairy-free butter, so you can rely on the recipes to work.
If you notice your dough seems wet, add more flour, one tablespoon at a time, until the dough feels softer. If your dough is too dry, add more milk, a tablespoon at a time. Every flour blend varies, and by making these adjustments, you can ensure your recipes turn out perfectly. Read Why Gluten-Free Flour Blends Vary to learn more about this.
How to Make Gluten-Free Snickerdoodle Scones (Step-By-Step)
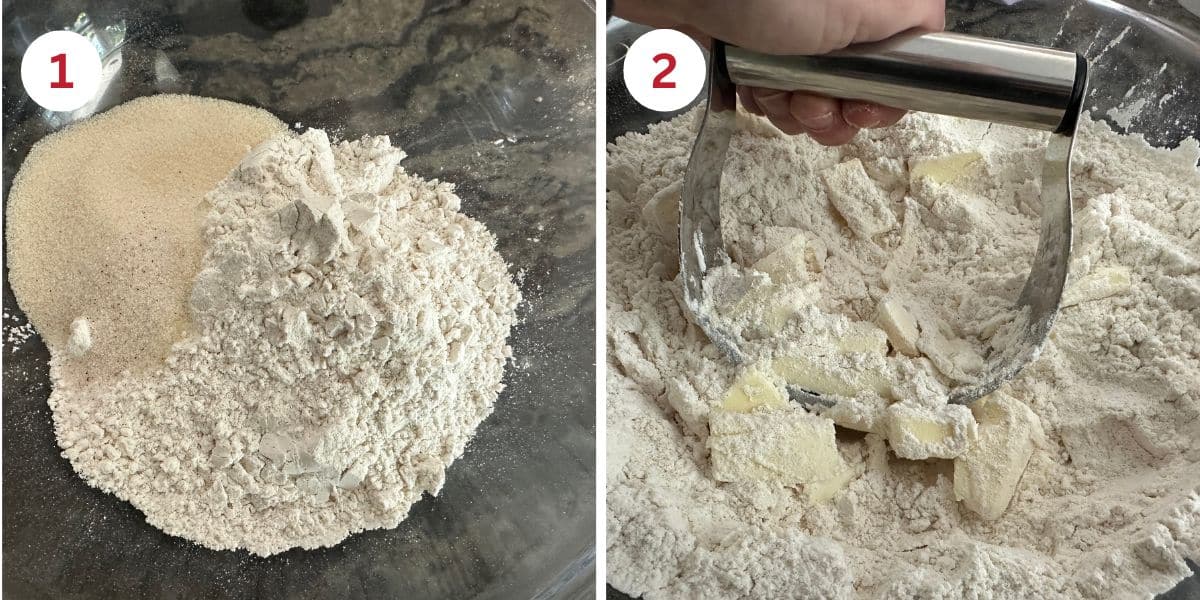
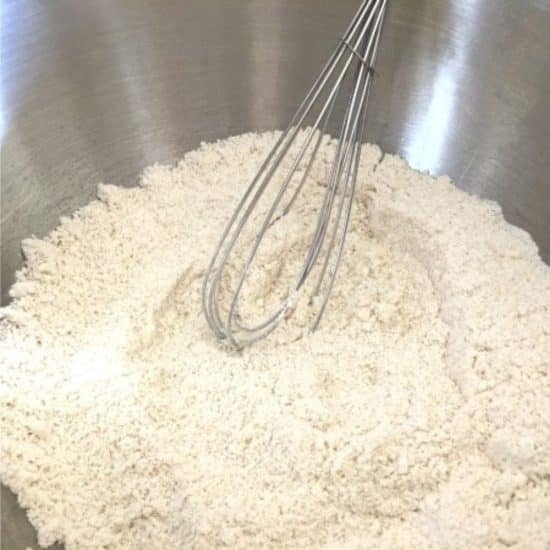
Step 1: Combine the gluten free flour blend, salt, and sugar in a large mixing bowl. Blend well to evenly distribute the dry ingredients.
Step 2: Chop the cold butter into chunks and add it to the flour mixture. Use a pastry blender to break the butter into the dough until you have pea-sized bits.
👀 Sandi Says: If you do not have a pastry blender, no problem! Freeze the butter and use a cheese grater held over the bowl to shred the butter directly into the flour. This keeps the butter cold and helps create those beautiful flaky layers.
Email This Recipe To Me!
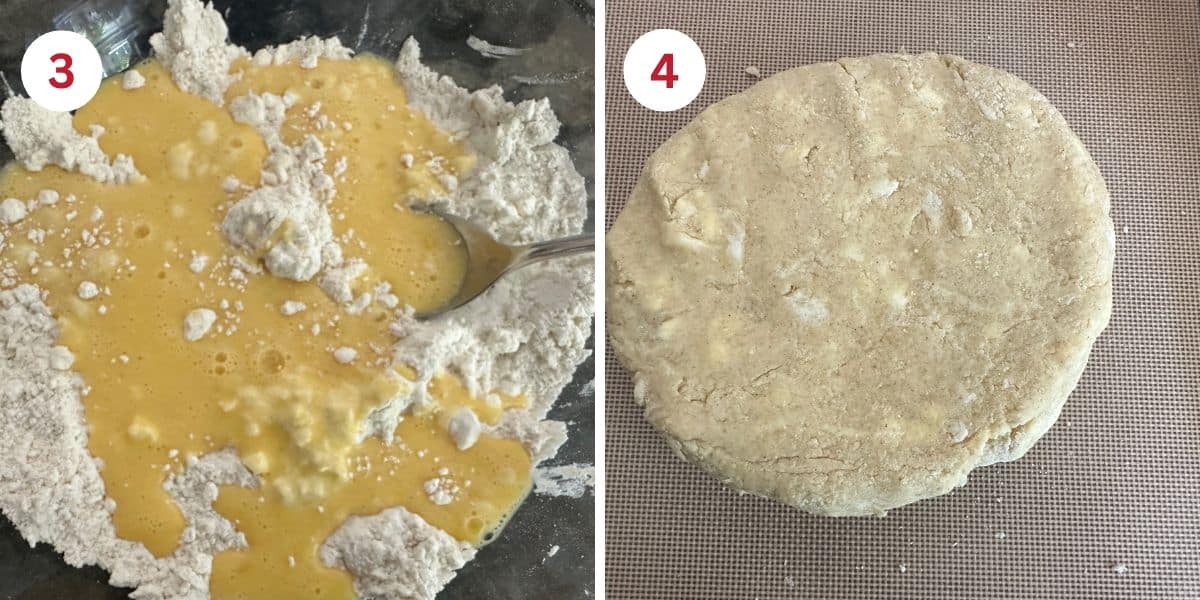
Step 3: In a small bowl, whisk together the eggs and your choice of milk (regular or non-dairy). Pour this into the flour and butter mixture, then mix until a soft dough forms. The dough should hold together without being too wet or dry.
Step 4: Transfer the dough onto a silicone baking mat or clean surface and shape it into a circle about 2 inches thick. You should see visible pieces of butter in the dough. Those are what will steam and puff in the oven, creating flaky layers.
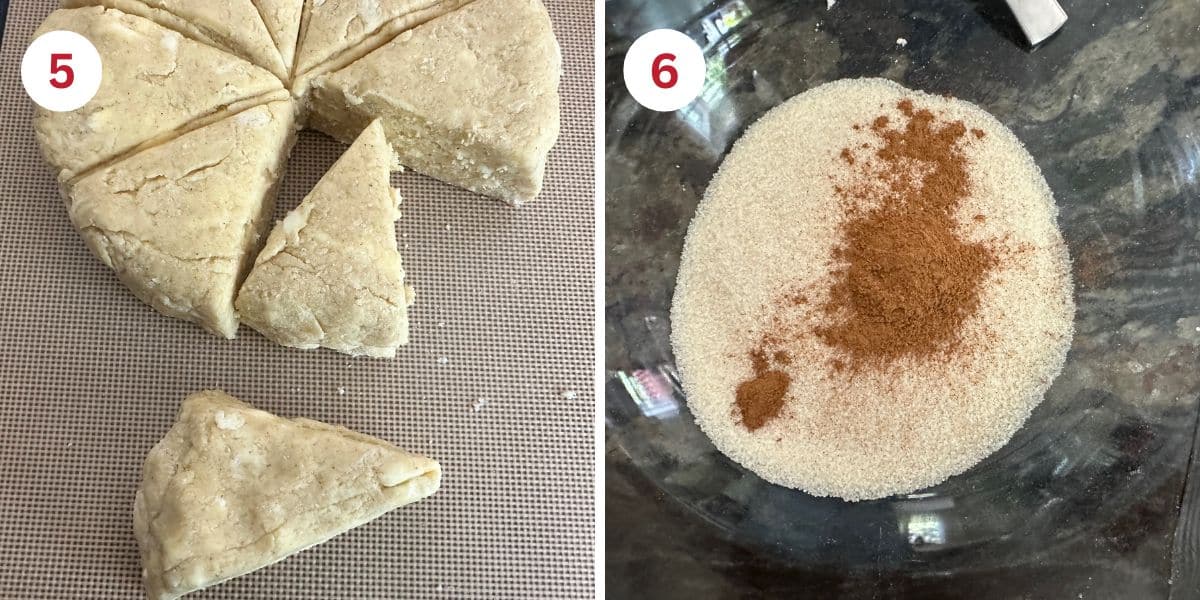
Step 5: Cut the dough into 8 wedges. Separate each scone.
Step 6: In a small bowl, whisk together the cinnamon and sugar until well blended. This will give the scones that signature snickerdoodle flavor and crinkly cinnamon sugar coating.
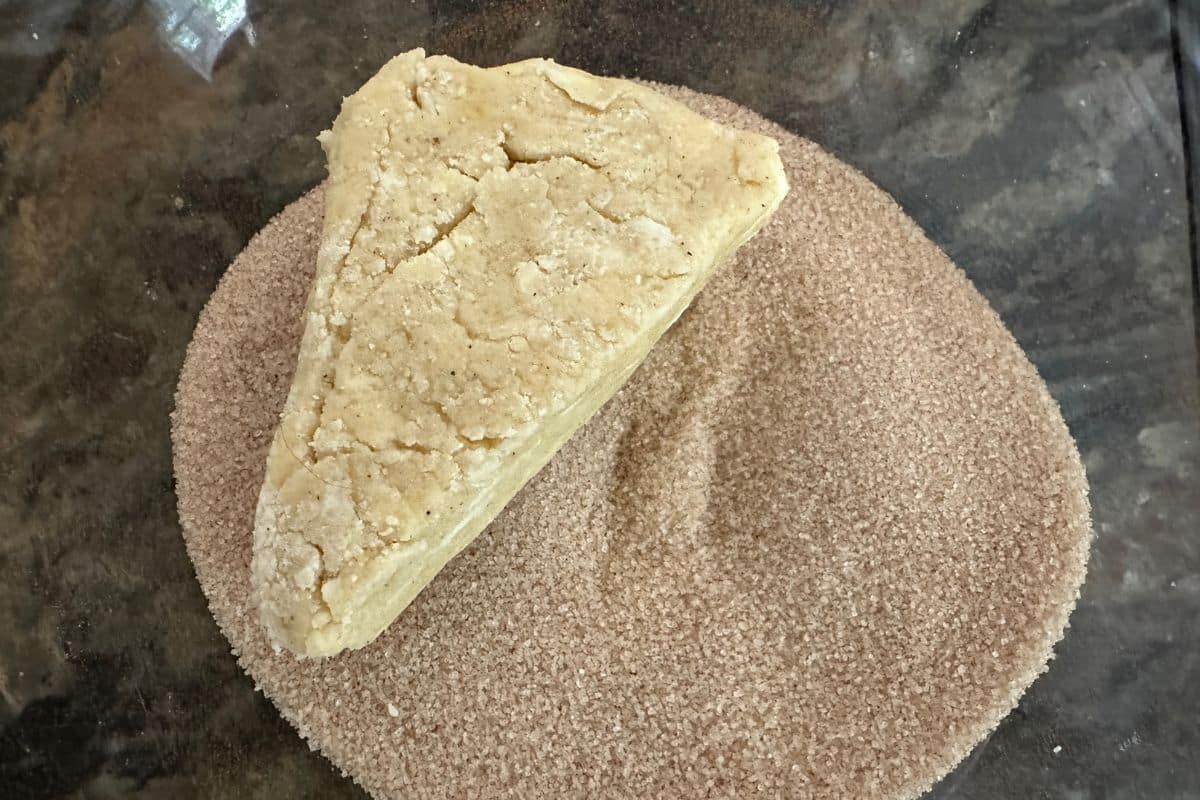
Step 7: Line a cookie pan with parchment paper. I recommend using parchment paper instead of a baking spray to make scones. Line a baking sheet with parchment paper (this works much better than baking spray for scones). Roll each scone wedge in the cinnamon sugar mixture, making sure to coat all sides of the dough.
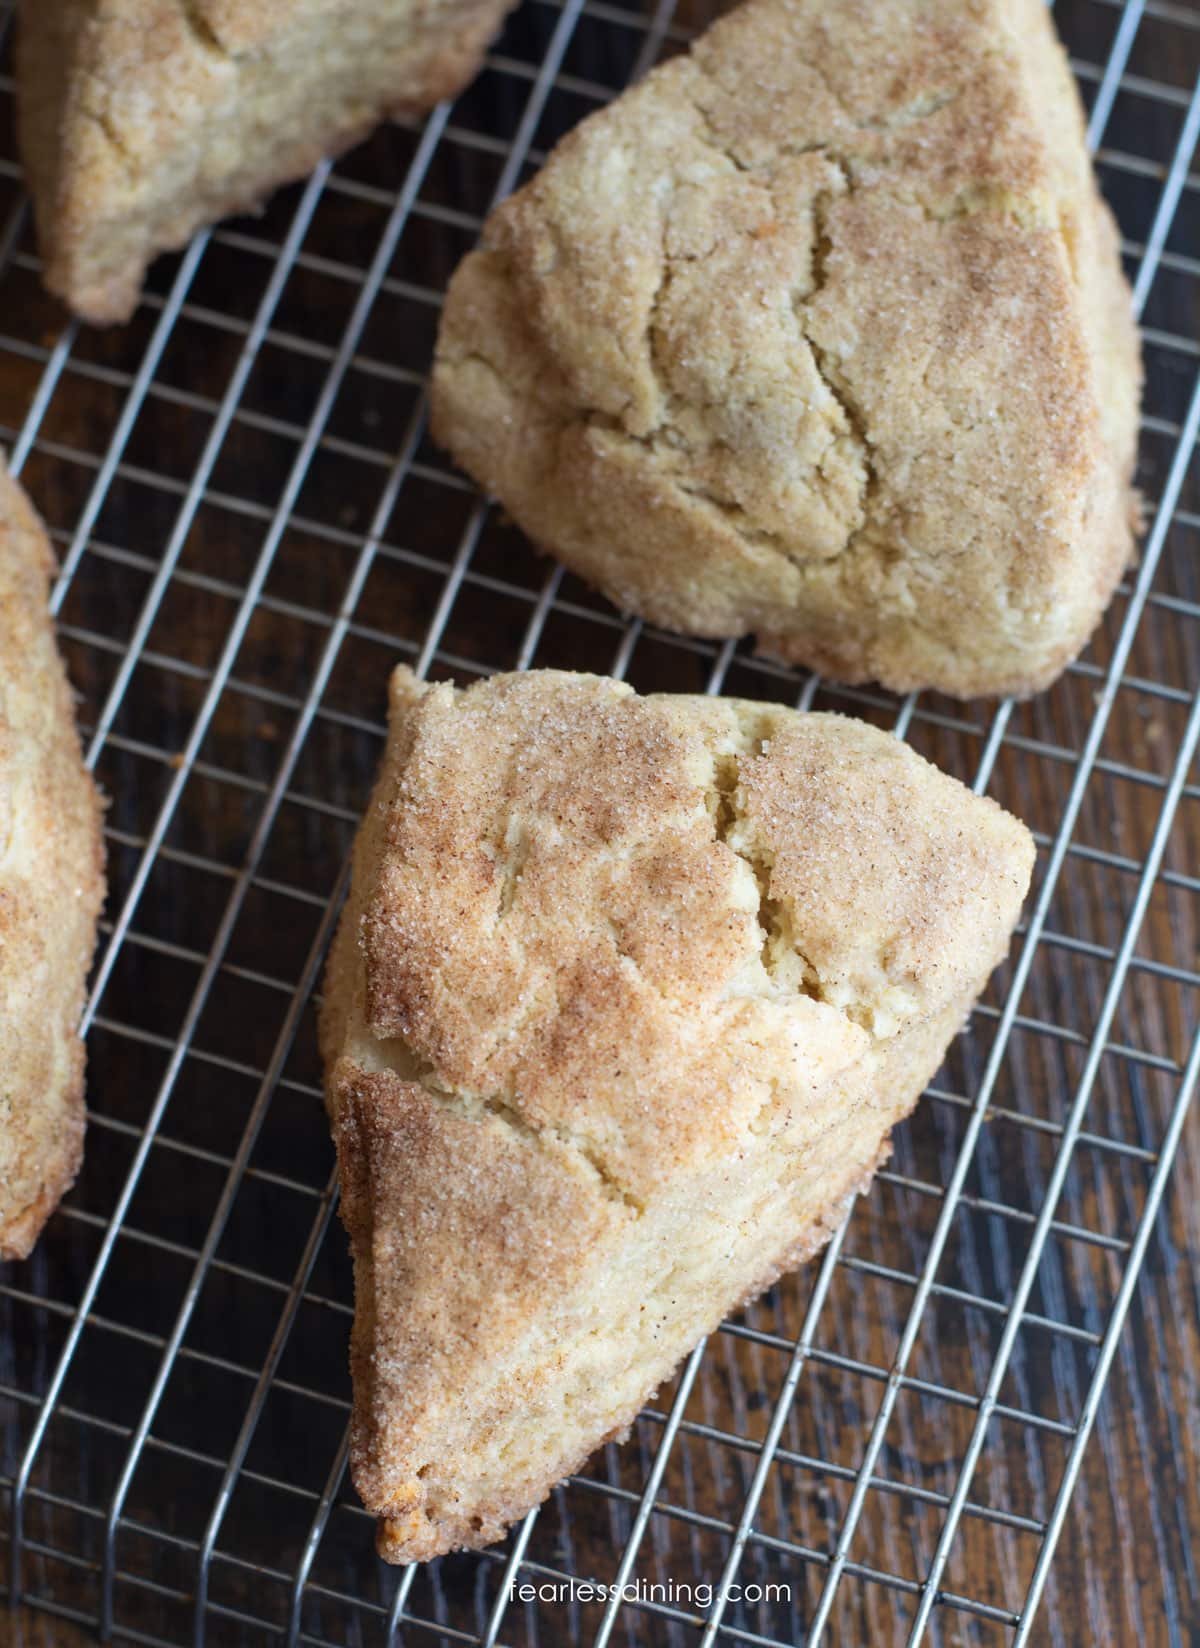
Step 8: Place each scone on the baking pan. Bake the scones for 20 to 25 minutes, depending on how thick and large you make your scone wedges. You will see they are done when they are slightly golden.
Step 9: Slide the parchment paper with the scones onto a cooling rack. Enjoy the scones when they are fully cooled.
If you love cinnamon and sugar flavors, try my Gluten-Free Cinnamon Apple Scones!
Tips For Success
1. It is important to have COLD butter, or you will not get big flaky layers.
2. Do not wiggle or push the kitchen knife sideways into the scone edges when slicing the scones. This can seal the dough’s edges, making it harder for the scones to rise.
Storage and Freezing Tips:
- Store leftover scones in an airtight container to prevent drying out. Gluten-free baked goods tend to spoil more quickly, so I recommend freezing leftover scones if you do not finish them within 3 days.
- To freeze the scones, place cooled scones in a freezer-safe zipper bag. Lay the scones flat in the bag and freeze. To thaw, let them sit out on the counter or microwave them for 25 seconds.
More Gluten-Free Scone Recipes:
Scones are my favorite. If you want more delicious scone goodness, try some of these recipes!
Love This Recipe?
💬 Did you make this recipe? Drop a comment below, and let me know how it turned out! ⭐⭐⭐⭐⭐ Please include which flour blend you used. This will help others know this recipe is delicious. Thank you!
Gluten-Free Snickerdoodle Scones – Cinnamon Sugar Goodness!
Ingredients
- 2 cups gluten free flour
- ⅓ cup cane sugar
- 2 teaspoons baking powder Aluminum-free!!
- ⅛ teaspoon salt
- ½ cup cold unsalted butter
- 2 large eggs
- ½ cup regular or non-dairy milk
- 1 teaspoon ground cinnamon
- ¼ cup cane sugar
Method
- Preheat the oven to 350º F. Check to ensure the oven rack is positioned in the middle of the oven.
- Combine the 2 cups gluten free flour, 1/3 cup cane sugar, 2 teaspoons baking powder, and 1/8 teaspoon salt in a large mixing bowl. Whisk well to distribute the dry ingredients evenly.
- Cut the cold 1/2 cup cold unsalted butter into chunks and add it to the flour mixture. Use a pastry blender to cut the butter into the dough until you have pea-sized bits.
- Sandi's Tip: If you don't have a pastry blender, you can freeze the butter and use a cheese grater held over the bowl to shred the butter directly into the flour. This keeps the butter cold and helps create those beautiful flaky layers.
- In a small bowl, whisk together 2 large eggs and your choice of 1/2 cup regular or non-dairy milk. Pour this into the flour and butter mixture, then mix until a soft dough forms. The dough should hold together without being too wet or dry.
- Cut the dough into 8 wedges with a sharp knife. Separate each scone. Do not twist or push the knife into the scone edges when cutting scones. This can seal the dough, making it more difficult for the scones to rise.
- Whisk together 1/4 cup cane sugar and 1 teaspoon ground cinnamon in a small bowl until well blended. This will give the scones that signature snickerdoodle flavor and crinkly cinnamon sugar coating.
- Line a cookie pan with parchment paper. I recommend using parchment paper instead of a baking spray to make scones. Line a baking sheet with parchment paper (this works much better than baking spray for scones).
- Roll each scone wedge in the cinnamon sugar mixture, making sure to coat all sides for maximum flavor in every bite.
- Place each scone on the baking pan. Bake the scones for 20 to 25 minutes, depending on the thickness and size of your scone wedges. You will see they are done when they are slightly golden.
- Slide the parchment paper with the scones off the baking sheet onto a cooling rack. Enjoy when the scones are fully cooled.
Nutrition
Notes
- I tested this recipe with both King Arthur Measure for Measure and Bob’s Red Mill 1:1 GF Blend. Most gluten-free flour blends should work well. Keep an eye on the moisture level of the dough. My rule of thumb is if your batter or dough is too runny, add more flour, and if it is too thick, add more liquids.
- If your blend doesn’t have a binder, add 3/4 teaspoon of xanthan gum.
- I used oat milk in my testing, but any non-dairy milk, as well as regular milk, will work.
- To make this recipe dairy-free, use plant-based butter and non-dairy milk.
- Store leftover scones in an airtight container so they do not dry out. Gluten-free baked goods tend to spoil quicker, so I recommend freezing leftover scones if you don’t finish them within 3 days.
- To freeze the scones, place the cooled scones in a freezer-safe zipper bag. Lay the scones flat in the bag and freeze them. To thaw, let them sit out on the counter or microwave them for 25 seconds.
Private Notes
Tried this recipe?
Let us know how it was!
Gluten-Free Related Reading
Gluten-free baking is like a science experiment. There are so many things you need to understand the different components of baking without gluten. My Gluten-Free Resources Section is here to help teach you the tools you need to know to become a confident gluten free baker.
This post may contain affiliate links. Please read our Disclosure Policy.
My Best Gluten-Free Baking Tips For Better Baking!
Why Binders Are Important In Gluten-Free Baking

The Best Gluten Free Flour Blends – And how to use them!
I truly hope you enjoy this recipe. I have been testing and creating gluten-free recipes for over 15 years. Creating gluten-free recipes that do not taste gluten-free is my goal for every recipe. Sometimes I only have to test a new recipe a couple of times, and others it takes multiple times. I do this so you get reliable, delicious results every time!

Though they were good, these turned out more like cake than scones. I also didn’t use a whole stick of butter and I accidentally misread the quantity of sugar, and did 1/2 cup instead. I’m kinda glad I did that because they’re not very sweet. I could have added more. Oh, and I substituted sugar for allulose.
Hi Shawn, Given you completely changed my recipe, it is not surprising these scones were more like cake. Not using the amount of butter I tested means you have a lot fewer steam pockets to make flaky layers. I haven’t tested the recipe using imitation sugar, so I can’t comment on them not turning out less sweet.