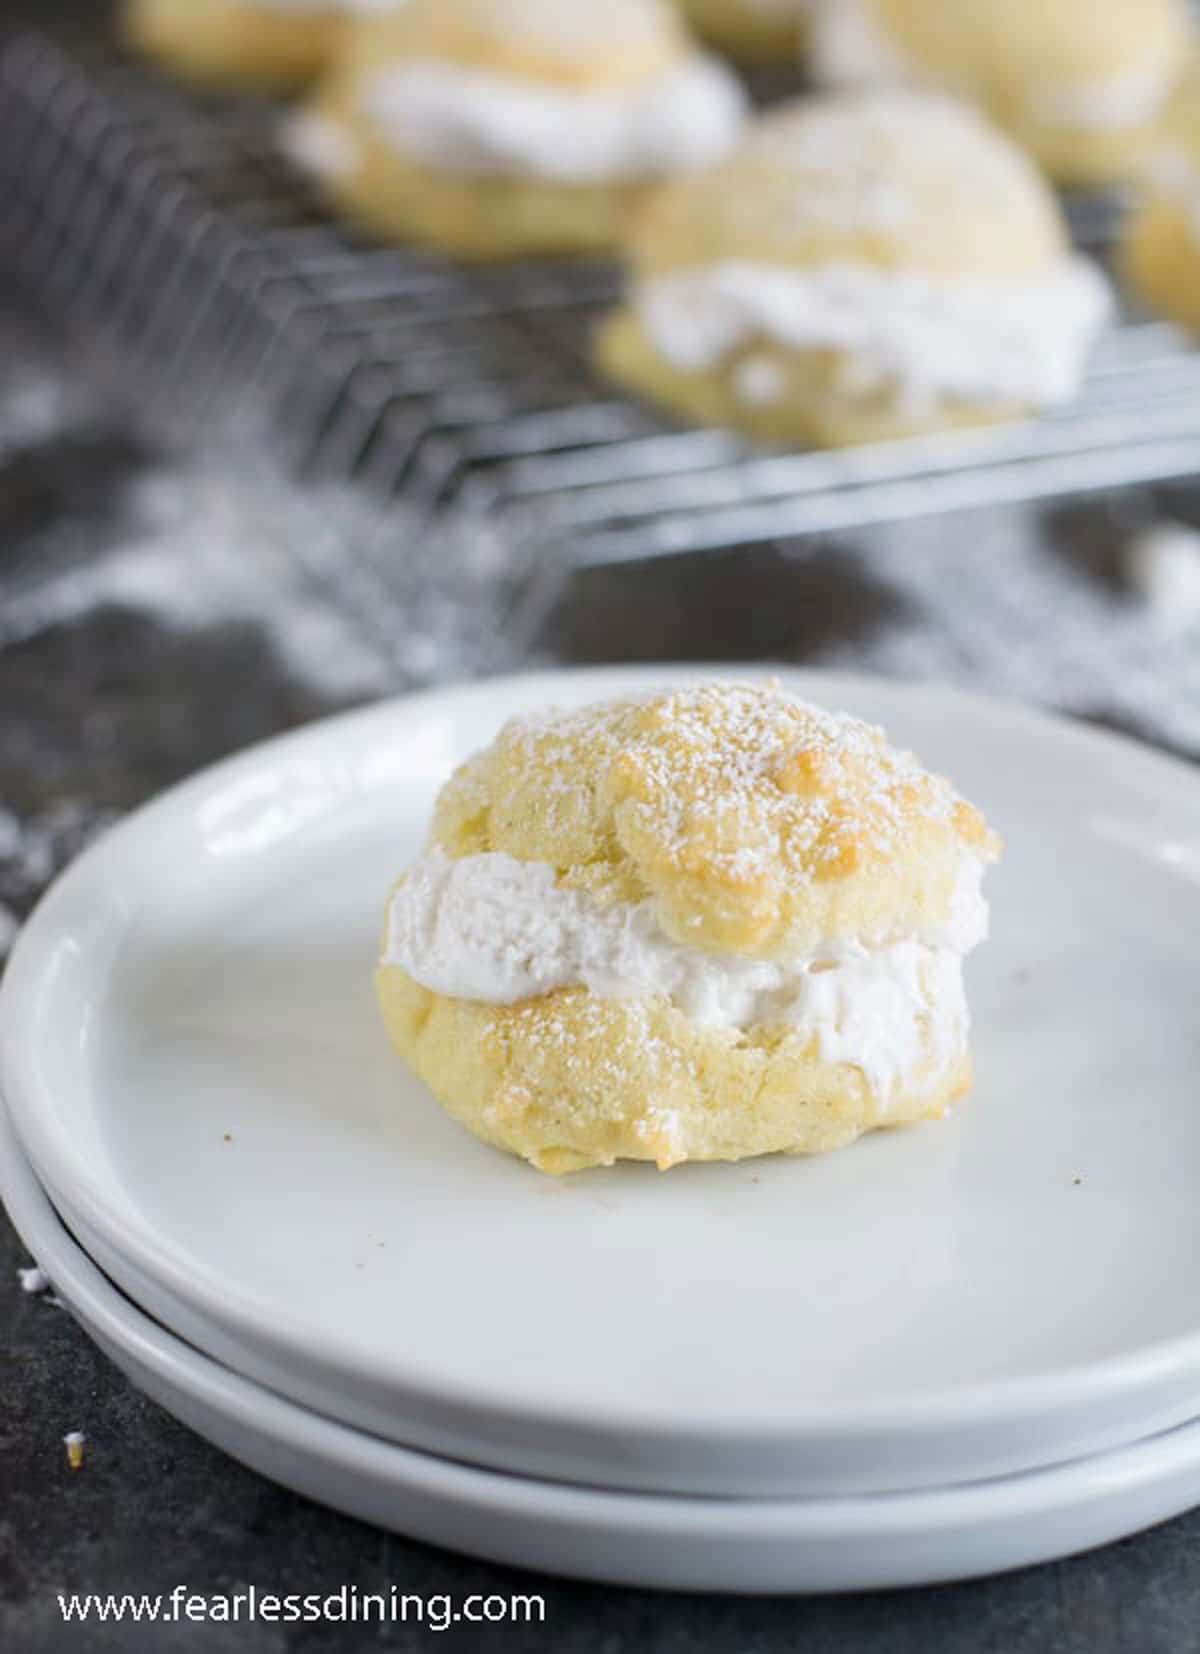
These gluten-free cream puffs (aka profiteroles) bake up golden and crisp on the outside, with a soft, airy center that’s perfect for holding whipped cream, pastry cream, or even ice cream. If you’ve missed classic cream puffs since going gluten-free, this recipe brings them back. They are light, flaky, and easy to make at home.
This post may contain affiliate links. Please read our Disclosure Policy.
If you haven’t tried a cream puff, you are in for a treat! Luckily for you, this recipe is EASY, and it makes a lot of little cream puffs so that you can have lots on hand! Did you ever have those puffy, airy cream puffs before you went gluten-free?
Well, now you can enjoy this popular dessert again! This cream puff recipe will bring back memories, and you will want to devour a whole batch! For a special treat, fill them with my homemade Raspberry Mousse!
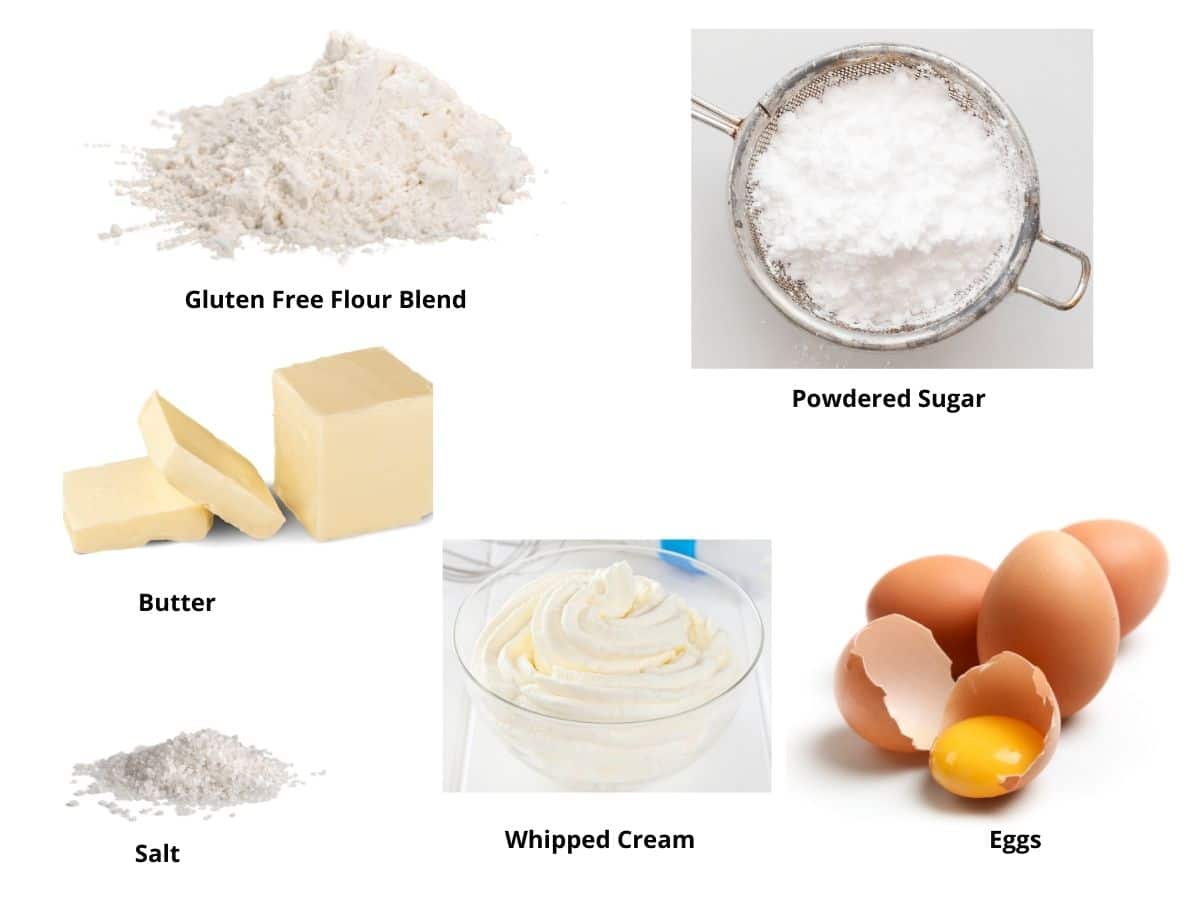
Ingredient Notes and Substitutions:
For the full list of ingredients and amounts, please go to the recipe card below.
- Gluten-Free Flour Blend – I have tested this recipe with King Arthur Measure for Measure and Bob’s Red Mill 1 to 1 GF blend. Other blends will work, you may need to adjust the moisture levels. Read this Gluten-Free Flour Blend Guide to learn more.
- Xanthan Gum – If your gluten-free flour blend doesn’t contain a binder, please add 3/4 teaspoon. Read why binders are important to learn more.
- Butter – Use unsalted butter in this recipe. I tested Earth Balance dairy-free butter as well.
- Eggs – I used large eggs. You want them to be at room temperature for this recipe.
- Whipped Cream – Use heavy cream or Cool Whip. Use TruWhip or So Delicious for dairy-free options.

Testing Notes From My Kitchen
This cream puff recipe is another recipe that has been on my blog since the early days. In the past, I did the original testing with Bob’s Red Mill 1:1 because that was one of the first gluten-free flour blends we could find. It works well in this recipe, but the dough definitely benefits from a 15 minute rest. This rest allows the rice flour to soften, to eliminate grittiness.
Other blends work well in this recipe. I recently tested King Arthur Measure for Measure. I Also tested a dairy-free version using Earth Balance. The dairy-free version was good, but not quite as creamy as with real butter.
How to Make Gluten-Free Cream Puffs (Step-By-Step)
Preheat your oven to 425ºF on a bake setting, not convection bake, and move the oven rack to the middle position.
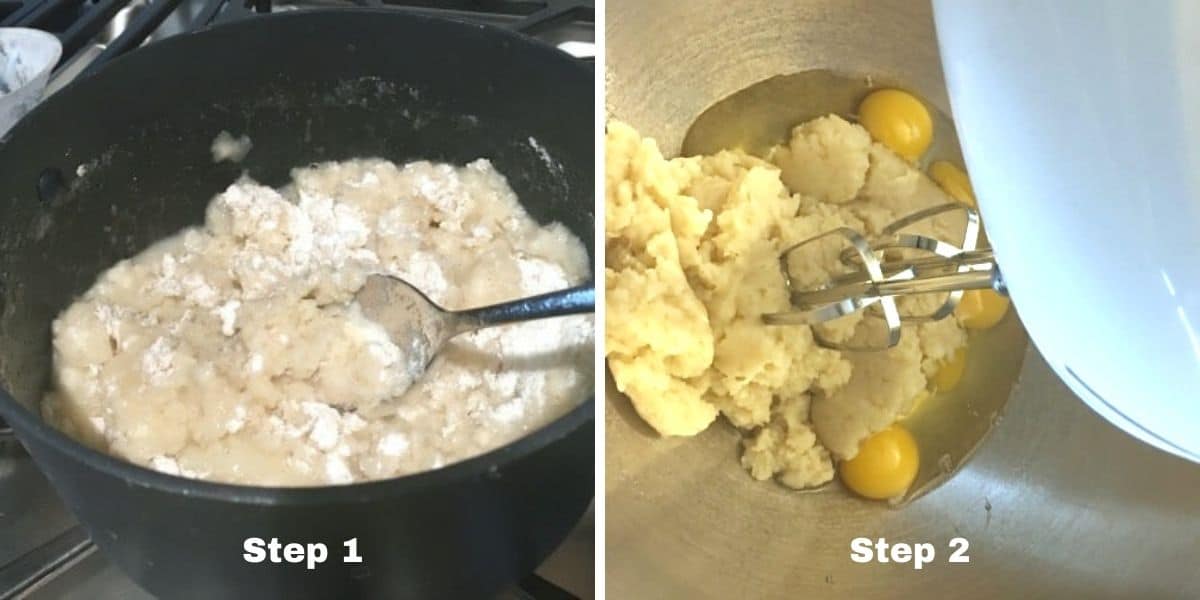
Step 1: In a medium saucepan over medium heat, bring the water and butter to a boil. Make sure these ingredients are rolling boiling! Mix in the flour quickly.
The flour mixture will quickly form a soft dough ball. Stir with a spoon and you will notice that the dough mixture will pull away from the sides of the pan. Let the mixture cool for 5-10 minutes. (This is important so it doesn’t cook the eggs.)
Step 2: Add the eggs to a small mixing bowl. You want to add the eggs all at once and use an electric hand mixer or standing mixer with a paddle attachment. Start at low speed and gradually increase to medium speed.
The dough will look curdled at first, but keep mixing because it will come together nicely.
Email This Recipe To Me!
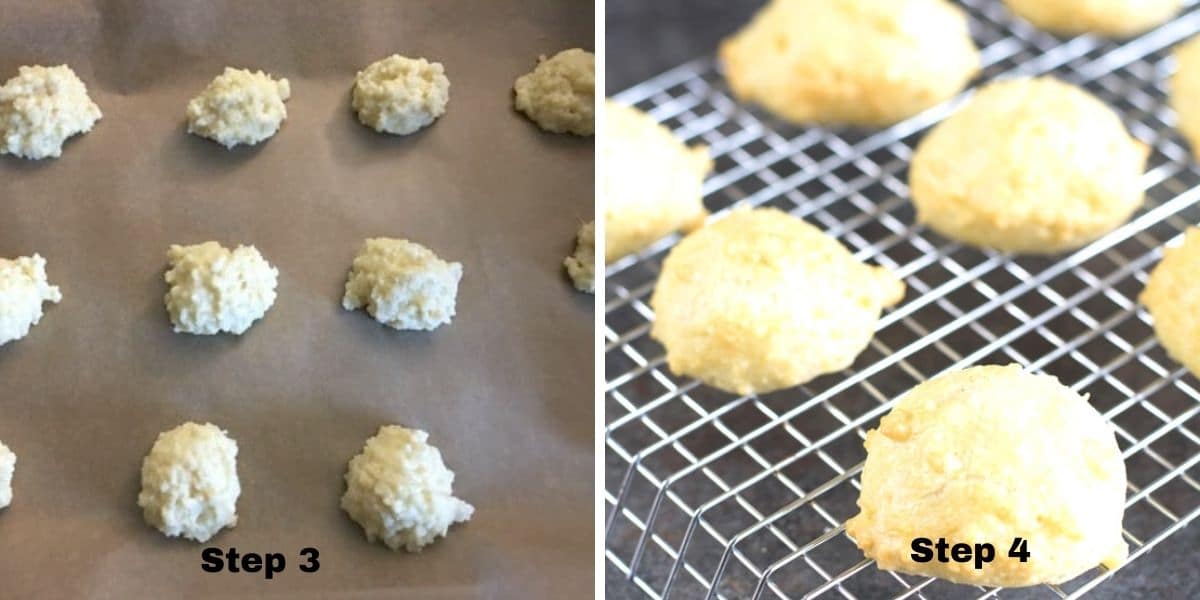
Step 3: Use a small cookie scoop to drop the dough onto a parchment paper-lined baking sheet. You can also use a piping bag with a large round tip to pipe the French pastry dough onto the baking sheet.
Step 4: Make sure to have a hot oven. Don’t put in the cream puff dough before the oven reaches the 425ºF temperature. If you put the dough in before the oven is very hot, the cream puffs will not rise up and hollow inside.
👀 Sandi Says: You will notice the dough is sticky. This is normal for choux pastry (gluten-free and normal!) Don’t add more flour.
Step 5: Bake the cream puffs for 22-25 minutes until the tops are golden brown. Do not open the oven door while baking. Remove the cream puffs from the oven and set them on a wire rack for cooling.
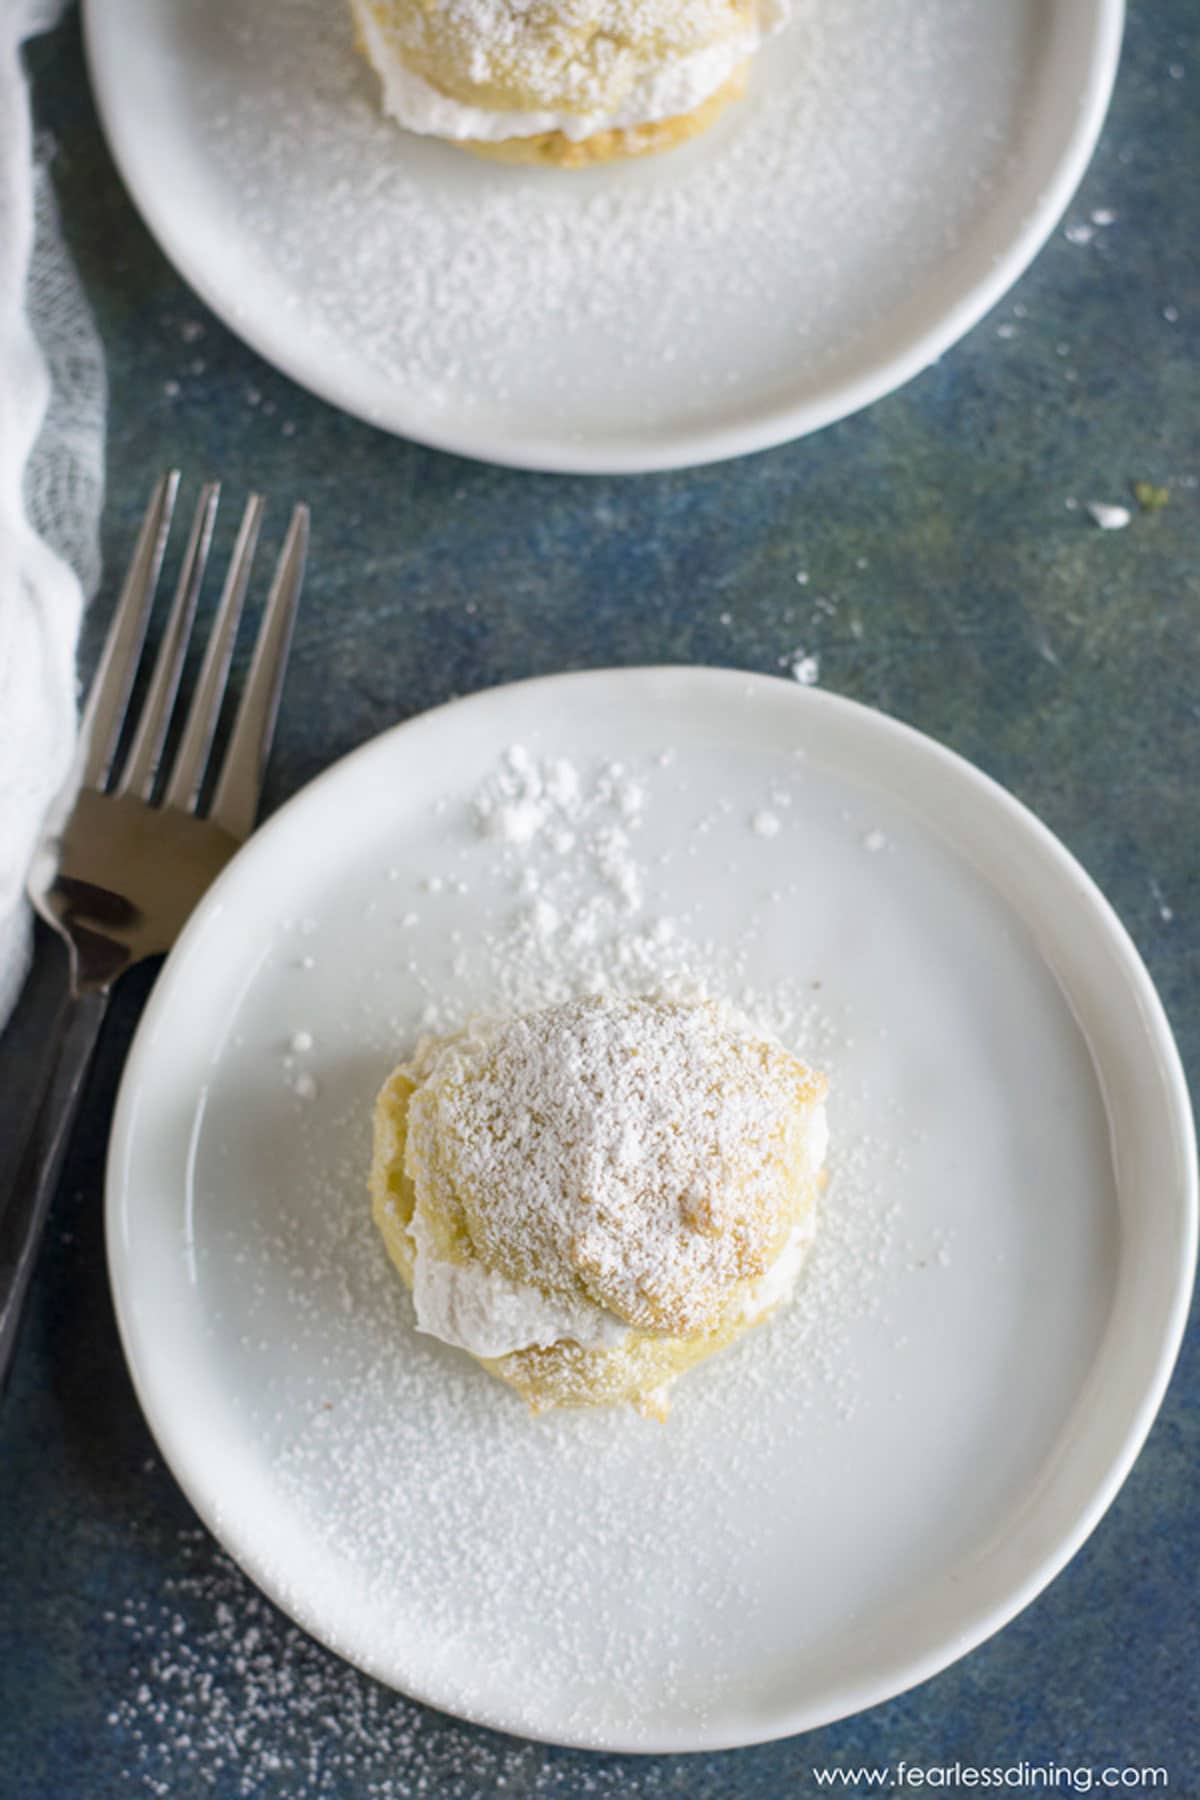
Step 6: Allow the cream puff shells to cool. Use a sharp knife to carefully cut off the cream puffs’ tops.
Step 7: Use a pastry bag to pipe the filling onto the bottom half. You can also use a large wooden spoon if you prefer. If you use a spoon, just add a dollop of cream filling on each bottom half. Take the top half and set it back on top of the cream filling.
Fill these gluten-free choux pastries with:
- Homemade pastry cream (one of my favorites!)
- Fresh or store-bought whipped cream.
- Ice cream
- Vanilla or chocolate mousse.
- Pudding
Top them with:
- Dust with powdered sugar.
- Drizzle with melted chocolate.
- Pour on this creamy chocolate ganache sauce. It is part of this Gluten-Free Chocolate Pound Cake recipe.
Tips For Airy Gluten-Free Cream Puffs:
- Boiling the water and butter before adding the flour is important. This helps the puffs puff up.
- Add the eggs all at once, then blend them into the dough ball with a mixer.
- Ensure your oven is 425º F before putting the dough balls into the oven!
- Do not open the oven door while the cream puffs are baking. I know it is tempting, but don’t do it!
Storage and Freezing Tips:
- Store the cream puffs for up to 3 days in an airtight container.
- You can freeze cream puffs, but I recommend it without the filling. To thaw, place them on the counter to come to room temperature, then place them in the oven at 325º F for 5-8 minutes to re-crisp.
Frequently Asked Questions:
If you are new to the world of profiteroles, these airy French choux pastry balls can be filled with all sorts of delicious things, including whipped cream, custard, vanilla pastry cream, and ice cream.
The gluten free dough, aka the gluten free pate choux, is used to make these profiteroles and eclairs!
There are lots of things you can fill cream puffs with. Here are my favorite ideas: You can fill your cream puffs with whipped cream, jam, Nutella, or ice cream.
You will also love these popular gluten-free French recipes: Gluten-Free Crepes recipe, these Gluten-Free Cheese Danish, and these Gluten-Free Flaky Pastries.
More Gluten-Free Dessert Recipes:
Love This Recipe?
If you made and enjoyed this recipe, I would be incredibly grateful if you could leave a comment below. Please include which flour blend you used. This will help others know this recipe is delicious. Thank you!
Gluten-Free Cream Puffs (Profiteroles Made Easy!)
Ingredients
- 1 cup water
- ½ cup unsalted butter
- 1 cup gluten free flour blend * see note
- 4 large eggs
- ⅔ cup whipped cream
- 2 tablespoons powdered sugar
Equipment
Method
- Preheat the oven to 425º F.
- Bring 1 cup water and 1/2 cup unsalted butter to a boil in a medium saucepan over medium heat. Make sure it is a rolling boil! Mix in the flour quickly. The flour mixture will form a soft dough ball.
- You will notice that the dough mixture will pull away from the sides of the pan. Let it cool for 5-10 minutes.
- Use an electric hand mixer or standing mixer with a paddle attachment to mix in 4 large eggs. Start on low speed and gradually increase to medium speed. Add all of the eggs one at a time. Be sure the dough mixture isn't too hot. You don't want it to cook your eggs.
- Use a small cookie scoop to drop the dough onto a parchment paper-lined baking sheet. You can also use a piping bag with a large round tip to pipe the French pastry dough onto the baking sheet.
- Make sure the oven is HOT. The temperature must be 425º F before putting the puff dough into the oven. The dough will be sticky, but the surface evens out with baking.
- Bake the cream puffs for 22-25 minutes until the tops are golden brown. Remove them from the oven and set the puffs on a wire rack for cooling.
- Allow the cream puff shells to cool fully.
- Use a sharp knife to carefully cut off the tops of the cream puffs. Use a pastry bag to pipe the filling onto the bottom half. You can also use a large wooden spoon if you prefer. If you use a spoon, just add a dollop of cream filling on each bottom half. Take the top half and set it on top of the cream filling.
- After the pastries are filled, you can top them in lots of fun ways. Dust them with powdered sugar, drench them in a chocolate ganache, or dip them in chocolate.
Nutrition
Notes
- I have tested this recipe with King Arthur Measure for Measure GF and Bob’s Red Mill 1 to 1 GF blend. That doesn’t mean others will not work. I have not tested other flours.
- If your gluten free flour blend doesn’t contain a binder, please add 3/4 teaspoon of xanthan gum.
- To make this recipe dairy-free, substitute the butter for vegan butter.
- These cream puffs will keep up to 3 days in an airtight container or up to 4 months in the freezer.
- You can easily freeze cream puffs, but I recommend freezing without the filling. To thaw, place them on the counter to come to room temperature, then place them in the oven at 325º F for 5-8 minutes to re-crisp.
Private Notes
Tried this recipe?
Let us know how it was!
This post was updated from an older July 2018 post with better directions and more filling ideas to try.
I truly hope you enjoy this recipe. I have been testing and creating gluten-free recipes for over 15 years. Creating gluten-free recipes that do not taste gluten-free is my goal for every recipe. Sometimes I only have to test a new recipe a couple of times, and others it takes multiple times. I do this so you get reliable, delicious results every time!

How many puffs does this recipe yield, please?
Hi Roseann, It really depends on the size you make them. I used a medium sized cookie scoop and had around 24.
Just made!! Just a quick question- mine were extremely wet and gooy in the middle but they were starting to burn so I had to pull them. Do you let the mixture cool before moving to the mixture and adding eggs? Just wondering what I missed. Thanks!
Hi Michelle, What gluten free flour did you use? I didn’t let the mixture cool too long, maybe five minutes to get the eggs out of the fridge. I suspect it is the flour blend. How big did you make the puffs?
So these are twice-baked (steps 6 through 9)?
Hi Ruth, They are not. It looks like a malfunction on the recipe card. I went in and fixed it. Thank you for bringing this to my attention.
I believe that the last sentence in step two should have the word “ one” removed . I had to read the tips section to confirm that all of the eggs are added at the same time. Also there is no mention about taking the pan with the dough off of the stove to aid in cooling before beating in the eggs. I don’t want to sound like I’m criticizing your recipe but for first time bakers it might be helpful. I can’t wait to make these as I have missed eating eclairs like we use to buy at the bakery many years ago before Celiac was diagnosed 25 years ago.
Hi Terrie, I see your point and made the correction. Thank you so much.
What can I use instead of eggs?
Hi Kathy, I haven’t tested this recipe without eggs, so I do not know how to advise.
Hello, could you tell me the amount of butter in grams? Thank you very much for all your delicious recipes that help us a lot
I looked online and the converter said 1/2 cup of butter is 113 grams.
This is the recipe my grandmother would use for dumplings in chicken soup, minus the sugar, of course. They aren’t the biscuit kind, we used to call them Danish dumplings. I’m going to try it for that. It would be great to have them GF. Such a great comfort food on a cold night.
I hadn’t thought of using this as a dumpling base, but I definitely can see this working! Thank you so much Jan.
Can you use the food processor (on pulse) to add the eggs?
I haven’t tested a food processor. If you use one, please let us know how it turned out.
So yummy!! I used King Arthur Baking mix (xanthan already in it)! I also used Earth Balance Organic spread for the butter and they are fluffy and perfect! Filled mine with Rediwhip coconut milk in the can….Thank you for the recipe!! These will be addictive 😻
I am so glad you enjoyed the cream puffs. They are definitely addictive 🙂