

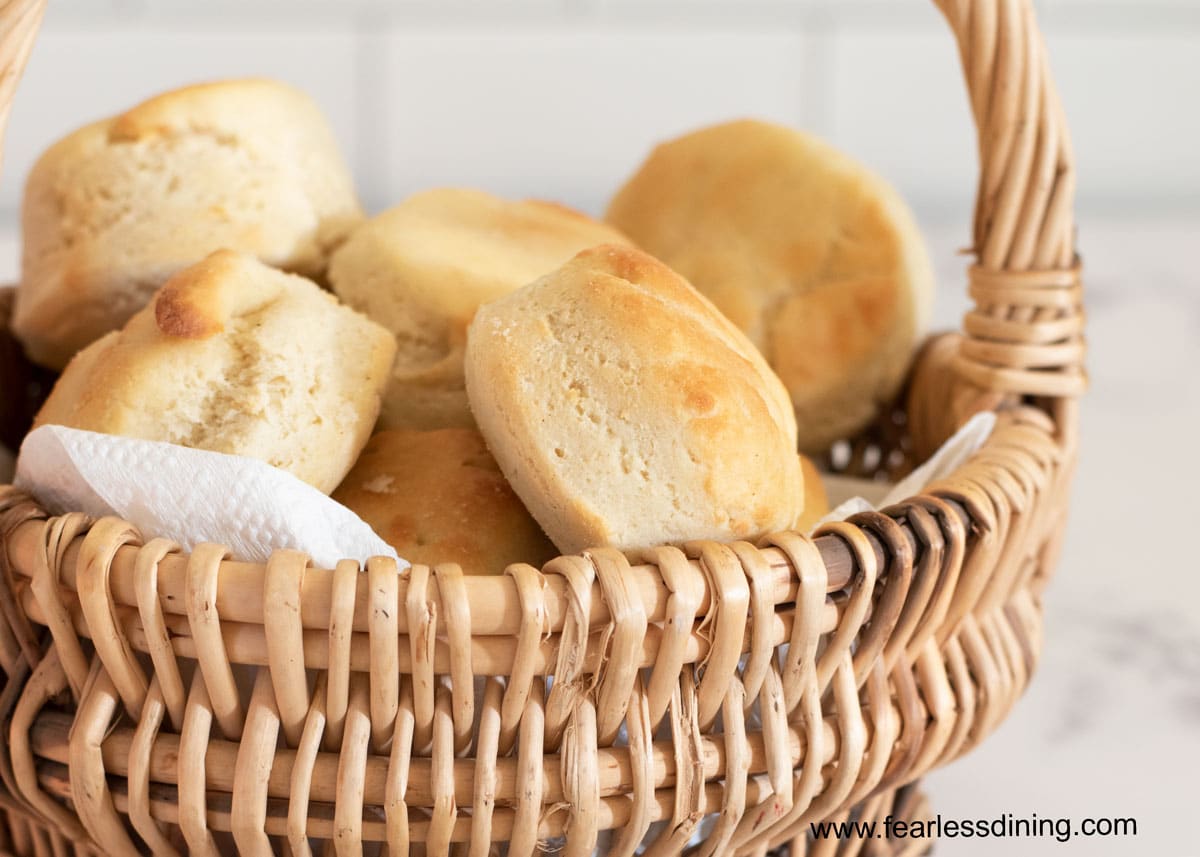
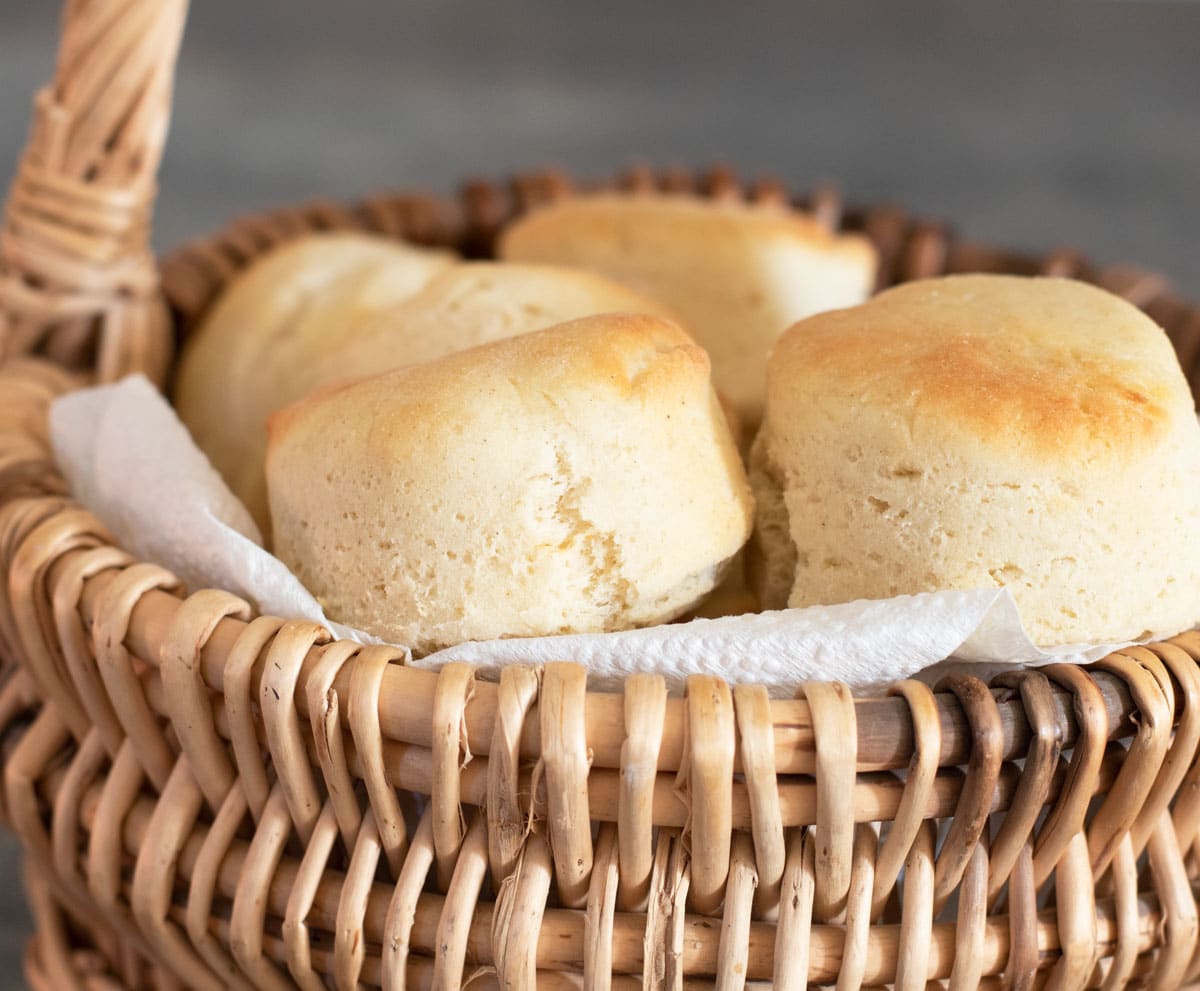
If you are looking for an incredible gluten free air fryer dinner rolls recipe that turns out light and fluffy, this gluten free rolls recipe will become your favorite. If you never thought to make gluten free bread in your air fryer, it is time to give it a try!
This post may contain affiliate links. Please read our Disclosure Policy.
❤️ Sandi’s Recipe Summary
The Quick Bite: This gluten-free dinner rolls recipe was created specifically for the air fryer. The circulating heat produces a golden, slightly crispy exterior and soft insides in about 15 minutes, and it leaves the oven free for the rest of the meal. Tested with Cup4Cup and reader testing with Bob’s Red Mill All Purpose GF Blend (red bag). I include oven directions for those who don’t have an air fryer.
First time I’ve made a yeast roll in over five years. The flavor was spectacular. I think they are a good cross between a yeast roll and a biscuit. I used Cup4Cup flour. Very easy recipe. Doesn’t take long at all. I went by the recipe suggestion of rising in a warmed oven. After 45 minutes they had risen but I wondered if more time would equal bigger lift and yes, it did. I went an extra 10 minutes. Followed the recipe exactly. I will definitely be making these again.”
Carrie A., Pinterest comment
One of the best things about making dinner rolls in the air fryer is that the oven stays free. In the summer, you won’t heat up your house using the oven, which I love. The circulating hot air in an air fryer gives these rolls a slightly golden, crispy exterior and a soft, fluffy interior. I make these as standard dinner rolls, but they also work well shaped into wider sandwich rolls.
This was a fun recipe to create and test. The part that tripped me up a few times was getting the moisture high enough for the rolls to rise, while keeping the dough workable. I only tested one flour blend in this recipe, but I tested both the discontinued version with dried milk powder and the new replacement version. I preferred the version with milk powder because it got a more golden color. It is unfortunate that Cup4Cup didn’t make both versions available.
I made this celiac-safe dinner roll recipe both in the air fryer and in the oven. Nobody at your table will know these are gluten-free. I found the outside slightly crisper in the air fryer version, which I really enjoyed.
Top these gluten free rolls with a warm pat of butter or this Kumquat Honey Butter. If you want to try another great roll recipe, try my Gluten Free Crescent Rolls recipe, too! They are a Fearless Dining favorite and a great copycat of Pillsbury Crescent Rolls. These Gluten Free Popovers are also delicious.
Ingredient Notes:
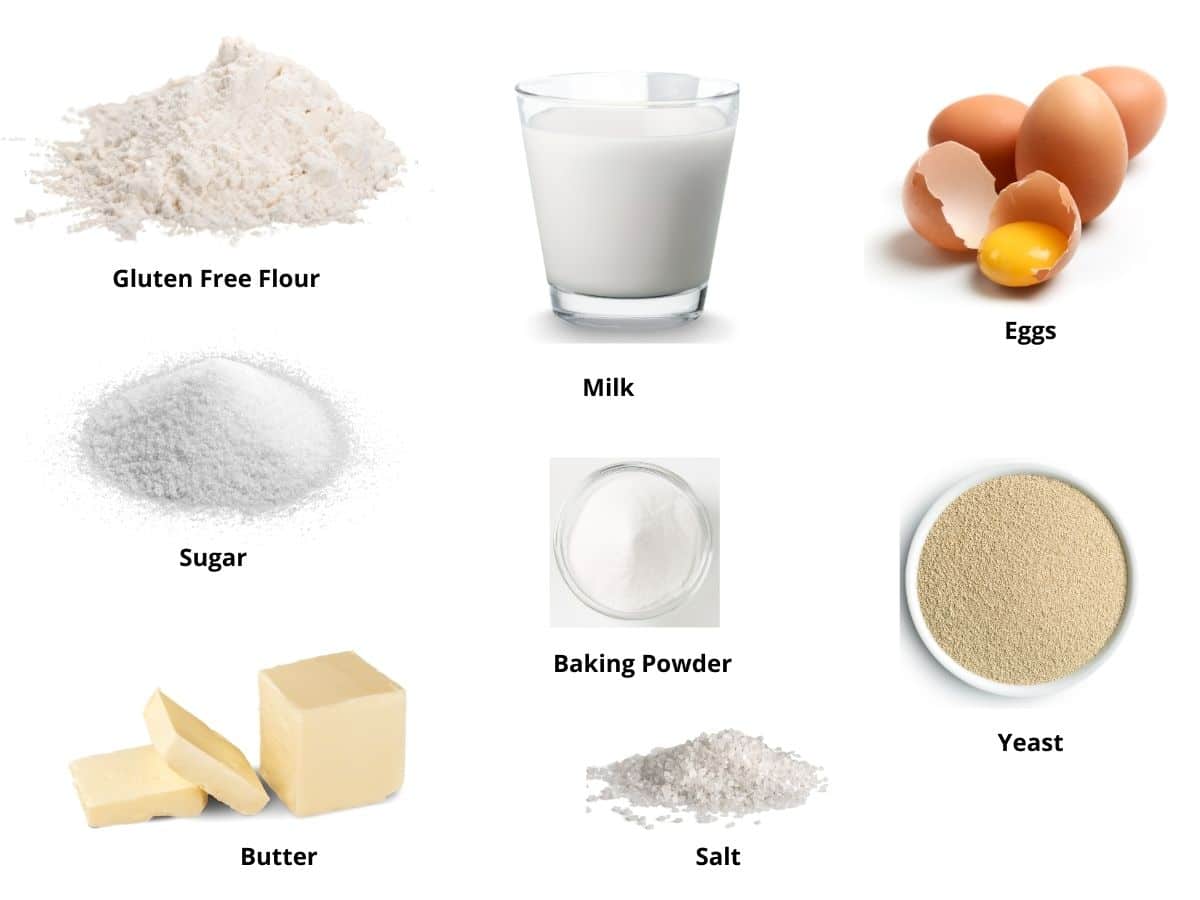
For the full list of ingredients and amounts, please go to the recipe card below.
- Gluten Free Flour Blend – I tested this recipe using Cup4Cup. That doesn’t mean others will not work; I just have not tested other flours. Readers also tested Bob’s Red Mill All Purpose Gluten Free Blend (in the red bag). Read Why Gluten Free Flour Blends Vary to learn more.
- Binder – This is what holds gluten free baking together. If your gluten free flour blend doesn’t contain xanthan gum or guar gum, please add 1 teaspoon. Read Why Binders Are Important In Gluten Free Baking to learn more.
- Sugar – A little is needed to activate the yeast. You can also use honey.
- Baking Powder – Use aluminum-free baking powder.
- Eggs – Use large eggs.
- Light Oil Spray – This is only needed if you use an air fryer. Read which are The Best Oils To Use In The Air Fryer.
- Butter – I recommend using unsalted butter.
- Active Dry Yeast – For best results, double-check that the active yeast brand you use is gluten free. Red Star Platinum is NOT gluten free!
👀 Sandi says: The ingredients are the same whether you bake these dinner rolls in the oven or cook them in your air fryer.
If you are trying to decide on what air fryer to get, I have a great list of the best air fryers for gluten free. I include a great list of pros and cons for each model. If you love bread as much as we do, you will want to check out all of my delicious gluten free bread recipes.
I used a Corsori 3.4 qt air fryer to make this recipe, but I am getting ready to get the 5.8 qt air fryer because I need a larger air fryer to cook more at once. If you are a family of two, the 3.4 qt should be large enough.
If you love bread and rolls with your meals, you will also want to try my easy Gluten Free Biscuits recipe. (And yes, you can make them in the oven or your air fryer!)
How to make gluten-free dinner rolls in the air fryer:
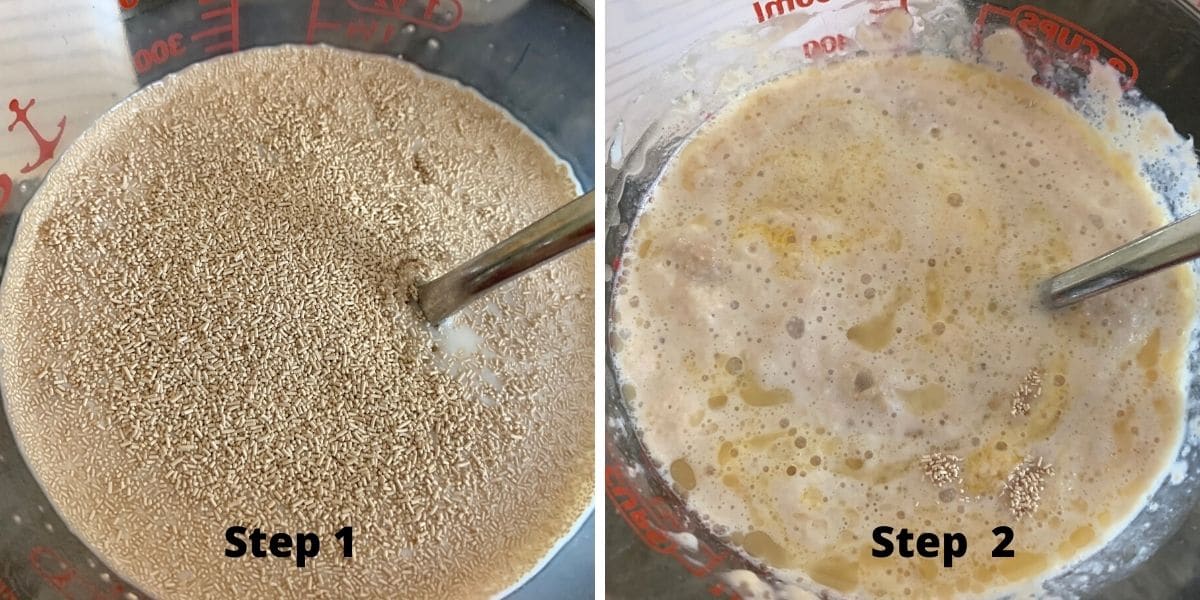
Step 1: Add yeast to the warmed milk and sugar to a small bowl. Ensure your milk is no hotter than 110º F; otherwise, the yeast will die.
👀 Sandi Says: If the yeast mixture is not frothy and bubbly after 10 minutes, the yeast is expired/dead, or the milk was too hot. Start over with fresh yeast and milk that is warm but not hot. It should be no hotter than 110°F
Step 2: Let this mixture sit for 5-10 minutes until it is frothy and bubbly. Add the remaining wet ingredients and mix well.
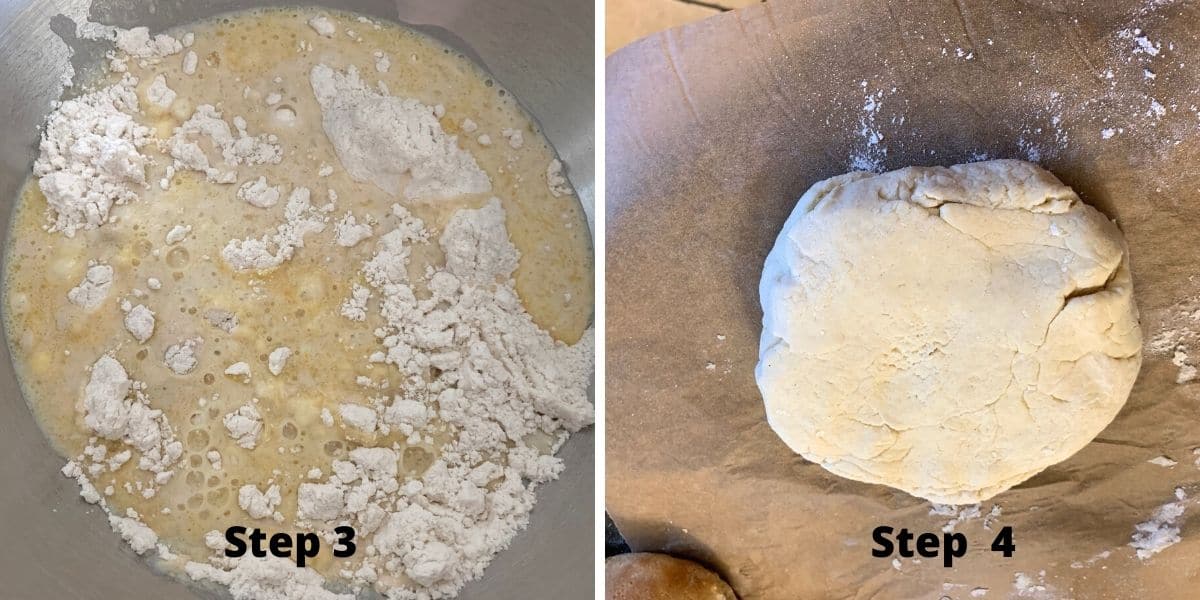
Step 3: Using a measuring cup, measure and add the dry ingredients to a large
👀 Sandi Says: If you have felt intimidated by baking with yeast since going gluten-free, this is a good place to start. Gluten-free yeast dough only rises once, which is why we shape the rolls first.
Step 4: Dust a surface with a little gluten free flour. Add the dough ball and press it into 1 1/2 to 2-inch thick circles.
Email This Recipe To Me!
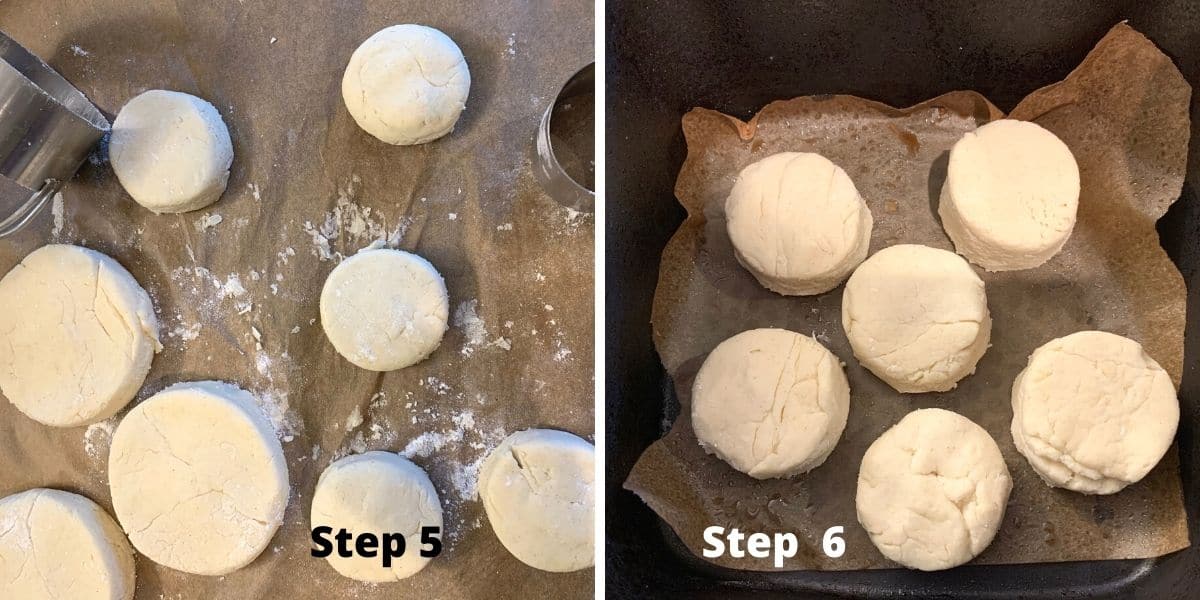
Step 5: Take the bread dough and use a biscuit cutter to cut out circles. You can make different sizes. Note that larger ones will take longer to bake. Dust the rolls with extra flour if needed.
If you prefer pull-apart rolls, place the dough balls close together in a baking pan so they touch during the rise. They will fuse at the edges during baking and pull apart when served, which is a great option for a holiday table where you want a more dramatic presentation.
Gluten-free dough rising tip: I like to preheat my oven to 175°F, then turn it off. Place the bowl with the plastic-covered dough in the oven and leave it with the door slightly cracked open to rise. This is especially helpful during the cold months.
Step 6: Rise the rolls. The minimum rise time is 45 minutes. If you have the time, I recommend going 55 to 60 minutes. The rolls will be noticeably taller and lighter with the extra rise. Several readers have confirmed this, and it matches what I have seen in my own testing.
The rolls are ready to bake when they have visibly puffed and feel slightly soft and airy when you gently press one. If they feel dense and do not spring back, give them another 10-15 minutes. Brush the tops of the rolls with melted butter or egg wash to brown them.
Step 7: See below for oven-baking directions! Preheat the air fryer to 360º F, then bake for 12-15 minutes, until the tops are golden brown. Remove from the air fryer and brush the tops with melted butter. Enjoy!
An air fryer circulates hot air directly around each roll rather than heating a large oven cavity. This produces a crispier exterior in less time than oven baking and without preheating for 15 minutes. It is also why leaving space between the rolls in the basket matters. The air needs to circulate around each roll for even baking.
These rolls will keep at room temperature for up to 3 days in an airtight container, or up to 4 months in the freezer. To reheat in the air fryer, place the rolls at 300°F for 3-4 minutes until warmed through. This restores the exterior texture better than microwaving, which makes the crust soft. From frozen, add 2-3 extra minutes.
Directions to bake them in the oven:
The air fryer produces a slightly crispier exterior than oven baking, which I prefer for dinner rolls. The oven version is a little softer all the way through, which works better if you are making these as sandwich rolls
If you love gluten free baking and prefer making these fluffy gluten free rolls in the oven, here are the directions:
- Prepare and rise the dough as instructed in steps 1-5.
- Preheat the oven to 350º F. Brush each dough roll with melted butter.
- Place on a parchment paper-lined
cookie sheet . - Bake for 15-20 minutes (depending on size).
- Remove the baked rolls from the oven and enjoy!
Why are my rolls dense?
If your rolls are not light and fluffy, there are two possible reasons. First, the dough was too dry (not enough liquid), or you didn’t let the dough rise enough. Every gluten free flour blend behaves differently. If you used a flour blend I didn’t test, you will need to monitor the liquid levels. Starchy blends tend to need more liquids. Also, check the expiration date on the yeasts.
Read my Gluten-Free Bread Troubleshooting Guide for more tips and feedback.
More Gluten-Free Bread Recipes:
- Gluten Free Sourdough Bread
- Easy Gluten Free Zucchini Bread
- Gluten Free Breadsticks
- The best Gluten Free Focaccia Bread
- Easy Gluten Free Honey Rolls
Love This Recipe?
If you made and enjoyed this recipe, I would be incredibly grateful if you could leave a comment below. Please include which flour blend you used. This will help others know this recipe is delicious. Thank you!
Fluffy Gluten Free Dinner Rolls (Air Fryer or Oven Baked!)
Ingredients
- 1 cup milk or non-dairy milk
- 2 teaspoons active dry yeast
- ¼ cup cane sugar
- 1 large egg
- 1 teaspoon baking powder aluminum-free
- ¼ teaspoon salt
- ¼ cup unsalted butter melted
- 2 ½ cups gluten free flour blend * see note
- 1 tablespoon gluten free flour blend for dusting
- 1 tablespoon unsalted butter melted for brushing over the rolls
Equipment
Method
- In a microwave safe bowl, warm 1 cup milk or non-dairy milk to 110º F. Do not use milk any warmer or it can kill the yeast.
- Add 1/4 cup cane sugar and 2 teaspoons active dry yeast and let it sit for 5-10 minutes until the yeast is frothy.
- In a large bowl, add 2 1/2 cups gluten free flour blend, 1 teaspoon baking powder, and 1/4 teaspoon salt. Whisk to blend.
- Add 1 large egg and melted 1/4 cup unsalted butter to the yeast mixture and whisk to blend it together.
- Pour the wet ingredients into the dry ingredients and mix into a soft dough. You only get one good rise with gluten free flour so you want to shape your rolls, then rise the dough.
- Place a piece of wax paper on the counter and dust it with flour. Place the dough ball on the wax paper and dust with1 tablespoon gluten free flour blend. You want your gluten free rolls dough to be pretty soft, but workable.
- Add flour if you need to make the dough more workable. (It really will depend on the gluten free flour blend you use. Some are starchier than others.)
- Press the dough down to 1 1/2 to 2-inches thick. Use a biscuit cutter or round cutter to cut out roll shapes. Cover loosely with plastic wrap and rise the rolls for 45 minutes.
- Place a piece of parchment paper in the air fryer basket. Use scissors to cut it if it is too large. Spray with a little light cooking spray. Place the dough rolls on the parchment paper, leaving a little space between each one. Spray with light oil and allow to rise 30 minutes.
- Heat your air fryer to 360º F and cook the rolls for 12-15 minutes. Actual time will depend on the size of the rolls so open the air fryer basket and check them at the 10-minute mark. You will know they are finished cooking when the tops are slightly golden and they are firm to the touch.
- Remove them from the air fryer and brush the tops with melted butter.
- Preheat the oven to 350º F.
- Follow the directions above, but instead of placing the dough rolls on parchment paper in the air fryer, put them onto a parchment paper-lined cookie sheet. Do not spray them with oil, but brush the top of each dough ball with melted butter.
- Bake for 15 minutes, again the actual baking time will vary by the size of your rolls.
- Enjoy!!
Nutrition
Notes
- I have tested this recipe with Cup4Cup. Note: Cup4Cup changed its flour blend formulation, and it doesn’t behave as the old formulation. I haven’t had a chance to retest this recipe with the new flour blend formulation. That doesn’t mean others will not work; I just have not tested other flours. Cup4Cup rose the best. One reader wrote she used Bob’s Red Mill All Purpose GF Blend.
- If your gluten free flour blend doesn’t contain xanthan gum or guar gum, please add 1 teaspoon.
- To make this recipe dairy-free, substitute the butter for vegan butter and use non-dairy milk. I recommend using unflavored, unsweetened non-dairy milk.
- These rolls will keep up to 3 days in an airtight container or up to 4 months in the freezer.
Private Notes
Tried this recipe?
Let us know how it was!
I truly hope you enjoy this recipe. I have been testing and creating gluten-free recipes for over 15 years. Creating gluten-free recipes that do not taste gluten-free is my goal for every recipe. Sometimes I only have to test a new recipe a couple of times, and others it takes multiple times. I do this so you get reliable, delicious results every time!

Thank you thank you! I’ve been gluten free for 5 weeks. Your recipe is amazing. This was the first yeast bread recipe I’ve tried. I used Bob’s gluten free All purpose flour, I don’t recommend bc it doesn’t taste or even smell great, likely because it’s made with garbanzo beans. I added xanthan gum as recommended. The rolls rose perfectly. I also used coconut sugar in place of the sugar
Hi Jennifer, I am thrilled you took a chance and tried my recipe. I have a love hate relationship with Bob’s All Purpose. I find I only use it for things like eggplant parmesan, etc.
How much baking powder?
Hi Betty, one teaspoon of aluminum-free baking powder. If you don’t have aluminum free, you can omit it.
Is there a reason that the baking soda has to be aluminum free? The baking powder I use is Clabber Girl. It has sodium aluminum sulfate. Can I still use it?
Hi Matthew, In this recipe it isn’t as important. I am personally sensitive to the metallic aftertaste that comes from regular baking powder. In my baked recipes needing more than 1 teaspoon, it is critical to use aluminum-free.
I just made the gluten free dinner rolls. They were awesome. My shaping skills need a little help, but that didn’t affect the taste.
I’m am newly diagnosed with celiac and other recipes I had tried from other sites (and a different flour) went straight to the travelling raccoons in the backyard because they either tasted funny or the bread/rolls had a weird consistency. My son also has celiac and we both loved the rolls. Thank you so much for putting all this information together in one place. We really appreciate you.
I am so glad you found my recipes! It makes me so glad you and your son can enjoy gluten free foods again…and not the racoons :-).
I made a double batch and saved a third of the dough. The next day I rolled it out and cut out dumplings, half inch by one inch. Boiled in broth for 12 minutes. Delicious.
That sounds delicious. It never occurred to me to use this dough for dumplings. Now I want to try that :-).
is this instant or regular yeast?
Hi Marilyn, I used regular active dry yeast.
Hello! Can I rise the dough overnight instead of just 1-2hrs before baking? Thank you!
Hi Aika, that should be fine. Be sure to wrap the dough in plastic wrap so it doesn’t dry out.
Thank you so much!
When I rise it overnight, should I just keep it on the countertop or inside the fridge? Thank you again Sandi! 😊
Hi Aika, I like to rise dough in the refrigerator. Be sure to cover it in plastic wrap so it doesn’t dry out.
When you do the oven Baking version of the gd dinner rolls it was a bit confusing. When you form the rolls do you do a 2nd rising on the rolls when formed before baking them?
I do a short second rise after shaping the rolls. I hope this helps.
You say to use Cup For Cup GF flour but didn’t say what brand. New to GF baking and was wondering what brand this is?
Hi Laura, Cup4Cup is the brand of flour. This guide may be helpful for you: https://www.fearlessdining.com/the-best-gluten-free-flour/
These are great! I used goat butter as I’m allergic to cow dairy and halved the sugar. I also used Aquafaba to replace the egg, which worked great! I baked mine for the full 15 as the center was still a bit gooey around the 12 min mark, when I pulled them out I gave them a nice coat if garlic butter yum!
Thank you so much for coming and letting everyone know that aquafaba works well in this recipe. I am sure it will help a lot of my readers.
Hi! I just baked the dinner rolls, I baked it in the oven at 350. I used almond milk and regular butter but also added 1 teaspoon of crushed rosemary. IT WAS YUMMY!
Yum, I love you added some herbs!
I just made these tonight and they are amazing!! I used the King Arthur GF flour, dairy free butter and almond milk. They turned out great and will make a perfect breakfast biscuit in the morning. Thank you for sharing this *wonderfully simple* recipe!
I am so glad you enjoyed them Brittany!!