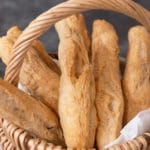
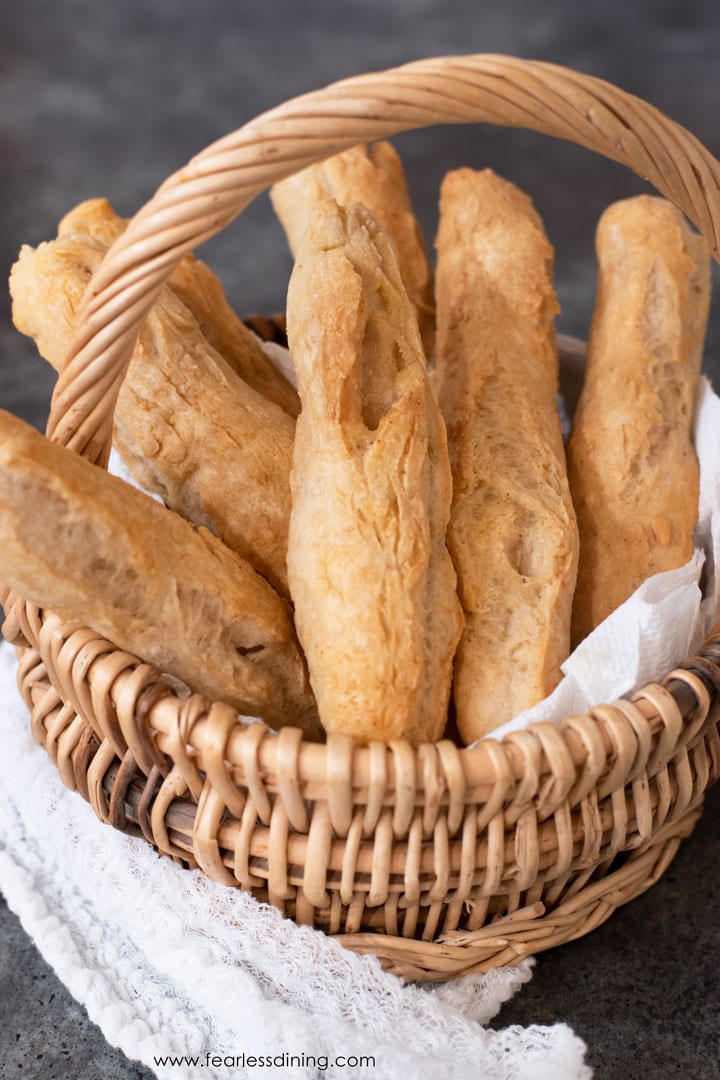
These gluten free breadsticks are crisp on the outside, like a baguette, and soft on the inside. My homemade gluten free breadsticks recipe is made with simple ingredients. These gluten free breadsticks are perfect for dipping into pasta sauces!
This post may contain affiliate links. Please read our Disclosure Policy.
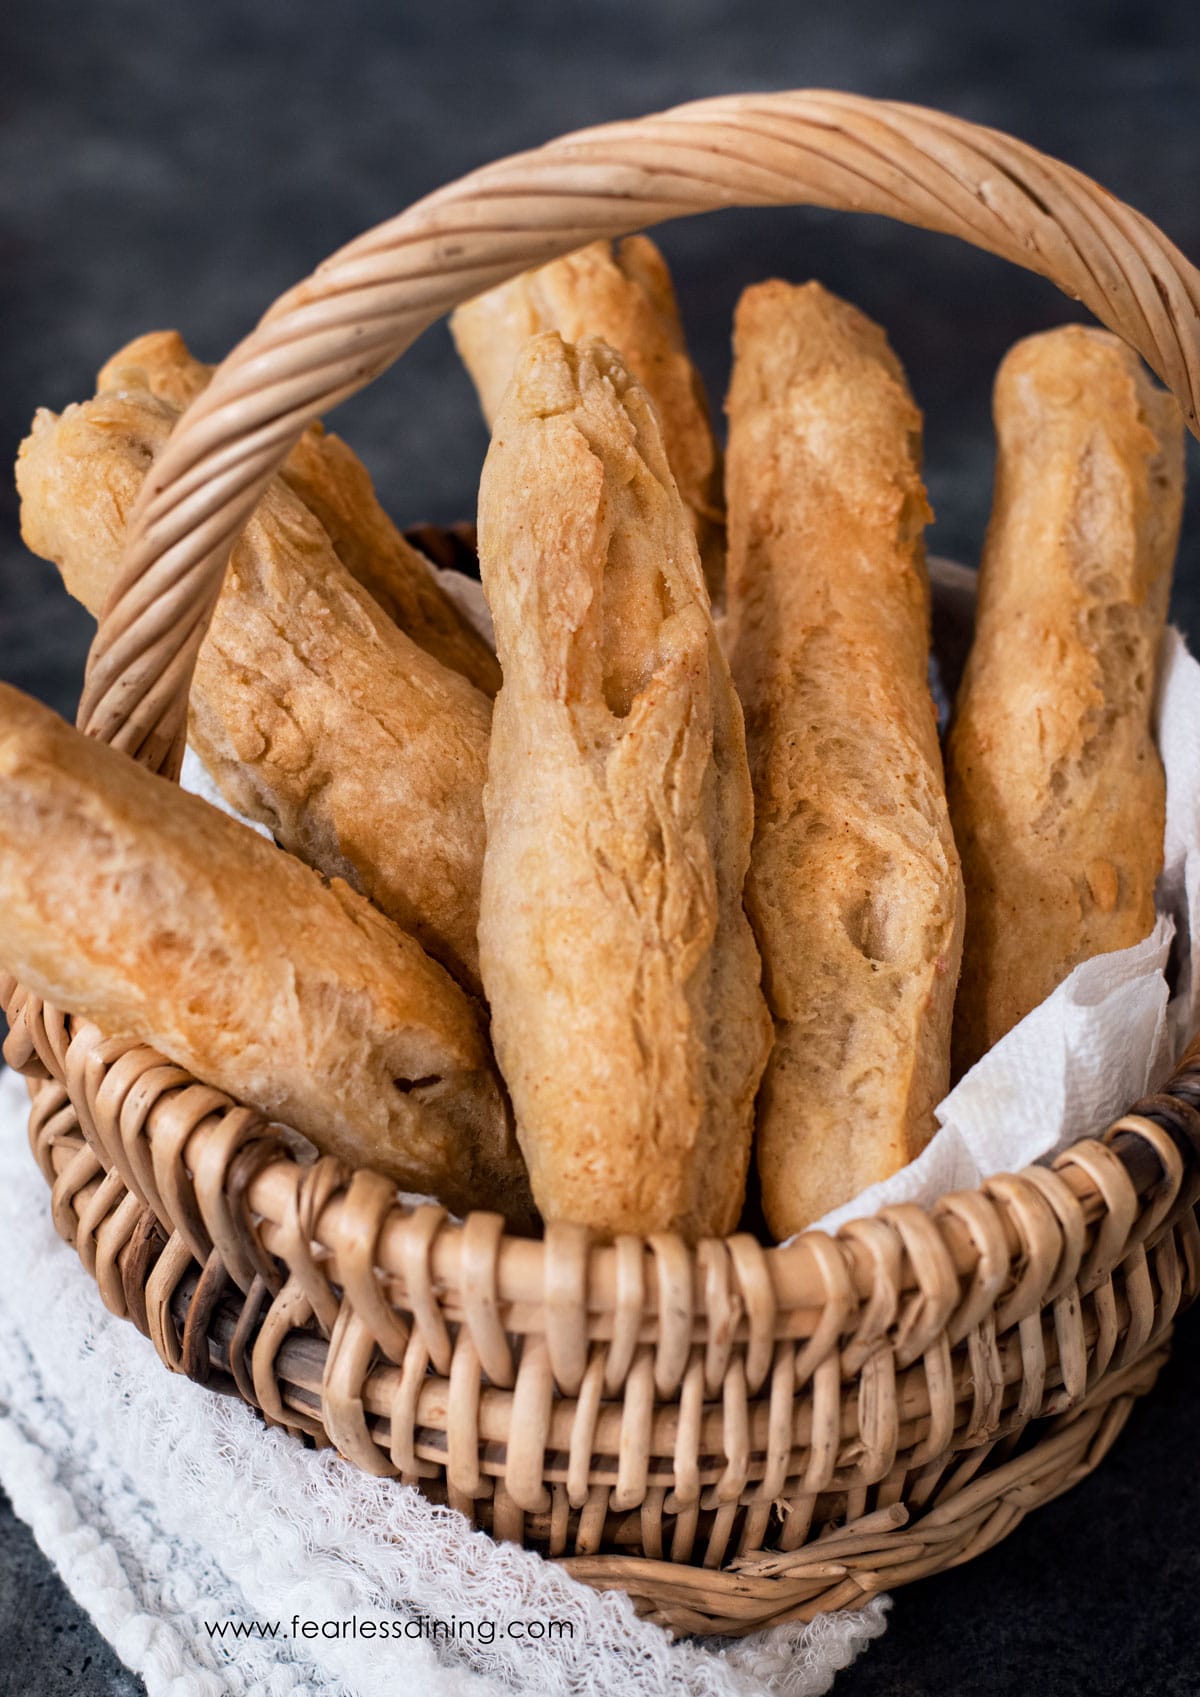
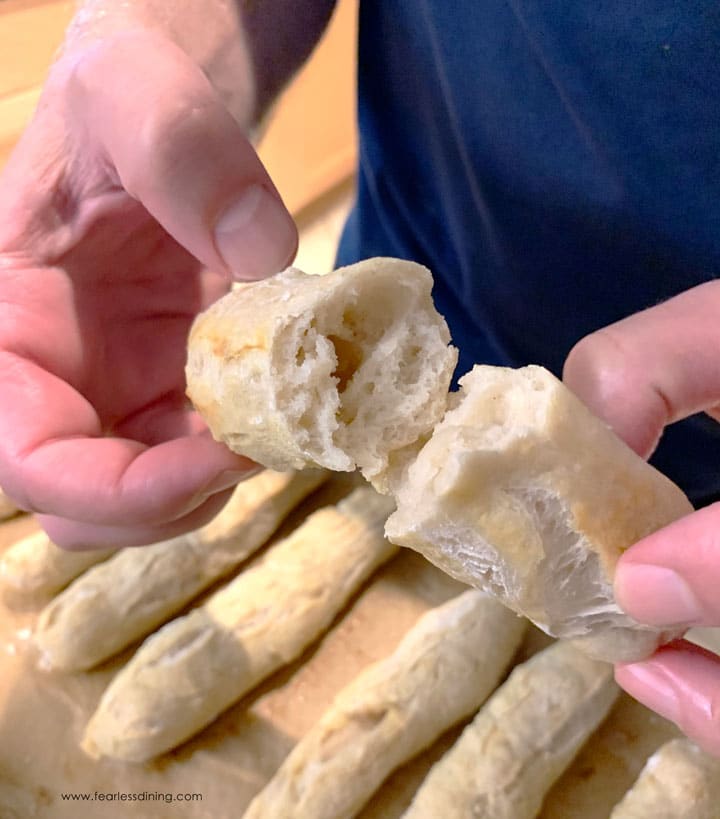
Let’s take a moment to appreciate these gluten free breadsticks. Not only are these breadsticks super easy to make, but they are crusty on the outside and soft on the inside! This is the best bread recipe, and it is made for dipping!!
🔑 Sandi says: I used my homemade gluten free sourdough starter to make this gluten free breadsticks recipe, but I also include an active dry yeast version for those who prefer using active dry yeast.
If you have made my sourdough starter recipe and want to try using it in more recipes, you have come to the right place! My gluten free sourdough bagels are pretty amazing! My sourdough also works really well in this gluten free sourdough pizza crust recipe!
Why make these gluten free breadsticks:
- Options – Make this recipe with a sourdough starter or active dry yeast!
- Crunchy breadsticks. That is the main reason why you will love these breadsticks. They are like mini baguettes!
- Those with food allergies will also love these gluten free breadsticks because they are made with few ingredients. They are egg- and soy-free, and I also include a dairy-free option!
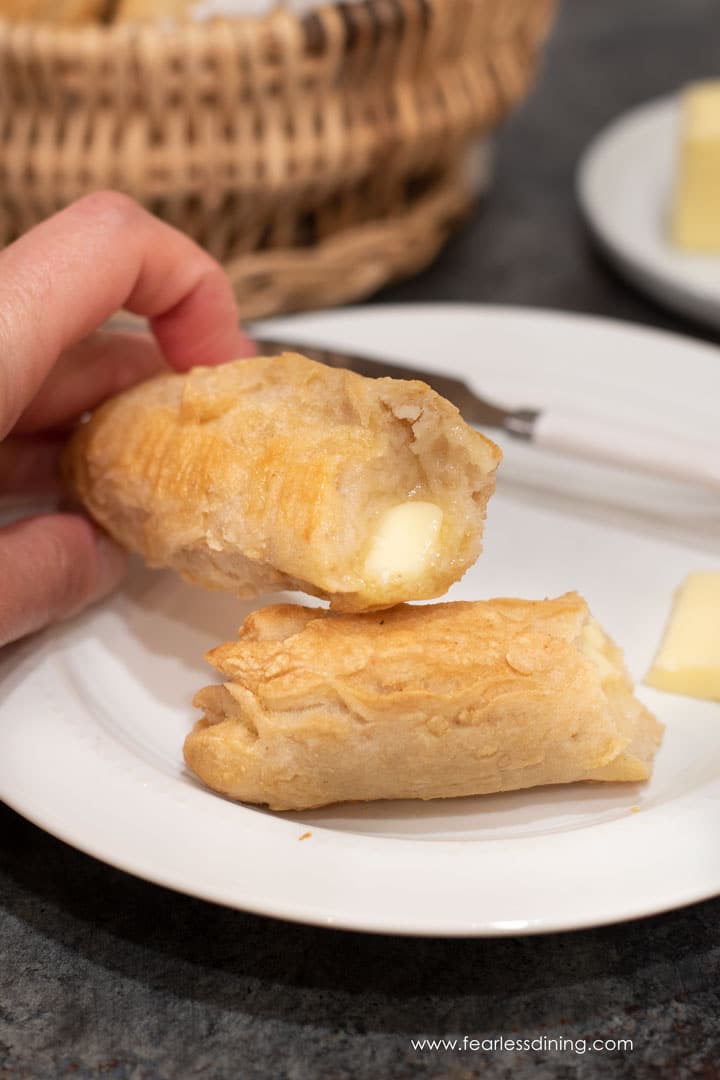
- You can easily add butter or olive oil, Italian seasoning, and garlic to make gluten-free garlic breadsticks. You can make them with or without garlic butter, giving you lots of options. You can even use homegrown fresh herbs to add more flavor!
Ingredient Notes:
For the full list of ingredients and amounts, please go to the recipe card below.
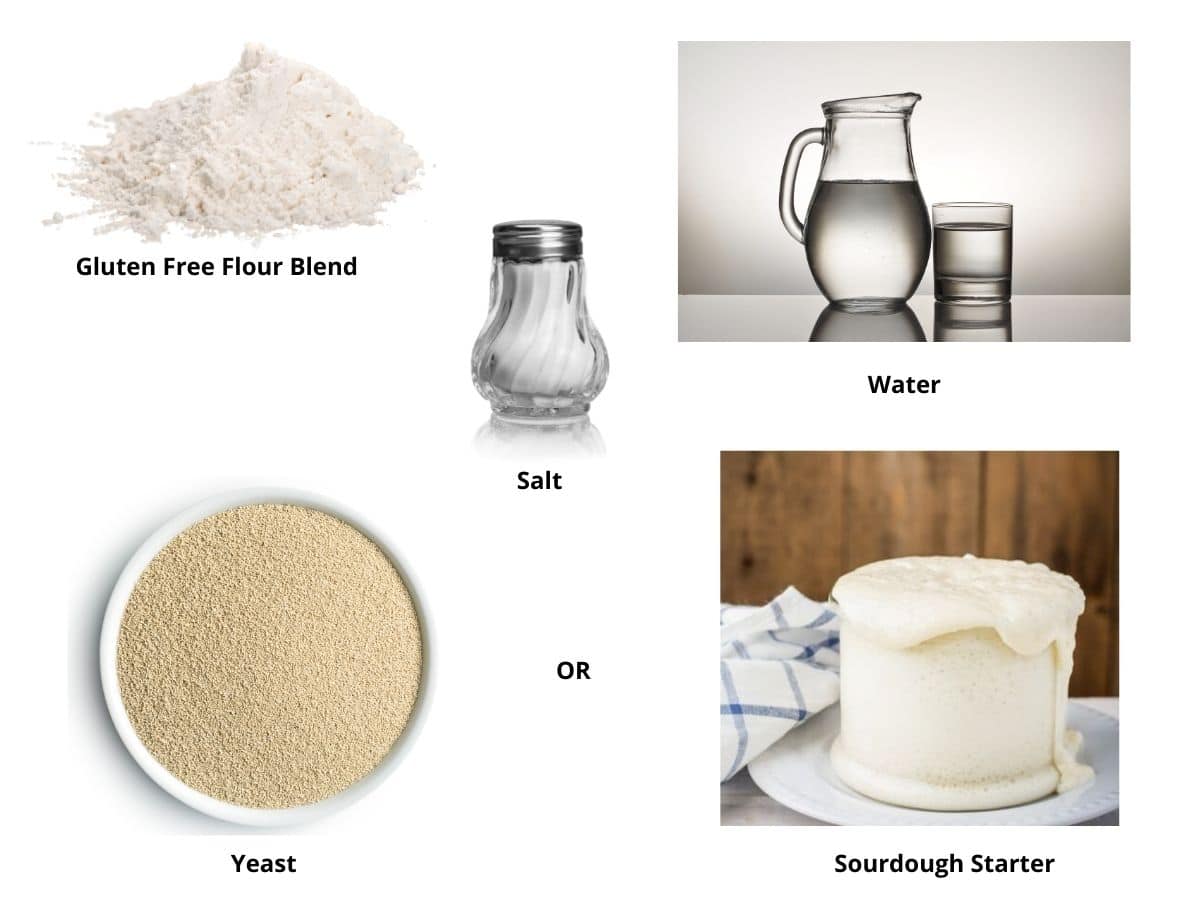
- Gluten free flour blend – I have tested this recipe with King Arthur Measure for Measure GF and Bob’s Red Mill 1 to 1 GF blend. These blends are not the best for yeast recipes, but they did work. If you want to use Cup4Cup or Authentic Foods Steve’s GF Bread Blend, they will rise much better if you are baking with dry yeast. Note: Cup4Cup recently changed its flour blend formulation, and it doesn’t behave as the old formulation. I haven’t had a chance to retest this recipe with the new flour blend formulation.
- Xanthan gum – If your gluten free flour blend doesn’t contain Xanthan Gum or Guar Gum, please add 1 teaspoon.
- Yeast – I used active dry yeast. Double-check the brand you use is gluten free. Red Star Platinum is NOT gluten free!
- It is optional to use dried Italian herbs and garlic powder or garlic salt in the dough.
Step-By-Step Photos and Directions:
You are going to love how easy this recipe is to make. Making gluten free: You are going to love how easy this recipe is to make. I break it down into simple steps.
Making gluten free breadsticks from scratch will yield a crusty, delicious breadstick that holds up to dipping into sauces! The active yeast version is made in less time, so if you want to enjoy these quickly, I recommend this instead of the sourdough version.
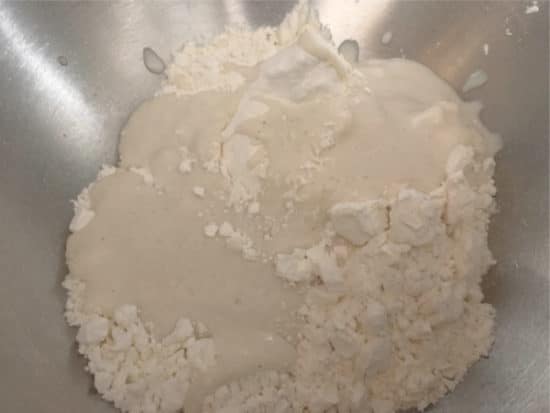
Step 1 With Sourdough Starter: In a large bowl, add 1/2 cup sourdough starter to gluten free flour blend, baking powder, and salt.
Step 1 With Yeast: If you are using active dry yeast, proof your yeast in 110º F warm water with 1 teaspoon of sugar. Let it sit for 5-10 minutes until it is very bubbly. Do not use water hotter as it can kill the yeast.
To measure your gluten free flour, I recommend using either the spoon method or leveling method.
Spoon Method: You can also use a spoon to fill the measuring cup. Use a knife to level along the top to remove the extra flour. Leveling Method: Put the measuring scoop into the flour and fill. Do not pack the flour. Use a knife to scrape along the top to remove the extra flour.
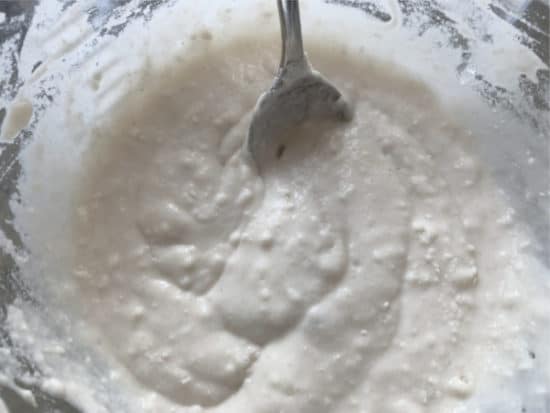
Step 2 With Sourdough Starter: Add 2 cups of purified water. Mix well and cover with a clean towel.
Step 2 With Yeast: Add the dry ingredients to a bowl and whisk to blend them. Add the yeast mixture and the rest of the wet ingredients.
NOTE: You can also use a standing mixer with a paddle attachment.
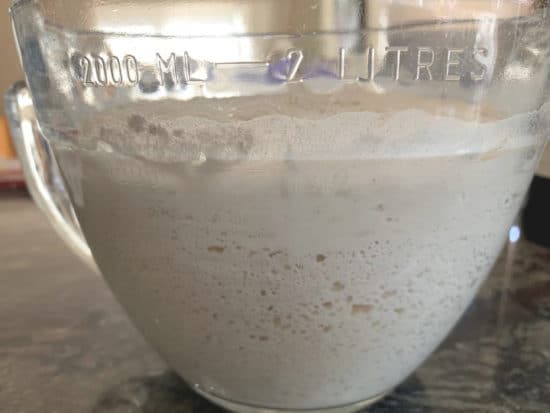
Step 3 Sourdough Starter: Allow to rise in a warm spot for 2-3 hours.
Step 3 With Yeast: You will want to shape your breadsticks, then set them aside to rise.
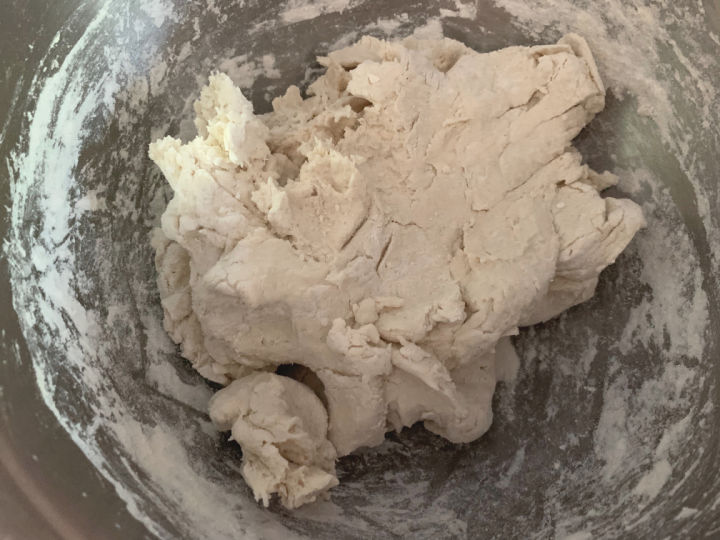
Step 4 Sourdough and Yeast: Add 1 cup of flour and mix. Add more flour until you can work your dough without it sticking to your hands. (The total amount will vary by your gluten-free flour blend.)
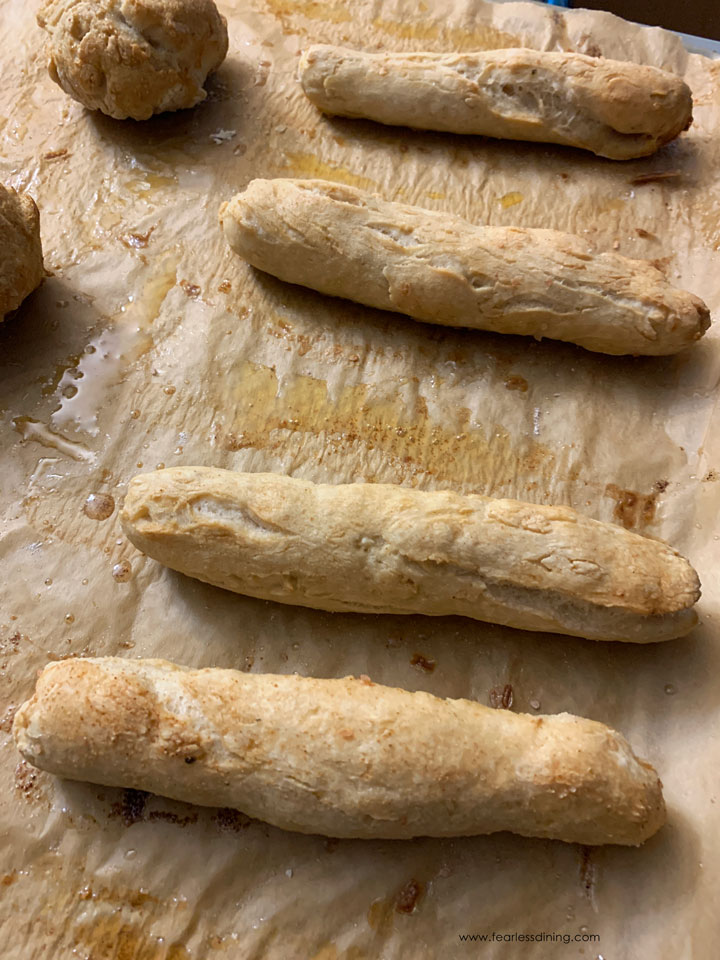
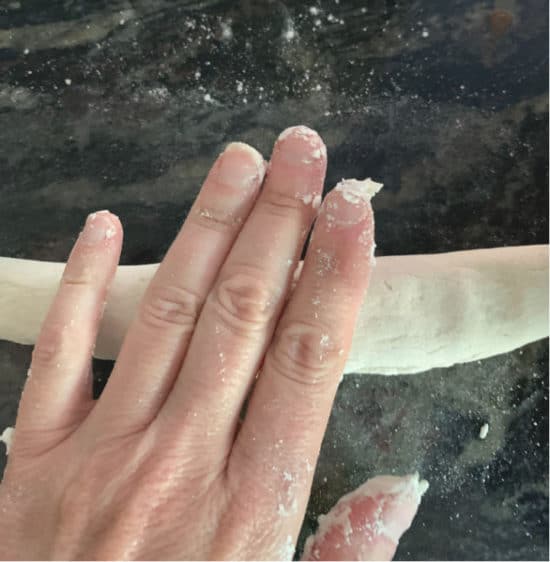
Step 5 Sourdough and Yeast: Break chunks of dough and roll (just like when you were young and played with playdough!) into ropes. You can make your breadsticks of any thickness. I made mine about 1 inch wide.
Email This Recipe To Me!
📢 Sandi says: Every gluten-free flour blend has a different starch-to-grain ratio. The brand of gluten-free flour you use will affect the moisture of the batter. If your cake batter is too runny, add more flour, and if it is too thick, add more liquids.
Read Why Gluten-Free Flour Blends Vary to learn more about this.
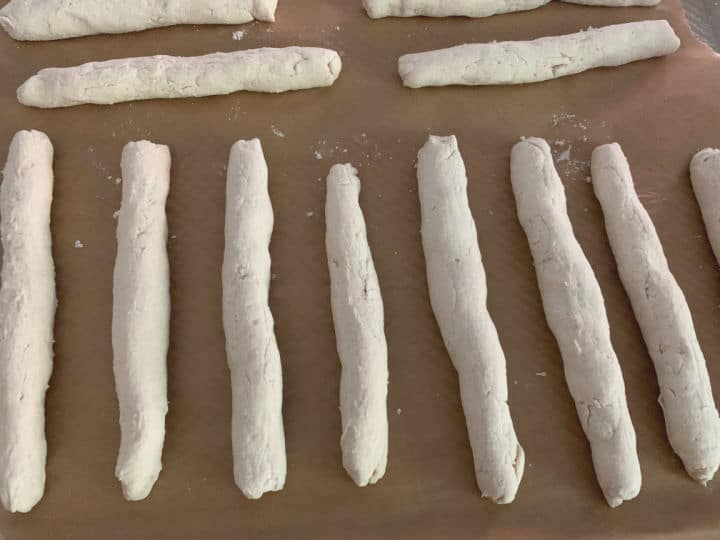
Step 6 Sourdough and Yeast: Place your rolled breadsticks on the baking sheet, cover them with plastic wrap, and allow the breadstick dough to rise for 1 hour. I know it can be hard to believe these grew into the big, yummy breadsticks in my finished photos, but they rise on the tray, then rise in the oven even more.
Step 7: Preheat the oven to 425º F. Put a piece of parchment paper on a
Step 8: If making regular breadsticks, use a pastry brush to spread an egg wash on each breadstick. (To make an egg wash, crack a raw egg and dump it into a small bowl. Scramble it to make the egg wash.) Top with salt.
👀 Sandi Says: This is a gluten-free, vegan breadstick recipe if you skip the egg wash. You can also use toppings like poppy seeds or sesame seeds.
Step 9: If you are making gluten free garlic breadsticks, brush the breadsticks with melted butter and garlic salt.
Step 10: Place the breadsticks in the preheated oven and bake for 30 minutes or until they are slightly golden brown. Note the actual baking time will depend on how thick you make your breadsticks. Cool on a wire rack.
Active Dry Yeast Version:
Here is a summary of how to make these gluten free breadsticks with active dry yeast:
- Pour a packet of yeast into 1/2 cup of warm water. Add 1 teaspoon of sugar. Let sit for 5 minutes until it froths.
- Add 2 cups of flour, 1 1/2 teaspoons of baking powder, and 1 teaspoon salt to a large bowl. Whisk to blend.
- Pour the yeast mixture and 1 3/4 cups of water into the flour. Mix well. For this rise, you want your mixture to be a little wet.
- Allow rising 2 hours.
- Add 1 1/2 cups flour to the bowl and mix. You want your dough to be stiff enough to roll.
- Roll the breadsticks as directed above and allow them to rise for 1 hour. Bake according to the regular sourdough directions.
Dip these gluten free breadsticks into these sauces:
- This gluten free pasta sauce. Dipping these breadsticks in is pure heaven!
- Dip into this savory tomato sauce and enjoy these gluten free turkey meatballs cooked in the sauce!
- There is nothing like a breadstick dipped into a creamy garlic alfredo sauce in this gluten free fettuccine alfredo.
- This homemade nut-free pesto sauce.
- Dip these breadsticks into my Gluten Free Cheese Fondue.
Frequently Asked Questions:
Store these breadsticks the right way! Learn How to Store Gluten Free Bread so you can keep it fresh.
The secret to getting the breadsticks to have a sourdough crusty outside is to bake at a high temperature and use either an egg wash or melted butter outside before baking.
The breadsticks will keep fresh for up to 3 days, but once you store them in a container, they will lose some of the crustiness. They are definitely best eaten the day they are made.
Unfortunately, these breadsticks are not similar to what you would find at Olive Garden. Olive Garden’s breadsticks are very soft, like a roll, whereas these breadsticks are more baguette crusty bread style.
I store these breadsticks in an airtight container in the refrigerator.
You can easily freeze these breadsticks in a freezer-safe zipper bag. To reheat them, you can thaw them and then bake for 6-8 minutes at 375º F.
Yes, you can use rapid yeast. If you use it, add it to the dry ingredients.
If you want to try a fun bread recipe, you will love my Gluten Free Bread Machine Bread recipe!
More gluten free sourdough recipes to try:
Love This Recipe?
If you made and enjoyed this recipe, I would be incredibly grateful if you could leave a comment below. Please include which flour blend you used. This will help others know this recipe is delicious. Thank you!
Crusty Gluten Free Breadsticks
Ingredients
- ½ cup sourdough starter
- 3 cups gluten free flour blend * see note
- 2 cups purified water
- 1 ½ teaspoons baking powder
- 1 teaspoon salt
- 3 tablespoons unsalted butter
- ½ teaspoon garlic salt
Method
- In a large bowl, add 1/2 cup sourdough starter, 1 cups gluten free flour blend, 1 1/2 teaspoons baking powder, 1 teaspoon salt, and 2 cups purified water. Mix well.
- Cover with a clean towel and let rise overnight. You can rise 4 hours if you are making it during the day.
- Add 2 cups of flour and mix. Add flour until you have a dough you can work with your hands without the dough sticking to everything. You don't want the dough too firm.
- Break pieces of dough off and roll like snakes into 1 inch thick breadsticks.
- Place on a parchment paper-lined baking sheet. Allow rising an hour.
- If you want plain breadsticks, brush an egg wash over each dough stick and then sprinkle with some salt.
- If you want garlic breadsticks, brush the dough sticks 3 tablespoons unsalted butter and 1/2 teaspoon garlic salt.
- Preheat the oven to 425º F.
- Put the tray into the oven and bake for 25-30 minutes. Baking time will vary on how thick you make your breadsticks.
Nutrition
Notes
- Pour a packet of yeast into 1/2 cup of warm water. Add 1 teaspoon of sugar. Let sit 5 minutes until it froths.
- Add 2 cups of flour, 1 1/2 teaspoons baking powder, and 1 teaspoon salt to a large bowl. Whisk to blend.
- Pour the yeast mixture and 1 3/4 cups of water into the flour. Mix well. For this rise, you want your mixture to be a little wet.
- Allow rising 2 hours.
- Add 1 1/2 cups flour to the bowl and mix. You want your dough to be stiff enough to roll.
- Roll the breadsticks as directed above and allow to rise 1 hour. Bake according to the regular sourdough directions.
Private Notes
Tried this recipe?
Let us know how it was!
This post was updated from an older August 5, 2020 post with easier directions.
I truly hope you enjoy this recipe. I have been testing and creating gluten-free recipes for over 15 years. Creating gluten-free recipes that do not taste gluten-free is my goal for every recipe. Sometimes I only have to test a new recipe a couple of times, and others it takes multiple times. I do this so you get reliable, delicious results every time!

I’m just curious did anybody else have to use A LOT of flour to make sure this wasn’t sticky?
I hope I’m doing this right. I am excited to try them!
Hi Lynne, it really depends on the flour blend you used. Every blend has a different starch-to-grain ratio and this greatly affects how much liquid/dry ingredients you need to tweak. I am happy to troubleshoot if you tell me which you used.
I made these to take to dinner at some friends’ house. I will use more flour next time, and bake them longer.
A video might be helpful for folks that have never baked bread, so they can have a visual of the rising process..
I’m anxious to try the cheese straws now.
Hi Sheila, This recipe is on my list to remake, so I will try to get some videos, or at least several, before and after rising. Thank you for the suggestions.
I imagine folks who have been missing bread sticks will be so happy! These sound great, Sandi–you do so much for all the gluten-free folks. I tell all my readers who are looking for gf recipes to find you!
You are so sweet. I hope everyone loves these breadsticks as much as we do!