
Fall is in the air, so it’s the perfect time to make a batch of these delicious Gluten Free Halloween Cut Out Cookies! The secret is that eating these soft Halloween Sugar cookies is only half the fun! Decorating them is the really exciting part.
This post may contain affiliate links. Please read our Disclosure Policy.
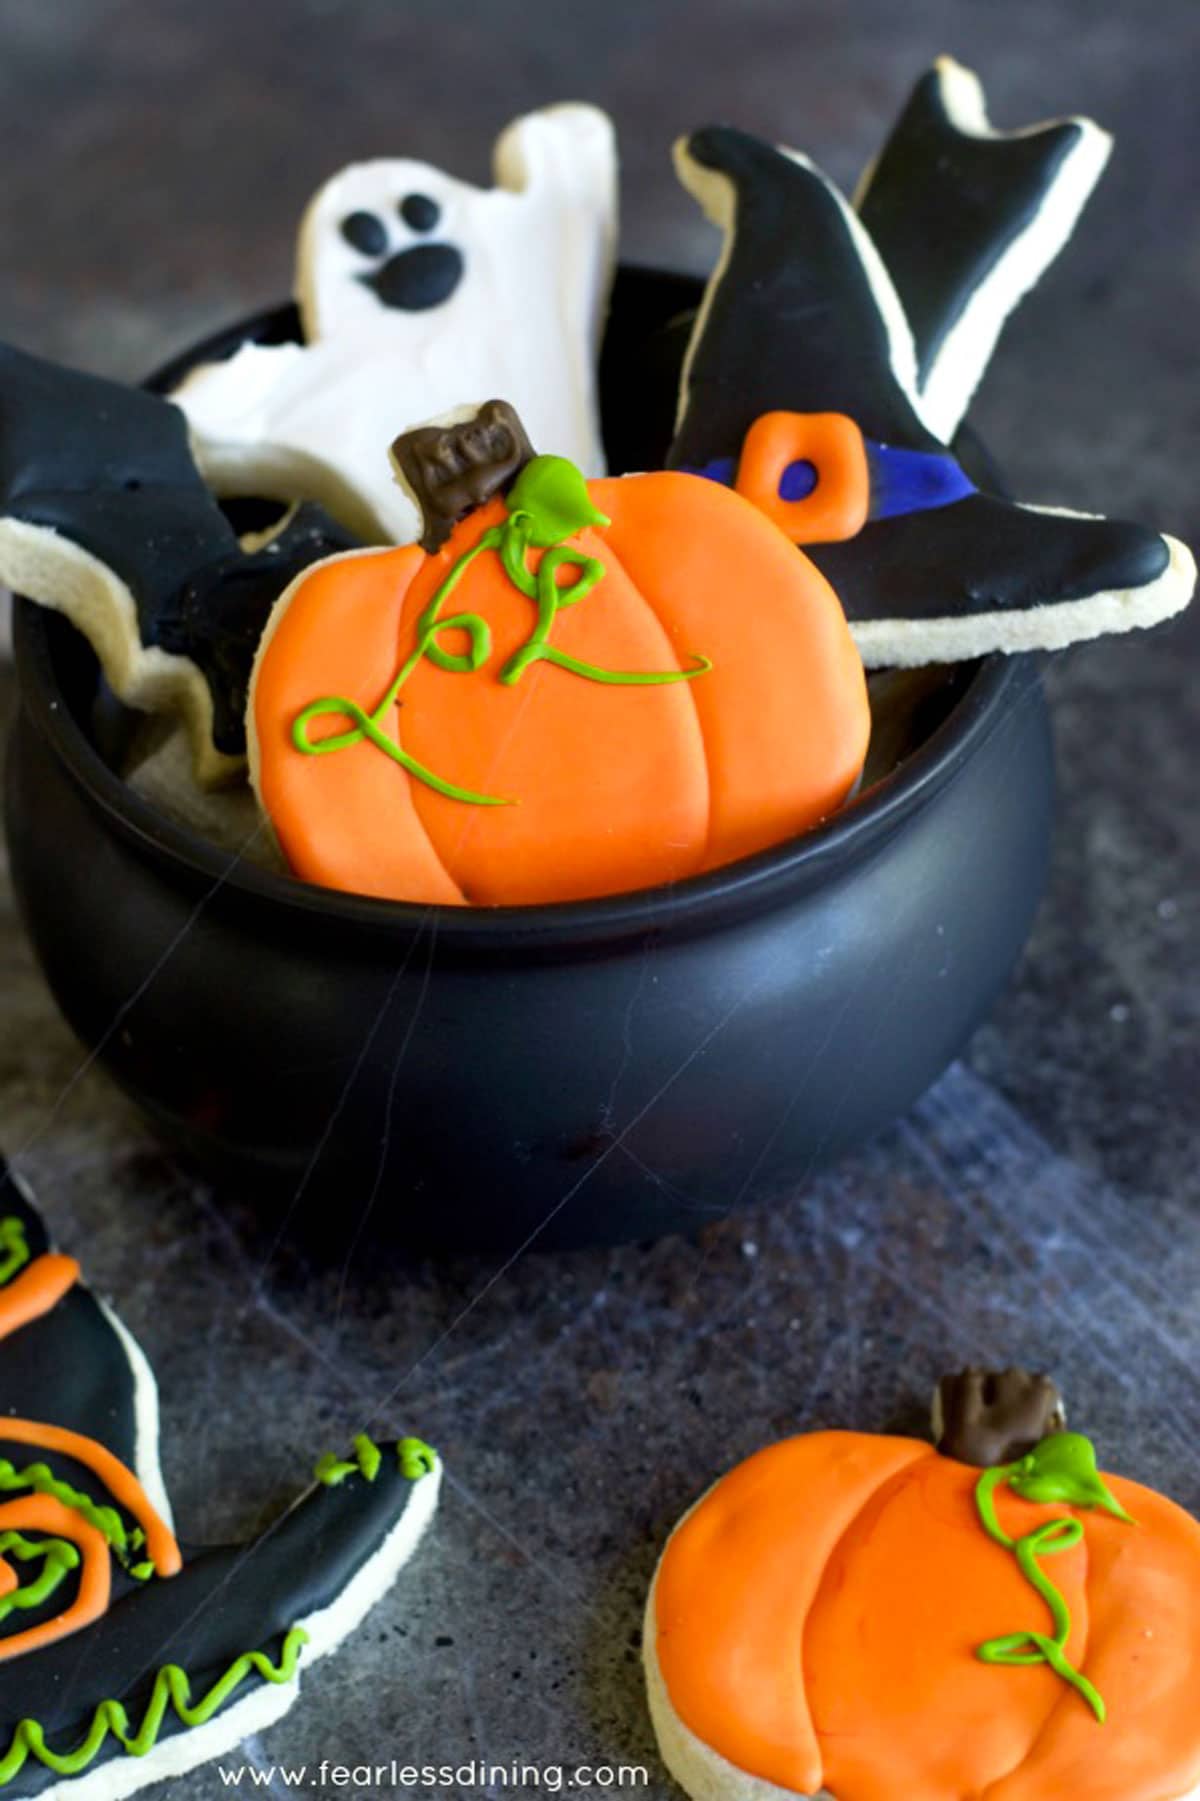
At my house, many holidays are spent decorating gluten-free cut-out cookies. It’s relaxing and gives us time to hang out as a family. You can use any cookie cutters you like, and this recipe is also great for any holiday!
If you are looking for a creative way to have fun, this is the cookie recipe. Plus, delivering a batch to friends or the kids’ classmates is fun. It’s impossible to eat one of these Halloween cookies without a smile.
If you love to bake, be sure to check out my Gluten Free Baking Tips so that your baked goods turn out great. If you prefer a chocolate cookie, try these Gluten Free Skeleton Cookies. Find more recipe inspiration with these Gluten-Free Halloween Treats.

If you love cookies as much as we do, you will want to check out all of my incredible gluten free cookie recipes! These Gluten Free Halloween Cookie Mix Jars are also perfect as hostess gifts.
Ingredient Notes:
For the full list of ingredients and amounts, please go to the recipe card below.
- Gluten Free Flour Blend – I tested this recipe using my two favorite blends King Arthur Measure for Measure and Bob’s Red Mill 1:1 Blend. That doesn’t mean others will not work; I just have not tested other flours, and I can not guarantee the recipe will work if you use different mixes.
- Xanthan Gum – If your gluten free flour blend doesn’t contain xanthan gum or guar gum, please add one teaspoon.
- Cream of Tartar – This is important for royal icing.
- Sugar – Be sure to use regular white sugar and not coarse sugar.
- Powdered Sugar – This is for the royal icing.
- Butter – Use unsalted butter. To make these gluten free Halloween cookies dairy-free, use vegan butter.
- Egg – Use size large.
- Pure Vanilla Extract – This is a recipe where you want to use real vanilla extract and not imitation.
- Food coloring – You can use regular or more natural food coloring. Use liquid or gel food coloring.
Step-By-Step Photos and Directions:
Are you ready to make these delicious gluten free soft Halloween cookies? First, grab some awesome Halloween cookie cutters. I used this 5 piece Halloween Cookie Cutter Set. Next, gather the ingredients you need.
I will walk you through the gluten-free sugar cookie recipe used to make these cut-out cookies. Then, I will show you how to make the royal icing and use it to decorate these gluten free Halloween cookies.
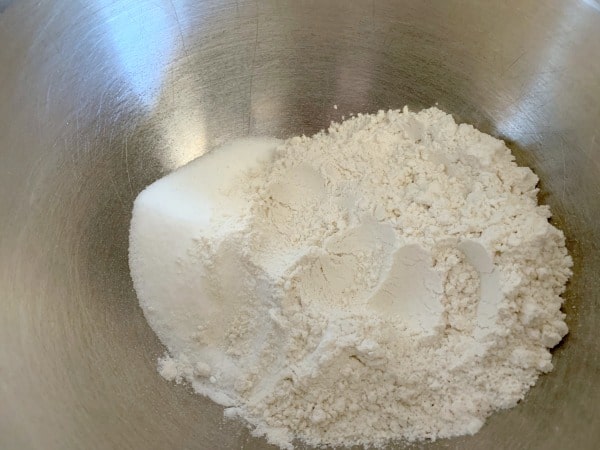
Step 1: Add the gluten free flour blend, sugar, and salt to a large
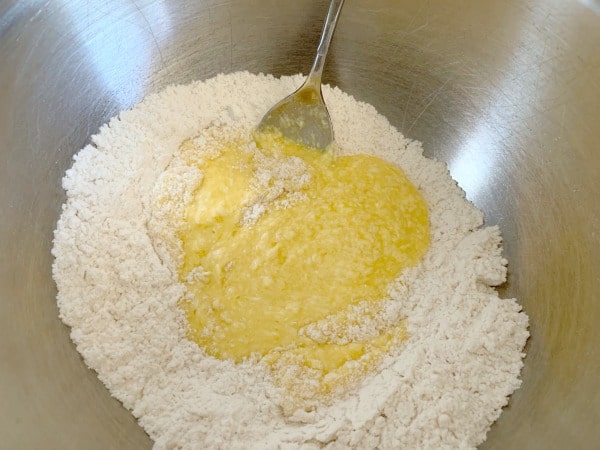
Step 2: Mix the softened butter, vanilla, and egg in a smaller bowl, then pour the wet ingredients into the dry ingredients. Mix well to form a thick cookie dough. (It should not be crumbly, though!)
📢 Sandi says: Every gluten-free flour blend has a different starch-to-grain ratio. The brand of gluten-free flour you use will affect the moisture of the batter. If your cake batter is too runny, add more flour, and if it is too thick, add more liquids.
Read Why Gluten-Free Flour Blends Vary to learn more about this.
Step 3: Here I tell you I am a bit remiss and didn’t get photos of the rolled-out cookie dough. I am going to list out the steps:
- Take the sugar cookie batter and wrap it in plastic wrap.
- Refrigerate the cookie dough for 45 minutes until cool. This will also help to remove any grittiness from the flour blend.
- Remove the gluten free Halloween cut-out cookie dough from the refrigerator. Place on wax paper and place another piece of wax paper on top.
- Use a rolling pin to flatten and spread the gluten-free sugar cookie dough. Roll to 1/2 inch thickness.
- Grab your Halloween cookie cutters and press the cookie cutters down into the cookie dough.
- Place the cutout cookie dough shapes onto a parchment paper-lined
cookie sheet and bake at 350º F for 9-10 minutes. - Remove from the oven and allow to cool on a cooling rack.
How To Decorate Cookies With Royal Icing:
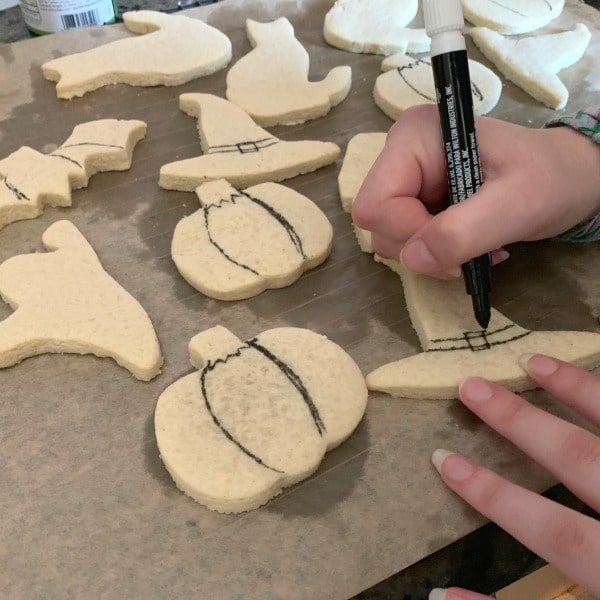
Step 1: First, you want to trace the areas where you will use the royal icing and the areas where you will use different colors. Use an edible cookie marker to trace your designs on the cut-out cookies. (That marker will be the best $2.89 you have ever spent if you love to decorate with royal icing!)
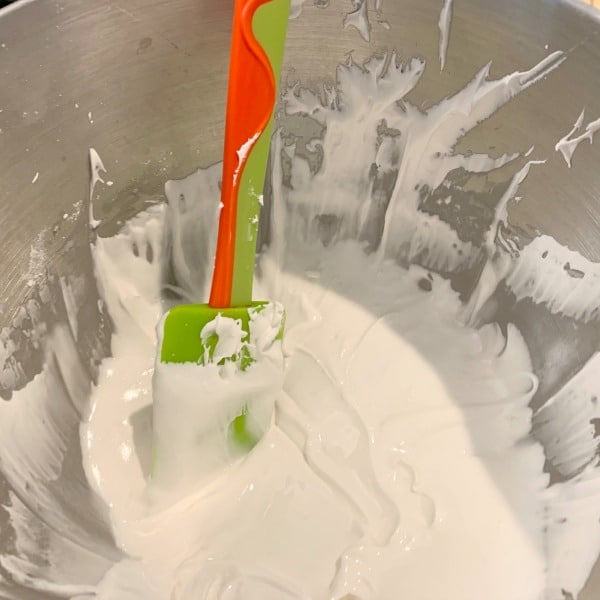
Step 2: Add the royal icing ingredients to a standing mixer with a whisk attachment. Whip up your homemade royal icing by starting on low speed. Gradually increase the speed. You want your royal icing to be firm and not runny to hold its shape well.
Step 3: Grab some of these ramekins. I use them to make lots of colors of royal icing.
Put a small amount of royal icing into a bunch of different containers. Add the food coloring you want to each and mix.
Email This Recipe To Me!
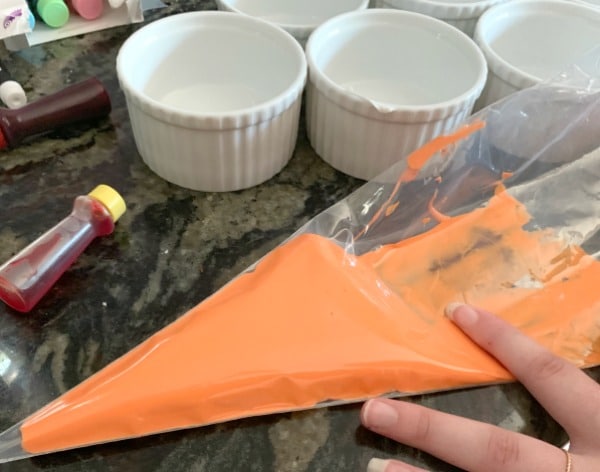
Step 4: Add each colored icing into a piping bag. You do not need a frosting tip. You only want to snip a bit off the corner so a small amount comes out.
👀 Sandi Says: Do not cut too much off the end of the piping bag, or your royal icing will come out too thick and fast.
Step 5: This is where those lines you drew on the cookies come in handy. Pipe the icing onto a section of the cookie. Use a toothpick to spread the icing to fill a section. The lines help you know where to put the royal icing.
Step 6: Allow the icing to dry. Royal icing dries pretty quickly. Then, you can start the next section. This gives you textured areas like the sections of the pumpkin.
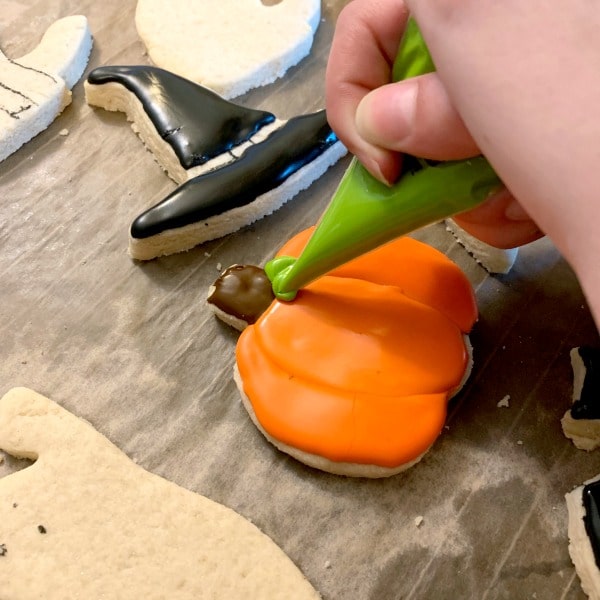
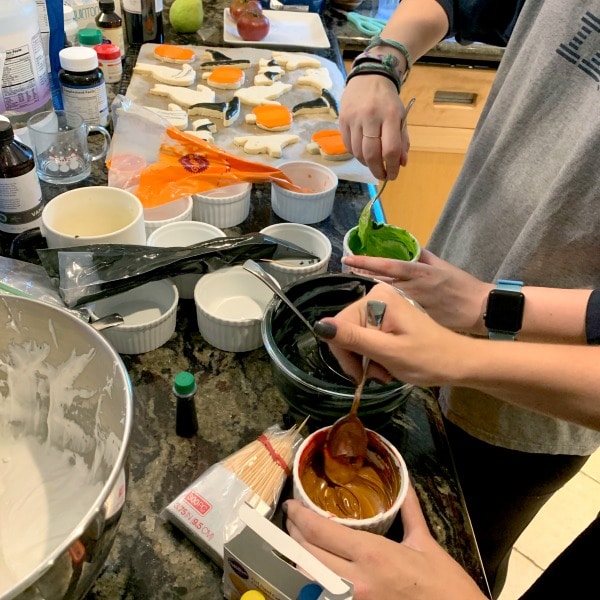
Use your colors to decorate each cookie. My daughter is making a green icing leaf for her pumpkin cut-out cookie here.
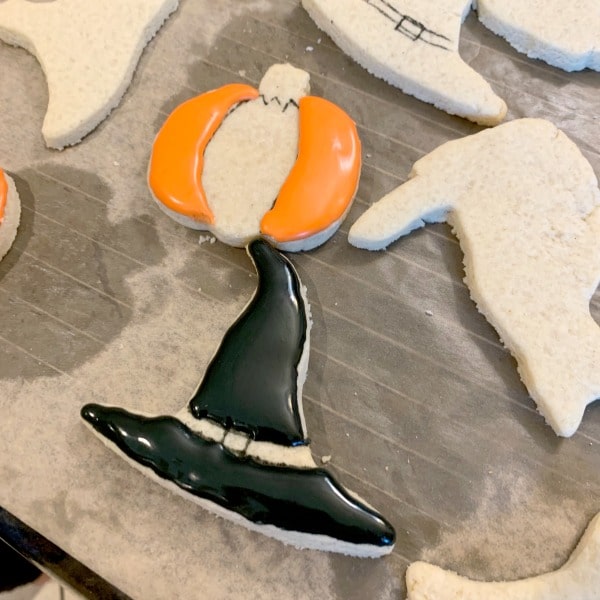
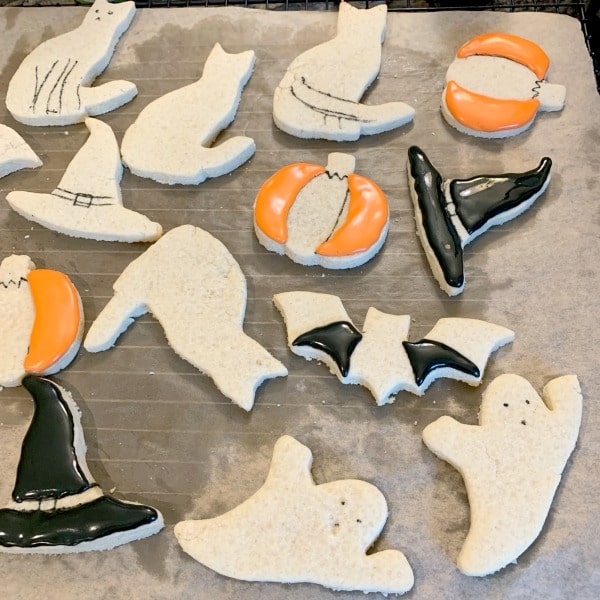
Here is a close-up to see how icing in sections works. Let sections dry, then fill another section. This will help give shape to your cookies.
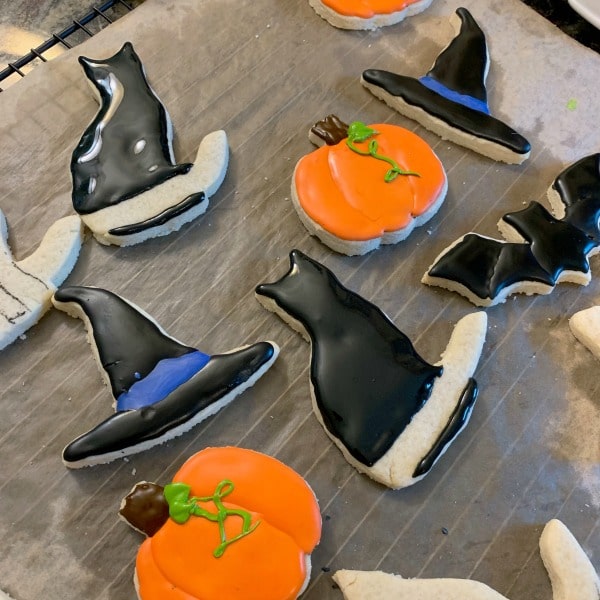
Adding more layers of royal icing of decoration to the Halloween cut-out cookies.

Someone had a little too much fun decorating the cat-shaped Halloween cookies :-). I love decorating cookies. Check out how cute these Gluten Free St. Patrick’s Day Cookies turned out.
Cut Out Cookies Baking Tips:
There are many reasons why gingerbread cookies spread. There are a few things you can do to remedy this issue. Take a look at these tips to prevent this from happening:
- Use room-temperature butter and eggs. It sounds crazy to use butter and eggs at room temperature, but it dramatically helps how your cookies will turn out. You’ll thank yourself later if you try it.
- Take special care to measure correctly. If you add in too much gluten free flour or other ingredients, it can mess with the cookies as they bake. If they don’t have the proper ratios of ingredients, you may end up with a disaster.
- Chill the dough when possible. I know you are probably ready to eat your cookies, but taking a few minutes to chill the batter makes them less likely to spread.
- Your oven temperature may be off. Periodically, check your oven temperature to make sure it’s right. Otherwise, the cookies will, for sure, spread if it’s not accurate.
- Use a cooled
cookie sheet when baking. Please don’t take a hotcookie sheet and put the batter on it, or I promise the cookies won’t turn out. They start baking immediately, and it messes with their shape of them. Use a couple of sheets and rotate them out when making large batches of cookies. - Don’t let the cookies sit on the pan too long. After baking, only let them sit on the baking sheet for up to 5 minutes. The pan will still be hot and continue baking them otherwise.
I also have a post where I detail how to make decorated royal icing on these Gluten Free Valentine’s Cookies.
Frequently Asked Questions:
They say royal icing can last up to 3-4 days in the refrigerator. I haven’t had any leftovers to test this out yet.
Yes, you can freeze gluten free sugar cookies! You can frost them beforehand and then flash-freeze them.
After they are frozen to the touch, the cookies can be placed in an airtight container lasting 2-3 months. Then you can grab a gluten free cookie here and there as needed.
Whenever you bake cut-out sugar cookies, spreading them can be a huge problem if you cut them and bake them right away. You will have a lot better results if you place the gluten free Halloween cut-out cookies on the baking sheet and then put them in the freezer.
I recommend just letting them sit in the freezer for around 10 minutes. This will help them stay in the shapes that you want, and they are less likely to spread.
I have found that dipping the cutter in flour is the easiest and most convenient way to keep the cookie dough from sticking to the cookie cutters.
Just use the gluten free flour blend on hand and dip the cutter in the flour, then cut some cookies and repeat. This will keep you making uniform-shaped cookies and allow you to keep your sanity.
These cookies will keep fresh for up to 4 days in an air-tight container in the refrigerator or up to 4 months in the freezer.
You may also enjoy these Gluten Free Easter Cookies. They are the perfect sugar cookies.
More Gluten Free Halloween Recipes:
- Fall Time Gluten Free Pumpkin Madeleines
- Halloween Candy Gluten Free Pumpkin Bundt Cake
- Gluten Free Black Velvet Cupcakes
- Gluten Free Mummy Wrapped Hot Dogs
- Fluffy Gluten Free Halloween Whoopie Pies
Love This Recipe?
If you made and enjoyed this recipe, I would be incredibly grateful if you could leave a comment below. Please include which flour blend you used. This will help others know this recipe is delicious. Thank you!
Gluten Free Halloween Cut Out Cookies (Includes Royal Icing Recipe)
Ingredients
- 2 cups gluten free flour blend
- 1 teaspoon baking powder aluminum-free!
- ½ cup cane sugar
- ⅔ cup unsalted butter softened a lot
- 1 large egg
- 1 ½ teaspoons pure vanilla extract
- 3 cups powdered sugar
- 2 egg whites
- ½ teaspoon cream of tartar
- pinch salt
- Food coloring
Equipment
Method
- Preheat the oven to 350º F.
- Add 2 cups gluten free flour blend, 1 teaspoon baking powder, 1/2 cup cane sugar, and a pinch salt; and whisk to blend.
- Put 2/3 cup unsalted butter (partially melted),1 large egg, and 1 1/2 teaspoons pure vanilla extract into a smaller bowl and whisk to blend.
- Pour the wet ingredients into the dry ingredients and mix.
- Wrap the dough in plastic wrap.
- Refrigerate the cookie dough for 45 minutes.
- Remove from the refrigerator and place the dough on wax paper. Place another piece of wax paper on top.
- Use a rolling pin to roll out the dough until it is 1/2 inch thick.
- Take your favorite cookie cutters and cut out cookies.
- Place the cut out cookies on a parchment-lined cookie sheet and bake for 8-10 minutes.
- Remove from the oven and cool on a cooling rack.
- Using a standing mixer, add 3 cups powdered sugar, 2 egg whites, 1/2 teaspoon cream of tartar, and a pinch of salt.
- Turn the mixer on SLOW. (If you turn it on too fast, it will explode sugar everywhere!)
- Slowly mix the icing for 9 minutes until it becomes somewhat fluffy and thick.
- Decorate your cookies, don't forget to let each color icing dry before adding another color, otherwise, the colors can run together.
- * See the recipe post for photos and instructions on how to decorate with royal icing.
Nutrition
Notes
- I have tested this recipe with King Arthur Measure for Measure GF, Bob’s Red Mill 1 to 1 GF blend, and Authentic Foods Multi Blend in this recipe. That doesn’t mean others will not work, I just have not tested other flours.
- If your gluten free flour blend doesn’t contain Xanthan Gum or Guar Gum, please add 3/4 teaspoon.
- To make this recipe dairy-free, substitute the butter for vegan butter.
- These cookies will keep up to 4 days in an airtight container, or up to 4 months in the freezer.
Private Notes
Tried this recipe?
Let us know how it was!
This post was updated from an older October 2019 post with more detailed directions.
I truly hope you enjoy this recipe. I have been testing and creating gluten-free recipes for over 15 years. Creating gluten-free recipes that do not taste gluten-free is my goal for every recipe. Sometimes I only have to test a new recipe a couple of times, and others it takes multiple times. I do this so you get reliable, delicious results every time!

Hello. I have been trying different gluten free sugar cookie recipes and they are not easy to get right. I used the king arthur flour. I ended up adding an egg white to the batter and a bit more butter to get the dough to stick together – or else it was just crumbles. The way that you make your royal icing (eggs instead of milk or water) gives a nice consistency but i am not fond of the taste. At any rate, these are one of the best recipes i’ve tried for gluten free. So kudos to you!!! and thanks for sharing!
Do you know if using colored sugar sprinkles before baking will work for this recipe?
Hi Jill, they are sugar and will melt a bit if you use them before baking.
The dough would not come together at all for me until I added 1 egg mixed with 1 tablespoon of water …
With only the butter and dry mix it was the consistency of almond meal and would not bing
Can I ask what gluten free flour blend you used? Did you scrape the top of the measuring cups to make sure the flour amount was exact? I haven’t needed to add an egg so I wanted to brainstorm with you.
Only liquid ingredient is butter? No eggs or milk?
That is correct Patti 🙂