
These Gluten Free Valentine’s Cookies are made with my popular gluten free cut-out sugar cookie base. They are then topped with royal icing and decorated to perfection! They make the perfect treat for all of your Valentine’s Day celebrations!
This post may contain affiliate links. Please read our Disclosure Policy.

Valentine’s Day is a big deal at the Fearless Dining House. We had a lot of fun making and decorating cookies to give to neighbors, friends, and classmates.
Royal icing differs from decorating with frosting in that it has a hard, glossy surface. You can tint royal icing in bright, vibrant colors and decorate it in intricate patterns like hearts, flowers, love messages, etc. I used this cookie recipe in my Gluten Free Halloween Cut Out Cookies recipe.
For more Valentine’s Day inspiration, I have lots of fun Gluten Free Valentine’s Day Recipes to try! We love making these Gluten Free Valentine’s Brownies too!
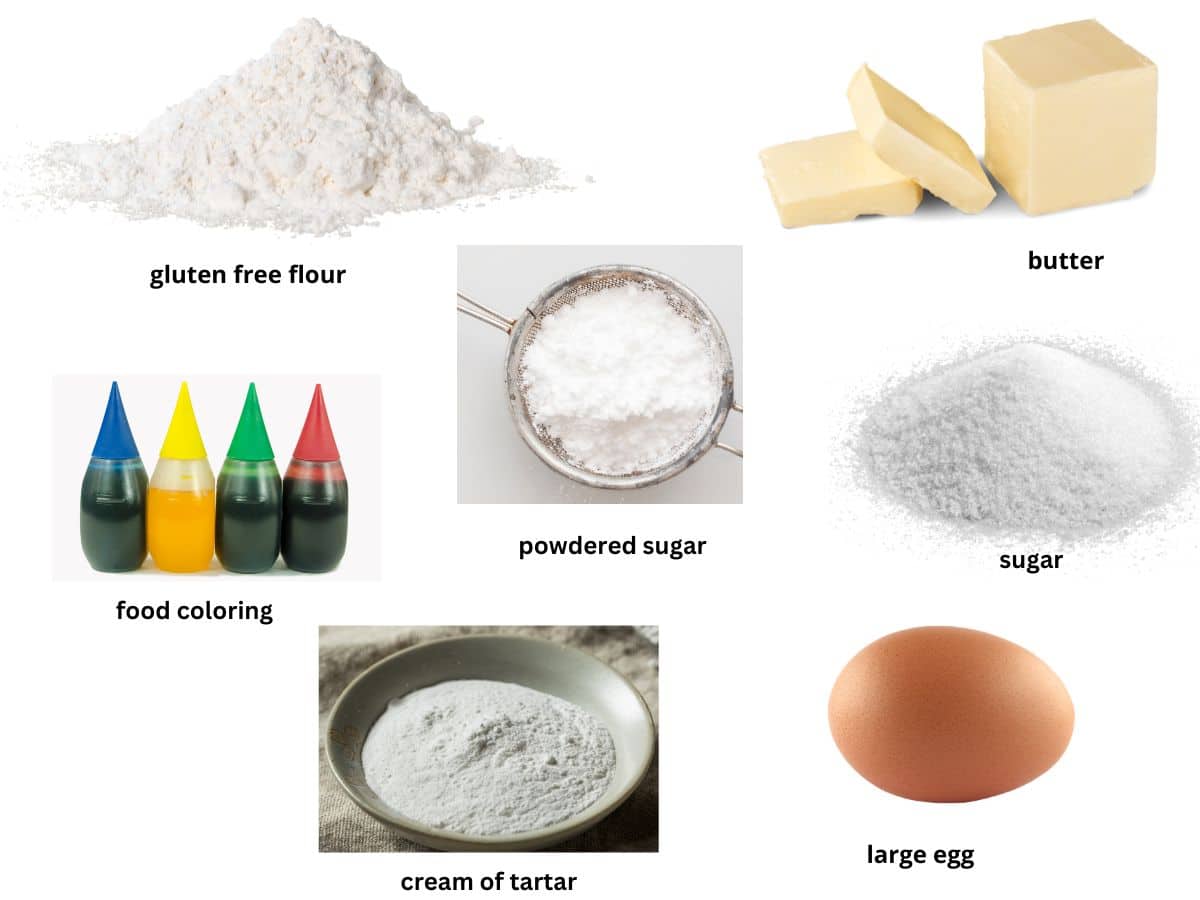
Ingredient Notes:
For the full list of ingredients and amounts, please go to the recipe card below.
- Gluten Free Flour Blend – I tested this recipe with both King Arthur Measure for Measure and Bob’s Red Mill 1:1. I needed a tiny bit more flour with the Bob’s, so if the dough isn’t workable, add a little more flour. I am sure other blends should work, but again, keep an eye on the dough. Some starchy blends may need more or less liquid.
- Xanthan Gum – If your blend doesn’t have xanthan gum, add one teaspoon.
- Cream of Tartar – This ingredient helps to stabilize the cookies.
- Sugar and Powdered Sugar – These are key ingredients for both sweetness and royal icing.
- Butter – You will need to use unsalted butter in this recipe. If you are dairy-free, use plant-based butter.
- Egg – Use size large.
- Vanilla Extract – I highly recommend using pure vanilla extract and not imitation vanilla. It makes a big difference in these cookies.
- Food Coloring – Use liquid or gel food coloring. You can use natural food coloring, but the colors will not be as vibrant.

Tips For Success:
- Take special care to measure correctly. If you add in too much gluten free flour or other ingredients, it can mess with the cookies as they bake. If they don’t have the proper ratios of ingredients, you may end up with a disaster.
- Chill the dough when possible. I know you are probably ready to eat your cookies immediately, but taking a few minutes to chill the batter makes them less likely to spread.
- Your oven temperature may be off. Periodically, check your oven temperature to make sure it’s right. Otherwise, the cookies will, for sure, spread if it’s not accurate.
- Use a cooled
cookie sheet when baking. Don’t take a hotcookie sheet and put the batter on it, or I promise the cookies won’t turn out. They start baking immediately, and it messes with the shape. Use a couple of sheets and rotate them out when making large batches of cookies. - Allow the icing to dry before starting the next section. Royal icing dries pretty quickly. Then, you can begin the next section. This gives you textured areas like the sections of the lips cookies.
If you want more baking tips, here are my best Gluten Free Baking Tips.
Step-By-Step Photos and Directions:
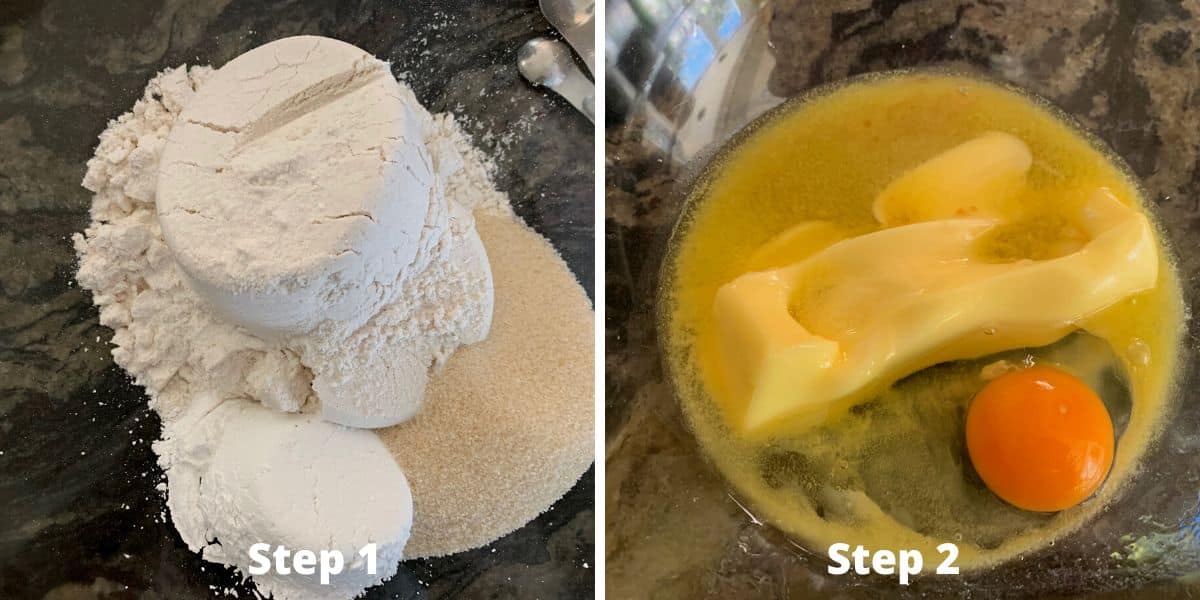
Step 1: Add the sugar, flour, and salt to a large
Step 2: Add the softened butter, egg, and vanilla to a medium-sized bowl. Use the whisk to mix the.
You can also use a stand mixer to make your dough. If you use the mixer, use the paddle attachment.
- Add the softened butter, egg, and vanilla to the mixer.
- Mix them on low speed and gradually increase the speed.
- Turn off the mixer and gradually add the dry ingredients. Continue to mix on low speed until all of the dry ingredients are mixed in.
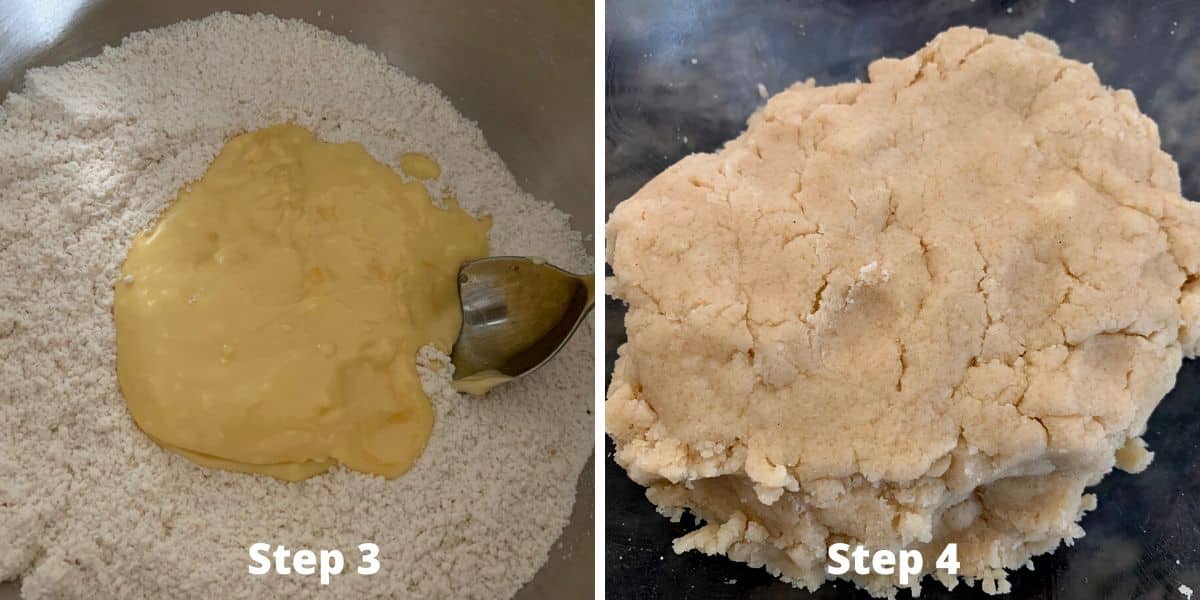
Step 3: Pour your wet ingredients into the dry ingredients. Be sure to use a bowl scraper on the sides of the bowl to get all of the wet ingredients out.
Step 4: This is what your cookie dough should look like. If you used a different flour blend and your dough is sticky, now is the time to evaluate if you need to add more flour.
Wrap the dough in plastic wrap and refrigerate the dough for 30-45 minutes. This is to keep the dough from spreading when you bake it, AND it helps soften the rice flour in the gluten free flour blend so there is no grittiness.
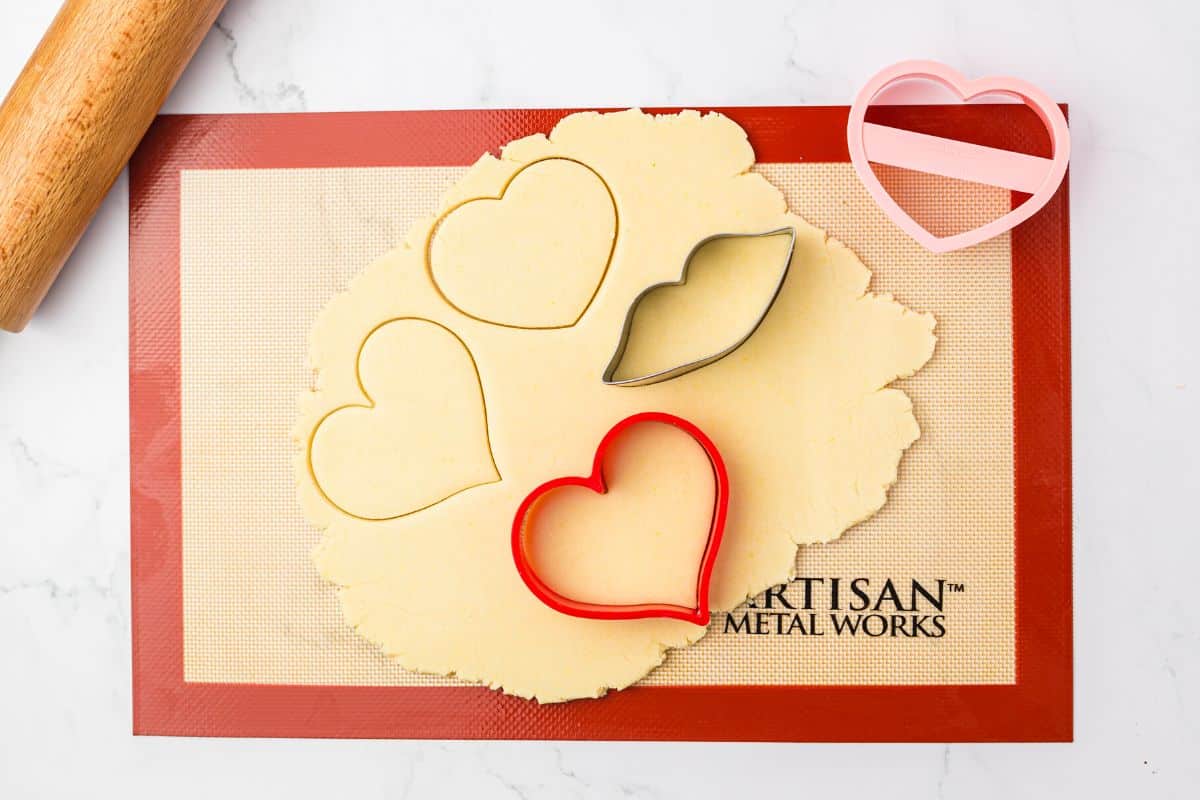
Step 5: Preheat your oven to 350º F. Remove the dough from the refrigerator. Place it onto a silicone mat or a clean surface. Use a rolling pin to roll the dough to 1/4 to 1/2 inch thickness.
Step 6: Use your cookie cutters to cut out shapes. Place the cookie shapes on a parchment-paper-lined
Step 7: Bake your cookies for 10-11 minutes, depending on the size and thickness of the cookies.
Remove the cookies and slide the parchment paper with the cookies onto a cooling rack. You do NOT want to ice the cookies until they are fully cooled.
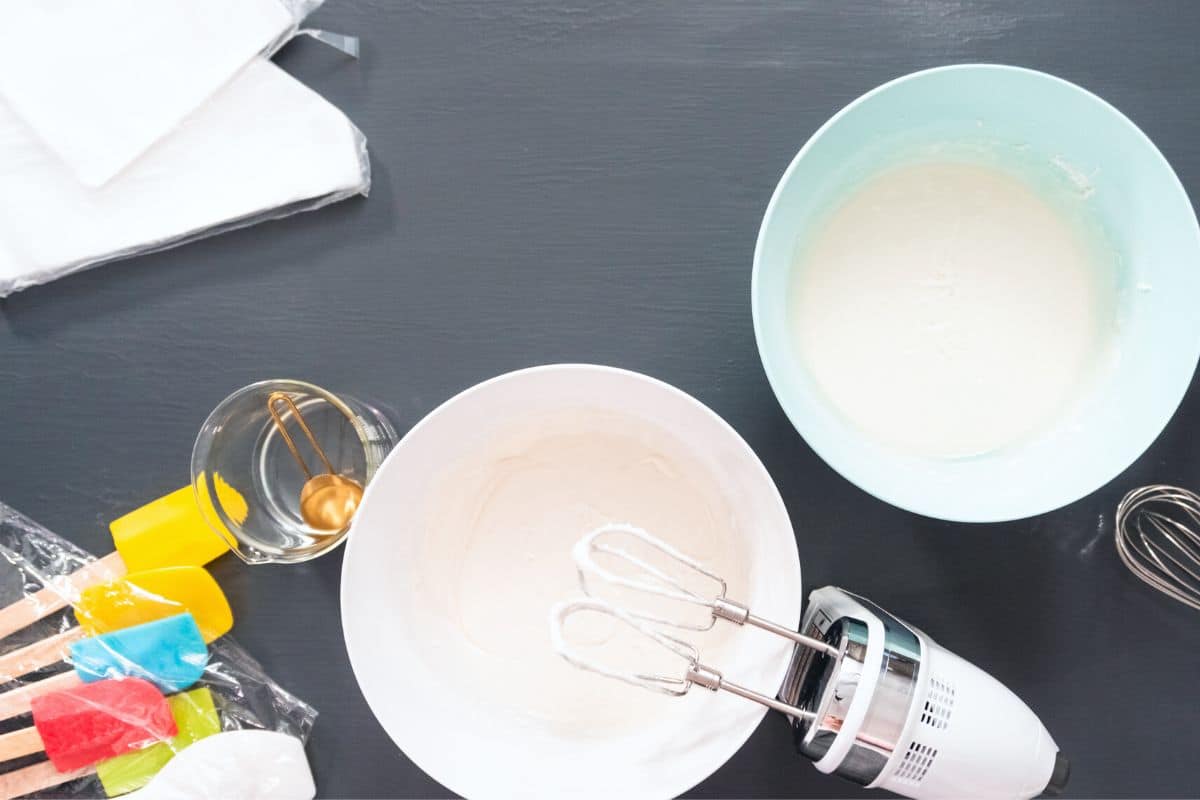
Step 8: While the gluten free Valentine’s cookies are cooling, let’s make the royal icing!
Add the royal icing ingredients to a large bowl (if you use an electric hand mixer) or a stand mixer with a whisk attachment. Whip up your homemade royal icing by starting on low speed. Mix for 9-10 minutes.
Gradually increase the speed once the powdered sugar is added to the bowl. You want your royal icing to be firm and not runny to hold its shape well.
Email This Recipe To Me!
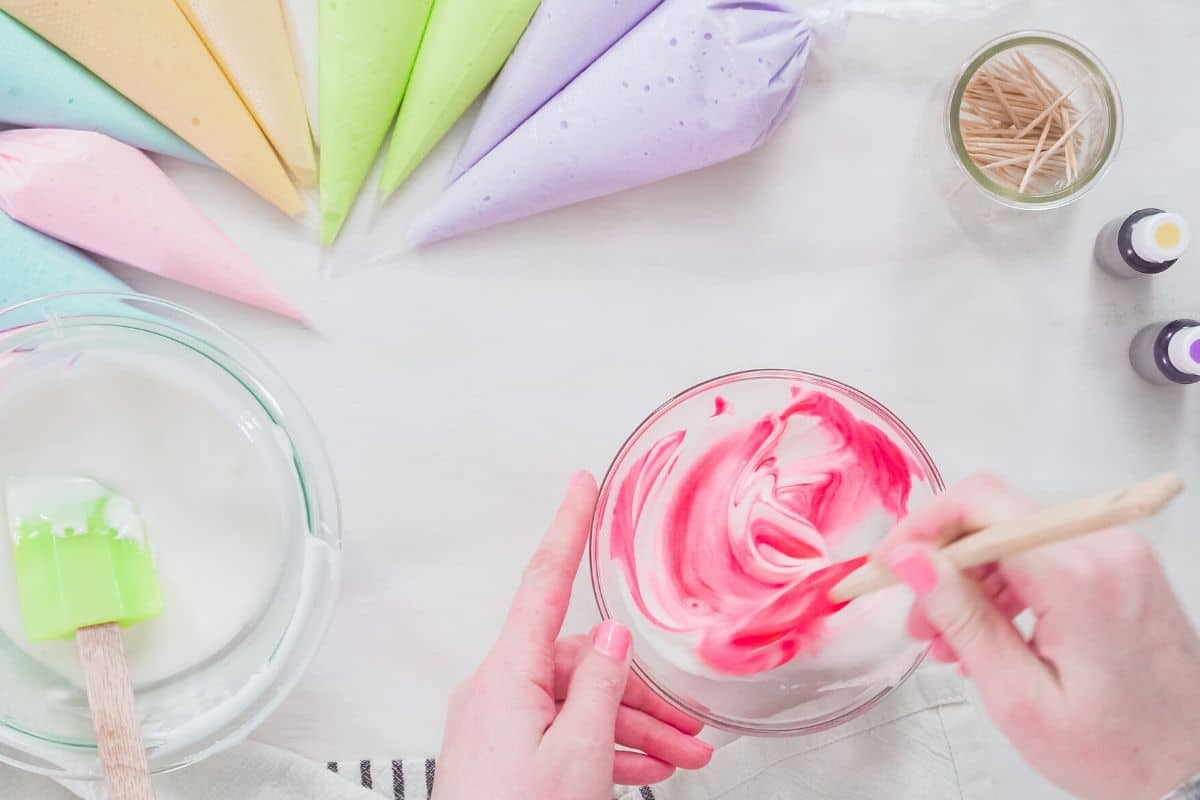
Step 9: Choose the colors of royal icing you want to make. Place a little royal icing in a bowl and add food coloring. Mix and repeat until you get the color you are aiming for.
Tip: Don’t color all of the royal icings, and forget to leave some plain white for base colors!
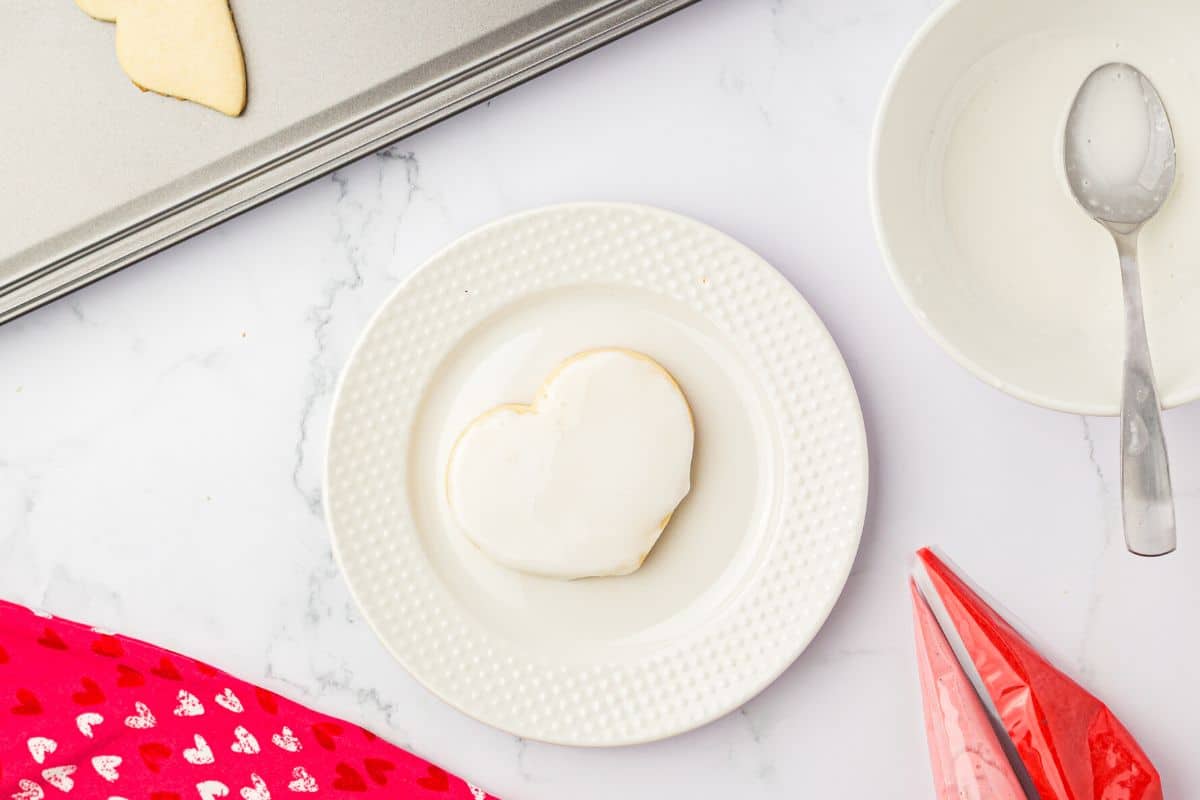
Step 10: Let’s go over how to make the dragged heart pattern. With this decorating technique, you want to work quickly before the royal icing dries. First, cover the top of the cookie with icing. I used white so the hearts stand out.
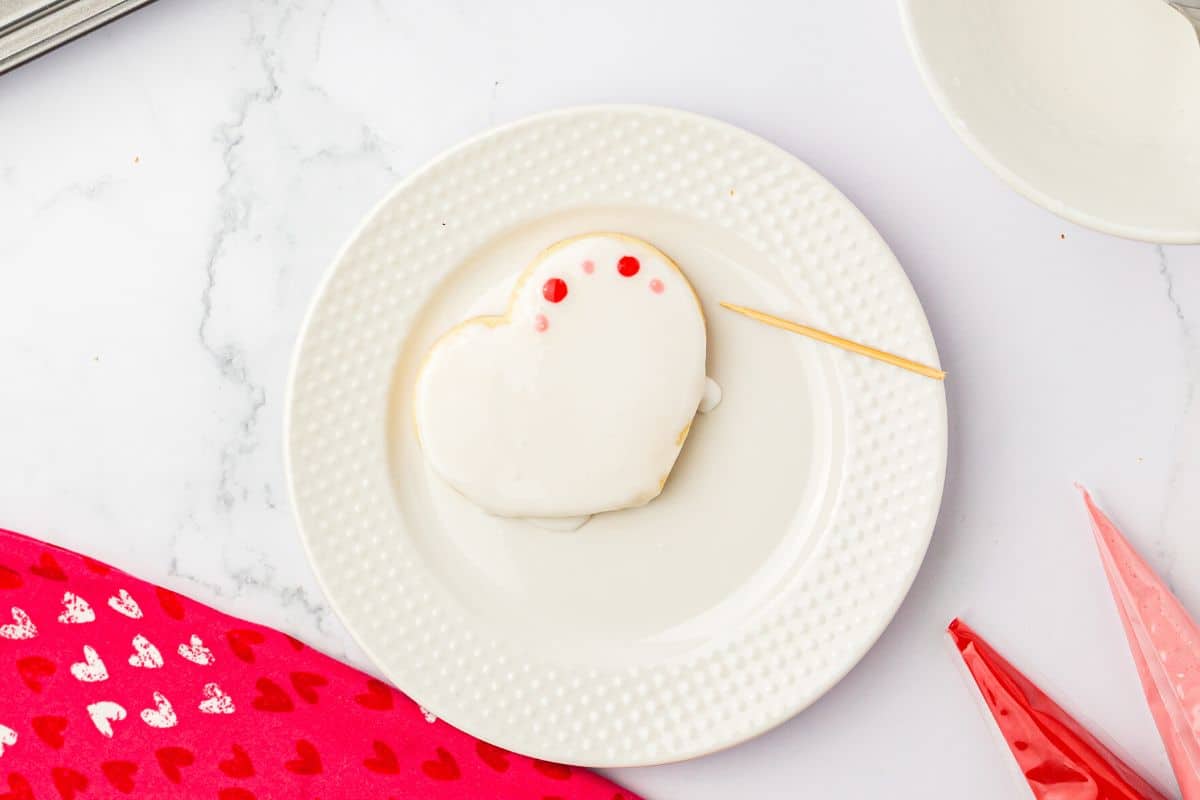
Step 11: Use a toothpick to drop dots of colored icing around the perimeter of the cookie.
HINT: I made a few dots, then moved to shape them as described in step 12, then added more dots and repeated. This way, your dots of icing won’t harden before you drag the toothpick through them.
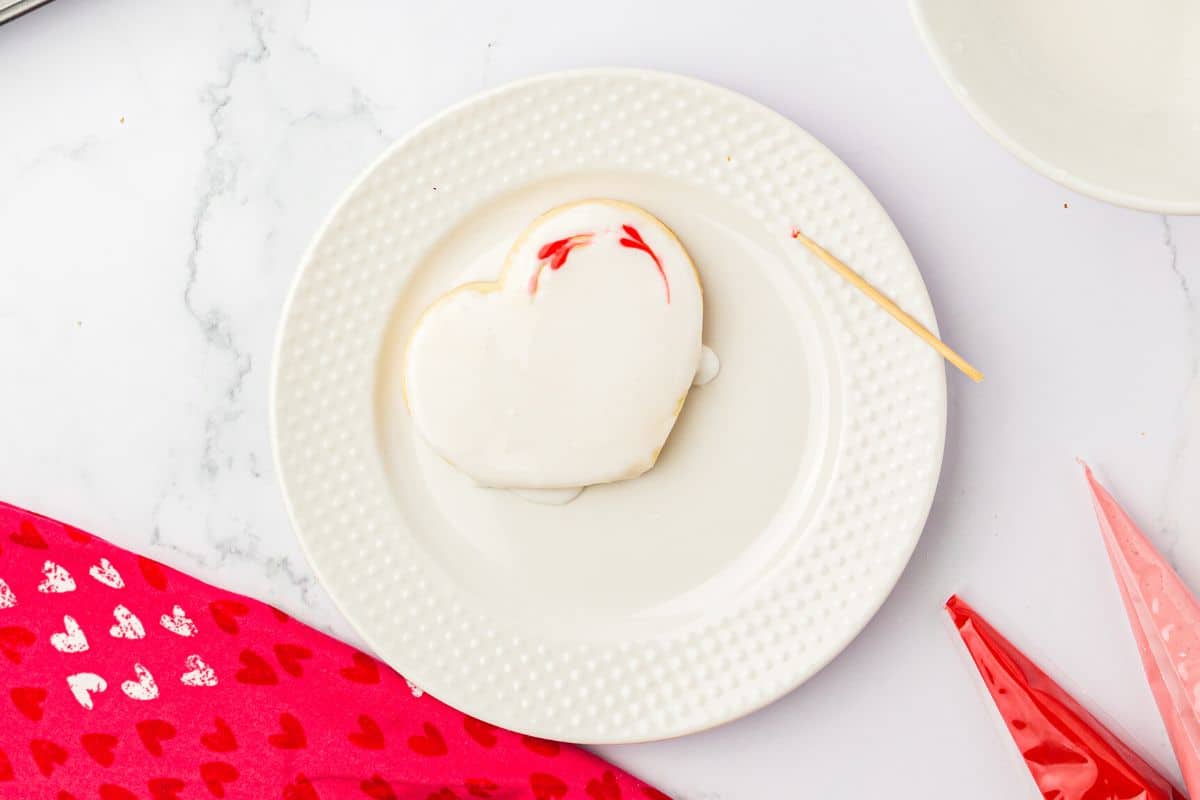
Step 12: To make the heart shapes, drag a toothpick through each dot of royal icing.

This is what the final cookie looks like. Let it dry for 4-5 hours after you finish making the decorative heart edging.

Note: If you plan to make sections of the same color as in the lips-shaped cookie, add royal icing to one section, then let that section dry. This will leave indentations or lines between the sections. You can see more examples of how to decorate in this way in my Gluten Free Halloween Cut-Out Cookies post.
If you love making cookies, I have over 100 incredible gluten free cookie recipes for you to try!
Frequently Asked Questions:
These icings are popular, but royal icing is best for detailed decorating because it dries hard. This locks in the decorations you drew on the cookies.
I would give the royal icing 4-5 hours to fully dry. It may take a little longer if you are in a humid climate.
To store these gluten free cookies with royal icing, let them fully dry. Store in an airtight container in the refrigerator for up to 4 days. You can also easily freeze the cookies in a freezer bag.
I advise making the dough ahead. You can store the dough in the refrigerator for up to 2 days. This dough also freezes well. To thaw the dough, put it into the refrigerator for a day or let it thaw on the kitchen counter for a few hours.
You may also have fun making these Gluten Free St. Patrick’s Day Cookies!

More Gluten Free Valentine’s Dessert Recipes:
- Easy Gluten Free Red Velvet Cookies
- Gluten Free Cakesicles
- Gluten Free Strawberry Meringues
- Creamy Chocolate Custard
Love This Recipe?
If you made and enjoyed this recipe, I would be incredibly grateful if you could leave a comment below. Please include which flour blend you used. This will help others know this recipe is delicious. Thank you!
Gluten Free Valentine’s Cookies (Cut Out Cookie and Royal Icing!)
Ingredients
- 2 cups gluten free flour blend * see note
- 1 large egg
- ½ cup cane sugar
- 1 teaspoon baking powder aluminum-free!
- dash of salt
- ⅔ cup unsalted butter room temperature
- 1 ½ teaspoons pure vanilla extract
- 3 cups powdered sugar
- 2 egg whites
- food coloring
- ½ teaspoon cream of tartar
Method
- In a large bowl, combine the 2 cups gluten free flour blend, ½ cup cane sugar, 1 teaspoon baking powder, and dash of salt. Use a whisk to mix them.
- Add the 1 large egg, v1 ½ teaspoons pure vanilla extract, and softened ⅔ cup unsalted butter to a medium bowl and whisk to blend.
- Pour the wet ingredients into the dry ingredients and mix into cookie dough.
- Wrap the dough in plastic wrap and chill in the fridge for 45 minutes. This helps the dough to not spread while baking, and it helps soften the rice flour in your blend so the cookies don't have a gritty texture.
- Preheat the oven to 350º F. Remove the cookie dough and place it onto a silicone mat. Roll the dough to 1/4 to 1/2 inch thickness.
- Use your cookie cutters to cut out the cookie shapes. Place them onto a parchment paper-lined baking sheet.
- Bake the cookies for 10-11 minutes. The time may vary depending on the thickness and size of the cookies.
- Remove the cookies and then them cool completely on a cooling rack.
- Add the 3 cups powdered sugar, 2 egg whites, and ½ teaspoon cream of tartar to a stand mixer. Use the whisk attachment. Whip on low speed as the powdered sugar gets mixed in.
- Mix the icing for 9 minutes. This is what will thicken this mixture into royal icing.
- Move some of the royal icing into small bowls and use food coloring to color each batch.
- To make the dragged heart pattern. Cover the top of the cookie with one color of icing. I used white so the hearts stand out.
- Use a toothpick to drop dots of colored icing around the perimeter of the cookie.
- To make the heart shapes, drag a toothpick through each dot of royal icing.
- Continue until you make all of the hearts you want.
- If you plan to make sections of the same color as in the lips-shaped cookies pictured in the post, add royal icing to one section, then let that section dry. This will leave indentations or lines between the sections. You can see more examples of how to decorate in this way in my Gluten Free Halloween Cut-Out Cookies post
- Allow the cookies to fully dry. The royal icing will harden to lock in the pattern. This will take 4-5 hours, longer if it is humid.
Nutrition
Notes
- I have tested this recipe with King Arthur Measure for Measure GF and Bob’s Red Mill 1 to 1 GF blend. If you use another blend, there is no guarantee the recipe will turn out the same as mine. Some blends are starchy and you need a lot more flour than others.
- You can use natural food coloring, but the colors will not be as vivid.
- I highly recommend reading the post for easy to follow photos of every step.
- Store these cookies in an airtight container for up to 3 days in the refrigerator.
- Freeze these cookies in a freezer bag for up to 4 months.
Private Notes
Tried this recipe?
Let us know how it was!
I truly hope you enjoy this recipe. I have been testing and creating gluten-free recipes for over 15 years. Creating gluten-free recipes that do not taste gluten-free is my goal for every recipe. Sometimes I only have to test a new recipe a couple of times, and others it takes multiple times. I do this so you get reliable, delicious results every time!

You neglected to tell us how much cream of tartar to use. I know I need some kind of leavening
Yes, I use 1/2 tsp of cream of tarter or 1 tsp aluminum-free baking powder. I added that. Thank you!
Do you think these could be made with coconut oil?
Hi Janet, I do not know. I haven’t tested this. If you try it, please come back and let me know how it worked.