These Gluten Free Maple Oat Biscuits are baked treats that combine the wholesome flavors of gluten free oats with the rich sweetness of maple syrup. These biscuits have a delightful flakiness and a warm, comforting taste, making them a perfect choice for fall meals.
This post may contain affiliate links. Please read our Disclosure Policy.
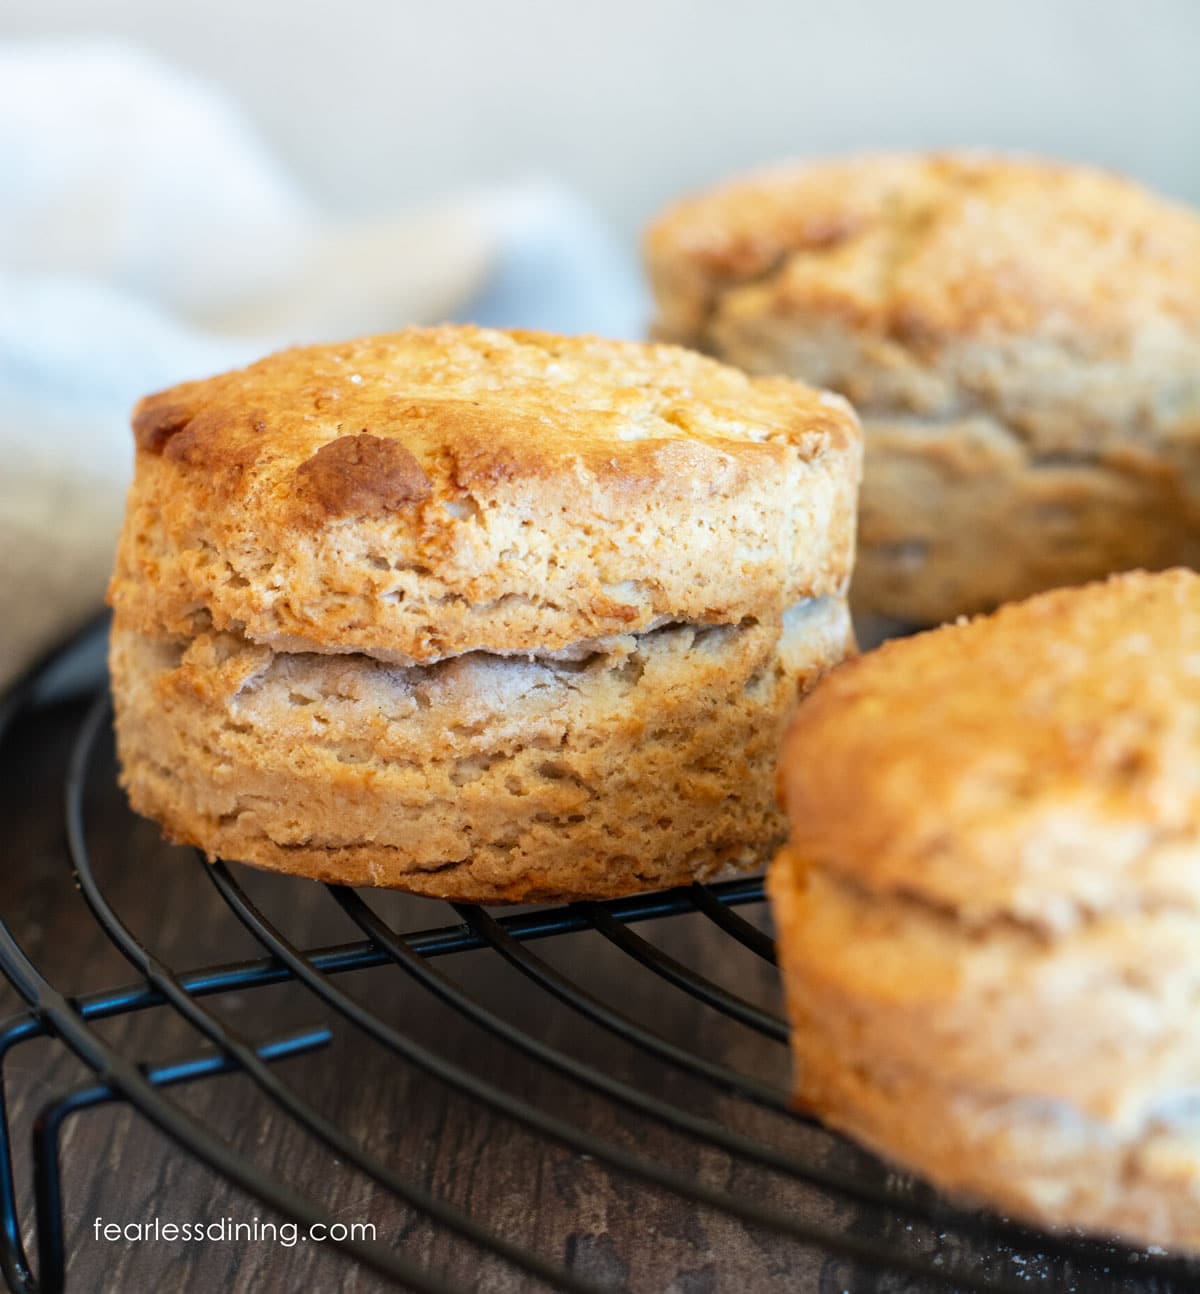
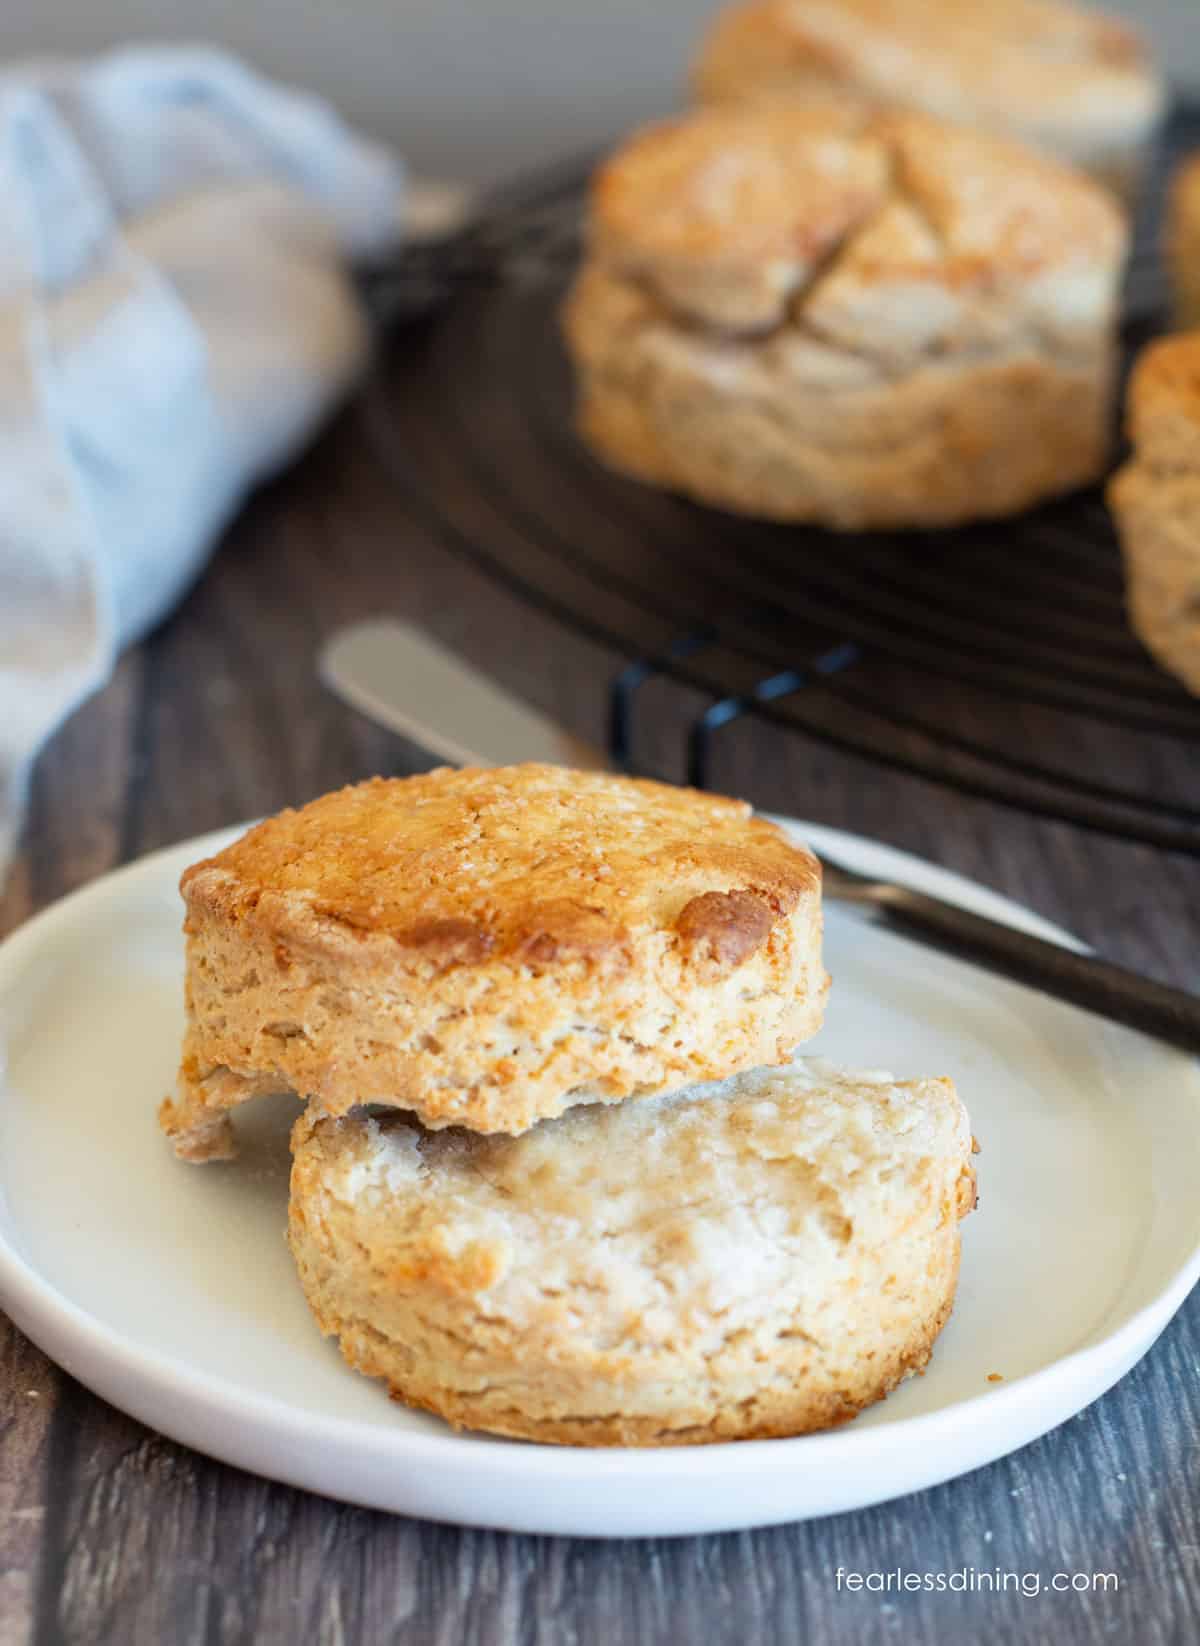
If you are looking for a delicious new gluten-free biscuit recipe, these gluten-free maple oat biscuits are big, fluffy, and full of fall flavor. With a subtle hint of maple syrup, they offer a delightful blend of earthy and sweet, irresistible flavors. I offer both buttermilk and regular milk options, allowing you to choose the flavor profile that suits you best in this gluten-free maple oat biscuit recipe.
These biscuits are delicious with breakfast, brunch, or Thanksgiving dinner. They are flexible depending on the sweetness you make them with. Swap one cup of liquid for sourdough discard as I did in this Gluten Free Sourdough Discard Biscuit recipe.
I tested this recipe three times to get these gluten free maple biscuits to rise to perfection!
This recipe is partially based on my Gluten Free Biscuits recipe. I made a few adjustments to accommodate the gluten-free oats used. If you prefer, make them in your air fryer following the air fryer directions in my Air Fryer Biscuits recipe.
Ingredient Notes:
For the full list of ingredients and amounts, please go to the recipe card below.
- Gluten Free Flour Blend – I tested King Arthur Measure for Measure for this recipe. If you read my popular gluten free biscuits recipe post, I tested 10 different gluten free flour blends. Any of the blends I tried, except one, will work in this recipe.
- Xanthan Gum – Add one teaspoon of xanthan or guar gum if your blend doesn’t contain a binder. See the Allergen Section above for a gum-free option.
- Gluten-Free Quick Oats – As I stated above, use certified gluten-free oats. For this recipe, I used quick oats. It was important to use a light oat so that these biscuits would rise better.
- Baking Powder – I use a lot of baking powder, so it is important to use aluminum-free baking powder.
- Baking Soda and Salt
- Brown Sugar and Ground Cinnamon
- Buttermilk – You can also use regular milk or make your buttermilk with 1 cup of milk and 1 TBSP lemon juice.
- Butter – I used unsalted butter, but it is a personal preference.
- Maple Syrup – Use pure maple syrup if possible.
If you have Celiac Disease, you must use gluten free oats. Regular oats are often cross-contaminated with wheat in production, and certified oats are grown under a purity protocol to protect those with Celiac.
Substitutions:
- To make this recipe gum-free, use my DIY Gluten Free Flour Blend. It uses psyllium husk instead of xanthan or guar gum.
- I have not tested this recipe with dairy-free ingredients yet, but if you test it, please leave a comment and let me know how it works.
- I plan to test this recipe by swapping the gluten free oats with quinoa flakes for those who can’t have oats.
These Gluten-Free Cornmeal Biscuits are delicious if you love using alternative flour types. I am also a huge fan of these Gluten-Free Chocolate Biscuits! If you love savory flavors, these Gluten-Free Cheddar Bacon Biscuits are also amazing.
How to Make Gluten-Free Maple Oat Biscuits (Step-By-Step)
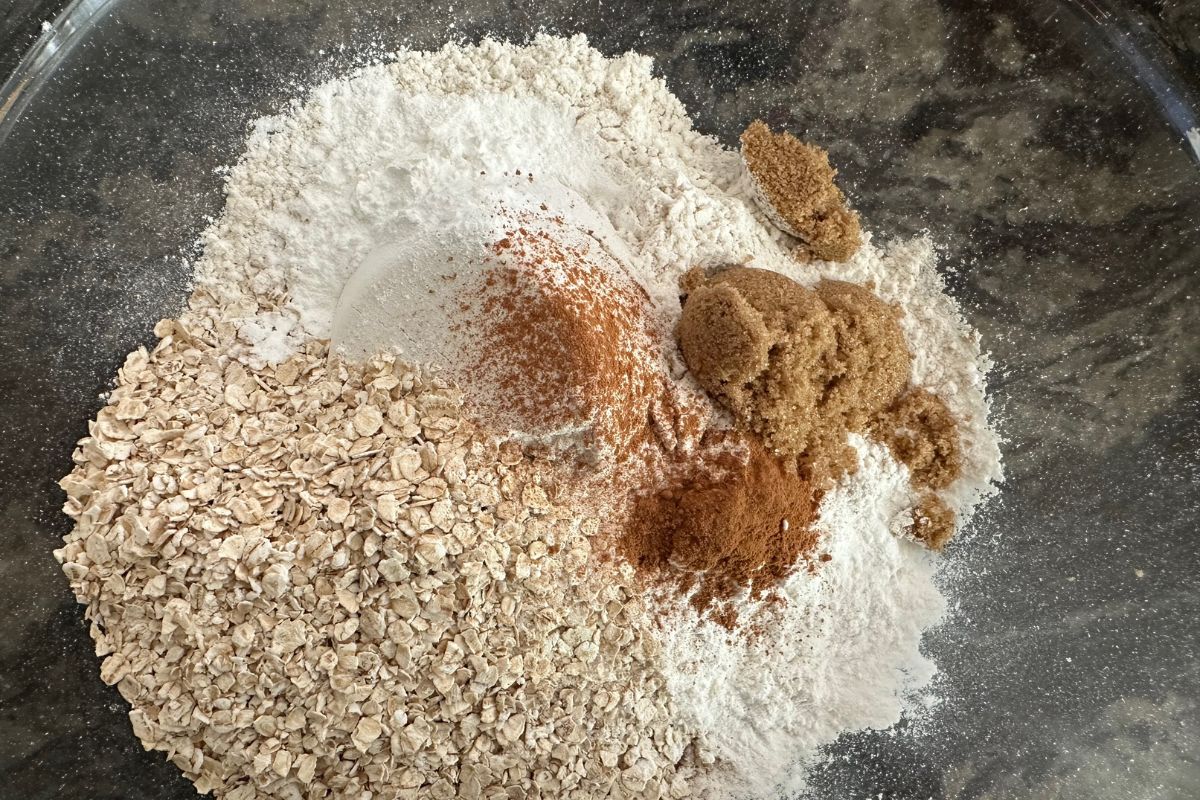
Step 1: Add your dry ingredients to a large
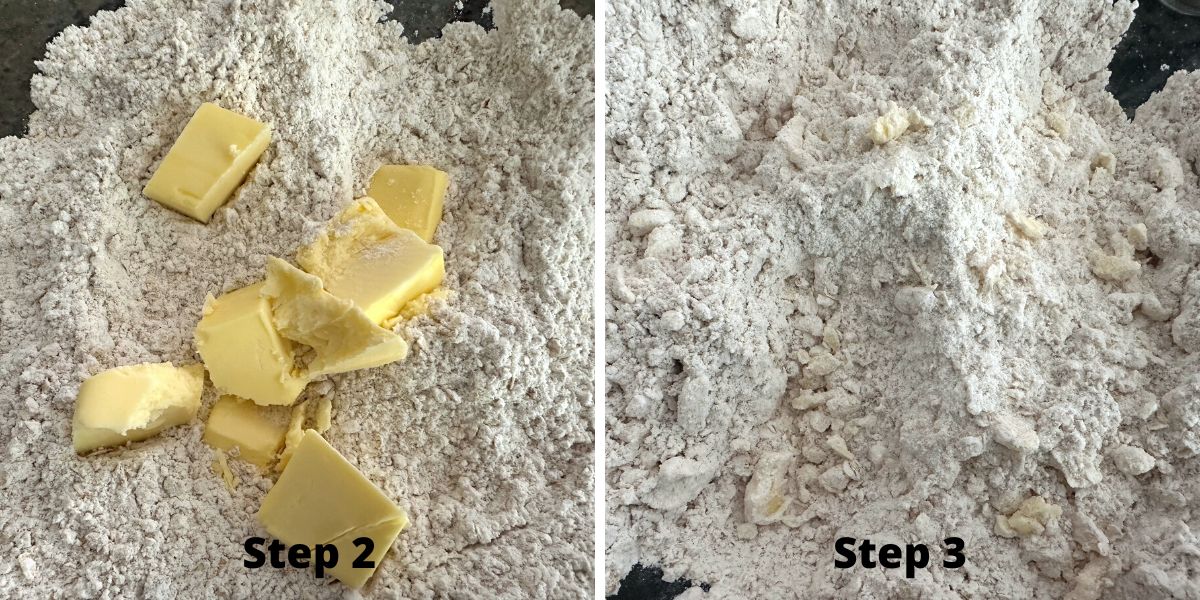
Step 2: Add the cold butter to the dry ingredients. Use a pastry blender to cut the butter into small pieces in the flour.
Step 3: Keep chopping the butter until it resembles crumbs like in the photo above.
🔑 Sandi says: If you don’t have a pastry blender, you can freeze your butter and grate it into the dry ingredients with a cheese grater.
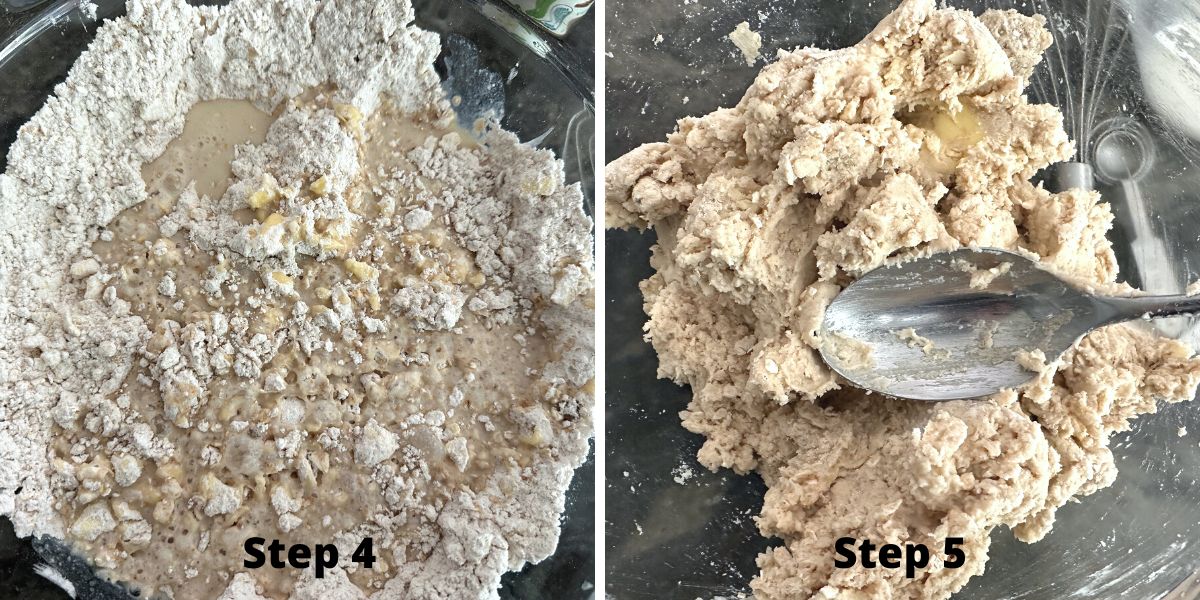
Step 4: Whisk the buttermilk (or milk) and maple syrup together. Pour them into the dry ingredients.
Step 5: Mix your wet and dry ingredients into a dough. Note: Every gluten-free flour blend has a different starch-to-grain ratio, greatly affecting the dough’s moisture level. If you need more flour or liquid, add it so your biscuit dough is workable.
🔑 Sandi says: If you mixed the dough a lot and your butter has softened or you want to eliminate possible grittiness, wrap the dough in plastic wrap and chill the dough in the refrigerator for 20-30 minutes before the next steps.
Email This Recipe To Me!
Preheat the oven to 425º F after you take the dough out of the refrigerator.
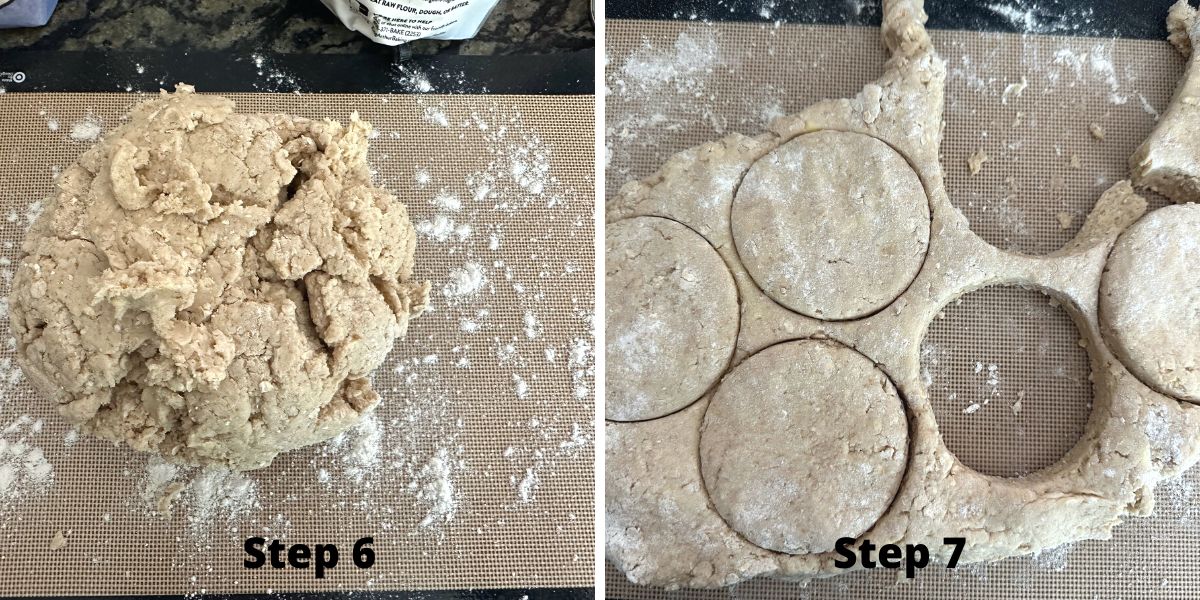
Step 6: Sprinkle a silicone mat with a little flour. Place the biscuit dough on the silicone mat. Roll or press the dough to 1 1/2 to 2 inches thickness.
Step 7: Use a biscuit cutter to cut out biscuits. It is very important not to twist the biscuit cutter. Twisting the biscuit cutter seals the edges, which prevents the biscuits from rising.
Place the biscuits on a parchment paper-lined
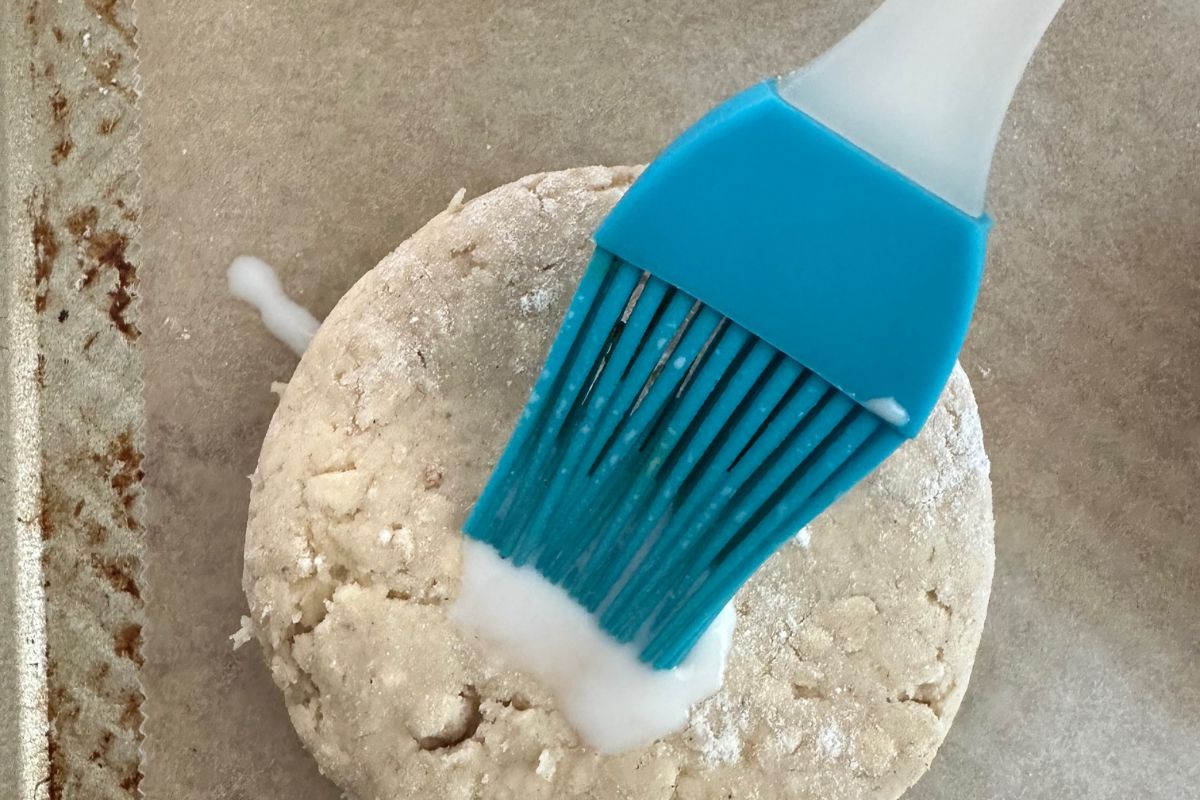
Step 8: Brush the top of each biscuit with milk. This is especially important if you use regular milk instead of buttermilk because it helps the tops of the biscuits get golden during baking.
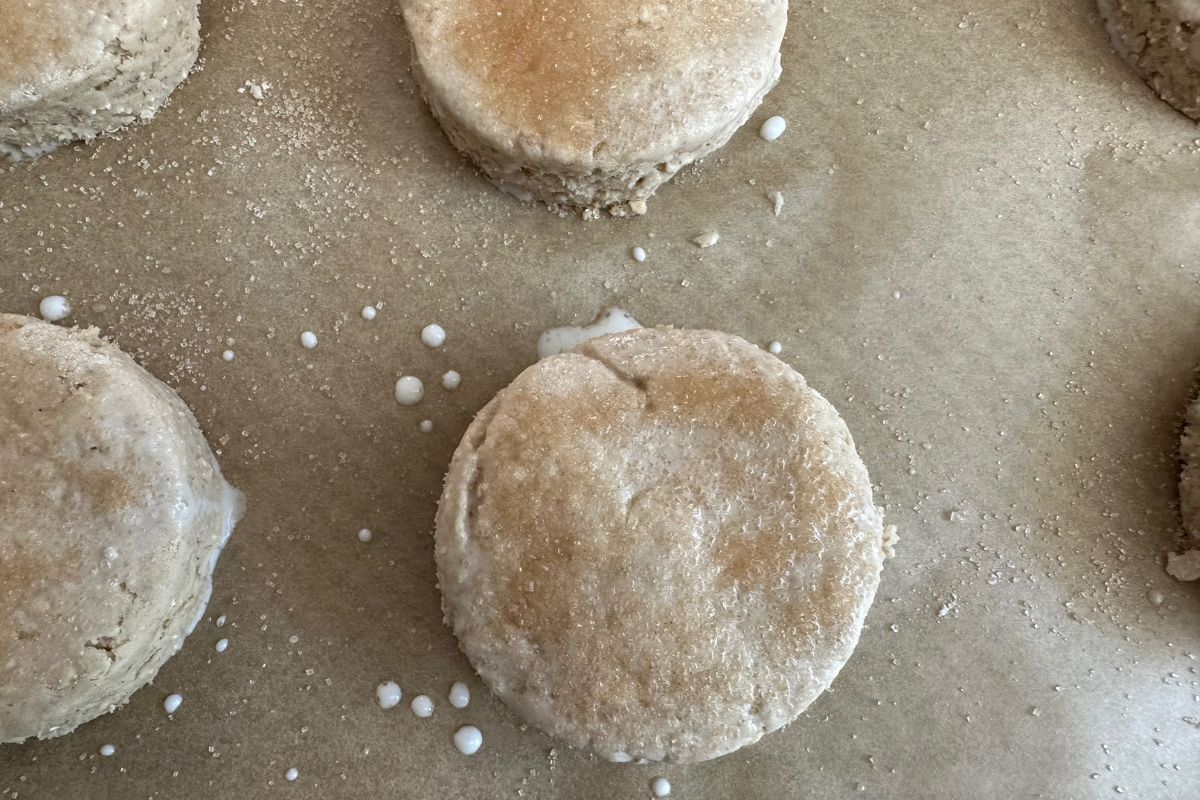
Step 9: Mix the cinnamon sugar topping and sprinkle over each biscuit.
Step 10: Bake the biscuits for 20-25 minutes. The baking time will vary depending on how large and thick your biscuits are.
Step 11: Remove the biscuits from the oven when the tops are golden. Place them onto a cooling rack to cool. Serve warm.
Tips For Success
1. Ensure your butter is very cold. This helps build the flaky layers.
2. Use gluten free quick oats in this recipe. They are lighter and won’t weigh down the rise like rolled oats can.
3. Do not overwork the dough. Try to flatten the dough quickly. The heat from your hands can warm the butter, affecting how well the biscuit layers bake.
Serve Gluten Free Oat Biscuits With:
These biscuits will work with both sweet and savory recipes!
- Roasted Chicken – The flavor of these biscuits works well with my roasted chicken and oranges recipe.
- Air Fryer Turkey Breast – These biscuits are perfect for serving with your Thanksgiving meal.
- Dijon Pork Tenderloin – This pork tenderloin is another great pairing of flavors with these gluten free maple oat biscuits.
- Gluten Free Strawberry Shortcake – These biscuits also work well in my favorite dessert, strawberry shortcake!
Frequently Asked Questions:
Store these biscuits in an airtight container. The refrigerator is best because gluten free baked goods tend to spoil quickly. They will last in the refrigerator for 3-4 days.
You can easily freeze these biscuits, which we always do with leftovers. Add room temperature, cooled biscuits to a freezer bag or container. Put them in the microwave oven for 35-45 seconds to thaw.
More Gluten Free Biscuit Recipes:
- Gluten Free Pumpkin Biscuits – These biscuits are filled with fall flavors!
- Flaky Gluten Free Brown Sugar Cinnamon Biscuits – These biscuits can double as a dessert for strawberry shortcake.
- Gluten Free Bisquick Biscuits – I am not a fan of the Bisquick recipe due to the grittiness of that blend, but I found a way to make them great!
- Gluten Free Cheddar Biscuits – Old Bay style!
Love This Recipe?
If you made and enjoyed this recipe, I would be incredibly grateful if you could leave a comment below. Please include which flour blend you used. This will help others know this recipe is delicious. Thank you!
Flaky Gluten Free Maple Oat Biscuits With Real Maple Syrup
Ingredients
- 2 ¾ cups gluten free flour blend * see notes
- ¾ cup gluten free quick oats ensure they are gluten free
- 3 tablespoons brown sugar
- 1 tablespoon baking powder aluminum-free
- 1 teaspoon baking soda
- 1 teaspoon salt
- 1 teaspoon ground cinnamon
- 8 tablespoons unsalted butter COLD
- 1 ¼ cups buttermilk *see note
- ⅓ cup pure maple syrup
- 3 tablespoons milk
- 3 tablespoons cane sugar
- ½ teaspoon ground cinnamon
Method
- Add the dry ingredients to a large mixing bowl. This includes 2 ¾ cups gluten free flour blend, ¾ cup gluten free quick oats, 1 tablespoon baking powder and 1 teaspoon baking soda, 1 teaspoon salt, 1 teaspoon ground cinnamon, and 3 tablespoons brown sugar (Do not add the cinnamon sugar sprinkle ingredients.) Use a whisk to blend them.
- Add the cold 8 tablespoons unsalted butter to the dry ingredients. Use a pastry blender to chop the butter into bits in the flour. If you don't have a pastry blender, you can freeze your butter and use a cheese grater to shred the cold butter into the dry ingredients.
- Whisk the 1 ¼ cups buttermilk (or milk) and ⅓ cup pure maple syrup together. Pour them into the dry ingredients.
- Mix your wet and dry ingredients into a dough. Note: Every gluten-free flour blend has a different starch-to-grain ratio, greatly affecting the dough's moisture level. If you need more flour or liquid, feel free to add it so that your biscuit dough is workable.
- If you mixed the dough a lot and your butter has softened or want to eliminate possible grittiness, wrap the dough in plastic wrap and chill the dough in the refrigerator for 20-30 minutes before the next steps.
- Preheat the oven to 425º F after you take the dough out of the refrigerator.
- Sprinkle a silicone mat with a little flour. Place the biscuit dough on the silicone mat. Roll or press the dough to 1 1/2 to 2 inches thickness.
- Use a biscuit cutter to cut out biscuits. NOTE: It is very important not to twist the biscuit cutter. Twisting seals the edges, which prevents the biscuits from rising. Place the biscuits on a parchment paper-lined cookie sheet.
- Brush the top of each biscuit with milk. This is especially important if you use regular milk instead of buttermilk because it helps the tops of the biscuits get golden during baking.
- Use a pastry brush to brush the top of each biscuit with milk.
- Mix the 3 tablespoons cane sugar and ½ teaspoon ground cinnamon topping and sprinkle over each biscuit.
- Bake the biscuits for 20-25 minutes. The baking time will vary depending on how large and thick your biscuits are.
- Remove the biscuits from the oven when the tops are golden. Place them onto a cooling rack to cool. Serve warm.
Nutrition
Notes
- I tested this recipe with King Arthur Measure for Measure. Other blends should work, but you may need to adjust moisture levels. Every gluten free flour blend has a different grain-to-starch ratio, so be sure to add more flour or liquid if needed.
- If your blend doesn’t contain a binder, add one teaspoon of xanthan gum.
- Use my DIY Gluten Free Flour Blend if you are gum-free.
- Store the biscuits in an airtight container in the refrigerator. They will last for up to 3 days. Freeze cooled biscuits in a freezer-safe container like a zip-bag. Thaw in the microwave.
Private Notes
Tried this recipe?
Let us know how it was!
I truly hope you enjoy this recipe. I have been testing and creating gluten-free recipes for over 15 years. Creating gluten-free recipes that do not taste gluten-free is my goal for every recipe. Sometimes I only have to test a new recipe a couple of times, and others it takes multiple times. I do this so you get reliable, delicious results every time!

Your recipes look delicious! Have you learned if there is a non dairy substitute that would work for the buttermilk? I want to try your recipes but I need substitute the milk.
Thanks!
Hi Jenny, You can use regular or dairy-free milk if you prefer. You can also add a little lemon juice to the almond milk.
I love to receive your notifications and try your new recipes. I made this recipe this morning for breakfast, and my husband and I loved it. Rich in flavor and super easy to make, I am not a baker, and your instructions are very helpful.
Thank you for another great recipe.
I am so glad you and your husband enjoyed these biscuits. Thank you so much, Giangi.