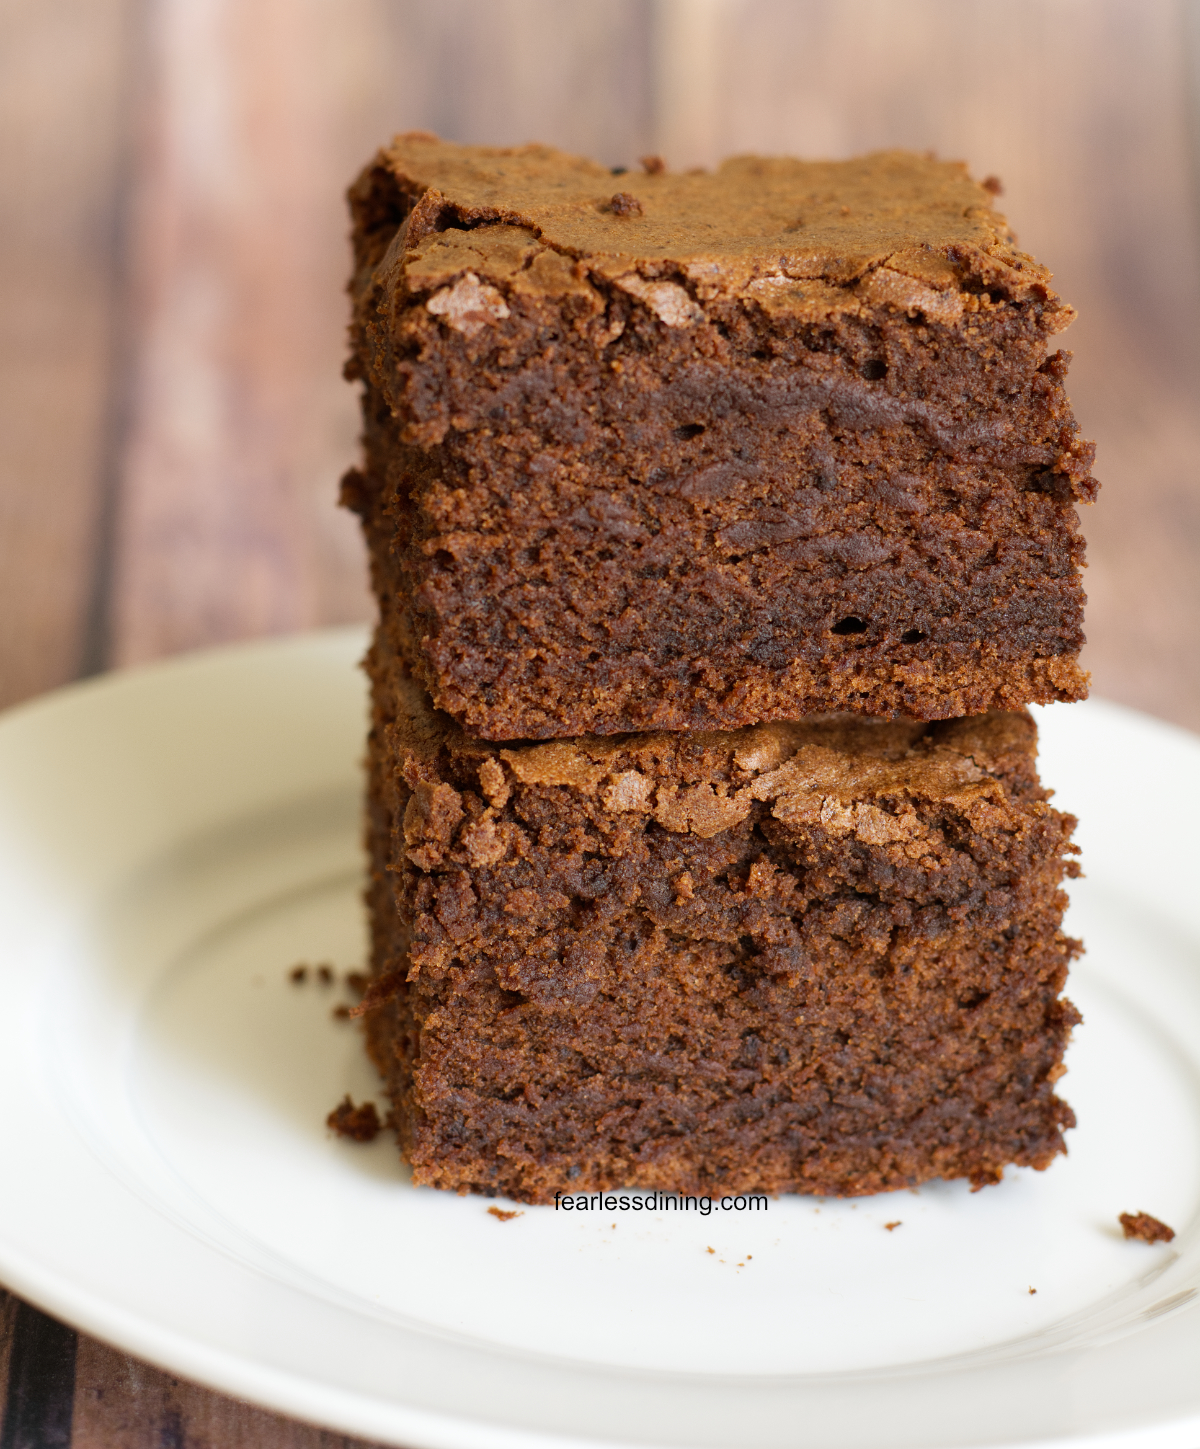
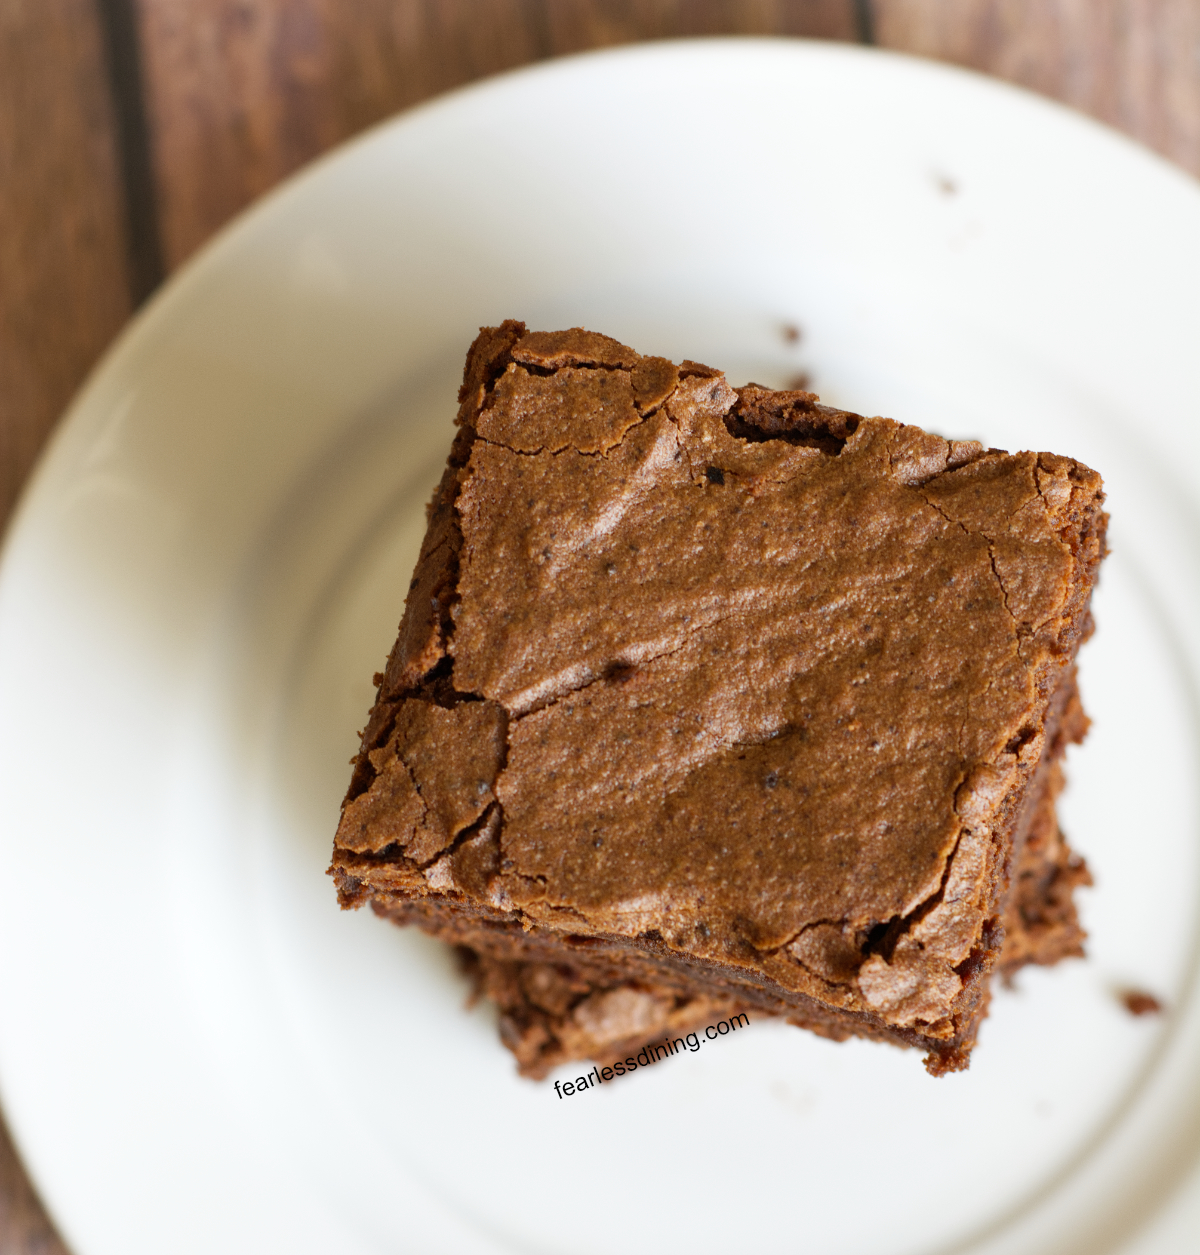
These homemade gluten free sourdough discard brownies are soft and fudgy with a crackly top. Don’t let their cake-like appearance fool you; they have a fudgy texture that is full of delicious chocolate flavor. They are made with simple ingredients, including gluten free flour, cocoa powder, gf sourdough discard, chocolate chips, eggs, butter, and milk or non-dairy milk. Make a batch in under an hour.
This post may contain affiliate links. Please read our Disclosure Policy.
❤️ Sandi’s Recipe Summary
The Quick Bite: Delicious gluten free discard brownies with sourdough discard. This recipe uses simple ingredients, and whipping the batter gives them a light and airy, fudgy texture.
If you have an active sourdough starter, most likely you have a jar of discard in your refrigerator. I finally perfected this gluten free sourdough discard brownie recipe, and I can’t wait to hear what you think. It has an incredible texture and lots of fudgy chocolate flavor. I even have a dairy-free version for readers who can’t have dairy.
This gluten free discard brownie recipe is loosely based on my popular Gluten Free Brownie recipe. These discard brownies have an almost melt-in-your-mouth creaminess, which was surprising because these brownies look cakey, but they’re fudgy in your mouth. The sourdough discard adds a slight tang that pairs nicely with the cocoa flavors.
See all of my gluten free sourdough and discard recipes on the blog. There is something for everyone, including flaky Gluten Free Sourdough Pie Crust, Gluten Free Sourdough Banana Bread, and Gluten Free Sourdough Discard Cinnamon Rolls.
Testing Notes From My Kitchen
This gluten free sourdough brownie recipe is loosely based on my popular Gluten Free Brownie recipe. After testing this discard recipe with oil, I wasn’t quite satisfied, so I decided to try butter. Butter really made the texture and flavor much better. They had an almost melt-in-your-mouth creaminess, which was surprising because these brownies look cakey, but they’re fudgy in your mouth.
I only tested this recipe using Bob’s Red Mill 1:1, but other blends should work. The brownie batter is more whipped and has a texture like whipped cream. Just keep an eye on the moisture level when using other blends. If the batter seems wetter, you can either add more flour or accept your brownies will be fudgier than mine. If your batter is much firmer, add a splash or two of milk and mix it in with the stand mixer.
Ingredient Notes and Easy Swaps:
For the full list of ingredients and amounts, please go to the recipe card below.
- Gluten-Free Flour Blend – As I mentioned in my testing notes, I only tested this recipe using Bob’s Red Mill 1:1. See my testing notes about other blends. Read Why Gluten-Free Flour Blends Vary to learn more about this.
- Binder – Binders are very important in gluten free baking because they prevent your baked goods from falling apart. If your blend doesn’t have a binder, add 1 teaspoon of xanthan gum. Learn Why Binders are a Must in Gluten-Free Baking.
- Sugar – This recipe uses a combination of sugar and brown sugar to keep these sweet. The white sugar helps form the crackly tops.
- Cocoa Powder – I tested my recipe using Anthony’s Dutch Process Cocoa Powder. Dutch process cocoa has been alkalized, so it is less acidic than natural cocoa. That balances the discard’s acidity and keeps the color dark and the flavor smooth. This is my preferred brand because this company batch tests to ensure their products are gluten free. Other gluten free brands include Hershey and Ghirardelli cocoa powders.
- Sourdough Discard – My sourdough starter is fed at a 1:1 flour-to-water ratio. If your starter is thicker, you may need to add more milk. If your discard is wetter, you may need a little more flour.
- Chocolate Chips – I tested this recipe using Guittard bittersweet chocolate chips. Any brand will work. Use Enjoy Life if you are making these dairy-free.
- Butter – I tested this recipe using salted butter. The salt in the butter helps to offset some of the sweetness.
- Milk or Non-Dairy Milk – I tested this recipe using Oatly 4 Ingredient Oat Milk. Any non-dairy type or regular milk will work.
Do you have a sourdough starter?
If you are new to baking with sourdough discard, you must first create or have an established gluten-free starter. You can see my full recipe and step-by-step directions on my How To Make A Gluten-Free Sourdough Starter page. Once you have a bubbly, active, gluten-free sourdough bread starter, you can make and enjoy any of my gluten-free sourdough and discard recipes.
How to Make Gluten Free Sourdough Discard Brownies (Step-By-Step)
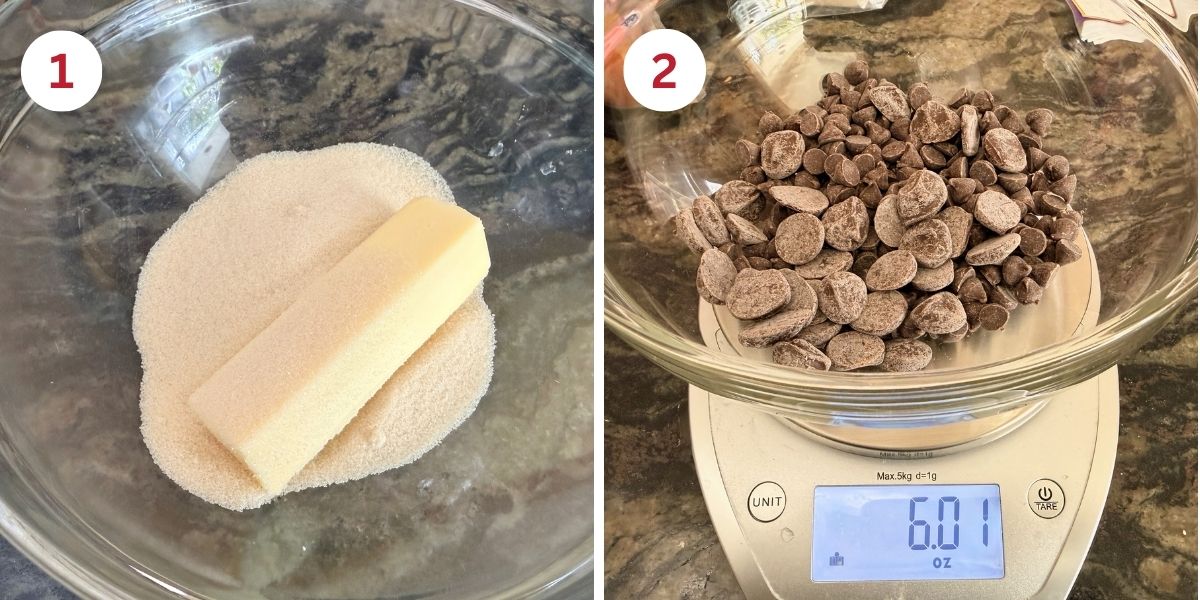
Step 1: Melt the butter with the sugar. I do two 35-second intervals, stirring between them, then a 25-second interval. You want the butter hot enough for the sugar to start melting.
👀 Sandi Says: The hot butter starts dissolving the white sugar. When the eggs are whipped in, the dissolved sugar forms a thin, meringue-like layer that rises to the surface and dries into the shiny, crackly top.
Step 2: Weigh out 6 ounces of chocolate chips. I used a combination of the remnants of two different sizes. Pour them into the hot butter and stir until the chips are melted.
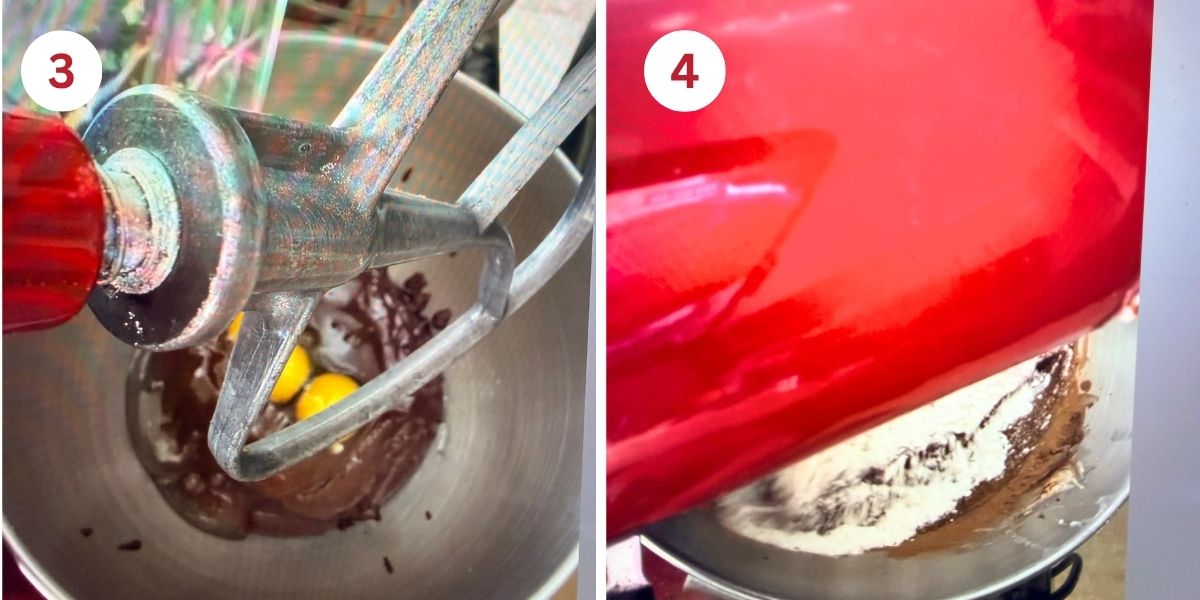
Step 3: Add the butter and chocolate mixture to a stand mixer. Add the eggs and mix on low speed for 1 minute. Add the sourdough discard, milk, and vanilla, and mix for one more minute.
Step 4: Add the cocoa powder and flour. Mix on low speed, gradually increasing the speed once the dry ingredients are incorporated. Mix for 2 minutes until the batter is fluffy.
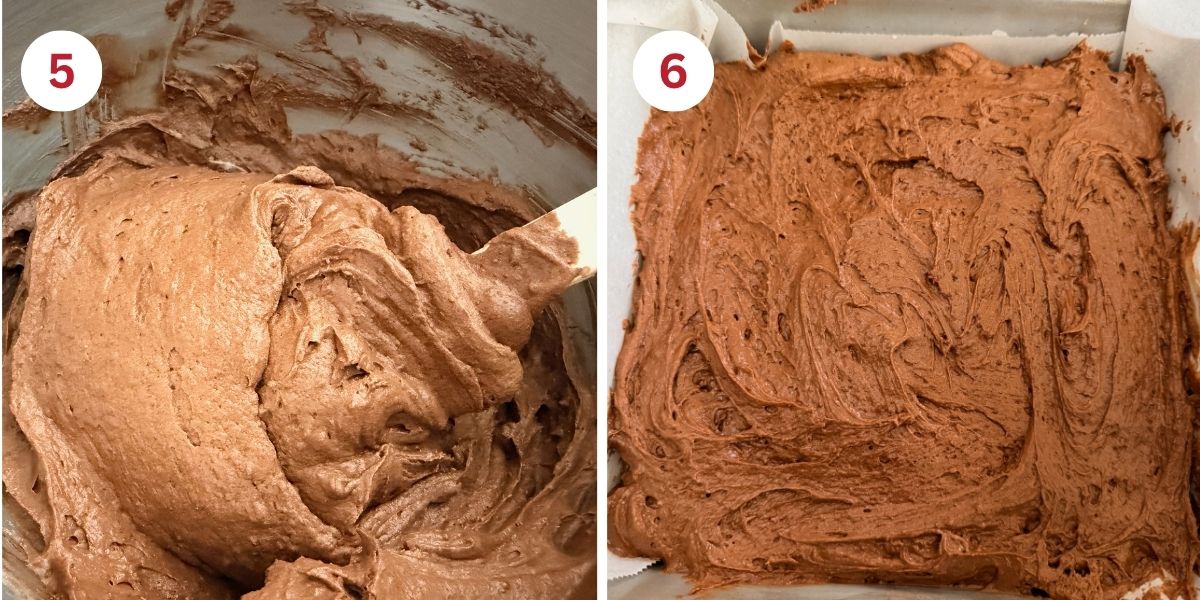
Step 5: The batter should be fluffy, like buttercream frosting, when it’s ready. This texture gives these brownies a cakey look with fudgy, melt-in-your-mouth chocolateiness.
Step 6: Line an 8×8 baking dish with parchment paper. This makes it easier to lift the brownies out of the pan. Spread the brownie batter evenly in the pan.
👀 Sandi Says: You can turn them into Gluten Free Brownie Bites by baking them in a mini muffin pan.
Step 7: Bake the brownies for 30-35 minutes. Insert a toothpick into the center to check if they are finished baking. If the toothpick comes out clean, they are done baking. The top of the brownies will look slightly shiny.
Step 8: Move the brownies to a cooling rack and let the pan sit for 5 minutes. After 5 minutes, lift the brownies out of the pan by the parchment paper. Set them back on the cooling rack. Cut the brownies when they are fully cooled.
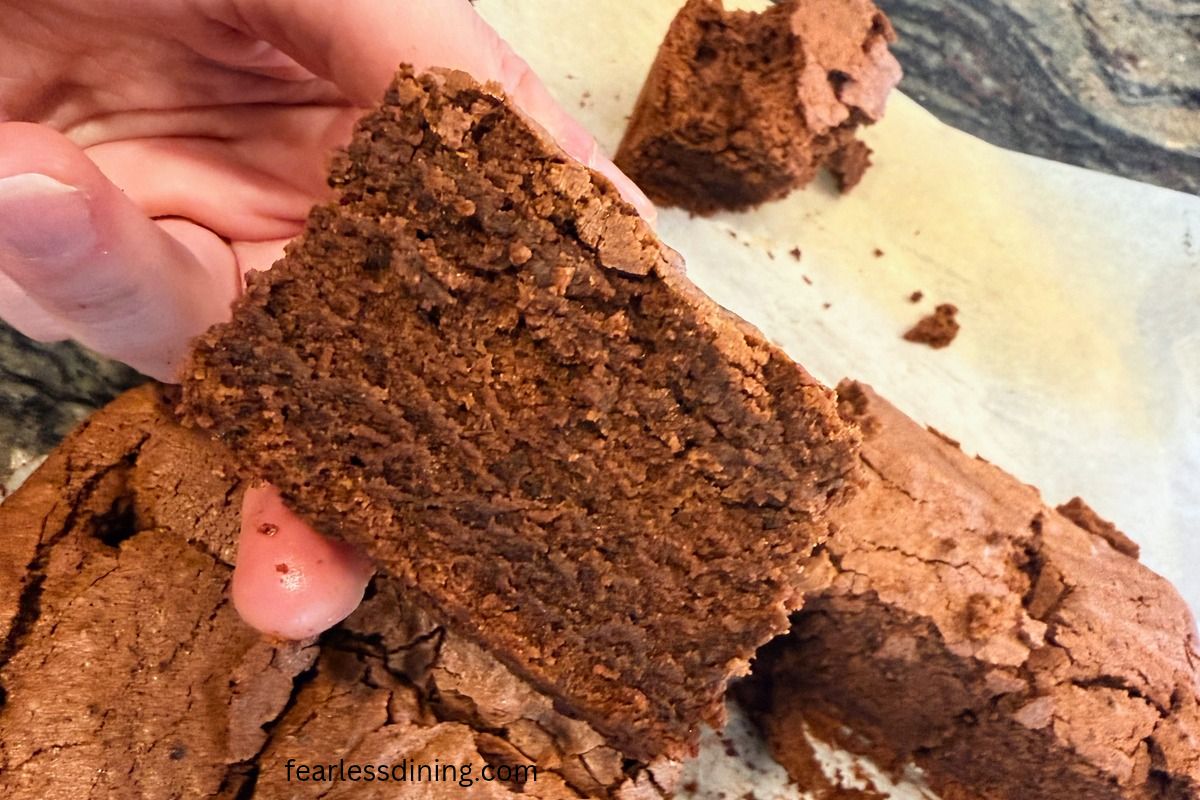
Even though they look cake-like, whipping the wet ingredients for 2 minutes adds air, which gives the brownies their lifted, cakey look. The high amount of butter and melted chocolate keeps the interior dense and fudgy once it cools and sets.
Frequently Asked Questions:
Your discard is good if it smells sour and is not discolored. It is bad if it has a foul odor, looks pink, or has visible mold.
Yes, you can make these discard brownies dairy-free. Use a plant-based butter and milk. I tested this recipe using Earth Balance and oat milk.
No, these sourdough discard brownies do not taste sour. They have a slight tang, but it is balanced with sweet chocolate flavor.
More Gluten Free Sourdough Discard Recipes:
See all of my gluten free sourdough discard recipes in one place or choose from one of these favorites:
- Gluten Free Sourdough Discard Scones – Add any fruit or mix-ins.
- Gluten Free Sourdough Focaccia – Great for dipping in oil or as a pizza crust.
- Gluten Free Sourdough Discard Muffins – Another that tastes great with any fruit.
- Gluten Free Sourdough Biscuits – Big and flaky!
Did you make this recipe?
💬 I would love to hear how it turned out. Leave a comment! Your feedback helps others (and helps me keep improving these recipes for you). ⭐⭐⭐⭐⭐
Gluten Free Sourdough Discard Brownies
Ingredients
- ¾ cup gluten free flour blend See notes
- ½ cup cocoa powder See notes
- ¾ cup white sugar
- ½ cup brown sugar
- ½ cup salted butter
- 3 large eggs
- ⅓ cup sourdough starter See notes
- 1 teaspoon pure vanilla extract
- ½ cup milk or non-dairy milk
- 6 ounces chocolate chips
Method
- Preheat the oven to 375ºF. Move the oven rack to the middle of the oven.
- Melt 1/2 cup salted butter with 3/4 cup white sugar. I do two 35-second intervals, stirring between them, then a 25-second interval. You want the butter hot enough for the sugar to start melting.
- Weigh out 6 ounces chocolate chips. I used a combination of the remnants of two different sizes. Pour them into the hot butter and stir until the chips are melted.
- Add the butter-and-chocolate mixture to a stand mixer. Add 3 large eggs and mix on low speed for 1 minute. Add the 1/3 cup sourdough starter, 1/2 cup milk or non-dairy milk, and 1 teaspoon pure vanilla extract, and mix for one more minute.
- Add 1/2 cup cocoa powder, 1/2 cup brown sugar, and 3/4 cup gluten free flour blend. Mix on low speed, gradually increasing the speed once the dry ingredients are incorporated. Mix for 2 minutes until the batter is fluffy.
- The batter should be fluffy, like buttercream frosting, when it's ready. This texture gives these brownies a cakey look with fudgy, melt-in-your-mouth chocolateiness.
- Line an 8×8 baking dish with parchment paper. This makes it easier to lift the brownies out of the pan. Spread the brownie batter evenly in the pan.
- Bake the brownies for 30-35 minutes. Insert a toothpick into the center to check if they are finished baking. If the toothpick comes out clean, they are done baking. The top of the brownies will look slightly shiny.
- Move the brownies to a cooling rack and let the pan sit for 5 minutes. After 5 minutes, lift the brownies out of the pan by the parchment paper. Set them back on the cooling rack. Cut the brownies when they are fully cooled.
Nutrition
Notes
- I tested this recipe using Bob’s Red Mill 1:1. Other blends should work, but they all vary by starch-to-grain ratio. If your batter is thicker and drier, add more milk. If your batter is wetter, add more flour.
- If your gf flour blend doesn’t contain a binder, add 1 teaspoon of xanthan gum.
- I feed my sourdough starter at a 1:1 flour-to-water ratio. If your starter is thicker, you may need to add more milk. If your starter is thinner, you may need to add more flour.
- Store in an airtight container. It will keep fresh for up to 4 days.
- Freeze cooled brownies in a freezer-safe zipper bag. Thaw on the counter or microwave them for 25 seconds.
Private Notes
Tried this recipe?
Let us know how it was!
I truly hope you enjoy this recipe. I have been testing and creating gluten-free recipes for over 15 years. Creating gluten-free recipes that do not taste gluten-free is my goal for every recipe. Sometimes I only have to test a new recipe a couple of times, and others it takes multiple times. I do this so you get reliable, delicious results every time!