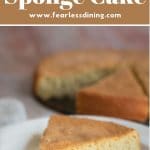
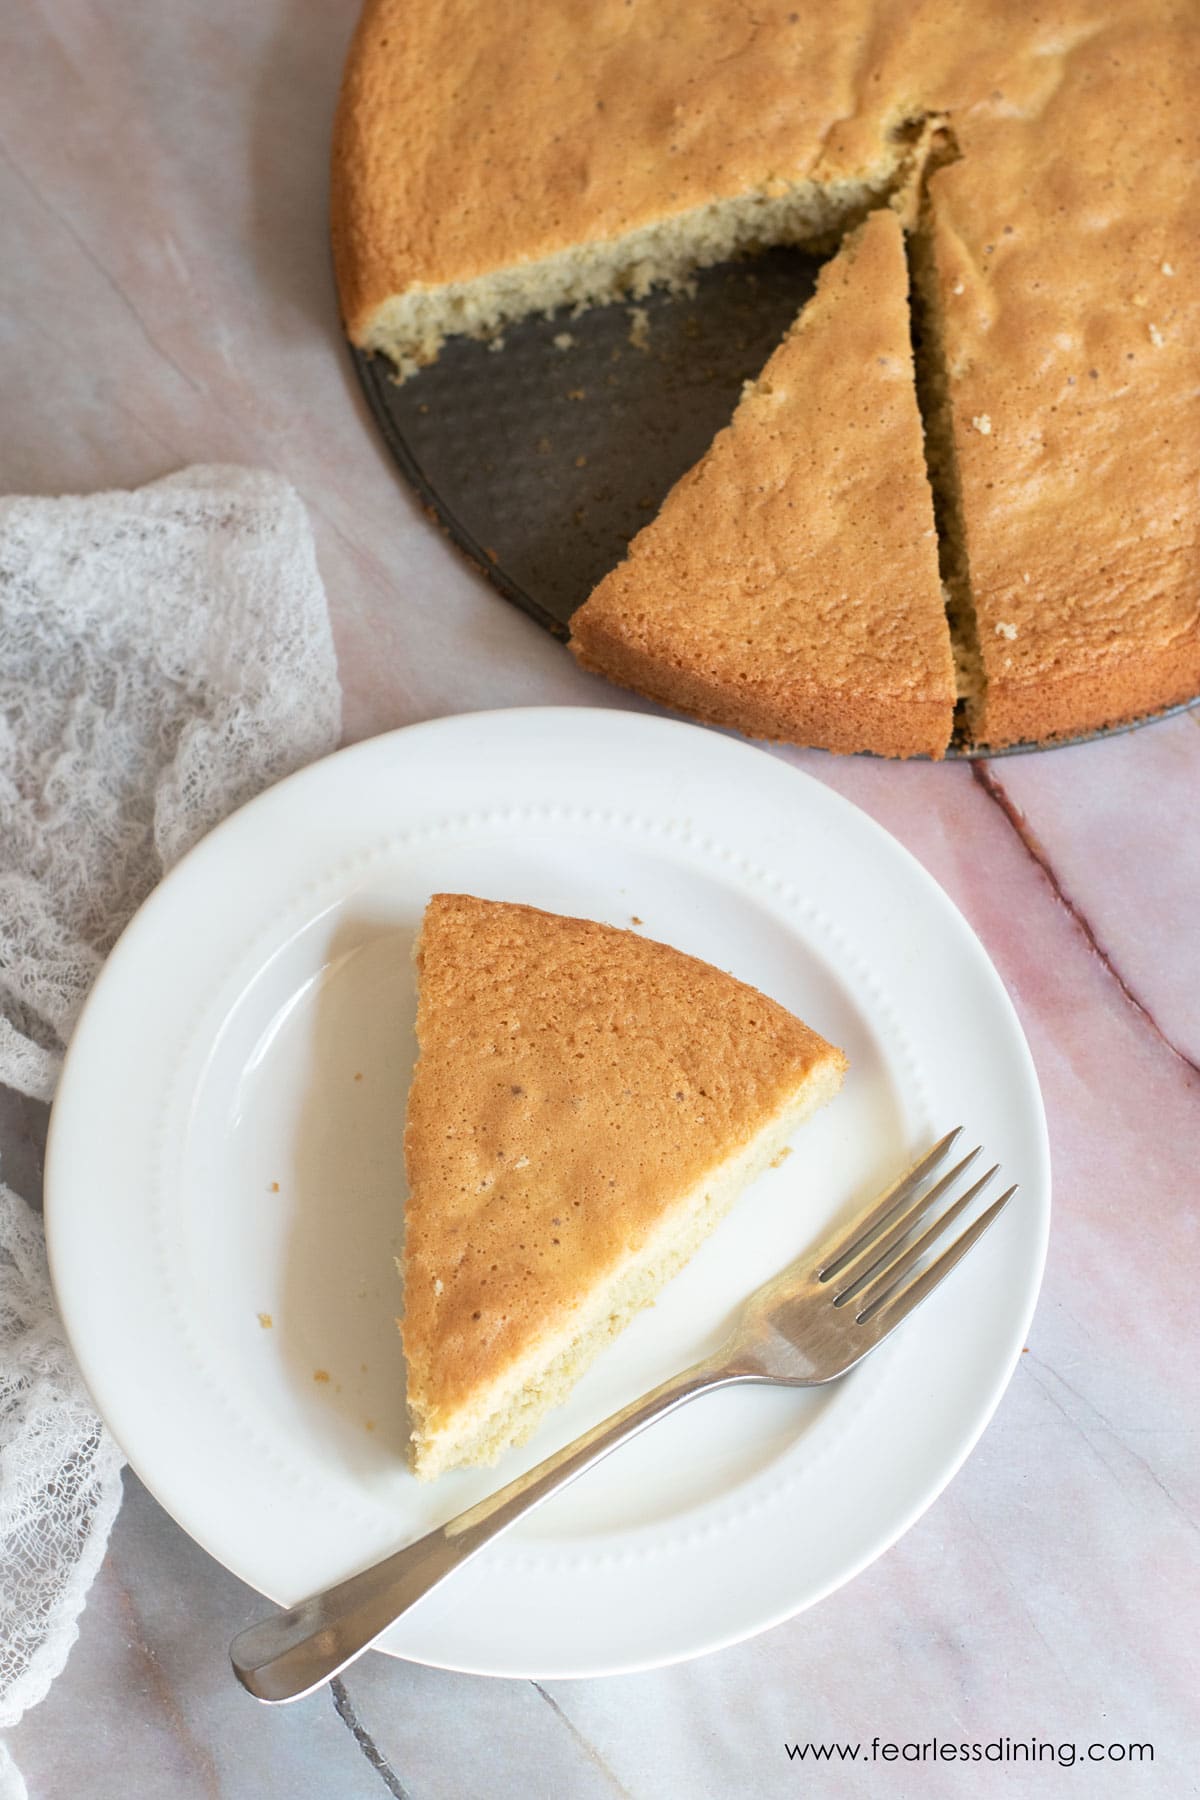
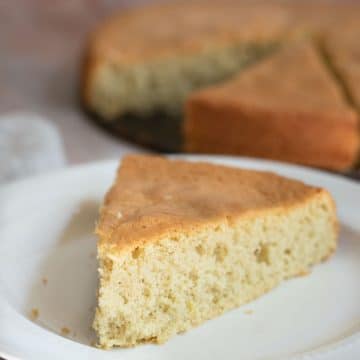
You will not believe how easy my homemade gluten-free sponge cake recipe is to make. This fluffy cake has an airy, lightly sweet vanilla flavor that is delicious on its own, or used as a base for gluten-free cakes like Victoria sponge or even Tiramisu! Make this cake in under an hour.
This post may contain affiliate links. Please read our Disclosure Policy.
❤️ Sandi’s Recipe Summary
The Quick Bite: With a few simple steps, you can make and bake this cake in about 45 minutes!
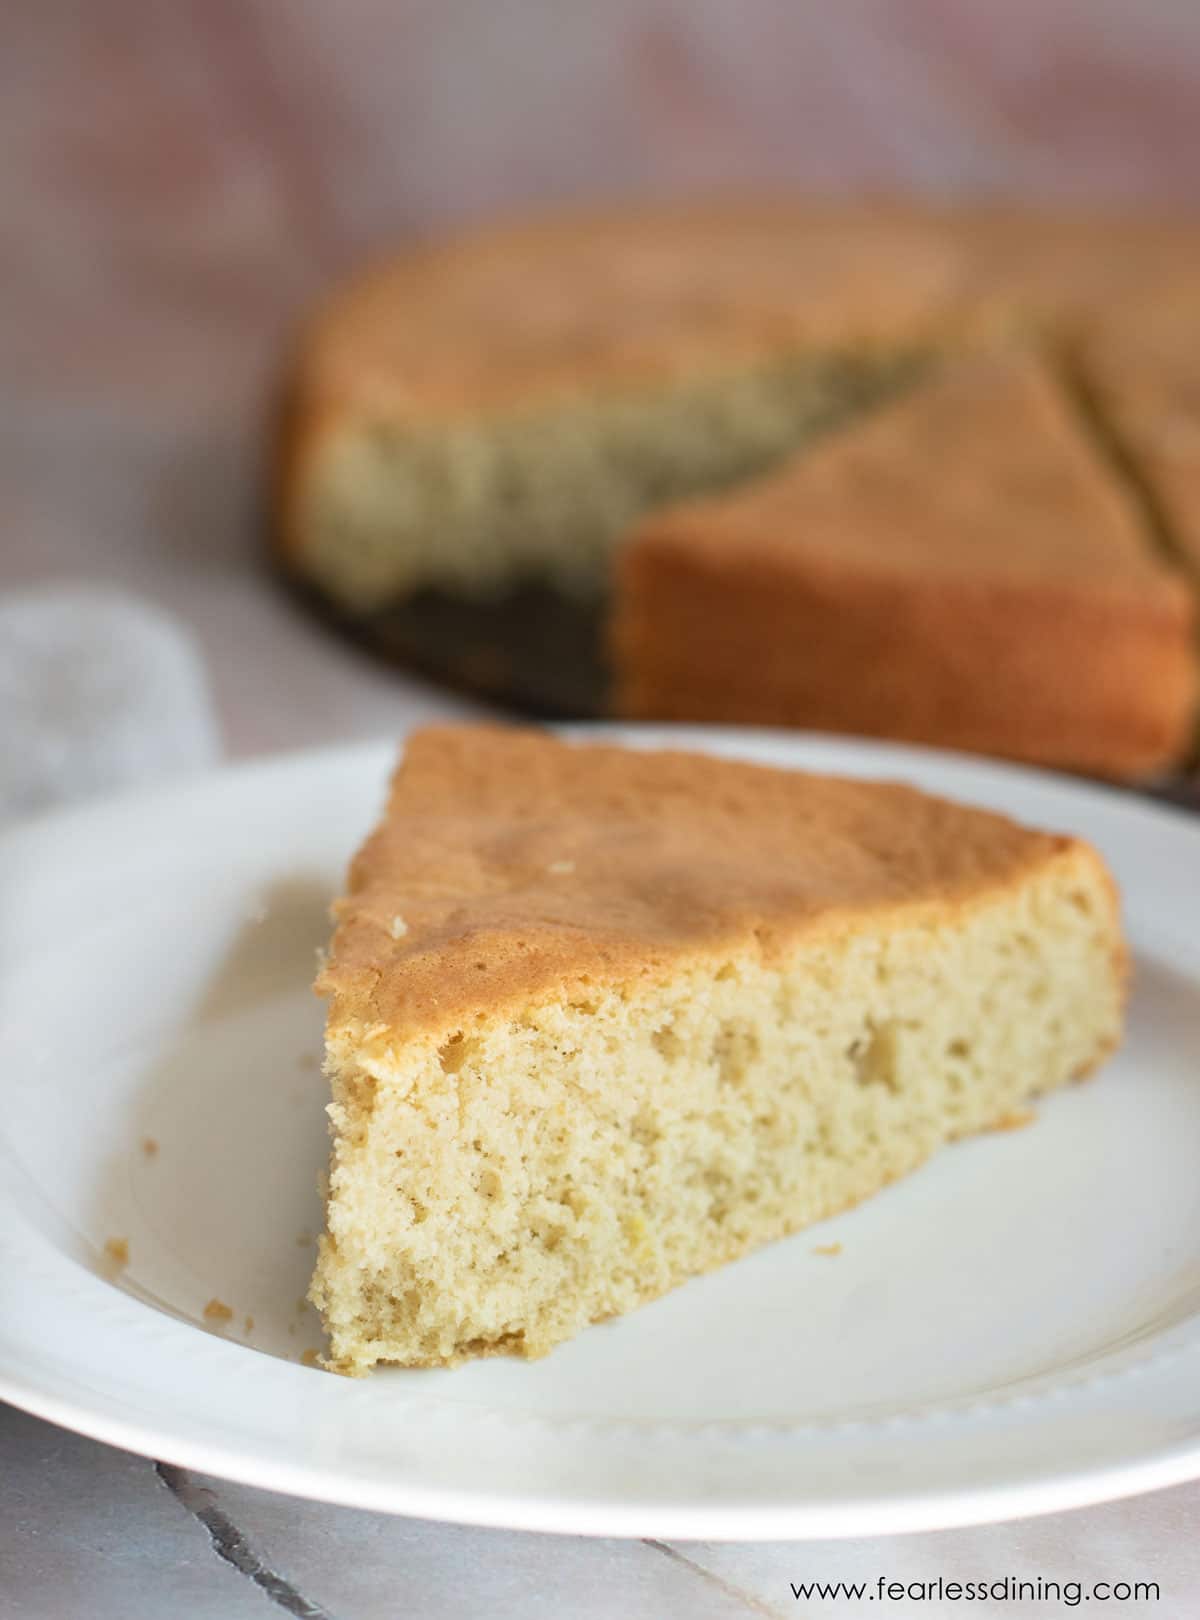
This gluten free sponge cake is one of my favorite recipes on the blog. Not just because it is delicious on its own. It is the foundation for so many incredible desserts. My Gluten Free Tiramisu starts here. It is the base for a classic Victoria sponge with whipped cream and fresh berries. It is light and airy, and has that telltale spring when you poke it.
If you love cake as much as I do, you will want to try all of my incredibly easy gluten free cake recipes!
We made the gluten free sponge cake, practice run for your gluten free tiramisu recipe.
Kimberly A., Pinterest comment
It turned out perfect.”
Ingredient Notes:
For the full list of ingredients and amounts, please go to the recipe card below.
- Gluten-Free Flour Blend – I tested this recipe using Bob’s Red Mill 1 to 1 Gluten-Free Flour Blend and King Arthur’s Measure for Measure Gluten-Free Blend. That doesn’t mean others will not work; I just have not tested other flours, so you may need to adjust the moisture level. Read Why Gluten-Free Flour Blends Vary to learn more about this. One reader in Spain used Schar Gluten Free Flour Blend successfully.
- Binder – If your gluten free flour blend doesn’t contain xanthan gum or guar gum, please add 1 teaspoon. To make this sponge cake without xanthan gum, use my DIY Gluten Free Flour Blend.
- Baking Powder – Use aluminum-free baking powder to avoid a metallic aftertaste.
- Eggs – Use size large eggs.
- Vanilla – Please use pure vanilla extract. It really does make a difference in flavor.
How to Make a Gluten Free Sponge Cake (Step-By-Step)

Step 1: Preheat the oven to 350º F. This is very important to ensure your cake cooks evenly.
Add the eggs and sugar to your stand mixer. Insert a whisk attachment. Whip them for about 10 minutes. The egg mixture should grow to about 3x of the original volume as it whips. As shown in the photo above, you want to see a thick ribbon fall from the beater to the bowl.
This whipping of the eggs and sugar is the secret to a light and fluffy gluten free sponge cake. They get a lot of air into the batter.
HINT: I used a standing mixer because holding an electric mixer for 10 minutes would be rough for me. Note, you can use either for the whipping.
Step 2: Pour the flour and baking powder into a bowl and whisk to blend. Sift the flour mixture into the whipped egg mixture a little at a time. This is important to remove any lumps.
Email This Recipe To Me!
VERY gently fold the flour into the sponge batter, sifting it in each time. Be careful not to overmix, or you will lose the bubbles that make this cake airy and fluffy!
📢 Sandi says: Every gluten-free flour blend has a different starch-to-grain ratio. The brand of gluten-free flour you use will affect the moisture of the batter. If your cake batter is too runny, add more flour, and if it is too thick, add more liquid.
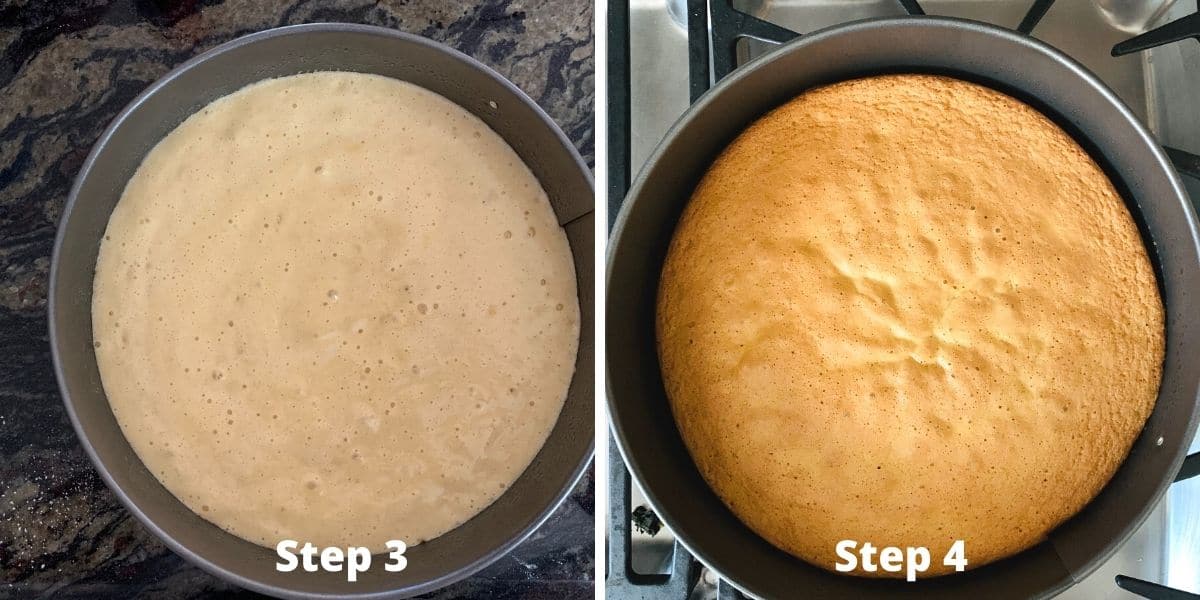
Step 3: Pour the sponge cake batter into your pan. As I mentioned above, you can use a springform pan, which is the easiest, or a cake pan. Spray a non-stick coating in any pan you use.
Step 4: Bake the cake for 30 minutes at 350º F. When the cake is done, it will have a golden top. Do not open the oven all the way. Turn the oven off and crack the oven open for 10 minutes before removing your cake. This will prevent the cake from falling.
To test for doneness, insert a toothpick into the center of the cake. If the toothpick comes out clean, it is done baking. If you see batter or crumbs, the cake must be baked longer.
Be sure the cake is fully cooled before cutting it. I recommend using a serrated knife to cut this cake! Store this sponge cake in an airtight container for up to 4 days or freeze it for up to 4 months in the freezer.
If you are new to cake baking, here is a good write-up of my favorite Kitchen Tools For Baking Cakes. I also have lots of Gluten Free Baking Tips to take your cake to the next level.
Frequently Asked Questions:
Troubleshooting Tips:
If your sponge cake is dense, not light and fluffy, you either overmixed the batter when adding the flour or didn’t mix the eggs and sugar long enough.
If the center of the cake sank, did you open the oven door while it was baking? This is one of the main causes. Cakes, especially sponge need a consistent oven temperature. Other things to check include the expiration date of your baking powder and the flour blend you used. Each blend varies, and often you need to make small adjustments by adding more flour or more liquid.
Need more troubleshooting help? I have a whole Gluten Free Cake Troubleshooting Guide! You may also love this Gluten Free Angel Food Cake recipe!
More Gluten Free Cake Recipes:
- Gluten Free Chocolate Cake
- Easy Gluten Free Vanilla Cake
- Gluten Free Vanilla Raspberry Bundt Cake
- Fool-Proof Gluten Free Apple Cake
Love This Recipe?
If you made and enjoyed this recipe, I would be incredibly grateful if you could leave a comment below. Please include which flour blend you used. This will help others know this recipe is delicious. Thank you!
Light and Fluffy Gluten Free Sponge Cake
Equipment
- springform pan
Ingredients
- 1 cup gluten free flour blend * see note
- ¾ cup cane sugar
- ½ teaspoon baking powder aluminum-free
- 5 large eggs
- 1 teaspoon pure vanilla extract
Instructions
- Add the 5 large eggs and 3/4 cup cane sugar to your standing mixer. Use a whisk attachment. Whip them for about 10 minutes, then add 1 teaspoon pure vanilla extract. The egg mixture should grow to about 3x of the original volume as it whips. You want to see a thick ribbon fall from the beater to the bowl as shown in the photo above.
- Pour the 1 cup gluten free flour blend and 1/2 teaspoon baking powder into a bowl and whisk to blend. Sift the flour mixture into the whipped egg mixture a little at a time. This is important to remove any lumps.
- VERY gently, fold the flour into the sponge batter each sifting. You want to be very careful not to over mix because you will lose the bubbles that make this cake so airy and fluffy!
- Pour the sponge cake batter into your pan. As I mentioned above, you can use a springform pan, which is the easiest, or cake pans. Spray a non-stick coating in any pan you use.
- Bake the cake for 30 minutes at 350º F. When the cake is done it will have a golden top. Do not open the oven all the way.
- Turn the oven off and crack the oven open for 10 minutes before removing your cake. This will prevent the cake from falling.
- To test for doneness, insert a toothpick into the center of the cake. If the toothpick comes out clean, it is done baking. If you see batter or crumbs, the cake needs to bake longer.
- Let the cake cool completely before slicing. Use a serrated knife to cut the cake.
Notes
- I have tested this recipe with King Arthur Measure for Measure and Bob’s Red Mill 1:1. That doesn’t mean others will not work; I just have not tested other flours. If you use another blend, you may need to adjust the moisture level with more flour or liquid. Each blend has a different starch-to-grain ratio.
- Binder – If your gluten free flour blend doesn’t contain xanthan gum or guar gum, please add 1 teaspoon.
- This cake will keep up to 4 days in an airtight container, or up to 4 months in the freezer.
- Serve with whipped cream and fresh berries! This cake is an awesome base for making tiramisu cake.
Email This Recipe To Me!
SPECIAL NOTE
Please know that every gluten free flour blend has a different starch to grain ratio. If you use a blend I didn’t test, my rule of thumb is to add more flour if your dough or batter is wet and add more liquid if the dough or batter is too dry!
Nutrition
Nutrition Disclaimer
Nutritional information is an estimate provided to you as a courtesy. You should calculate the actual nutritional information with the products and brands you are using with your preferred nutritional calculator.
I truly hope you enjoy this recipe. I have been testing and creating gluten-free recipes for over 15 years. Creating gluten-free recipes that do not taste gluten-free is my goal for every recipe. Sometimes I only have to test a new recipe a couple of times, and others it takes multiple times. I do this so you get reliable, delicious results every time!

Delicious foolproof recipe!! Wonderful each time. We love it plain or with strawberries and whipped cream. It really is such a great cake and very versatile!!! Thank you!!!
Thank you so much, Jennifer, I am thrilled you loved this cake recipe!
I would love to make this cake for my Wedding Anniversary but wanted to do it in a much smaller pans, like 2 6inch pans. Would I just divide this recipe in half to accommodate for the pain size, and maybe change the cook time? Wanted something simple for a Strawberry Shortcake-Cake and this recipe is as simple as it can get.
I love this, Kris. I would definitely divide the batter into the two pans. As for cook time, I would check it at 20 minutes and keep an eye on it. Do the toothpick test, if the toothpick comes out clean, the cake is finished baking. Happy anniversary!
What diameter springform pan did you use?
Hi Claire, I used a 10 inch springform pan. A 9 inch is also okay to use.
This recipe is amazing and super easy. I’m using it to make a tiramisu cake. Now I hope the gluten free ladyfingers turn out
I am so glad you loved this cake recipe. It is great in tiramisu…or just serve with fresh berries and whipped cream.
Is this recipe for one 9” pan? I ended up putting the batter into two 9” because I was concerned about it spilling over. I’m looking forward to trying it.
Hi Pam, I baked this cake in a springform pan, which is a bit taller so it wouldn’t overflow.