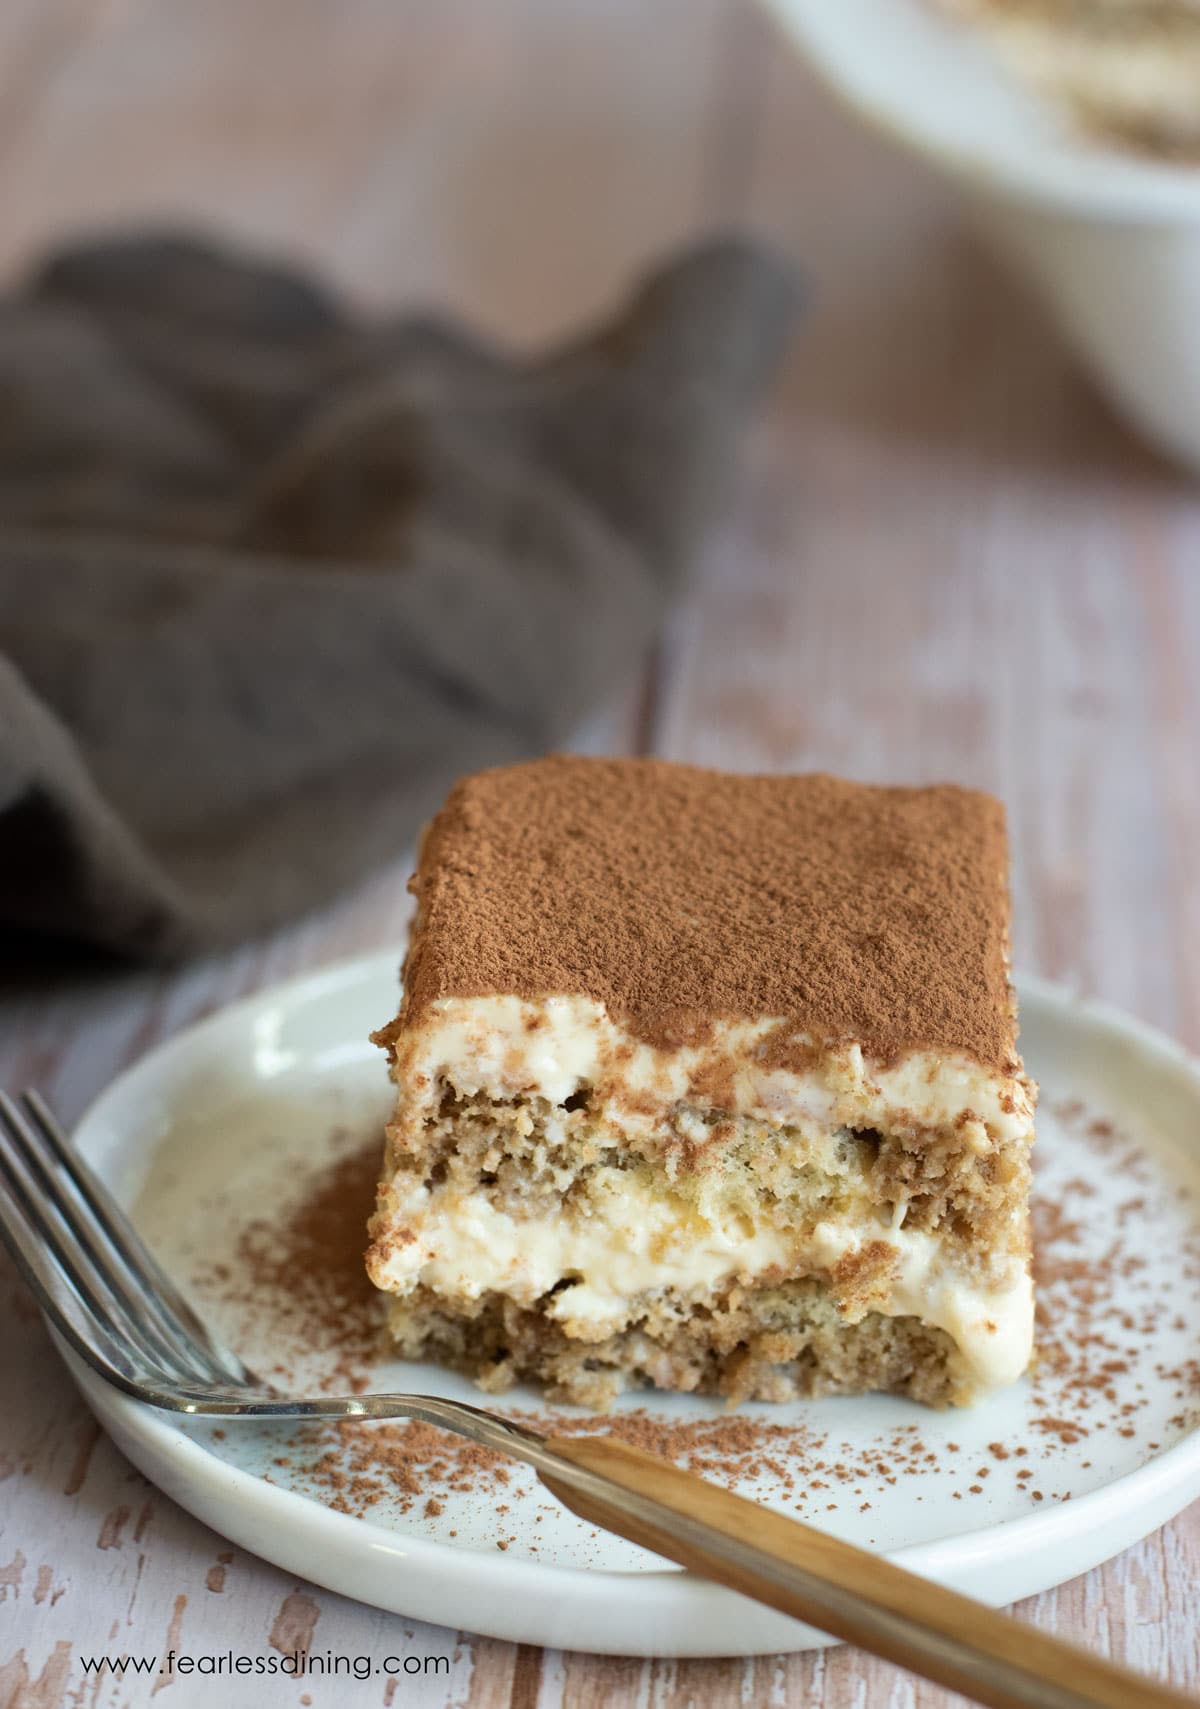
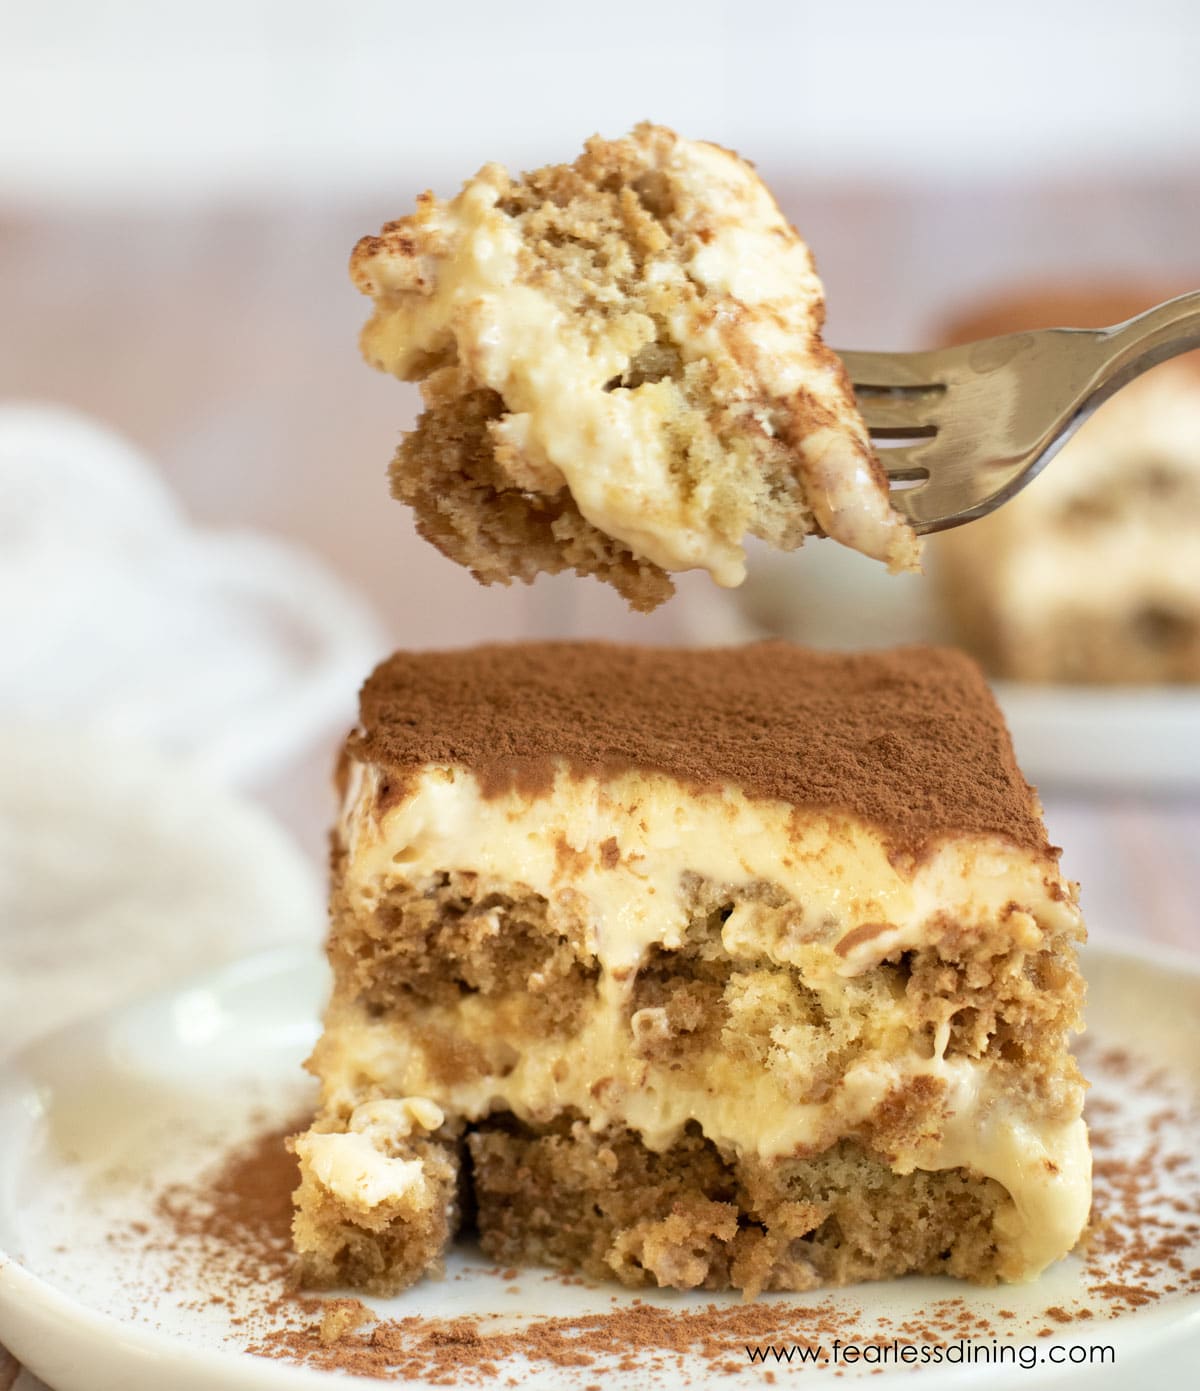
If you’ve been missing a classic tiramisu since going gluten-free, this homemade version will absolutely become a new favorite. This gluten-free tiramisu is layered with creamy mascarpone custard, rum-soaked sponge cake (or gluten-free ladyfingers), and a generous dusting of cocoa powder. It tastes just like the real thing.
This post may contain affiliate links. Please read our Disclosure Policy.
I fell in love with this recipe on the fourth try. After creating gluten-free recipes for the past 15 years, I am very picky about cake, and I work hard to get the flavor and texture just right. The ultimate compliment is when someone can’t tell my recipe is gluten-free.
I made and tested this recipe several times until it was absolutely perfect in every way. I wanted it to be easy and fail proof so you would feel confident making my recipe. This cake checks all of the boxes of what a tiramisu should taste like. Creamy layers, soft rum-soaked spongy layers, and delicious flavor.
You can use gluten-free ladyfingers if you can find them. It is easy to make a tiramisu without ladyfingers by using my Gluten-Free Sponge Cake since store-bought gluten-free ladyfingers are often hard to find. I used this delicious filling from a New York Times Tiramisu recipe I found. It is by far the best filling. I modified it a bit by using dark rum instead of regular rum.
If you love cake as much as I do, you will want to check out all of my delicious homemade gluten-free cake recipes on the blog.
Ingredient Notes:
I made this cake as allergen friendly as possible while maintaining the classic tiramisu flavor and texture. This cake is gluten-free, nut-free, oat-free, and soy-free.
For the full list of ingredients and amounts, please go to the recipe card below.
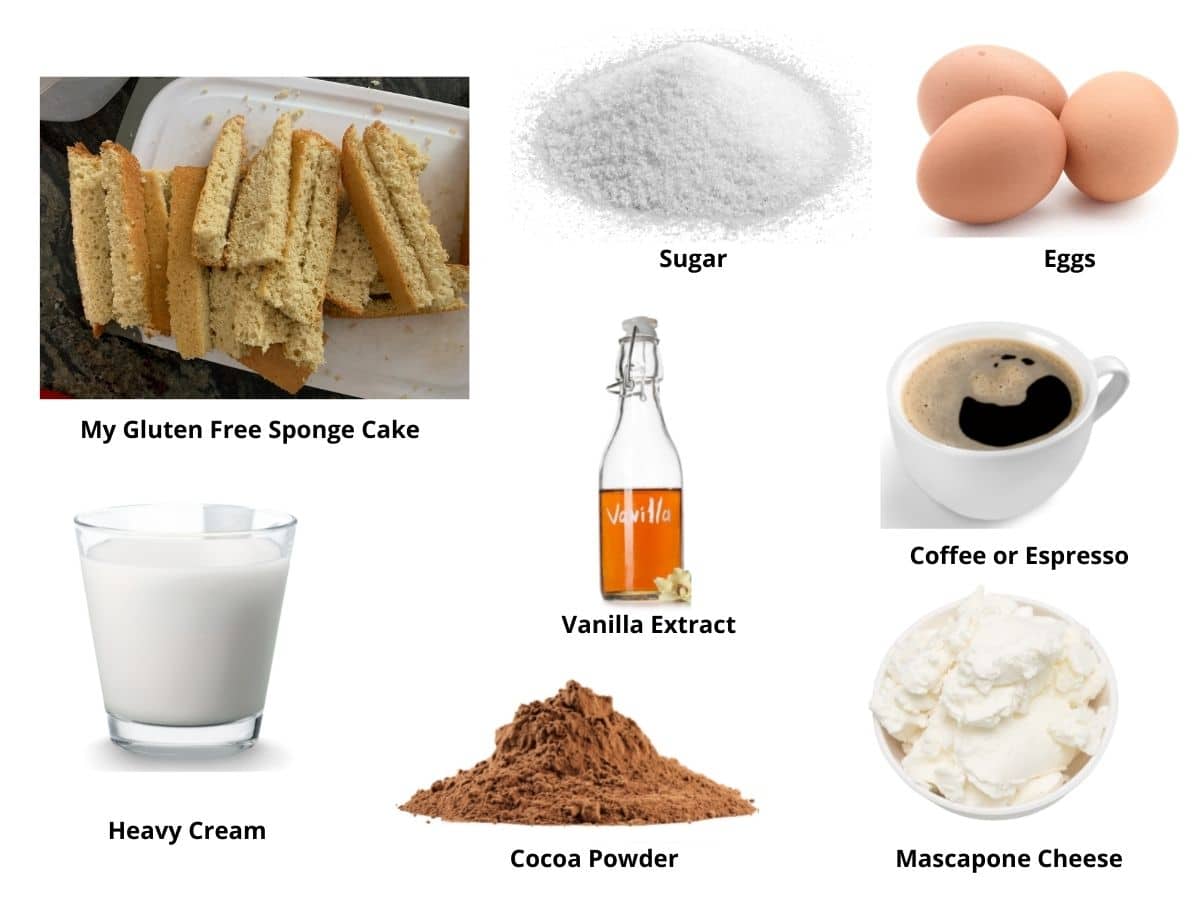
- Gluten-Free Sponge Cake – For this recipe, use my Gluten-Free Sponge Cake or use gluten-free ladyfingers. Schar makes gluten-free lady fingers, but I have yet to see them in stores in my area.
- Eggs – Large eggs, separated. The yolks are whipped into the custard layer.
- Heavy Cream – Adds richness and creaminess. Don’t substitute with half-and-half.
- Mascarpone Cheese – This cheese is traditional for tiramisu.
- Cocoa Powder – Most brands are gluten-free, but always read the label to be sure! I like to use Ghirardelli, Hershey’s, or Anthony’s brands of cocoa powder. I used Anthony’s Dutch Process Cocoa.
- Coffee – Use coffee or a double espresso watered down to equal 1 cup of liquid.
- Rum – I prefer dark rum for its deeper flavor. You can use regular rum or rum extract for an alcohol-free version.
- Vanilla Extract – I recommend using pure vanilla extract.
Variations and Substitutions:
- If you do not have heavy cream, use the same quantity of evaporated milk with 1 tablespoon of tapioca or cornstarch.
- To substitute the mascarpone, mix full-fat cream cheese with butter and heavy cream.
- Add mini chocolate chips to the mascarpone layer.
⚠️ A note about egg safety: This recipe contains uncooked eggs because they are made in the traditional Italian way. The eggs are whipped for 10 minutes, and the quality of the eggs in the U.S. is very high. You can temper the eggs by whisking them over a hot water bath before adding them to the standing mixer. As a precaution, if you are pregnant, you may want to try another of my gluten-free dessert recipes.
Tiramisu is a delightful no-bake cake that is so easy to put together. If you love no-bake-style cakes, try my easy Gluten-Free Icebox Cake recipe too!

A Note From My Kitchen
I could not find gluten-free ladyfingers locally, so I tested this tiramisu several times using my homemade gluten-free sponge cake. Honestly, I may never go back! I worked on getting the texture just right so it would hold up to the espresso without turning soggy, and the result is light, airy, and full of flavor! The sponge soaks up just enough coffee to keep each bite rich and balanced, without overwhelming the mascarpone layers. It is a little extra effort, but the payoff is worth it. Plus, now you no longer need to hunt down specialty ingredients to make a show-stopping gluten-free tiramisu at home.
How to Make Gluten-Free Tiramisu (Step-By-Step)
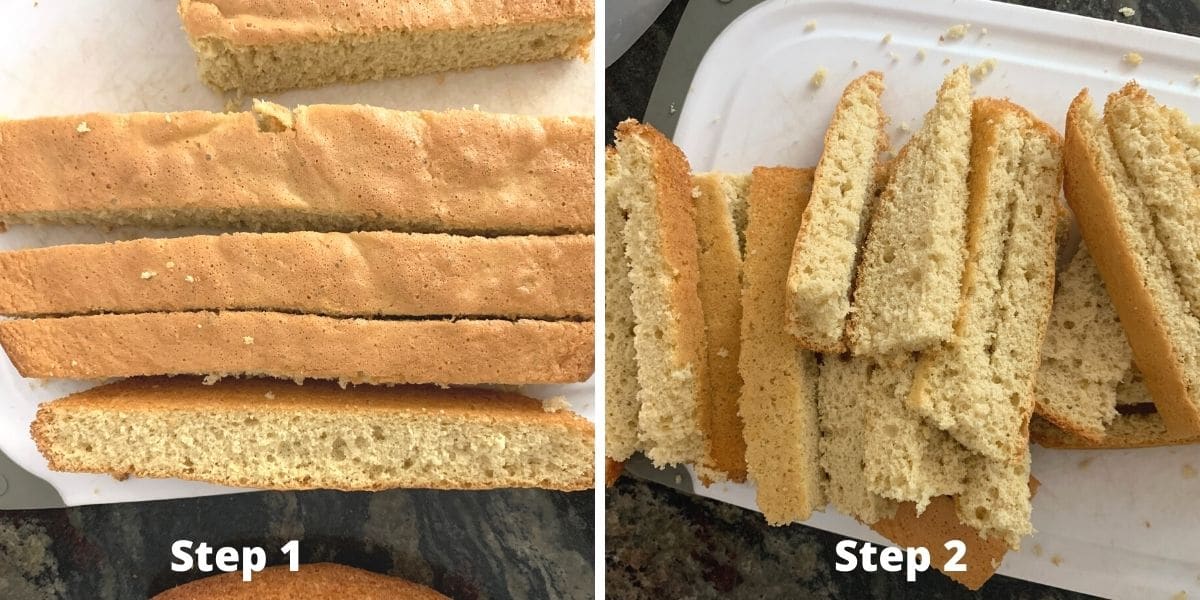
Step 1: If using store-bought ladyfingers, jump to step 3. Prepare one batch of my gluten-free sponge cake. This cake creates the perfect base for tiramisu without ladyfingers. Let it cool completely before using so the layers do not get soggy.
Step 2: Once fully cooled, slice your gluten-free sponge cake into even strips. These will be layered like ladyfingers in your tiramisu. You can also cut the cake into rectangles if preferred.
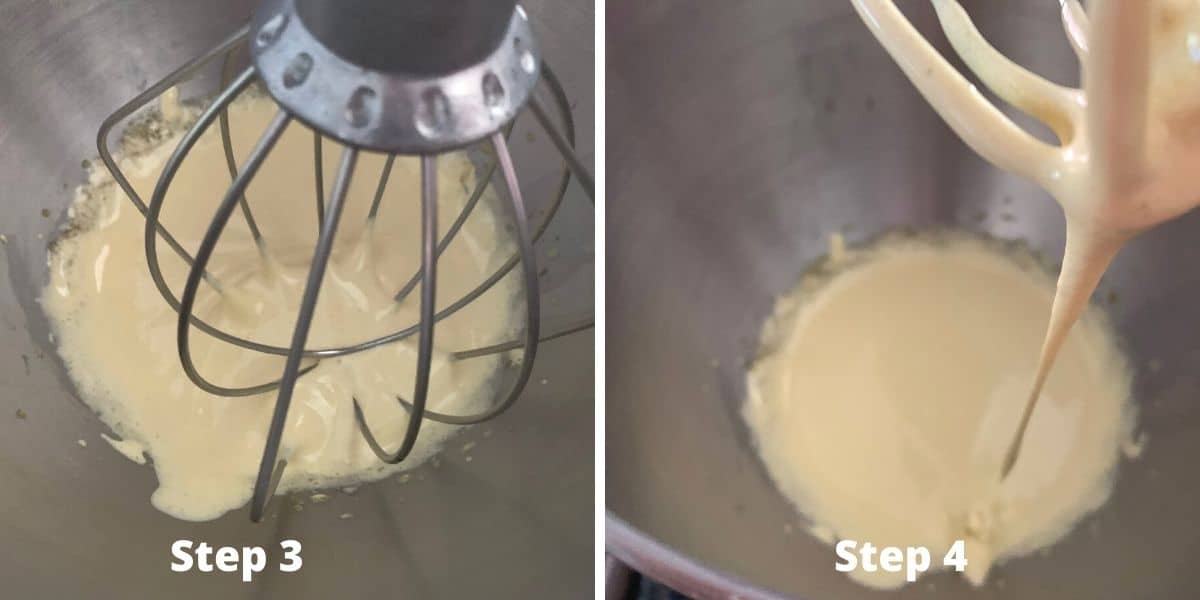
Step 3: In a stand mixer, beat large egg yolks and granulated sugar on high for about 10 minutes. This creates a traditional Italian-style tiramisu custard which is thick, pale, and ribbon-like in texture. You can use an electric hand mixer, but it can get tiring to hold it for 10 minutes.
Step 4: Pull up the whisk attachment or beater. The mixture will make a ribbon when you do this. Move the mixture to a bowl and clean the mixer/beater attachment.
🔑 Sandi says: Remember that you can temper the egg yolks if using raw eggs makes you nervous. Whisk the egg yolks in a bowl over a hot water bath, whisking constantly. After 5 minutes, add them to the standing mixer with the sugar and whip.
Email This Recipe To Me!
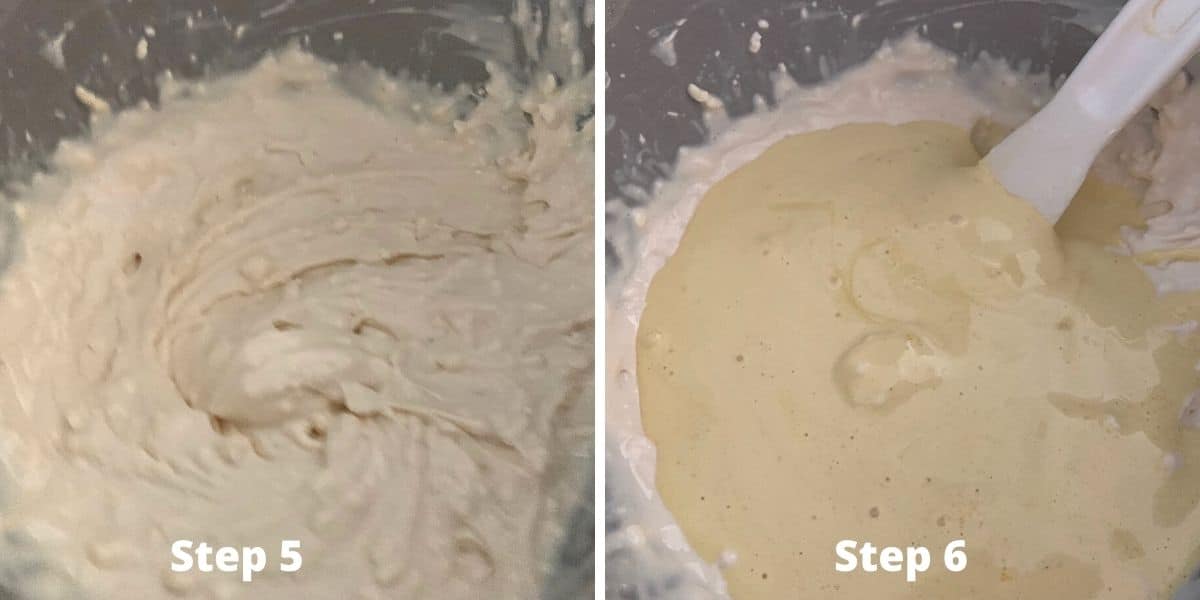
Step 5: In a clean mixing bowl, beat the cold heavy cream until soft peaks form. Add mascarpone cheese and pure vanilla extract, and mix until smooth and creamy. This makes the signature tiramisu mascarpone filling.
Step 6: Use a spatula to gently fold the whipped egg yolk mixture into the mascarpone cream. This gives your gluten-free tiramisu that rich and airy texture.
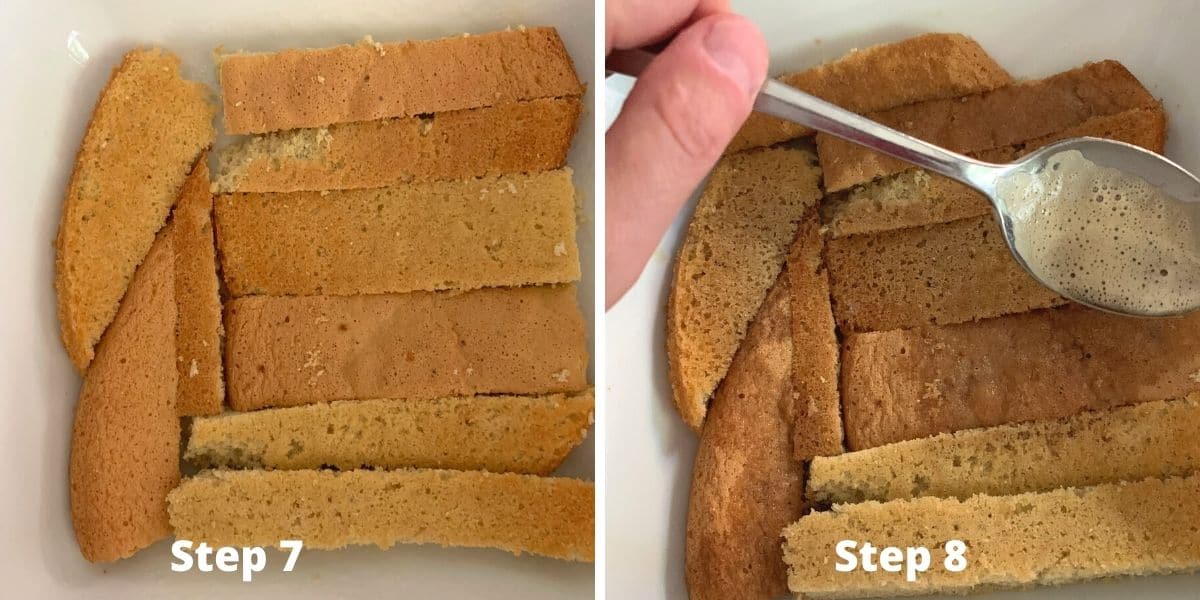
Step 7: Spray oil in your 8×8 baking dish with a gluten-free non-stick spray. Add a layer of gluten-free sponge cake strips (or ladyfingers, if using) to the bottom of the dish.
Step 8: Mix strong brewed coffee or espresso with dark rum (or rum extract for alcohol-free tiramisu) in a small bowl. Drizzle the mixture over the sponge cake layer so it absorbs the liquid without getting too wet.
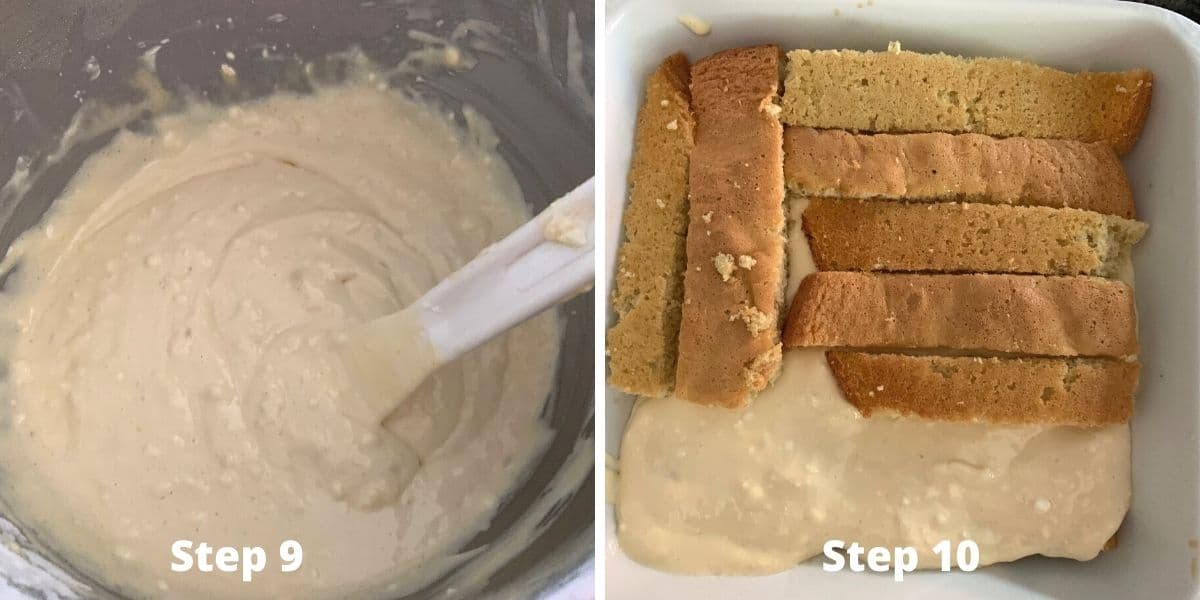
Step 9: Spoon half of the mascarpone custard filling over the soaked cake layer. Smooth it out with a spatula. This is the creamy layer that gives tiramisu its signature richness. Optional: Dust the top of the mascarpone layer with cocoa powder.
Step 10: Add another layer of sponge cake or ladyfingers. Drizzle with more coffee mixture, then spread the rest of the mascarpone filling evenly over the top.
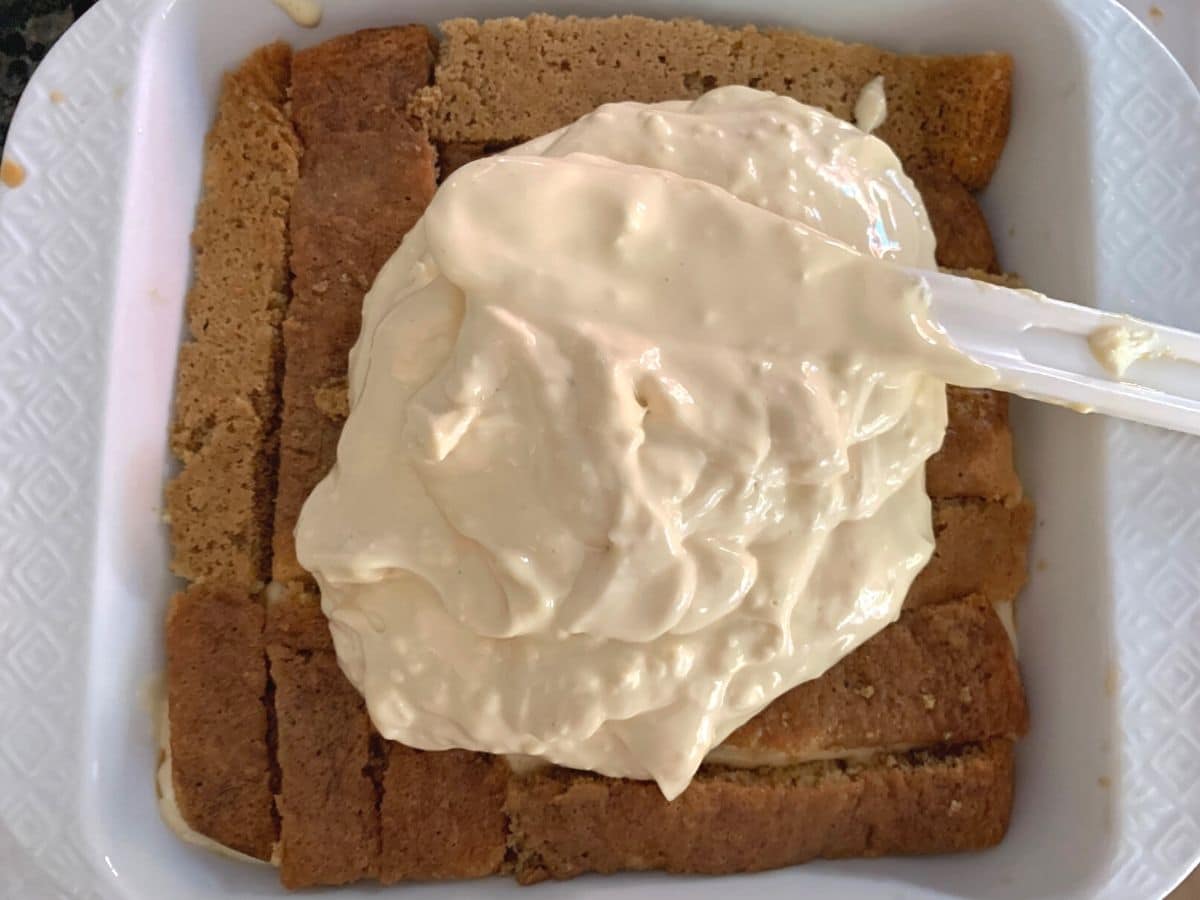
Step 11: Add the rest of the whipped custard over the sponge cake slices or lady fingers and spread to coat the sponge cake evenly.
Step 12: Sift Dutch-process or regular cocoa powder over the top of your gluten-free tiramisu using a small sifter. This finishing touch adds a classic chocolatey flavor and a beautiful look.
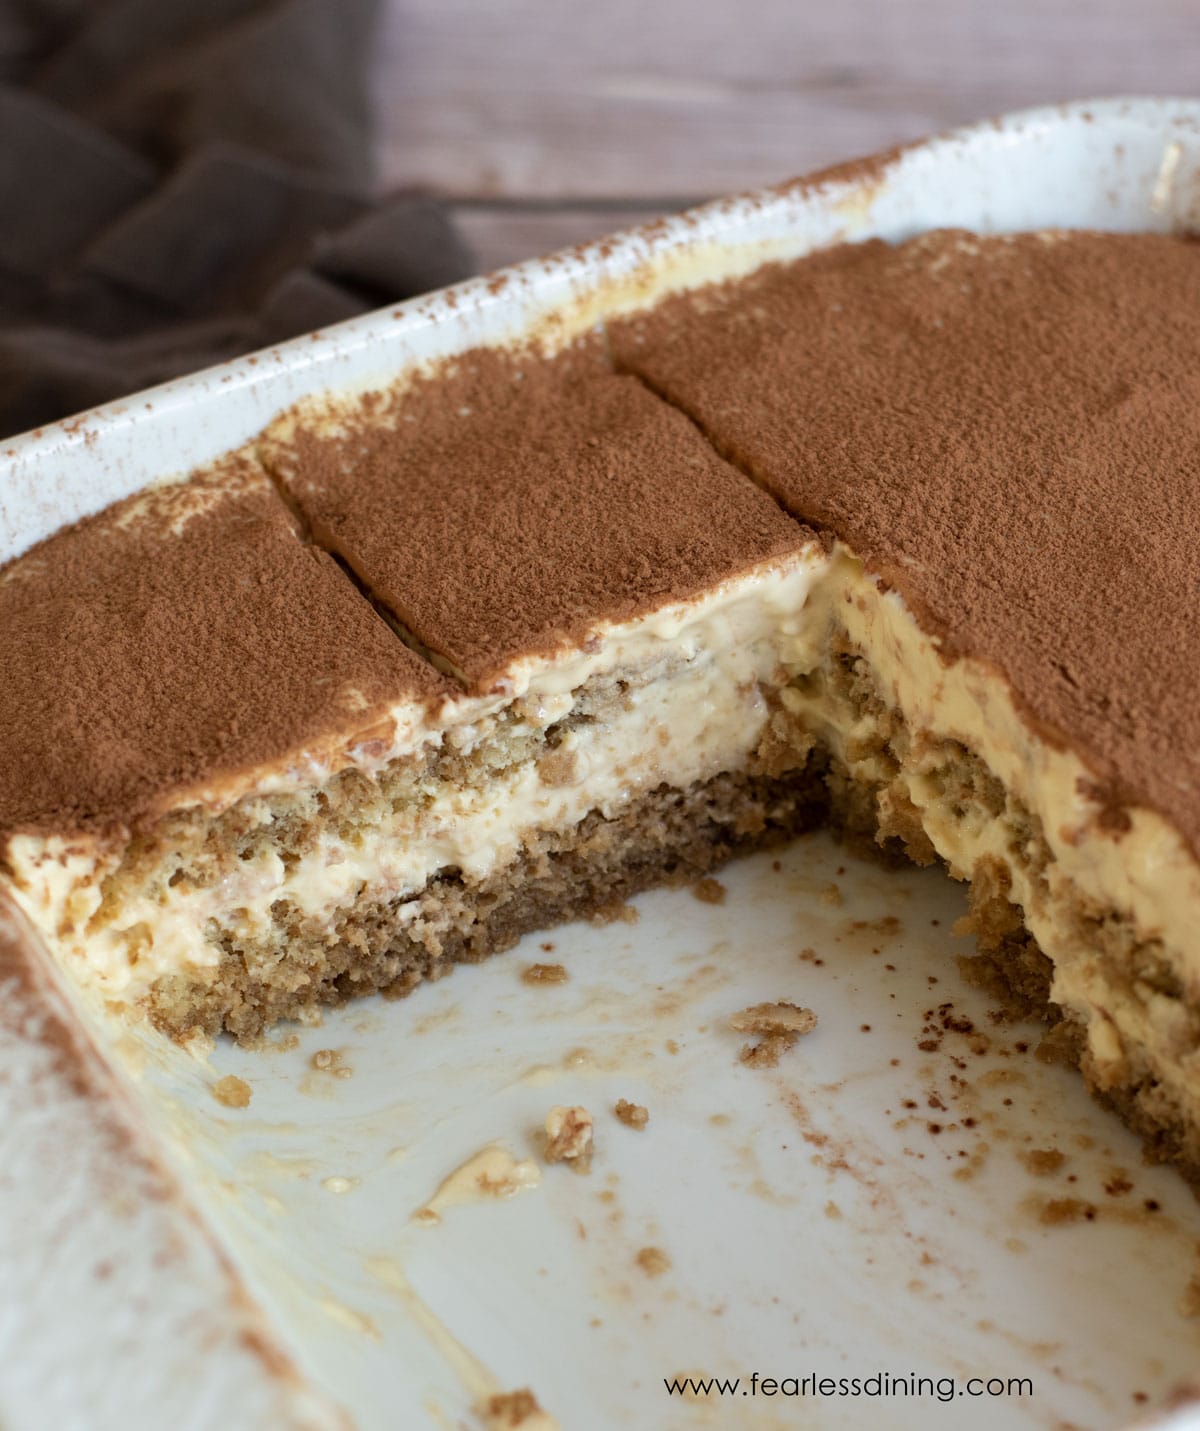
Step 13: Chill and serve. Cover the tiramisu and chill in the refrigerator for at least 2 hours, or overnight for the best texture. Serve cold and enjoy this creamy gluten-free Italian dessert!
Storage:
Tiramisu can be stored in an airtight container in the refrigerator for up to 3 days. Because it contains eggs and dairy, it’s not recommended to keep it longer. Freezing: I haven’t tested freezing this dessert. If you freeze yours, let me know how it turns out after thawing.
Frequently Asked Questions:
If you prefer not to use alcohol but want the same flavor, consider using rum extract.
I have only seen one brand of gluten free ladyfingers online by Schar, but I have not found them in person yet. This is why I use my gluten-free sponge cake recipe, linked above, as a substitute.
Yes! Mascarpone cheese is gluten-free. It is made with no gluten ingredients.
More Gluten-Free Cake Recipes:
If you love to bake, I have close to 100 incredible cake recipes for you to explore! Here are a few family favorites:
Love This Recipe?
💬 Did you make this gluten-free tiramisu recipe? Drop a comment below, and let me know how it turned out! ⭐⭐⭐⭐⭐ Please include which flour blend you used. This will help others know this recipe is delicious. Thank you!
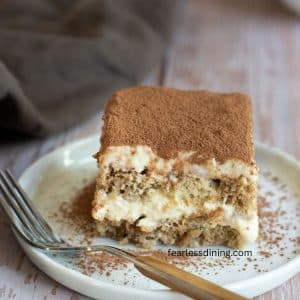
Bakery-Quality Gluten-Free Tiramisu
Equipment
Ingredients
- 1 gluten free sponge cake * see note
- 1 cup mascarpone * see note for substitute
- ¾ cup heavy cream *do not use half and half
- 1 cup coffee * see note
- 2 tablespoons dark rum * see note for alcohol-free
- 1 teaspoon pure vanilla extract
- 4 egg yolks
- ½ cup cane sugar
Topping
- 3 tablespoons Dutch process cocoa powder
Instructions
- Prepare one batch of my gluten-free sponge cake. This cake creates the perfect base for tiramisu without ladyfingers. Let it cool completely before using so the layers will not get soggy. If you use gluten-free lady fingers, skip to step 3.
- Once cooled, slice your gluten-free sponge cake into even strips. These will be layered like ladyfingers in your tiramisu. You can also cut the cake into rectangles if preferred.
- In a stand mixer, beat 4 egg yolks and 1/2 cup cane sugar on high for about 10 minutes. This creates a traditional Italian-style tiramisu custard. It should be thick, pale, and ribbon-like in texture.
- Pull up the beater. The mixture will make a ribbon when you do this. Move the mixture to a bowl and clean the mixer/beater attachment.
- Remember that you can temper the egg yolks if using raw eggs makes you nervous. Whisk the egg yolks in a bowl over a hot water bath, whisking constantly. After 5 minutes, add them to the standing mixer with the sugar and whip.
- In a clean mixing bowl, beat the cold 3/4 cup heavy cream until soft peaks form. Add 1 cup mascarpone and 1 teaspoon pure vanilla extract, and mix until smooth and creamy. This makes the signature tiramisu mascarpone filling.
- Use a spatula to gently fold the whipped egg yolk mixture into the mascarpone cream. This gives your gluten-free tiramisu that rich and airy texture.
- Spray oil in your 8×8 baking dish with a gluten free non-stick spray. Add a layer of gluten-free sponge cake strips (or ladyfingers, if using) to the bottom of the dish.
- Mix 1 cup coffee and 2 tablespoons dark rum in a small bowl. Drizzle some over the sponge cake pieces.
- Spoon half of the mascarpone custard filling over the soaked cake layer. Smooth it out with a spatula. This creamy layer gives tiramisu its signature richness. Optional: Dust the top of the mascarpone layer with cocoa powder.
- Add another layer of sponge cake or ladyfingers. Drizzle with more coffee mixture, then spread the rest of the mascarpone filling evenly over the top.
- Add the rest of the whipped custard over the sponge cake slices or lady fingers and spread to coat the sponge cake evenly.
- Put 3 tablespoons Dutch process cocoa powder into a small sifter and sift the cocoa over the custard. This is important to do in order to remove the lumps that always seem to be in cocoa powder.
- Cover the tiramisu and chill in the refrigerator for at least 2 hours, or overnight for the best texture. Serve cold and enjoy this creamy gluten-free Italian dessert!
Notes
- You can make my easy gluten free sponge cake recipe, or look for Schar gluten free ladyfingers in stores. I haven’t been able to find them, so I use my cake.
- To substitute the mascarpone, mix full-fat cream cheese with butter and heavy cream.
- You can use one cup of coffee, or an espresso watered down to the equivalent of one cup.
- I prefer dark rum over white rum in this recipe. If you do not want alcohol, use rum extract, which can be purchased at most grocery stores.
- Due to the use of raw egg yolks, this cake will not last long. I would recommend eating it within two days. Tiramisu can be stored in an airtight container in the refrigerator for up to 3 days This cake is not good for making ahead unless you just bake the gluten free sponge cake ahead.
Email This Recipe To Me!
SPECIAL NOTE
Please know that every gluten free flour blend has a different starch to grain ratio. If you use a blend I didn’t test, my rule of thumb is to add more flour if your dough or batter is wet and add more liquid if the dough or batter is too dry!
Nutrition
Nutrition Disclaimer
Nutritional information is an estimate provided to you as a courtesy. You should calculate the actual nutritional information with the products and brands you are using with your preferred nutritional calculator.
This post was updated from an older August 2021 post with more recipe details.
I truly hope you enjoy this recipe. I have been testing and creating gluten-free recipes for over 15 years. Creating gluten-free recipes that do not taste gluten-free is my goal for every recipe. Sometimes I only have to test a new recipe a couple of times, and others it takes multiple times. I do this so you get reliable, delicious results every time!


Excellent recipe! We used the Spongecake recipe with Bob’s 1to1, and espresso flavored mascarpone for a bolder coffee flavor. It is a new family favorite.
I am so glad you used my sponge recipe for this tiramisu. I have never seen espresso-flavored mascarpone, but it sounds like a great addition. Thank you!
How much vanilla?
This recipe has one teaspoon of vanilla extract.
I wanted to make a different dessert for Christmas. My daughter is Celiac. My husband and I love Tiramisu. Will be trying your recipe. Sounds really good, I found the Schar Gluten Free Fingers on Amazon. I will let you know how it all goes.
ThankYou.
I am so glad you are going to make this. Feel free to reach out if you have any questions, Judy.
This was so easy to make and came out delicious! I added a little extra rum, but I like the taste of the rum when I eat it, 🤣🙌🏻 If you’re looking for a gluten free dessert- this is IT!
I am so glad you loved this tiramisu recipe Jaki! I love the added rum :-).