
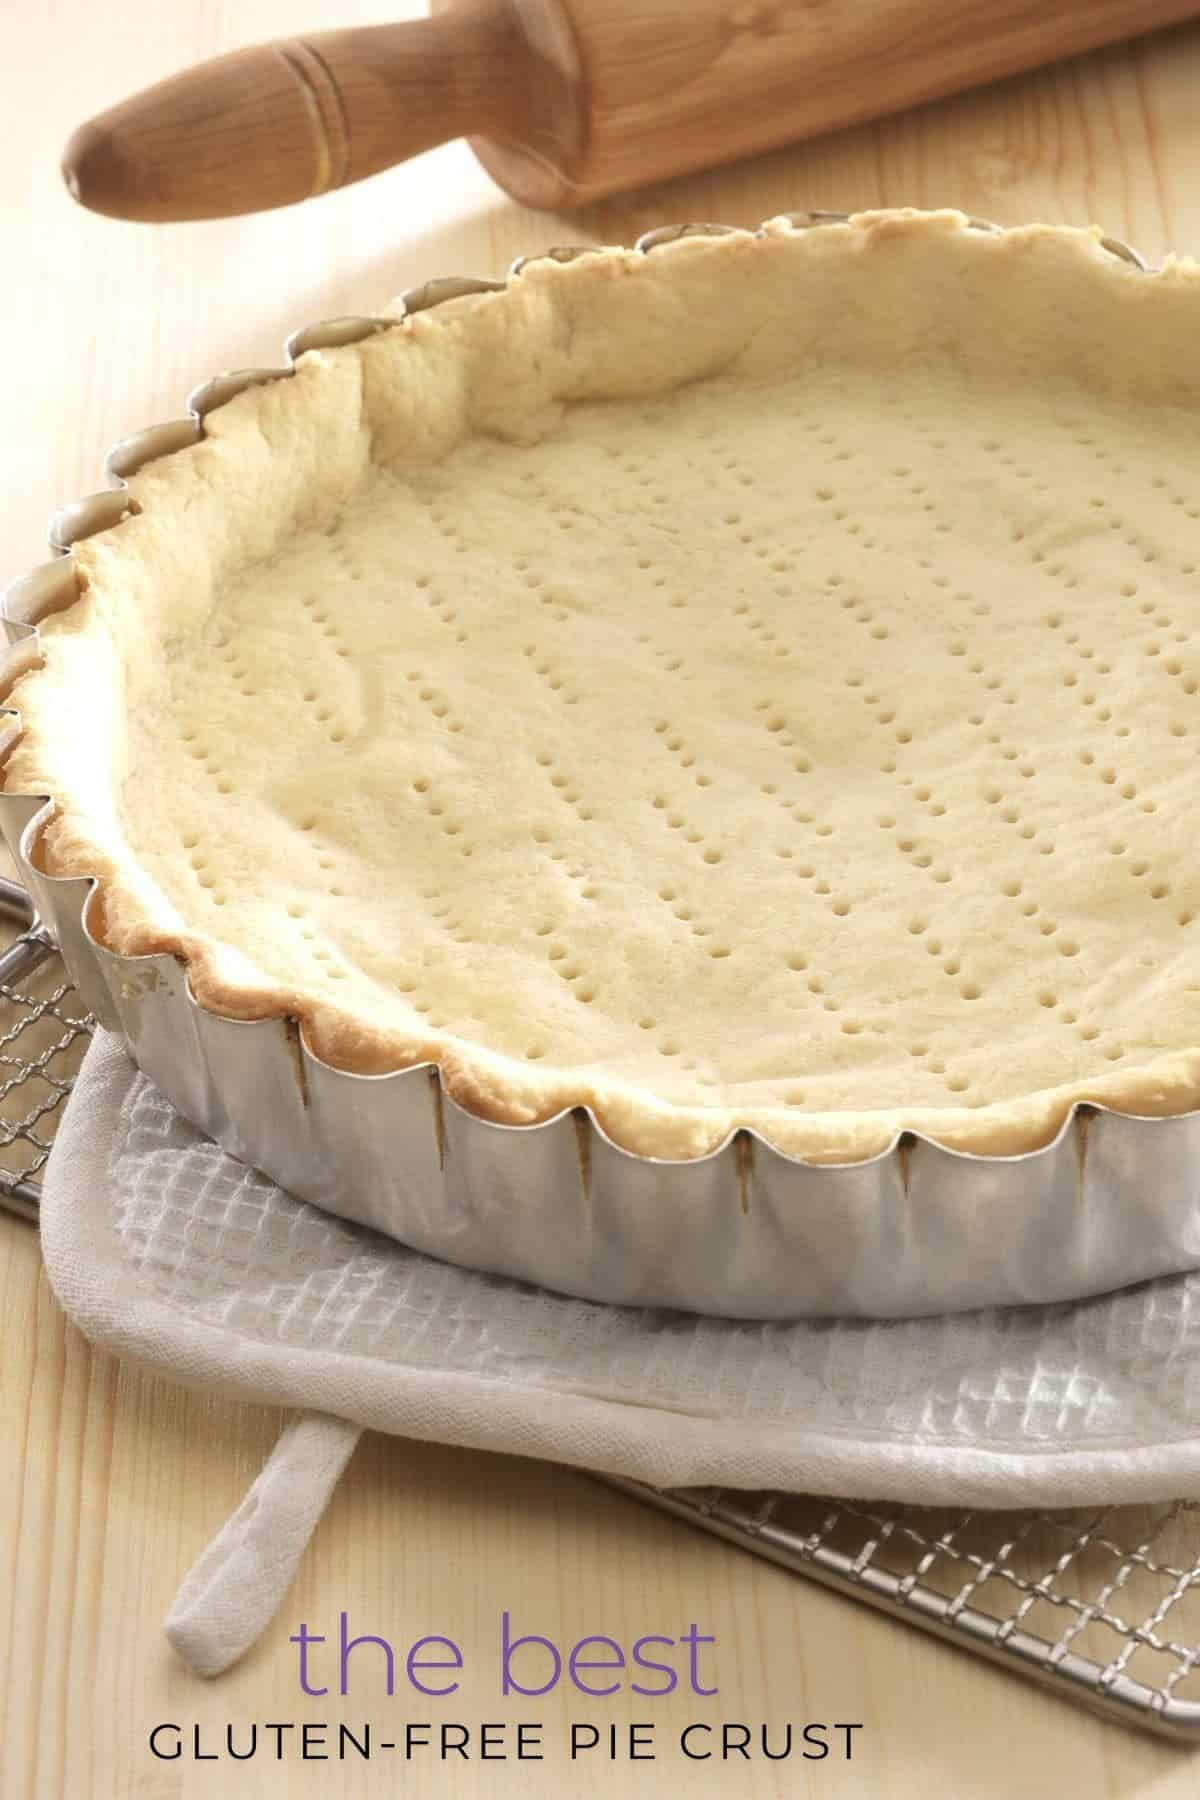
This is an incredible gluten-free pie crust recipe that is flaky, buttery, and easy to roll without cracking or falling apart. It is my go-to for both sweet and savory pies, and readers consistently say it is the best pie crust they have tried. All you need are a few simple ingredients like gluten-free flour, butter, water, salt, and an egg. Whether you are baking your first pie or you’re a seasoned pro, this crust is a game-changer.
When I first started baking gluten-free 15 years ago, pie crust was one of the most challenging things to get right. I wanted a crust that was flaky, easy to work with, and did not taste like it was missing something. However, as many of you know, gluten-free baking can be…frustrating.
I tested batch after batch, finding some were too dry and others turned tough instead of tender. I tested different flour blends, varied fat ratios, and adjusted the chill time multiple times. There were definitely moments I questioned my sanity.
If you love pie, check out all of my delicious gluten-free pie recipes! This pie crust also works well for hand pies and turnovers, like these Gluten-Free Apple Turnovers. If you love using sourdough discard, I highly recommend trying this Gluten-Free Sourdough Pie Crust recipe.
This post may contain affiliate links. Please read our Disclosure Policy.

A Note From My Kitchen
This pie crust recipe is a labor of love. I spent years testing and perfecting this recipe. When we originally went gluten-free almost 15 years ago, there was no such thing as a gluten-free flour blend. Today, things are much easier.
I tested five different flour blends in this pie crust recipe. There were two clear winners in terms of flakiness. Cup4Cup and my gluten-free pastry flour (linked above). All of the flour blends yielded a beautiful flaky crust; my two favorites were just a little bit flakier.
My rule of thumb for using different flour blends is to make moisture adjustments to the dough as needed. If the crust dough seems too wet, add more flour, and if the dough seems too dry, add more water. Make these adjustments 1 tablespoon at a time to better control the level of moisture.
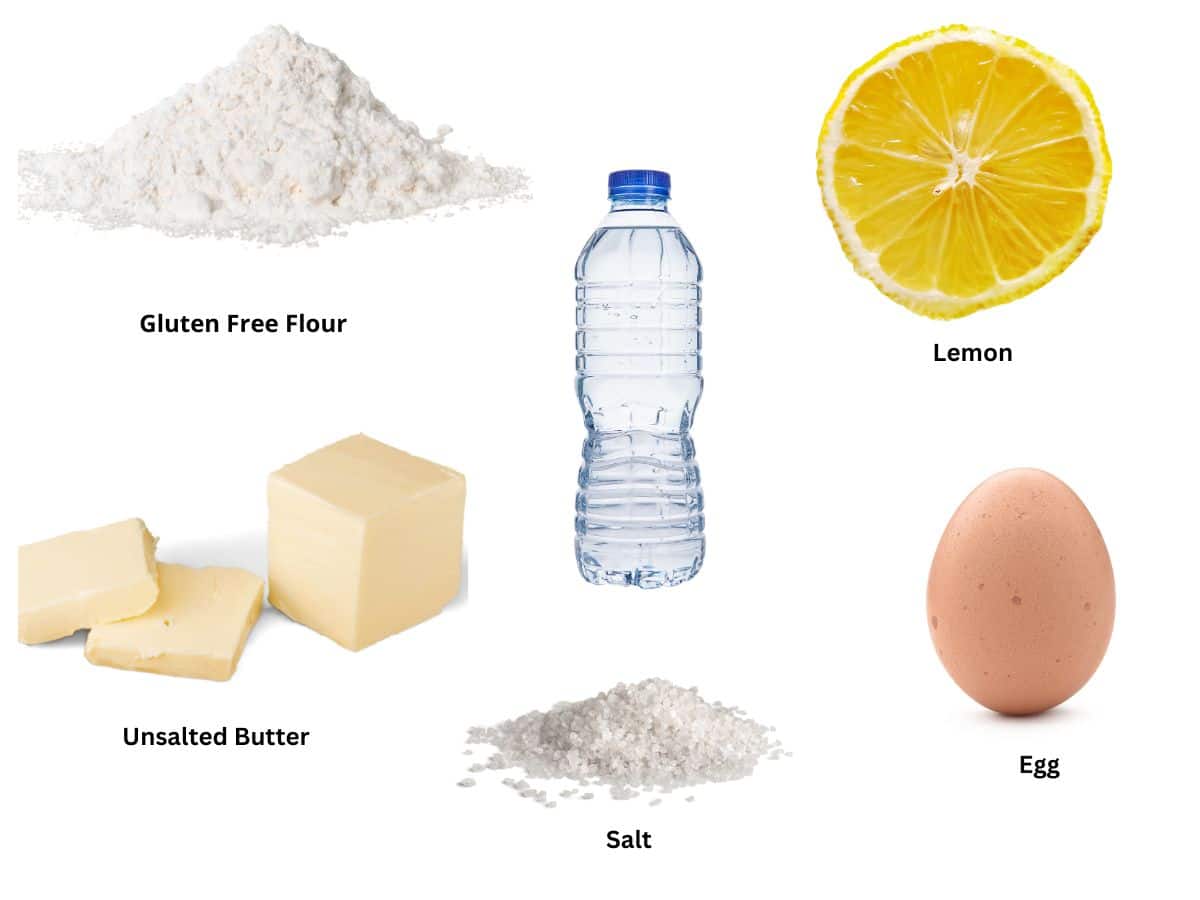
Ingredient Notes:
Note: This pie crust recipe makes a single-crust pie. If you plan to have a top crust, you will need to double this recipe for a double-crust pie. For the full list of ingredients and amounts, please go to the recipe card below.
Gluten-Free Flour Blends Tested:
- My favorite blend is Cup4Cup for its extra flakiness. (Note: Cup4Cup recently updated its formula, which may behave a bit differently. I have not retested this crust recipe with the new version.)
- I also tested this recipe with King Arthur Measure for Measure, Bob’s Red Mill 1:1, and Pillsbury Gluten-Free Flour.
- Try my homemade gluten-free flour blends. This gluten-free pie crust recipe is delicious with my Gluten-Free All Purpose Flour Blend or my Gluten-Free Pastry Flour Blend.
Pro Tip: Every gluten-free flour blend has a different starch-to-grain ratio. Depending on the blend, your dough may need slight adjustments. I recommend adding more liquid if the dough feels dry or more flour if it is sticky. Make adjustments one tablespoon at a time. Read Why Gluten-Free Flour Blends Vary to learn more.
The Rest of the Pie Crust Ingredients:
- Xanthan Gum: If your blend does not contain xanthan or guar gum, add 3/4 teaspoon to help the crust hold together and roll without crumbling. Read Why Binders are so Important in Gluten-Free Baking to learn more.
- Cold, unsalted butter. For a dairy-free version, substitute a firm vegan butter, such as Earth Balance.
- Large Egg. This homemade gluten-free pie crust recipe uses one egg, which helps give it a little more binding and a soft texture. See below for the Egg-Free version.
- Ice-cold water. Helps keep the butter firm and creates flaky layers. I strain out the ice before measuring.
- Lemon Juice. Adds to the flavor and helps with flakiness.
Reader-Tested Variations:
- Dairy-free tested – Multiple readers had success using Earth Balance plant-based butter.
- Egg-free – “Use 3 tablespoons of whipped aquafaba, and the crust turned out great.” Shelly
- Lard instead of butter – “Works great!” Alicia P.
- No pastry cutter? “A fork worked perfectly.” Lucy
In a Nutshell: This gluten-free pie crust works because cold butter creates steam pockets, the egg adds structure, and proper hydration prevents cracking, preventing the three main challenges gluten-free dough often faces.
How to Make a Gluten-Free Pie Crust (Step-By-Step ):
If you are making a top and bottom pie crust, be sure to double this pie crust recipe.
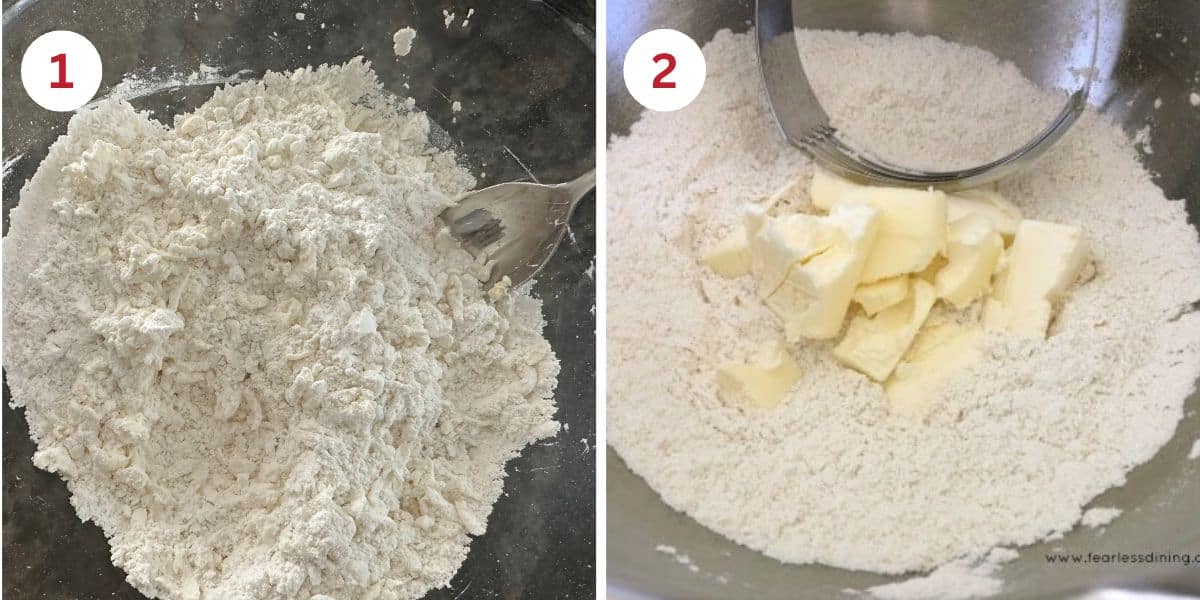
Step 1: Combine the gluten-free flour, binder (if needed), and salt in a large bowl. Whisk to blend.
Step 2: Cut cold butter into small cubes and add to the flour. Use a pastry blender or fork to blend until the mixture resembles coarse crumbs with pea-sized butter chunks. These butter pieces are key to a flaky texture!
👀 Sandi Says: If you don’t have a pastry blender, freeze the butter and use a cheese grater to shred the butter into the dry ingredients.
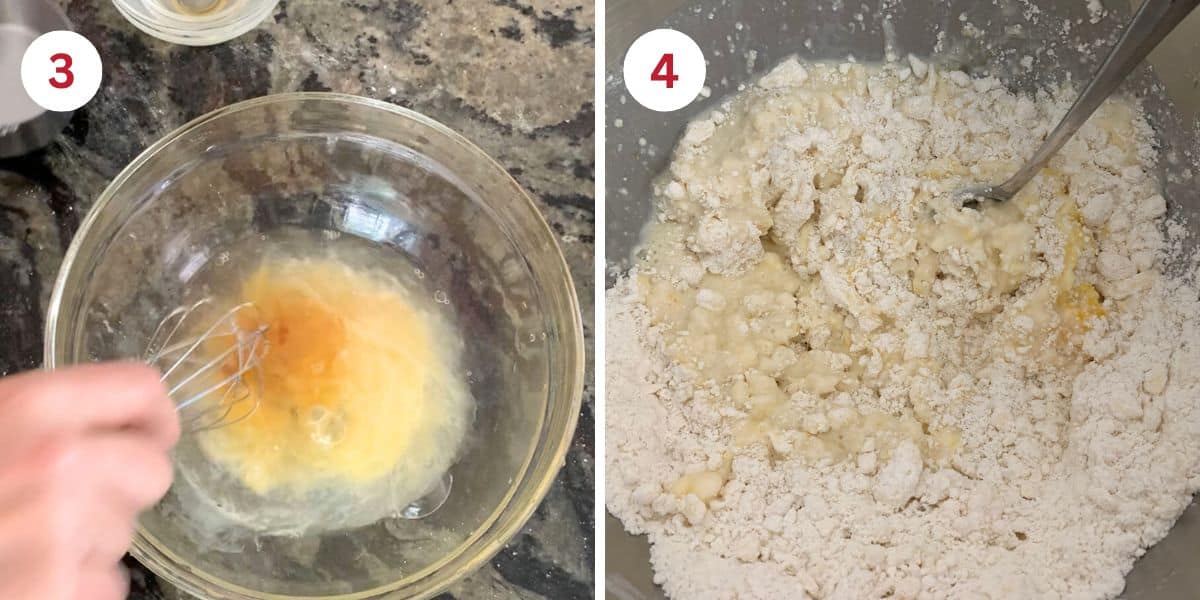
Step 3: Add the egg, cold water, and lemon juice to a small mixing bowl and whisk.
Step 4: The dough should be firm but not sticky. Add more flour or water as needed. Wrap the pie dough in plastic wrap and chill it in the refrigerator for 15 minutes, allowing the butter to cool.
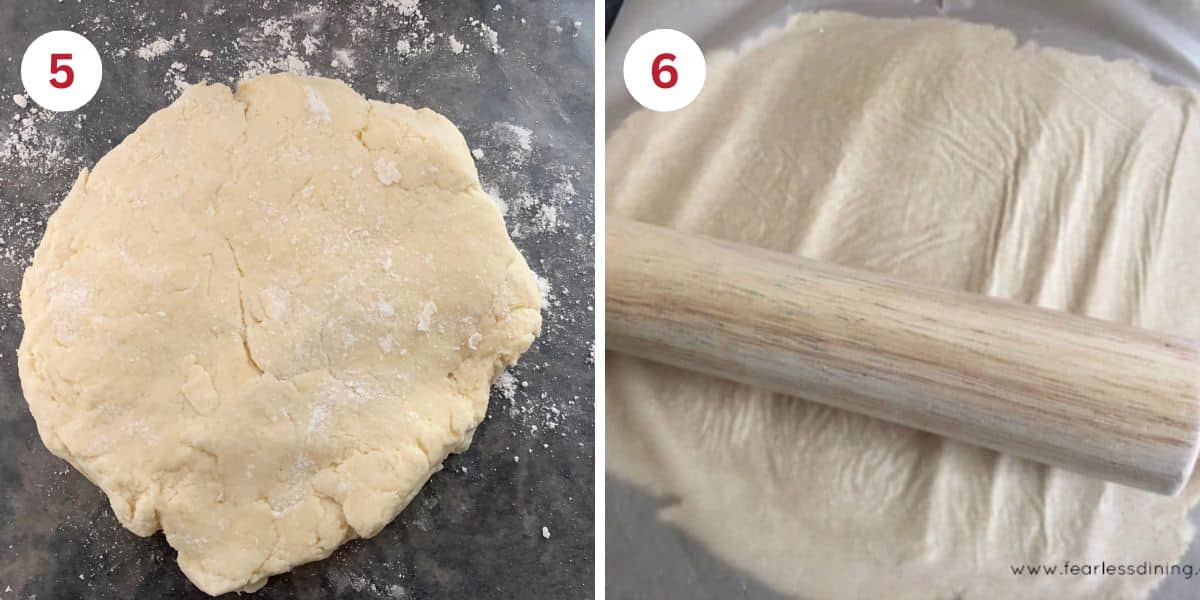
Step 5: Remove the pie dough from the fridge. Prepare your work surface by dusting a clean surface with flour or using a silicone mat. Shape the pie dough into a circle and add a second sheet of wax paper.
👀 Sandi Says: If your dough is sticky, dust the silicone mat and the top of the dough with extra flour.
Step 6: Use a rolling pin to roll the dough into a circle slightly larger than your pie pan. I like to make my dough 1/4-1/3 inch thick.
Step 7: Spray a 9-inch pie pan with gluten-free baking spray to prevent sticking. Note: PAM Baking Spray is NOT gluten-free!
Email This Recipe To Me!
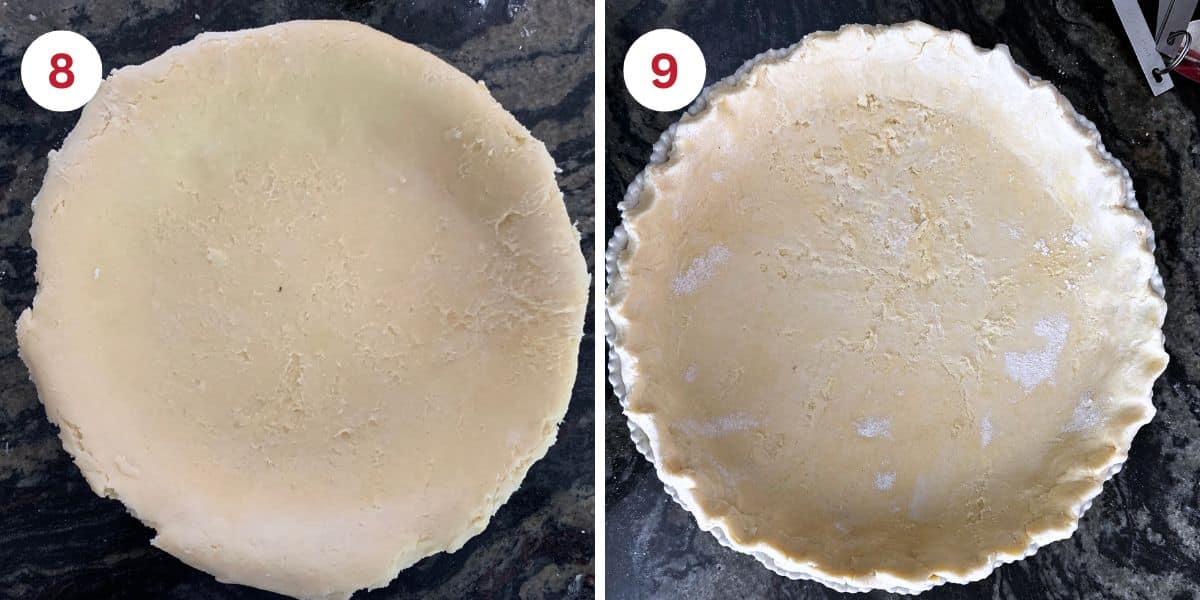
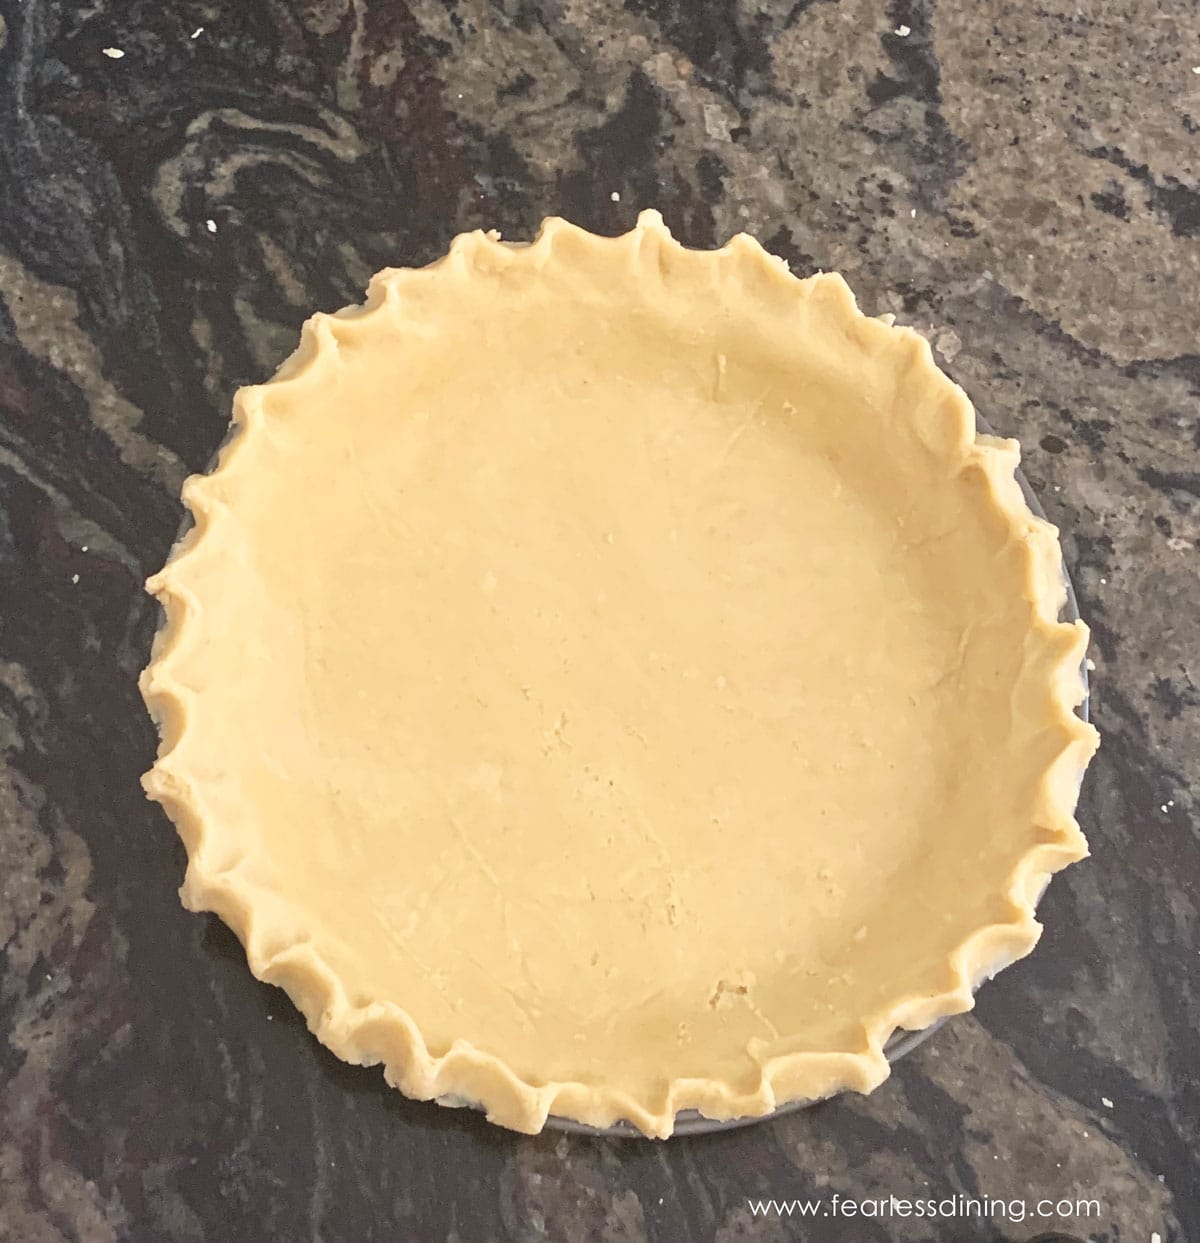
Step 8: Remove the top layer of paper and gently flip the dough into a greased 9-inch pie pan. Peel away the silicone mat from the back.
Step 9: Crimp the edges if you are not filling the crust now. To crimp the edges, hold your fingers in a V shape and place them on the outside of the crust. Use a finger to press the dough between your fingers so it crimps into the open space. Repeat this all the way around the edge of the pie crust.
Crust Instructions For No Top Crust:
- If you are not making a top crust, press the dough into the pan and crimp the edges as described above
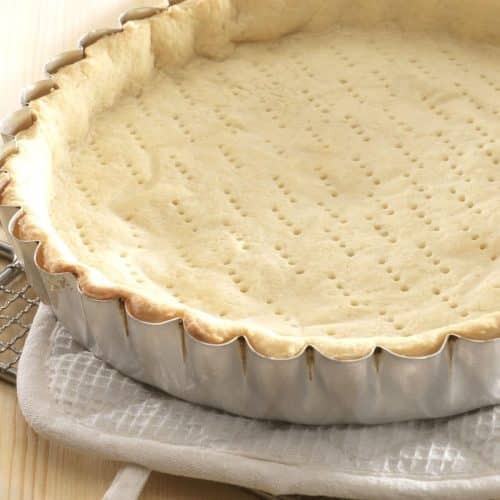
- Add the pie filling and bake the pie at 350º F for 20-25 minutes.
- If you use a cream filling and do not need to bake the filling, poke a few holes in the bottom of the crust for air to vent.
- This will prevent air bubbles from forming at the bottom of the crust.
- Cool the crust and add the cream filling.
How to Make a Top Crust:
If you didn’t double the pie crust recipe to have enough dough for the top crust, make the top crust now.
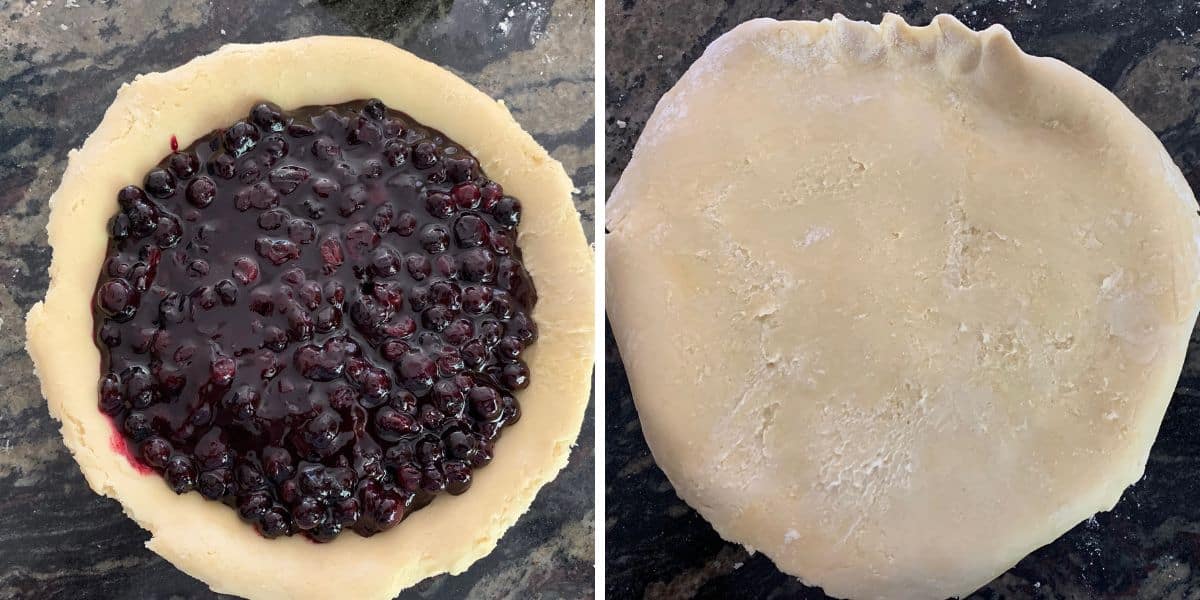
- Add your pie filling to the crust. Note that the edges are not yet crimped.
- Roll out the top crust in the same way you would for the bottom crust.
- Place the top crust carefully over the pie filling. Center the dough so you have overlapping dough over the bottom crust.
- Follow the instructions above to crimp the top and bottom crusts together.
- Use a fork or the tip of a knife to make 3-4 air holes to vent the steam while the pie bakes.
- Follow the same baking instructions. If the edges of your pie crust start to get too golden, you can make a foil tent over the crust to prevent the edges from burning.
How to Make a Lattice Top Crust:
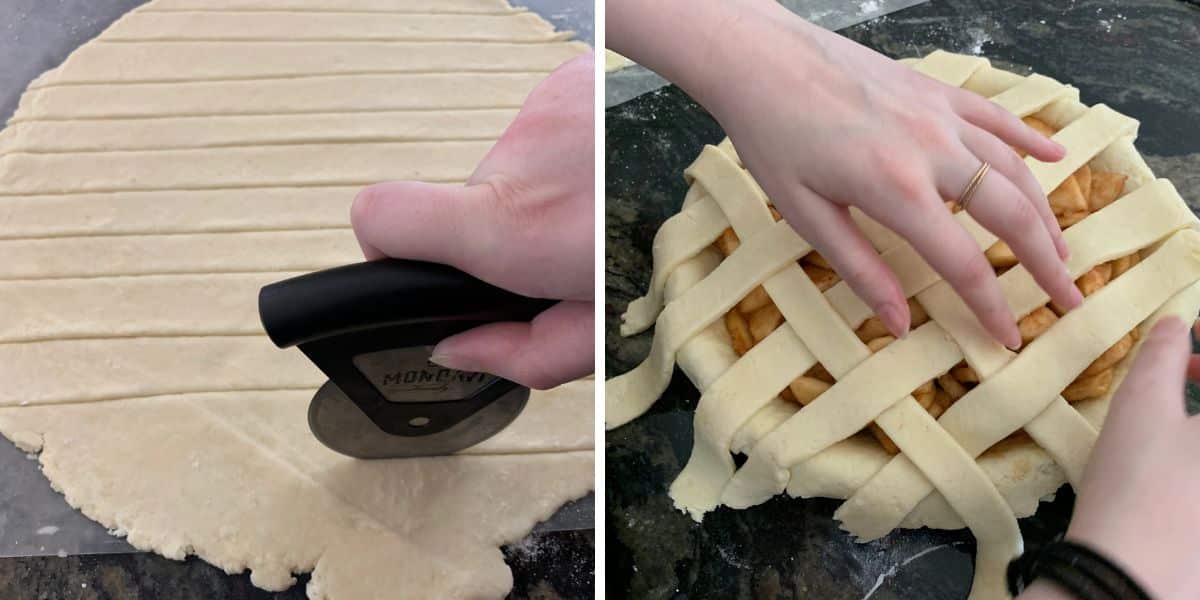
- Roll the top crust dough flat, as you would for a regular pie crust top. Use a pizza wheel to cut out strips. You can make them as thick or thin as you like!
- Lay strips across the top of the pie in one direction. Take a dough strip and start at one end, weaving it in and out of the dough strips that are already across the dough. Continue with each strip until you have a woven pie crust top.
- I have a recipe with full instructions to weave the crust in my Gluten-Free Apple Pie recipe.
It is easy to give your pie crust a fancy bakery look!
- Grab your favorite cookie cutter and make a statement with the top crust! I used stars for a 4th of July pie. You can use any shape or size of cookie cutters. The complete directions are in my Gluten-Free Mixed Berry Pie post.
- You can also make mini pies in ramekin dishes, as I did with this Gluten-Free Strawberry Pies recipe.
Storage and Freezing Tips:
- Making it ahead? This pie dough will keep fresh in the refrigerator for up to 3 days.
- Store the baked pie crust in the refrigerator. It will stay fresh for up to 3 days.
- To freeze unbaked: Wrap the dough tightly in plastic wrap, then place it in a gallon-size freezer-safe bag. Squeeze out extra air.
- Freeze the baked crust in a gallon-size freezer bag if the pie isn’t too tall.
Why did my crust turn out tough?
If you have a tough crust, it is because you overmixed the butter into the flour. You need the butter chunks in the dough to create air pockets during baking, resulting in flakiness.
Why is my pie crust soggy on the bottom?
If your gluten-free pie crust is soggy, there are several reasons this could happen.
- Did you use fresh or frozen fruit? Frozen fruit releases a lot of water, which can leave the pie crust with a soggy bottom.
- Did you roll the crust too thin? A thin crust will not hold up to a pie filling.
- If you used a liquid or custard filling, did you par-bake the crust for a few minutes first?
For more pie-making tips, see my Gluten Free Pie Troubleshooting Guide!
Frequently Asked Questions:
Heat can cause all sorts of mischief when you bake. Pinch the edges of the dough in a design. Use a fork to make steam holes in the bottom. These steam holes prevent your crust from bubbling and puffing up in a weird way.
I do not like using a food processor because it can overgrind the butter, leaving it with too-small chunks that do not create the flaky layers in the crust.
I like to roll my pie crust dough, and when I think I am close to the size of the pan, I will hold the pan up to the dough circle. You want the dough rolled out large enough to reach the sides and leave a little extra to pinch along the outer edges.
What Can You Make with This Pie Crust?
Savory Pies:
- You can also use this flaky pie crust for quiche recipes!
- You can use this crust to make my popular Gluten-Free Chicken Pot Pie recipe.
- Quiche is also a great way to use pie crust. For quiche, it is nice because you do not need a top crust! My easy Gluten-Free Quiche recipe can be customized with all of your favorite mix-ins.
Sweet Pies:
- You can use this single pie crust to make delicious galettes like this Gluten-Free Plum Galette.
- If you love pecans, you must try this homemade Gluten-Free Pecan Pie recipe. It is amazing with this crust!
- You can also use this crust to make this Gluten Free Hatch Chile Apple Pie.
- This homemade Gluten-Free Blueberry Pie is a bakery-quality pie you will love!
- We love this Gluten-Free Pumpkin Pie over the fall holidays.
- This Gluten-Free Pumpkin Streusel Pie is also a winner for fall.
If you are looking for pie-filling ideas, do not forget to check out this list of 50+ gluten free pies!! There is a pie for every diet: paleo, whole30, keto, and vegan!
If you do not feel like making a top crust, you can also use this pie crust recipe to make this Honey Apple Galette. You can also use this crust to make this Gluten Free Hatch Chile Apple Pie!
Love This Recipe?
💬 Did you make this recipe? Please leave a comment below, and let me know how it turned out! ⭐⭐⭐⭐⭐ Please include which flour blend you used. This will help others know this recipe is delicious. Thank you!
The Best Gluten-Free Pie Crust Recipe
Equipment
Ingredients
- 1 ½ cups gluten free flour blend * see note
- ¼ teaspoon salt
- 9 tablespoons unsalted butter * see note
- 1 large egg * see notes for egg-free
- 1 teaspoon lemon juice
- ¼ cup water +1 to 3 additional tablesppons
Instructions
- If you are making a top and bottom pie crust, note that you must double this pie crust recipe.
- Preheat the oven to 350º F. Make sure to set the oven rack to the middle of the oven.
- In a large mixing bowl, combine 1 1/2 cups gluten free flour blend and 1/4 teaspoon salt. Whisk to blend.
- Add the 9 tablespoons unsalted butter to the dry ingredients. Use a pastry blender to cut the butter into tiny pieces. If you don't have a pastry blender, freeze the butter and use a large grater to grate it into the flour.
- If you don't have a pastry blender, freeze the butter and use a cheese grater to shred the butter into the dry ingredients.
- In a small bowl, add 1 large egg, 1 teaspoon lemon juice, and 1/4 cup water
- Pour wet ingredients into the dry ingredients and mix. Mix gently with your hands or a large spoon until a dough forms. It should be firm but not sticky. Add more flour or water as needed. Wrap the pie dough in plastic wrap and chill the dough in the refrigerator for 15 minutes to cool the butter.
- Remove the pie dough from the fridge. Prepare your work surface by dusting a clean surface with flour or using a silicone mat. Shape the pie dough into a circle and add a second sheet of wax paper. If your dough is sticky, dust the silicone mat and the top of the dough with extra flour.
- Top with another piece of wax paper and use a rolling pin to roll flat in a circle shape. I rolled my dough to about 1/4 of an inch thick.
- Spray a 9-inch pie pan with gluten-free baking spray to prevent sticking. Note: PAM Baking Spray is NOT gluten-free! Remove the top layer of paper and gently flip the dough into a greased 9-inch pie pan. Peel away the silicone mat from the backside.
- Crimp the edges if you are not filling the crust now. To crimp the edges, hold your fingers in a V shape and place them on the outside of the crust. Use a finger to press the dough between your fingers so it crimps into the open space. Repeat this all the way around the edge of the pie crust.
Crust Instructions For No Top Crust:
- Add your pie filling and bake the pie at 350º F for 20-25 minutes.
- If you use a cream filling and do not need to bake the filling, poke a few holes in the bottom of the crust for air to vent.
- Cool the crust and add the cream filling.
How to Make the Top Crust:
- Add your pie filling to the crust. Roll out the top crust like you would for the bottom crust.
- Place the top crust carefully over the pie filling. Center the dough so it overlaps over the bottom crust.
- Follow the instructions above to crimp the top and bottom crusts together.
- Use a fork or sharp knife to cut 3-4 air holes in the top crust to vent the steam while the pie bakes.
How to Make a Lattice Top Crust:
- Roll the top crust dough flat, as you would for a regular pie crust top. Use a pizza wheel or sharp knife to cut out strips. You can make them as thick or thin as you like!
- Lay strips across the top of the pie in one direction. Take a dough strip, starting at one end, and weave it in and out of the strips already across the dough. Continue with each strip until you have a woven pie crust top.
- Cut strips out of the rolled top dough. Use the strips to weave a lattice-style crust.
Video
Notes
- I have tested this recipe with Cup4Cup, King Arthur Measure for Measure GF, Bob’s Red Mill 1 to 1 GF blend, and Authentic Foods Multi Blend. That does not mean others will not work; I just have not tested other flours. Note: Cup4Cup recently changed its flour blend formulation, and it does not behave exactly like the old formulation. I haven’t had a chance to retest this recipe with the new flour blend formulation.
- My homemade Gluten-Free All Purpose Flour works perfectly in this recipe.
- If your gluten free flour blend doesn’t contain Xanthan Gum or Guar Gum, please add 3/4 teaspoon.
- One reader used 3 TBSP of whipped aquafaba in place of the eggs to make it egg-free. She said it worked great.
- To make this recipe dairy-free, substitute the butter for vegan butter.
- These pie crusts will keep fresh for up to 4 days in an airtight container or for up to 4 months in the freezer.
Email This Recipe To Me!
SPECIAL NOTE
Please know that every gluten free flour blend has a different starch to grain ratio. If you use a blend I didn’t test, my rule of thumb is to add more flour if your dough or batter is wet and add more liquid if the dough or batter is too dry!
Nutrition
Nutrition Disclaimer
Nutritional information is an estimate provided to you as a courtesy. You should calculate the actual nutritional information with the products and brands you are using with your preferred nutritional calculator.
I truly hope you enjoy this recipe. I have been testing and creating gluten-free recipes for over 15 years. Creating gluten-free recipes that do not taste gluten-free is my goal for every recipe. Sometimes I only have to test a new recipe a couple of times, and others it takes multiple times. I do this so you get reliable, delicious results every time!

Sooo, do not recommend using gf bisquick for this. Top fluted part melted and literally fell into the bottom of the oven and scorched. Filling then spilled over the edges where the crust had broken and proceeded to make a waterfall of pumpkin. Looks like something the dog did after eating out of the trash. I did this as an experiment and like a good scientist, well not call it a fail. We’ll call it one more way NOT to make gf pie.😁
Hi Teresa, I agree. I am not a fan of gf Bisquick. It is very gritty and just hasn’t worked well in my recipes. I love to experiment as well…and I am so glad you wrote to prevent others from trying that blend.
Can you use a food processor to mix the dough?
Hi Teri, I do not advise using a food processor. It will break up the butter too much and you won’t get the flaky layers.
So I had to go to 3 stores to find a pastry cutter but it was worth it. I made a Dutch Apple Pie using this crust and my gluten-free granddaughters loved it. Thanks for the recipe!
Oh my gosh, I am so sorry for the extra trips. It really does cut in butter nicely. I would say next time freeze the butter and use a cheese grater. I feel like the flaky layers are bigger with the pastry blender, but a grater works in a pinch.
I am looking forward to making this pie crust. My one question is, do I have to use the baking spray. I do not bake often enough to purchase it.
Hi Nancy, If you feel more comfortable not spraying your pie pan, it should be okay given the amount of butter in the crust.
Can you mix the dough in a food processor?
Hi Teri, I find a food processor overmixes the butter and you don’t get as many flaky layers. If you don’t have a pastry blender, freeze the butter and use a cheese grater to shred it into the flour mixture.
Don’t know what happened., but the fluted crust turned out hard as a rock.
Hi Ada, I am sorry that happened and it isn’t the norm for this recipe. Please let me know what flour blend you used, and whether you used a pastry blender or cheese grater to shred your butter. Also how much you worked the dough, and if you swapped any ingredients. I am happy to troubleshoot because this is an awesome pie crust recipe.
Sandi, thank you so much! I finally purchased Bob’s Red Mill flour and made this pie crust for my pot pies. It was perfect and not difficult to make. You can’t tell it’s gluten free. Now my husband wants an apple pie. 😊
You have an avid fan forever.
Thank you so much, Debbie. I am so glad you love my pie crust recipe. Sounds like you have an apple pie in your future to keep your hubby happy 🙂
You stated that Pam Cooking Spray is not gluten free. According to the Conagra website, Pam Olive Oil, Pam Original, and Pam Butter are all gluten free. Pam for baking is NOT gluten free, it contains wheat flour.
Hi Mary, I am reading the post and it clearly states PAM Baking spray. There is nowhere that says Pam Cooking Spray in my post or recipe.
Do I have to par bake the crust if I’m making a pumpkin pie?
Hi Marion, you do not need to par bake this crust. Enjoy 🙂
Question-
Can I substitute something else for the egg – trying for a gluten free vegan version?
Hi Shawna, I haven’t tested an egg-free version of this crust recipe. If you do try it, I would love if you could come back and let us know how it turned out.
BEST GF Pie crust ever. Thank you for working so hard to figure this out for all of us. I definitely will be using this recipe again
I am so glad you loved this pie crust recipe. Thank you so much, Michele!
I’m not sure how old this post is, but I just found it. I have never made a piecrust from scratch in my life and I’m 53. But we have some gluten sensitivities in my home and I thought I would give it a try. I have been buying store-bought gluten-free piecrust. I cannot believe how simple and easy this recipe was and how incredibly delicious this piecrust tasted. I really didn’t expect it to taste good, but it was fantastic and I think I may have given up on store-bought pie crust forever.
Hi Amy, This post was originally written, tested, and put on my blog in 2017. I have updated it a few times, as I test other flour blends, etc. I am so glad you took a chance on my recipe, and that you loved how your pie crust turned out. Thank you so much!