If you have been craving that golden, flaky puff pastry but need a version that’s both gluten-free and dairy-free, you are in for a treat. This dairy-free puff pastry bakes up with buttery layers that shatter delicately with each bite. It’s rich, crisp, and surprisingly easy to make at home. With the right dairy-free butter and a few chilling tricks, you can make gorgeous gluten-free pastries, savory tarts, or even a galette.
This post may contain affiliate links. Please read our Disclosure Policy.
(If you are making rough puff for the first time, I do not recommend clicking the Jump to Recipe button. I share a LOT of important tips and photos showing how to make this gluten-free rough puff pastry.)
When I recently released my Gluten-Free Rough Puff Pastry Dough, my readers were so excited. A large portion of them are also dairy-free, and the emails and social media messages started flooding my inbox asking me for a dairy-free version.
After several rounds of testing and tweaking, I finally perfected this dairy-free puff pastry dough that delivers on texture and flavor. This rough puff pastry dough will work in all of my Gluten-Free Pastry and Gluten-Free Turnover recipes. (See below for more delicious recipes using this pastry dough!)
Best Gluten-Free Flour Blends for Dairy-Free Puff Pastry Dough
My Custom Blended Gluten-Free Pastry Flour – I only tested this dairy-free version of my rough puff pastry with my homemade Gluten-Free Pastry Flour gave the best results in both texture and flakiness. It rolls out smoothly and rises well. It is my top recommendation for this dough.
Cup4Cup – I tested my gluten-free rough puff with Cup4Cup. This blend worked in this dairy-free version.
King Arthur Measure for Measure – I tested King Arthur’s Measure for Measure only in my gluten-free version. I expect this blend to also work well in the dairy-free version.
Other Ingredient Notes:
For the full list of ingredients and amounts, please go to the recipe card below.
- Xanthan Gum – Only add this if the blend you choose to use does not contain a binder. Add 3/4 teaspoon.
- Sugar – Use cane sugar. It helps give a golden color to the pastries.
- Salt – Use either sea salt or kosher salt.
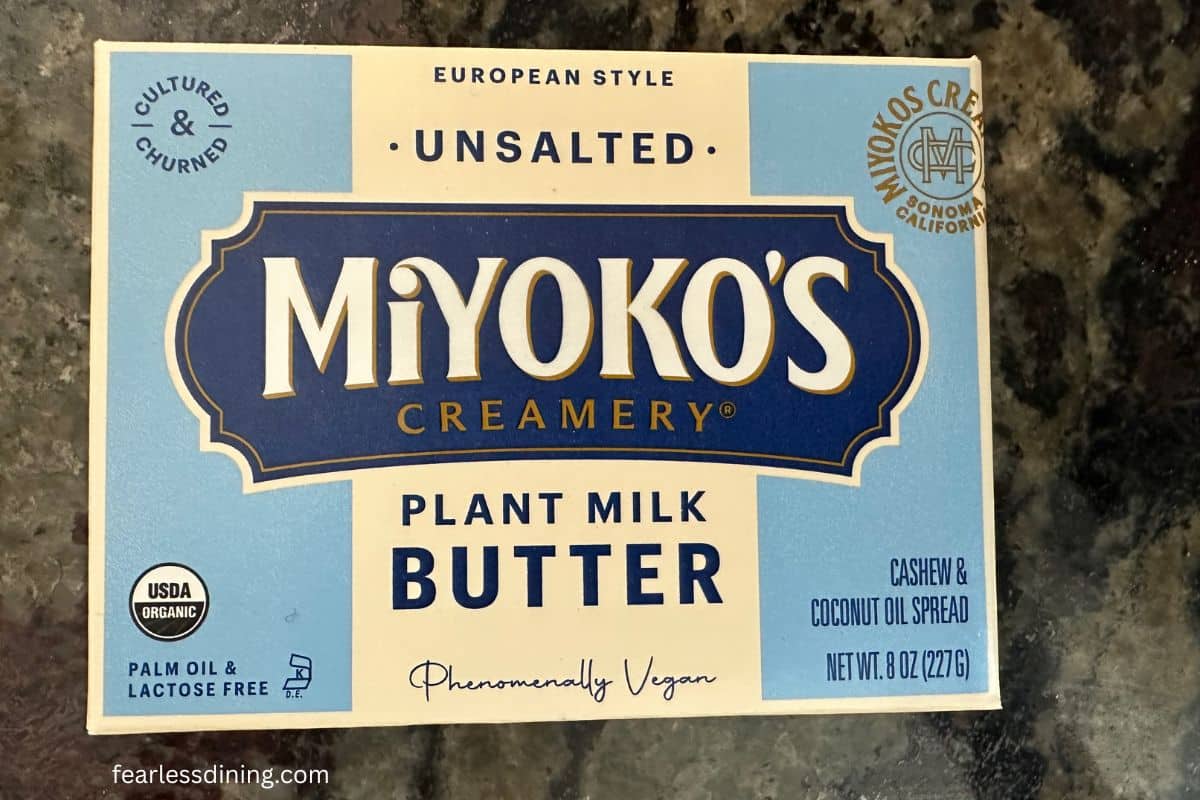
- Dairy-Free Butter – I tested this recipe with Miyokos Dairy-Free Butter because it is extra creamy and mimics European butter. I haven’t tested other brands.
- Water – I recommend COLD filtered water in this recipe to avoid any off-chemical flavors from the water.

A Note From My Kitchen
Temperature control is everything when working with gluten-free, dairy-free puff pastry. The secret to those delicate, shatteringly crisp layers?
Cold ingredients. If your dairy-free butter melts into the dough, you lose the steam pockets that make the pastry rise. I recommend freezing your dairy-free butter for at least an hour before you start.
How to Make Gluten-Free Dairy-Free Puff Pastry (Step-By-Step)
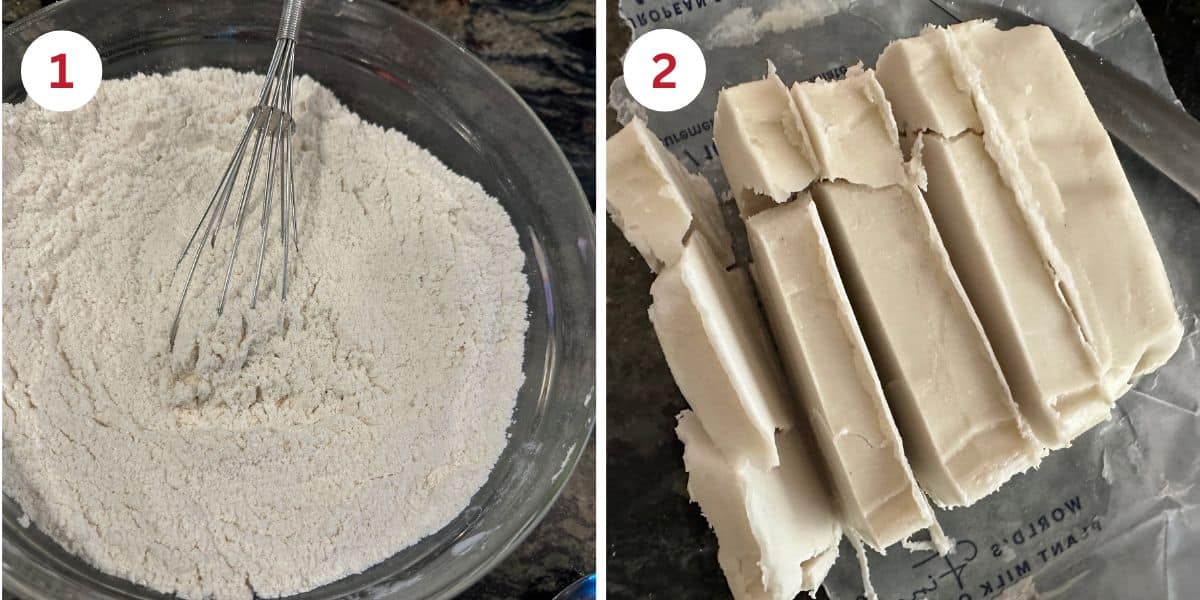
Step 1: In a large bowl, whisk together your gluten-free pastry flour, sugar, and salt. The light flour blend sets the base for a light, flavorful dough.
Step 2: Remove the dairy-free butter from the freezer and chop it into small chunks. You want distinct pieces. These will flatten into layers as you roll and fold the dough.
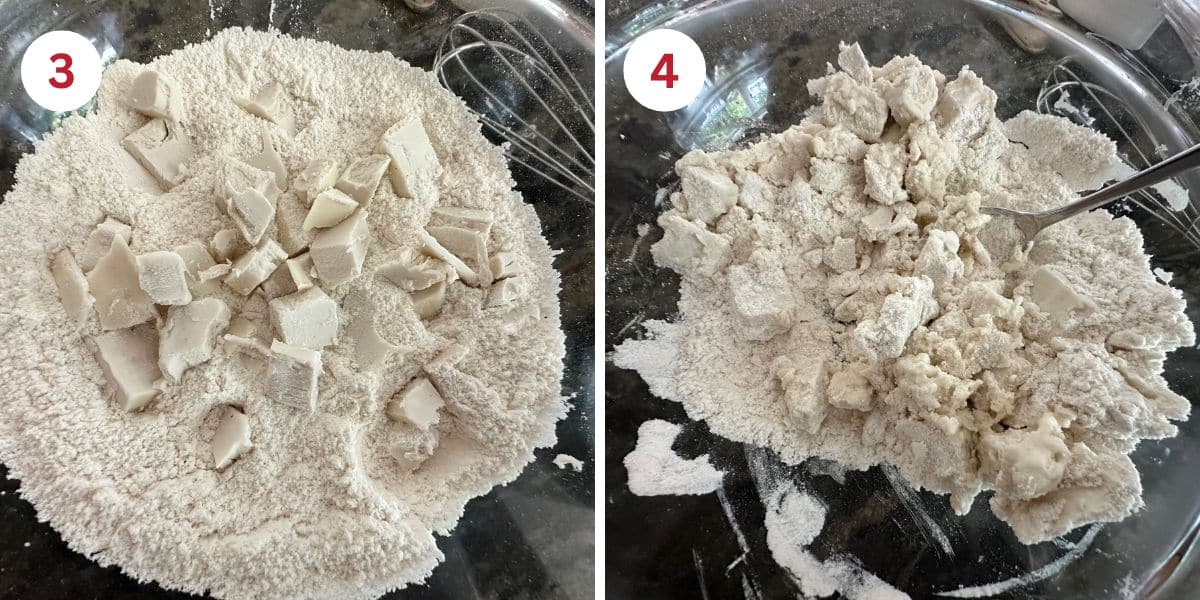
Step 3: Add the butter chunks to the flour mixture and toss gently to coat. Don’t break the butter down too much. You want to see it later in the dough.
Step 4: Slowly drizzle in the cold water, mixing gently with your hands or a spoon. The dough should look shaggy and rough, not smooth. This texture means you’re on the right track for flakiness.
Email This Recipe To Me!
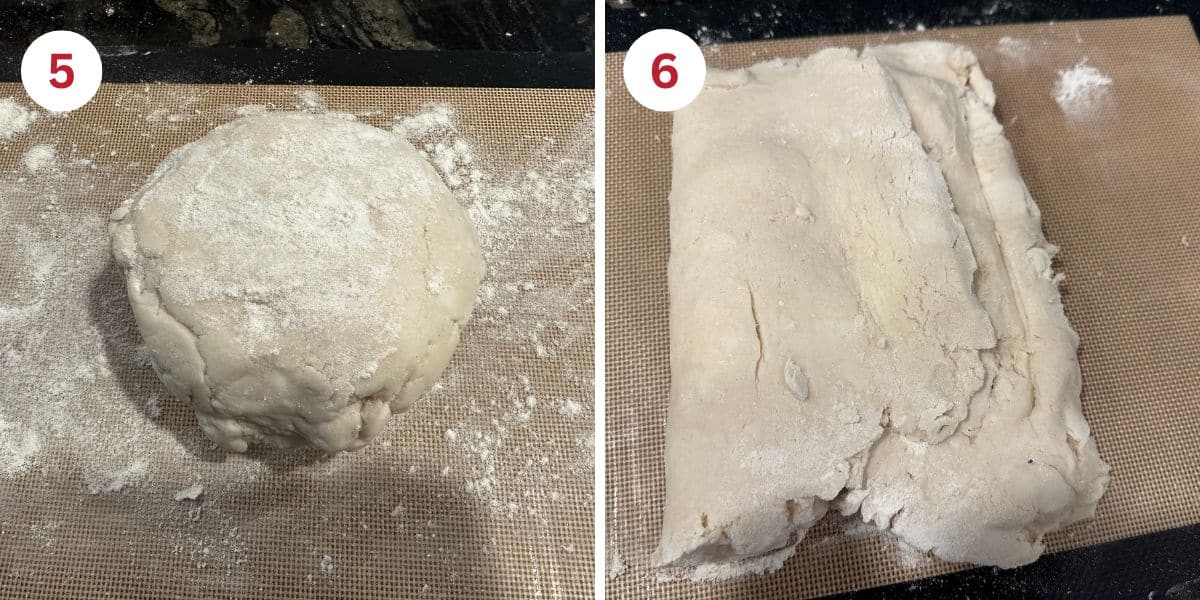
Step 5: Press the shaggy dough into a ball. If needed, lightly dust with gluten-free flour to help it come together. Place the dough on a floured silicone mat set over a freezer gel pack to keep it cool. Pat into a rough rectangle, then wrap it tightly in plastic wrap and refrigerate for 30 to 45 minutes.
👀 Sandi’s TIP: Dairy-free butter does not stay cold as long as butter, so I highly recommend this trick I used. Use a big rectangular freezer gel pack. These are more commonly used for icing injuries, but when placed under a silicone mat, it really keeps your dough cold.
Lamination: Rolling and Folding the Dough
Step 6: Roll the dough in one direction. Dust it with more flour to prevent it from sticking to the rolling pin. Fold the dough over itself on one end, then the other. The first few times you roll the dough, it will be shaggy and loose. That is normal.
Wrap the dough in plastic wrap and place it into the refrigerator to chill for 30 to 45 minutes. Place the gel pack back in the freezer.
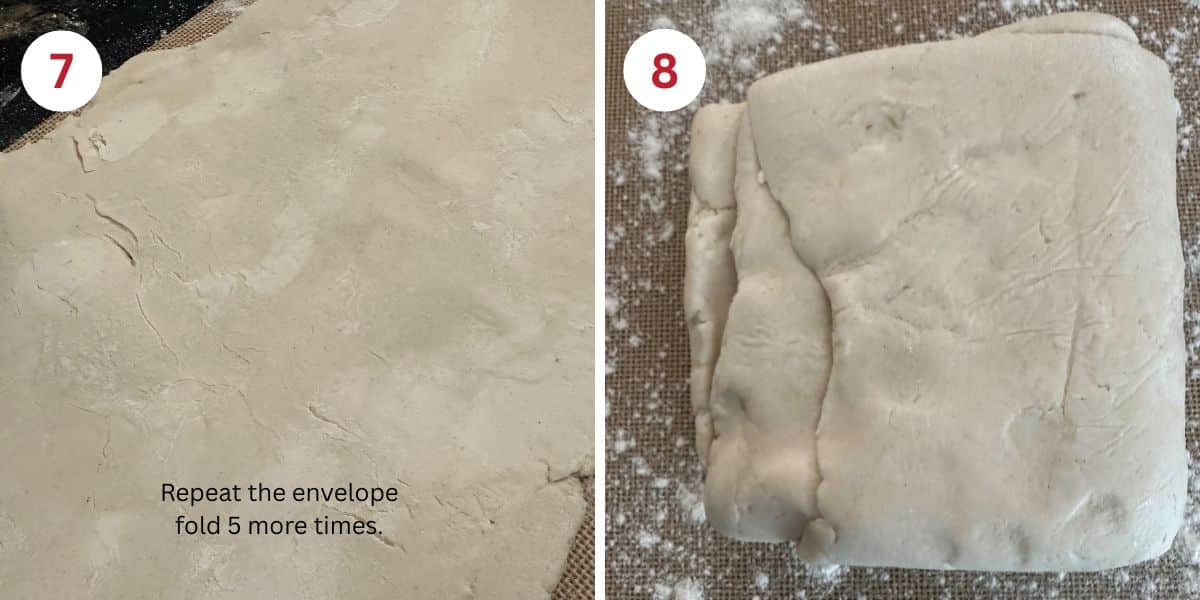
Step 7: Remove the dough from the fridge, place the ice pack under the silicone mat, dust it and the dough with flour, and roll it into a long rectangle. Roll the dough into a long rectangle, about 6×18 inches.
If the edges crack as you roll, press them back together with your fingers. The butter chunks will start to flatten and streak into the dough, and this is what you want, so you get the flaky layers! Always roll the dough in one direction (up and down as pictured above) for the best lamination.
Step 8: Fold the bottom third of the dough up, then fold the top third down over it, just as you would when folding a letter. Wrap and chill again for 30 to 45 minutes.
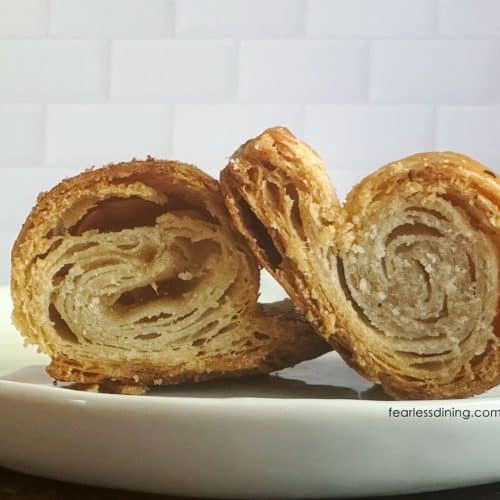
Repeat this roll, fold, chill cycle 5 more times. Each time, your dough becomes smoother, and the layers get more defined.
Dough Rolling Rules:
- Seeing dairy-free butter streaks through the dough is a good sign.
- If you get soft spots, stop rolling the dough immediately, fold it, and chill it in the refrigerator.
- Temperature is everything when working with puff pastry. The dough should feel cold but pliable when you roll it. With dairy-free butter, always have the ice gel pack under the silicone mat.
- You do not have to be perfect with your folds!! Try to keep the dough evenly rolled and consistent in size and width each time. Even imperfect folds will create yummy flaky layers!
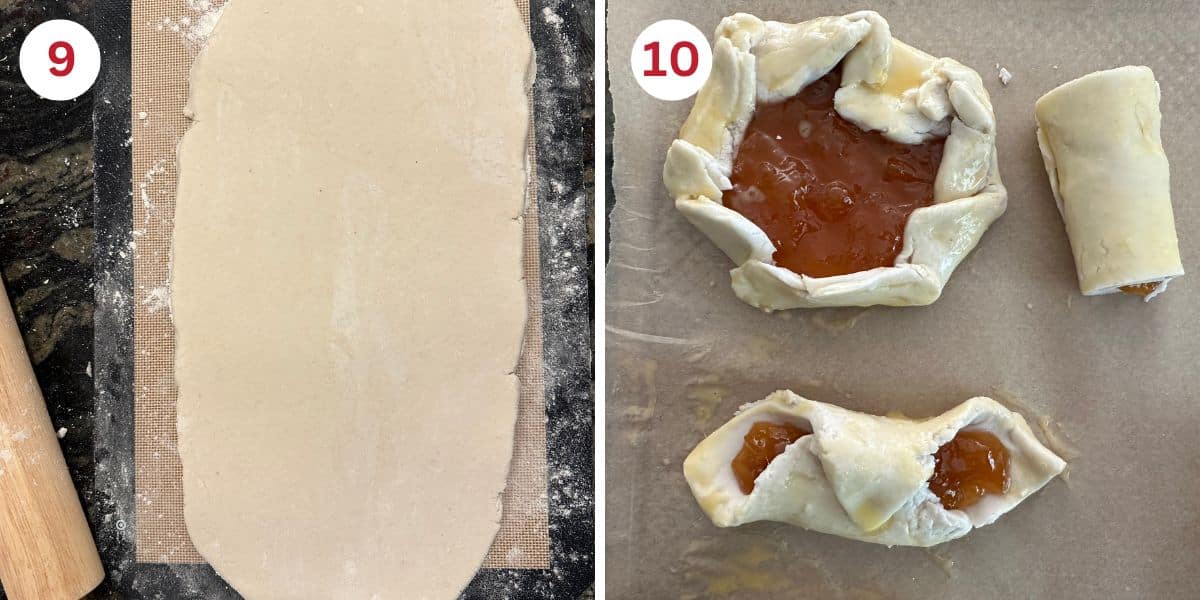
Step 9: You are ready to make pastries! Remove the dough from the refrigerator and roll it one last time. Cut it into any shape of pastry you like.
Step 10: Once your pastries are shaped, freeze them for 15 to 20 minutes. This final chill helps set the layers and keeps the butter from leaking out in the oven. You can also shape pastries and freeze them raw on a tray. Once frozen solid, transfer to a freezer-safe bag. Bake straight from frozen by adding 2 to 3 minutes to the baking time.
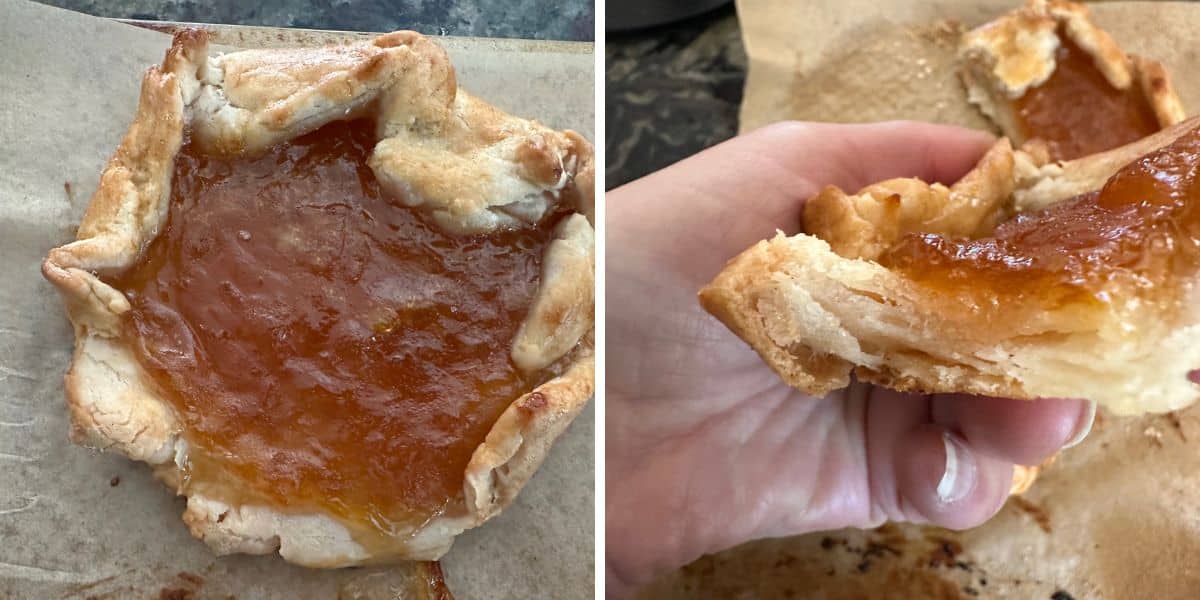
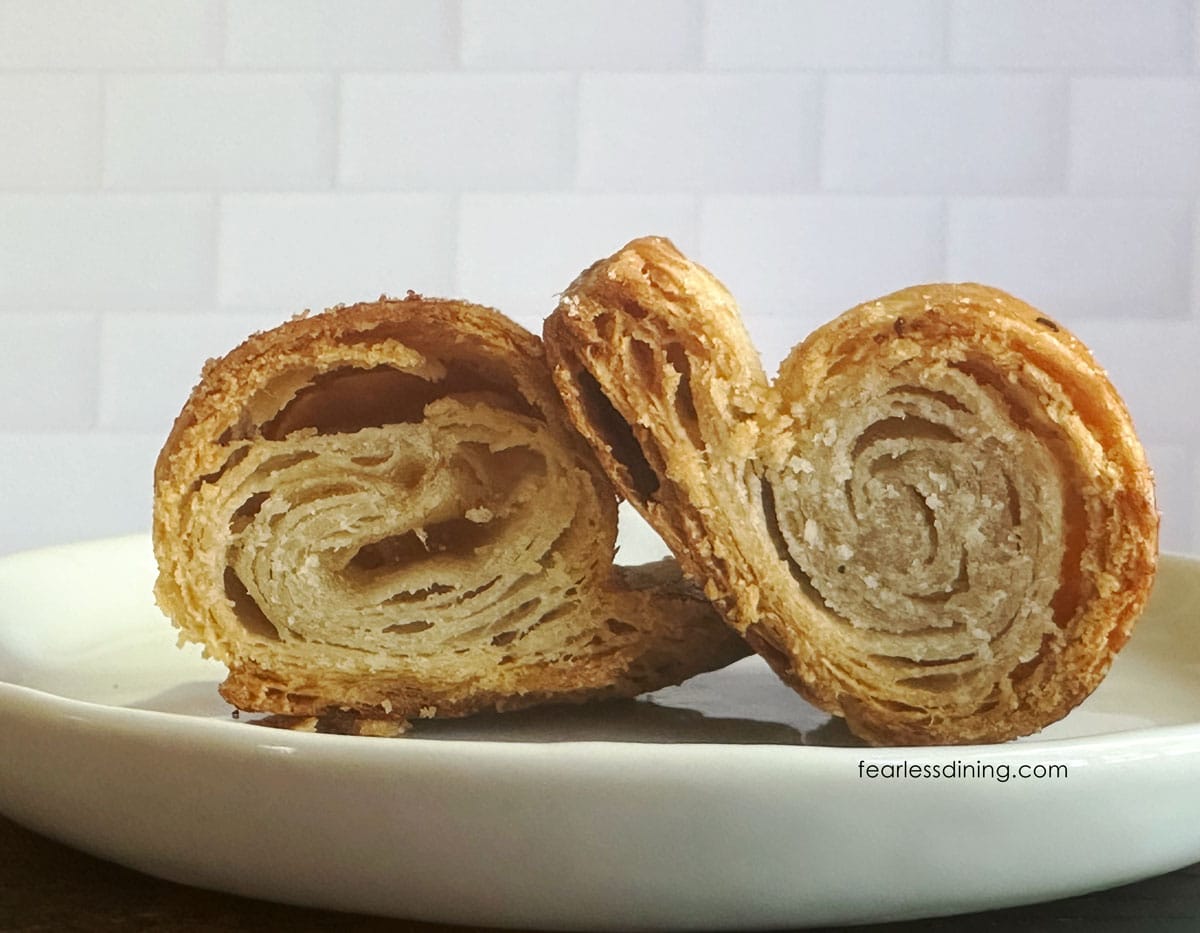
Here is the tart I made. When you cut it, you can see all of the flaky layers. What will you make with this flaky, dairy-free rough puff pastry dough?
Baking the Pastry
All of my pastry recipes have baking directions, but I am including them here in case you are using this rough puff pastry dough to make a different recipe.
- Preheat the oven to 425º F. You want the oven hot to create steam in the butter pockets.
- Place the shaped pastries in the freezer for 15-20 minutes. High heat is best when making rough puff pastries like these turnovers because it helps the butter steam quicker. This will help prevent butter leakage by allowing the butter to steam in the dough pockets and make the flaky layers.
- Brush the pastry with an egg wash (1 egg + 1 tablespoon milk or non-dairy).
- Different shapes will need different times to bake. Bake for 20-25 minutes and look for a golden and flaky crust on top.
- Remove the turnovers from the oven and slide the parchment paper with the turnovers onto a wire cooling rack. I do not recommend eating them hot. The filling is very hot, and the pastries need to cool to set the flaky layers. The layers may be too moist if you cut into them too soon.
Tips for Gluten-Free Dairy-Free Pastry:
- Keep the butter cold at all times. Dairy-free butter softens fast, which can cause your layers to smear instead of laminating. Always work quickly and chill the dough often.
- Make clean cuts. When shaping pastries, use a sharp knife or pastry wheel and press straight down instead of dragging. This helps the pastry puff up instead of sealing the layers shut.
- Freeze before baking. Chill your shaped pastries in the freezer for 15 to 20 minutes before baking. This step helps lock in those flaky layers for maximum puff in the oven.
- Use my freezer gel pack trick! Dairy-free dough gets warm fast. Place a large rectangular freezer gel pack under your silicone mat while rolling. It keeps your dough cool without needing extra trips to the fridge.
Storage/Freezing Tips:
- Store the dough, wrapped in plastic wrap, in a zipper bag or an airtight container. This is important so the dough doesn’t dry out. It will keep fresh for 2 days in the refrigerator.
- You can freeze the fully laminated dough after your final fold. Wrap the dough tightly in plastic wrap and store in a freezer bag for up to 2 months. Thaw it overnight in the fridge before using.
Frequently Asked Questions:
Rolling out the butter in the dough will make this dough sticky in areas. This is why dusting the silicone mat and the top of the dough with gluten-free flour is important. Keep the surface well floured and don’t be afraid to chill the dough more often if it gets too soft.
The pastries will stay flaky, but over time, they can get a little soft from being in an airtight container. I warm my pastries up in my toaster oven to re-crisp them.
This is likely caused by the dairy-free butter becoming too warm or the layers getting sealed. Freeze pastries before baking and don’t press down on seams. (Note, a little butter leaking is okay, but it shouldn’t be a lot.)
Butter likely melted into the dough because the dough was not chilled enough. Cold butter creates the steam pockets and more puffing up.
Likely caused by butter getting too warm or layers getting sealed. Freeze pastries before baking and avoid pressing down on the seams. A little leaking butter is okay, but you do not want a lot of butter melting out.
Ways to Use This Gluten-Free Dairy-Free Puff Pastry
This homemade pastry dough is incredibly versatile. You can use it in both sweet and savory recipes—here are some of my favorite gluten-free and dairy-free pastry ideas:
- Gluten-Free Dairy-Free Pie Crust – Use this dough as a flaky Gluten-Free Pie Crust for pot pies or galettes.
- Gluten-Free Dairy-Free Turnovers – Fill Gluten-Free Turnovers with fruit, dairy-free cream cheese, or even savory fillings like spinach and mushrooms. These Gluten-Free Apple Turnovers are also delicious.
- Gluten-Free Puff Pastry – Top Gluten-Free, Dairy-Free Pastries with sliced fruit, dairy-free custard, or veggies and herbs.
- Mini Dairy-Free Hand Pies – Gluten-Free Hand Pies and Gluten-Free Pop Tarts are perfect for lunchboxes or make-ahead snacks.
- Gluten-Free Dairy-Free Danish – Use a dairy-free cheese to make these Gluten-Free Danish dairy-free with this pastry.
- Savory Pastry Bites – Use leftover dough to wrap sausage or hot dogs, or fill with roasted vegetables and vegan cheese.
Love This Recipe?
💬 Did you make this recipe? Drop a comment below, and let me know how it turned out! ⭐⭐⭐⭐⭐ Please include which flour blend you used. This will help others know this recipe is delicious. Thank you!
Flaky Gluten-Free Dairy-Free Puff Pastry
Equipment
Ingredients
- 2 ½ cups gluten free flour blend * see notes!
- ¼ cup cane sugar
- ¼ teaspoon salt
- 13 tablespoons frozen dairy-free butter I tested Miyoko's only
- ¾ cup COLD purified water add 1-2 TBSP as needed
Instructions
- In a large bowl, whisk together your 2 1/2 cups gluten free flour blend, 1/4 cup cane sugar, and 1/4 teaspoon salt. (*If your blend does not contain a binder, add 3/4 teaspoon of xanthan gum!)
- Remove the 13 tablespoons frozen dairy-free butter from the freezer and chop it into small chunks. You want distinct pieces. These will flatten into layers as you roll and fold the dough.
- Add the butter chunks to the flour mixture and toss gently to coat. Don’t break the butter down too much. You want to see it later in the dough.
- Slowly drizzle in the 3/4 cup COLD purified water, mixing gently with your hands or a spoon. The dough should look shaggy and rough, not smooth. This texture means you’re on the right track for flakiness.
- Press the shaggy dough into a ball. If needed, lightly dust with gluten-free flour to help it come together. Place the dough on a floured silicone mat set over a freezer gel pack to keep it cool. Pat into a rough rectangle, then wrap it tightly in plastic wrap and refrigerate for 30 to 45 minutes.
- Sandi's Note: Dairy-free butter does not seem to stay cold as long as butter, so I highly recommend this trick: Use a big rectangular freezer gel pack. These are more commonly used for icing injuries, but when placed under a silicone mat, they really keep your dough colder.
- Roll the dough in one direction. Dust it with more flour to prevent it from sticking to the rolling pin. Fold the dough over itself on one end, then the other. The first few times you roll the dough, it will be shaggy and loose. That is normal.
- Wrap the dough in plastic wrap and place it into the refrigerator to chill for 30 to 45 minutes. Place the gel pack back in the freezer.
- Remove the dough from the fridge, place the ice pack under the silicone mat, dust it and the dough with flour, and roll it into a long rectangle. Roll the dough into a long rectangle, about 6×18 inches.
- If the edges crack as you roll, press them back together with your fingers. The butter chunks will start to flatten and streak into the dough; this is what you want, so you get the flaky layers! Always roll the dough in one direction (up and down) for the best lamination.
- Fold the bottom third of the dough up, then fold the top third down over it, just like folding a letter. Wrap and chill again for 30 to 45 minutes.
- Repeat this roll, fold, chill cycle 5 more times. Each time, your dough becomes smoother, and the layers get more defined.
- You are ready to make pastries! Take the dough out of the refrigerator and roll it one last time. Cut it into any shape of pastry you like. See my post for lots of recipes using this pastry dough!
- Once your pastries are shaped, freeze them for 15 to 20 minutes. This final chill helps set the layers and keeps the butter from leaking out in the oven.
- You can also shape pastries and freeze them raw on a tray. Once frozen solid, transfer to a freezer-safe bag. Bake straight from frozen. Add 2–3 minutes to the baking time.
Baking Pastry
- Preheat the oven to 425º F. You want the oven hot to create steam in the butter pockets.
- Place the shaped pastries in the freezer for 15 to 20 minutes. High heat is best when making rough puff pastries like these turnovers because it helps the butter steam quicker. This will help prevent butter leakage by allowing the butter to steam in the dough pockets and make the flaky layers.
- Brush the pastry with an egg wash (1 egg plus 1 tablespoon milk or non-dairy).
- Different pastry shapes will need different times to bake. Bake for 20 to 25 minutes and look for a golden and flaky crust on top.
- Remove the pastries from the oven and slide the parchment paper with the turnovers onto a wire cooling rack. I do not recommend eating them hot. The filling is very hot, and the pastries need to cool to set the flaky layers. The layers may be too moist if you cut into them too soon.
Notes
- My Custom Blended Gluten-Free Pastry Flour – I only tested this dairy-free version of my rough puff pastry with my homemade Gluten-Free Pastry Flour gave the best results in both texture and flakiness. I used 334.89 grams
- Cup4Cup – I tested my gluten-free rough puff with Cup4Cup using their older formulation with dried milk powder, which performed well. I haven’t tested their newer formula yet. This blend will work in my dairy-free version. I used 287.19 grams
- King Arthur Measure for Measure – I tested King Arthur’s Measure for Measure only in my gluten-free version. It work well in this dairy-free version. (I didn’t measure this blend.)
- Store the dough, wrapped in plastic wrap, in a zipper bag or an airtight container. This is important so the dough doesn’t dry out. It will keep fresh for 2 days in the refrigerator.
- You can freeze the fully laminated dough after your final fold. Wrap the dough tightly in plastic wrap and store in a freezer bag for up to 2 months. Thaw it overnight in the fridge before using.
Email This Recipe To Me!
SPECIAL NOTE
Please know that every gluten free flour blend has a different starch to grain ratio. If you use a blend I didn’t test, my rule of thumb is to add more flour if your dough or batter is wet and add more liquid if the dough or batter is too dry!
Nutrition
Nutrition Disclaimer
Nutritional information is an estimate provided to you as a courtesy. You should calculate the actual nutritional information with the products and brands you are using with your preferred nutritional calculator.
I truly hope you enjoy this recipe. I have been testing and creating gluten-free recipes for over 15 years. Creating gluten-free recipes that do not taste gluten-free is my goal for every recipe. Sometimes I only have to test a new recipe a couple of times, and others it takes multiple times. I do this so you get reliable, delicious results every time!
