
This Thanksgiving, skip the messy brine bags and complicated prep. I share how a simple dry-brine and a jar of orange marmalade transform a holiday turkey into something incredible. You get skin that turns golden brown, meat that stays juicy, and a citrus-sage roasted flavor that your family keeps talking about. This orange marmalade-glazed turkey is gluten-free, dairy-free, allergen-friendly, and surprisingly budget-friendly.
This post may contain affiliate links. Please read our Disclosure Policy.

Thanksgiving has always been a big deal in our house. I really should say leftovers have always been a big deal in our house. Even when we travel to visit family to celebrate, I still make a turkey and all the fixings. My kids, especially my son, ate turkey for days. I have never blogged about my turkeys because they get eaten so quickly, and I can’t get a good photo.
This year, I decided to grab a turkey early so I could have a roasted turkey on the blog. This turkey became something of a pantry dive recipe. I wanted to keep the cost very low while still getting incredible flavor and a moist turkey.
This time, I decided to test an easy dry brine using pantry staples. There are no brining bags required, and it turned out to be the juiciest turkey I’ve ever made. The star of this year’s turkey is a jar of orange marmalade. It kept this turkey so moist and gave the skin a beautiful golden brown color.
With the economy the way it is right now, a budget turkey recipe was really important for me to create. The jar of marmalade costs only $1.99, and the other ingredients are similarly inexpensive. I have a lot of delicious gluten-free budget recipes for every meal on my blog, as well as lots of gluten-free budgeting tips.
Check out all of my easy Gluten-Free Thanksgiving recipes and find a new favorite. Serve with these classic Gluten-Free Biscuits or my Gluten-Free Honey Rolls.
Ingredient Notes and Easy Swaps:
For the full list of ingredients and amounts, please go to the recipe card below.
- Turkey – I tested this recipe with a 14-pound turkey. Please note that the turkey must be fully thawed to do the dry brine.
- Orange Marmalade – This is the secret to this juicy turkey recipe.
- Fresh Sage – Fresh sage adds much more flavor than dried sage, but if you can’t find fresh, use dried.
- Garlic Powder – You can use 2 freshly minced garlic cloves if you prefer, but garlic powder worked very well.
- Low Sodium Chicken Broth – Since this turkey is dry-brined, it is important to use low-sodium chicken broth.
- Kosher Salt – Dry brining a turkey uses coarse kosher salt. Try not to use sea salt.
- Butter – I used unsalted butter in this recipe.

A Note From My Kitchen
This turkey recipe is very easy to make, but you must be sure your turkey is fully thawed. The secret to keeping this turkey moist is the dry brine salt rub and the orange marmalade sauce. It is really important the dry brine be rubbed under the skin onto the turkey meat. It locks in moisture.
You can use a sharp knife to make a small cut in the skin, and slide under the skin to rub the dry brine. You can see this more clearly in my step by step photos below. If the idea of loosening the skin feels intimidating, just take it slow. The skin is sturdy and will stretch without tearing.
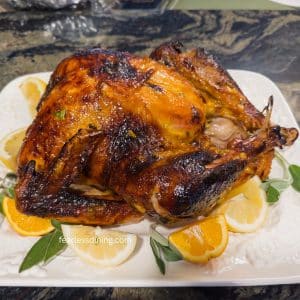
I am really excited about this recipe and I can’t wait to hear what you think. The golden, citrus-glazed turkey roasts up juicy and flavorful, with crisp skin that locks in the buttery orange-sage goodness.
Turkey Thawing Schedule:
- Day 1 (Purchase your turkey): Start thawing the frozen turkey in the refrigerator. A 14-lb turkey falls into roughly the 12 to 16 lb category, which means about 3 to 4 days of thawing. (24 hrs per 4 to 5 lb => For example, a 14 lb turkey will thaw in around 3.5 days)
- Once thawed (on Day 3 in this example), you can keep the turkey in the fridge for up to 1 to 2 more days before cooking.
- Day 4: Begin your 24-hour dry brine.
- Day 5 (next day): Move into roasting-day prep: remove from fridge 45 to 60 minutes before roasting, apply your under-skin orange marmalade rub, and proceed with roasting.
⚠️ Sandi Says: Always put the frozen turkey into a big baking pan with sides. The frozen turkey bag will leak turkey slime and goo, and it is best to have it leak in the pan instead of all over the refrigerator.
How to Make a Dry-Brined Roasted Turkey (Step-By-Step)
It is very important that your turkey be fully thawed before dry-brining it. Please see the above thawing directions. Note, I do not advise cold water bathing the turkey. If you use a cold water bath to thaw the turkey, you can not dry-brine it. Cold water thawing means you have to bake it right away.
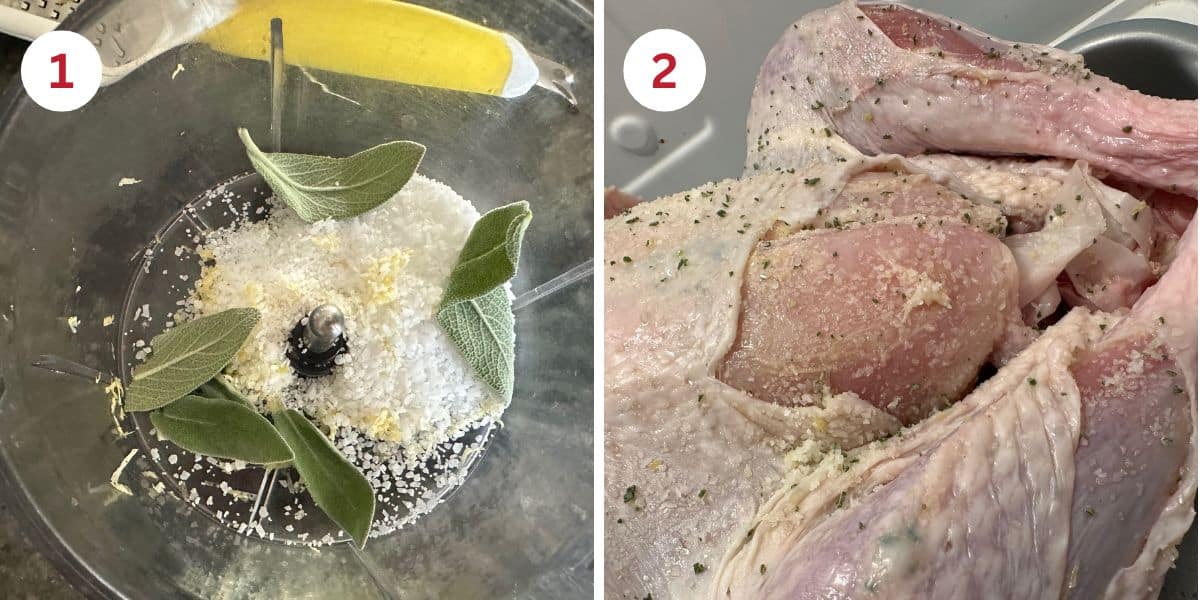
Step 1: Add the kosher salt, sage, and lemon zest to a mini food processor. Grind it until the sage is in tiny pieces, about 30 seconds. Use about 1 tablespoon of kosher salt per 4–5 pounds of turkey.
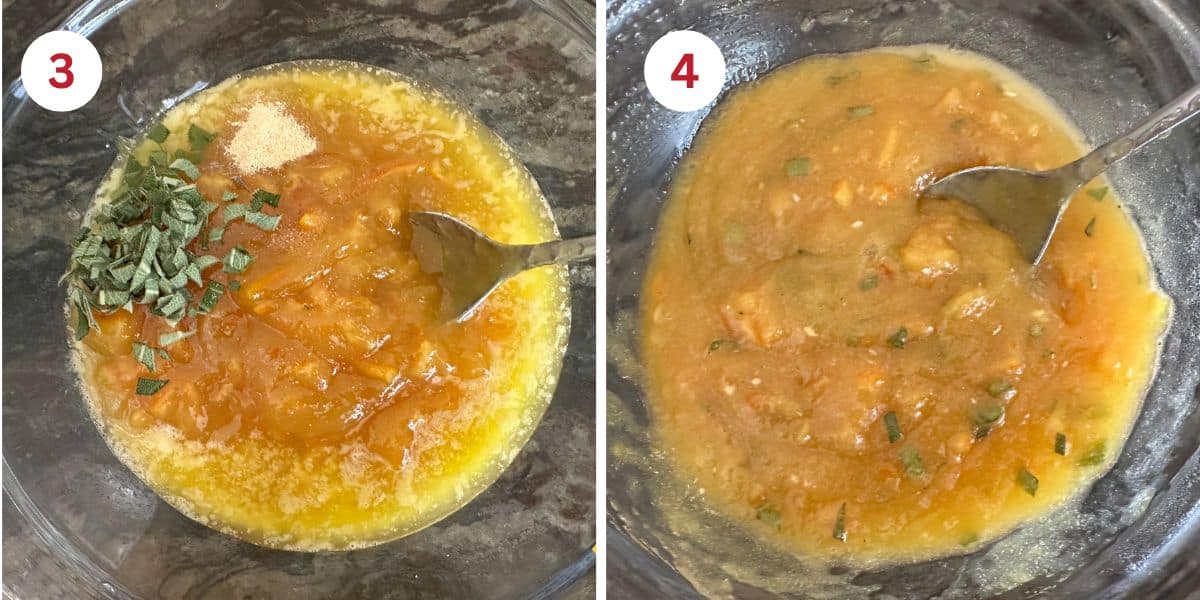
Step 2: Loosen under the skin all around the turkey. Under the breast, legs, and thighs. Use a spoon to drop some salt under the skin and use your hand to rub it all over the turkey meat. It doesn’t have to be a thick coating, just rub it everywhere. Rub the extra seasoned salt mixture over the skin.
👀 Sandi Says: I removed the turkey’s giblets and put them in a container to refrigerate. I later cooked them in the pan drippings and chicken broth to add deeper flavor to the gravy.
Place the turkey back in the pan and place it into the refrigerator, uncovered, for 24 hours. Plastic wrap can make the turkey skin turn out soggy, so don’t use it for the 24-hour refrigeration.
Remove the turkey when the brining time is finished and preheat the oven to 350ºF.
Email This Recipe To Me!
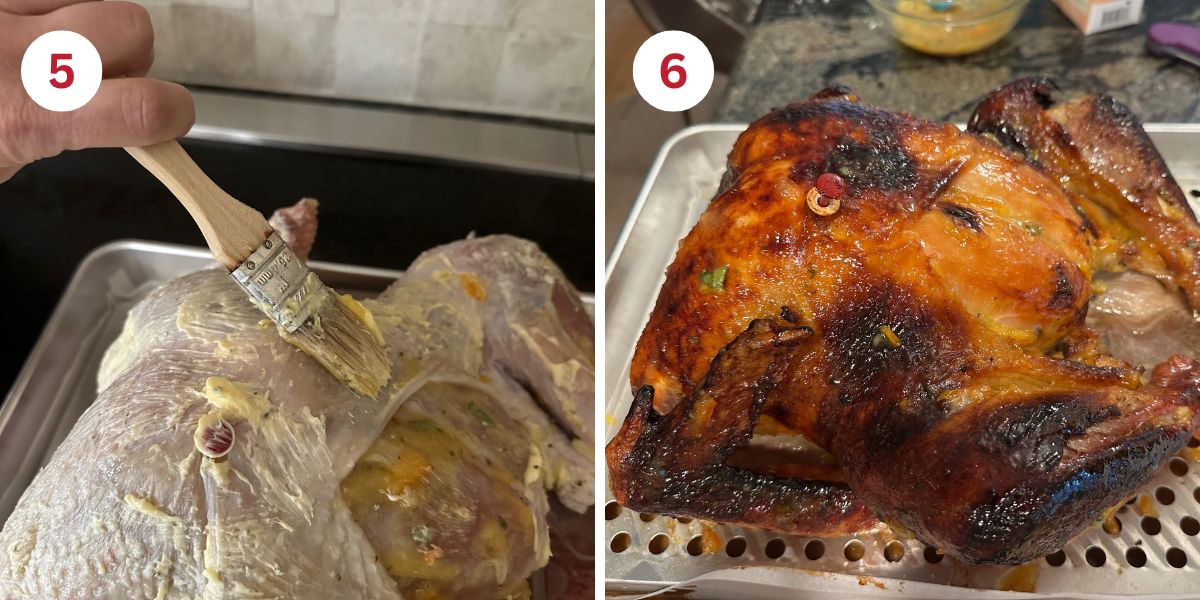
Step 3: Add the melted butter, orange marmalade, garlic powder, and chopped sage to a mixing bowl.
Step 4: Mix well to incorporate all of the melted butter. Divide this marmalade mixture in half and refrigerate half. This refrigerated half will be brushed onto the turkey towards the end of baking to make a glaze.
Use a spoon to add half of the marmalade mixture under the chicken skin. Use your hands to rub and push the marmalade all around under the skin. This helps to lock in moisture as the turkey bakes.
A note about the baking pan: the turkey should be on a rack, so it isn’t sitting in the pan drippings.
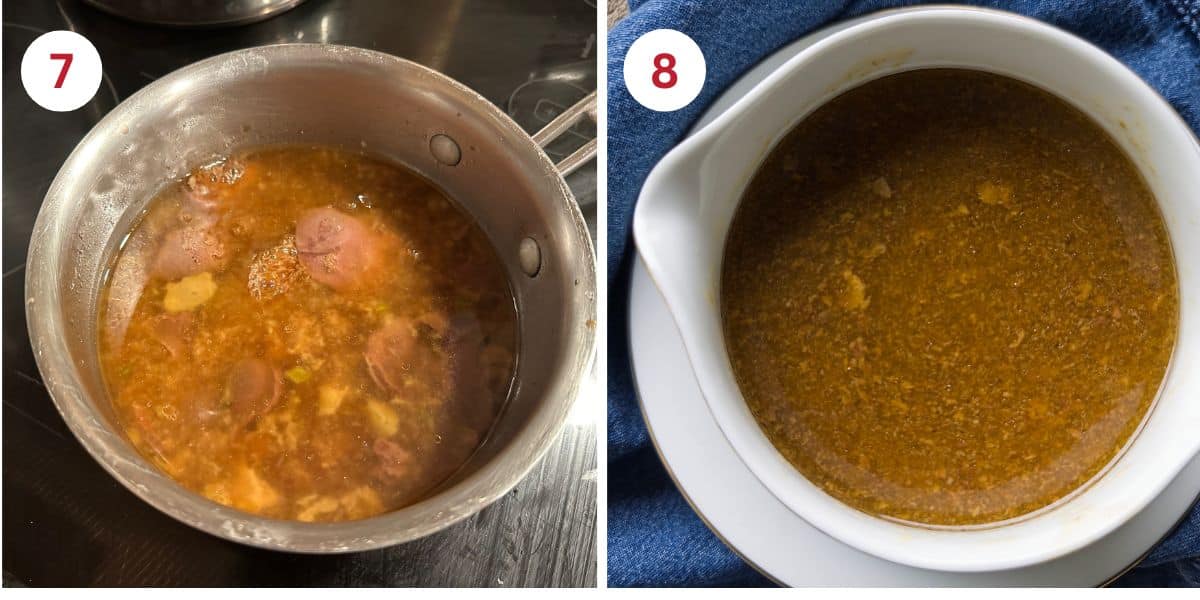
Step 5: Soften the butter and brush it all over the outside of the turkey skin.
NOTE: The sugar in the marmalade will make the turkey brown darker. To prevent browning from happening too early, cover the turkey with foil for the first 2/3 to 3/4 of the baking time.
Add the chicken broth to the bottom of the baking pan.
Step 6: When the turkey’s internal temperature is 150ºF, use a brush to cover the outside of the turkey with the remaining orange marmalade mixture. Return to the oven uncovered.
The turkey is finished baking when the internal temperature is 165°F for the breast, 170–175°F for the thighs. Many turkeys have a plastic button that pops out when the turkey is finished baking.
🍗 Sandi Says: Remove the turkey from the oven and let it rest for 30-45 minutes. Tent it with aluminum foil to keep the heat in. The internal juices redistribute during this time, and carving the turkey too soon will cause the moisture to spill out onto the cutting board instead of staying in the meat.
How to Use Pan Dripping to Make Gravy:
Step 7: While the turkey is resting, pour the pan drippings into a small pot. Add the raw giblets and more low-sodium chicken broth, if needed. Bring to a boil, then turn down the heat to low. Let the giblets cook in the boiling gravy. Cook for 20 minutes.
Remove the cooked giblets and finely dice them. Add them back to the gravy. Use a ladle to add 1/3 cup of hot gravy to a small bowl. Add 1-2 tablespoons of cornstarch and mix into a slurry. It is important to do this to keep the gravy smooth. Pour the slurry into the gravy and mix. Simmer until the gravy thickens.
Serve the turkey with these sides:
If you are looking for some easy Thanksgiving sides to go with this turkey dinner, here are my favorite gluten-free Thanksgiving side dish recipes:
Frequently Asked Questions:
No, do not rinse the turkey. The dry brine helps add a lot of delicious flavor while the turkey bakes.
No, I do not recommend dry brining a partially thawed turkey. The salt won’t penetrate the meat. See my thawing schedule above.
Yes, if your Thanksgiving celebration is small, you can easily dry-brine turkey parts. Reduce the amount of salt to 1/2 teaspoon per turkey pound.
I do not recommend stuffing the turkey before baking if you dry-brine it. The stuffing will turn out too salty.
If you notice the skin browning too fast, make a foil tent and place it over the turkey.
To mellow out the saltiness, add low-sodium chicken or turkey broth or a squeeze of lemon.

More Gluten-Free Thanksgiving Recipes:
- Gluten-Free Pumpkin Cheesecake (Bakery Quality!)
- Easy Gluten-Free Sweet Potato Pie
- The Best Gluten-Free Pie Crust Recipe
- Traditional Gluten-Free Stuffing
- Brown Sugar Cinnamon Carrots
- Stuffed Kobocha Squash (Vegan or Vegetarian!)
Love This Recipe?
💬 I would love to hear how it turned out. Your feedback helps others (and helps me keep improving these recipes for you). ⭐⭐⭐⭐⭐
Dry Brined Roasted Turkey with Orange Marmalade and Sage
Equipment
- roasting pan with rack
Ingredients
- 14 pound turkey Use any size you need.
- 32 ounces low-sodium chicken or turkey broth
- 3 tablespoons unsalted butter softened
Dry Brine
- 3 tablespoons Kosher salt Use 1 TBSP per 4-5 pounds of turkey
- 1 ½ tablespoons fresh sage
- 1 teaspoon lemon zest
Marmalade Mixture:
- 17 ounces orange marmalade
- 4 tablespoons unsalted butter melted
- ½ teaspoon garlic powder or two cloves minced
- 1 tablespoon fresh sage finely chopped
Instructions
Dry Brining:
- Before you start, your turkey must be fully thawed before dry-brining it. Please see the full post for thawing directions.
- Add the kosher salt, sage, and lemon zest to a mini food processor. Grind it until the sage is in tiny pieces, about 30 seconds. Use about 1 tablespoon of kosher salt per 4–5 pounds of turkey.
- Loosen under the skin all around the turkey. Under the breast, legs, and thighs. Use a spoon to drop some salt under the skin and use your hand to rub it all over the turkey meat. It doesn't have to be a thick coating, just rub it everywhere. Rub the extra seasoned salt mixture over the skin.
- Place the turkey back in the pan and place it into the refrigerator, uncovered, for 24 hours. Plastic wrap can make the turkey skin turn out soggy, so don't use it for the 24-hour refrigeration.
Seasoning and Roasting:
- Remove the turkey when the brining time is finished and preheat the oven to 325ºF.
- Add the melted butter, orange marmalade, garlic powder, and chopped sage to a mixing bowl.
- Mix well to incorporate all of the melted butter. Divide this marmalade mixture in half and refrigerate half. This refrigerated half will be brushed onto the turkey towards the end of baking to make a glaze.
- Use a spoon to add half of the marmalade mixture under the chicken skin. Use your hands to rub and push the marmalade all around under the skin. This helps to lock in moisture as the turkey bakes.
- Soften the butter and brush it all over the outside of the turkey skin
- The sugar in the marmalade will make the turkey brown darker. To prevent browning from happening too early, cover the turkey with foil for the first 2/3 to 3/4 of the baking time.
- Add the chicken broth to the bottom of the baking pan. There is no need to baste the turkey since you dry brined it.
- When the turkey's internal temperature is 150ºF, use a brush to cover the outside of the turkey with the remaining orange marmalade mixture. Return to the oven uncovered.
- The turkey is finished baking when the internal temperature is 165°F for the breast, 170–175°F for the thighs. My 14 pound turkey took 3 1/2 hours to bake. Many turkeys have a plastic button that pops out when the turkey is finished baking.
- Remove the turkey from the oven and let it rest for 30-45 minutes. Tent it with aluminum foil to keep the heat in. The internal juices redistribute during this time, and carving the turkey too soon will cause the moisture to spill out onto the cutting board instead of staying in the meat.
Pan Dripping Gravy:
- While the turkey is resting, pour the pan drippings into a small pot. Add the raw giblets and more low-sodium chicken broth, if needed. Bring to a boil, then turn down the heat to low. Let the giblets cook in the boiling gravy. Cook for 20 minutes.
- Remove the cooked giblets and finely dice them. Add them back to the gravy.
- Use a ladle to add 1/3 cup of hot gravy to a small bowl. Add 1-2 tablespoons of cornstarch and mix into a slurry. It is important to do this to keep the gravy smooth. Pour the slurry into the gravy and mix. Simmer until the gravy thickens.
Notes
- Serve hot. See my full post for side dish recommendation and roll recipes to serve with this roasted turkey.
- Store leftovers in an airtight container. It will keep fresh for up to 3 days.
- Freeze leftover turkey you won’t finish within 3 days. I freeze it in either a freezer-safe container or zipper bag.
Email This Recipe To Me!
SPECIAL NOTE
Please know that every gluten free flour blend has a different starch to grain ratio. If you use a blend I didn’t test, my rule of thumb is to add more flour if your dough or batter is wet and add more liquid if the dough or batter is too dry!
Nutrition
Nutrition Disclaimer
Nutritional information is an estimate provided to you as a courtesy. You should calculate the actual nutritional information with the products and brands you are using with your preferred nutritional calculator.
I truly hope you enjoy this recipe. I have been testing and creating gluten-free recipes for over 15 years. Creating gluten-free recipes that do not taste gluten-free is my goal for every recipe. Sometimes I only have to test a new recipe a couple of times, and others it takes multiple times. I do this so you get reliable, delicious results every time!

Super moist turkey–what a treat! Easy to follow recipe w/perfect combination of orange and sage flavors. I have a lime tree, so used lime zest instead of lemon. Guests and family wanted my recipe, so now they will be introduced to your site. Thank you for an easy way to upgrade a traditional baked turkey.
I am so glad you took a chance on my turkey recipe, Emily. I love the idea of using lime, I may try that next year. Thank you so much.
This had just the right amount of orange flavor without being overpowering. My turkey was already brined so I only made the glaze. This was one of the best turkeys that I ever made!
I am so glad you loved this turkey recipe. The glaze holds the juices in, which was a bonus when recipe testing. Thank you, Sue.