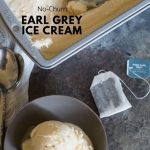
If you are a fan of bold tea flavors and frozen desserts, this no-churn Earl Grey ice cream will become your new favorite. Each scoop is packed with rich flavor and a velvety texture, and the best part is that it is made with just three ingredients. No cooking or churning is required. Whether you prefer traditional or dairy-free, I have tested both versions so you can make this your way.
This post may contain affiliate links. Please read our Disclosure Policy.
Our family recently visited a new ice cream place. It was a small local ice cream shop making interesting small-batch flavors. Sadly, the ice cream shop has closed, so I dedicate this post to its delicious memories. I was hooked by one taste of their creamy Earl Grey ice cream. It had hints of Earl Grey spices and was lightly sweet. I just knew I needed to try to re-create these flavors in a creamy, no-churn recipe.
If you love this easy, no-churn ice cream recipe, you’ll also want to try my Lemon Curd Ice Cream recipe. My kids make this recipe with our Vitamix. (You can also use a high-speed blender.)
Serve this Creamy Earl Grey Tea Ice Cream in these Gluten-Free Ice Cream Tacos.

A Note From My Kitchen
I tested this recipe with both regular and dairy-free ingredients to make sure it would work well either way. After a helpful comment from Marion about using So Delicious’ new dairy-free heavy cream, I tested it alongside coconut condensed milk. Both versions turned out smooth, rich, and scoopable. Whether you’re dairy-free or not, this recipe delivers!
Ingredient Notes and Easy Swaps:
For the full list of ingredients and amounts, please go to the recipe card below.
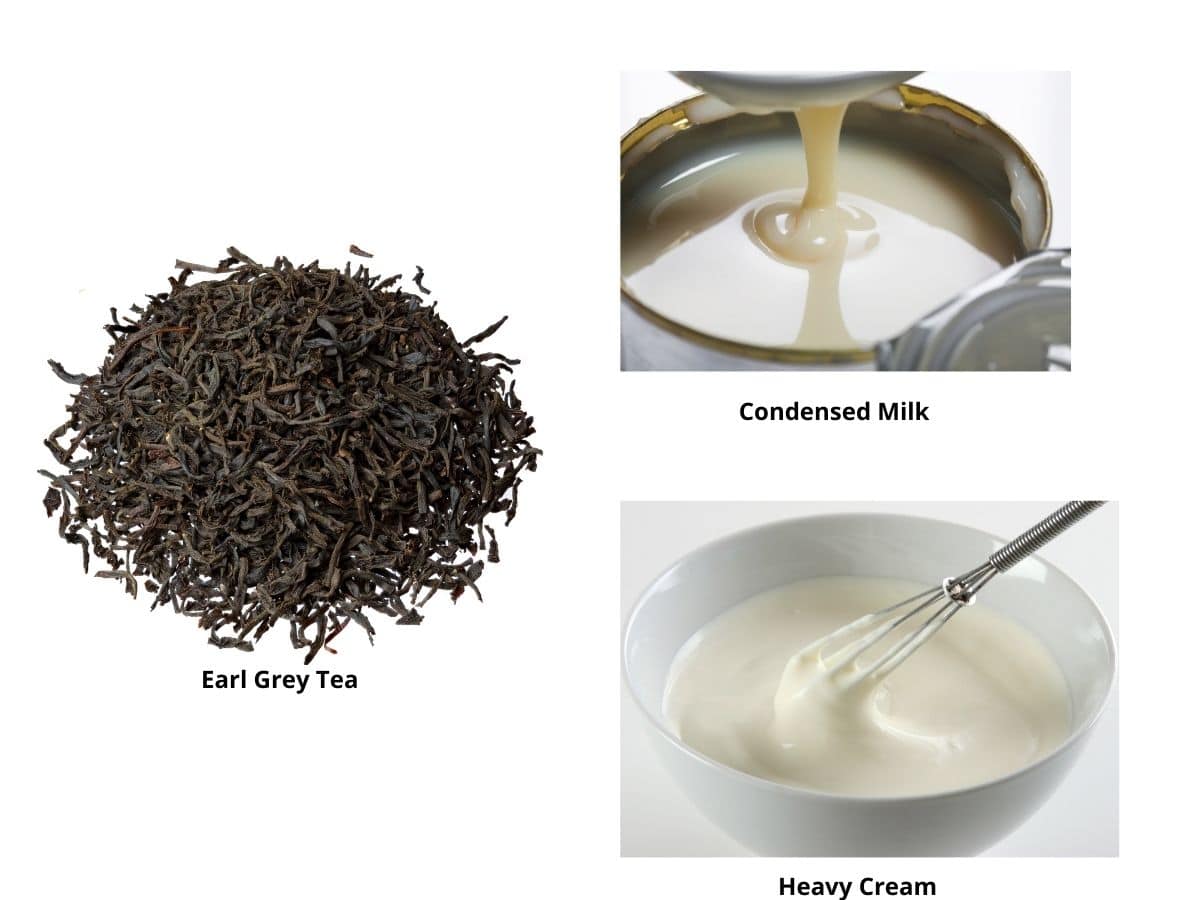
- Earl Grey Tea – Use a high-quality Earl Grey for the best flavor. The stronger the tea, the more fragrant and flavorful your ice cream will be. You can use decaf or regular, depending on your preference.
- Condensed Milk – You need sweetened condensed milk for this recipe (not evaporated milk). Regular or coconut condensed milk both work well and add all the sweetness needed. No extra sugar required!
- Heavy Whipping Cream – Heavy whipping cream gives this recipe its luxurious texture. For a dairy-free version, use So Delicious Dairy-Free Heavy Cream or another high-fat dairy-free alternative that whips well.
Substitutions:
- Make it dairy-free using So Delicious dairy-free heavy cream and coconut condensed milk
- I used condensed coconut milk, but you can substitute regular canned condensed milk if desired.
- You can use regular, caffeinated Earl Grey or decaffeinated.
Email This Recipe To Me!
How To Make Earl Grey Ice Cream (Step-by-Step)
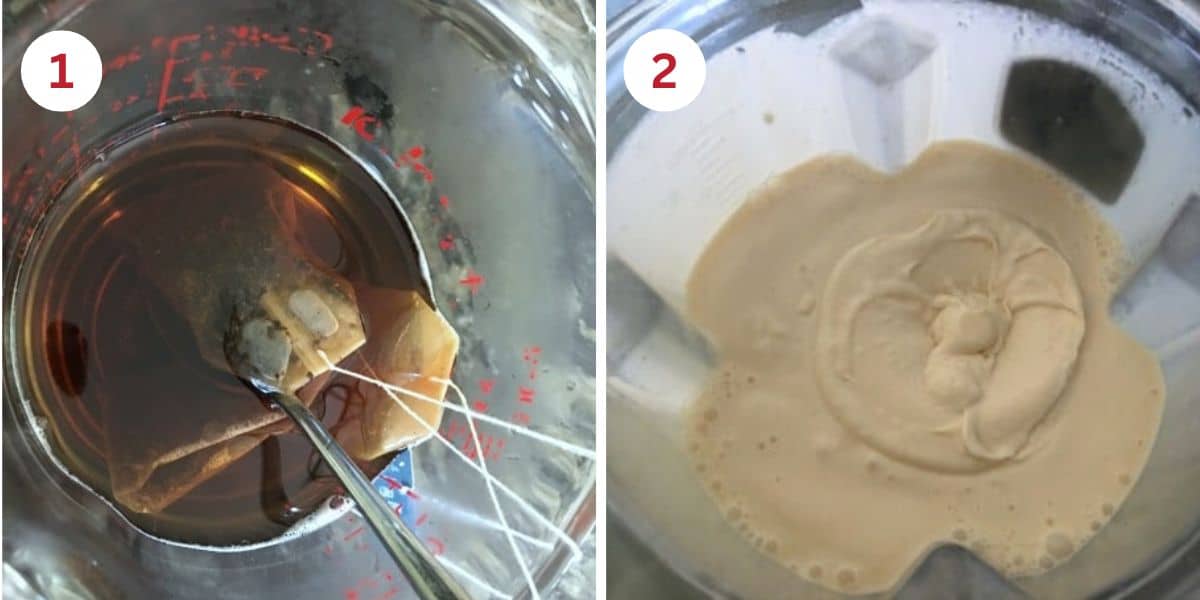
Step 1: Steep three Earl Grey tea bags in a cup of hot water. I steep the tea for at least 10 minutes to get a nice, strong flavor. Cool the tea down so it isn’t hot when you add it to the whipped cream. The stronger the tea, the richer the flavor of the ice cream!
Step 2: Add all of the ingredients into the Vitamix or blender and blend until thick and creamy. As you can see above, the whipping cream helps this no-churn ice cream become really thick and creamy.
One thing I love about this ice cream recipe is that you don’t have to add any extra sugar. The condensed milk provides enough sweetness to make this ice cream perfect.
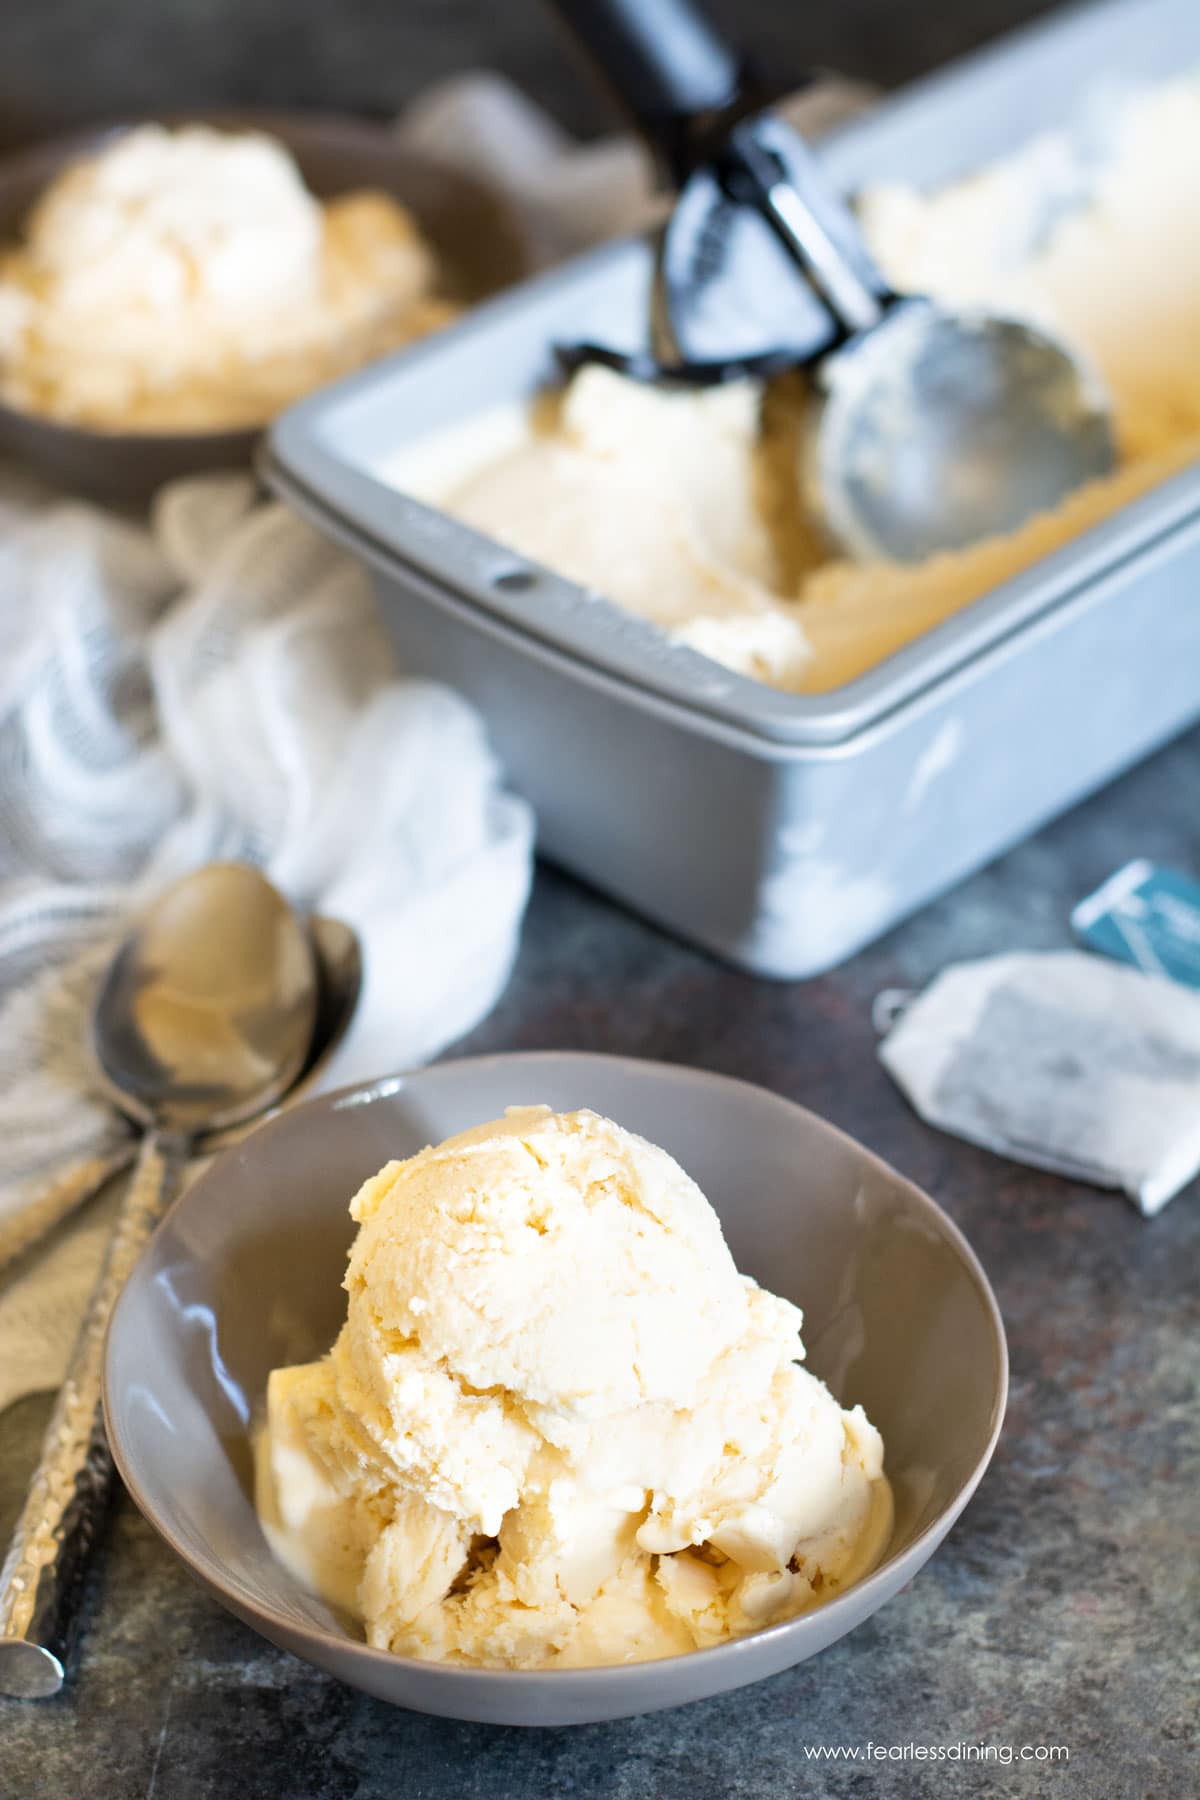
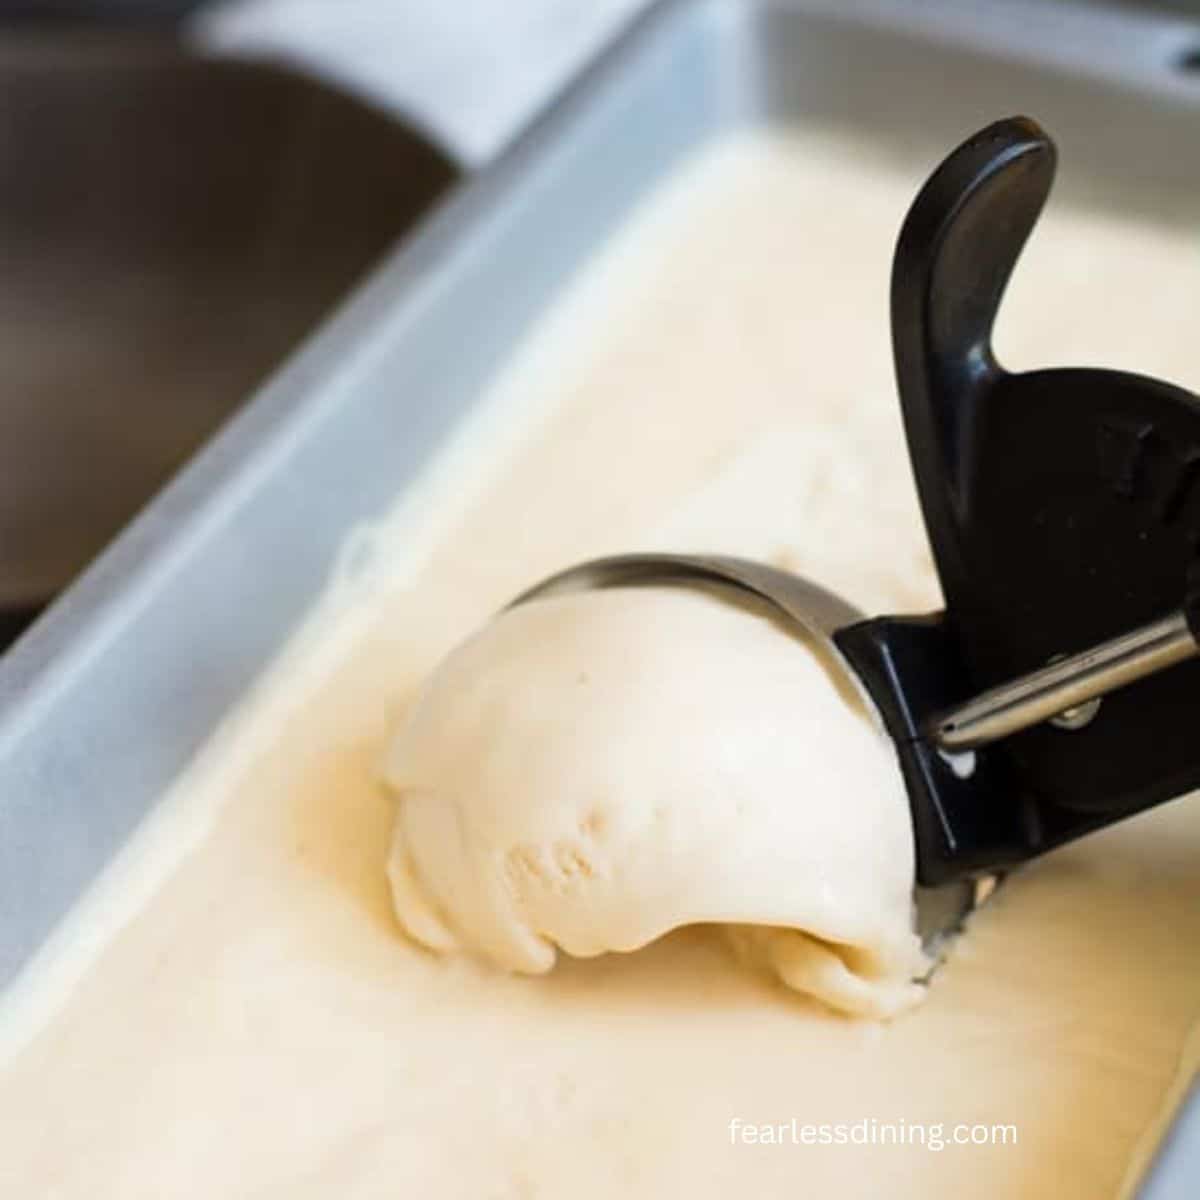
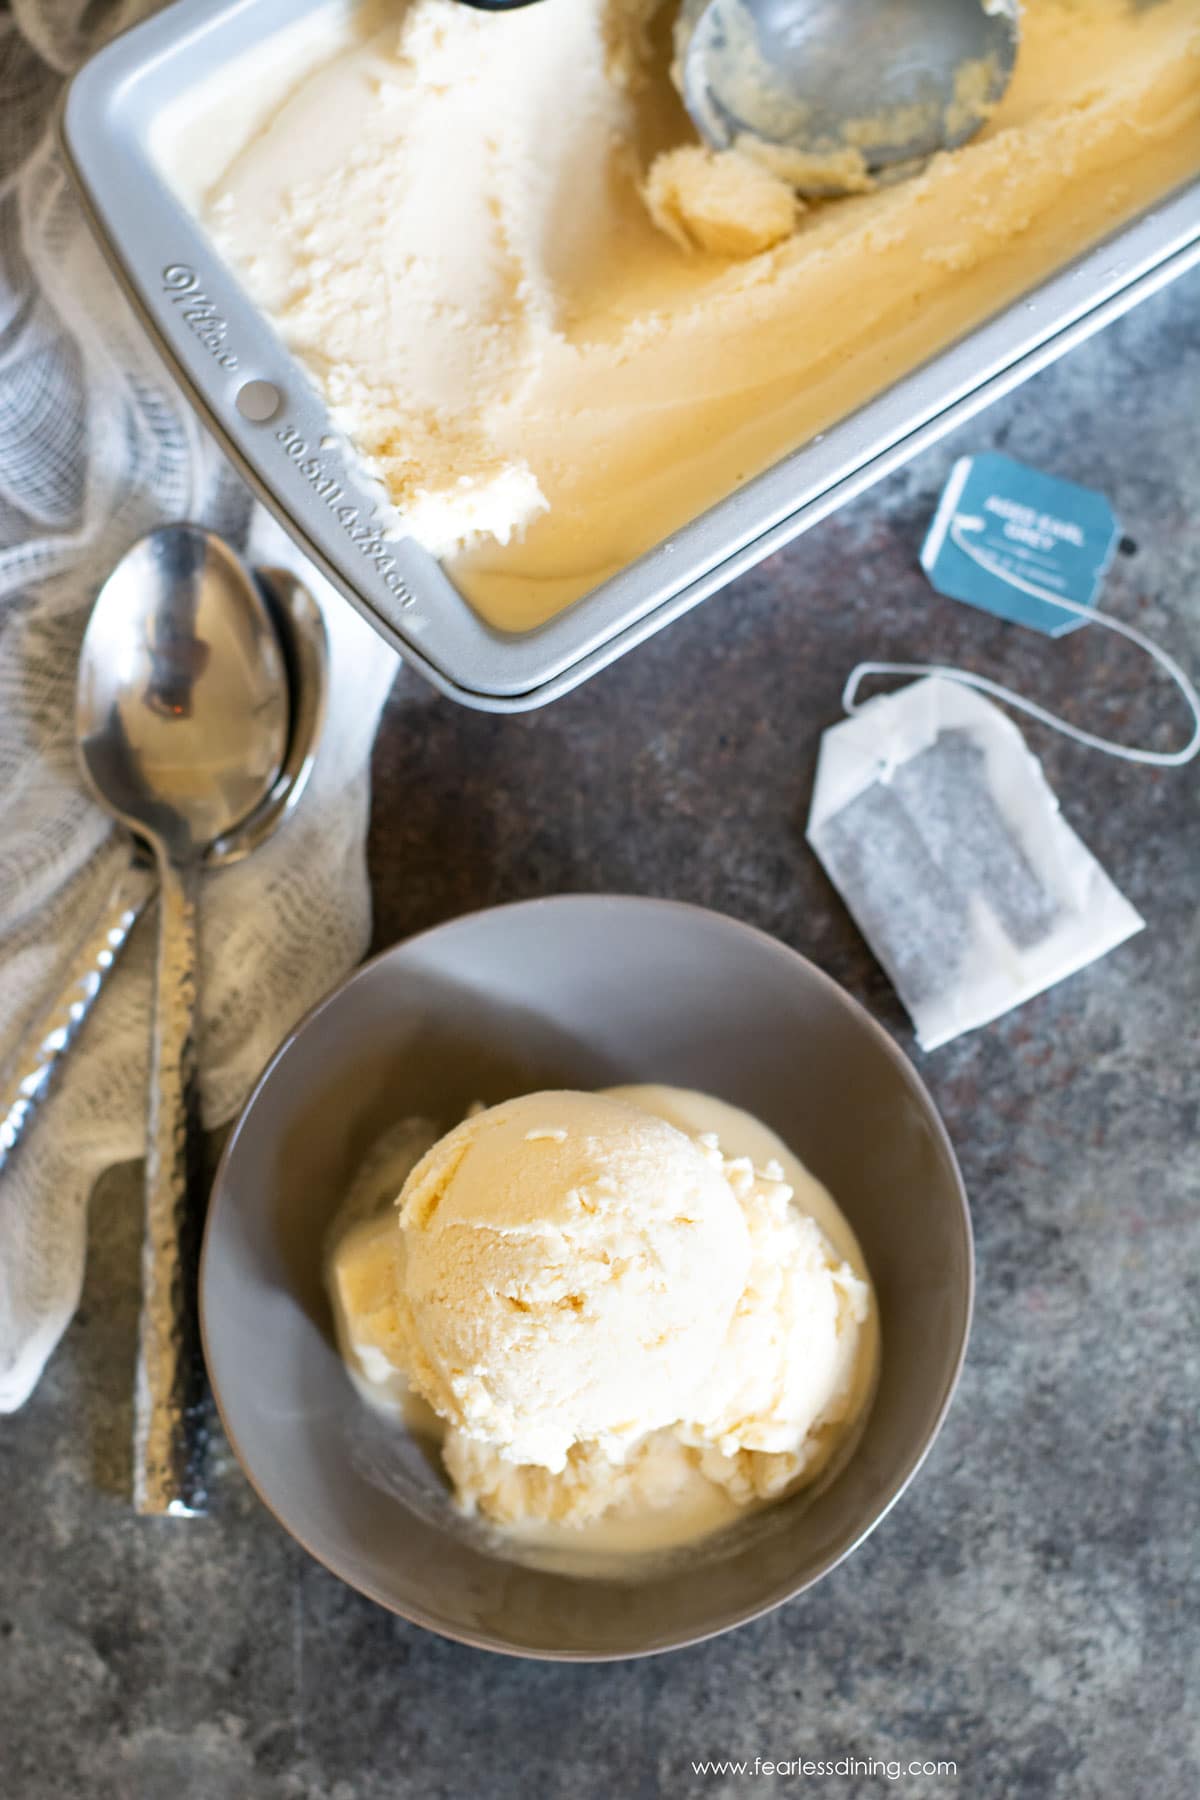
Step 3: Pour the ice cream mixture into a freezer-safe container and cover it with the lid or plastic wrap. Freeze for 3-4 hours. Scoop and enjoy. If you are looking for the ice cream scoop pictured above, I love this easy-release ice cream scoop.
You can serve this 3-ingredient ice cream in gluten free ice cream cones from your local grocery store. I love topping my ice cream with these Cinnamon-Spiced Walnuts, too!
Frequently Asked Questions:
No-churn is ice cream that is not cooked on a stove before freezing. No-churn ice cream is my newest addiction. It fits my criteria of being easy to make, and I consider it my ice cream for when I feel lazy.
Yes! You can steep 1 tablespoon of loose-leaf Earl Grey tea in a reusable tea strainer or cheesecloth pouch.
You can use caffeinated or decaffeinated tea to make this ice cream recipe. Many prefer to use decaf tea if they plan to serve it to their children or enjoy it in the evening/night.
If you store the ice cream in an airtight freezer-safe container, it will last up to 2 months in the freezer.
Make sure your tea is fully cooled before blending, and don’t skip the high-fat cream. Lower-fat options won’t whip up properly and can result in an icy texture.
More Ice Cream Recipes:
If you haven’t made homemade ice cream, here are some easy recipes to help get you started!
- Fresh Vegan Plum Sorbet – Sweet, tart, and so refreshing.
- Pineapple Sorbet – A tropical treat with big flavor.
- Banana Flambe Sundaes – A dramatic dessert for guests!
Love This Earl Grey Ice Cream Recipe?
💬 Did you make this recipe? I would love to hear how it turned out. Your feedback helps others (and helps me keep improving these recipes for you). ⭐⭐⭐⭐⭐
Earl Grey No Churn Ice Cream
Ingredients
- 14 ounces condensed milk * see note
- 1 cup Earl Grey tea * see note
- 2 pints heavy whipping cream * see note
Method
- Steep three Earl Grey tea bags in 1 cup hot water for at least 10 minutes for a strong flavor. Let the tea cool completely before using. The stronger the brew, the bolder the flavor.
- Allow the tea to cool down for 10 minutes.
- Add the cooled tea, sweetened condensed milk, and heavy cream to a high-speed blender or Vitamix. Blend until the mixture becomes thick and creamy, about 30 seconds to 1 minute.
- Pour the mixture into a freezer-safe container. Cover tightly and freeze for 3–4 hours, or until the mixture is firm. Scoop and enjoy!
- Tip: Let it sit at room temperature for 5–10 minutes before scooping if it freezes very hard.
Nutrition
Notes
- Please use heavy whipping cream. Half-and-half will not work in this recipe. I have not tested full-fat coconut milk.
- Use high-grade Earl Grey tea. You really can taste the difference! Use tea bags or loose leaf tea (in a reusable tea strainer).
- You can use either milk-based condensed milk or coconut condensed milk in this recipe. So Delicious and a couple of other brands now make dairy-free heavy cream. I tested So Delicious and it worked great!
- This ice cream will keep in an airtight freezer-safe container for up to 2 months in the freezer.
Private Notes
Tried this recipe?
Let us know how it was!
This post was updated from an old August 2018 post with more recipe details.
I truly hope you enjoy this recipe. I have been testing and creating gluten-free recipes for over 15 years. Creating gluten-free recipes that do not taste gluten-free is my goal for every recipe. Sometimes I only have to test a new recipe a couple of times, and others it takes multiple times. I do this so you get reliable, delicious results every time!

Recipe was good. Mixture tasted delicious but instructions were a bit unclear on how long to blend for. I think I accidentally blended the mixture too much while waiting for it to “thicken”. I now have earl grey flavoured butter. Could entirely be a personal mistake since I maybe didn’t check the mixture enough while blending for the “thick consistency” but I’m just commenting as a warning in case anyone else makes the same mistake. Will try making again more carefully.
Hi Kiki, What blender did you use? There is a big difference in time needed to blend between high speed blenders, like a Vitamix and a regular blender.
Well… I have some criticisms. But first, the flavor of this recipe is great. Not overly sweet, and VERY easy to make in just a blender. However once it fully freezes through (like overnight) it is as hard as a rock and totally unscoopable. Every time I wanted a serving, I had to take it out and wait 10 mins. Even then, it was more like shaving ice. Secondly, the heavy cream leaves a THICK coating of fat on the tongue. I could tolerate it just fine, but ppl with texture issues might wanna give this a miss. I used full dairy everything, so maybe it comes out with vegan milk alternatives like many of the other reviewers here?
That is strange. I am glad you loved the flavor. What did you use to blend the mixture? Maybe it wasn’t whipped enough?
Made this ice cream yesterday. So easy and so delicious! Works really well with all dairy free ingredients too. I used Silk whipping cream and coconut sweetened condensed milk in my stand mixer. Great results!
I am so glad to hear the Silk dairy free whipping cream worked well. I have tried it for whipped cream, but I haven’t tried it in ice cream yet. Thank you!
hi, how can I make this diary free, is there a substitute for heavy whipping cream?
Unfortunately, I have not tested this recipe with a heavy cream substitute.
Hi, thanks for sharing. I was wondering since I am by myself and I’m not much of big eater, if i half the recipe, for 1/2 cup of water can i put 2 tea bags of earl grey tea? my earl grey tea is approximately 38 grams of tea each. what would you recommend? i hope to hear from you. thank you so much. Though I have not tried the recipe, I will give you already 5 stars for it just for taking your time to share this recipe. it is much appreciated.
Hi Tanya, I think halving the recipe will be fine. You can use as much or as little tea as you like. I think two bags would add great flavor for the proportion you are making. Take care, Sandi
Just a note: brew/steeping tea extra-long does nothing to make it stronger. The amount of tea leaves used is what adds to the strength of the tea’s flavor. Brewing/steeping for longer than 3-5 minutes doesn’t make it stronger, it just makes the tea much more astringent and bitter.
So if anyone has trouble with the tea tasting bitter in this recipe, I’d recommend making a stronger brew by using more tea leaves, and steeping no more than 5 minutes, max, to avoid any bitterness.
Hi there. I am attempting to make this recipe but with sweetened condensed cow’s milk rather than coconut. So far it is not going my way. The mixture never thickened up in the Vitamix. I am now freezing the mixture for an hour and will attempt to whip it up again.
Hi Carole, did you use heavy whipping cream? It should pretty much turn to whipped cream in the Vitamix.
Ice cream sounds yummy. I don’t have an ice-cream maker…can i try blender? or would it be too fast a churn that it will destroy it? Keeping recipe safely though…TIA
Hi Shweta, you can definitely use a blender 🙂
Thanks a lot. Will try
Hoping am not posting twice- 1st attempt didn’t seem to work. What a gorgeous recipe, thanks so much for posting. I’d just been looking at recipes for Irish Tea Brack and this popped up. I didn’t even know condensed coconut milk was a thing that existed- haven’t seen it locally yet. Wow. This ice cream would be lovely with Earl Grey (or green tea?) shortbread. Have you seen Alice Medrich’s Blackberry Buttermilk Sherbert? It’s brilliant, like this.
Thank you so much for taking the time to write Jane. I am so glad you like this recipe. I will have to look for the buttermilk sherbert…it sounds heavenly.
Eeeeee would be lovely with Earl Grey shortbread! Lovely recipe, thanks. Also had no idea that condensed coconut milk is a thing. Wow. Have not seen this locally.