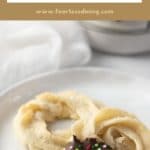

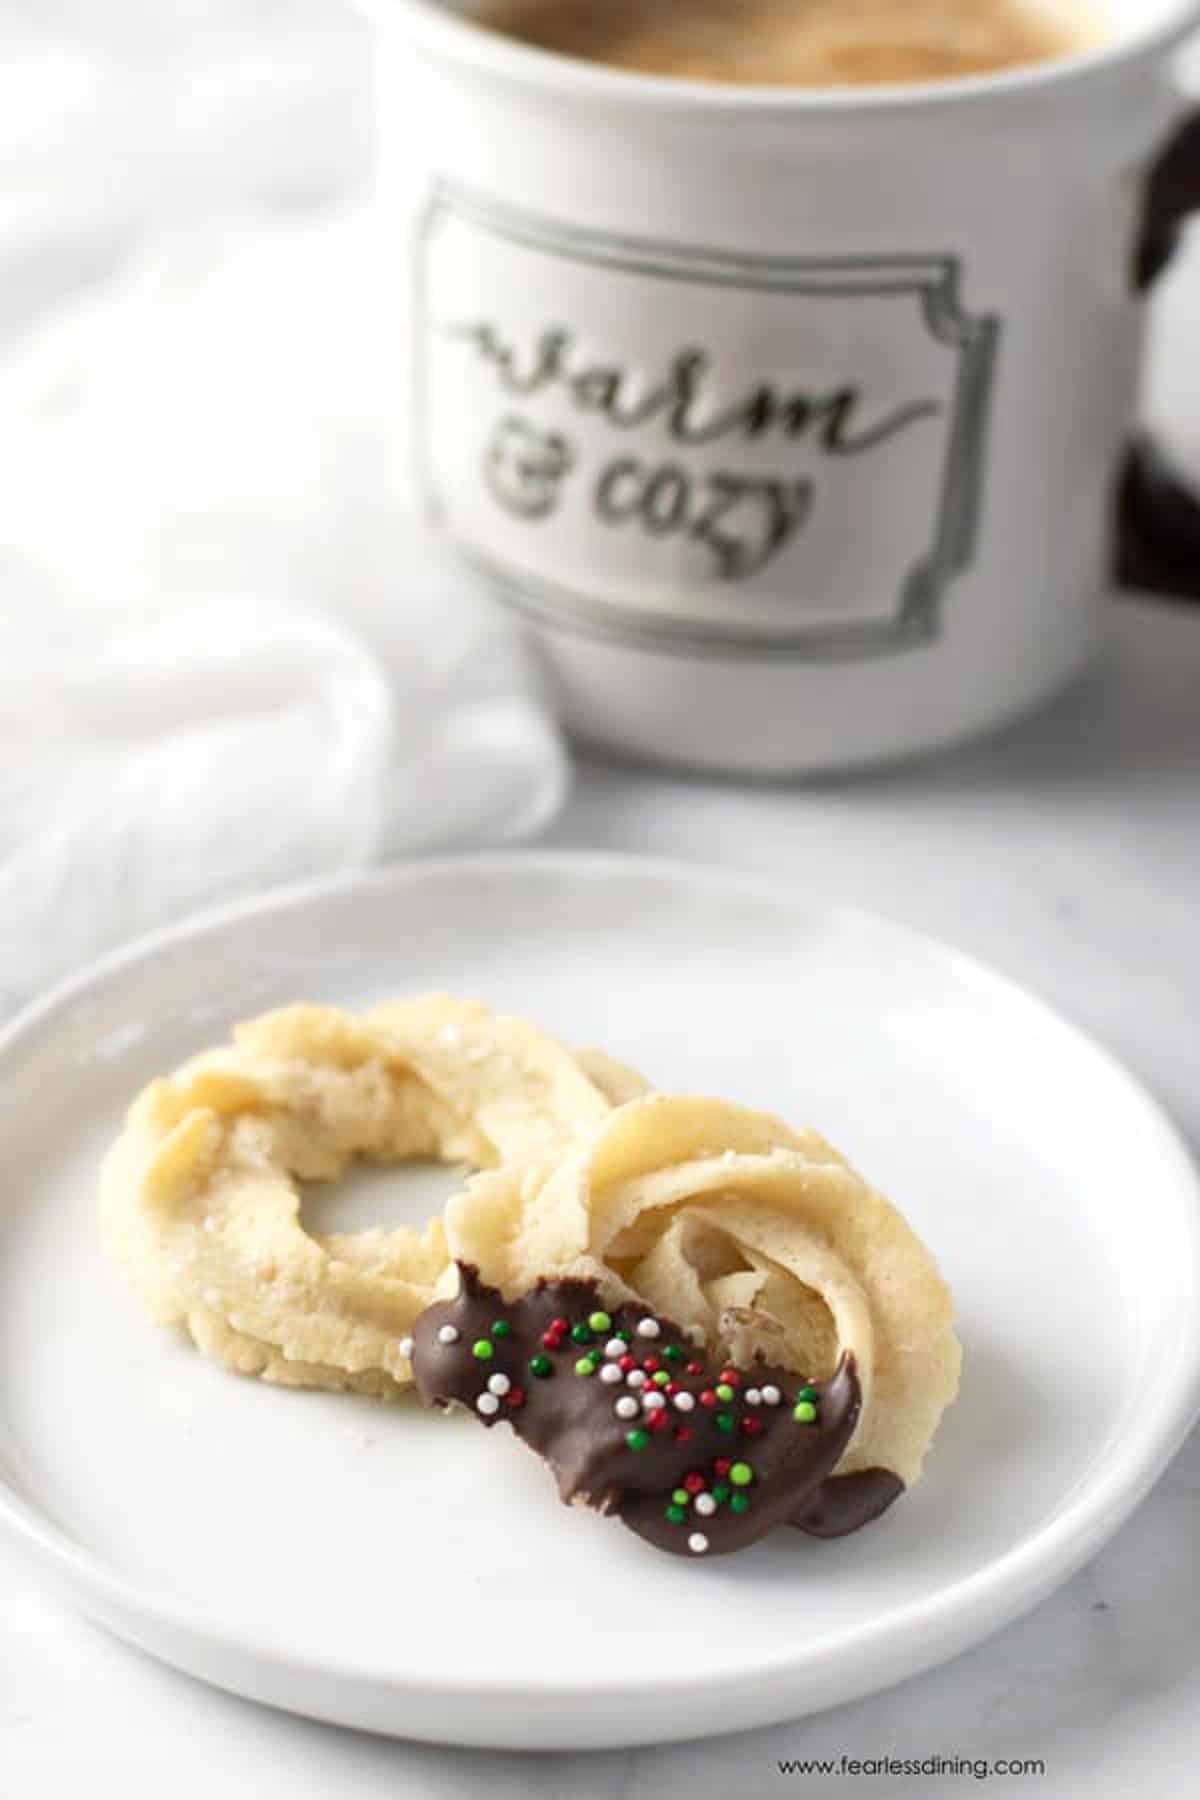
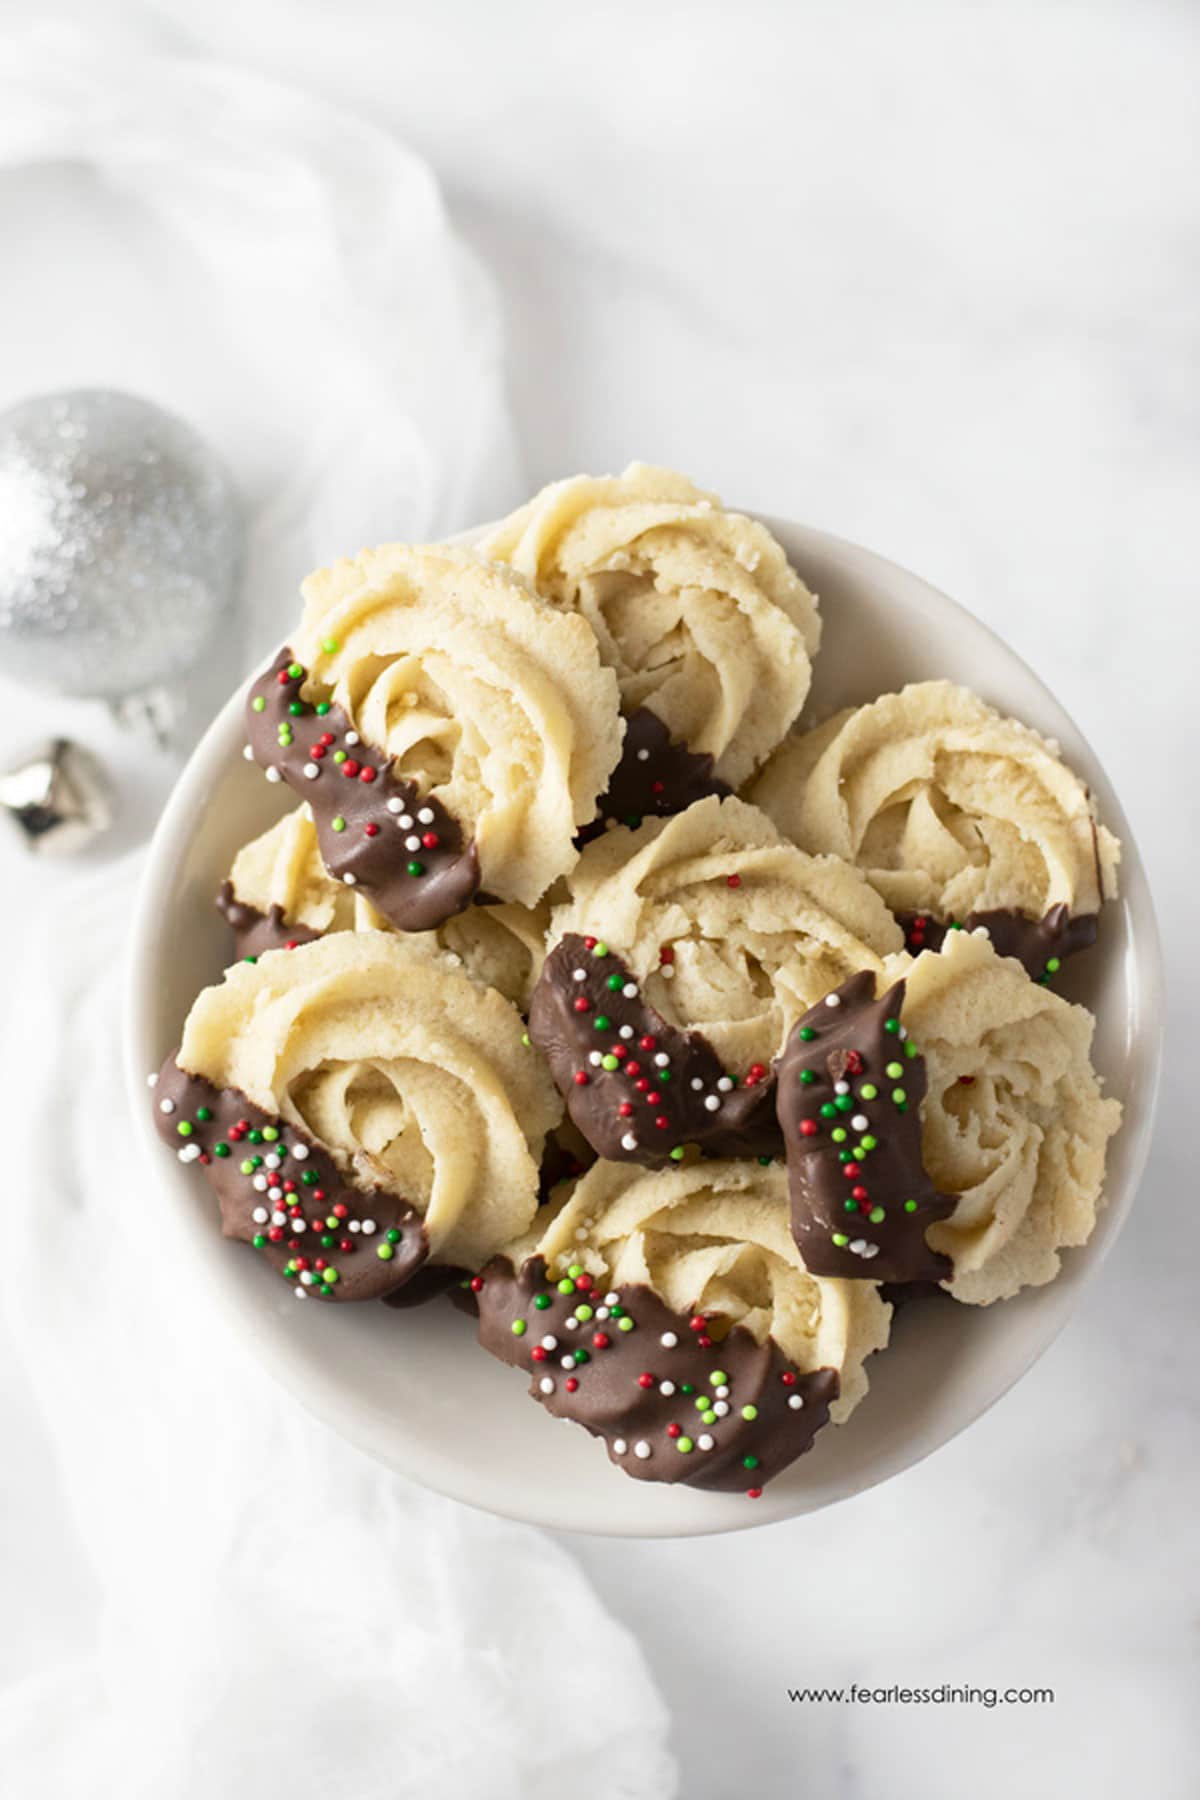
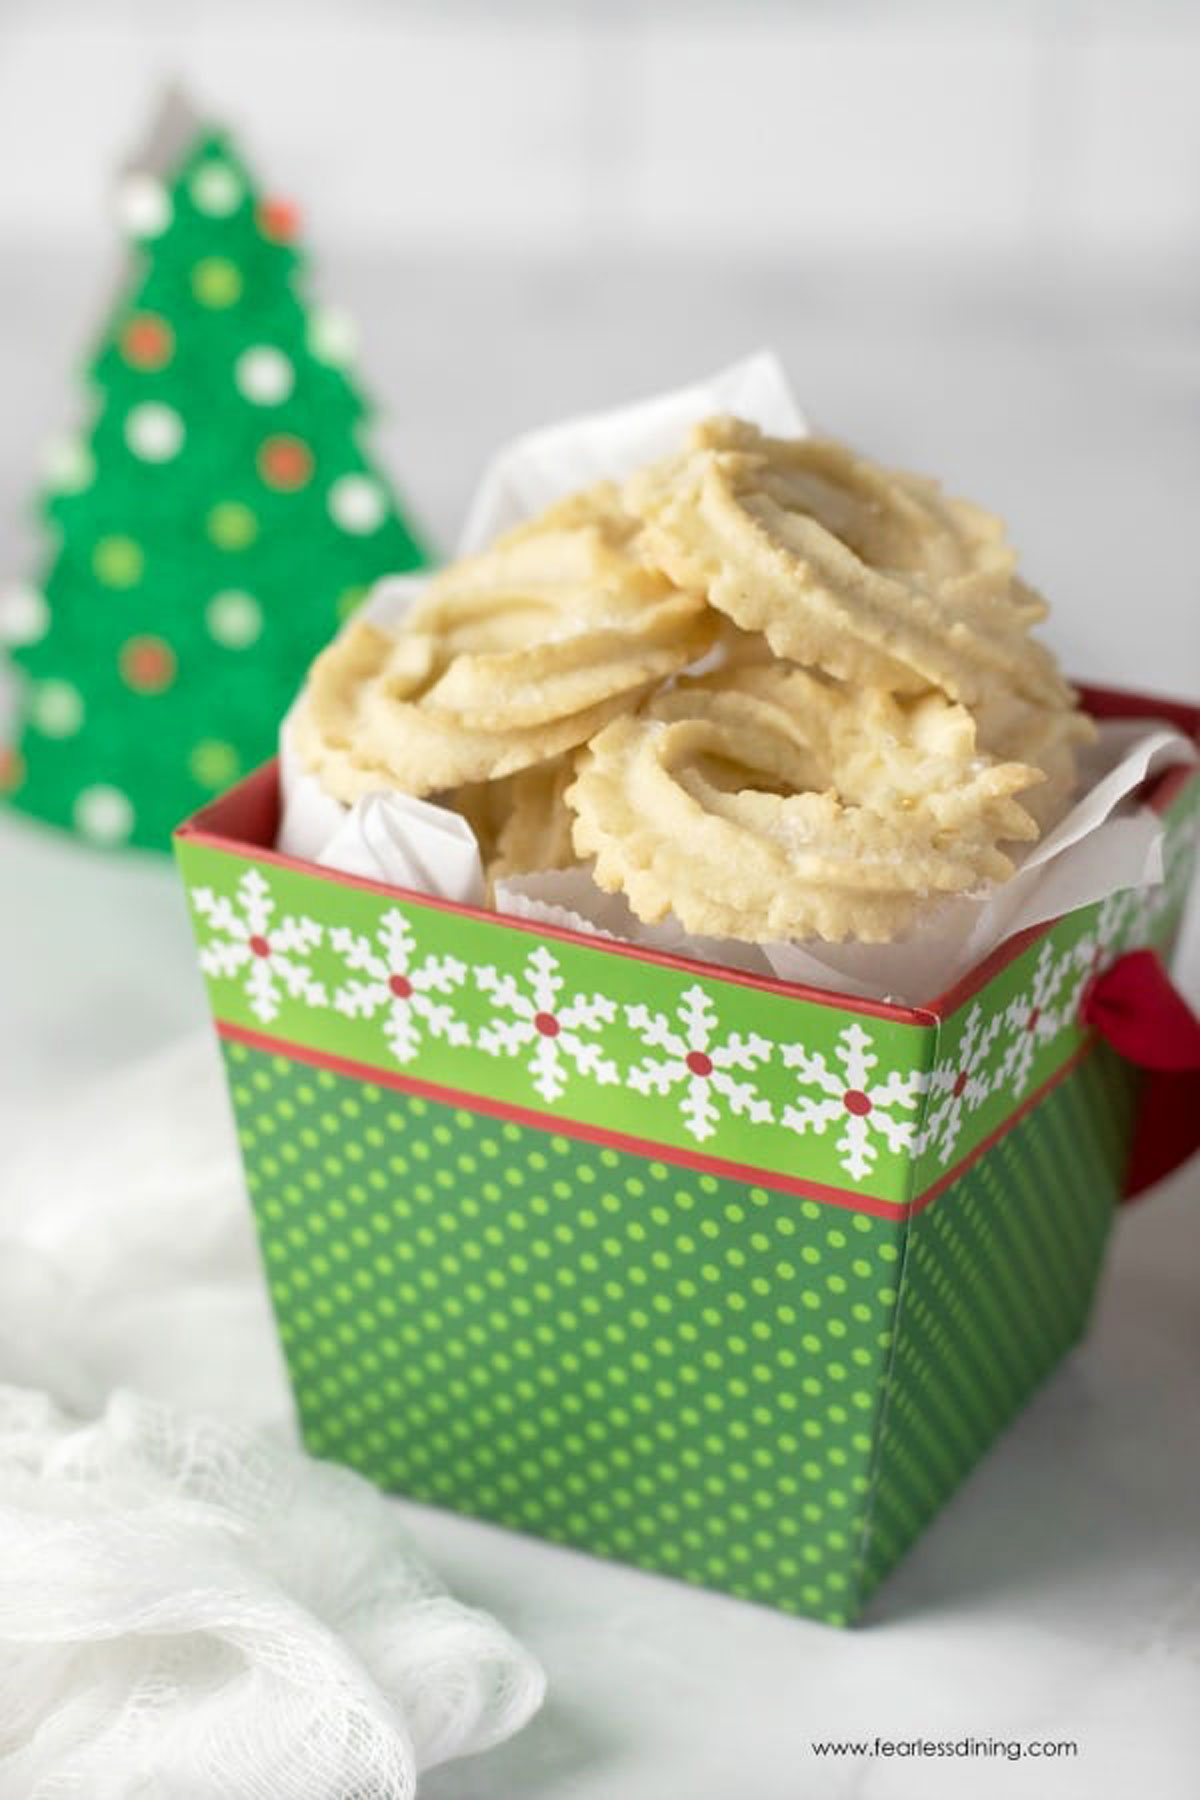
If you’ve missed those buttery Danish sugar cookies from the iconic blue tin, this recipe is for you. These gluten-free butter cookies are crisp on the outside, soft in the middle, and rich with real vanilla flavor. They’re nostalgic, elegant, and easy enough for holiday baking or cookie gifts.
This post may contain affiliate links. Please read our Disclosure Policy.
These cookies were created in partnership with Plugrá® butter, because high-quality butter makes all the difference in flavor and texture.
I’ve been excited to share this recipe with you in time for the holidays. These are the best gluten-free butter cookies!! This is one of our all-time favorite holiday recipes. These tasty cookies taste just like the non-GF Dutch butter cookies we all love. (You know, the ones that are sold in that festive blue tin every holiday season!)
If you are a cookie fanatic like me, you must give some of these gluten-free cookie recipes a try!
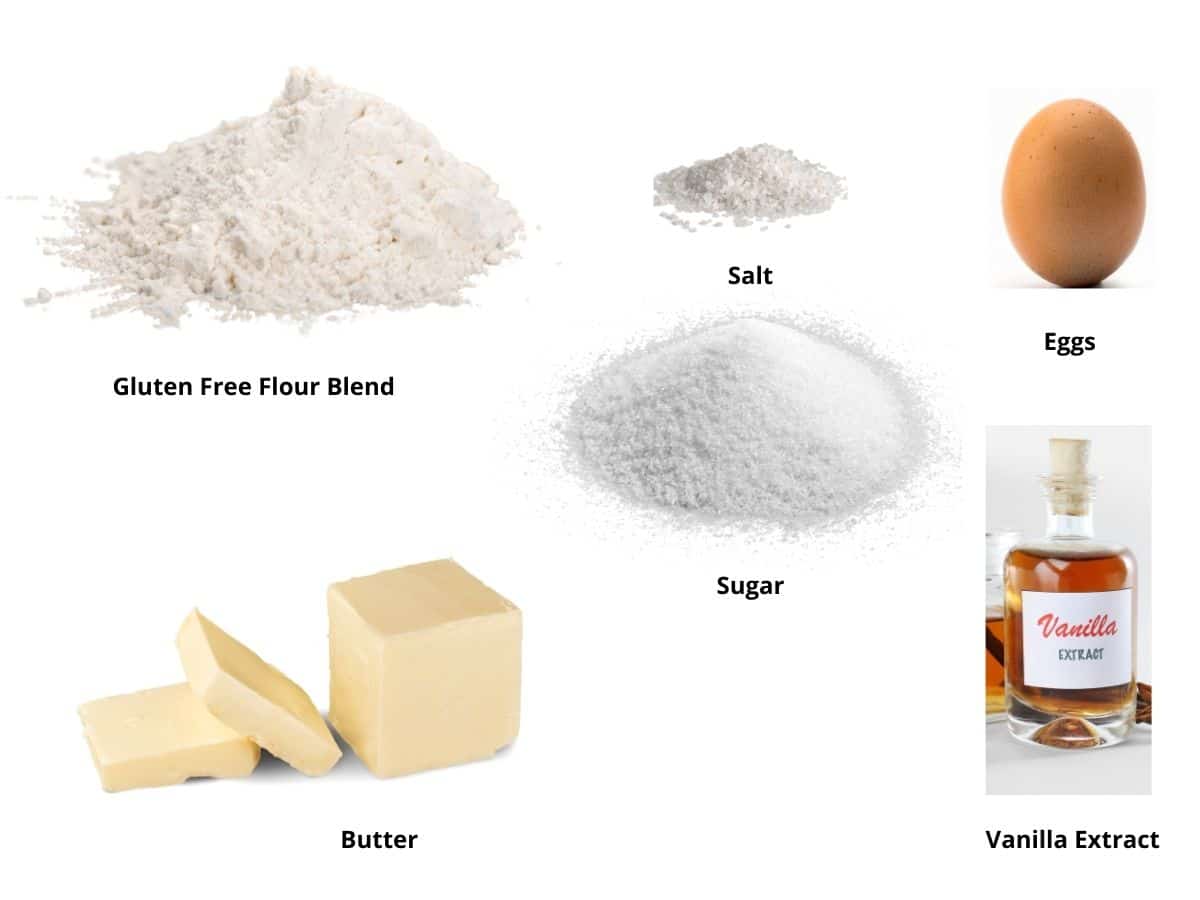
Ingredient Notes:
For the full list of ingredients and amounts, please go to the recipe card below.
- Gluten-Free Flour Blend – I tested this recipe with Bob’s Red Mill 1 to 1 and King Arthur Measure for Measure to make sure these cookies hold their shape and pipe well. If your blend does not contain xanthan gum, I recommend adding ¾ teaspoon.
- Sugar – Use regular cane sugar.
- Salt – I used sea salt, but you can also use kosher salt. Do not use pink Himalayan salt.
- Eggs – Use large eggs to help with binding.
- Pure Vanilla Extract – The vanilla flavor is the star of these butter cookies. Do not use imitation vanilla.
Flavor Modifications:
- Use almond extract instead of vanilla extract.
- Add 1 tablespoon of orange or lemon zest to add some citrus flavor.
- Add 1/2 teaspoon anise extract to add a little spice and licorice flavor.

A Note From My Kitchen
These cookies look fancy, but the dough is surprisingly easy to work with, even if you’re new to piping! If the dough feels too soft, a quick chill will make it easier to control. You can test your piping technique on a sheet of parchment first before committing to a baking tray. Your kids will love adding sprinkles after dipping them in chocolate; just check that the sprinkles are gluten-free!
How to Make Gluten-Free Butter Cookies (Step-By-Step)
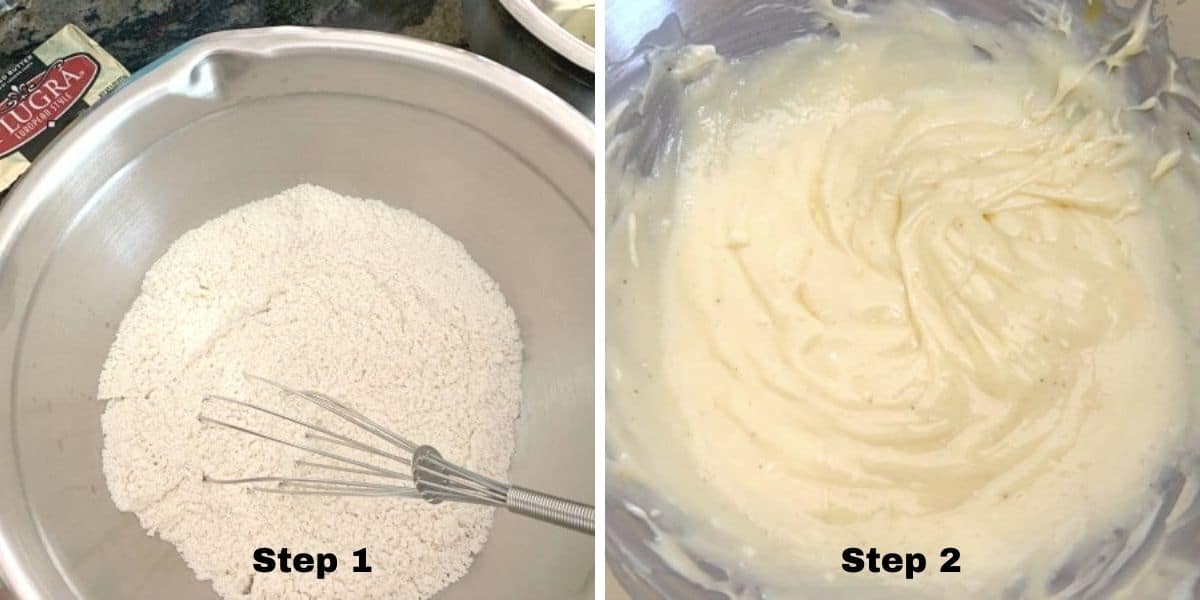
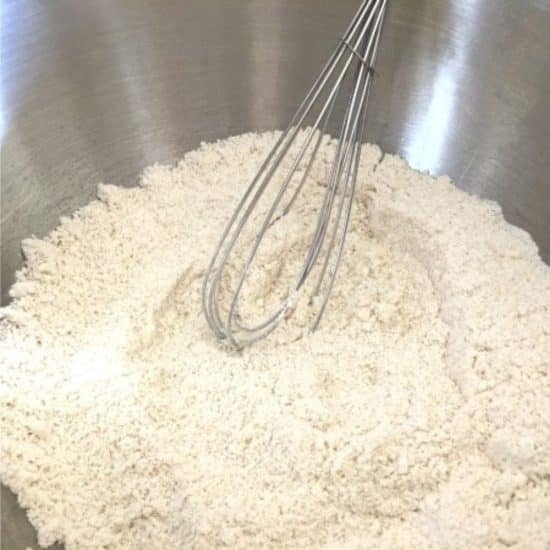
Step 1: Start by whisking together your dry ingredients. This helps distribute the leavener and binder evenly so you don’t get gummy pockets.
Step 2: In a separate bowl, mix your softened butter, sugar, egg, and vanilla until smooth. Your butter should be very soft, but not melted. If it’s too warm, the cookies can spread too much.
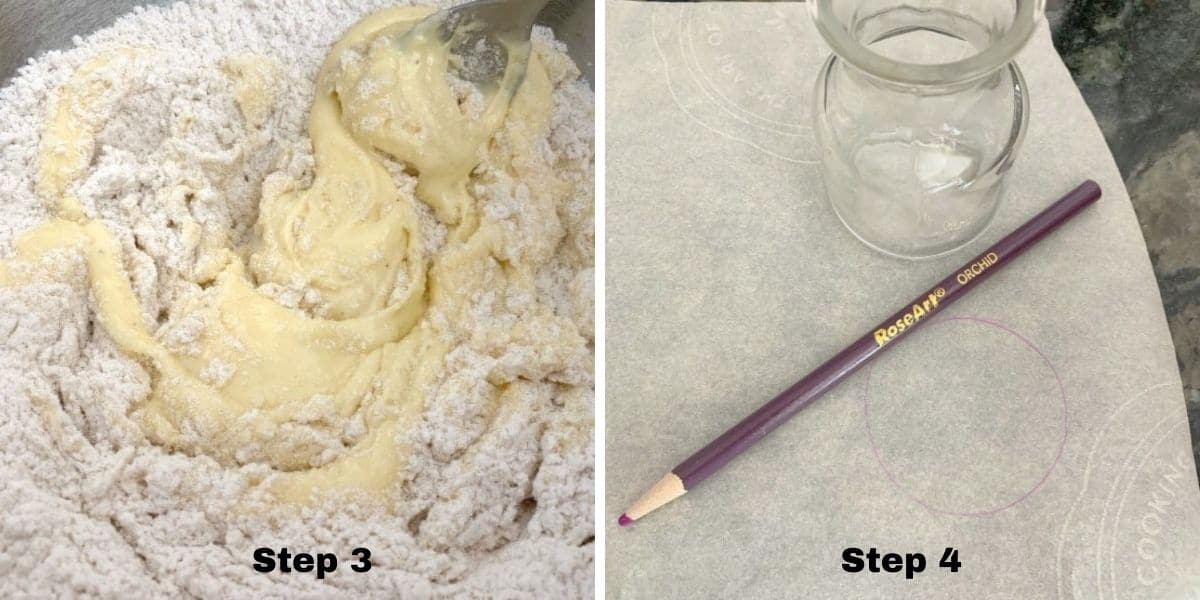
Step 3: Mix the wet and dry ingredients together until a smooth dough forms. If the dough feels sticky or your kitchen is warm, chill it for 15 to 30 minutes to help it hold shape when piped.
Step 4: There are two easy ways to ensure your cookies all turn out the same size. The first method is to take a small glass and trace circles around the bottom in rows, using a piece of parchment paper.
You can also use a silicone macaron mat that has fillable circles. To avoid getting ink on the cookies, turn the parchment paper over.
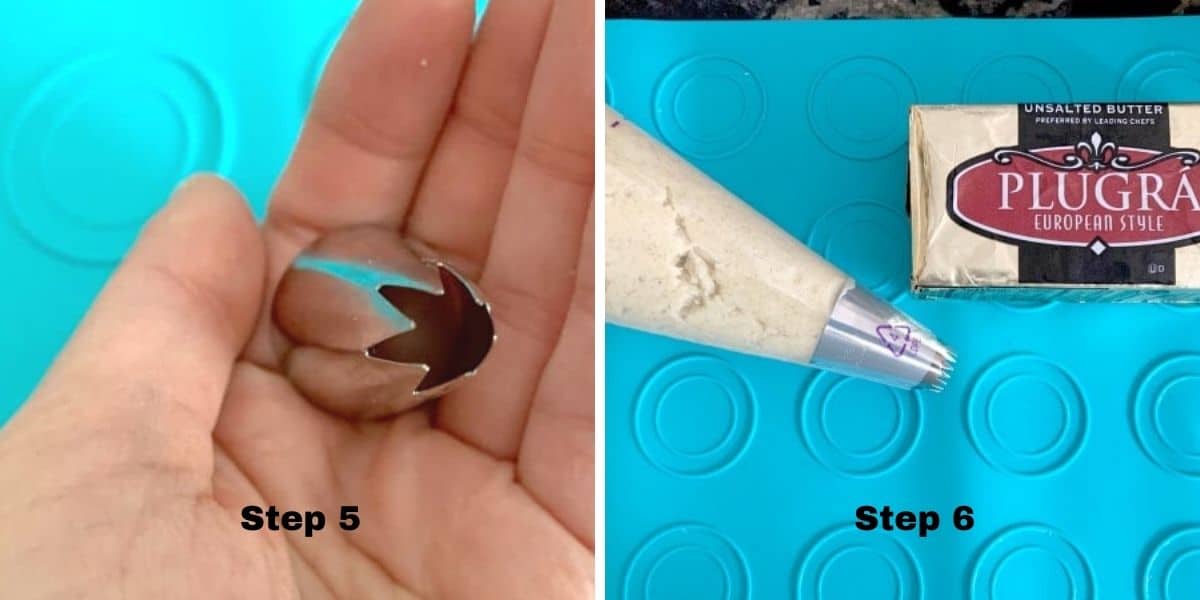
Step 5: Use a tip with has jagged edges if you want your cookies to have the flower shape that my cookies have. I like the Wilton tip 8B.
Step 6: Add the semi-soft batter to a pastry bag with the shape of the piping tip I show above. Your cookie batter should be somewhat soft for piping.
Email This Recipe To Me!
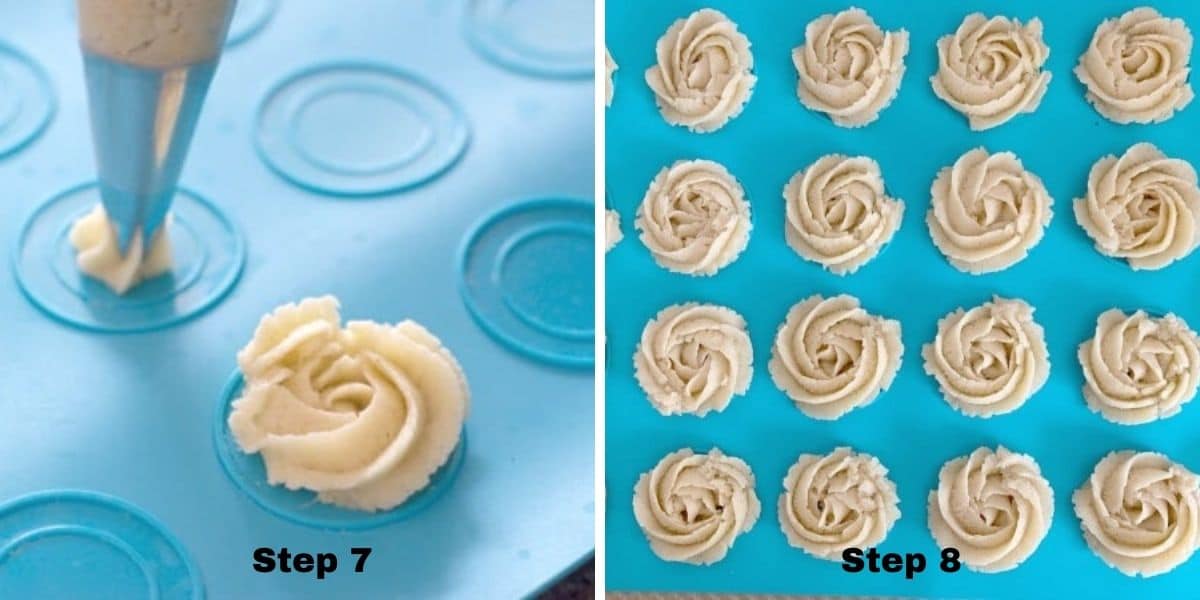
Step 7: Pipe the dough in a spiral to form a rosette.
Step 8: Continue until all the circles are filled with cookie dough. Bake until the edges just start to turn golden. Be careful not to overbake, or they will lose that delicate, buttery texture.
Let the cookies cool completely before moving them. The cookies will be a little soft until they cool and set into a nice crisp texture.
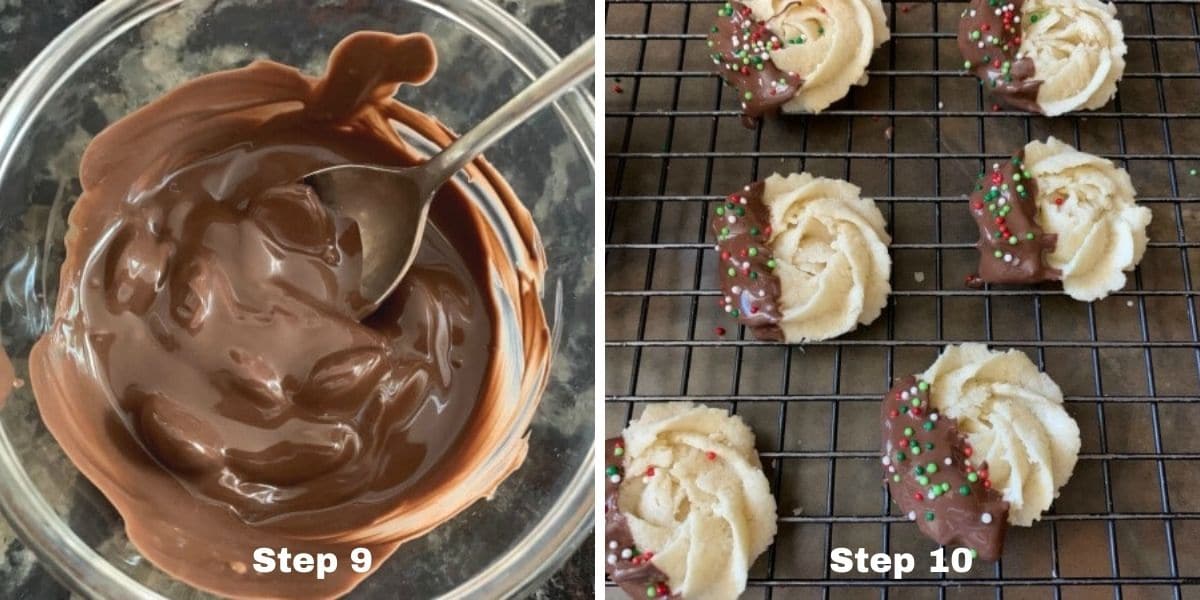
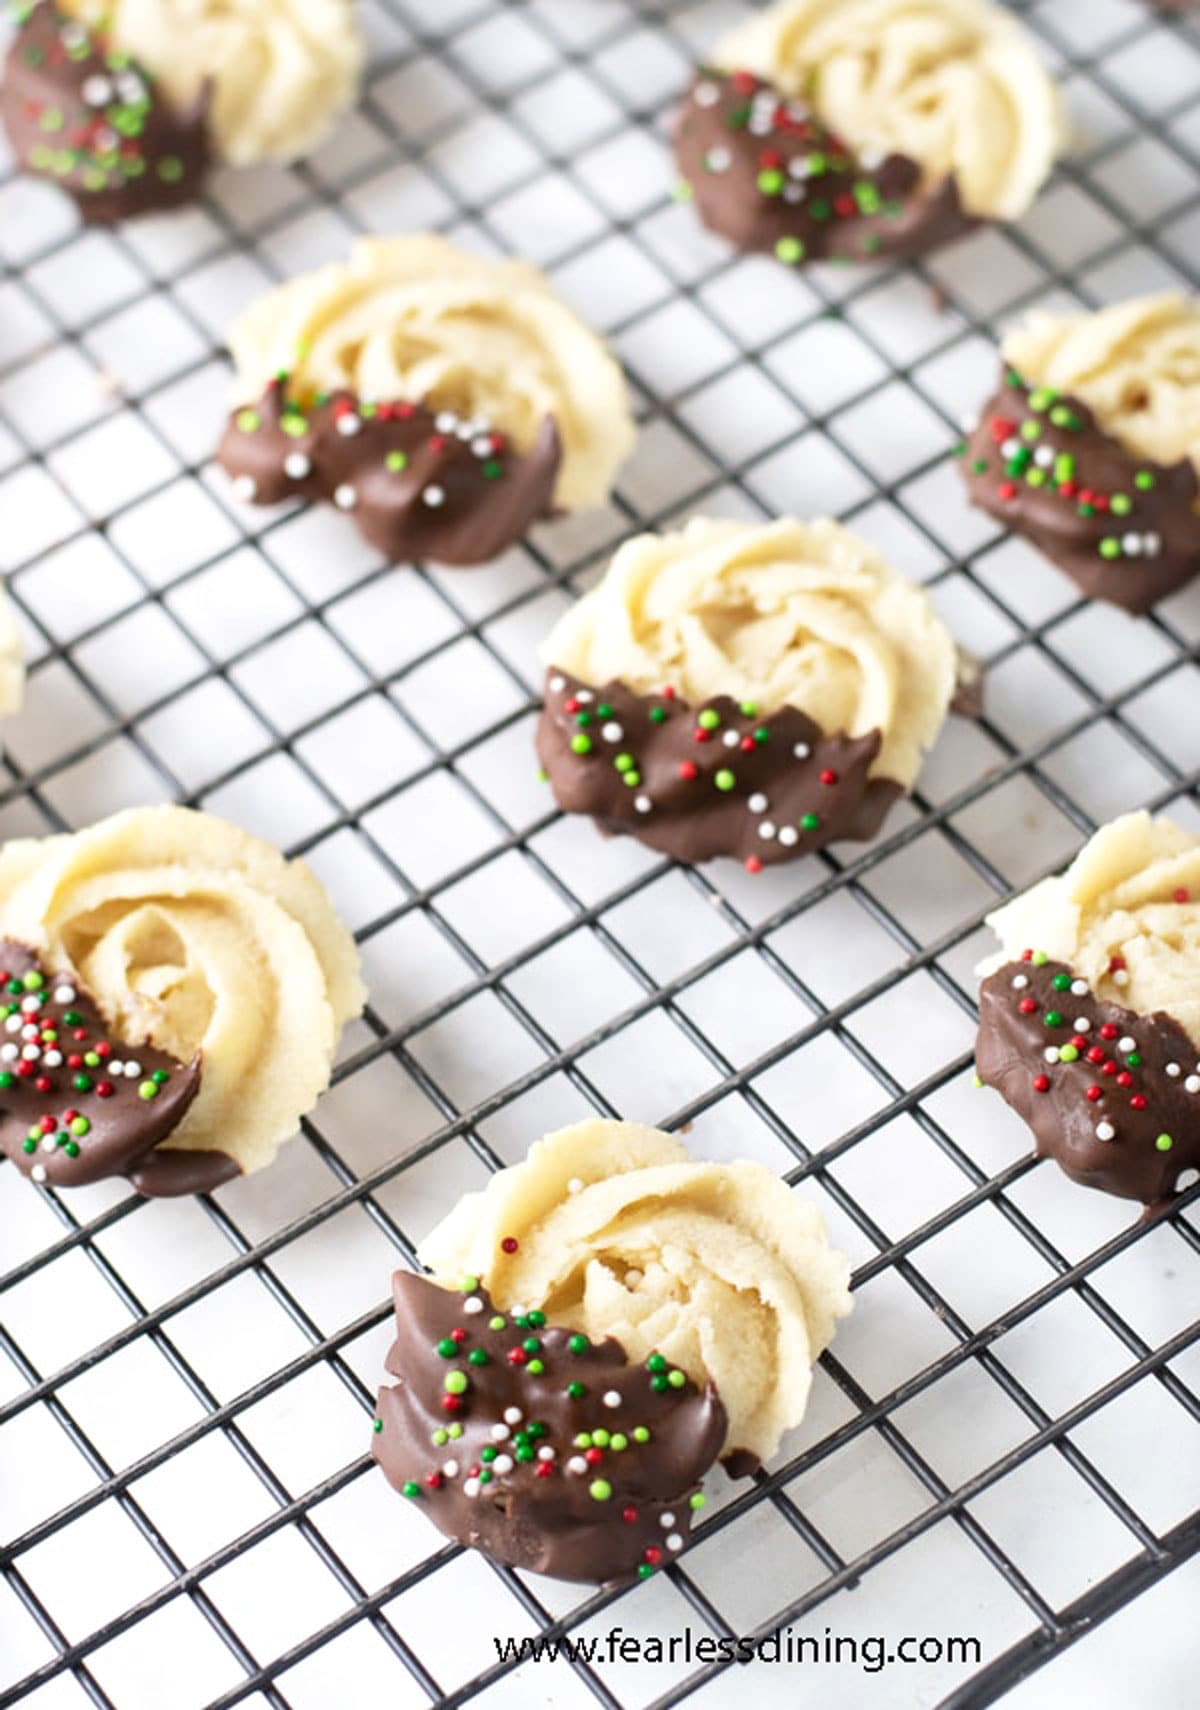
Melt the chocolate and dip the cooled cookies into the chocolate. Move them to a rack until the chocolate hardens. Optional: Decorate with gluten-free sprinkles.
Sandi’s Gluten-Free Cookie Tips:
- Use room-temperature butter and eggs.
- I always recommend using parchment paper, especially with buttery cookies.
- Use a cooled
cookie sheet when baking. - Don’t let the cookies sit on the pan too long.
I have a great Gluten-Free Cookie Troubleshooting Guide if you need help baking gluten-free cookies. Be sure to check out my favorite Cookie Baking Tools.
I hope you love these gluten-free butter cookies as much as we do. They make a beautiful holiday gift. If you love European cookies, try these Italian Gluten-Free Pizzelles too!
How To Store Gluten-Free Butter Cookies:
- Store these cookies in an airtight container. I prefer storing them in the refrigerator. They will keep fresh for up to 4 days.
- You can also freeze these cookies. Place cooled cookies into a zip-style freezer bag. They will keep fresh in the freezer for up to 3 months.
If you like to decorate cookies, try these Gluten-Free Cinnamon Sugar Cookies or my Gluten-Free Lebkuchen Cookies (aka German gingerbread cookies), or my buttery Gluten-Free Shortbread.
Frequently Asked Questions and Troubleshooting:
Yes, you can use your standing mixer with a paddle attachment if you prefer.
Yes! They work well with dairy-free butter like Earth Balance. The texture may be slightly softer, but it still pipes and bakes beautifully.
Filling a piping bag can be a messy task. To make it easier, I fold down the piping bag to fill the batter more deeply.
Yes! You can shape the dough into small balls and press them flat with a fork for a more rustic look. They will not have the classic ridges but will still taste delicious.
I love using Ghirardelli melting wafers (milk, dark, or white). Other chocolate chips work too. Always melt in 20-second bursts to avoid burned chocolate.
This usually means the butter was too warm. Chill the dough for 20-30 minutes before piping, especially if your kitchen is warm or your butter was overly soft.
More Gluten-Free Christmas Cookie Recipes:
- Chestnuts roasting over an open fire are the inspiration for these Gluten-Free Roasted Chestnut Cookies.
- Santa loves these Easy Gluten-Free Snickerdoodles cookies!
- These Gluten-Free Chocolate Pizzelles are fabulous Italian cookies for the holidays.
- Everyone loves this classic Holiday Gluten-Free Gingersnaps cookie recipe.
- A Collection of Gluten-Free Christmas Cookies
Love This Recipe?
💬 Did you make this gluten-free Danish butter cookie recipe? I’d love to hear how it turned out! Let me know which flour blend you used! Your feedback helps others (and helps me keep improving these recipes for you). ⭐⭐⭐⭐⭐
Gluten-Free Danish Butter Cookies (Blue Tin Copycat!)
Ingredients
- 1 ¾ cups gluten free flour blend * see note
- ½ cup cane sugar
- ⅛ teaspoon salt
- 1 cup room temperature unsalted butter softened
- 1 large egg
- 1 teaspoon pure vanilla extract
Equipment
- piping bags
- 8B star frosting tip
Method
- Preheat the oven to 350º F. Use the bake setting, not the convection setting. Move the oven rack to the center of the oven.
- You can use a stand mixer with a paddle attachment or mix the ingredients in mixing bowls by hand.
- In a large mixing bowl, add 1 3/4 cups gluten free flour blend, 1/2 cup cane sugar, and 1/8 teaspoon salt, and whisk to blend thoroughly.
- In a smaller bowl, add 1 cup room temperature unsalted butter, 1 teaspoon pure vanilla extract, and 1 large egg. Whisk until creamy.
- Pour the wet ingredients into the dry ingredients and mix. Every gluten-free flour blend has a different starch-to-grain ratio. The brand of gluten-free flour you use will affect the moisture of the batter. If your cookie dough is too wet, add more flour, and if it is too thick, add more liquids.
- Optional: Chill for 15-20 minutes. Just don't chill the dough for too long, as you want it to be soft enough to pipe through a pastry bag. Take a pastry bag and a an 8 B star tip. Cut the tip of the bag and insert the tip.
- Fill the pastry bag with the butter cookie dough.
- Place a piece of parchment paper onto a cookie sheet. I really do not like to use cooking spray. Parchment paper helps your cookies bake more evenly. Use the small glass to trace circles on the parchment paper. (Or use a macaron mat!).
- Pipe the cookie dough in a spiral starting in the middle around each circle. (See photos in my post for step by step instructions on how to do this.)
- Bake the cookies for 8-10 minutes, depending on the size and shape of the cookies. You want the cookies to be slightly golden. Move the baked cookies to a cooling rack by sliding the parchment paper with the cookies onto the rack.
- Optional, when the cookies are fully cooled, dip into melted chocolate and sprinkles.
Nutrition
Notes
- I have tested this recipe with King Arthur Measure for Measure and Bob’s Red Mill 1:1.
- If your gluten-free flour blend doesn’t contain a binder such as Xanthan Gum or Guar Gum, please add 3/4 teaspoon. A binder is what holds gluten-free baked goods together, so it is an important part of any gluten-free baked good.
- To make this recipe dairy-free, substitute the butter with vegan butter.
- Note that you can pipe these cookies into any shape or drop them onto a cookie sheet with a small cookie scoop.
- These cookies will keep fresh for up to 4 days in an airtight container or up to 4 months in the freezer.
Private Notes
Tried this recipe?
Let us know how it was!
Gluten-Free Related Reading
Gluten-free baking is like a science experiment. There are so many things you need to understand the different components of baking without gluten. My Gluten-Free Resources Section is here to help teach you the tools you need to know to become a confident gluten free baker.
My Best Gluten-Free Baking Tips For Better Baking!
Why Binders Are Important In Gluten-Free Baking

The Best Gluten Free Flour Blends – And how to use them!
This post has been updated from an older November 2019 version with additional details.
I truly hope you enjoy this recipe. I have been testing and creating gluten-free recipes for over 15 years. Creating gluten-free recipes that do not taste gluten-free is my goal for every recipe. Sometimes I only have to test a new recipe a couple of times, and others it takes multiple times. I do this so you get reliable, delicious results every time!

Hi, I haven’t attempted these yet. I am wondering approximately how many cookies one batch makes?
Hi Victoria, it 100% depends on the size of the cookies you make. Mine made roughly 24 cookies.
ok. thanks so much!
Keep me posted!
Hello! What is the diameter of the circle, and do you think a Wilton 1M tip would work?
Hi Diane, The circles on the mat I used are around 2 inches (max). I think a small 1m tip would be fine to use.
am so sad I tried making these today and they didn’t come out looking like little wreath…they came out looking like flat sugar cookies …help!!
Hi Beth, I am happy to help troubleshoot. First, what flour blend did you use? How soft was your cookie dough and did you swap any ingredients?
Hi there-
I was looking for a healthy gf cookie recipe and came across your recipe. I am planning on making valentines cookies with my grandchildren and wonder if we can roll this out and use cookie cutters? Would you suggest that or maybe not such a good idea?
Thank you! 😊
Hi Colleen, this cookie dough is too soft for cookie cutters because it is meant to be piped. Try this recipe: https://www.fearlessdining.com/gluten-free-valentines-cookies/
It’s a great recipe, but they took 15 minutes to get to the color and crispness I like in a butter cookie. I used King Arthur measure for measure flour. I used erythritol instead of sugar. And I used a cookie press instead of a piping bag.
Hi Angie, I am glad you loved the recipe. I wonder if the erythritol affected the baking. Sugar is what gets them to crisp. I can’t test alternate sugars as they mess with my stomach.
Very best crisp tender, no fall apart GF sugar cookie and not too sweet. I used Bobs Red Mill 1:1 GF flour. Dropped spoonfuls flattened with piece of parchment and baked 20-25 minutes. Look perfect and taste the best ……Thank you!
I am thrilled you loved this recipe. These cookies taste like the Danish cookies we used to buy in the blue tin before going gluten free. Thank you so much for coming back to leave a review!
so I do not know what I did but these cookies flattened. i followed step by step and did not overmix. also the taste and texture is like mashed potatoes. its really weird.
Hi Desiree, it sounds like you used a flour blend I have not tested. Which did you use? From your description of the cookies texture, you used a starchy blend, and it needed more flour. More flour would have also helped with the spreading.
These are truly delicious! I used almond extract in place of vanilla (just personal preference) and let the cookie dough rest for a few hours in the fridge to allow the flavors to develop and the gluten free flours and starches to absorb moisture (I do this with all my gf cookie recipes and most all of my other gf baked goods). So, so yummy!! My husbands favorite cookie is a butter cookie and he said these were he best I have made (and he doesn’t have to eat gf, he just does it for me to make my life easier). Thanks for this superior cookie recipe!
I am so glad you loved the recipe for these butter cookies. I love your husband isn’t gluten free and still said they are the best!
Could I use a cookie press instead of a piping bag?
Hi Barbara, A press should work well. You may need less flour, depending on the blend you use.
My husband says he likes these BETTER than regular flour version. I made this with no vanilla but 3 tsp almond extract and the flavor was just like Mom’s Spritz cookies. I would advise to let the dough sit for 1/2 hour or so, because the first batch had a grainy texture, but later batches did not. I used Pillsbury 1:1 gluten-free flour. I believe the rice component softened in that time. Mine took 18+ minutes to bake.
It is good to hear the Pillsbury GF worked well. I also love you used almond extract. Thank you so much for coming back to let others know!
These had a good flavor. The dough was too stiff to pipe, so I will add more butter next time, and perhaps some milk.
I think the lady that said she refrigerates her cookies for several hours before baking has a great idea.
Hi Sheila, which gluten free flour blend did you use? Every gluten free blend has a different starch-to-grain ratio, and this affects the moisture. Next time, if you use the same flour blend, I would recommend a little less flour or add more butter.
These are great! I could not pipe them, even after leaving them out to soften for a few hours. They were still too stiff. But I made little balls and they worked great, even rolling some in a sanding sugar to look like the “tin” cookies of my youth. Thanks for a nostalgic treat!
I am so glad you loved these cookies. If the batter is too thick, it is most likely the flour blend you used had a higher starch content. If this happens, it is okay to add more melted butter.
I actually used the King Arthur measure for measure and I had the same problem. It was too thick for the piping. But I made them into balls and that worked just fine! I did have to put them in for a couple min longer because 10 min left them undone in the middle. I might try putting the dough in the fridge and then rolling and using a cookie cutter. They were fantastic though! Close to the blue tin which I had growing up. 😊
Hi Alison, did you melt the butter? It should be soft and pipable. I am glad it tasted great.