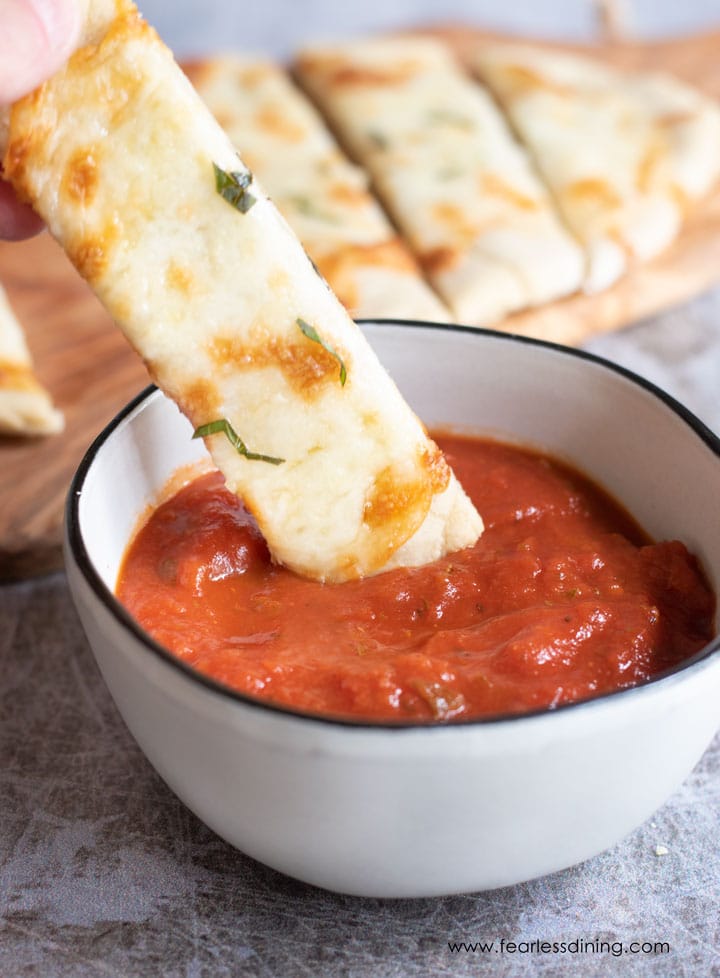
This gluten-free flatbread recipe is quick to make and full of possibilities. Use this flatbread for dipping, wraps, or even pizza! This version turns out chewy, bubbly, and golden, which is perfect on its own or topped with your favorite pizza fixings. I’ll walk you through how to make it with either regular yeast or using a sourdough starter, plus three simple cooking methods that deliver great texture every time.
This post may contain affiliate links. Please read our Disclosure Policy.
❤️ Sandi’s Recipe Summary
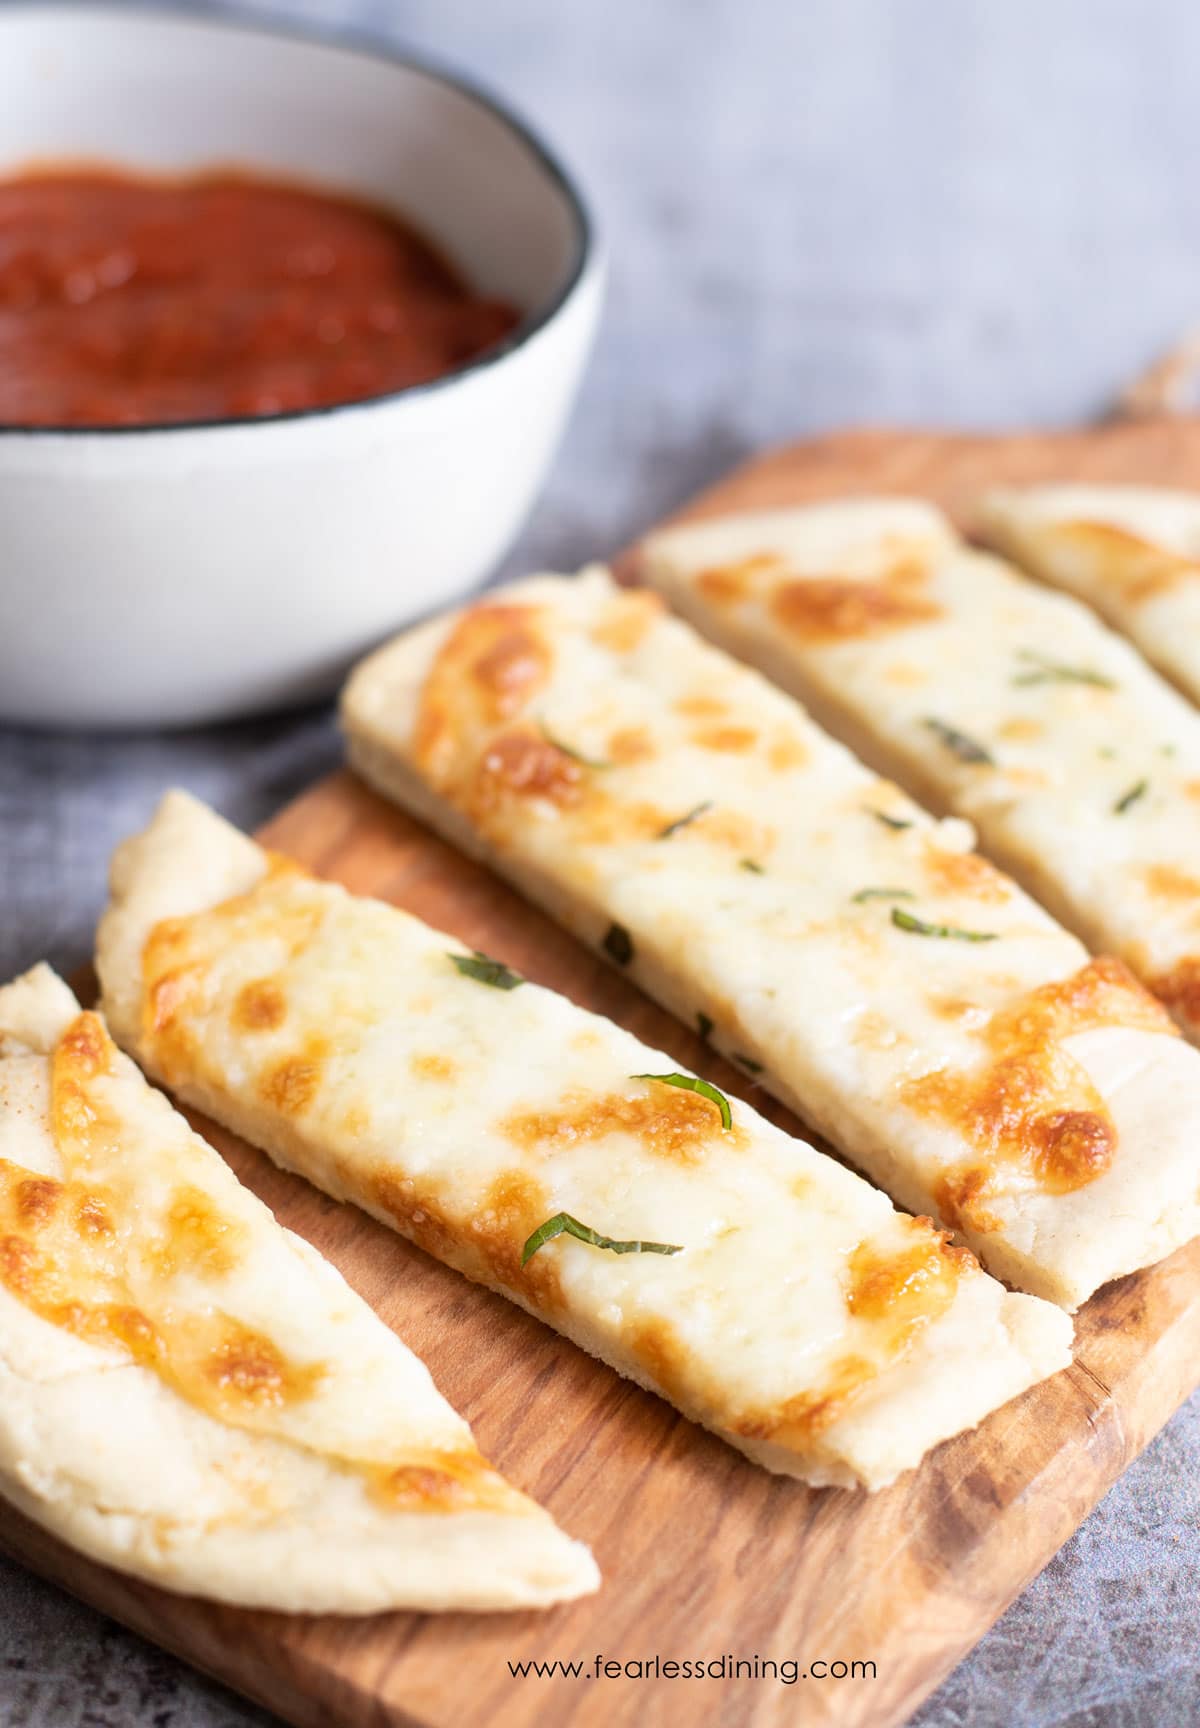
This gluten-free flatbread recipe makes flatbread that is chewy with delicious air bubbles. It holds up well to sauces and toppings. I will show you below how easy it is to make a gluten-free flatbread pizza…my kids love to help make them.
If the idea of using sourdough sounds fun, but you don’t have a sourdough starter, make one! My Gluten-Free Sourdough Starter Instruction Guide will walk you through every step.
This recipe is part of my Ultimate Guide to Gluten-Free Bread Recipes, where I share my trusted tips, flour blends, and more reader-loved breads.
Gluten-Free Flatbread Recipe Testing Notes:
I tested this gluten-free flatbread recipe with three different flour blends and three cooking methods to make sure it holds up well to toppings and doesn’t dry out. I also compared using sourdough and yeast, and both versions rose well; with different timing. The hot pizza stone gave the flatbread the bubbliest texture, but a hot cast iron skillet version is perfect for quick dinners.

Ingredient Notes:
For the full list of ingredients and amounts, please go to the recipe card below.
- Gluten-Free Flour Blend – I tested this recipe with Cup4Cup, the old blend with dried milk powder, Better Batter, and my All-Purpose Gluten-Free Flour Blend.. The new Cup4Cup also works well. If your gluten free flour blend doesn’t contain a binder, you must add 3/4 teaspoon of xanthan gum.
- Yeast – Use regular active yeast or use a free sourdough starter. The starter will need a much longer rise time. Rapid yeast also works well.
- Baking powder and Salt – These give the dough extra rise and flavor!
- Toppings – You can enjoy the flatbread plain or add cheese, pizza sauce, pesto, or even minced garlic.
- Water – I recommend using filtered water in yeast recipes because chlorine and other chemicals can limit the yeast’s ability to rise. It helps the yeast grow better.
Always verify that the flour blend you use works with yeast. Many of the 1:1 blends do not. Here is a great resource: my Guide to Gluten-Free Flour Blends.
Gluten-Free Flour Blends at a Glance:
- Cup4Cup (old & new formulations): Worked good and had bubbles and chew; new formula still works nicely.
- My DIY GF Blend: Reliable results every time; best with yeast or sourdough.
- Better Batter – Nice rise.

A Note From My Kitchen
If you’re new to gluten-free baking, flatbread is a great place to start. It’s flexible, forgiving, and doesn’t require a fancy pan or mixer. Don’t worry if your dough feels a little sticky. That’s normal with gluten-free flours. You can always dust your hands, the dough, or the rolling pin with more flour to help.
Remember, gluten-free dough only rises once, so be sure to shape your flatbread before letting it rise. And it’s okay if your flatbread doesn’t look perfect. Mine didn’t when I first started either. Each time you make it, you’ll get more comfortable with how the dough feels and bakes.
Tips For Perfect Gluten-Free Flatbread:
- Be sure your yeast is gluten-free! Red Star “Platinum” is not gluten free.
- You only get one good rise from gluten free dough. Shape your flatbread, then let it rise.
- For best results, rise your dough in a warm environment. I preheat my oven to 175ºF, then turn the oven off. I rise my dough in the oven with the door cracked open.
How to Make Gluten-Free Flatbread (Step-by-Step)

Email This Recipe To Me!
Step 1: Add warm water, a packet of yeast, and a teaspoon of sugar to a bowl. Let it sit for 5 minutes until the mixture gets frothy. If you don’t see bubbles, double-check the expiration date of the yeast. Discard the old yeast packet and try a new one.
👀 Sandi Says: Note: You can use gluten free sourdough starter if you have some on hand. You will need to rise the dough much longer if you use it.
Step 2: Combine the dry ingredients in a bowl and whisk to blend. Pour the yeast mixture into the dry ingredients and mix into a soft dough.

Step 3: The dough should be very workable but slightly sticky. You can add more flour, a tablespoon at a time, and dust it with gluten-free flour if it is too sticky to work with.
👀 Sandi Says: You only get one good rise with gluten-free dough, so you’ll want to let it rise after rolling it out. Use a rolling pin to roll the dough out. You can roll to any thickness. For pizza, I try to make it 1/2 inch thick. For true flatbread, I roll it to a thickness of 1/4 inch.
Step 4: Cover the dough with plastic wrap and let it rise in a warm spot for 30-45 minutes.
If using sourdough, allow for a longer rise time. Let your dough rise overnight or rise for at least 3 hours. Add more flour to make the dough wet but workable. Be sure to wrap the dough in plastic to prevent it from drying out overnight.

Three Ways To Cook Flatbread:
- On the grill: Preheat a pizza stone on the grill to 425º F. Move the dough to the hot baking stone. Bake the flatbread crust on a pizza stone to get it nice and crispy. To make pizza, add your toppings after the crust pre-cooks for 10 minutes. Cook an additional 8 minutes until the crust is crisp and the cheese is golden.
- In a 12″ cast-iron skillet: Preheat the skillet over medium heat. Carefully drop the dough onto the skillet. You want to monitor the heat so your pan doesn’t get too hot and burn your dough. The dough will bubble. Check the bottom and flip when you see that the bottom is cooked.
- In an oven or toaster oven. A pizza stone fits beautifully in a large or regular oven. Heat the pizza stone to 425ºF. Add the dough and cook as instructed in the grill directions above.
How do I know when to flip the flatbread over?
Cooking the flatbread on the stovetop is easy. As you cook it, use a spatula to peek at the underside. If you see golden bubbles, the flatbread is ready to be flipped so it can cook on the other side.
Step 5: Top your flatbread. You can use pizza sauce, pesto, fresh herbs, and goat cheese…add whatever you like! If you use cheese, cook until the cheese is slightly golden.
If you love flatbread, try my awesome Gluten-Free Naan recipe.
Frequently Asked Questions:
Yes! Let it cool completely, then wrap in wax paper and store in a freezer bag for up to 4 months.
This flatbread will stay fresh for 2-3 days in the refrigerator. To make this gluten-free flatbread after storing, place it into the oven at 375ºF for 8 minutes.
You can easily make this flatbread without yeast. It will not puff up as much, but the flavor will still be great.
If you love this flatbread recipe, wait until you try my updated Gluten-Free Focaccia Bread recipe!! You may also enjoy dipping this gluten-free flatbread into some of these herb infused olive oils!

I made this crust and was so surprised at how good it was. I give it a 10. This was amazing”
Christine H., Pinterest user
Try These Gluten-Free Recipes:
Love This Recipe?
💬 Did you make this gluten-free flatbread recipe? I’d love to hear how it turned out, and which pan or flour blend you used! Your feedback helps others (and helps me keep improving these recipes for you). ⭐⭐⭐⭐⭐
Gluten-Free Flatbread (Dairy-Free too!)
Ingredients
- 2 cups gluten free flour blend *see note
- 1 teaspoon cane sugar
- 2 teaspoons active dry yeast *see note
- 1 teaspoon baking powder
- ½ teaspoon salt
- 1 tablespoons olive oil
- 1 cup warm water
Method
- In a small bowl, add sugar, yeast and warm water. Allow to sit for 5 minutes so yeast are bubbly.
- In a large bowl add all dry ingredients. Whisk to blend.
- In the bowl of yeast and water, add olive oil. Pour into dry ingredients and mix.
- Shape the dough into flatbread, cover it with plastic wrap, and let it rise in a 200º F warm spot for 45 minutes.
- Preheat the oven (or grill) to 425º F. If your pizza stone is new and not seasoned yet, put a thin layer of olive oil. Put the pizza stone in the oven while preheating so it gets nice and hot. Remove the stone from the oven. *See note*
- Break pieces of dough off. Put a piece in between two pieces of plastic wrap. Roll to 1/2 inch flat for pizza or 1/4 inch flat for a thinner flatbread. Carefully put on the pizza stone.
- Bake for 8-10 minutes until the crust is crispy.
- If you are adding toppings, remove the crust from the oven and spoon sauce onto the crust. Top with mozzarella cheese. Add your favorite toppings.
- Bake an additional 5-8 minutes until the cheese is melted.
Nutrition
Notes
- I have tested this recipe with Cup4Cup and Better Batter in this recipe. That doesn’t mean others will not work. I just have not tested other flours. The Bob’s didn’t rise as much as the other two blends.
- If your gluten free flour blend doesn’t contain Xanthan Gum or Guar Gum, please add one teaspoon.
- You can also use a sourdough starter in this recipe. Use 1/3 cup instead of a package of yeast. Note that your rise time will need to be longer using a sourdough starter.
- On the grill: Preheat a pizza stone on the grill to 425º F. When the stone is very hot, add the dough to the hot baking stone. Bake the flatbread pizza crust on a pizza stone to get nice and crispy. For making pizza, add your toppings after the crust pre-cooks for 10 minutes. Cook an additional 8 minutes until the crust is crisp and the cheese is golden
- In a 12″ cast-iron skillet: Preheat the skillet over medium heat. Carefully drop the dough onto the skillet. You want to monitor the heat, so your pan doesn’t get too hot and burn your dough. The dough will bubble. Check the bottom and flip when you see the bottom is cooked.
- In an oven or toaster oven: A pizza stone fits beautifully in either a large toaster oven or a regular oven. Heat the pizza stone up in the oven to 425ºF. Add the dough and cook as mentioned above in the grill directions.
Private Notes
Tried this recipe?
Let us know how it was!
I truly hope you enjoy this recipe. I have been testing and creating gluten-free recipes for over 15 years. Creating gluten-free recipes that do not taste gluten-free is my goal for every recipe. Sometimes I only have to test a new recipe a couple of times, and others it takes multiple times. I do this so you get reliable, delicious results every time!

To whom it may concern,
This sounds like a wonderful gluten-free nondairy dough for a flatbread. I have a question, can I make this dough and partially cook it early in the day? I would then put on toppings and finish the baking later in the evening. Is that a problem for the quality of the pizza?
Hi Hedy, it is just me…I don’t have a team or helpers. I use this flatbread for pizza often. My favorite way is to put the dough onto the grill and add the toppings…it makes the dough a bit more crisp on the outsides. Partially baking is fine.
Delicious, easy recipe for gluten free pitas. I made it into 8 mini pitas, baked at 425 for 12 minutes, and they were perfect! Better than gluten free bread in the store and I know what’s in it!
Wow, I never thought to use this recipe to make pitas, was there a big air bubble in the middle?
This is tasty! Next time I will sprinkle with coarse salt.
That sounds great!
I made this for Mother’s Day brunch and it was amazing. No one knew it was gluten free. I used Cup4Cup like instructed. A few notes for others: the recipe is confusing (to me, at least) on if you should let the dough rise in the shape of a ball, or roll it out and then let it rise. I elected to let it rise in the shape of a ball. After the rise, I olive oiled my hands and divided it in two (I doubled the recipe). I placed the dough on a piece of parchment paper, covered the top with plastic wrap, and rolled it out. I then carefully removed the plastic wrap from the top and slid the parchment paper onto a cookie sheet. If you use plastic wrap for top and bottom, it seemed to me that it would be difficult to get both pieces removed and the rolled out dough onto a stone/grill/sheet without it falling apart. I made them the day before our gathering, so all I had to do was bring the prepared crust to room temp, add my toppings, and bake until the cheese was melted. They turned out beautifully. Thank you for a fabulous recipe! I will be using Cup4Cup way more often now!
Thank you so much. I am really glad you loved the recipe. I will try to clarify the recipe for folks, I appreciate your valuable feedback.