
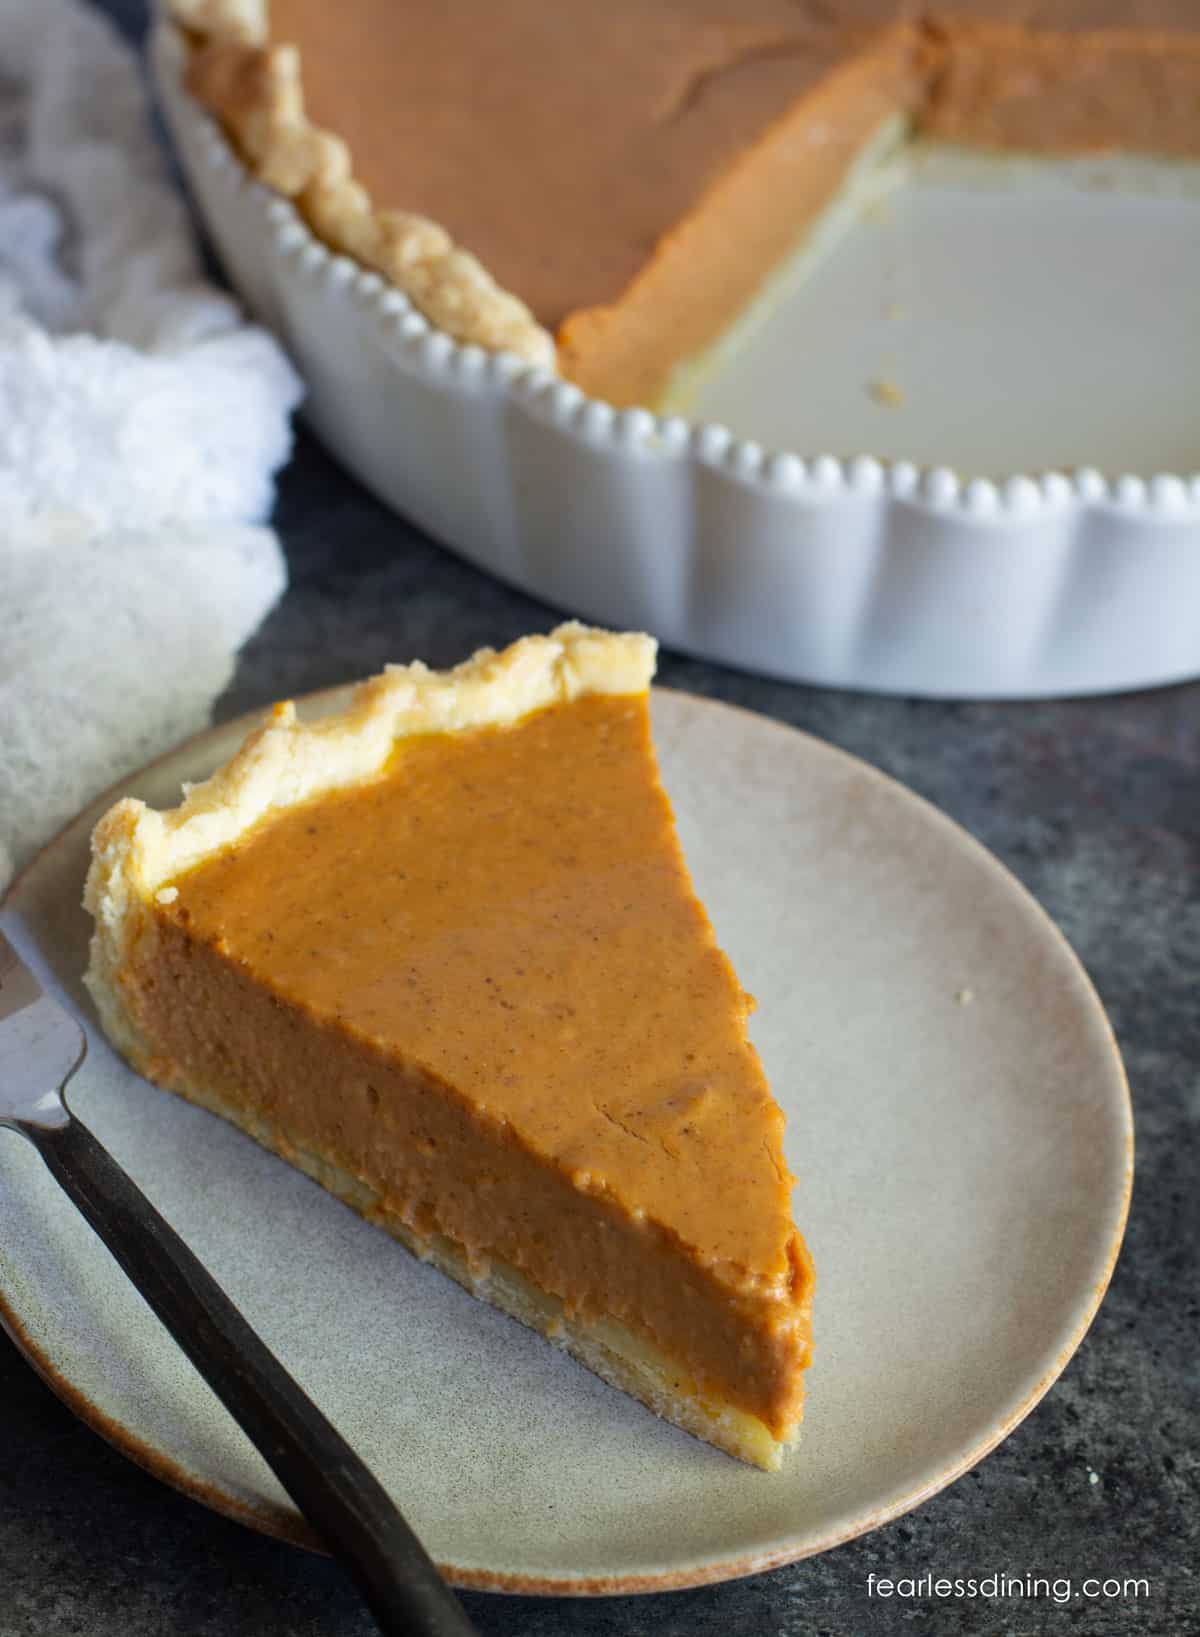
Pumpkin pie is a classic fall dessert, but this easy recipe takes this popular pie to the next level! This easy gluten-free pumpkin pie has a smooth, rich pumpkin flavor and a buttery, flaky crust. The combination of flavors is sheer perfection!! Nobody will know this homemade pumpkin pie is gluten-free! I include a dairy-free option as well.
This post may contain affiliate links. Please read our Disclosure Policy.
Email This Recipe To Me!
It is fall and officially pumpkin season!! Pumpkin season is my favorite time of the year, and I have over 30 easy gluten-free pumpkin recipes on the blog. Making a pumpkin pie with my super flaky crust is a fun way to make a classic Thanksgiving dessert. The combination of textures and flavors makes every bite delicious, and you’ll love how easy it is to make. It’s a delicious way to celebrate the season!
If you love baking pie, I have a lot of great gluten-free pie recipes on the blog. Check out these 50 gluten free pie recipe ideas for even more inspiration! You may also enjoy this yummy Gluten-Free Pumpkin Pie with a crumb topping.

A Note From My Kitchen
This pie underwent several rounds of testing. My first attempt failed because of my curiosity, or opening the oven door a few times while the pie was baking. This is a common mistake that people often make, and it can significantly impact the baking process. In this instance, it caused the top of my pie to crack. I am a firm believer in sharing these fails because we all can learn from them. I discuss ways to prevent a cracked top below.
The next try in perfecting my recipe went much better. I didn’t open the oven door, and my pie turned out creamy and perfect. For the crust, I have tested my pie crust with a lot of gluten-free flour blends. Most should work. Cup4Cup was my favorite for flaky layers. Remember to add more liquid if the dough seems too dry, and add more water if the dough feels too wet and sticky. Read Why Gluten-Free Flour Blends Vary to learn more about this.
This recipe is based on my popular Gluten-Free Pumpkin Pie Bar recipe, and I look forward to hearing what you think of this pie.
Ingredient Notes:
For the full list of ingredients and amounts, please go to the recipe card below.
- Gluten-Free Flour Blend – I tested this recipe with Cup4Cup, Bob’s Red Mill 1:1, and Namaste GF Flour Blend. Other blends may work, but you may need to adjust the recipe by adding more liquid or flour to achieve the desired consistency.
- Xanthan Gum – If your blend doesn’t contain a binder, it is important to add 3/4 teaspoon. This is what holds your gluten free baked goods together. If you want to learn more about binders, see the Related Gluten-Free Reading section below.
- Baking Powder – Use aluminum-free baking powder.
- Butter – Use unsalted butter.
- Egg– Use large eggs.
- Pumpkin Puree – Use canned pumpkin puree and not pumpkin pie filling.
- Condensed Milk – I used regular condensed milk. If you are dairy-free, coconut condensed milk is a great option, and it works very well in this recipe.
How to Make a Gluten-Free Pumpkin Pie (Step-By-Step)
I used my popular Gluten-Free Pie Crust recipe as the crust base for this pie. It gets rave reviews and works well with multiple gluten-free flour blends.

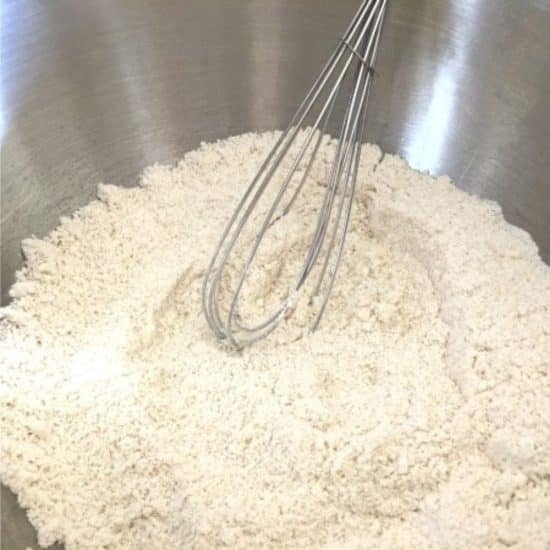
Step 1: Add the flour, salt, and sugar to a large mixing bowl and whisk until well blended.
Step 2: There are two methods for cutting the butter into the dry ingredients. You can use a cheese grater to shred the butter into the flour, or you can cut the butter into the dry ingredients using a pastry blender.
I used a cheese grater with frozen butter. If you use a cheese grater, use a spoon to scoop up flour and dump it onto the butter shreds. This will prevent them from sticking together, and you will get better flaky layers.
Add the wet ingredients to a small bowl and pour them into the flour and butter mixture. Mix until it resembles pie dough. Wrap the dough ball in plastic wrap and refrigerate it for 30 minutes.
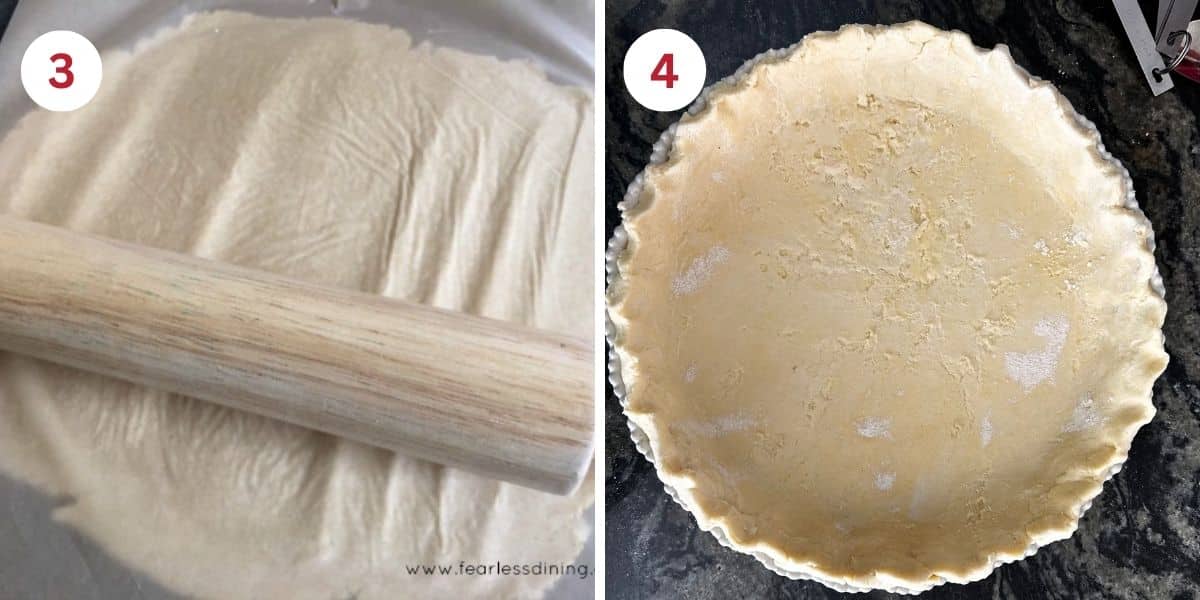
Step 3: Remove the dough from the refrigerator and unwrap it from the plastic wrap. Dust a silicone mat with a little flour. Place the dough on a silicone mat. Cover it with a piece of wax paper and roll it with a rolling pin. You can also dust the top of the dough with extra flour and roll it without the wax paper.
Step 4: Spray gluten-free baking spray on a pie dish. Pull the wax paper off the top of the dough. Use the silicone mat to lift the pie dough over the pie dish. Invert it so the dough is centered over the dish. Put the dough in the pie dish and remove the silicone mat.
Use your fingers to press the dough into the pie pan. Pinch the edges of the pie crust to crimp them.

Step 5: To make the pumpkin filling, add the pumpkin, egg, condensed milk, and spices to a large mixing bowl.
Step 6: Use a whisk to combine the wet ingredients. Preheat the oven to 350º F.
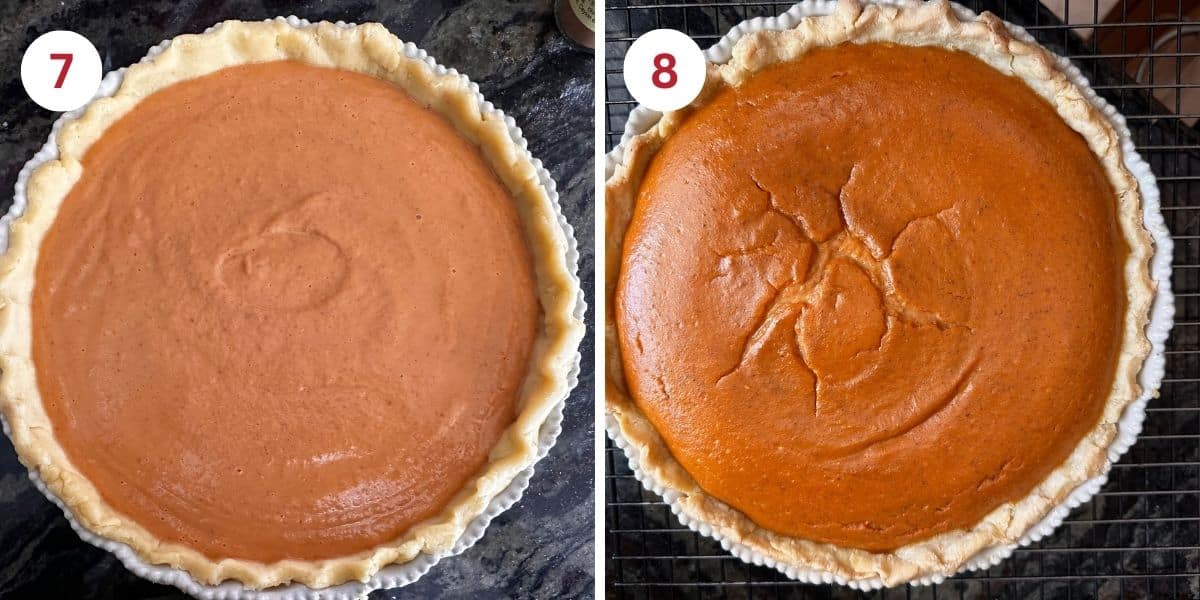
Step 7: Flash-bake the pie crust for 5-8 minutes. Remove the pie crust from the oven and pour the pie mixture into it. Bake the pie for 40-45 minutes until done. If you notice the crust getting too brown, you can tent the pie with foil toward the end of the baking time.
When the pie is finished baking, it should be fairly firm to the touch.
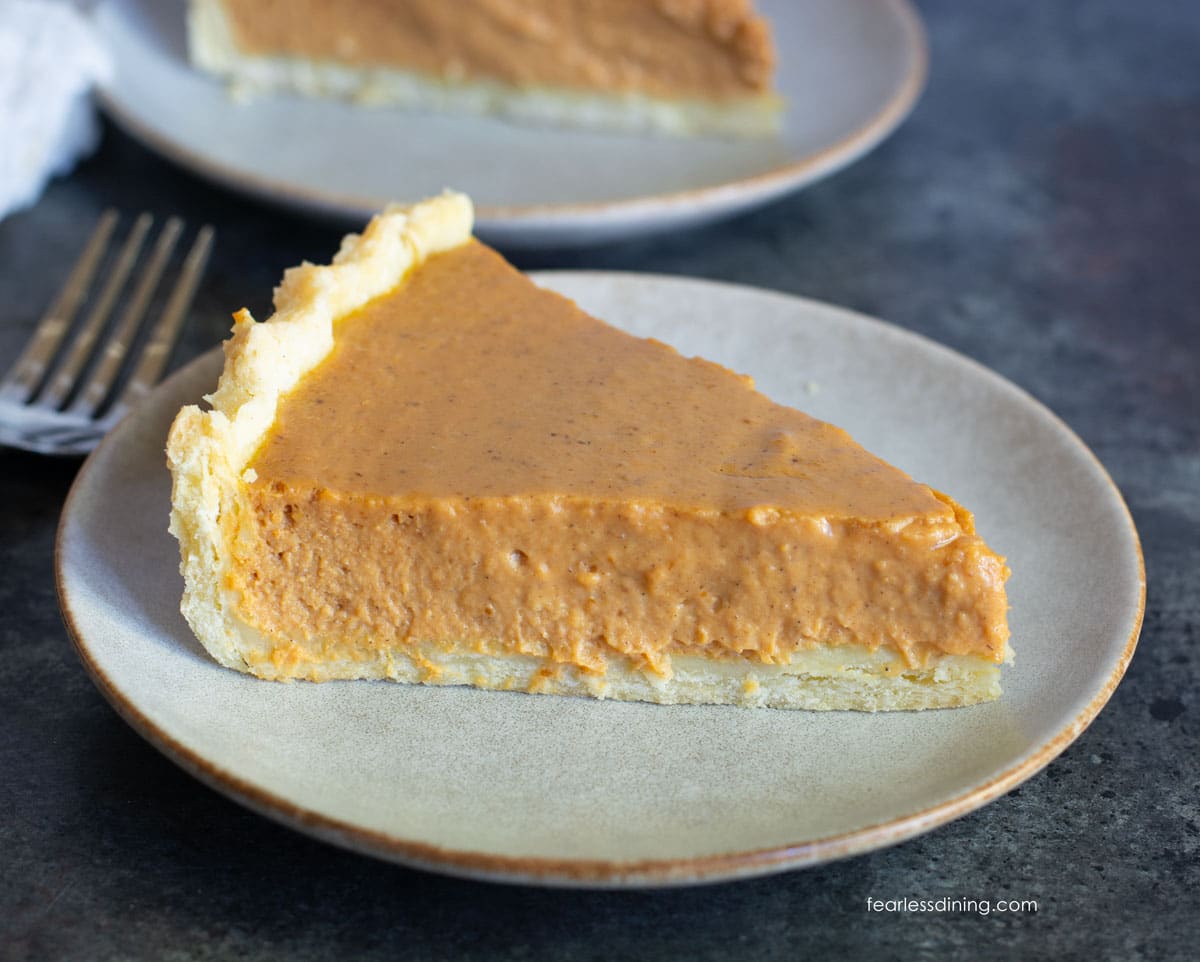
Step 8: Remove the pie from the oven and set it to cool on a wire cooling rack. Let the pie completely cool for an hour. Loosely cover the pie with plastic wrap and chill in the refrigerator. Serve the pie when cool.
You can decorate the top of the pie with whipped cream, pecans, or serve it plain. My family loved this pie, and I hope your family does as well!! If you have sourdough discard to use up, you can also use this Gluten-Free Sourdough Pie Crust recipe instead with this pumpkin filling.
Tips For Success
1. Freeze the butter if you are using a grater, so it is very cold. It will help build those flaky layers in your pie crust.
2. Chill the dough before rolling it out. Wrap the dough in plastic wrap to prevent it from drying out.
3. For even more tips on baking the perfect pie, see my Gluten-Free Pie Troubleshooting Guide!
How to avoid the top of the pie from cracking:
My first attempt at this recipe resulted in a cracked top. I wanted to take the time to discuss this. This fail is more likely to happen if you use a deep pie pan instead of a metal pie pan. Here are my best tips to prevent the top of your pie from cracking.
- The most common cause of pie cracks is overbaking the pie. Pumpkin pie continues to set as it cools, so remove it from the oven when the center still has a slight jiggle.
- Bake your pie at a lower temperature. I used 350°F (162°C-177°C), which helps the filling set more evenly without creating too much heat that leads to cracking.
- Another option I often use when baking sourdough bread is a water bath. Fill a larger baking pan with a bit of water (about 1 inch up the sides.) Place the pan on the lower shelf in the oven while your pie bakes. This will help regulate the heat more evenly and prevent overbaking.
- Avoid opening the oven door frequently. This is where I made an error, and I don’t want you to make the same mistake. A sudden shift from hot to cool can cause the filling to contract too quickly, resulting in cracks.
How to store leftover pumpkin pie:
Store the leftover pie by covering it tightly with foil or plastic wrap. Place the pie in the refrigerator. Once more of the pie has been eaten, I slice it and put the slices into an airtight container.
More Gluten-Free Pie Recipes:
Need more inspiration? I have a lot of incredible gluten-free pie recipes to choose from:
- Mom’s Best Gluten-Free Blueberry Pie
- Gluten-Free Apple Pie with a lattice crust
- Gluten-Free Derby Pie
- Incredible Gluten-Free Pecan Pie
Love This Recipe?
If you made and enjoyed this recipe, I would be incredibly grateful if you could leave a comment below. Please include which flour blend you used. This will help others know this recipe is delicious. Thank you!
Homemade Gluten-Free Pumpkin Pie (The Flakiest Crust!)
Ingredients
- 1 ½ cups gluten free flour blend see notes
- ¼ cup cane sugar
- ¼ teaspoon salt
- 9 tablespoons unsalted butter cold!
- ¼ cup water + 2-3 TBSP
- 1 teaspoon lemon juice
- 15 ounces pumpkin puree see notes
- 14 ounces condensed milk, sweetened
- 2 large eggs
- 1 teaspoon pure vanilla extract
- 1 ½ teaspoons pumpkin pie spice
- 1 teaspoon ground cinnamon
- ⅛ teaspoon salt
Method
- Freeze a stick of butter for 30 minutes before using it. If you don't have time to do this, you will want to use very cold butter.
- I used my popular Gluten Free Pie Crust recipe as the crust base for this pie. It gets rave reviews and works well with multiple gluten free flour blends.
- Add the flour, salt, and sugar to a large mixing bowl and whisk to blend them.
- There are two ways to cut the butter into the dry ingredients. You can use a cheese grater to grate the butter into the flour, or you can cut the butter into the dry ingredients using a pastry blender.
- I used a cheese grater with frozen butter. If you use a cheese grater, use a spoon to scoop up flour and dump it onto the butter shreds. This will prevent them from sticking together, and you will get better flaky layers.
- Add the wet ingredients to a small bowl and pour them into the flour and butter mixture. Mix until it resembles pie dough. Wrap the dough ball in plastic wrap and refrigerate it for 30 minutes.
- Preheat the oven to 350º F.
- Remove the dough from the refrigerator and unwrap it from the plastic wrap. Dust a silicone mat with a little flour. Place the dough on a silicone mat. Cover it with a piece of wax paper and roll it with a rolling pin. You can also dust the top of the dough with extra flour and roll it without the wax paper.
- Spray gluten free baking spray on a pie dish. Pull the wax paper off the top of the dough. Use the silicone mat to lift the pie dough over the pie dish. Invert it so the dough is centered over the dish. Put the dough in the pie dish and remove the silicone mat.
- Use your fingers to press the dough into the pie pan. Pinch the edges of the pie crust to crimp them.
- Add the pumpkin, egg, condensed milk, and spices to a large mixing bowl.
- Use a whisk to whip the wet ingredients together. Preheat the oven to 350º F. Set the oven rack to the middle of the oven.
- Flash-bake the pie crust for 5-8 minutes. Remove the pie crust from the oven and pour the pie mixture into it. Bake the pie for 40-45 minutes until done. If you notice the crust getting too baked, you can tent the pie with foil toward the end of the baking time.
- When the pie is finished baking, it should be fairly firm to the touch.
- Remove the pie from the oven and set it to cool on a wire cooling rack. Let the pie completely cool for an hour. Loosely cover the pie with plastic wrap and chill in the refrigerator. Serve the pie when cool.
- You can decorate the top of the pie with whipped cream or pecans or serve it plain. My family loved this pie, and I hope your family does as well!!
- Store the leftover pie by covering it tightly with foil or plastic wrap. Place the pie in the refrigerator. Once more of the pie has been eaten, I slice it and put the slices into an airtight container.
Nutrition
Notes
- I tested my pie crust with King Arthur Measure for Measure, Bob’s Red Mill 1:1, Cup4Cup (see below), and Namaste GF Blend. Other blends should work, but you may need to adjust the liquid or dry ingredients.
- New Cup4Cup Formulation – Both formulations of this flour are on the market until the old one sells out. Read your Cup4Cup bag on the front. The new formulation says it is free of the top 9 allergens. The older bags do not say this. This brand reformulated its blend to be dairy-free. I am slowly testing it in my recipes.
- If your blend doesn’t contain a binder, you will want to add 3/4 teaspoon of xanthan gum.
- Make this recipe dairy-free; use dairy-free butter and coconut condensed milk.
- The most common cause of pie cracks is overbaking the pie. Pumpkin pie continues to set as it cools, so remove it from the oven when the center still has a slight jiggle.
- Bake your pie at a lower temperature. I used 350°F (162°C-177°C), which helps the filling set more evenly without creating too much heat that leads to cracking.
- Another option that I often use when I bake sourdough bread is a water bath. Fill a larger baking pan with a bit of water (about 1 inch up the sides). Place the pan on the lower shelf in the oven while your pie bakes. This will help regulate the heat more evenly and prevent overbaking.
- Don’t open the oven door frequently! This is where I erred, and I don’t want you to make the same mistake. A quick shift from hot to cool can cause the filling to contract too quickly, leading to cracks.
Private Notes
Tried this recipe?
Let us know how it was!
Gluten-Free Related Reading
Gluten-free baking is like a science experiment. There are so many things you need to understand the different components of baking without gluten. My Gluten-Free Resources Section is here to help teach you the tools you need to know to become a confident gluten free baker.
My Best Gluten-Free Baking Tips For Better Baking!
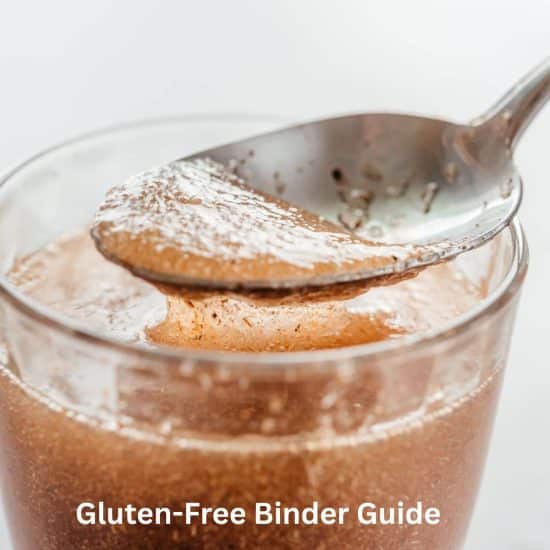
Why Binders Are Important In Gluten-Free Baking

The Best Gluten Free Flour Blends – And how to use them!
I truly hope you enjoy this recipe. I have been testing and creating gluten-free recipes for over 15 years. Creating gluten-free recipes that do not taste gluten-free is my goal for every recipe. Sometimes I only have to test a new recipe a couple of times, and others it takes multiple times. I do this so you get reliable, delicious results every time!

I made this recipe for the gluten freebies in my family, including me. The other half got store bought. I had a premade crust so I did not make your pie crust. I loved it. The flavor was good and the spice not to overwhelming. We all had our’s with some whipped cream. It was a hit.
I wanted you to know I have made several of your recipes and all have been loved by everyone including the non gluten free peoples . Thanks.
I am so glad you loved this pie recipe. I am glad you used a store bought crust…I bet it tasted incredible.
Perfect timing! I’m making the desserts for our friend’s annual Thanksgiving get together here in the UK and I need the pie to be gluten-free! Thank you, Sandi!
That is so sweet of you to try my recipe for your friendsgiving! Thank you!
no baking powder or sugar listed in the ingredients but mentioned in the instructions
Hi Nancy, Thank you. The 1/4 cup sugar goes in the crust and there is no baking powder so I fixed that.