

These soft and flaky gluten-free biscuits are easy to make with just 5 ingredients. I made sure this recipe is fail-proof by testing 12 different gluten-free flour blends, and I share how each blend performed and what tweaks you need to make based on the gluten free flour blend you use. There are dairy-free and vegan options as well. Whether you are new to gluten-free baking or you just want the tallest biscuit recipe, this is the recipe to make.
This post may contain affiliate links. Please read our Disclosure Policy.
❤️ Sandi’s Recipe Summary
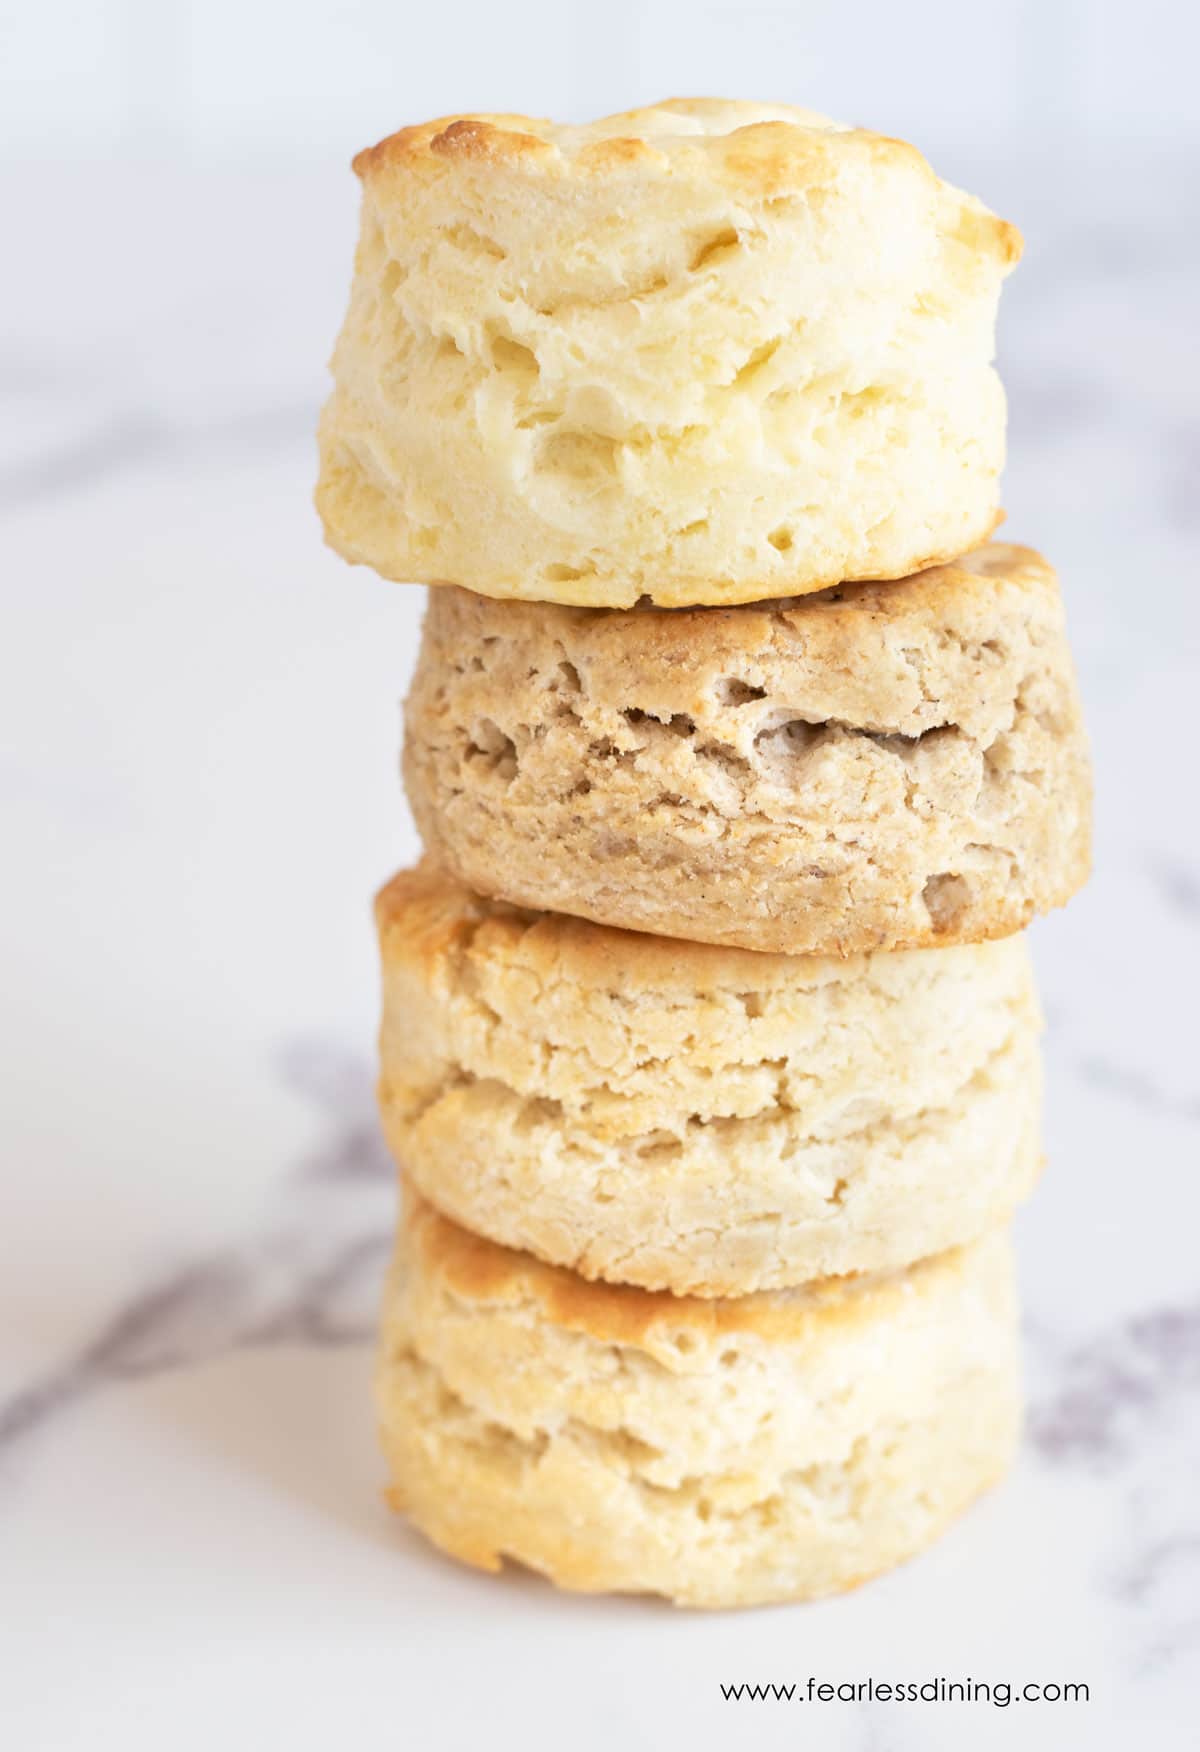
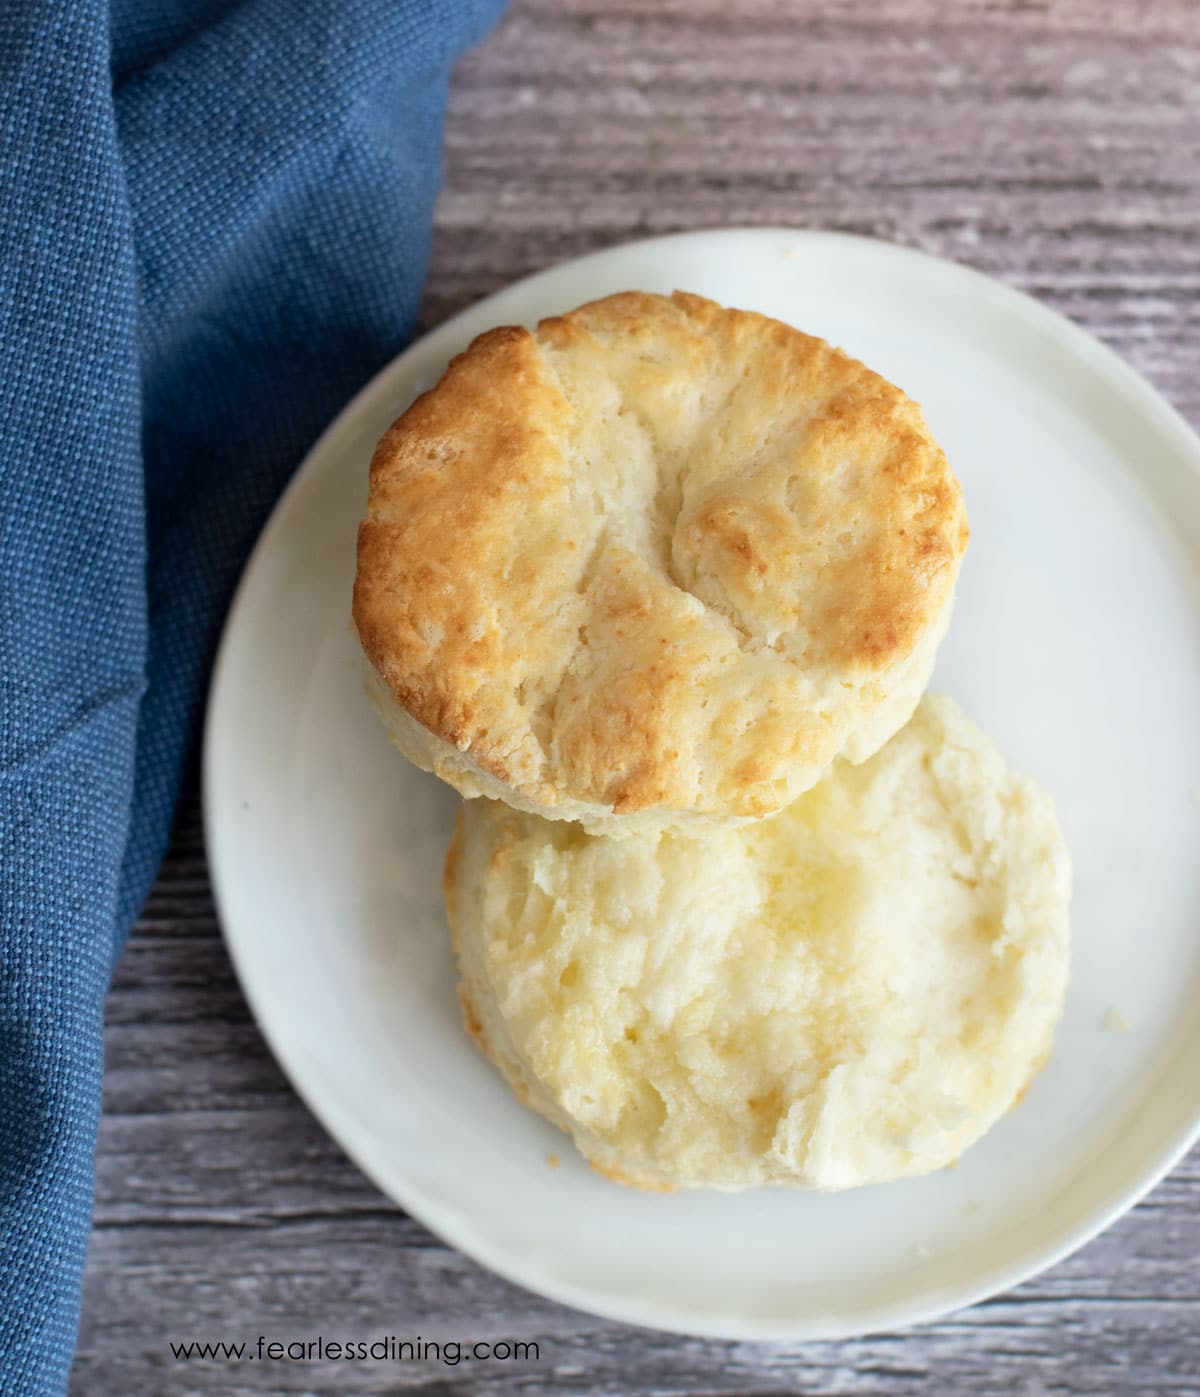
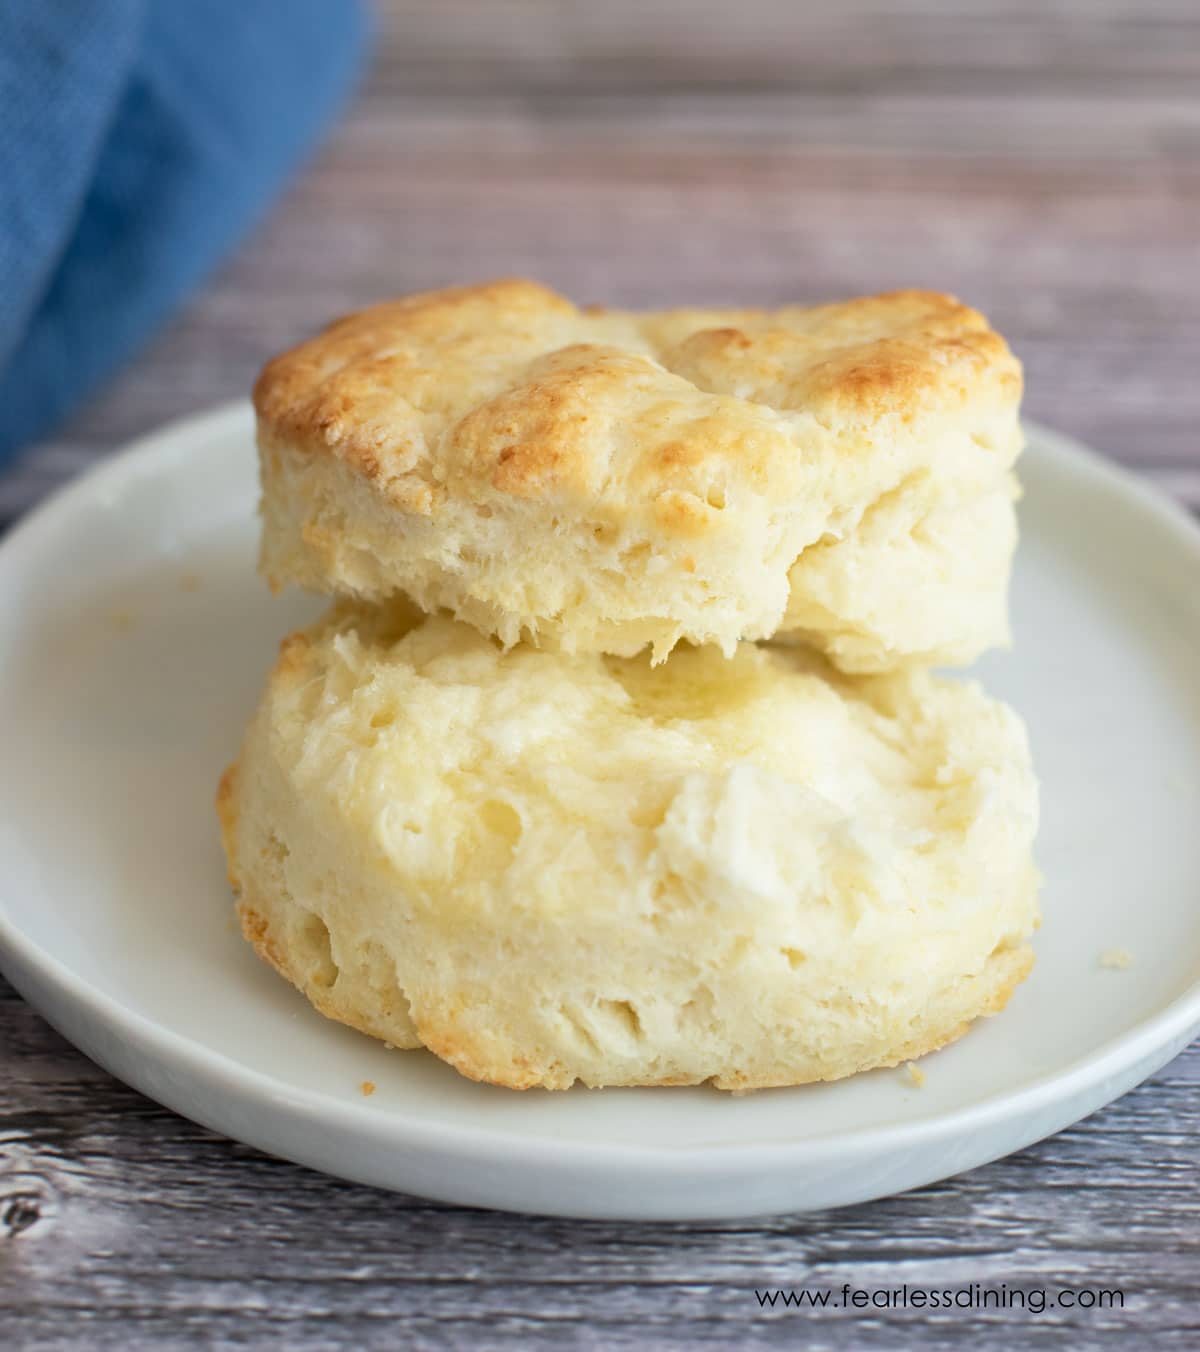
The Quick Bite: These big, flaky biscuits are made with just 5 simple ingredients, and there is also a vegan option.
I created this homemade biscuit recipe several years ago. I noticed a lot of variance between how each gluten free flour blend worked in my recipe. I decided to test this recipe using different flour blends side by side to see how they compare. I looked at the rise, texture, and taste, and then adjusted the moisture as needed for each blend so you can get consistent results.
If you are tired of making biscuit recipes that don’t turn out, are heavy like hockey pucks, or just don’t taste good, this is the recipe you need. Find the gluten free flour blend you plan to use below so you know if you need to add more milk or flour to adjust for that blend.
When I first started to create this recipe, my inspiration was this New York Times Biscuits recipe. I converted it to gluten-free. For more biscuit recipe inspiration, see all of my gluten-free biscuit recipes, which include both sweet and savory options.
Video: Watch Me Make These Gluten-Free Biscuits
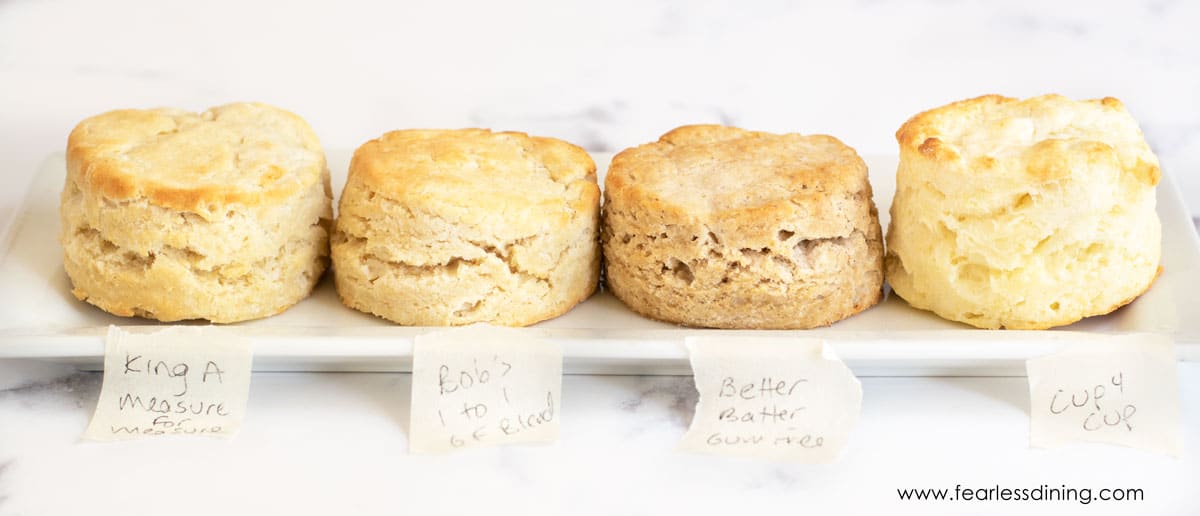
Gluten Free Flour Blends I tested and My Testing Notes
Most gluten-free flours rose similarly in my test, but many needed adjustments to the moisture level. Every blend has a different starch-to-grain ratio. Read Why Gluten Free Flour Blends Vary to learn why this happens.
Cup4Cup had the best rise. Here are a few things that stood out, including any adjustments you need to make:
- Arrowhead Mills 1:1 – This blend needed 1 1/2 TBSP of additional milk.
- King Arthur Measure for Measure – The gluten-free biscuit dough was wetter than the other flour blends. It didn’t affect the amount of rise, but the dough spread a little more than others when baking. I didn’t add more flour, but used about two teaspoons of flour sprinkled on the top to press the dough down enough to use the biscuit cutter.
- Better Batter Artisinal Gum-Free – I had to add two tablespoons of additional milk so the biscuit dough wasn’t too stiff.
- Bob’s Red Mill 1 to 1 Gluten-Free Blend – I felt the dough was workable without additional flour or milk. I recommend letting the dough sit in the refrigerator for 15-20 minutes. This will allow the rice flour to soften.
- Cup4Cup – Cup4Cup changed/reformulated the recipe of their gluten-free flour blend. The version I loved most had dried milk powder. The new formulation is the version that says “free of the top 9 allergens” on the front of the bag. It also works well in this recipe.
- Pillsbury Gluten-Free Flour Blend – This flour performed well without any additional modifications.
- Target Good & Gather Gluten-Free Blend – The biscuits tasted great, but are a little more crumbly than other gluten-free blends. I would recommend adding 2 TBSP of additional milk.
- Just About Food Whole Grain Gluten-Free Blend – I had to add almost 1/2 cup of additional flour because the biscuit dough was so wet with just 1 cup of milk. Again, this flour was terrible, and I don’t recommend using it.
- Pamela’s GF All Purpose Flour – Another winner! NOTE: You need an additional 1/4 cup of milk using this brand.
- Gluten-Free Bisquick – Check out this Gluten Free Bisquick Biscuit recipe. This blend is very rice-heavy, which means baked goods can turn out very gritty. To prevent this, chill the dough in the refrigerator for 20 minutes so that the rice flour can soften.
- I tested this recipe with my DIY Gluten-Free All Purpose Flour Blend. These gluten-free biscuits without xanthan gum turned out great. This blend was great in this gluten free biscuit recipe without xanthan gum for those who are gum-free. You need 1 TBSP of additional milk if you use my flour blend.
- Namaste Organic Flour Blend– This blend surprised me. It rose very well. I added 1 TBSP of additional milk.
Reader Tested Flour Blends:
Many of my readers also participated in this gluten-free biscuit baking test and sent me the blends they had used successfully. I love it when my readers write to me with the blends they try because we all benefit!
- Pinterest reader Jess W. said, “I use the GF Americas Test Kitchen flour blend that I make up in large quantities and add a teaspoon of xanthan gum. “Works awesome; my family loves them!”
- Sunset Divided Flour
- Jules Gluten-Free Flour
- Mannis Gluten-Free Flour
- Life Smart All-Purpose Flour Blend
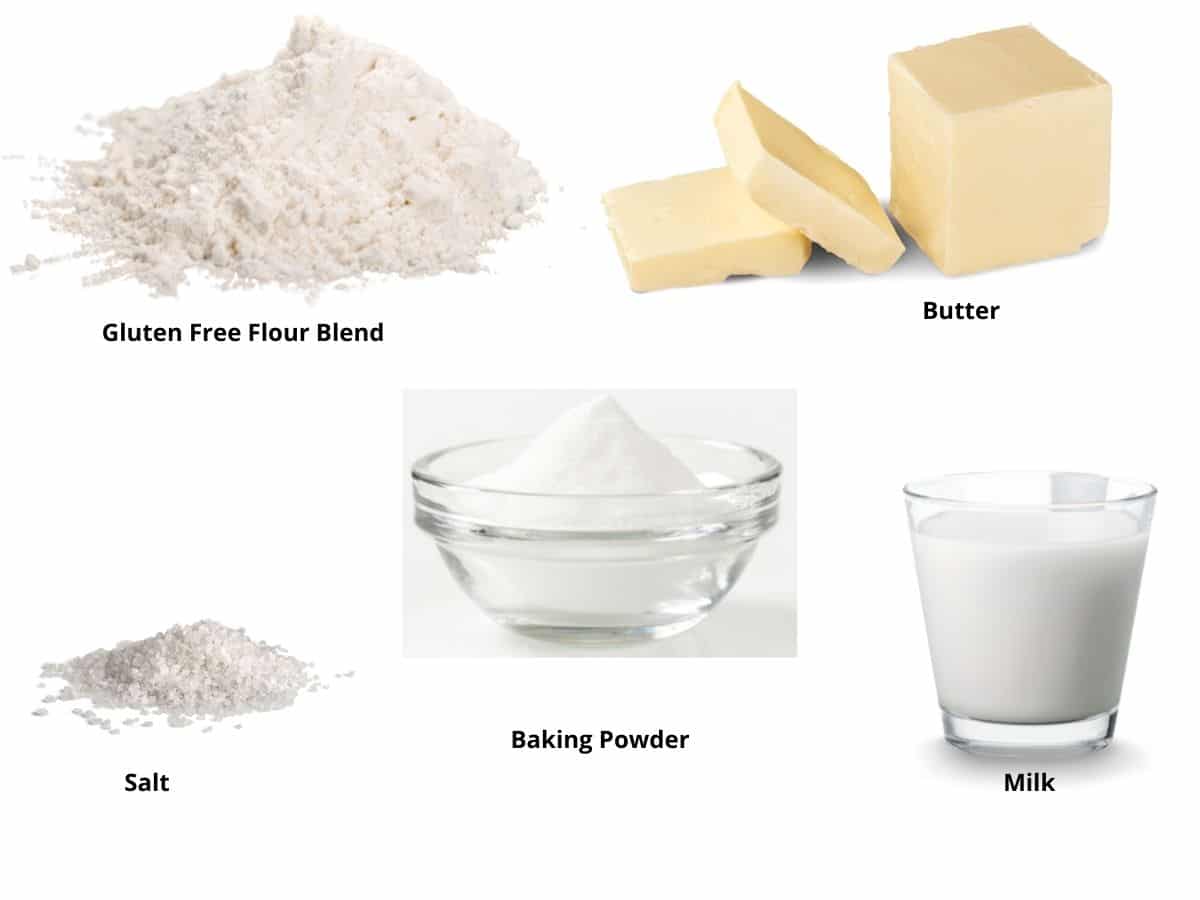
Ingredient Notes:
For the full list of ingredients and amounts, please go to the recipe card below.
- Gluten-Free Flour – See above for the best flour blend to use, and all of my testing notes on other gluten free flour blends.
- Binder – Make sure your blend contains xanthan gum or another binder. If not, add a teaspoon of xanthan gum to your flour mix.
- Baking Powder – This recipe calls for two tablespoons of baking powder. You must use aluminum-free baking powder. Regular aluminum baking powder will leave a strong metallic aftertaste. I tested Rumford, Bob’s Red Mill Baking Powder (labeled GF), and Thrive Market Aluminum-Free Baking Powder with good results. Other brands of gluten-free baking powder without aluminum include Argo and Bakewell Cream.
- Butter – I used unsalted butter. It is a personal preference. If you use salted butter, you may consider reducing the amount of added salt. Use regular butter or vegan butter. Just make sure the vegan butter is very cold if you use it.
- Milk – I prefer using whole milk. You can use non-dairy milk, but be sure to use one that is not sweetened or flavored. You can also use buttermilk if you prefer gluten free buttermilk biscuits.
I also have several flavored biscuit recipes, such as these Gluten-Free Pumpkin Biscuits and Gluten Free Cornmeal Biscuits.
How to Make Gluten-Free Biscuits (Step-By-Step):
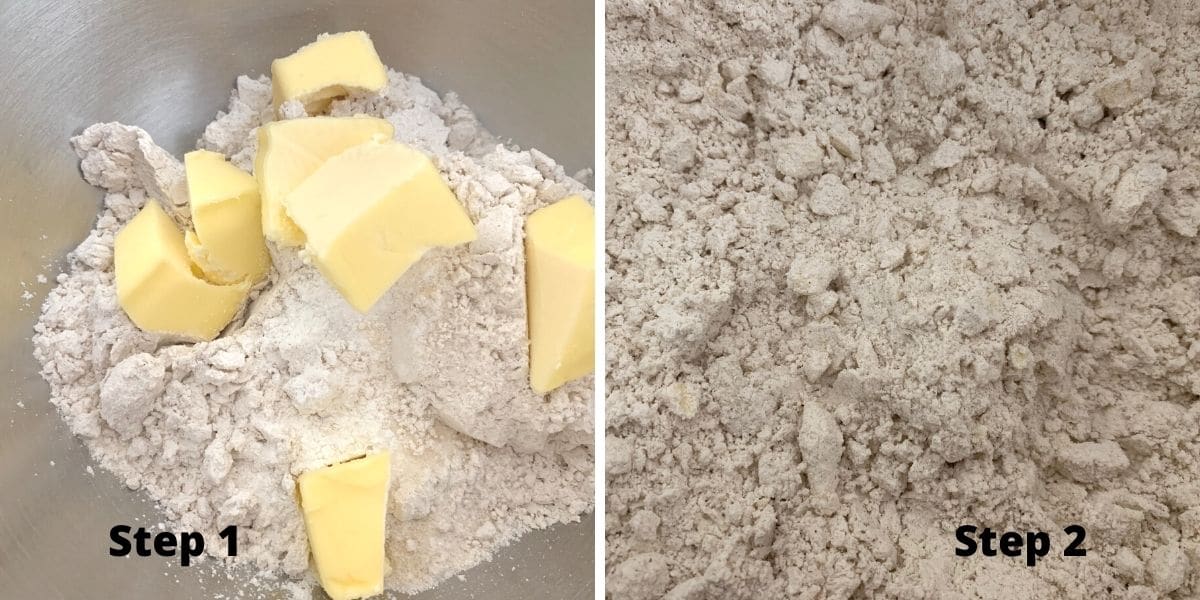
Step 1: Add your dry ingredients to a bowl and whisk them to blend. Add the 5 TBSP of cold butter. Use a pastry blender to cut the butter into the flour.
EASY TIP: If you do not have a pastry blender, freeze the butter, then grate it into the dry ingredients with a large cheese grater.
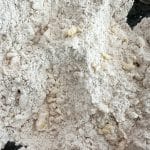
Step 2: Your flour mix will resemble crumbs, as shown in this photo.
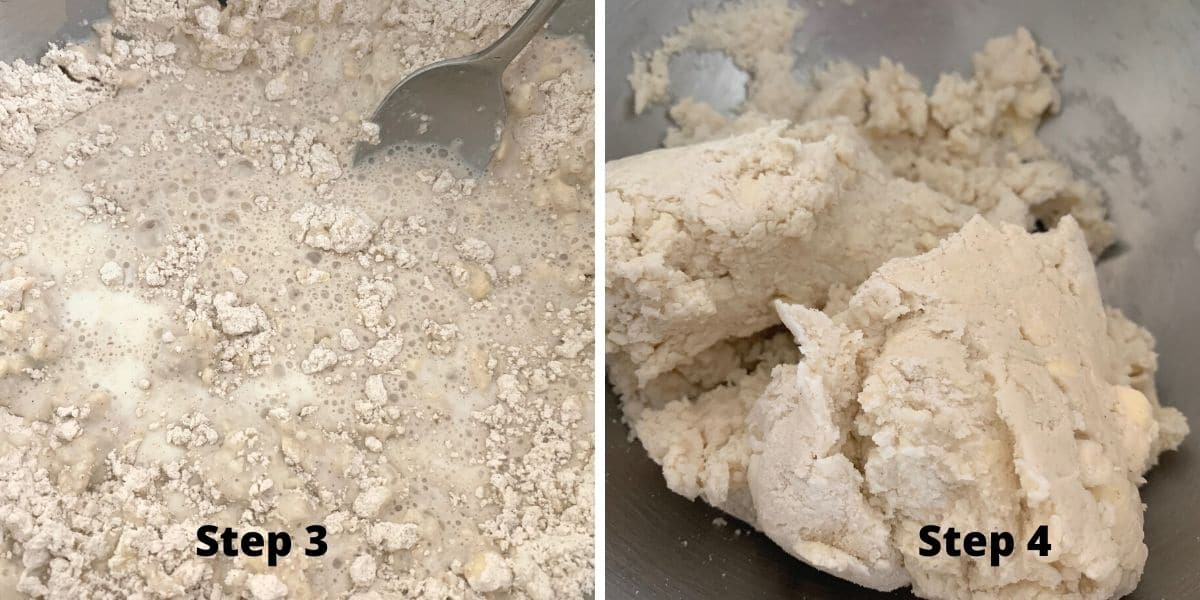
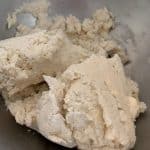
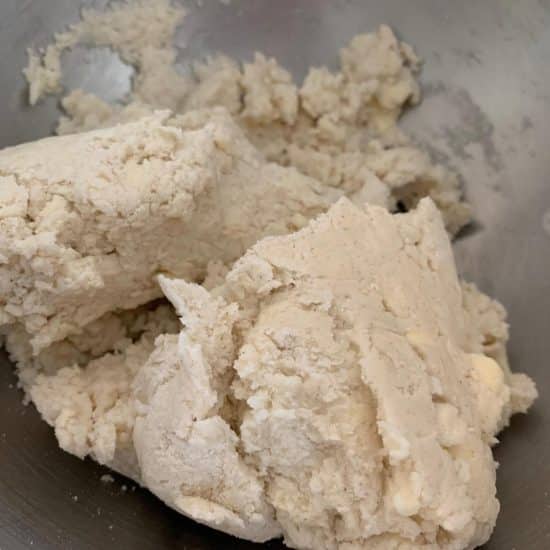
Step 3: Add the milk and mix it into the dough.
Step 4: Your dough should have a consistency similar to the one shown in the photo above. If your dough is too wet, add more flour; if it’s too dry, add more milk. If you work the dough a lot, trying to get the consistency right, put the dough into the refrigerator for 15-20 minutes to re-chill the butter.
Email This Recipe To Me!
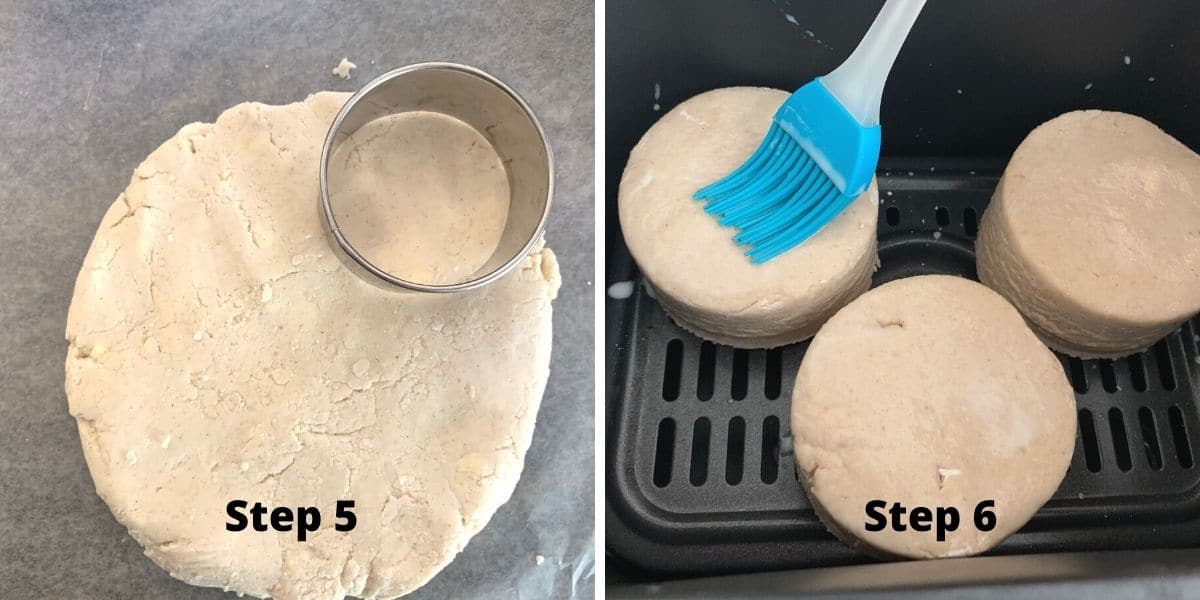
Step 5: Put the dough on a silicone mat. You may want to dust it with a tiny bit of gluten-free flour. It depends on which gluten-free flour blend you use. Press the dough to a thickness of 1 1/2 inches. Use a biscuit tool to cut out biscuit shapes from the dough. You can use a large ice cream or
Step 6: Place your biscuits on a parchment paper-lined cookie sheet to bake in the oven. Brush the top of each biscuit with milk. This will help your biscuits get that nice golden color.
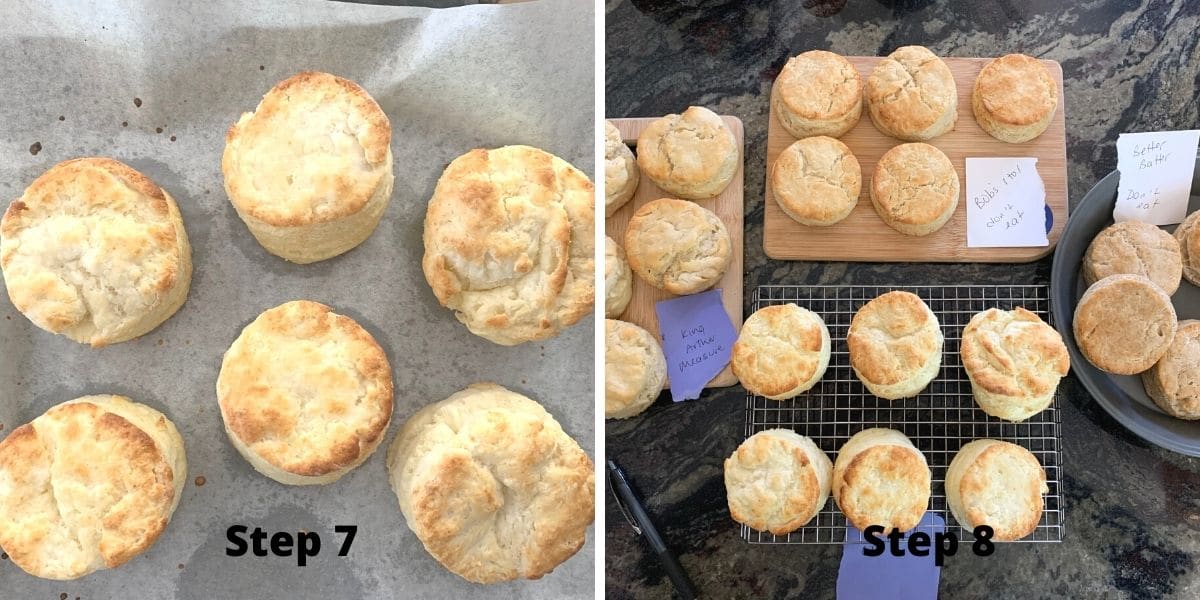
Step 7: Bake the biscuits at 425º F for 15 minutes. You will know the biscuits are done baking when they have a light golden color on top.
Step 8: Here are some test batches. I baked one at a time, so each cooled on a wire rack before transferring to another tray while the next set cooled. Note that I had to put a “Do Not Eat” sign on the biscuits so my family would not take any!
Store in an airtight container. They will stay fresh for up to 3 days, but they may not retain their fluffiness as they did on the first day. I recommend freezing the extras and reheating them in a microwave.
Spread this Kumquat Honey Butter over warm biscuits for a citrusy flavor. These biscuits are the perfect topper for my Gluten-Free Chicken Pot Pie recipe!
Biscuit Troubleshooting:
- If your biscuits turned out flat, either the dough was too warm and should be chilled for 15 to 20 minutes, the baking powder had expired, or you twisted the biscuit cutter.
- If your biscuits are crumbly, either you did not use a flour blend with a binder, or the dough was too dry. Add 1 Tbsp milk at a time to hydrate the dough.
- If your biscuits taste gritty, you may have used a rice-heavy blend, and the biscuit dough needs to rest 15 to 20 minutes before baking.
Frequently Asked Questions:
Yes! Make these vegan by using vegan butter and dairy-free milk. Several readers made these biscuits vegan using Country Crock, Violife, and Earth Balance. They have also used almond milk and rice milk. I have had success with Oatly Basic.
Yes, you can use buttermilk to make the biscuits. It is very easy to make buttermilk from scratch. Reduce the baking powder to 2 teaspoons and add 1/2 teaspoon of baking soda.
Yes, that is not a typo.
I made these biscuits tonight for a de-constructed chicken pot pie. Because it was the first time I tried the recipe, I didn’t know if they would get soggy cooking them on top of the the chicken and vegetables. I used King Arthur Measure for Measure flour. I made them dairy free with almond milk and Country Crock Plant Butter. I used 2 extra tablespoons of almond milk. I made 8 drop biscuits that baked in about 16 minutes. They were the best biscuits I have had since becoming gluten free about 12 years ago.”
Bethany, Blog comment
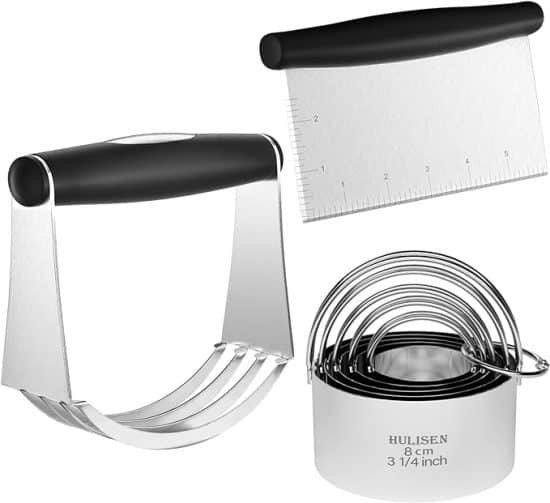
My Favorite Biscuit Tools:
I absolutely love this biscuit set I bought on Amazon. It has everything you need to make biscuits (or scones). It includes a pastry blender, biscuit tool in multiple sizes, and a cutting tool for making square-shaped biscuits. It is all dishwasher safe and easy to clean.
You can also make these biscuits in your air fryer. Just follow these directions for my Gluten-Free Air Fryer Biscuits.
More Gluten-Free Biscuit Recipes to Try:
If you liked this biscuit recipe, try one of my other biscuit flavors! Here are some favorites:
- These Gluten-Free Cheese Biscuits are easy to make. Use any cheese flavor you enjoy!
- Sweeten things up with these Gluten-Free Cinnamon Sugar Biscuits.
- We love serving these Gluten-Free Oat Biscuits with breakfast!
- Vary the sweetness level to make these Gluten-Free Chocolate Biscuits sweet or savory!
- Need grain-free? These Paleo Biscuits get rave reviews!
- Use sourdough discard to make these Gluten-Free Sourdough Biscuits.
- These Gluten-Free Bacon Cheddar Biscuits are also tasty!
Love This Recipe?
💬 Did you make this gluten-free biscuit recipe? I would love to hear how it turned out, and which pan or flour blend you used! Your feedback helps others (and helps me keep improving these recipes for you). ⭐⭐⭐⭐⭐
Gluten-Free Biscuits (Big, Flaky, and Easy!)
Equipment
- Biscuit Tool
Ingredients
- 2 cups gluten free flour blend See note section below for gram measurements
- 2 tablespoons aluminum-free baking powder 12 grams; see note
- 1 teaspoon salt 6 grams
- 5 tablespoons unsalted butter 71.5 grams; COLD
- 1 cup milk 227 grams; see note
Instructions
- Combine 2 cups gluten free flour blend, 2 tablespoons aluminum-free baking powder, and 1 teaspoon salt in a large mixing bowl and whisk the ingredients to blend them.
- Add the cold 5 tablespoons unsalted butter to the mixing bowl.5 tablespoons unsalted butterUse a pastry blender to chop in the butter into the flour. These cold butter shreds are what helps make the flaky layers! You want the final mixture to look like flour with a lot of butter crumbs.
- *If you do not have a pastry blender, you can freeze the butter and use a cheese grater to shred the frozen butter into the dry ingredients.
- Add the 1 cup milk to the bowl and mix to form a nice dough ball. It should be soft, firm, and workable. Do not overwork the dough or the butter bits will melt.
- Preheat your oven to 425º F.
- Put the dough on wax paper or a silicone mat. Depending on the gluten-free flour blend you used, you may want to dust the wax paper or silicone mat with a tiny bit of gluten-free flour. It depends on which gluten free flour blend you use. Press to 1 1/2 inch thickness.
- Use a biscuit cutter to cut out biscuit shapes from the dough. If you prefer, you can use a large ice cream scoop or cookie scoop to make drop style biscuits.
- Place each biscuit on a parchment paper lined cookie sheet.
- Brush the top of each biscuit with milk. This will help your biscuits get that nice golden color on top. (Note, if you are using dairy-free milk, the biscuits will not get as golden in color.)
- Bake at 425º F for 15 minutes until the biscuits are golden on top. (If you use plant-based milk and butter, the biscuits will not get as golden. You can tell they are finished baking when they have risen and have visible risen layers.)
Video
Notes
- Gram Measurements: King Arthur Measure for Measure is 291.4 g, Bob’s 1:1 is 304.4g, Namaste is 267.2g, and Cup4Cup 297.8g (old version). I haven’t had a chance to measure other blends. Other gluten-free blends will weigh differently, so if you bake by weight, please check your brand’s nutrition label or weigh 1 cup yourself before starting.
- Please read my full post for the list of tested gluten-free flour blends and the adjustments needed. It is too long to post here in the notes.
- If your blend does not contain a binder such as xanthan gum or psyllium husk as a binder, add 1 tsp of xanthan gum.
- You need to use VERY cold butter. If you use a grater, use frozen butter.
- This recipe calls for 2 TBSP of aluminum-free baking powder. Be sure to use aluminum-free baking powder. Regular aluminum baking powder will leave a metallic aftertaste. I used Thrive Market Aluminum-Free Baking Powder. Other brands of gluten free baking powder without aluminum include Rumford, Argo, and Bakewell Cream.
- To make this biscuit recipe dairy-free, use non-flavored/sweetened dairy-free milk and vegan butter. Several readers have successfully tested multiple dairy-free brands.
- Each brand of flour blend performed a little differently. This is because every blend has a different starch-to-grain ratio. Please read the post for some tips for each blend. Some needed additional liquid.
- If you prefer to use buttermilk, you can add 1 TBSP of lemon juice to one cup of milk. Use 2 teaspoons of baking powder and 1/2 teaspoon of baking soda if you use buttermilk.
- These biscuits will keep fresh for up to 3 days in an airtight container or up to 4 months in the freezer. Freeze the cooled biscuits in a freezer-safe container or zipper bag.
Email This Recipe To Me!
SPECIAL NOTE
Please know that every gluten free flour blend has a different starch to grain ratio. If you use a blend I didn’t test, my rule of thumb is to add more flour if your dough or batter is wet and add more liquid if the dough or batter is too dry!
Nutrition
Nutrition Disclaimer
Nutritional information is an estimate provided to you as a courtesy. You should calculate the actual nutritional information with the products and brands you are using with your preferred nutritional calculator.
I truly hope you enjoy this recipe. I have been testing and creating gluten-free recipes for over 15 years. Creating gluten-free recipes that do not taste gluten-free is my goal for every recipe. Sometimes I only have to test a new recipe a couple of times, and others it takes multiple times. I do this so you get reliable, delicious results every time!


I was wondering what the difference is between using flour mixes and just using gluten free biscuit mix.
Hi Suzanne, The main difference is with biscuit mixes tend to include a leavener. Often Bisquick and cheaper mixes tend to turn out more grainy because they don’t mill the rice flour as finely.
Thank you so much for clearing that up for me Sandi! I’m definitely going to give one of your recipes for gf biscuits and other recipes a shot because I have been craving biscuits for so long and couldn’t figure out why the biscuit mixes weren’t working!
I understand the concept of mixes, but they cost more and often don’t work as well. One tip when using a mix is to let the batter or dough sit for 15-20 minutes to allow the rice flour to soften. That can eliminate grit. Anything you need to rise with flaky layers, like biscuits, the dough should be wrapped in plastic wrap and sit in the fridge so the butter bits don’t melt.
Hi Sandi: I have been trying recipe after recipe and myriad gf flours to try to come up with a high profile, flaky biscuit. I finally came upon yours and was truly impressed you gave it a shot with multiple flours! Way to go!! As a jazz musician I cannot help myself slightly winging things but for your recipe I “mostly” stayed to the “sheet music”. I used Measure for Measure (this time), went with 4/5 2% milk and 1/5 half-half. Then, I added 1T white vinegar to simulate buttermilk. Froze the butter. No biscuit cutter so used glass jam container. The. Best. Ever. I was amazed, frankly. Thank you so much, so much!
You made my day. My husband and I are jazz fans, and he used to play the trombone in his jazz band, and your note gave us both a big smile. I am so glad you enjoyed the biscuits and got to add a few creative “notes” to make it extra special.
“Bone” players are a special breed, indeed! 🙂 Next time I am trying the ATK flour as another reader did w success! Keep supporting jazz, you two! 1000 thanks again!
Hello! I followed this to a tee and brought them to a breakfast potluck for work. Unfortunately I had to throw them out, as they had an awful taste. I used Bob’s gluten-free flour, added 3/4 tsp of Xantham gum as recommended in the recipe (and as per directions on Bob’s packaging), and two tablespoons of Arm & Hammer baking soda, which claims to be aluminum-free. They rose well and looked great with a good texture, though they smelled funny. I thought this was maybe just because of the gluten-free flour, which I hadn’t used before, but after my first bite my whole mouth felt awful and my colleague who had a bite said all she could taste was baking soda. I quickly had to warn everyone not eat them and took them to the compost. The recipe states “2 tablespoons aluminum-free baking powder 12 grams” but after trashing them, I looked up the conversion: 1 tablespoon = 17.07 grams. If 12 grams is the correct measurement, 2 tablespoons equates almost three times the required amount. :/
Hi Evie, There is a lot to unpack in your comment, and I want to make sure I give you advice so you can bake these successfully next time. First, I think you used Bob’s All Purpose Flour, which is made with bean starch. That isn’t a great choice and bean flour can add a little bitterness. My recipe specifically calls for baking powder, which is VERY different from baking soda. (Baking soda should never be used in such a large quantity.) Aluminum-free baking powder is what works in this recipe, and has no aftertaste. I hope you are able to try this recipe again, these biscuits are really good. I hope this helps.
Oh my goodness! I owe you the greatest apology — I don’t know why I read “soda” over and over when looking at this recipe. Thank you for taking the time to respond and calling me on that — I will definitely try the recipe again!
I am so glad we figured it out and now you can make these biscuits and be proud enough to take them to a potluck. If you haven’t seen it, I have a YouTube video linked in this recipe that you can watch me make the entire recipe on video. I am not a great public speaker, but it is a really helpful video.
I used King Arthur measure for measure flour blend, weighed out the grams, aluminum feee baking powder, country crock non dairy butter and non dairy cream. I had to add a little bit more cream to the mix as it was slightly dry and wasn’t coming together. I brush them on top with the dairy free cream, which did not work to Brown them in the oven. Unfortunately, they were not great. The flavor wasn’t bad, but they fell apart easily, and the texture was off. It was the type of biscuit that sticks to the roof of your mouth. I’m thinking maybe I shouldn’t have used the cream. Maybe it was too thick and I should’ve used milk. I’m just writing this so that other people can learn from my mistake.
Hi Anna, My recipe doesn’t call for cream, so I am wondering why you used that instead of milk. That is probably why the texture was off.
So now that Cup4Cup is different what flour do you prefer to use? I was making a different GF biscuit recipe and I finally ran out of original C4C and used King Arthur and they were the worst biscuits ever. your recipe is very different but i’m willing to switch if you can make a similar biscuit to my old C4C.
Hi Emily, so many of us food bloggers wrote to Cup4Cup in dismay that they discontinued the old blend. I did get a chance to try the new version and it worked well. It is important to brush milk over the top so they get a golden top now that their flour doesn’t have the dried milk powder. I am sorry the other biscuit recipe didn’t work out. I am sure it will work in mine, but it is very important to use aluminum-free baking powder and not to twist the biscuit cutter tool when you cut out the biscuits.
Sorry to keep being a nuisance. I love to cook and bake but over the years it’s become more and more difficult for me to do any baking that has a lot of steps because of it causing back pain after awhile, so I look for more simple gluten free recipes that don’t require as much effort. You’re recipe for gf biscuits sounds like something I can do fairy easily. My question is why should you not twist the biscuit cutter when cutting out the biscuits?
Please, I love helping and answering questions…even more so if it helps to reduce your pain level. Twisting the biscuit cutter seals the edges, which prevents them from rising tall. I hope this helps. Freezing the butter and using a cheese grater will shred the butter eaiser than using a biscuit cutter. Plus you can sit down if that is easier on your back.
I used King Arthur gluten free flour, Argo aluminum-free baking powder, and followed the recipe to a T other than having to add a bit more milk to make the dough workable. Baked them for 15 min, they didn’t rise much at all, and to be honest they have a horrific taste, which made me wonder if the call for baking powder was supposed to be in teaspoons, not tablespoons. They have an odd, almost chemical taste and a very unusual aftertaste. With just a few ingredients I’m not sure how I could have screwed this up. I doubled the recipe so I was precise with 4C of flour, 10T of cold butter, 4T of baking powder, 2t of salt, and 2C of milk. What went wrong???
Hi Dave, Just to confirm, you used King Arthur Measure for Measure, 100% sure you used aluminim-free baking powder, and didn’t swap any ingredients? I want to double check that you didn’t use the King Arthur All Purpose Mix? The only time I have heard of a metallic taste is when people use baking powder with aluminum. My recipe was based on the New York Times biscuit recipe, and I am 100% sure it is 2 tablespoons. If they didn’t rise much, I would recommend ensuring the baking powder wasn’t expired. Other reasons these biscuits may not rise is if you twisted the biscuit cutter while cutting out the biscuits, this seals the edges so they can’t rise or if the dough is overworked, the butter bits melt into the dough and you lose the steam pockets the butter makes. I am happy to troubleshoot more if needed.
I cooked these in a cast iron over the campfire – last 10 minutes of a stew cooking, put them on top with a lid and coals – they were amazing. TY!
Hi Jo, Wow, I never thought to cook these biscuits camping, so I am grateful for your instructions. I am sure other readers will want to try this. Thank you.
I used the Complements gluten free flour with zanthan gum already in it. This flour mix has no rice flour- is corn, potato, tapioca. It is Sobey’s store brand. It took a bit more milk than your recipe- between a slosh and a smidge. They didn’t turn out flaky, but nice and soft- kind of cake texture- and crispy on outside. The 3 celiacs in our family liked them a lot, and ate all of them with chili for supper. I will use this recipe again! Thank you!
Hi Judy, From the ingredients you listed, the Complements blend sounds really starchy. I am glad you tweaked the recipe to add a bit more liquid. I am wondering if the soft texture is due to the starches. I am really glad you all loved the recipe.
I used King Arthur 1:1 flour to make 1/2 a recipe and had to add an extra tablespoon of flour. I used this to top a chicken pot pie for 2 and the biscuits didn’t brown as much as I like but tasted wonderful! This will be my go to recipe for biscuits in the future
Hi Janas, I am so glad you loved the biscuits. Did you brush the tops with milk? That will help them brown more.
made these to the directions. tasted good but did not rise. not fluffy at all
Hi Holly, You didn’t give much detail for me to offer how to help you. Basic troubleshooting: Was your baking powder aluminum-free and did you check the expiration date? Did you twist the biscuit cutter when cutting the biscuits from the dough. Did you swap any ingredients? I am happy to help if I know what you did.