
If you are looking for comfort foods, it doesn’t get any better than these homemade gluten free fried mac and cheese bites! They are perfectly crispy on the outside, creamy, and cheesy on the inside!
This post may contain affiliate links. Please read our Disclosure Policy.

(*This post is sponsored by Milton Craft Bakers. They make some of the best gluten free crackers!)
Today is all about comfort food. I start with my family’s favorite gluten free mac n cheese and then make it more fun by frying it up into crunchy bite-sized balls. This adds flavor and makes these cheese bites so much fun to eat! They make a great kid-friendly meal or appetizer!
And if you REALLY love cheese, you must try their delicious cauliflower pizzas because those are also certified gluten free!! I have found these pizzas at my local Costco, but many local grocery stores also carry them.
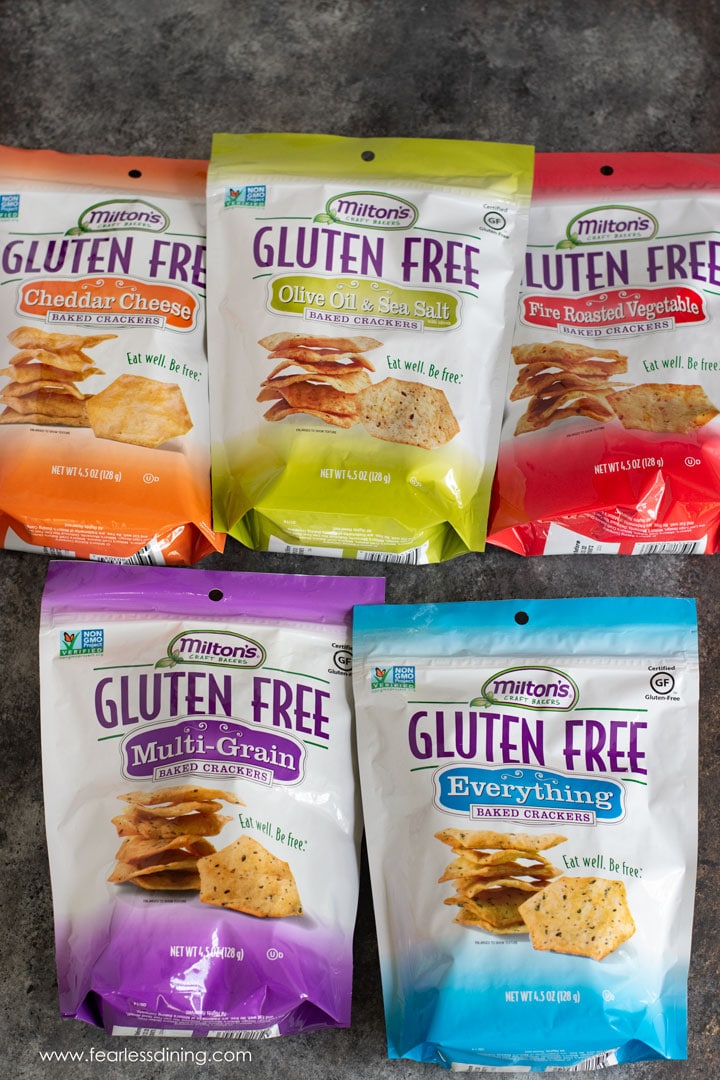
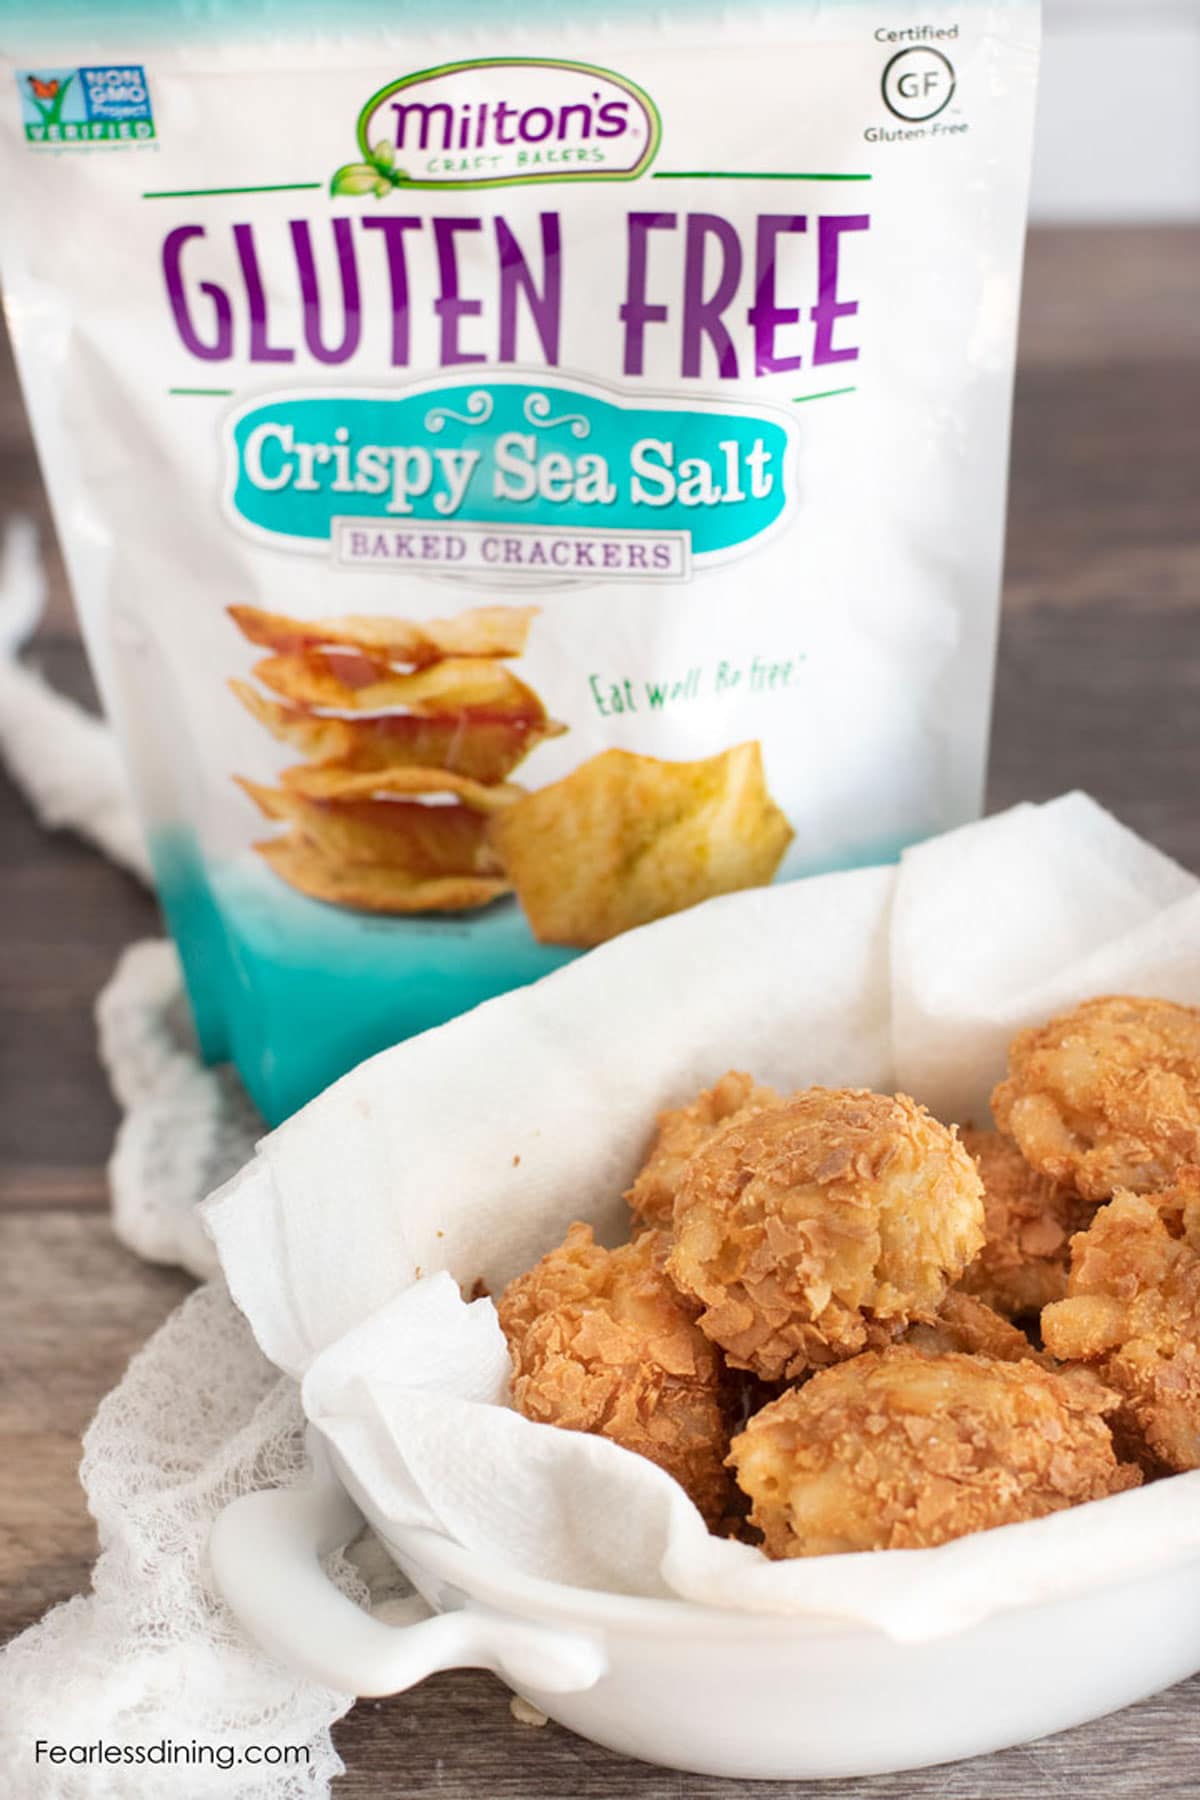
Milton’s Gluten-Free Crackers come in many delicious flavors, including Sea Salt, Olive Oil, and Sea Salt, Fire-Roasted Vegetables, Everything (one of my favorites!), Multigrain, and Cheddar Cheese.
All of these flavors would taste delicious as a coating to these gluten free macaroni and cheese bites! My kids took a vote, and we decided to use Sea Salt for our crispy coating, but feel free to use your favorite!
Instead of breading, I have been having fun using crushed Milton’s crackers. It adds so much more flavor to recipes than breadcrumbs! Try using any of Milton’s Gluten Free Crackers to coat these gluten free fried mozzarella sticks!
If you are looking for more kid-friendly recipes, try these Gluten Free Pigs In A Blanket a try too!
I froze these overnight and fried them in the oil the next day. They were delicious.”
sara m., Facebook comment
Ingredient Notes:
For the full list of ingredients and amounts, please go to the recipe card below.
- Gluten Free Macaroni – I like Jovial and Tinkyada brands because they hold their shape well and don’t get mushy as easily as other brands.
- Cream Cheese – I used full-fat cream cheese.
- Cheddar Cheese – Use mild or sharp cheddar shredded cheese.
- Butter – Use salted or unsalted butter.
- Seasonings – Garlic powder, salt, and pepper.
- Milton’s Gluten Free Crackers
- Egg – Use a large egg.
- Oil—Make sure your oil has a high smoking point. I like to use canola or avocado oil.
If you prefer regular macaroni and cheese, you will love this gluten free mac n cheese!
Step-By-Step Photos and Directions:
Step 1: Cook your gluten free elbows one minute less than the package directions. Cook the pasta, then give it a cold water rinse to stop the cooking process and prevent your pasta from turning to mush.
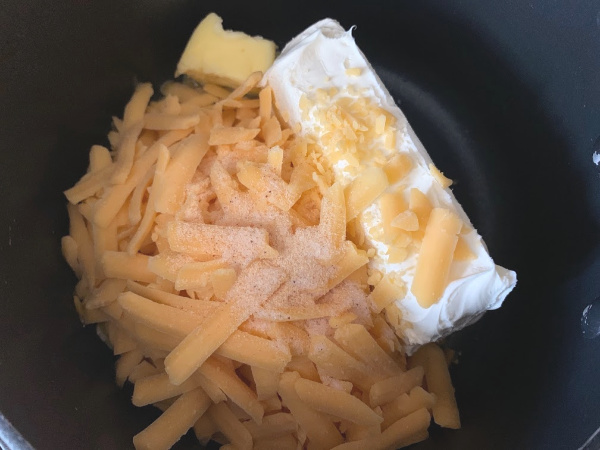
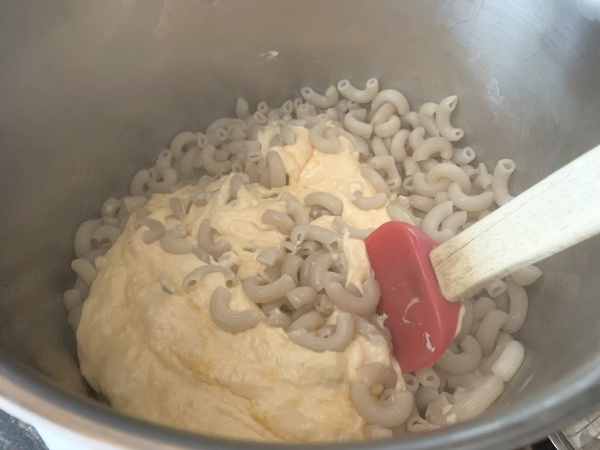
Step 2: Add your cheese sauce ingredients to a large cooking pot. I highly recommend using a non-stick pot for easy clean-up later! I use cream cheese, cheddar cheese, unsalted butter, heavy cream, and seasonings.
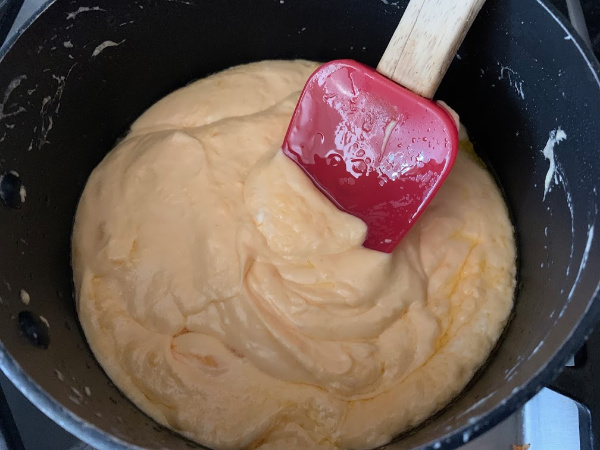
Your melted cheese sauce is going to be thick and creamy. This will help the macaroni stick together better when forming your bites.
Email This Recipe To Me!
Step 3: Mix your hot cheese sauce into the drained macaroni. Freeze the mac and cheese for 30 minutes to cool.
You don’t want it to harden completely; just firm up enough to shape into bites.
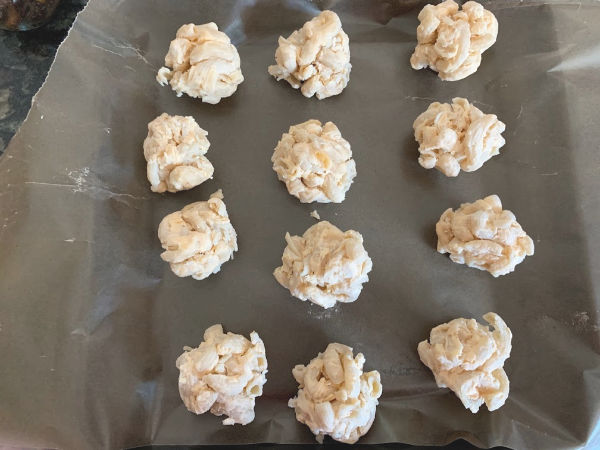
Step 4: Take your mac and cheese from the refrigerator and use a large spoon or cookie scoop to make balls. Use your hands to squeeze each mix tightly into balls.
If they are warm after this, refrigerate again so they hold together for the dipping.
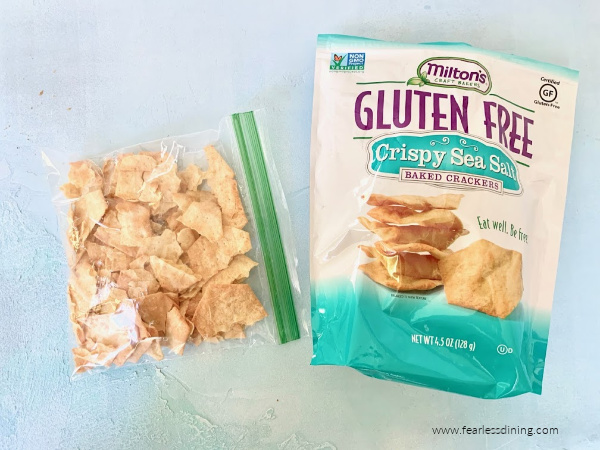
Step 5: Choose a flavor of Milton’s Gluten-Free Crackers to use. Crush the crackers by placing them into a large plastic bag. Squeeze out the air and zip to close. Use a rolling pin to crush the crackers into small bits. You can also use a food processor if that is easier.
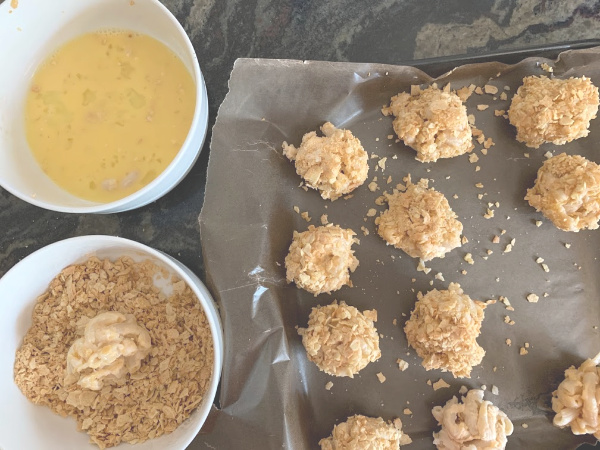
Step 6: Put the crushed crackers into a bowl. Put the scrambled egg into a separate bowl. Take a mac and cheese ball and dip it into the egg mixture. Roll around to coat the edges.
Next, dip it into the crackers and roll it around. You want the whole ball to be coated in crackers.
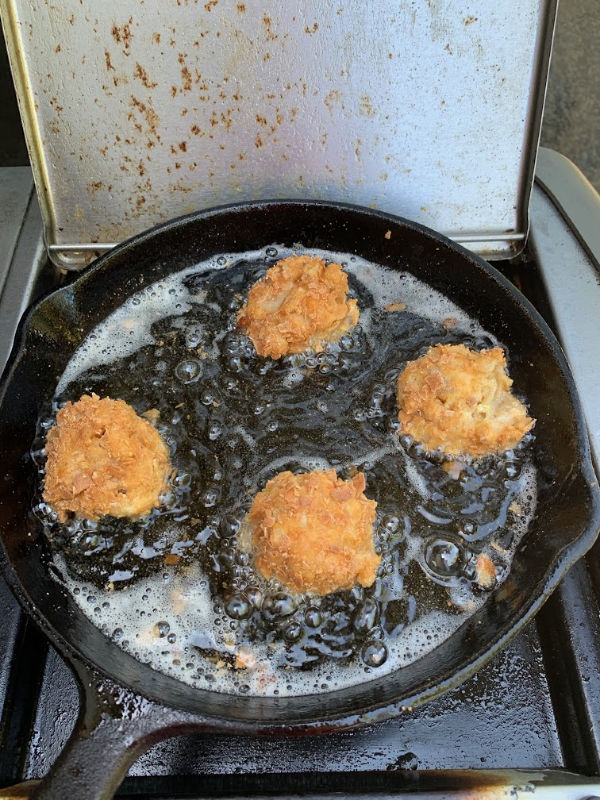
Step 7: Heat oil in a cast-iron skillet or Dutch oven. I like to fry foods on the side burner on our grill so the oil stays outside.
Heat the oil to 375º F. Test your oil by dropping a few crumbs into the oil. If they start to sizzle, your oil is ready.
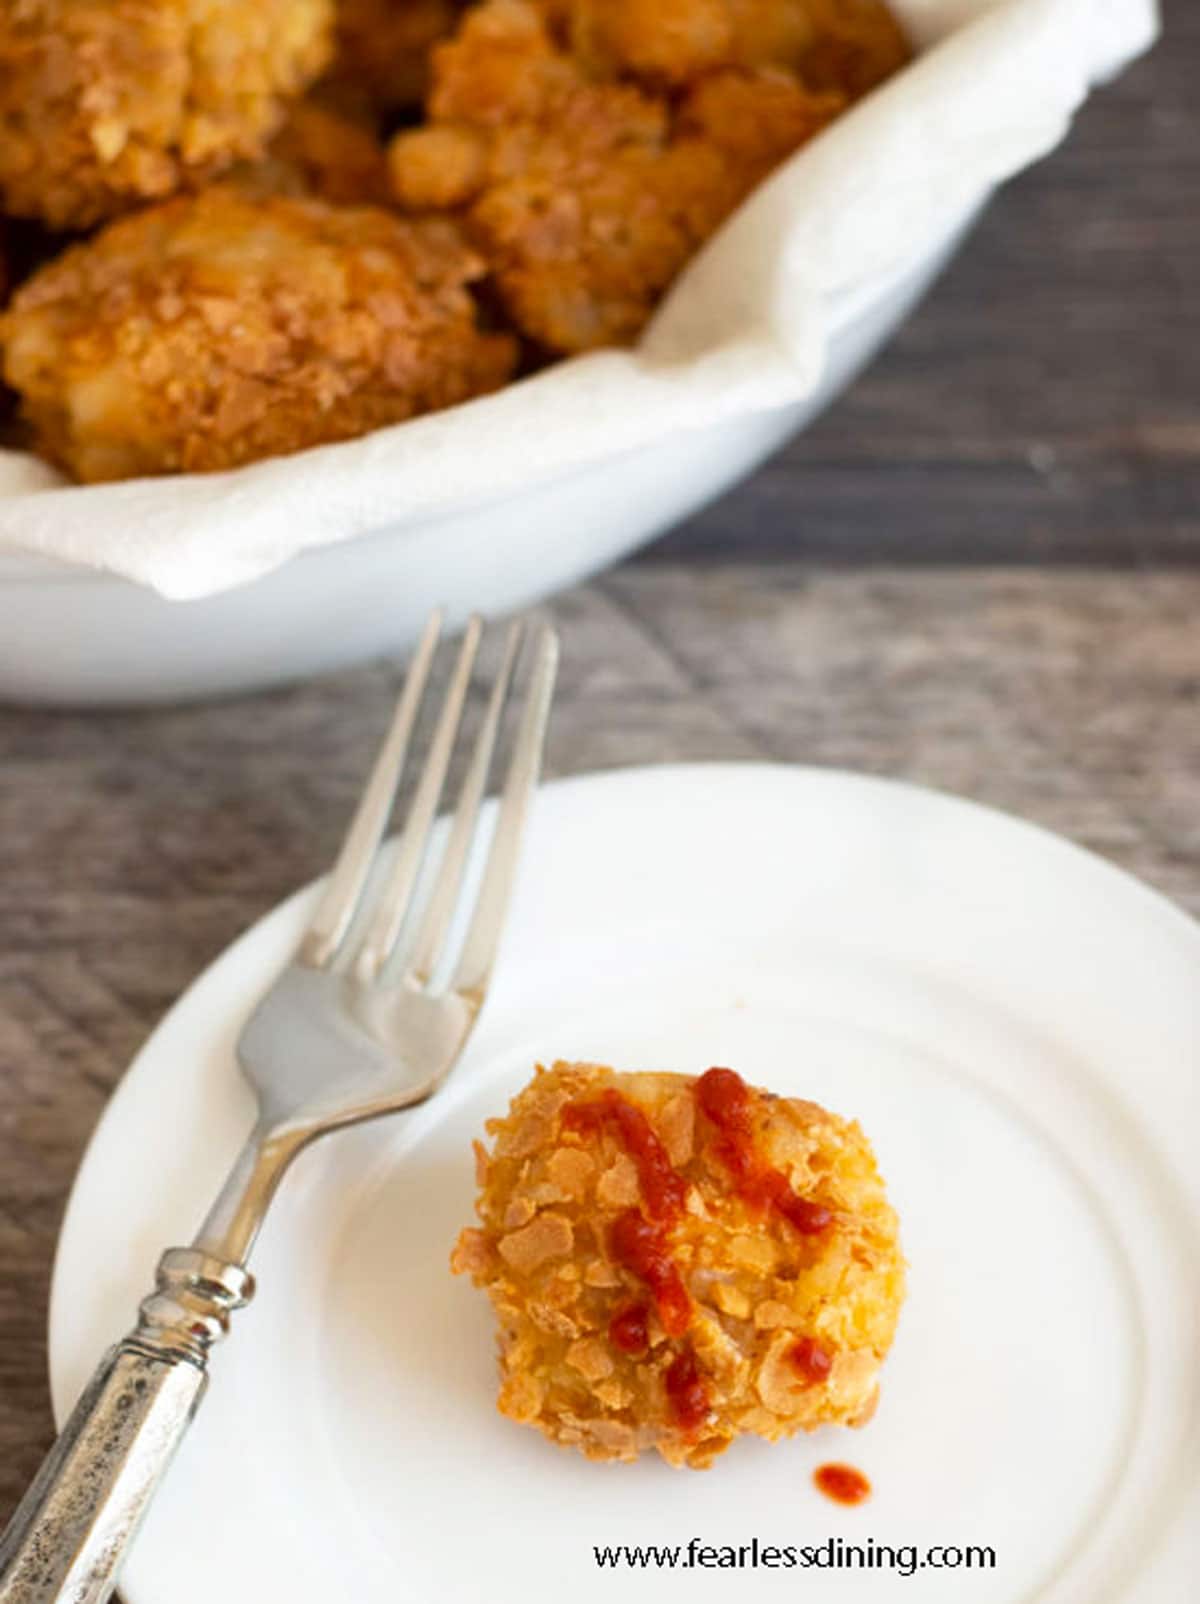
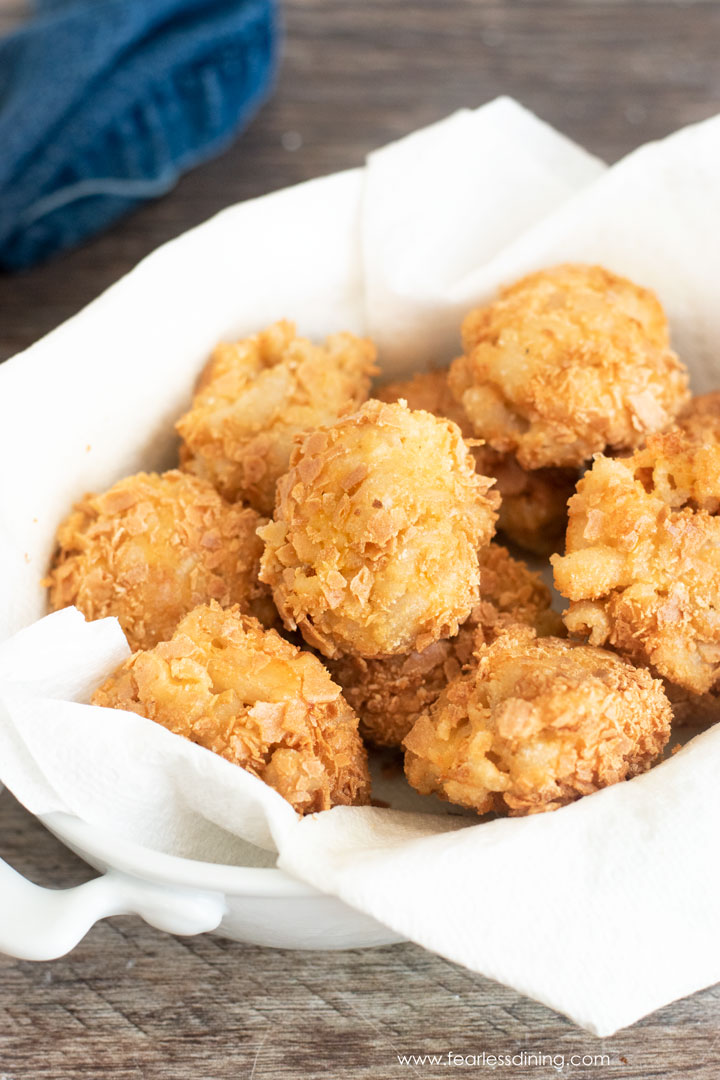
Step 8: Drop a few mac and cheese balls into the hot oil. Use a slotted metal spoon to roll them around so all sides cook evenly. It takes 3-4 minutes to cook fully. When cooked, remove to a paper towel-lined plate.
Enjoy hot so the cheese is gooey and delicious. You can dip these crispy macaroni and cheese balls or drizzle some sriracha on them. You may also love these easy gluten free recipes to make with kids!
Can you use boxed gluten free mac and cheese?
If you are short on time or prefer to use a boxed gluten free mac & cheese that you already have in your pantry, that is completely fine. Just follow the directions on the box to make the mac and cheese. Then, follow the rest of my recipe instructions.
Frequently Asked Questions:
There are many brands of gluten free macaroni available in grocery stores. These are made with rice, corn, legumes, quinoa, or a combination of gluten free ingredients.
When frying foods, it is important to use an oil that is high heat tolerant. I like to use canola, avocado, and coconut oils are really good for high heat. Do NOT use olive oil, as it can’t handle high heat and will get rancid.
These mac and cheese bites will keep fresh for up to 4 days in an airtight container or up to 4 months in the freezer.
The best way to reheat these mac and cheese bites is to place them on a baking tray and bake them at 350º F for 10-15 minutes. You can also re-crisp them in your air fryer. Cook for 4-5 minutes at 350º F.
More Gluten Free Kid-Friendly Recipes:
- Gluten Free Pigs In A Blanket
- Easy Gluten Free Fish Sticks
- Crispy Gluten Free Chicken Nuggets
- Gluten Free Hamburger Helper
Love This Recipe?
If you made and enjoyed this recipe, I would be incredibly grateful if you could leave a comment below. Please include which flour blend you used. This will help others know this recipe is delicious. Thank you!
Gluten Free Mac and Cheese Bites
Ingredients
- 12 ounce package gluten free pasta
- 8 ounces cream cheese
- 8 ounces cheddar cheese
- 2 tablespoons unsalted butter
- ¼ cup heavy cream
- 1 teaspoon salt
- ⅛ teaspoon garlic powder
- 4.5 ounce package Milton’s Gluten Free Crackers
- 2 eggs
- oil for frying
Method
- Cook your gluten free macaroni to the package instructions. Every brand varies widely, so it is best to follow the package's directions.
- In a pot, add 8 ounces cream cheese, 8 ounces cheddar cheese, 1/4 cup heavy cream, 2 tablespoons unsalted butter, 1 teaspoon salt, and 1/8 teaspoon garlic powder. Cook on medium low heat until all of the cheeses are melted. Stir frequently.
- Add the cooked drained pasta to the cheese sauce and mix well.
- Freeze the mac and cheese mixture for 30 minutes to cool.
- Put 4.5 ounce package Milton’s Gluten Free Crackers into a ziplock plastic bag and seal. Use a rolling pin to crush the crackers into crumbs.
- Pour the crackers into a bowl.
- In another bowl, add the 2 eggs and mix well.
- Line a plate with wax paper and use a spoon to scoop mac and cheese out of the pot.
- Use your hands to gently squeeze/press the mac and cheese mix together and line them up on the wax paper.
- If the balls are warm, put back into the refrigerator for 15 minutes.
- Remove the bites from the refrigerator.
- Start heating oil for frying in a cast-iron pan.
- Roll in the egg mixture, then into the cracker mixture.
- When the oil is ready for frying, test by dropping a few crumbs into the oil. If it sizzles, it is ready.
- Drop a few bites into the hot oil. Leave room around each one.
- Use a metal slotted spoon to gently turn the balls around so they cook evenly.
- Remove when they are crisp on each side to a paper towel lined plate. Repeat until all bites are cooked.
- Serve hot.
Nutrition
Notes
Private Notes
Tried this recipe?
Let us know how it was!
I truly hope you enjoy this recipe. I have been testing and creating gluten-free recipes for over 15 years. Creating gluten-free recipes that do not taste gluten-free is my goal for every recipe. Sometimes I only have to test a new recipe a couple of times, and others it takes multiple times. I do this so you get reliable, delicious results every time!
