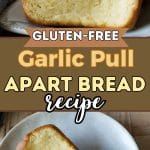
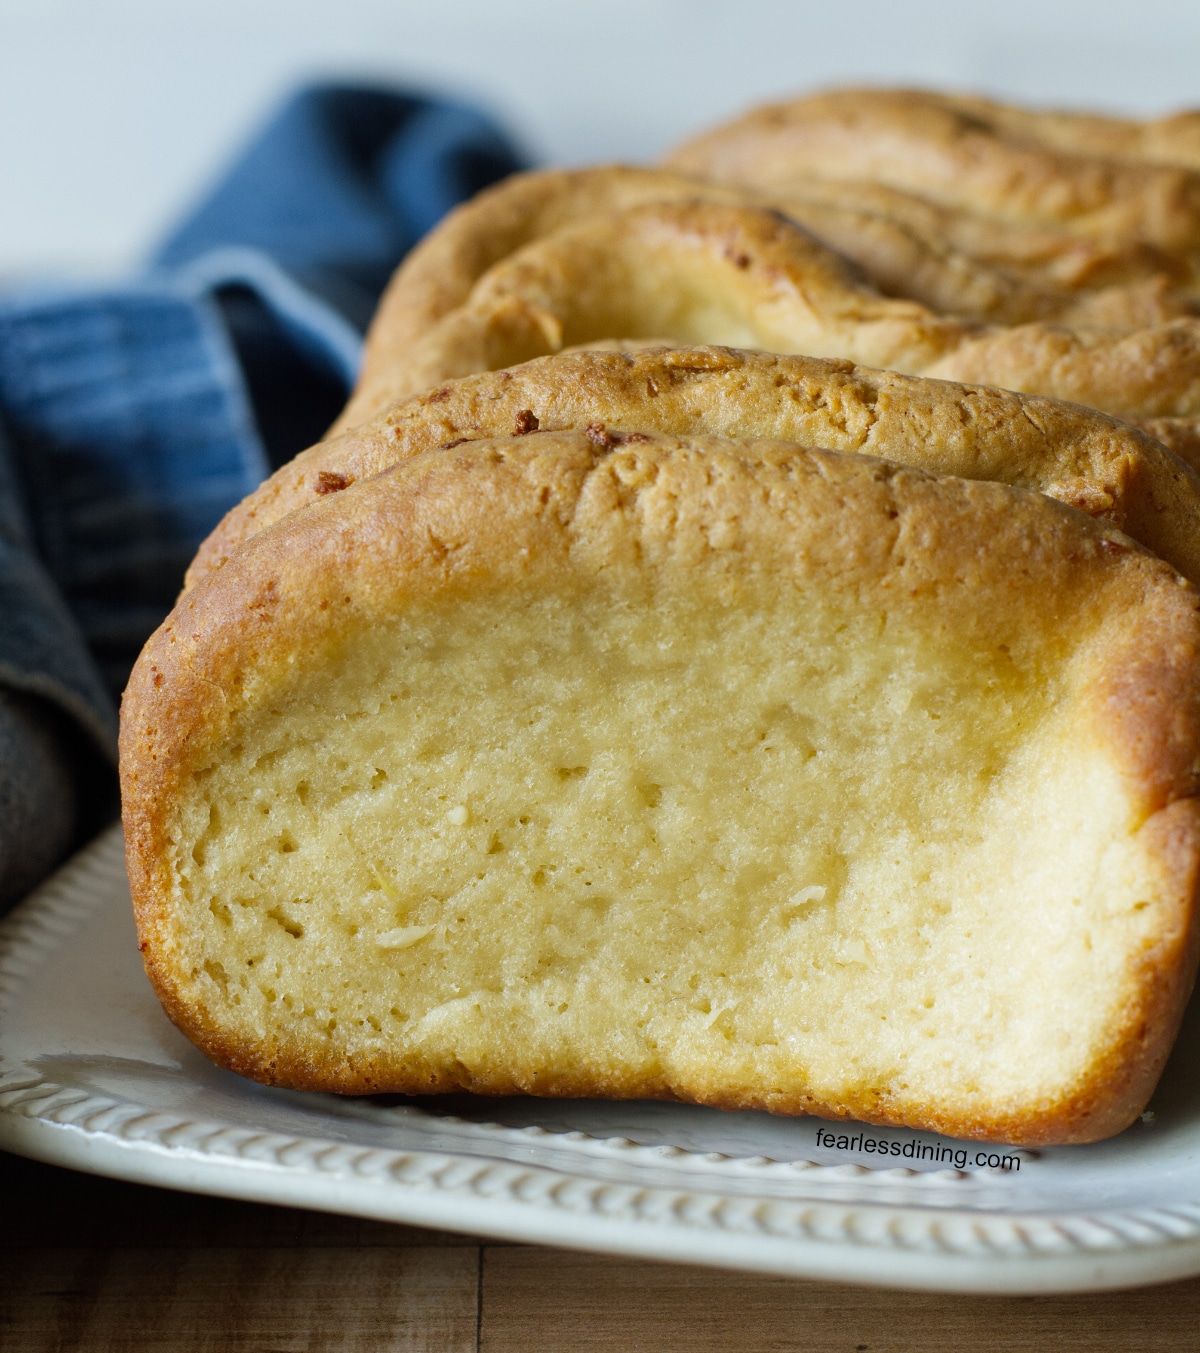
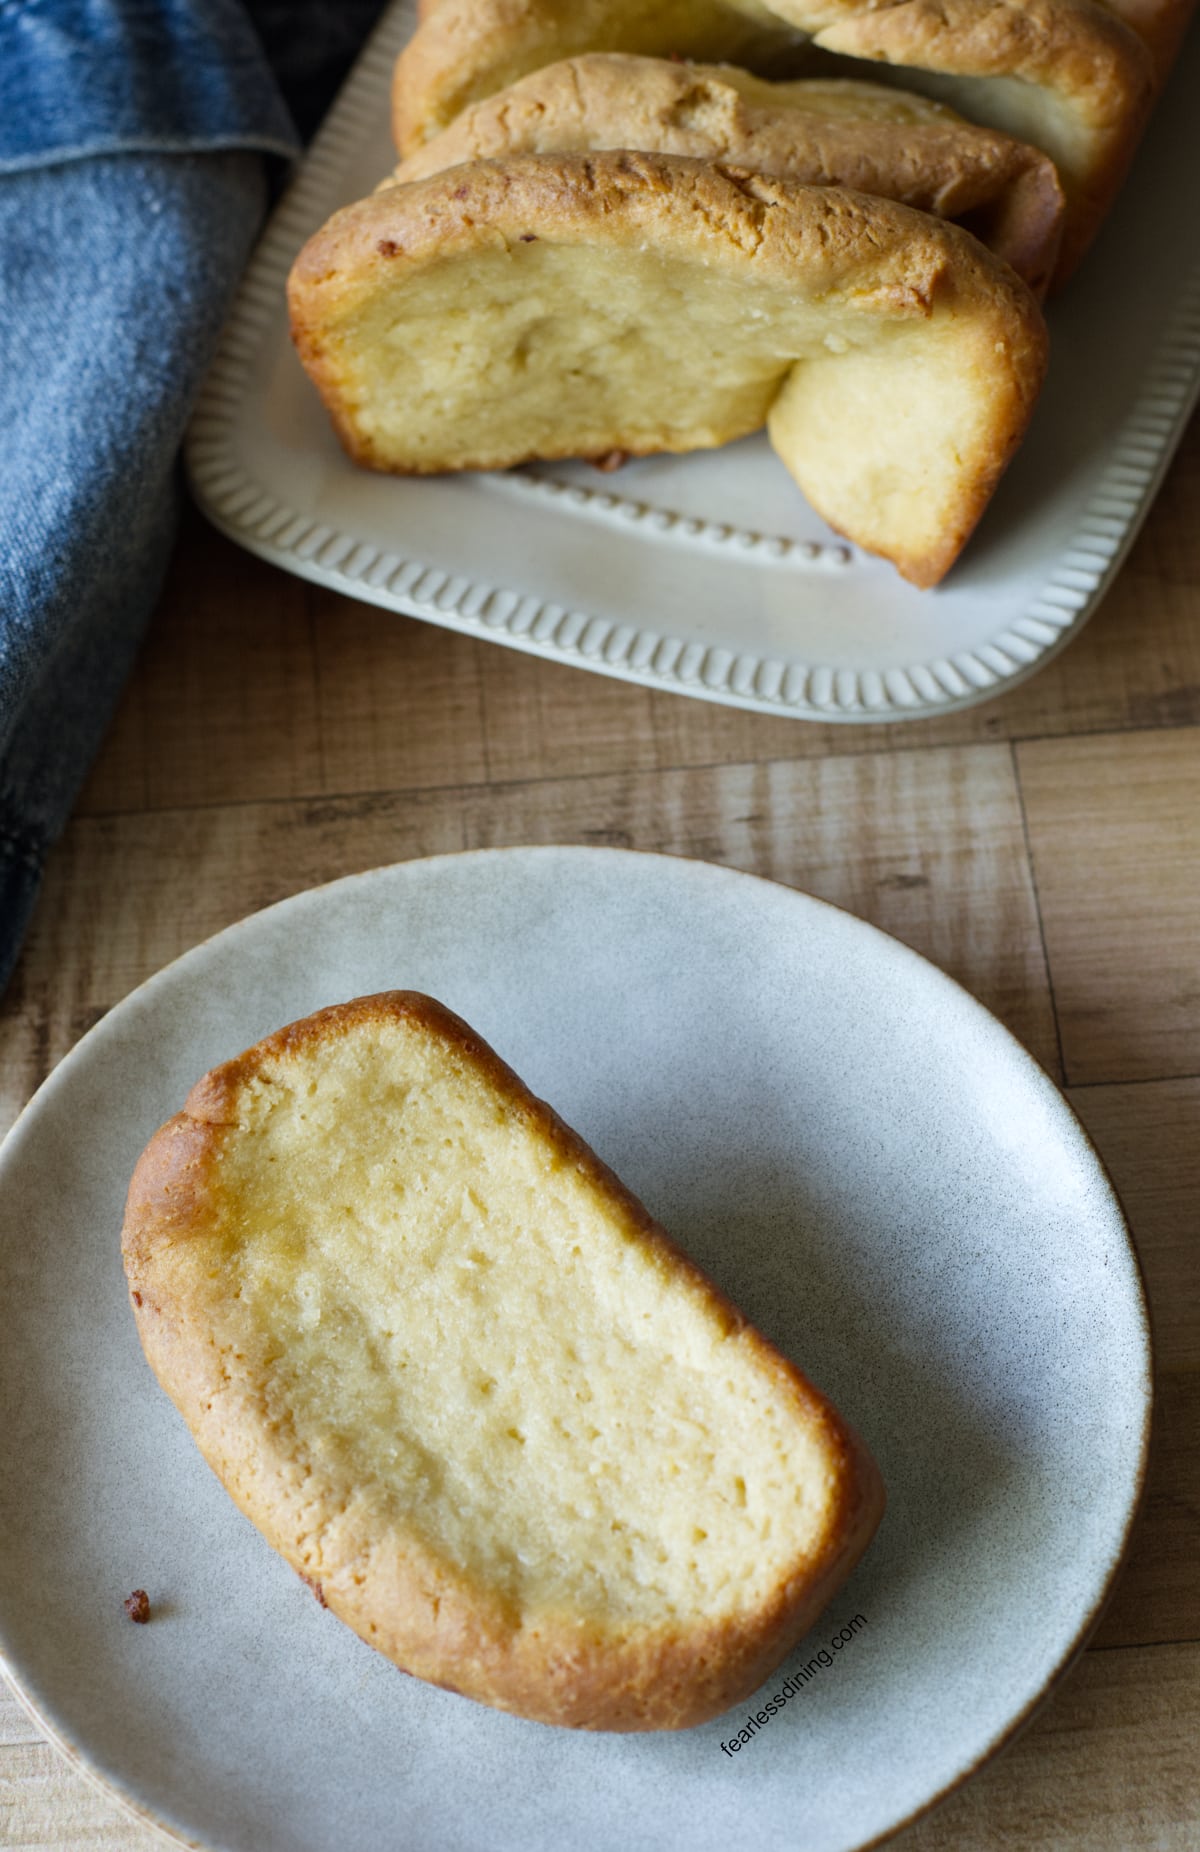
This homemade gluten free pull apart garlic bread is fluffy and light, with slightly crisp edges. The garlic butter bakes deeply into the dough, giving it incredible flavor. It is made for dipping into Italian sauces and serving with a hot bowl of soup. Make a loaf of this homemade garlic bread in under two hours, with rise time.
This post may contain affiliate links. Please read our Disclosure Policy.
❤️ Sandi’s Recipe Summary
The Quick Bite: This gluten free garlic pull apart bread is soft and fluffy, with garlic butter flavor in every bite. This garlic bread is made from scratch, with simple ingredients.
This homemade garlic pull-apart bread with yeast bakes in individual slices. Creating these dough slices and slathering them with garlic butter allows the flavors to sink into each slice. It is the bread I didn’t know I needed in my life, until I started making it. I am not sure I could eat pasta without this bread now.
When making this celiac safe recipe, it is critical to use a flour blend that works in yeast recipes. Many gluten-free 1:1 blends do not work in yeast recipes and will leave you disappointed. You need to visit the brand websites to verify your blend can work in yeast recipes. You can also see my recommendations in this Gluten-Free Flour Guide.
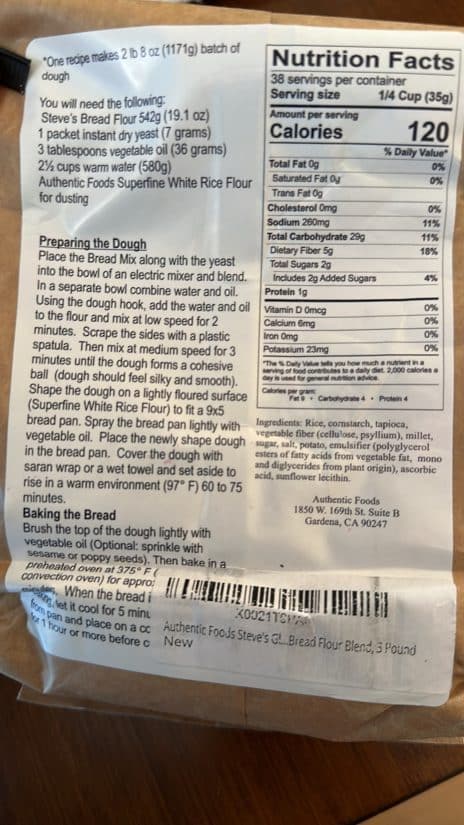
I tested this recipe only with Authentic Foods Steve’s Gluten-Free Bread Blend. It is the blend I use every time I make shaped bread. It behaves like real dough and bakes up fluffy and light. If you haven’t tried this blend, it is magic in a bag. I used my Gluten-Free Challah recipe as the base bread dough for this garlic bread because it is tried-and-true and fluffy enough to absorb the garlic butter.
I know this blend isn’t available in every country, and that you will need another option. If you need to use another flour blend, I would recommend starting with 1/4 cup less water. Steve’s blend has a much higher water need than traditional gluten-free flour blends.
Dip it into this Gluten-Free Pasta Sauce, Gluten-Free Marinara Sauce, or this Gluten-Free Alfredo Sauce.

Ingredient Notes and Easy Swaps:
For the full list of ingredients and amounts, please go to the recipe card below.
- Gluten-Free Flour Blend – I tested this recipe with Authentic Foods Steve’s Gluten-Free Flour Blend. It is by far the best flour blend for shaped gluten-free bread. I share the above photos, including the ingredient list, for those who want to see what is in this flour. Other blends should work, but you will need to use less liquid. Steve’s Blend has a much higher moisture need than regular flour blends. Read Why Gluten-Free Flour Blends Vary to learn more about this.
- Binder – Binders are what hold your gluten-free baked goods together. The most widely used are xanthan or guar gum. Steve’s blend uses vegetable fiber. If the blend you are going to use doesn’t contain a binder, I recommend adding 1 teaspoon of xanthan gum for this bread. Learn Why Binders are Important in Gluten-Free Baking.
- Yeast – Most yeast brands are gluten-free, with the exception of Red Star Platinum. It has wheat. I used Rapid Yeast. If you use Active Dry Yeast, bloom it in warm water to get it started.
- Butter – I used unsalted butter. You can also use salted butter, but if you do, don’t add the salt to the dough ingredients.
- Garlic – I prefer using fresh garlic and pressing it into bits in my garlic press. You can use jarred garlic if you must; I find it is stronger than fresh garlic. I would use less if you are going to try jarred.
- Optional – Parmesan cheese and parsley. I didn’t include these, but they are delicious if you choose to add them.
If you are looking for more recipes using Steve’s Blend, try some of these gluten-free recipes using Steve’s Blend.
How to Make Gluten-Free Garlic Pull Apart Bread (Step-By-Step)
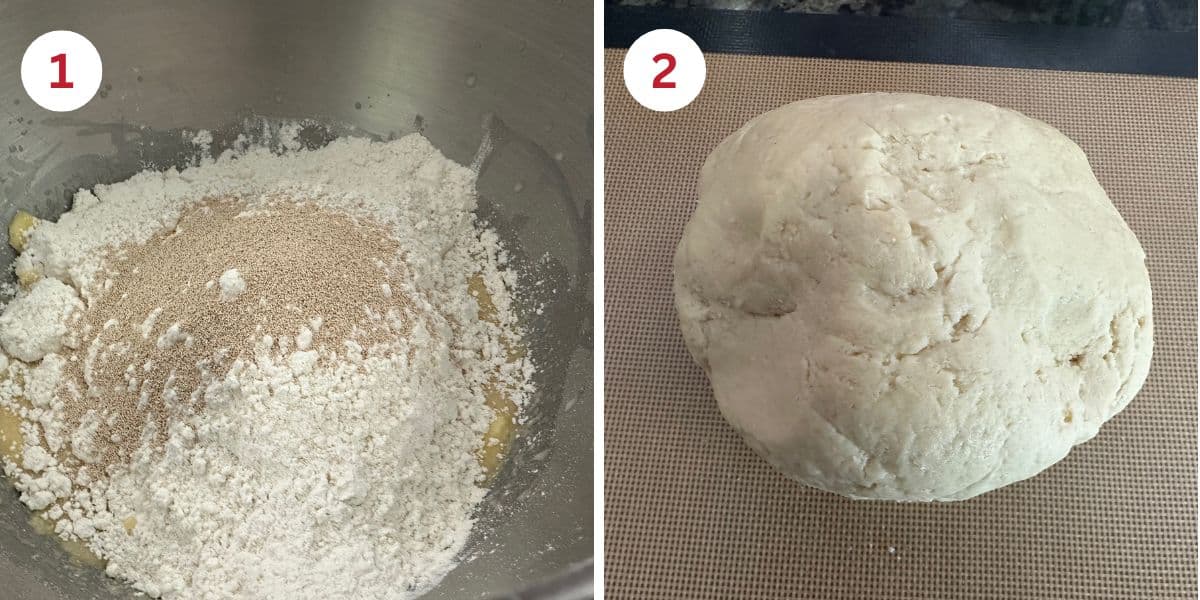
Step 1: Partially melt the butter and add it to the stand mixer. Add the eggs and other wet ingredients. Add the dry ingredients and sprinkle the rapid yeast on top. Add a paddle or bread dough attachment and mix on low speed.
Once the ingredients are incorporated, increase the speed and mix for 30 seconds. Look for the dough to pull off the sides of the bowl.
Email This Recipe To Me!
👀 Sandi Says: Do a dough check. Is the dough firm? If so, add more water and blend it in. Is the dough wet or loose? Add more flour. This is especially important if you are using a different flour blend than the one I tested.
Step 2: Remove the dough from the mixer bowl and place it onto a silicone mat. It is important to shape your pull apart bread first because you only get one good rise in gluten-free baking. We will rise the bread once it is in the pan.

Step 3: Roll the dough into an oval that is the same length as your loaf pan. I used this one-pound loaf pan. Use a bench scraper to cut the dough into equal pieces. I made each slice about an inch wide. I ended up with 10 pieces, but it is going to vary depending on the size of your slices.
👀 Sandi Says: Spray the loaf pan with non-stick baking spray. I use La Tourangelle Baking Spray because it is gluten-free. Do NOT use PAM Baking Spray because it is not gluten-free/
Step 4: Melt the butter and garlic together in a microwave-safe dish. I melt it for 20-second intervals to avoid it from splashing in the microwave. Mix it with a pastry brush and spread it onto both sides of a slice.
If you are using optional Parmesan and chopped parsley, sprinkle them onto each slice.
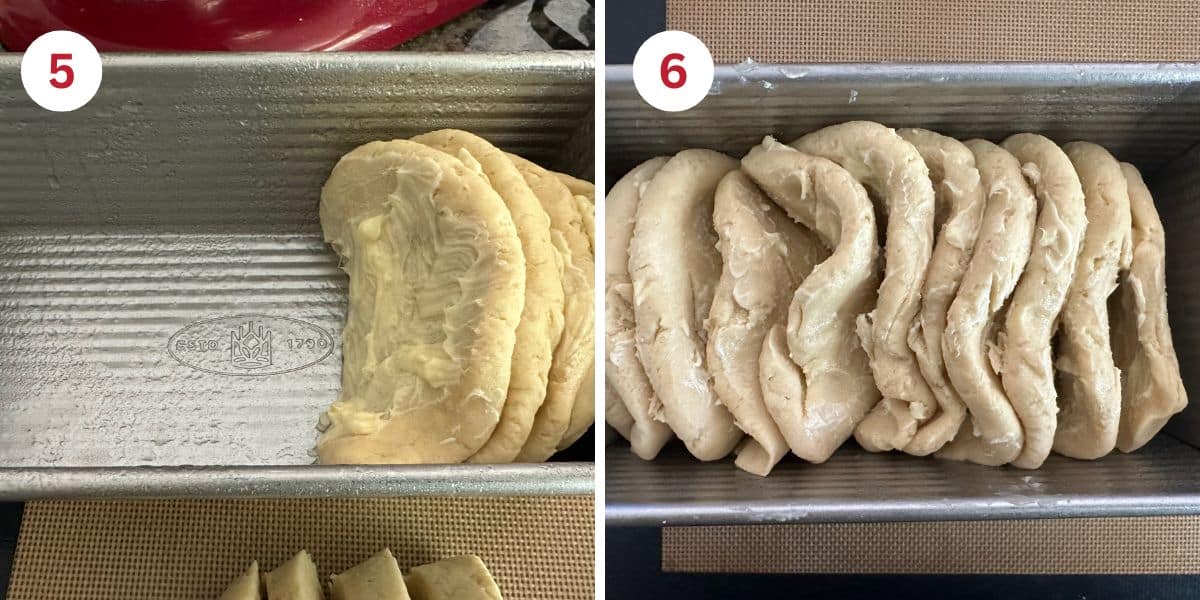
Step 5: Place each slice in the bread pan so that they touch. This will make the loaf seem attached, but the slices of garlic bread will pull apart easily when baked. Repeat until all of the slices of dough are coated and in the pan.
Step 6: When the dough is in the pan, cover it loosely with plastic wrap and let the dough rise in a warm place. I preheat my oven to 175ºF and then turn off the oven. I rise my dough in the oven with the door cracked open.
Step 7: When the dough has doubled in size, remove the pan from the oven. Preheat the oven to 350ºF.
Step 8: Bake the bread for 40-45 minutes. The top should be golden when the bread is finished baking. Note that metal pans bake faster, while glass baking pans bake more slowly. You may need to adjust the baking time if you are not using a metal pan. Use a digital thermometer. The internal temperature should be 190-195ºF.
Serve this gluten free garlic bread with this Gluten-Free Skillet Lasagna, Gluten-Free Baked Ziti, or this Gluten-Free Lemon Ricotta Pasta.
More Gluten Free Bread Recipes:
I really enjoy baking gluten-free bread. If you want more baking inspiration, give some of these recipes a try!
- Gluten-Free Artisan Bread
- Gluten-Free Whole Grain Bread with Ancient Grains
- Gluten-Free Brioche
- Gluten-Free Garlic Knots
Love This Recipe?
💬 Did you make this gluten-free pull-apart garlic bread recipe? I would love to hear how it turned out. Your feedback helps others (and helps me keep improving these recipes for you). ⭐⭐⭐⭐⭐
Gluten Free Pull Apart Garlic Bread
Ingredients
- 2 ¾ cups gluten free flour blend 410 grams * SEE NOTES
- 2 tablespoons sugar 25 grams
- 2 ¼ teaspoons rapid yeast 7 grams
- 1 teaspoon salt 5.7 grams
- 3 large eggs 152 grams
- 3 tablespoons unsalted butter 42 grams
- ¾ cup milk or non-dairy milk 187 grams
- ½ cup unsalted butter 114 grams
- 2-3 garlic cloves, minced
- ⅓ cup Optional: Grated Parmesan
Method
- Partially melt 3 tablespoons unsalted butter and add it to the stand mixer. Add 3 large eggs and 3/4 cup milk or non-dairy milk. Add 2 3/4 cups gluten free flour blend, 2 tablespoons sugar, 1 teaspoon salt, and sprinkle the 2 1/4 teaspoons rapid yeast on top. Add a paddle or bread dough attachment and mix on low speed.
- Once the ingredients are incorporated, increase the speed and mix for 30 seconds. Look for the dough to pull off the sides of the bowl.
- Remove the dough from the mixer bowl and place it onto a silicone mat. It is important to shape your pull apart bread first because you only get one good rise in gluten-free baking. We will rise the bread once it is in the pan.
- Roll the dough into an oval that is the same length as your loaf pan. I used this one-pound loaf pan. Use a bench scraper to cut the dough into equal pieces. I made each slice about an inch wide. I ended up with 10 pieces, but it is going to vary depending on the size of your slices.
- Melt the butter and garlic together in a microwave-safe dish. I melt it for 20-second intervals to avoid it from splashing in the microwave. Mix it with a pastry brush and spread it onto both sides of a slice.
- If you are using optional Parmesan and chopped parsley, sprinkle them onto each slice.
- Place each slice in the bread pan so that they touch. This will make the loaf seem attached, but the slices of garlic bread will pull apart easily when baked. Repeat until all of the slices of dough are coated and in the pan.
- When the dough is in the pan, cover it loosely with plastic wrap and let the dough rise in a warm place. I preheat my oven to 175ºF and then turn off the oven. I rise my dough in the oven with the door cracked open.
- When the dough has doubled in size, remove the pan from the oven. Preheat the oven to 350ºF.
- Bake the bread for 40-45 minutes. The top should be golden when the bread is finished baking. Note that metal pans bake faster, while glass baking pans bake more slowly. You may need to adjust the baking time if you are not using a metal pan. Use a digital thermometer. The internal temperature should be 190-195ºF.
Nutrition
Notes
- I tested this recipe with Authentic Foods Steve’s Gluten-Free Flour Blend. It is by far the best flour blend for shaped gluten-free bread. I share the above photos, including the ingredient list, for those who want to see what is in this flour. Other blends should work, but you will need to use less liquid. Steve’s Blend has a much higher moisture need than regular flour blends
- If your flour blend doesn’t contain a binder, add 1 teaspoon of xanthan gum.
- To make this dairy-free use Earth Balance plant-based butter.
- Store leftovers in an airtight container. Freeze what you don’t use up.
Private Notes
Tried this recipe?
Let us know how it was!
I truly hope you enjoy this recipe. I have been testing and creating gluten-free recipes for over 15 years. Creating gluten-free recipes that do not taste gluten-free is my goal for every recipe. Sometimes I only have to test a new recipe a couple of times, and others it takes multiple times. I do this so you get reliable, delicious results every time!
