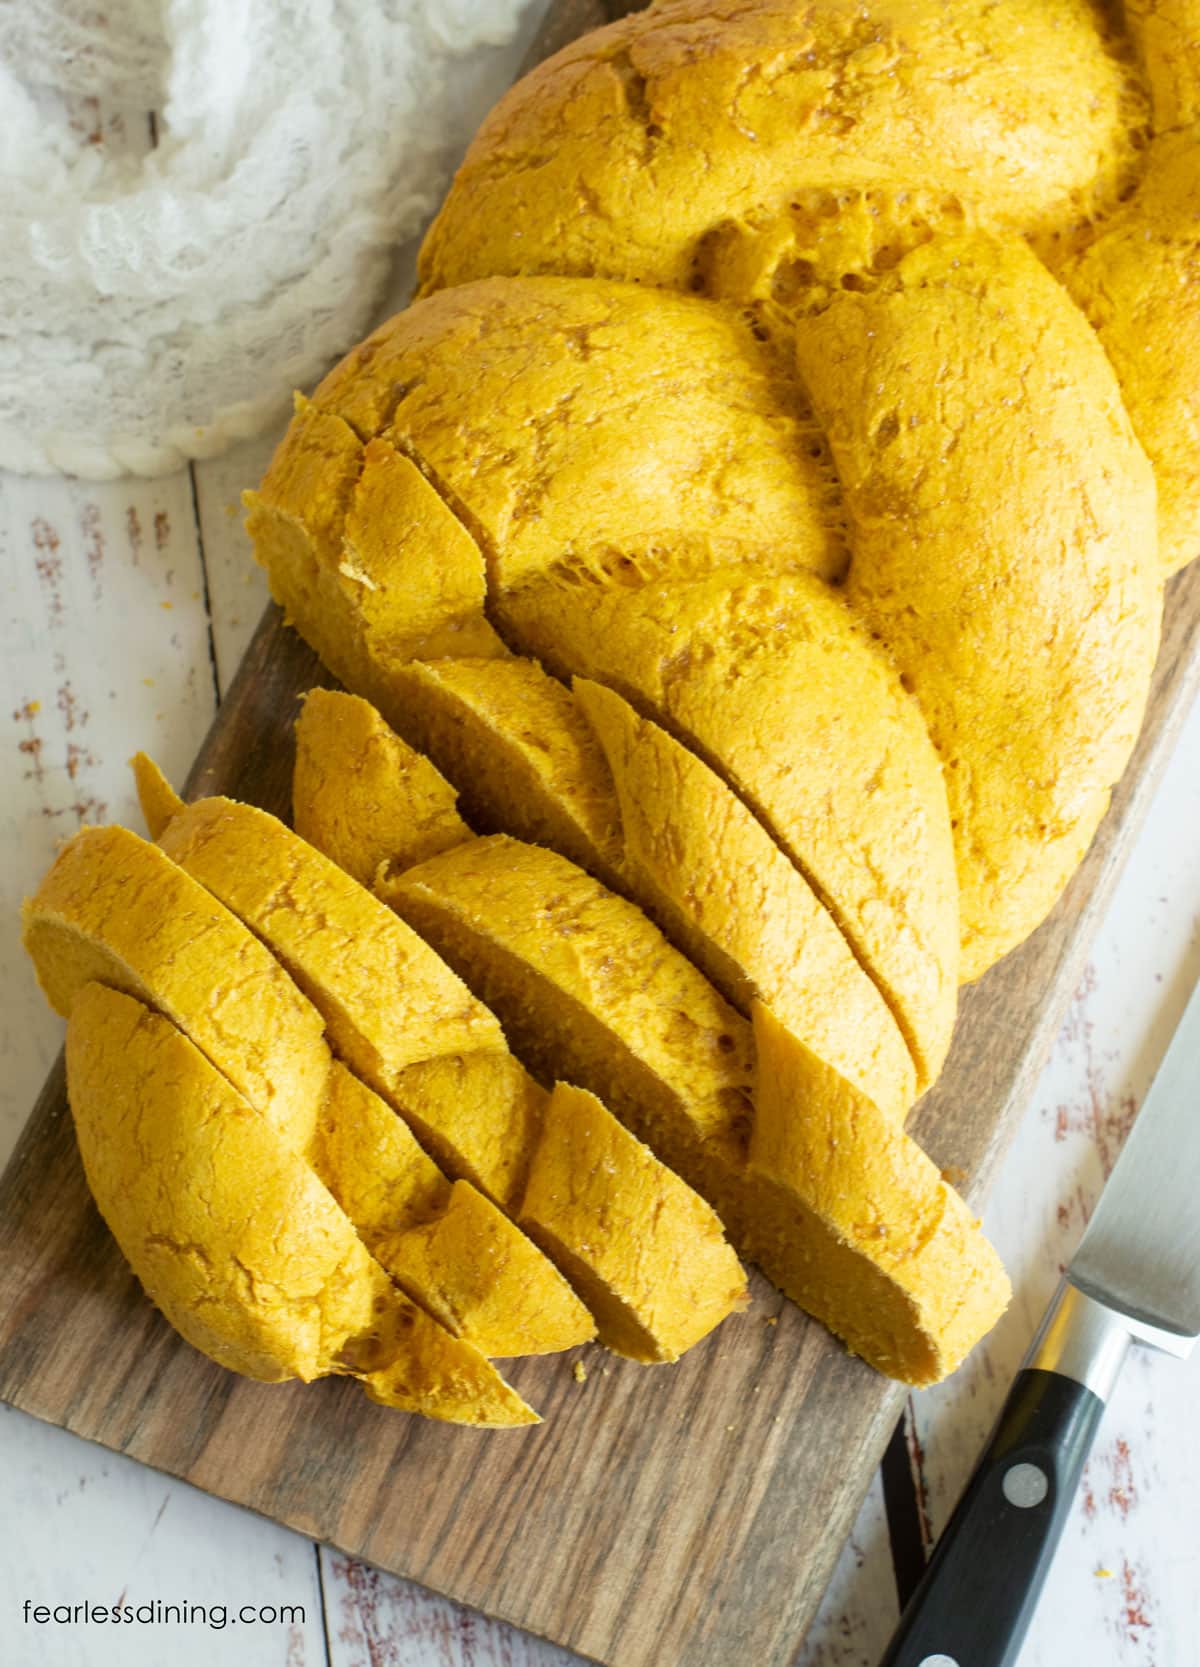
This gluten-free pumpkin challah is not only fluffy, but it is also full of delicious fall flavors. Challah should be fun, so why not vary the flavors throughout the year? I share all of my tips to make the best loaf of challah!
This post may contain affiliate links. Please read our Disclosure Policy.
I have been experimenting with flavors and am proud of my new gluten-free pumpkin challah recipe. You can work and braid the dough, even with the pumpkin puree and fall seasonings used!!
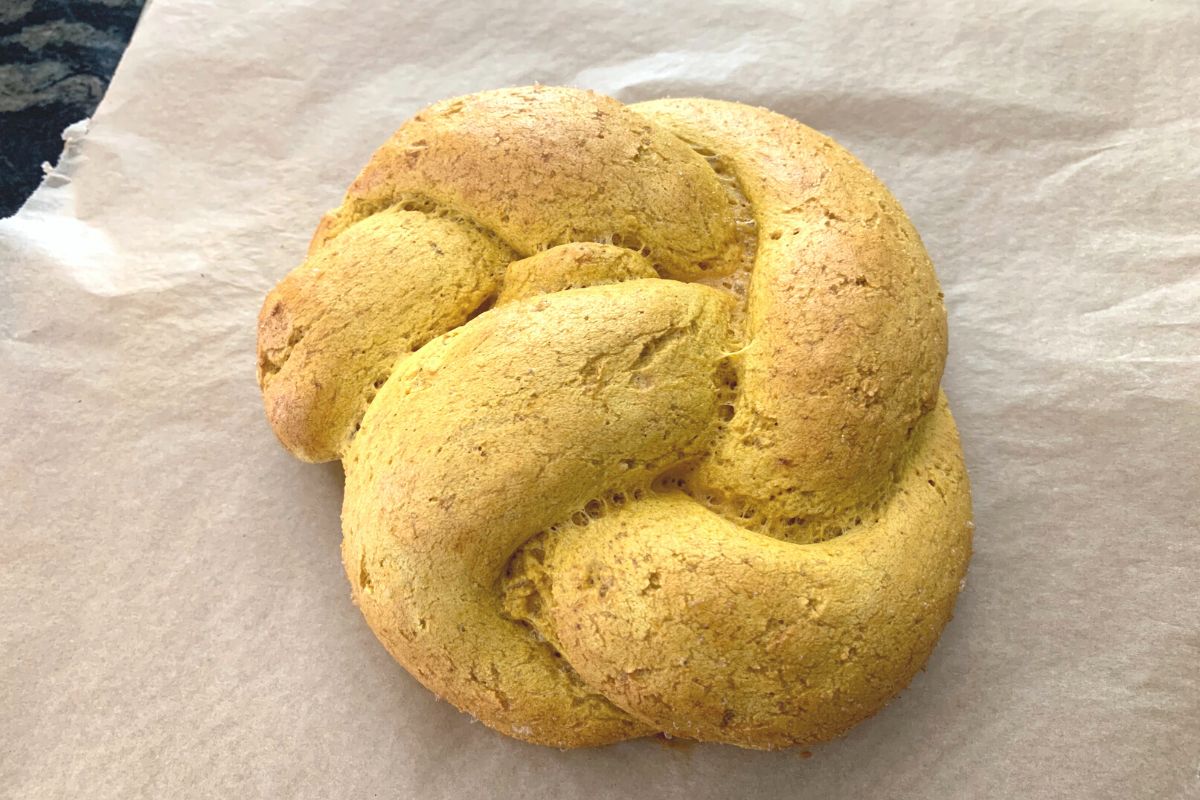
You can braid this challah the traditional way, make it in a round shape for Rosh Hashana, or use the dough to make gluten free challah rolls! Anyway, you make it, know that my recipe will taste incredible!
You can also check out all of my easy gluten-free bread recipes if you are looking for more fun recipes to try.
Ingredient Notes:
For the full list of ingredients and amounts, please go to the recipe card below.
- Gluten-Free Flour Blend – I tested this gluten-free challah recipe using Authentic Foods Steve’s Gluten Free Bread Blend.. I don’t know what magic they worked into the dough, but I can’t say enough good things about this flour blend. It is perfect for any bread where you need to work the dough. Other blends can work, but it is important to use a blend that works with yeast. You will need to tweak the liquid amounts as well because most blends don’t need as much liquid as Steve’s blend. You can also use Cup4Cup, but note you need to reduce the liquid amount because this blend requires less liquid than Steve’s blend.
- Xanthan Gum – If the blend you use doesn’t have xanthan or guar gum, you will need to add one teaspoon. This helps hold the bread together because it mimics gluten.
- Pumpkin Spice and Ground Cinnamon – Double-check your spices are gluten-free. Many do not contain gluten ingredients, but may be made on shared equipment. I like to use McCormick and Penzey’s spices.
- Salt – Use kosher salt or sea salt.
- Butter – I recommend using unsalted butter.
- Pumpkin Puree – Be sure to use pumpkin puree and NOT pumpkin pie filling. You can use canned or roast a pumpkin and puree it.
- Yeast – Be sure to verify that the yeast you use is gluten free. Red Star Platinum is NOT gluten free.
- Eggs – Use size large.
Check out ALL of my bread recipes using Authentic Foods Steve’s Gluten-Free Bread Blend.
Step-By-Step Photos and Directions:
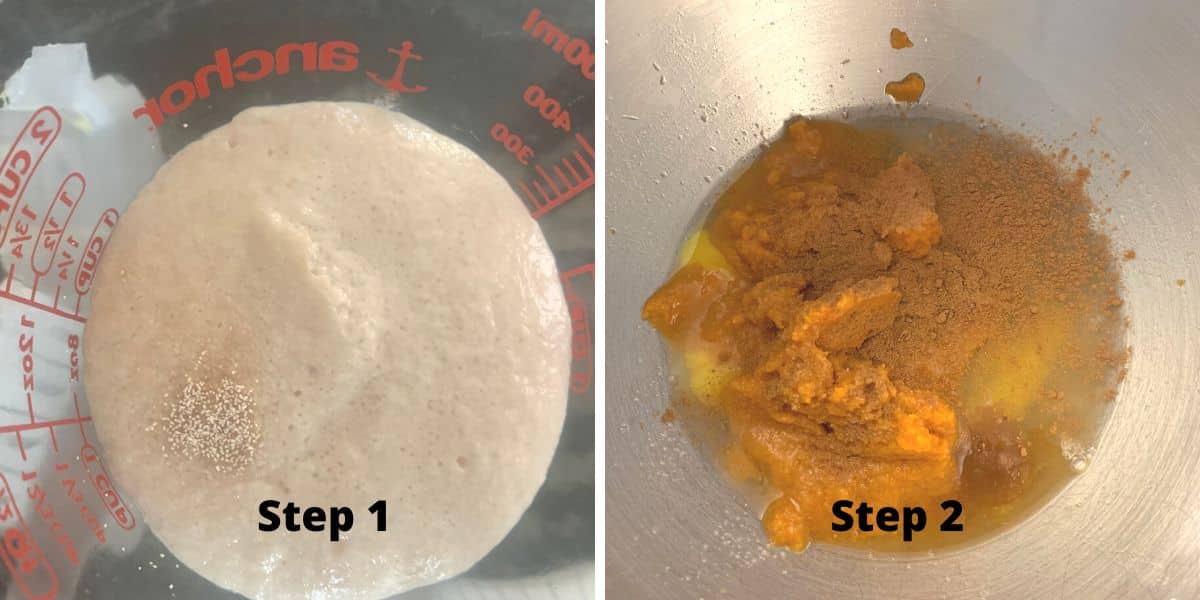
Step 1: Add warm water to a glass dish, making sure the water is no hotter than 110º F. Add the yeast and sugar. Let the yeast mixture sit for 5 minutes until it is frothy and full of bubbles.
Step 2: Add the melted butter, egg, pumpkin puree, yeast mixture, and spices to a standing mixer. (Note: you can also mix this up in mixing bowls.) Put on the paddle attachment. Mix until the wet ingredients are combined.
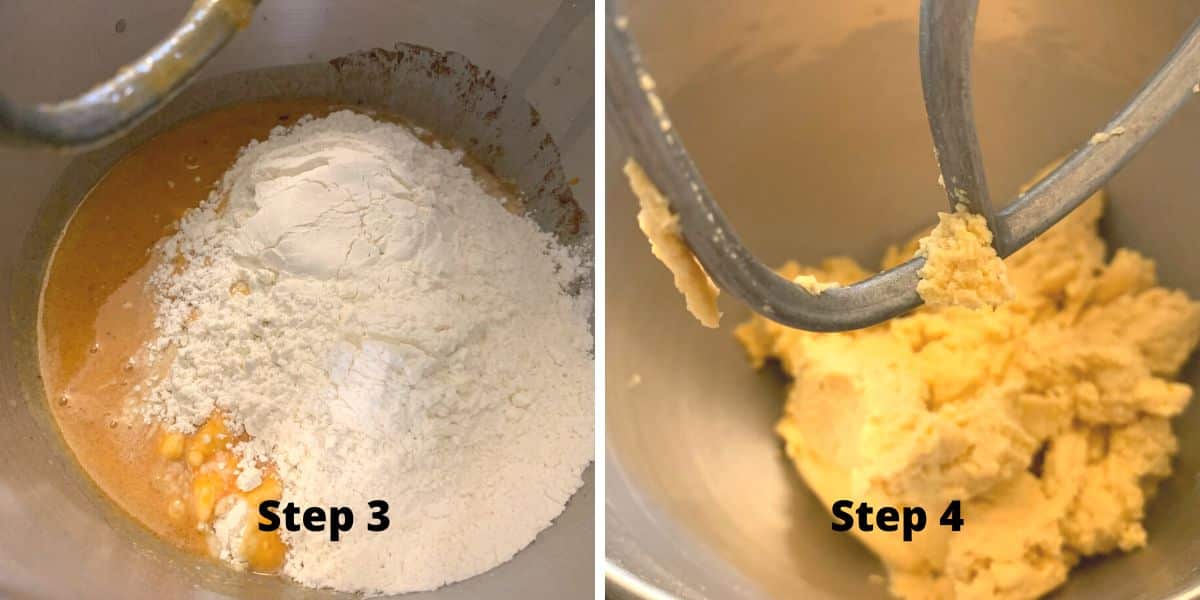
Step 3: Add the gluten-free flour and salt to the stand mixer bowl. Add a paddle or a dough hook attachment. Mix the ingredients on medium speed until you have a nicely formed dough. Do not mix long; you only need about 20-30 seconds if you use my preferred gluten free flour blend.
NOTE: Don’t forget that if you are using Cup4Cup, add 1/4 cup additional flour or reduce the amount of liquids used. (Do not add extra if you use the Authentic Foods brand, I recommend.)
Step 4: Your dough should make a nice ball.
👀 Sandi Says: You will only get one good rise from the gluten-free dough, so you need to shape your challah BEFORE raising the dough.
Email This Recipe To Me!
Step 5: Divide your dough into three equal-sized balls of dough. Roll them out like snakes so that they are all the same length. Place the strands side by side and braid them into challah, crossing each strand over itself. Cover the dough with plastic wrap and place it warmly to rise.
Gluten Free Dough Rising Tip:
Turn your oven on to 200ºF. Place the baking sheet with the challah into the oven. Turn the oven, keeping the door cracked open. I always rise my dough in a warm oven. Let the challah rise until it doubles in size, which takes about 45 minutes if you use the recommended flour blend.
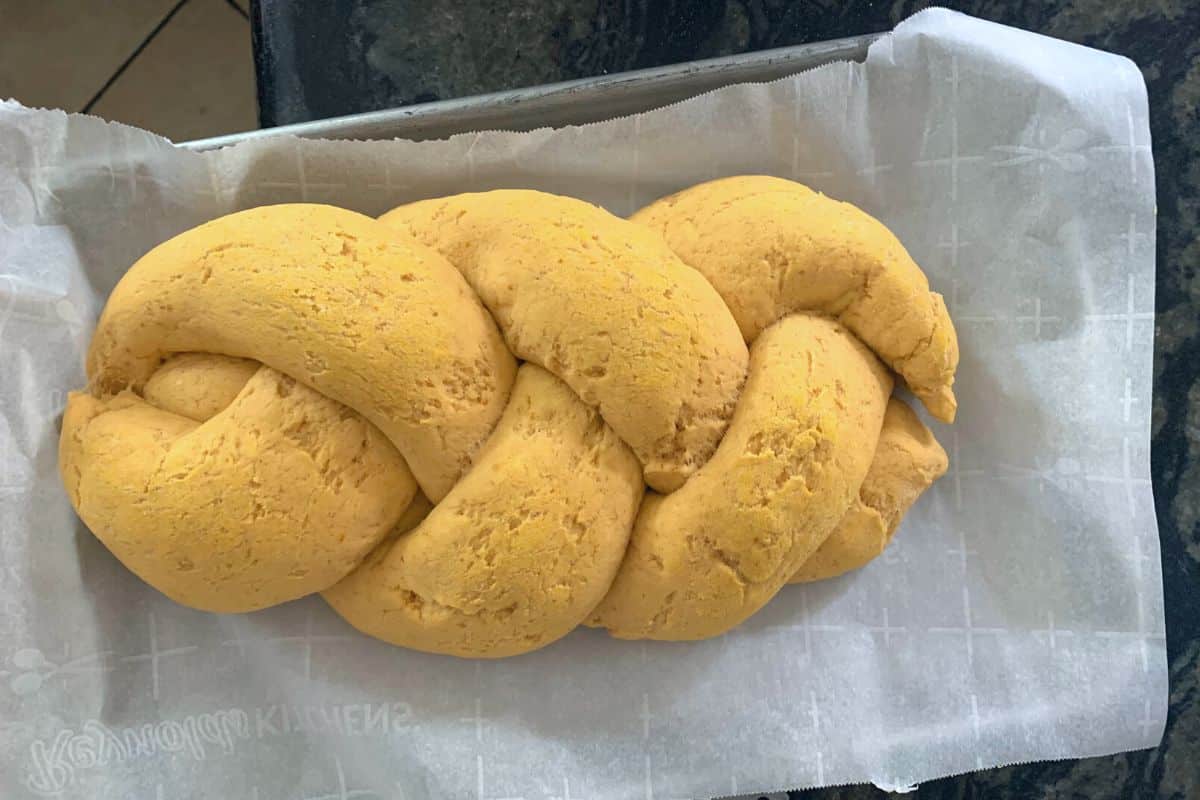
Step 6: This is what the pumpkin challah will look like when it has doubled in size.
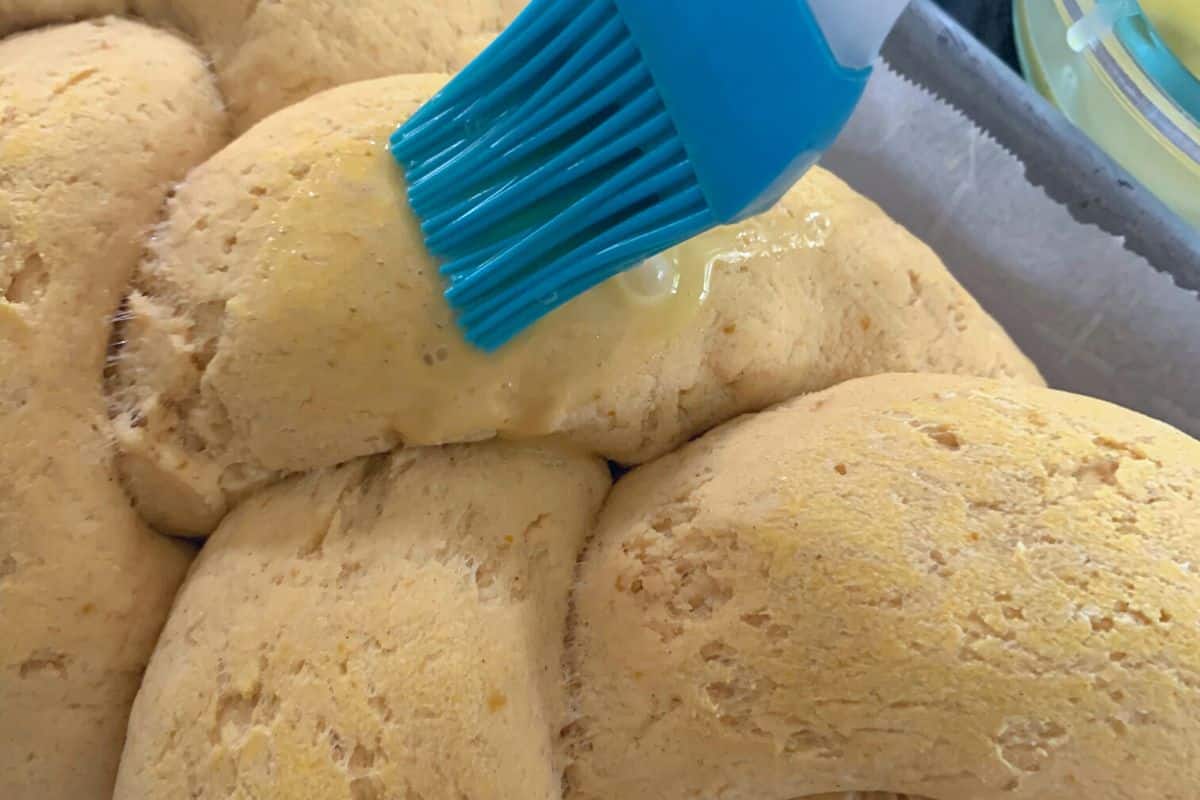
Step 7: Whisk a small egg in a bowl. Brush the egg wash over the challah dough. This will help it get golden.
Step 8: Bake the challah at 350º F for 25 minutes. The actual baking time will vary depending on the size and thickness of the challah you make.
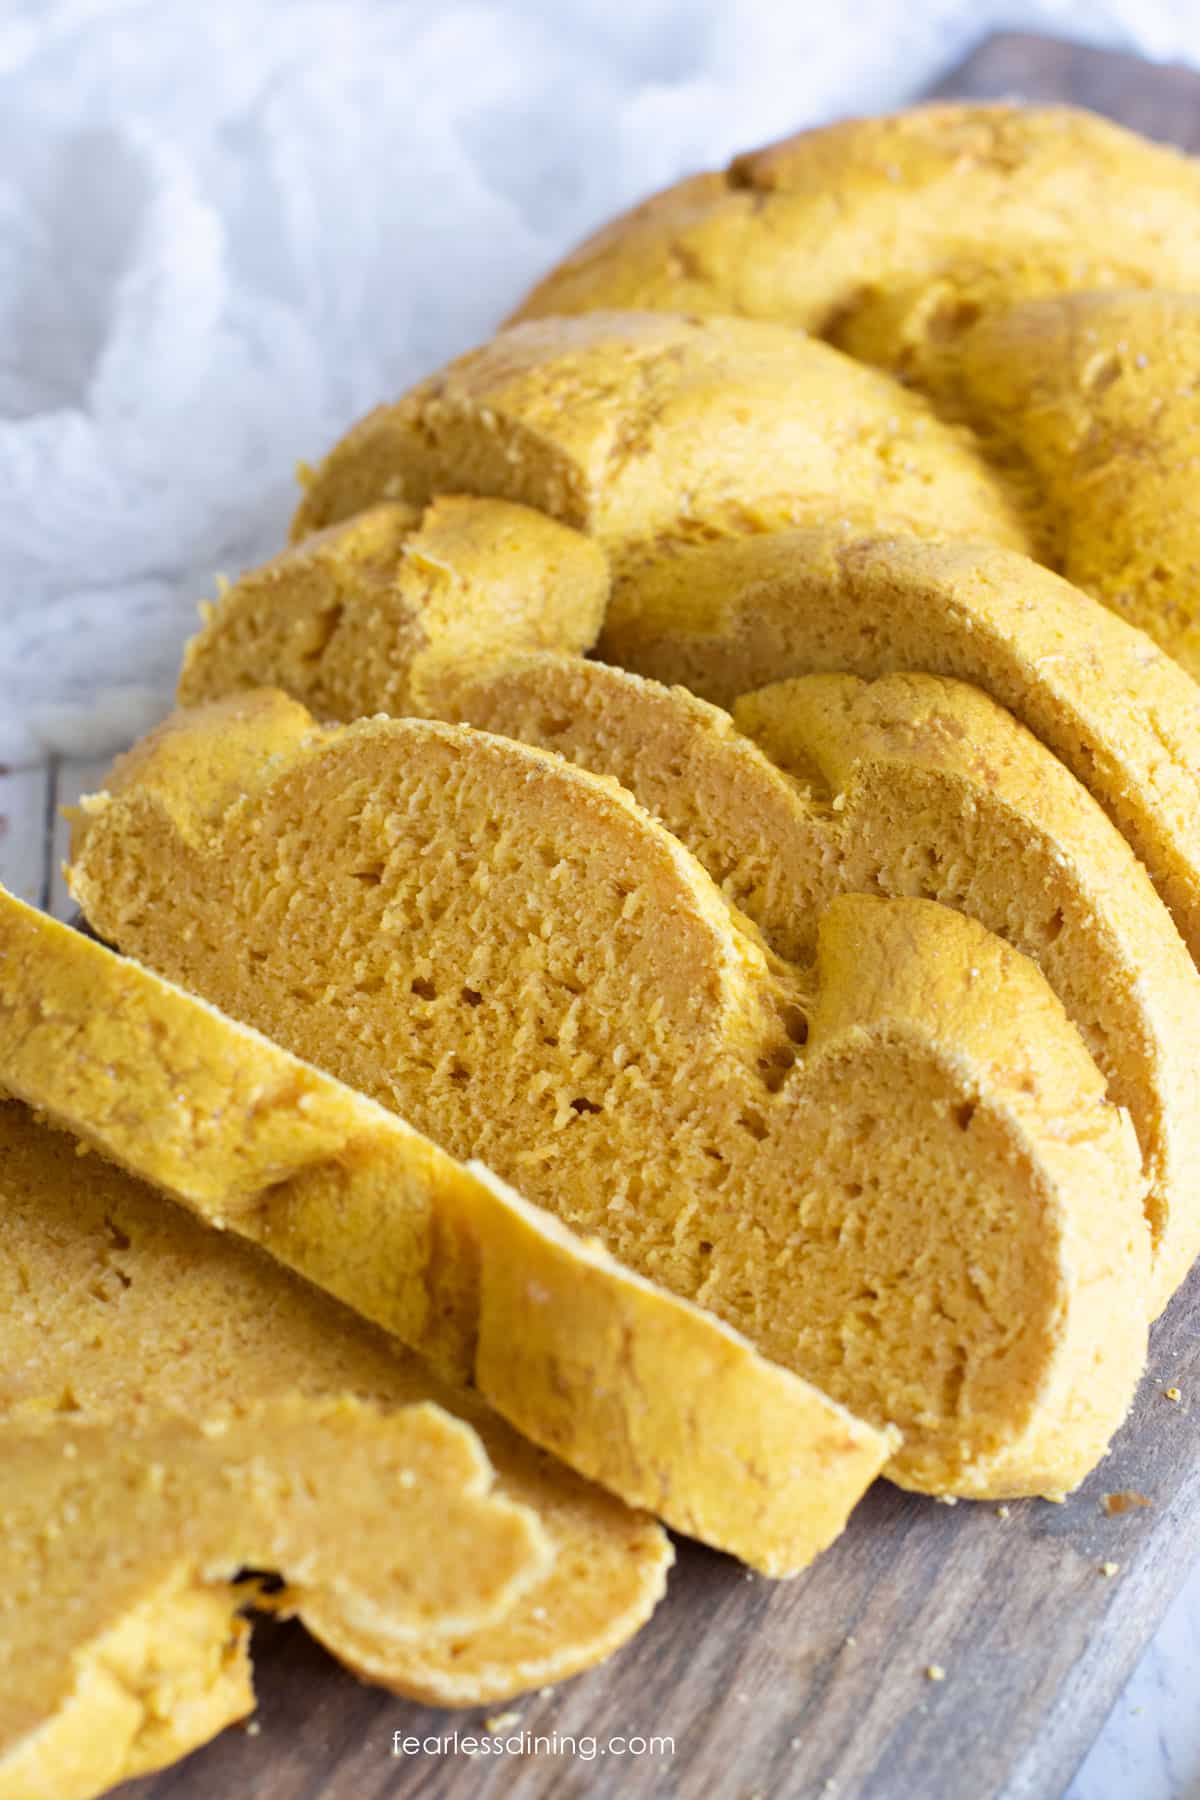
Remove the gluten free pumpkin challah from the oven and place it on a wire rack to cool. Do not slice the challah until it has cooled. Serve for Shabbat or anytime.
For more bread troubleshooting, read my Gluten-Free Bread Troubleshooting Guide for more information and tips. Also, be sure to store your bread properly. Read How to Store Gluten-Free Bread to see how I store my gluten-free bread to keep it fresh the longest.
Frequently Asked Questions:
This pumpkin challah will keep fresh for up to 3 days. Store it in an airtight container in your refrigerator. Note that gluten-free flour doesn’t have the same preservatives, so it will not keep fresh outside the refrigerator.
To braid round challah, roll two long strands out of the dough. Twist the strands around each other, then roll them into a round shape. (Similar to how you would roll cinnamon rolls.) Bake it in that round position.
Yes, you can freeze this challah. I recommend you do this. Slice the challah or freeze it whole. If you slice it, you may want to place wax paper between each slice to prevent it from freezing.
Love This Recipe?
If you made and enjoyed this recipe, I would be incredibly grateful if you could leave a comment below. Please include which flour blend you used. This will help others know this recipe is delicious. Thank you!
Gluten Free Pumpkin Challah
Ingredients
- 2 ½ teaspoons active dry yeast * see note
- 2 tablespoons cane sugar
- ¾ cup warm water 110º F
- 2 ½ cups gluten free flour blend * see note!
- 1 teaspoon kosher salt
- 1 large egg
- ½ cup pumpkin puree
- 2 tablespoons unsalted butter melted
- 1 teaspoon pure vanilla extract
- 1 teaspoon ground cinnamon
- 1 teaspoon pumpkin pie spice
Method
- Preheat your oven to 200º F, then turn off the oven. This is where you will rise your dough.
- Heat the purified ¾ cup warm water to 110º F in a glass dish. Add the 2 tablespoons cane sugar and stir to dissolve the sugar. Add 2 ½ teaspoons active dry yeast. Let it sit for 5 minutes until it is bubbling.
- Add ½ cup pumpkin puree, 1 teaspoon pure vanilla extract, softened 2 tablespoons unsalted butter, and 1 large egg to the bowl of a standing mixer. Attach the paddle attachment and mix for 30 seconds.
- Pour in the yeast mixture and mix for 15 seconds.
- Add in 2 ½ cups gluten free flour blend, 1 teaspoon ground cinnamon, 1 teaspoon pumpkin pie spice, and 1 teaspoon kosher salt. Mix on low speed, gradually increasing the speed as the dough forms.
- You only get one rise, so you need to shape the bread.
- NOTE: If you are not using the recommended flour, Authentic Foods Steve's GF Bread Flour, you will need to add more flour. For Cup4Cup you need an additional 1/4 cup of gluten free flour. I didn't test any other brands, so keep in mind you will need to add more if you used another flour.
- Break the challah dough into three evenly sized balls. Roll each into a rope. They should all be the same length and thickness.
- Place the ropes on a parchment-lined cookie sheet. Braid the three ropes crossing each over the other until you have a braided challah loaf.
- Cover loosely with plastic wrap and put it into the oven to rise. Let the challah rise for one hour or until it doubles in size.
- Remove the bread from the oven and remove the plastic wrap. Preheat the oven to 350º F. Bake the challah for 25-30 minutes. The actual baking time will vary depending on how thick the challah is.
- Remove the challah and cool on a cooling rack.
Nutrition
Notes
- I highly encourage you to use Authentic Foods Steve’s GF Bread Flour Blend. It is life changing. You can braid and work the dough as you would a gluten dough! If you can’t use this, the only other flour blend I have tested is Cup4Cup. You need to add 1/4 cup of additional flour if you use Cup4Cup or other blends.
- If your flour blend doesn’t have xanthan gum, add one teaspoon.
- Store the challah in an airtight container. It freezes really well too!
Private Notes
Tried this recipe?
Let us know how it was!
I truly hope you enjoy this recipe. I have been testing and creating gluten-free recipes for over 15 years. Creating gluten-free recipes that do not taste gluten-free is my goal for every recipe. Sometimes I only have to test a new recipe a couple of times, and others it takes multiple times. I do this so you get reliable, delicious results every time!

All the AF recipes use gram measurements. I’m wondering if you could please add that to the recipe as well??? Even Aaron Rice at AF recommends going by gram weight for the best consistent results.
Hi Terry, I do not own a kitchen scale and I really do not want to switch 400-500 baked goods recipes. The cost to redo every recipe with weights would be time and cost prohibitive. From what I see, every gluten free flour’s weight varies due to the level of starches. I have readers using multiple flour blends and for me to test everyone isn’t really feasible for me. I believe there are some good gram conversion apps online that may be helpful for you.