
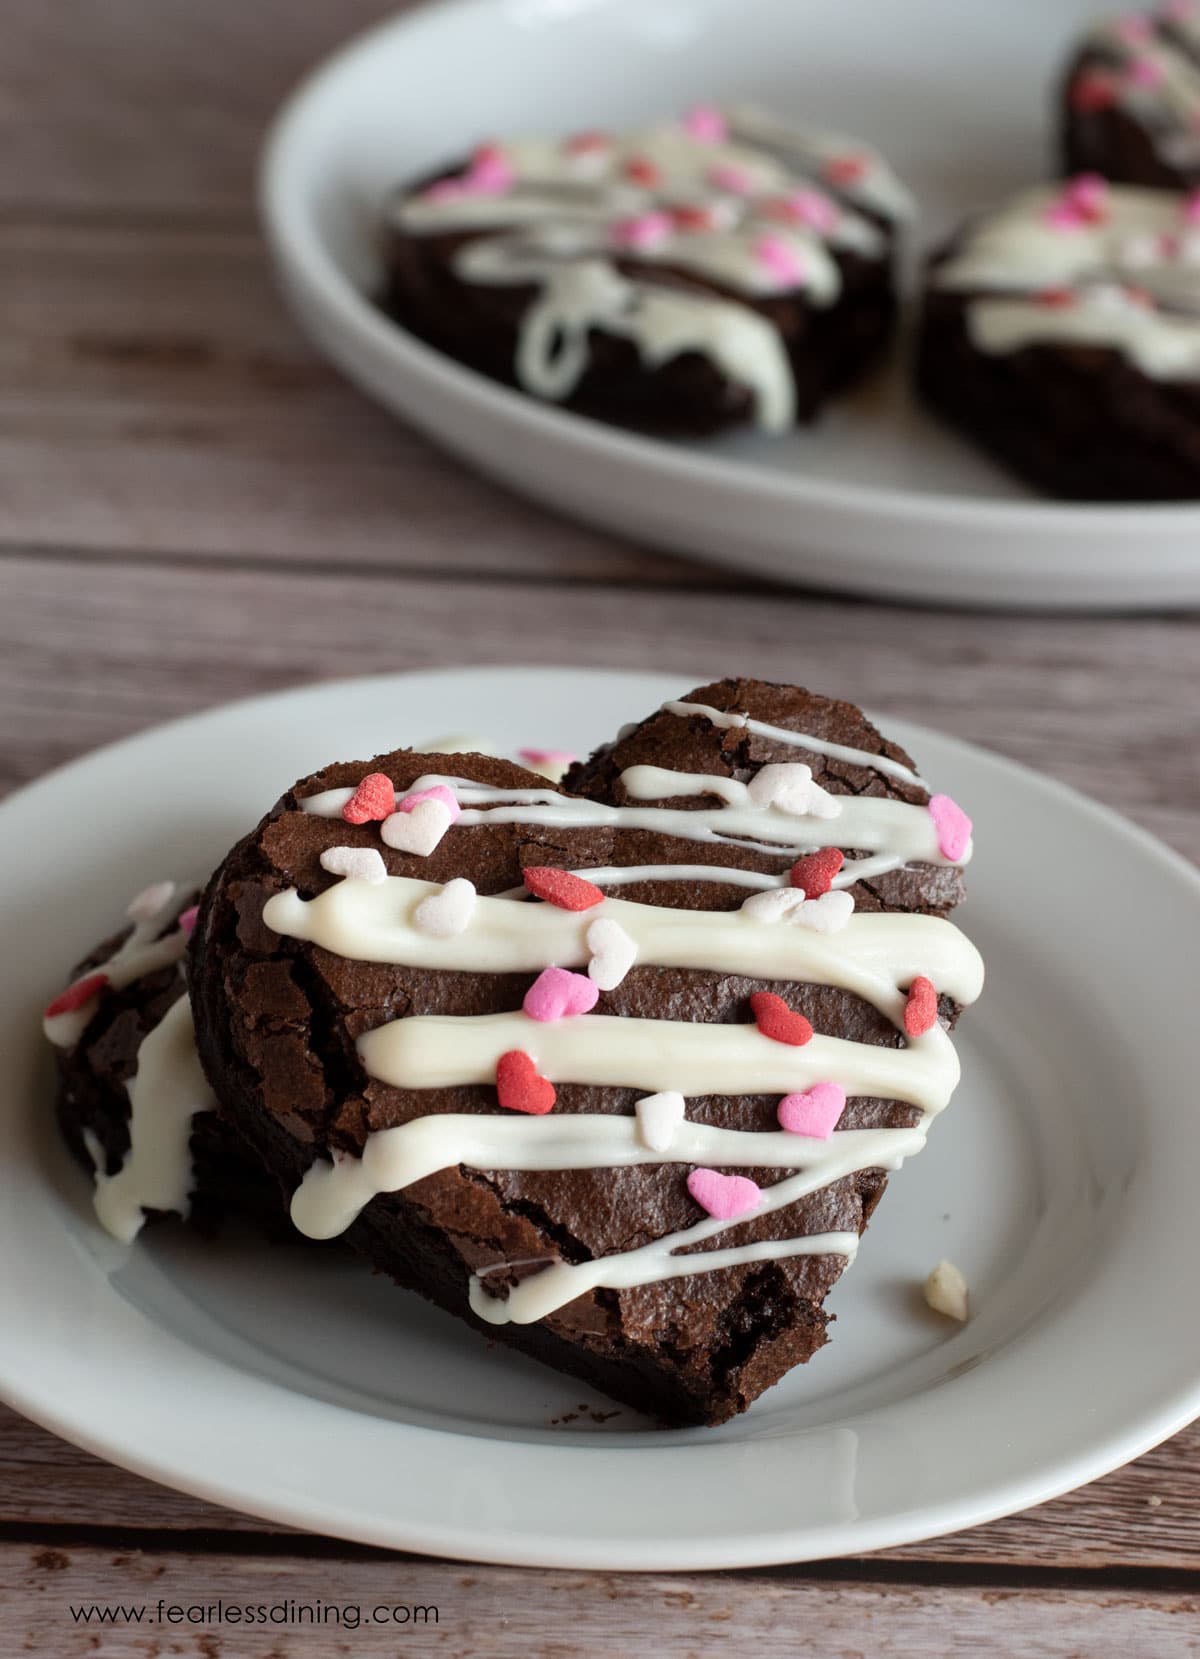
These adorable gluten-free brownie hearts are the perfect sweet treat for Valentine’s Day! Rich, fudgy, and drizzled with creamy white chocolate, they’re finished with festive heart sprinkles for an extra special touch. Best of all, they’re quick and easy to make. Just use my easy Gluten-Free Brownie Recipe or save time with a gluten-free brownie box mix.
This post may contain affiliate links. Please read our Disclosure Policy.
❤️ Sandi’s Recipe Summary
If you want a quick and easy recipe for Valentine brownies, this is a must-make recipe. They are moist, fudgy, and have that perfect brownie texture you love! I recommend using my popular brownie recipe, but if you are in a pinch for time, a box mix will also work well!
You can also use my brownie recipe to make this Gluten-Free Heart Shaped Brownie Layer Cake!
If you are a brownie lover like me, did you know I have a bunch of delicious flavors of brownies on the blog? Check out ALL of my irresistible gluten-free brownie recipes! My gluten-free brownie recipes can be used with cookie cutters; I love using my Gluten Free Lemon Brownies with other holiday cookie cutters like Easter!
Ingredient Notes:
For the full list of ingredients and amounts, please go to the recipe card below.
- Gluten-Free Flour Blend – I tested this recipe with Bob’s Red Mill 1:1 Blend and King Arthur Measure for Measure. Reader Tested Blends: Pillsbury Gluten Free, Pamela’s Baking Mix, and Better Batter flour blends also work in this recipe. Other blends may work, but you may need to tweak the moisture level.
- Cocoa Powder – Several great gluten-free cocoa powder brands have a rich, superior chocolate flavor. The ones I use the most are Anthony’s and Ghirardelli. I used Dutch Process Cocoa Powder.
- Xanthan Gum – Add only if your gluten free flour blend doesn’t contain a binder! See the Related Reading section below to learn more about how binders work in gluten free baking.
- Baking Powder – Use baking powder for Dutch process and black cocoa powder. If you use regular cocoa powder, you need to add 1/2 teaspoon baking soda instead of baking powder. Regular cocoa powder is more acid-neutral and needs the added acid from baking soda.
- Salt – Salt enhances the chocolate flavor in the baked brownies, but a coarse salt is fun to sprinkle on top of the brownies if you are not frosting them.
- Non-Dairy or Regular Milk – Either will work. I used almond milk, but any plant-based milk will work.,
- Light Cooking Oil – I used canola oil. Choose an oil without a strong flavor.
- Eggs – large eggs.
- Vanilla Extract – In this recipe, pure vanilla extract or imitation vanilla extract will work.
- Chocolate Chips – If you are dairy-free, I recommend Enjoy Life Chocolate Chips. Otherwise, feel free to use your favorite gluten-free chocolate chip brand. Note: Wilton chocolate is made on shared equipment with wheat, so avoid this brand if you are Celiac.

A Note From My Kitchen
I know I called this recipe a Valentine’s recipe, but given how well these brownies hold up to cookie cutters, you can make these for any holiday! They are fudgy and delicious. You can also change up the flavor by using one of my other gluten-free brownie recipes. This brownie recipe has been tested dozens of times, and gets rave reviews, so it is the perfect base for this recipe. Don’t forget, if you use a different flour blend, you may need to adjust the moisture levels with more milk or flour.
How to this Gluten-Free Brownie Cut Out Recipe (Step-By-Step)
Preheat the oven to 350º F and move the oven rack to the middle of the oven position. Use the bake cycle and not convection so your homemade Valentine’s brownies bake evenly.

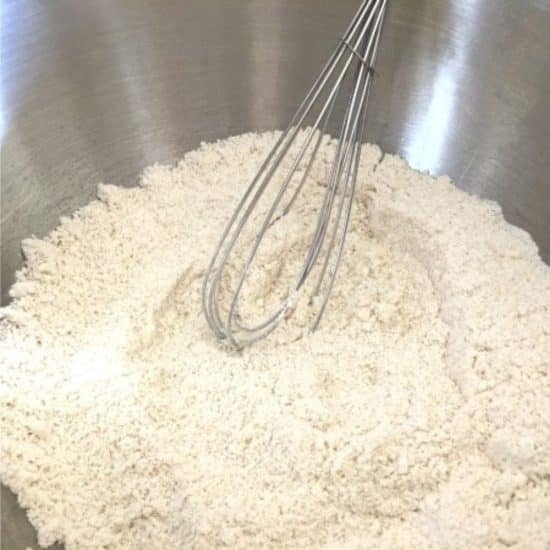
Step 1: In a large mixing bowl, whisk together the following: gluten-free flour blend, cocoa powder, sugar, brown sugar, salt, and baking powder. Again, if you use regular cocoa powder, you will swap 1/2 teaspoon for the baking powder, which will help the brownies rise slightly while staying fudgy.
Sandi Says: If you are adding chocolate chips, chopped nuts, or other mix-ins, stir them into the dry ingredients now. This helps coat them in flour, preventing them from sinking to the bottom of the brownies.
Step 2: Add the light cooking oil, eggs, vanilla, and milk or non-dairy milk to a mixing bowl. Use a whisk for 15 seconds until all the wet ingredients are mixed.
Mixer Option: If using a stand mixer or hand mixer, add the wet ingredients to the mixer bowl and blend with the paddle attachment for 20 to 30 seconds before adding the dry ingredients.

Step 3: Slowly pour the wet ingredients into the dry ingredients, stirring gently with a large spoon or rubber spatula until a thick, rich chocolate brownie batter forms.
Be careful not to overmix the brownie batter; this can make the brownies dense instead of fudgy.
Step 4: The batter should be thick and glossy, showing just how fudgy your brownies will turn out! (See the above photo.)
Email This Recipe To Me!

Step 5: Line a metal 9×13 pan with parchment paper. This will make lifting your brownies out of the pan much easier.
Bake the brownies for 22 to 25 minutes. If you bake in a glass pan, your brownies may need longer to bake, and metal pans tend to bake faster. Remove the baked brownies from the pan. Let them sit in the pan for five minutes, then lift them gently out of the pan by the edges of the parchment paper. Place the brownies on a cooling rack.

Step 6: Do not cut out your brownie shapes until the brownies are completely cool. If the brownies are too warm, they will be too soft to cut into perfect hearts!
❤️ How To Avoid Wasting Brownies while cutting out your hearts. You want to press down the cutter, starting at the edge. Rotate the cookie cutter so it fits more hearts in. Gently lift the cutter to remove each heart-shaped brownie. See how I press down near the edge and rotate the cookie cutter as I go? You can also use the extra bits to make these Gluten-Free Cake Pops.
Step 7: If you want to make the frosting, I share a great vanilla buttercream frosting recipe…plus tips on how to color the frosting in my Gluten-Free Frosting recipe.
If you are melting white chocolate, add the white chocolate chips or melting wafers in a small microwave-safe bowl. To avoid burning the chocolate, heat at 20-second intervals, stirring between intervals. Sprinkle on the sprinkles while the chocolate is melted so the sprinkles stick. Check my list of gluten-free sprinkles to ensure your sprinkles are gluten-free.
Tips For Success
1. IMPORTANT: If you use a gluten-free brownie box mix. Follow the box directions!!
2. Wait until the brownies are cooled before slicing them.
Storage and Freezing Instructions:
- Keep brownies in an airtight container at room temperature for 3 to 4 days, or freeze the brownies for up to 3 months.
- To freeze the brownies, flash-freeze them on a baking sheet. Place the frozen brownies into a freezer-safe container or zipper bag. Set them out on the counter for 20 to 30 minutes to thaw the brownies.
Frequently Asked Questions:
If you have questions, I have answers!! If you have a question you do not see here or have not answered in the post, please drop me a comment, and I will respond to your question quickly!
I like to go by touch. After 20 to 25 minutes, gently touch the top of the brownies to see if it feels firm and not jiggly. The top should also be a little shiny.
There are two reasons this can happen. Every gluten-free flour blend has a different starch-to-grain ratio, so if you used a flour blend different from what I tested, the brownie batter could have been too dry. If you use the cookie cutters before the brownies are fully cooled, they will be crumbly.
I haven’t tested reducing the sugar in my brownie recipe. Sugar plays a big role in baking brownies, so I can not guarantee the recipe will work as well if you lessen the sugar.
My favorite thing to do with the brownie scraps is to make my Gluten-Free Trifle with them.

More Gluten-Free Valentine’s Day Recipes:
Love This Recipe?
💬 Did you make this recipe? Drop a comment below, and let me know how it turned out! ⭐⭐⭐⭐⭐ Please include which flour blend you used. This will help others know this recipe is delicious. Thank you!

Gluten-Free Valentine’s Brownies
Equipment
- 9×13 metal pan
- Cookie Cutters
Ingredients
- 1 cup gluten free flour blend * see notes
- ½ cup unsweetened cocoa powder * see notes
- 1 teaspoon baking powder or 1/2 tsp baking soda, depending on the type of cocoa powder used. See notes.
- ¼ teaspoon salt
- ½ cup brown sugar
- 1 cup cane sugar
- ½ cup light flavored oil I used canola oil
- ½ cup dairy-free milk regular also works
- 3 large eggs
- 2 teaspoons vanilla extract
- 6 ounces chocolate chips regular or dairy-free
Instructions
- Preheat the oven to 350º F and move the oven rack to the middle of the oven position. Use the bake cycle and not convection so your homemade Valentine's brownies bake evenly.
- IMPORTANT: If you use a gluten-free brownie box mix. Follow the box directions!!
- In a large mixing bowl, whisk together the following: 1 cup gluten free flour blend, 1/2 cup unsweetened cocoa powder, 1 cup cane sugar, 1/2 cup brown sugar, 1/4 teaspoon salt, and 1 teaspoon baking powder . Again, if you use regular cocoa powder, you will swap 1/2 teaspoon for the baking powder, which will help the brownies rise slightly while staying fudgy.
- If you plan to add chocolate chips, chopped nuts, or other mix-ins, stir them into the dry ingredients now.
- Melt the 6 ounces chocolate chips in a microwave-safe dish. I highly recommend melting them at 20-second intervals. Stir between each interval to prevent the chocolate from burning. You can also use a double boiler to melt the chocolate if you prefer.
- Add the light 1/2 cup light flavored oil, 3 large eggs, 2 teaspoons vanilla extract, melted chocolate chips, and milk or 1/2 cup dairy-free milk to a mixing bowl. Use a whisk for 15 seconds until all the wet ingredients are mixed.
- Slowly pour the wet ingredients into the dry ingredients, stirring gently with a large spoon or rubber spatula until a thick, rich chocolate brownie batter forms.
- Line a metal 9×13 pan with parchment paper. This will make lifting your brownies out of the pan much easier.
- Bake the brownies for 22-25 minutes. If you bake in a glass pan, your brownies may need longer to bake, and metal pans tend to bake faster.
- Let them sit in the pan for five minutes, then lift them gently out of the pan by the edges of the parchment paper. Place the brownies on a cooling rack.
- Do not cut out your brownie shapes until the brownies are completely cool. If the brownies are too warm, they'll be too soft to cut into perfect hearts!
- Grab your heart-shaped cookie cutters. You can use any size or a combination of different-sized heart cookie cutters.
- Press down the cutter, starting at the edge. Rotate the cookie cutter so it fits more hearts in. Gently lift the cutter to remove each heart-shaped brownie.
- If you want to make the frosting, I share a great vanilla buttercream frosting recipe…plus tips on how to color the frosting in my Gluten-Free Frosting recipe.
Notes
If your flour blend doesn’t include a binder, add 3/4 teaspoon of xanthan gum.
If your cocoa powder has lumps, I recommend sifting it into the dry ingredients to remove the lumps.
If you use regular cocoa powder, swap the baking powder for 1/2 teaspoon of baking soda. If you use Dutch process or black cocoa, use the baking powder amount as listed.
Be careful not to overmix the brownie batter; this can make the brownies dense instead of fudgy.
If you are melting white chocolate, add the white chocolate chips or melting wafers in a small microwave-safe bowl. To avoid burning the chocolate, heat at 20-second intervals, stirring between intervals. Sprinkle on the sprinkles while the chocolate is melted so the sprinkles stick. Check my list of gluten-free sprinkles to ensure your sprinkles are gluten-free.
Storage: Keep brownies in an airtight container at room temperature for 3-4 days, or freeze the brownies for up to 3 months. To freeze the brownies, flash-freeze them on a baking sheet. Place the frozen brownies into a freezer-safe container or zipper bag. Set them out on the counter for 20-30 minutes to thaw the brownies.
Email This Recipe To Me!
SPECIAL NOTE
Please know that every gluten free flour blend has a different starch to grain ratio. If you use a blend I didn’t test, my rule of thumb is to add more flour if your dough or batter is wet and add more liquid if the dough or batter is too dry!
Nutrition
Nutrition Disclaimer
Nutritional information is an estimate provided to you as a courtesy. You should calculate the actual nutritional information with the products and brands you are using with your preferred nutritional calculator.
Gluten-Free Related Reading
Gluten-free baking is like a science experiment. There are so many things you need to understand the different components of baking without gluten. My Gluten-Free Resources Section is here to help teach you the tools you need to know to become a confident gluten free baker.
My Best Gluten-Free Baking Tips For Better Baking!
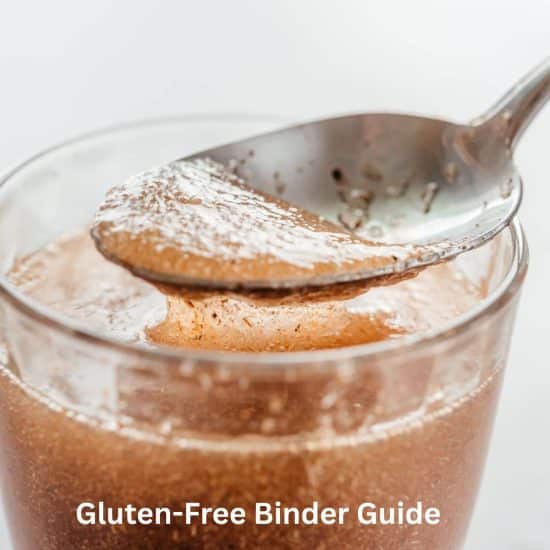
Why Binders Are Important In Gluten-Free Baking

The Best Gluten Free Flour Blends – And how to use them!
I truly hope you enjoy this recipe. I have been testing and creating gluten-free recipes for over 15 years. Creating gluten-free recipes that do not taste gluten-free is my goal for every recipe. Sometimes I only have to test a new recipe a couple of times, and others it takes multiple times. I do this so you get reliable, delicious results every time!

Besides the beautiful presentation, it tastes so good.
I am so glad you enjoyed them. Thank you!