You are going to love how easy it is to make homemade prickly pear syrup!! The cactus pear fruit is sweet and colorful! I have used this sweet syrup for cocktails, pancake syrup, and even as a natural coloring for frosting!
This post may contain affiliate links. Please read our Disclosure Policy.
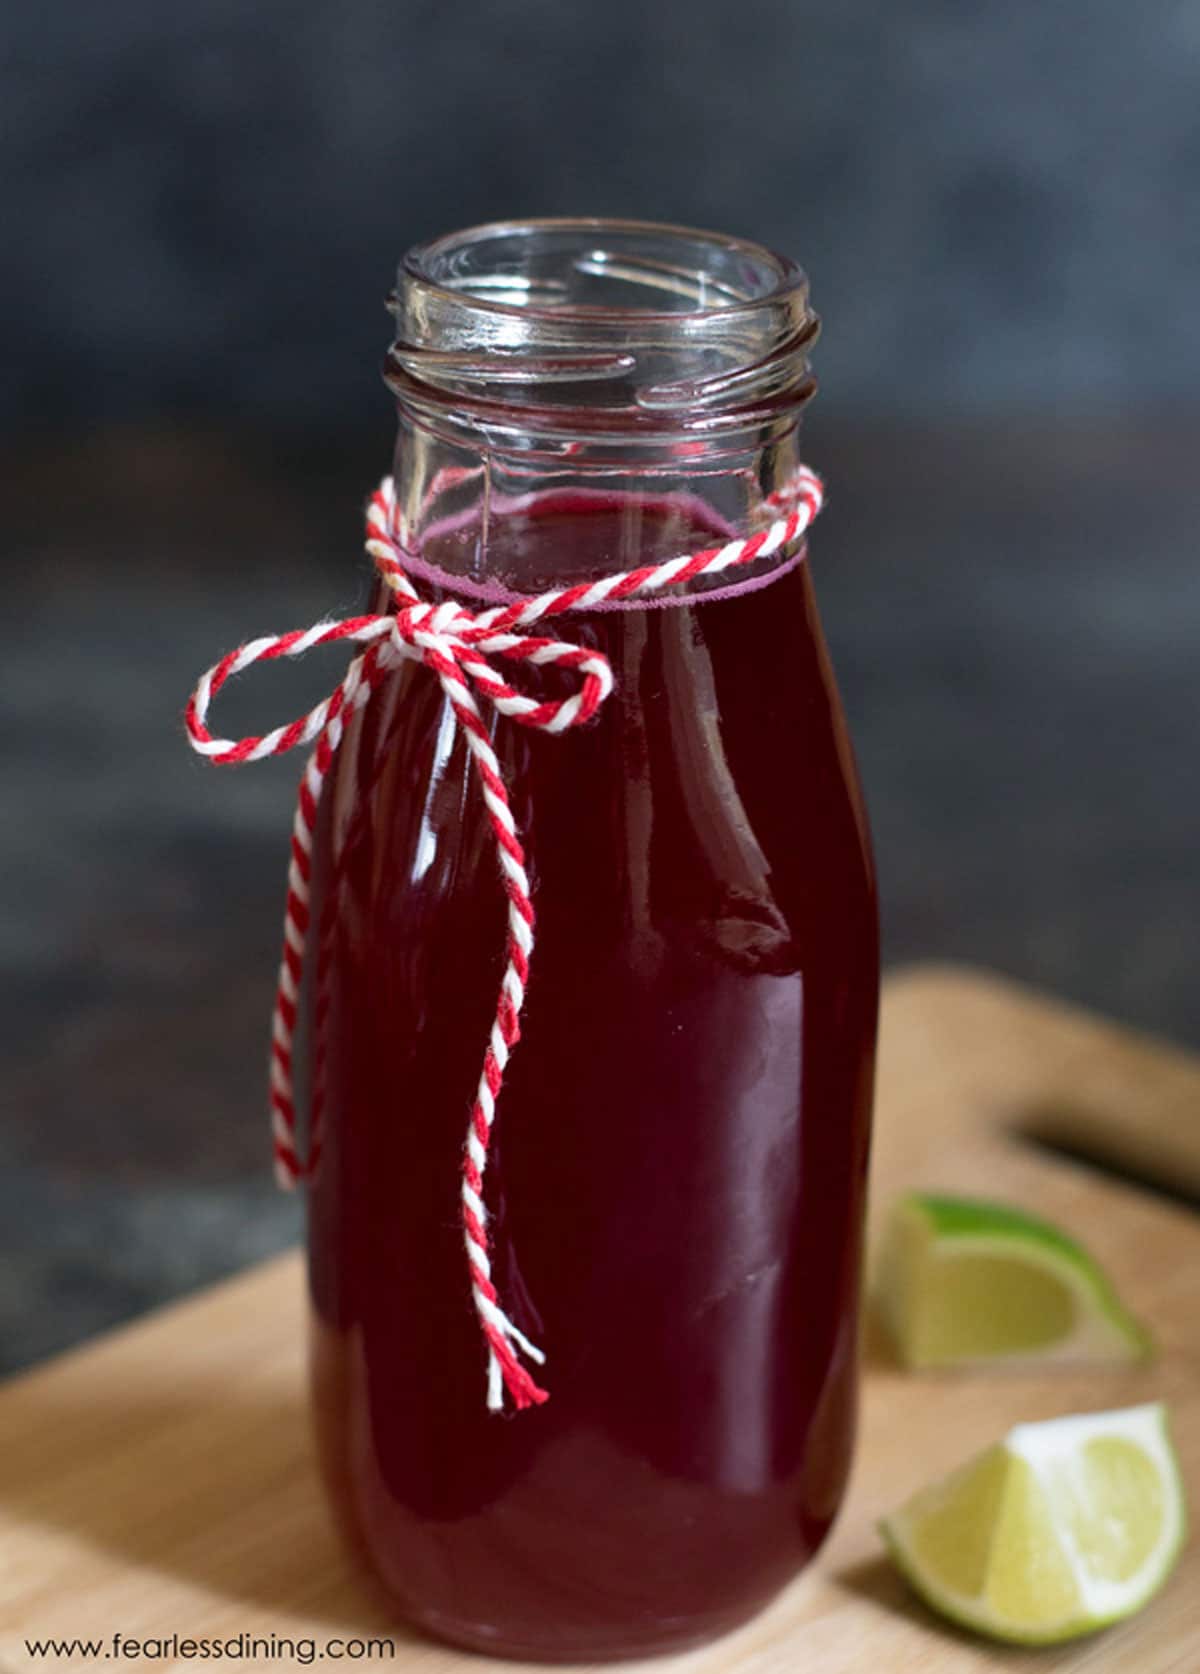
What is prickly pear fruit?
Prickly pear fruit comes in several colors and varieties. I have found cactus fruit pulp in brilliant orange and vibrant hot pink. I am lucky our little produce market often has cactus pears, so I can experiment with them!
You can read a lot more about prickly pears and find many delicious recipes in my Guide to Prickly Pears. If you like prickly pears, you will want to try these yummy Prickly Pear Margaritas!!
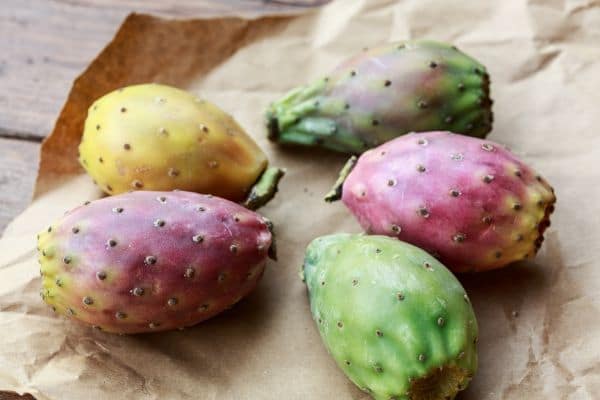
Have you seen other colors of cactus pear fruit? Check these prickly pears out! They come in some beautiful colors!! I have made syrup from orange and hot pink cactus fruits.
You are going to love how easy making this prickly pear syrup is. The hardest part is finding prickly pears. We are lucky to have a small produce market here, and they have different varieties of prickly pears most of the year.
Allergen Information:
This homemade prickly pear syrup is made from scratch and is gluten-free, dairy-free, egg-free, soy-free, nut-free, and oat-free.
Ingredient Notes:
For the full list of ingredients and amounts, please go to the recipe card below.
- Prickly Pears – Use any color you can find.
- Sugar – This sweetens the syrup and helps to thicken it as it reduces.
- Water – I like to use purified water to make this syrup.
- Lemon Juice – Helps preserve freshness.
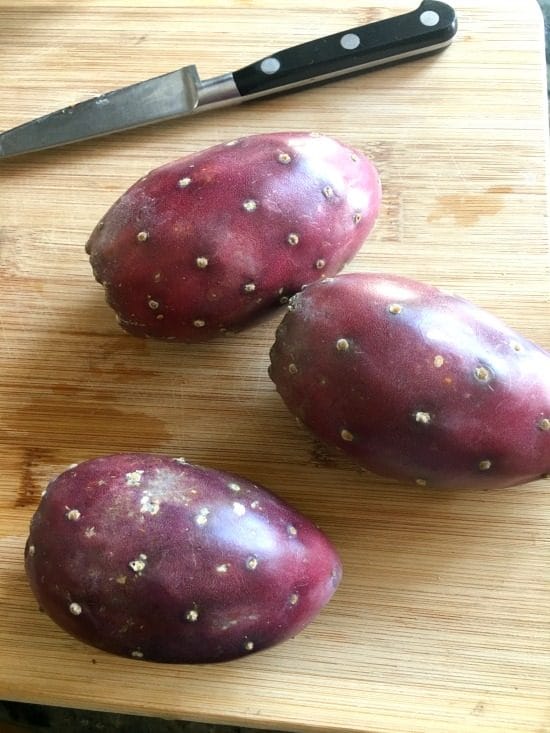
This is what cactus fruit looks like when the thorns are removed. I don’t recommend buying with the thorns, as they are really tough to pull off without hurting yourself.
Email This Recipe To Me!
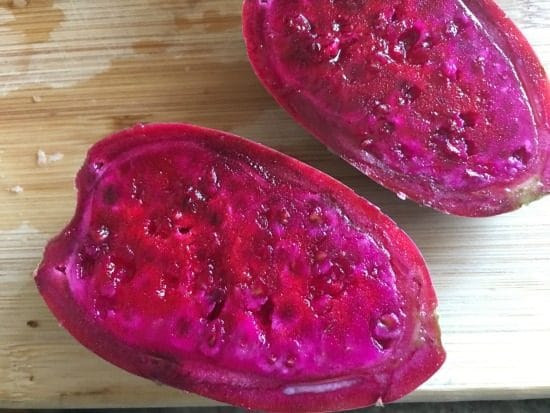
This is what the hot pink prickly pear looks like inside. Prickly pears have a ton of tiny, rock-hard seeds. You do not want these in your syrup!
Here is what the orange prickly pear fruit looks like. I used it to make the margarita I mentioned above.
For this golden prickly pear, I didn’t cook the pulp into syrup; I just strained it to mash out the liquid to make margaritas. The strainer is important because it keeps all of the seeds out of the juice.
Step-By-Step Photos and Directions:
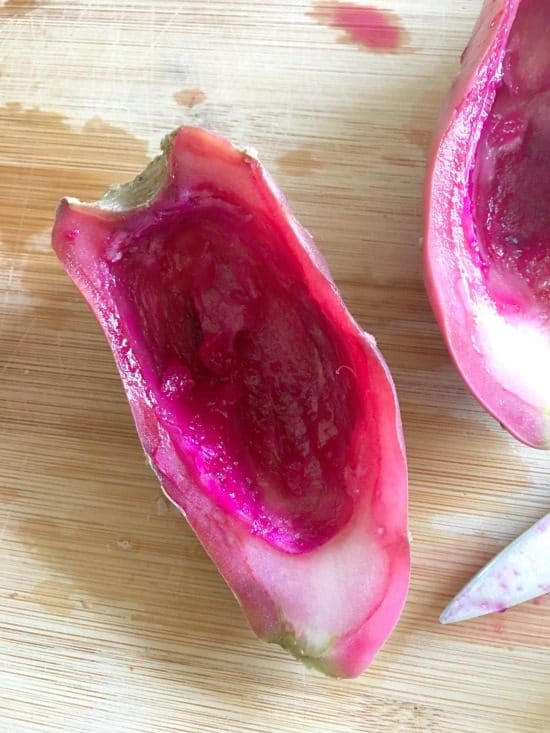
Step 1: To get the useable parts, I scoop out the flesh of the prickly pear.
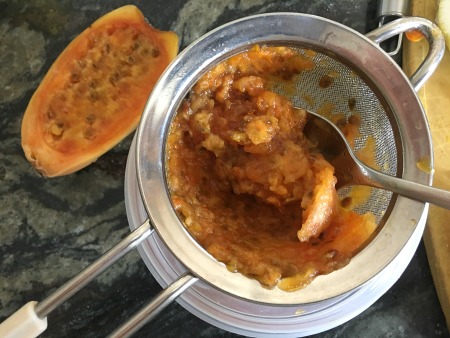
Step 2: Grab a strainer and run the liquid and prickly pear through it. Use a spoon to press it into the strainer to get all of the juice out. (You can do this step before or after cooking the pear.)
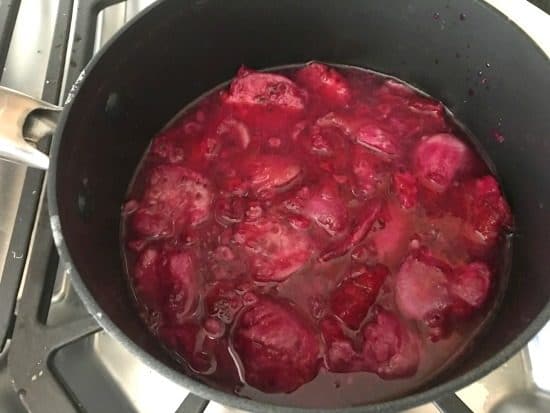
Step 3: Put the flesh into a pot and simmer with 1/4 cup sugar and 1 tablespoon of lemon juice. I simmer the syrup for about 30 minutes on really low heat until it thickens. If you didn’t put it through the strainer to remove the seeds, do this now.
Step 4: Allow the liquid to cool, and you have your syrup! This homemade prickly pear syrup tastes amazing with bourbon in this Prickly Pear Cocktail.
Frequently Asked Questions:
Prickly pear cactus fruit can vary from golden orange and green to hot pink.
You could technically swallow the little seeds but do not bite them. They are rock-hard. It is best to strain the cactus pear fruit to remove all seeds.
Most prickly pears are sold without the spines. If yours has the spines, you definitely want to find these with the spines (aka giant thorns) removed. The thorns are hard to remove and hurt if you accidentally prick yourself with one. Wear thick gloves and use tweezers or pliers to remove them.
This homemade cactus pear syrup will last a week in the refrigerator.
I store my prickly pear syrup in an air-tight jar. You can also keep it in an air-tight storage container.
More fun sauce recipes to try:
Tools:
- A fine mesh strainer to prevent the hard seeds from getting into the syrup.
- You will want to use a cutting board that won’t stain.
Love This Recipe?
If you made and enjoyed this recipe, I would be incredibly grateful if you could leave a comment below. This will help others know it’s delicious. Thank you!

Prickly Pear Syrup
Ingredients
Method
- Take your de-thorned prickly pears and cut them in half. Scoop out the middle of the fruit and add it to a small pot with 3 cups water and 1/2 cup cane sugar.
- Bring to a gentle boil, then cover and reduce the heat to a simmer.
- Allow the mixture to simmer, stirring occasionally, for 30 minutes. When the mixture thickens, remove from the heat and allow it to cool.
- Take a soup ladle and add one scoop of the mixture to a strainer. (Make sure the strainer is over a bowl.)
- Use a spoon to press the prickly pear mixture into the strainer to get all of the liquid out. Empty the strainer of the seeds and thick pulp and repeat until you do this with all of the prickly pear mixture.
- Chill for a minimum of one hour.
Nutrition
Notes
- I do not recommend eating the seeds of prickly fruit. Technically, you can, but they are as hard as rocks, and you can chip a tooth. Use a strainer to press the prickly fruit pulp through it so you can get the juice without the seeds.
- Prickly fruit comes in many different colors, from golden orange to green and hot pink. Any will work well in this recipe.
- This prickly pear syrup will keep fresh in the refrigerator in an airtight container for up to one week.
Nutritional Disclaimer
Nutritional information is an estimate provided to you as a courtesy. You should calculate the actual nutritional information with the products and brands you are using with your preferred nutritional calculator.
Tried this recipe?
Let us know how it was!
FYI You don’t pull the prickly pear thorns out with tweezers, unless you want to sit there for forever, lol. You either get a small hand held torch to burn them off before picking, or you hold them with tongs over a flame (stove, etc) & hold them over the flame just long enough to burn the thorns off all the way around. 🙂
That is a great tip. Thank you!
I tried this recipe today. I ended up with prickly pear juice!
I followed the recipe exactly. I am currently reducing the juice by cooking it down again. I’m not sure there will be anything left if it thickens!
Hi Wendy, Did you substitute any ingredients in the recipe? How much liquid did you start with?
Not sure if I measured everything out right. My syrup is watery. I added additional tablespoons of sugar to try to thicken it. Any suggestions?
Hi Ashly, I haven’t seen this happen. Did you substitute any ingredients, cook different times, use the same amount of prickly pear? If you could walk me through your process I can try to help troubleshoot. Sandi
Can you can the prickly pear syrup? I’ve been trying to figure out what to do with the prickly pears that I have besides making prickly pear jelly and had thought of making a syrup. I have about 200 more process, and this recipe is exactly what I was looking for. I process the whole prickly pear through a juicer that leaves nothing but pulp and juice and it seems to make a good base for jellies and flavoring. Thank you
Hi Dale, I have never canned anything, but I would assume this syrup would be good for canning due to the sugar.
Hello, Just wondering if you left the skins on when steeping, does this make it bitter?
Hi Kristi, If you look at the photos, you can see I remove the flesh and do not use the skins.
Recipe calls for 1/2 cup sugar and no lemon it the directions above it states 1/4 c sugar and lemon juice which is it?
It is both, I corrected the bottom part of the recipe as it was only listed on top. Thank you!
Cool stuff because ‘pears are about the best fruit ever. To remove thorns, put some on a colander and under running water roll them around. The spines come loose and wash away but beware of glochids, the tiny thorns. Always use gloves when handling. Even when we toast pads to pickle for nopalitos there’s a chance of glochids. Also, we put the seeds in bird feeders. A lot of birds go nuts over them and chili seeds. It is Arizona, LOL!
Thank you for the tips. Those spines are tricky to be sure!! I am very thankful they are sold here without the spines.
Thank you for the recipe! I did this with my friend and she grilled them and mushed them in the strainer hot and soft. That way you don’t have to mess with the thorns. Can’t wait to try the syrup with bourbon.
I am so glad you had fun with my recipe, Ann. I absolutely love that you grilled the prickly pears. I bet that added great flavor!
Your recipe calls for 1 and a half pounds of prickly pear. Is that before the fruit is scooped out or do you mean 1 and a half pounds of the fruit that will get cooked. Thanks.
Nora
Hi Nora, that is before the fruit is scooped. The weight when you buy them in the store.
This is confusing – the recipe says 1.5 cups. Do you mean 1.5 cups of pulp or the pulp from 1.5lbs of fruit?
Hi Elle, this is the pulp.
I want to make this as a gift. Will it be fine to freeze the syrup until right before I gift it?
Hi Sandra, I have never frozen this syrup so I do not know how it will turn out when thawed.
I use a potato masher instead of spoon works a lot faster and a lot easier. I went and picked the fruit myself. I make my on lemonade I use raw honey warmed up with lots of Italian lemons, Meyer lemons a lot.
What a great idea! I will try this next Brenda, thank you!
Can this be made with honey instead of sugar?
Hi Jackie, I am not sure. Since honey is a liquid, you will have to keep an eye on how wet it is. You may need to cut back on moisture, or simmer it longer to have some liquid evaporate.
can I use this recipe for pancake syrup with regular pears
Hi Karen, I haven’t tried with regular pears. If you try it, can you please let me know how it turns out?
Do you know if you can freeze the syrup? I’m not sure we can use it all in a week.
Hi Paula, yes, you can freeze it. I recommend freezing it in an ice cube tray then storing the cubes in a freezer safe container.
when it’s cooked it taste nice and sweet
I am so glad you liked this recipe Ashton 🙂
How long does the jarred syrup last for in the pantry?
Hi Cyrena, I would not store it in the pantry, I would keep it in the refrigerator…about a week?
Hi Natalie, I wanted to say regarding the Prickly Pear, they grow on a cactus which grows wild throughout the desert southwest, I have some in my front yard ready to be picked right now as they are ripe and ready every August. I live in Tucson, Arizona, where we are surrounded by every kind of cactus there is in existence. My tribe uses this fruit for syrups, jams, salads or fresh off the cactus, the thorns are easier to deal with than people make it out to be. They taste fruity with the texture of a papaya but not overly sweet.