
This gluten-free Boston brown bread is a lighter, fluffier take on the traditional recipe! While it was not baked in the traditional can, it has all the flavors of molasses you love. It has a texture that’s soft and satisfying, not dense. Serve it as a side for soups, stews, or simply with a pad of butter. It’s an updated twist on a timeless favorite, made gluten-free and even more delicious!
This post may contain affiliate links. Please read our Disclosure Policy.

One of my readers, Diane, asked me to create a gluten-free version of a bread she used to eat before going gluten-free. Although I lived in Boston for years before going gluten free, I don’t recall ever trying the famous canned Boston brown bread.
I think the thing I love most about this recipe, after the fact that it is fluffy, is that you do NOT need to toast this bread. It is incredible as it is! This recipe is featured in my Ultimate Gluten-Free Bread Guide, where you will find dozens of tested bread recipes and troubleshooting tips.
If you love to bake more whole-grain varieties of bread, try my Gluten-Free Multi-Grain Bread or my Gluten-Free Buckwheat Bread recipes. I have so many incredible gluten-free bread recipes on the blog just waiting for you to make them!

A Note From My Kitchen
The traditional version of Boston Brown Bread is baked in a can, which I felt unsure of. I am a fluffy bread girl at heart, so I packed all the same flavors of this bread into a fluffier version of gluten-free Boston brown bread. This is the best brown bread recipe if you are like me and do not want to make a dense, canned loaf of brown bread. It is delicious!!
This bread took a few tries to get the flavor right. I tested blackstrap and regular molasses to get the right caramelized flavors. I also tested it with butter and oil. I prefer using oil because the bread was lighter, but you can easily use butter if you would like a denser texture.
Ingredient Notes:
For the full list of ingredients and amounts, please go to the recipe card below.
- Gluten-Free Flour Blend – I tested this gluten free brown bread recipe using Namaste Gluten Free Flour Blend. This blend worked really well with yeast. Many 1:1 blends do not work with yeast. For more information, please see my Related Reading section below.
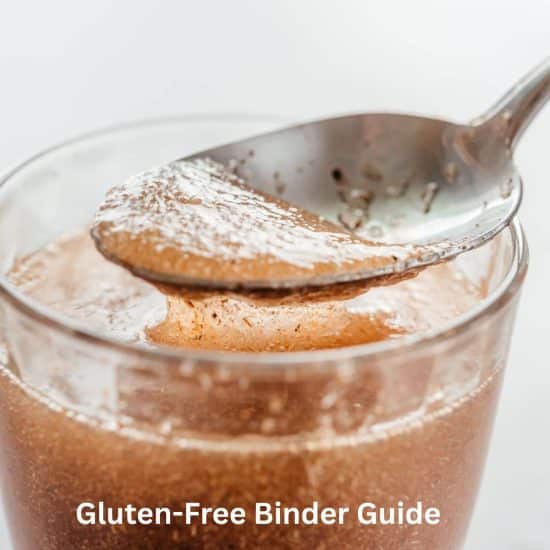
- Binder – If your flour blend doesn’t contain a binder, you will need to add 3/4 teaspoon of xanthan gum or use a psyllium husk gel. You can learn more about how binders work in gluten free baking in my Related Reading section below.
- Rapid Yeast – I used rapid yeast in this recipe. Active yeast will also work, but you will need to activate it before adding it to the wet ingredients.
- Flaxseed Meal – I used ground flaxseed meal to improve the texture of the bread.
- Molasses – I used unsulphered molasses to make this recipe.
- Honey – This adds the perfect amount of sweetness to help activate the yeast.
- Oil – You can use any lightly flavored oil in this recipe. I used avocado oil.
- Egg – The original canned recipe doesn’t include eggs, but I found that adding one egg to make this bread fluffier improved the texture of the bread.
- Raisins – Traditionally, black raisins are used. If you only have golden raisins, that is fine to use.
- Water – When baking things with yeast, I highly recommend using purified water because chlorine can kill the yeast, making the bread not rise well.
If you are looking for a more traditional bread recipe, try my fluffy Gluten-Free Bread Recipe.
Sandi’s Pick:
I know I mention a Pullman loaf pan often in my bread recipes. I love using this pan for a few reasons:
- It allows the bread to rise up high in the pan.
- This pan has three vent holes in the bottom to allow even baking.
- It is also very easy to clean!

How to Make Gluten-Free Boston Brown Bread (Step-By-Step):

Step 1: Put the raisins in a small bowl and add boiling water to cover the raisins. Soaking your raisins will make them more tender in the bread. Soak them for about 10 minutes. Drain them in a colander to remove the extra water.
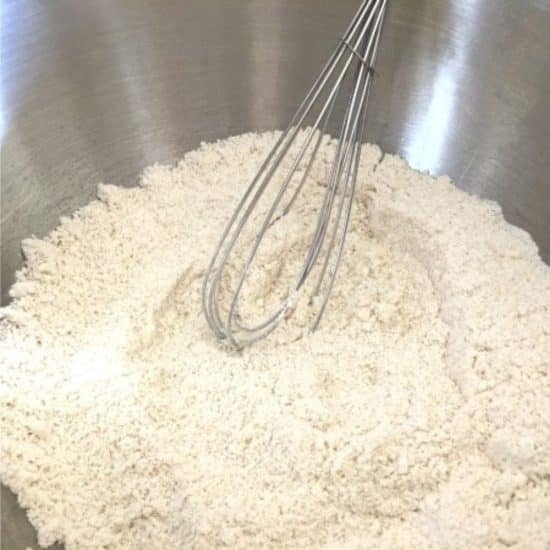
Step 2: Add the dry ingredients to a large mixing bowl. This includes the flour, rapid yeast, ground flaxseed meal, and salt.
👀 Sandi Says: You are welcome to use a stand mixer with a paddle attachment to make the bread dough. Add the wet ingredients to the stand mixer bowl. I still recommend mixing the dry ingredients together before adding them to the stand mixer. This way, all of the dry ingredients are evenly disbursed.

Step 3: In a smaller bowl, add molasses, oil, egg, water, and honey. Whisk until they are blended.
Step 4: Pour the wet ingredients, including the raisins, into the dry ingredients. Mix into bread dough. Note that your dough will be softer and will not be dough you want to work with your hands.
The dough will be sticky, this is from the molasses. If your dough is too dry, add more milk. If your dough is a lot wetter than mine, add more flour. Every blend is different. Read Why Gluten-Free Flour Blends Vary to learn more about this.
Email This Recipe To Me!

Step 5: Line a Pullman loaf pan with parchment paper. I do this for two reasons. It prevents sticking to the pan, and it makes lifting out the baked bread so much easier!
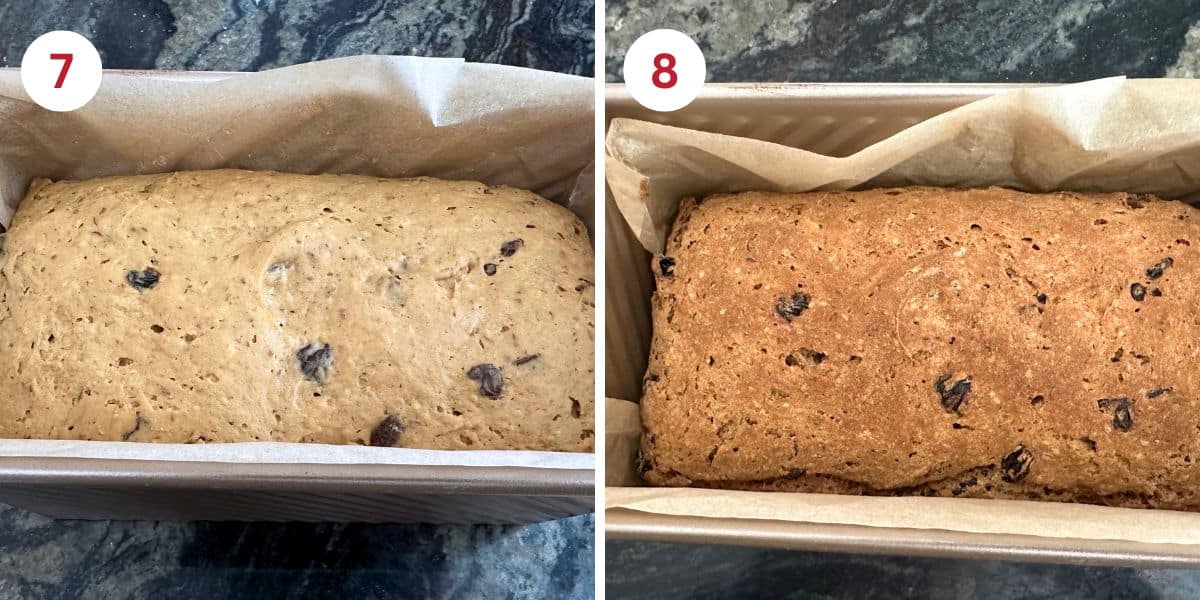
Step 6: Spread the dough out with a spatula or large spoon so the top is flat and the dough is evenly spread out. Place plastic wrap over the top of the loaf pan and let it rise until the dough has doubled in size.
It is important to let the dough rise in a warm spot. See my Tips For Success section below for my best-bread rising advice. When testing my recipe, I noticed the rapid yeast took a little longer to take off and let the bread rise. It will take 45 to 60 minutes to rise. It should double in size.
Step 7: Preheat the oven to 350°F and ensure the oven rack is positioned in the center of the oven. I recommend using the Bake setting and not the Convection setting. I find that the regular bake setting works much better for gluten-free baking.
This photo will show you what the dough will look like after rising.
Step 8: Bake the bread for 45 minutes. Check the temperature of the bread. When it is finished baking, the top will be golden, and the internal temperature will be around 208º F. Use this digital thermometer because knowing the internal temperature will ensure your bread is baked all the way through.
Step 9: Remove the bread from the oven and let it sit for 5 minutes, then gently lift the bread up by the parchment paper onto a cooling rack. You can gently remove the parchment paper so the bread is sitting on the rack to cool.
The final step is having patience. Gluten-free bread needs to be fully cool before you slice it. Trust me on this: I have baked so much gluten free bread over the years. This cooling is when the crumb sets, the moisture gets distributed through the bread, and the bread will slice a lot easier.
Tips for Making Gluten-Free Boston Brown Bread:
- My favorite place to rise bread dough is in my oven. I preheat my oven to 175º F and then turn the oven off. It really helps the dough rise nicely. Some of my readers like to use a heat mat or the heat base from a yogurt maker.
- Don’t add dried raisins. It will change the texture because it absorbs liquid from the dough.
Frequently Asked Questions:
You can use dried cranberries and other fruit in this bread. Nuts are also a great addition.
I have not tested other blends, but it should work if you use a brand that works with yeast. Note, you often have to go to the brand website to see if the blend works with yeast. You may need to add a little more flour or liquid. You can read more about what blends work with yeast in the Related Reading section below.
You can learn much more about baking gluten free bread from scratch in my Gluten-Free Bread Troubleshooting Guide. I cover all of the bread-baking flops and share my best tips to prevent them.
How to Store Brown Bread:
Store leftover bread in an airtight container. If you do not plan to use it within two days, I recommend slicing and freezing the bread in a freezer-safe bag. Gluten-free doesn’t last as long, and it spoils quickly. To thaw, microwave slices of bread for 30 seconds.

More Gluten-Free Bread Recipes:
Now that you have the hang of baking gluten-free bread, try one of these delicious recipes:
Love This Recipe?
If you made and enjoyed this recipe, I would be incredibly grateful if you could leave a comment below. Please include which flour blend you used. This will help others know this recipe is delicious. Thank you!
Gluten-Free Boston Brown Bread (No Can Needed!)
Ingredients
- ½ cup raisins and boiling water
- 3 ½ cups gluten free flour blend (453.5 grams) * SEE Notes!
- 2 ½ teaspoons rapid yeast or one packet
- 2 tablespoons ground flaxseed meal
- 1 teaspoon salt
- 3 tablespoons unsulphered molasses
- 1 large egg
- ¼ cup light oil
- 2 tablespoons honey
- 1 ½ cups water purified!
Equipment
Method
- Put the 1/2 cup raisins and boiling water in a small bowl and add boiling water to cover the raisins. Soaking your raisins will make them more tender in the bread. Soak them for about 10 minutes. Drain them in a colander to remove the extra water.
- Add the dry ingredients to a large mixing bowl. This includes the 3 1/2 cups gluten free flour blend, 2 1/2 teaspoons rapid yeast, 2 tablespoons ground flaxseed meal, and 1 teaspoon salt.
- In a smaller bowl, add 3 tablespoons unsulphered molasses, 1/4 cup light oil, 1 large egg, 1 1/2 cups water, and 2 tablespoons honey. Whisk until they are blended.
- Pour the wet ingredients, including the raisins, into the dry ingredients. Mix into bread dough. Note that your dough will be softer and will not be dough you want to work with your hands.
- Line a Pullman loaf pan with parchment paper. I do this for two reasons. It prevents sticking to the pan, and it makes lifting out the baked bread so much easier!
- Spread the dough out with a spatula or large spoon so the top is flat and the dough is evenly spread out. Place plastic wrap over the top of the loaf pan and let it rise.
- Rise the dough for 45-60 minutes until the dough to double in size.
- Preheat the oven to 350º F and ensure the oven rack is in the middle of the oven. I recommend using the Bake setting and not the Convection setting. I find the regular bake setting works much better when it comes to gluten free baking.
- Bake the bread for 45 minutes. Check the temperature of the bread. When it is finished baking, the top will be golden, and the internal temperature will be around 208º F.
- Remove the bread from the oven and let it sit for 5 minutes, then gently lift the bread up by the parchment paper onto a cooling rack. You can gently remove the parchment paper so the bread is sitting on the rack to cool.
- Allow the bread to cool fully before slicing. Trust me on this: I have baked so much gluten free bread over the years. This cooling is when the crumb sets, the moisture gets distributed through the bread, and the bread will slice a lot easier.
Nutrition
Notes
- I tested this bread with Namaste Gluten Free Flour Blend and the gram measurement is with this blend. Other blends should work as long as they work with yeast recipes. Check the brand websites because most flour blend companies do not put this info on the bag.
- If your flour blend doesn’t contain a binder, you will need to add one teaspoon of xanthan gum or use a psyllium husk gel. (18 grams, make a gel using 1/2 cup of the water from the recipe.)
- I used rapid yeast in this recipe. Active yeast will also work, but you will need to activate it before adding it to the wet ingredients.
- You can use a stand mixer with a paddle attachment to make the bread dough. Add the wet ingredients to the stand mixer bowl. I still recommend mixing the dry ingredients together before adding them to the stand mixer. This way, all of the dry ingredients are evenly mixed.
-
My favorite place to rise bread dough is in my oven. I preheat my oven to 175º F and then turn the oven off. It really helps the dough rise nicely.
- You can learn more about baking gluten free bread from scratch in my Gluten Free Bread Troubleshooting Guide. I cover all of the bread-baking flops and share my best tips to prevent them.
- Store leftover bread in an airtight container. If you do not plan to finish it in 2 days, I recommend slicing and freezing the bread in freezer-safe zipper bags. Gluten free bread doesn’t keep fresh for long. To thaw, microwave slices for 30-35 seconds.
Private Notes
Tried this recipe?
Let us know how it was!
Gluten-Free Related Reading
Gluten-free baking is like a science experiment. There are so many things you need to understand the different components of baking without gluten. My Gluten-Free Resources Section is here to help teach you the tools you need to know to become a confident gluten free baker.
My Best Gluten-Free Baking Tips For Better Baking!
Why Binders Are Important In Gluten-Free Baking

The Best Gluten Free Flour Blends – And how to use them!
I truly hope you enjoy this recipe. I have been testing and creating gluten-free recipes for over 15 years. Creating gluten-free recipes that do not taste gluten-free is my goal for every recipe. Sometimes I only have to test a new recipe a couple of times, and others it takes multiple times. I do this so you get reliable, delicious results every time!

Hello Sandi,
Thank you so much for this and your other wonderful GF bread recipes! I especially like how you share from your experiences…. tips and guidelines to help your readers produce great gf breads! I have a question about this Boston Brown Bread: Would it do well if proofed in a round banneton basket and baked in round form in the oven? Thanks!
Hi Virginia, I am so glad you are enjoying my recipes. I baked the Boston brown bread in a loaf pan, so I haven’t tried a banneton/round bake. If you try it, please come back and let me know how it works out.
I was so grateful for my reader, who introduced me to this popular Boston bread. She was my inspiration to make a fluffier version and it tastes incredible!