
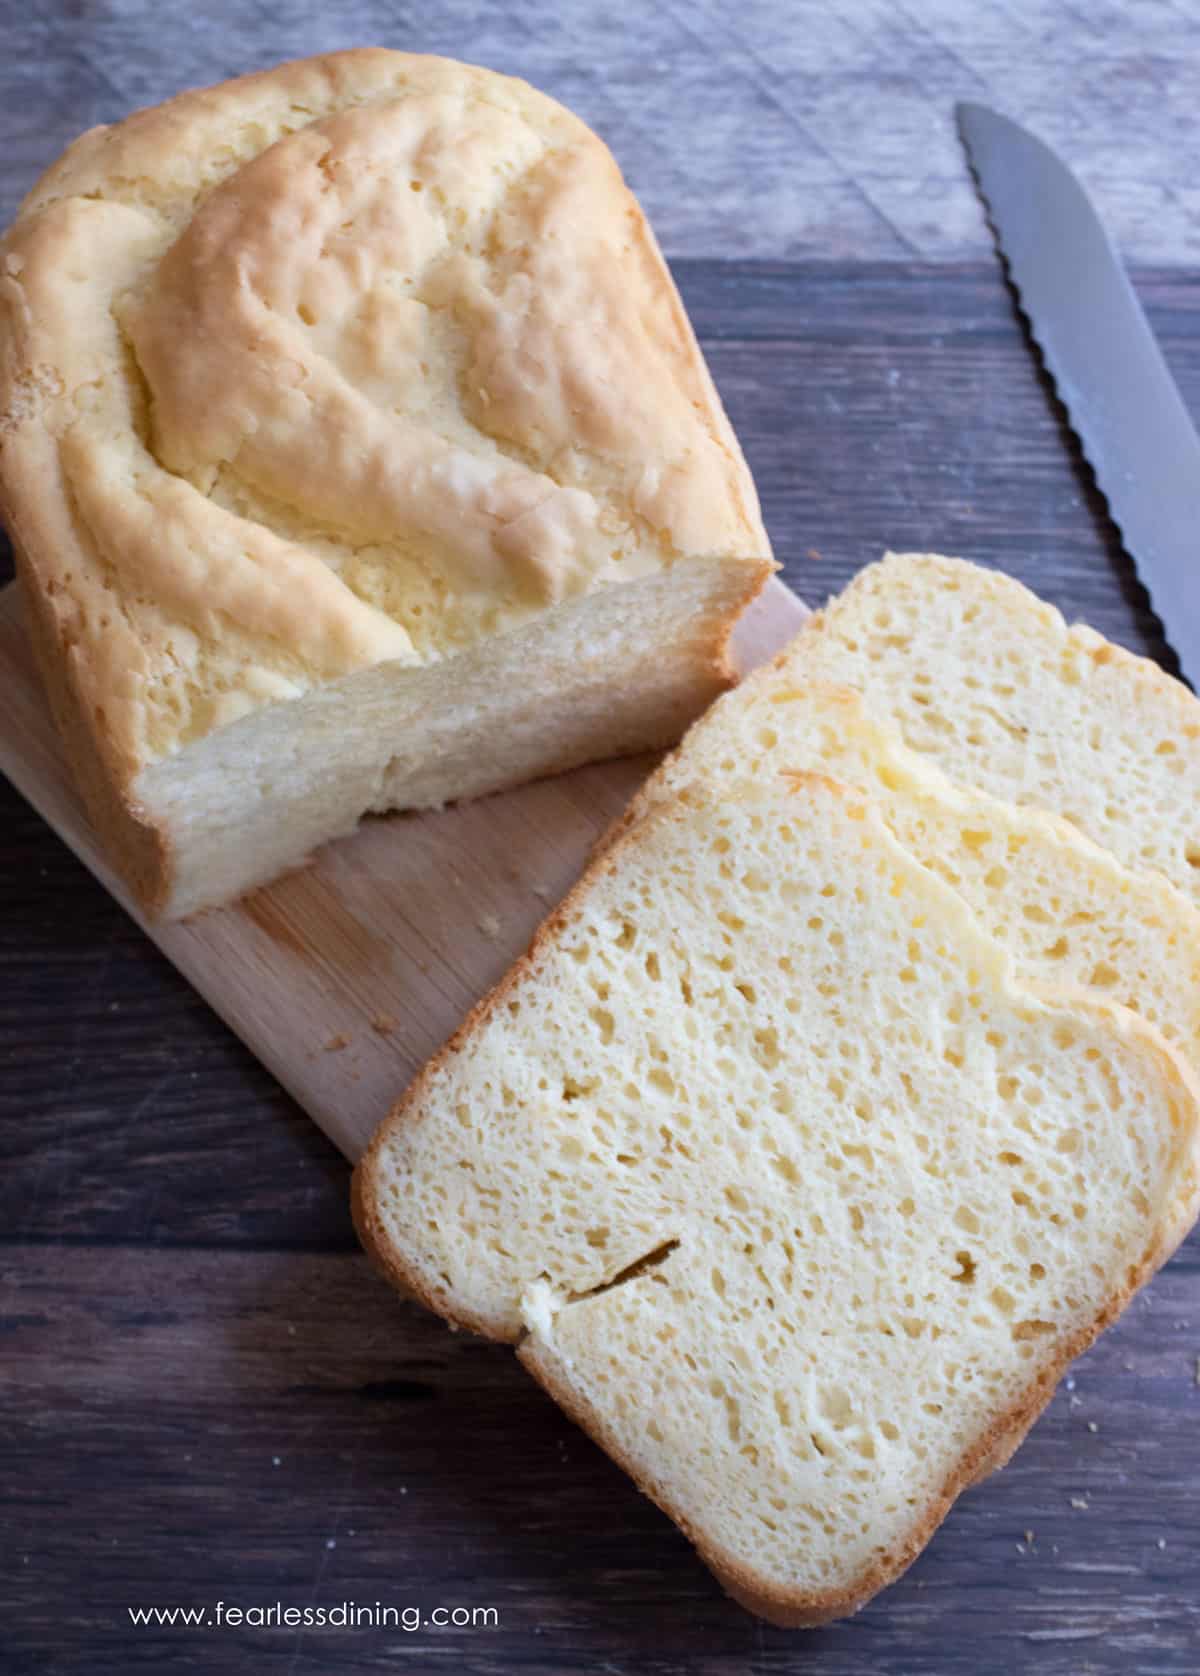
If you have been searching for a gluten-free bread machine recipe that actually works, one that turns out soft, sliceable, and tastes like squishy Wonder Bread you remember from childhood, I made this for you. After 15 years of testing this recipe in my own kitchen for my kids, I have perfected this method to ensure your loaf never turns into a “brick.”
❤️ Sandi’s Recipe Summary
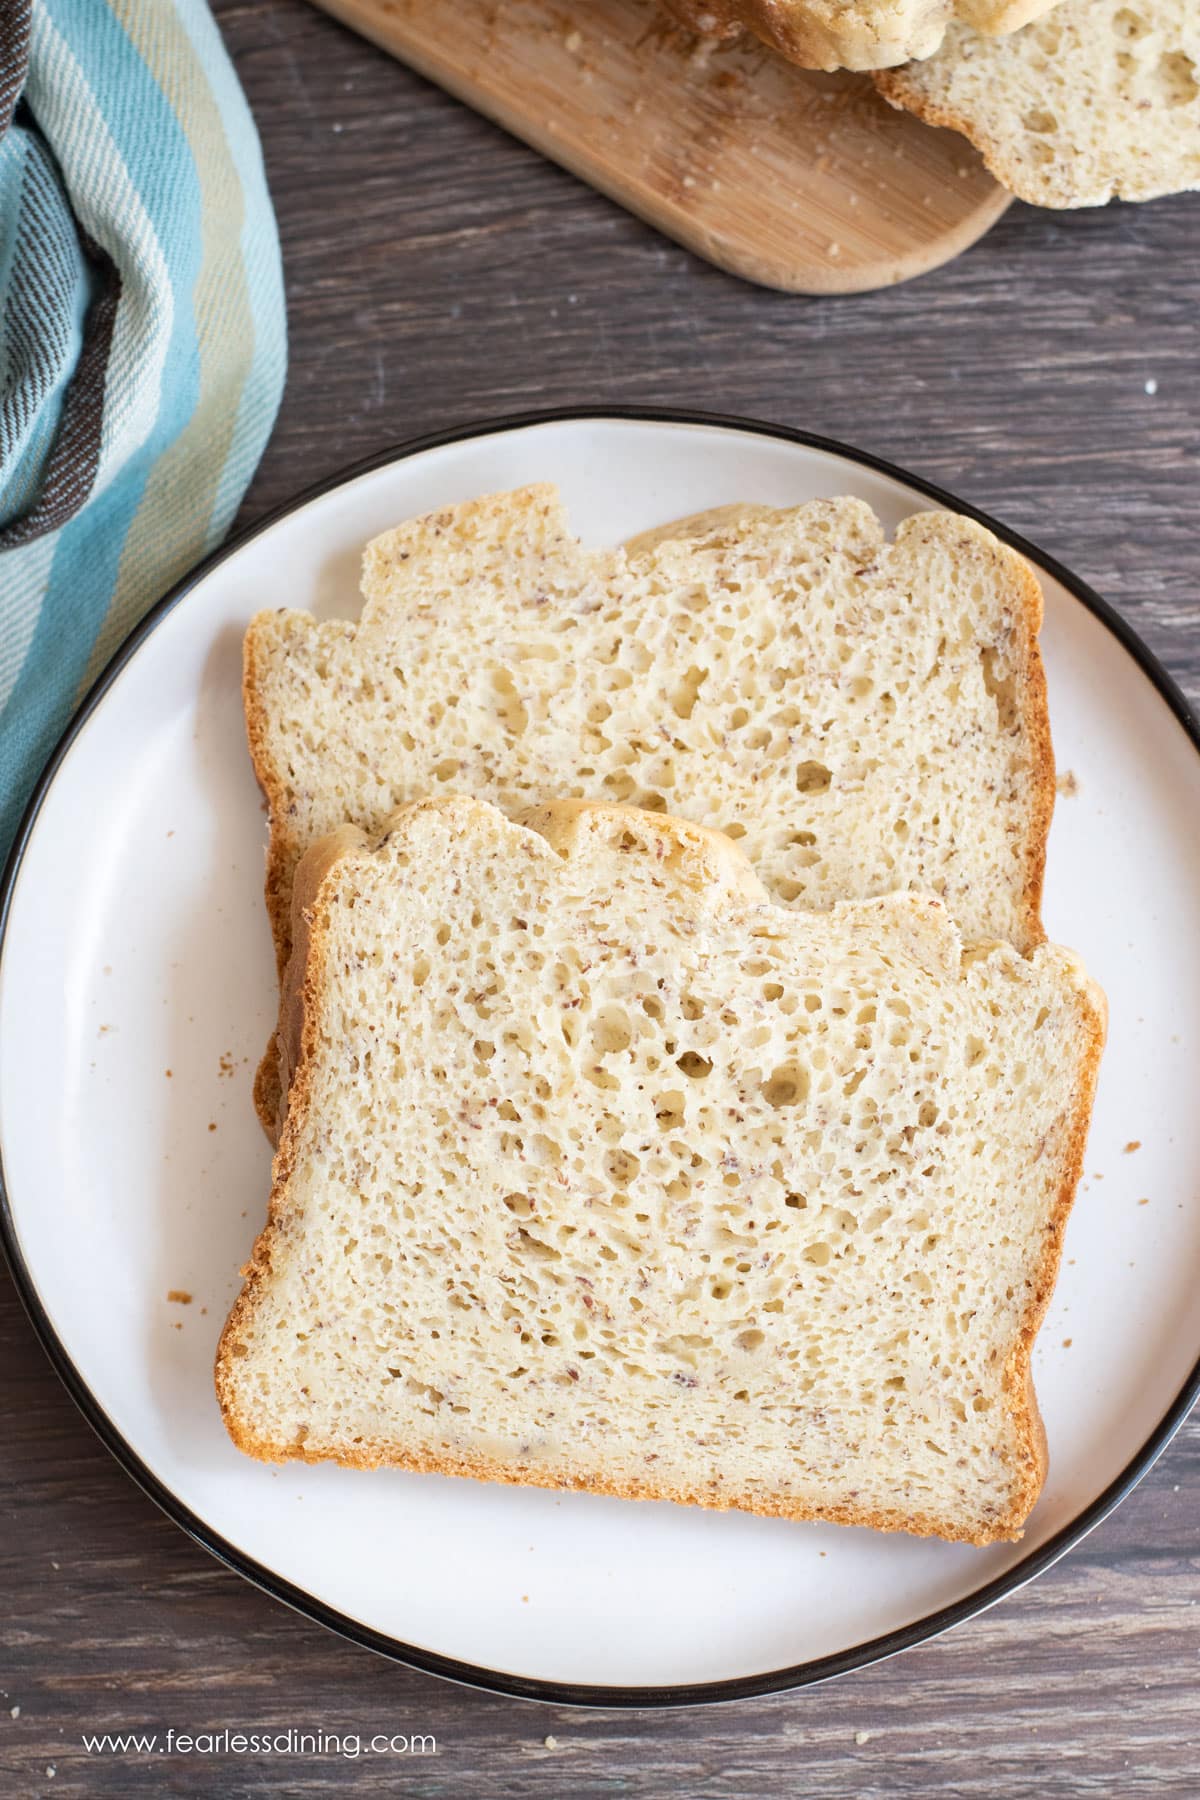
The Quick Bite: This is a simple, homemade gluten free bread machine recipe that helps you make soft, fluffy gluten free sandwich bread. I share lots of tips for using the bread machine, even how to use a bread machine without a gluten free setting. It freezes easily, and it can be baked in the oven if you do not have a bread machine.
When we first went gluten-free almost 15 years ago, we could not buy a loaf of gluten-free bread in any grocery store. My kids were young and picky, and it was challenging to think of things to pack in their lunchboxes. I spent years perfecting this gluten-free bread recipe to work in my bread machine. My kids wanted a bread that was fluffy, not dense.
I made this recipe as easy as possible for you to make, and it is naturally gluten-free and dairy-free, with options for egg-free and gum-free as well. Hundreds of readers have made it and shared their success! If you don’t have a bread machine, you can bake it in your oven. See my Gluten-Free Bread Recipe.
For the full list of ingredients and amounts, please go to the recipe card below.
Tested Gluten-Free Flour Blends
For best results, use one of the flour blends that I tested.
- Works: Cup4Cup (both the old version and new version), Sandi’s DIY All-Purpose Flour Blend.
- Doesn’t Work: Bob’s 1:1, King Arthur Measure for Measure, and bean flour blends. Always check the bag and the website of any gluten-free flour blend to ensure it works in yeast recipes.
Reader-tested blends (please see the comments for reader comments using these blends):
- Walmart Great Value Gluten-Free Flour
- King Arthur Gluten-Free Bread Flour
- Premium Gold Gluten-Free Flour Blend
- Two readers commented that they swapped gluten-free oat flour for the sorghum flour in my blend.
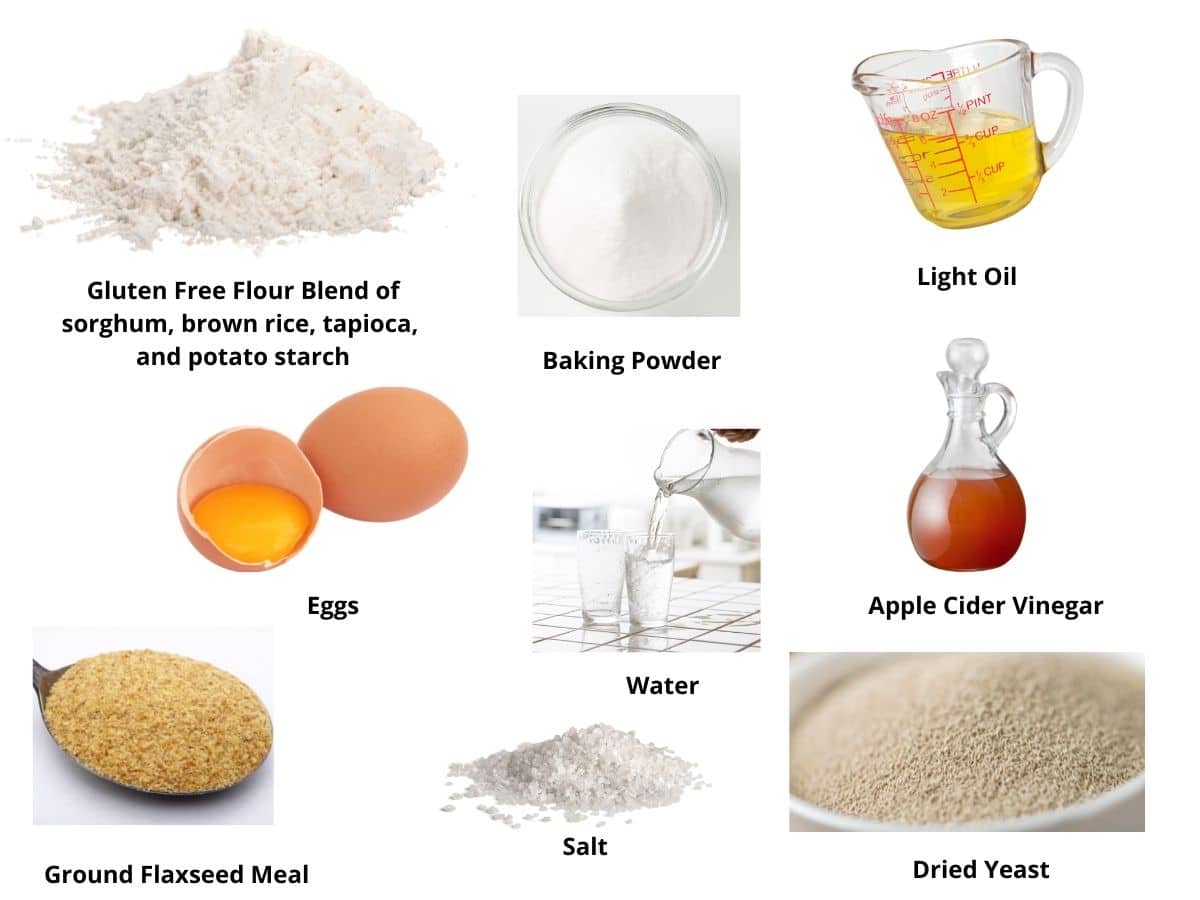
The rest of the ingredients:
- Flaxseed Meal: I add flaxseed meal because it adds moisture, extra binding, and structure. Use finely ground. If you use a 1:1 blend, omit the flaxseed meal.
- Eggs: Use large eggs. For egg-free, many readers have had success swapping Just Egg liquid replacer.
- Apple Cider Vinegar: Boosts rise and improves texture.
- Baking Powder: Use aluminum-free.
- Sugar: Just a couple of tablespoons to activate the yeast and balance the flavor.
- Yeast: Always confirm it’s gluten-free. (Red Star Platinum is not gluten-free.)
Allergen Substitutions:
This recipe is very forgiving, and you can swap these common allergens and still make a great loaf of gluten-free bread in your bread machine.
- Egg-Free: Replace the eggs with Just Egg.
- Gum-Free: Use my DIY gluten-free flour blend with psyllium husk instead of xanthan gum.
- Yeast Swap: Use rapid yeast if needed. The same quantity works.
- Alternate Flours (reader-tested): Great Value GF flour and Namaste have been reported to work by readers, but I haven’t tested them personally.

A Note From My Kitchen
I spent years testing this recipe specifically in my bread machine because gluten-free dough behaves very differently in a bread maker. Small changes, like blending ingredients first, choosing yeast-compatible flour blends, and scraping the sides of the bread pan early, make the difference between a dense loaf and a soft, sliceable one.
I know most of you prefer using a gluten-free flour blend, but many 1:1 blends do not work in yeast-based recipes. I did test one flour blend, Cup4Cup, in this recipe, and it worked well. If you use a different flour blend, check the back of the bag and the brand’s website to confirm it is suitable for yeast recipes.
How to Make Gluten-Free Bread in Your Bread Machine (Step-By-Step)
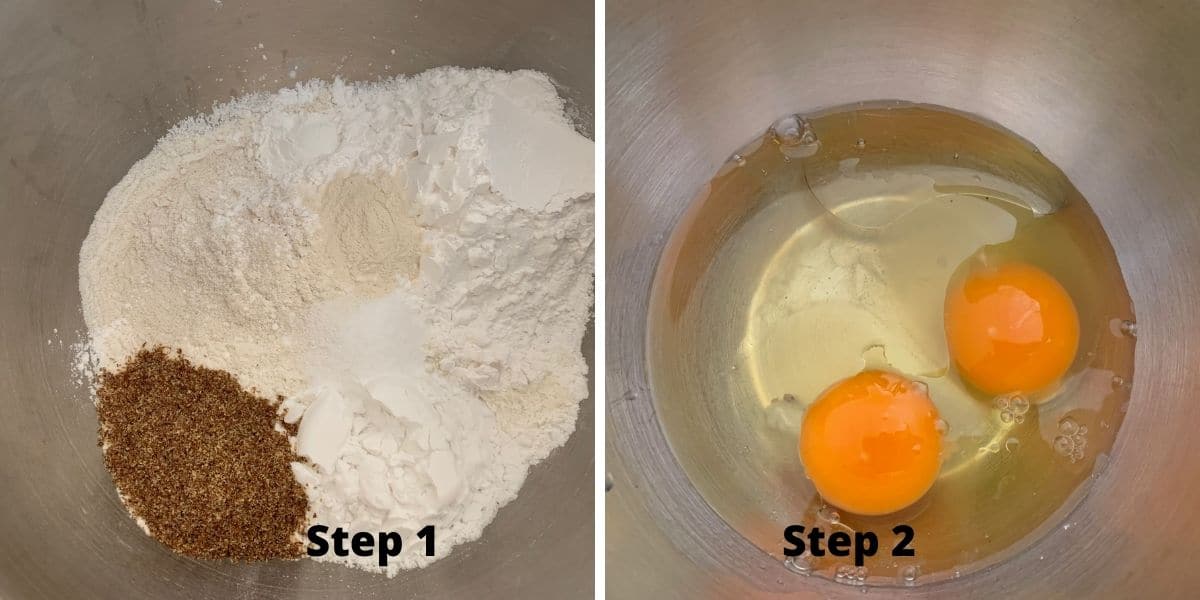
Step 1: Add your dry ingredients to a large mixing bowl. Whisk the dry ingredients together before adding them to the machine.
Step 2: Add the wet ingredients to a mixing bowl. Blend the wet ingredients until smooth.
Testing Tip: I know many recipes tell you to add the wet ingredients, then the dry ingredients, to the bread machine. Mixing them first helps prevent pockets of unmixed flour, evenly distributing the eggs, oil, and vinegar, and it promotes an even rise, especially important in gluten-free baking.
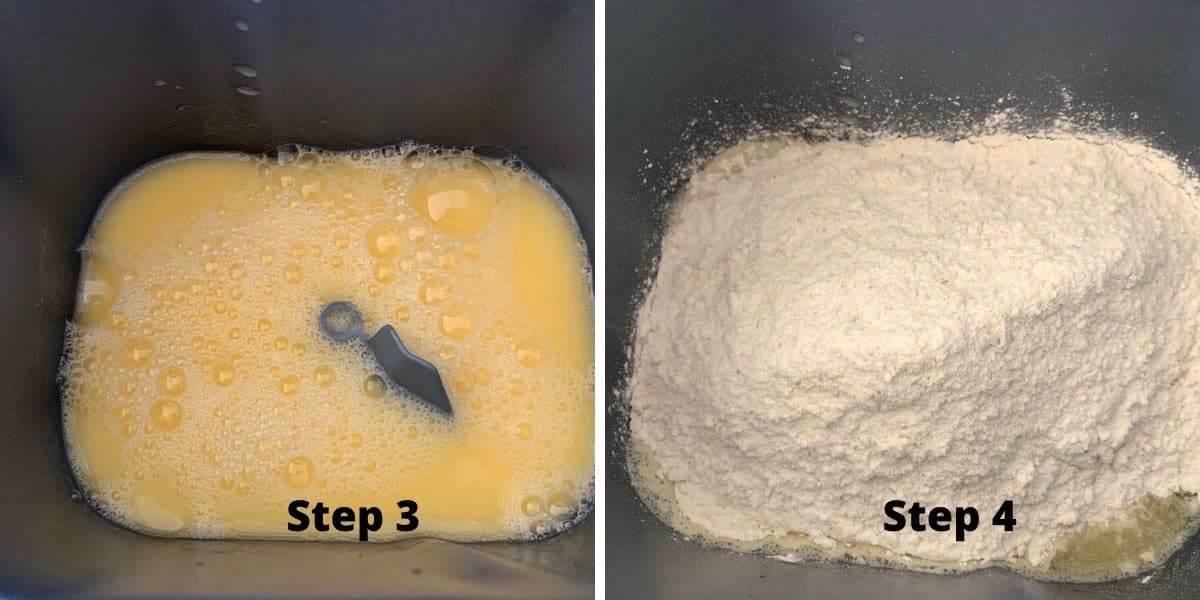
Steps 3 and 4: Pour the dry ingredients over the wet ingredients. Do not stir them together; the machine requires these layers to activate the yeast.
Email This Recipe To Me!
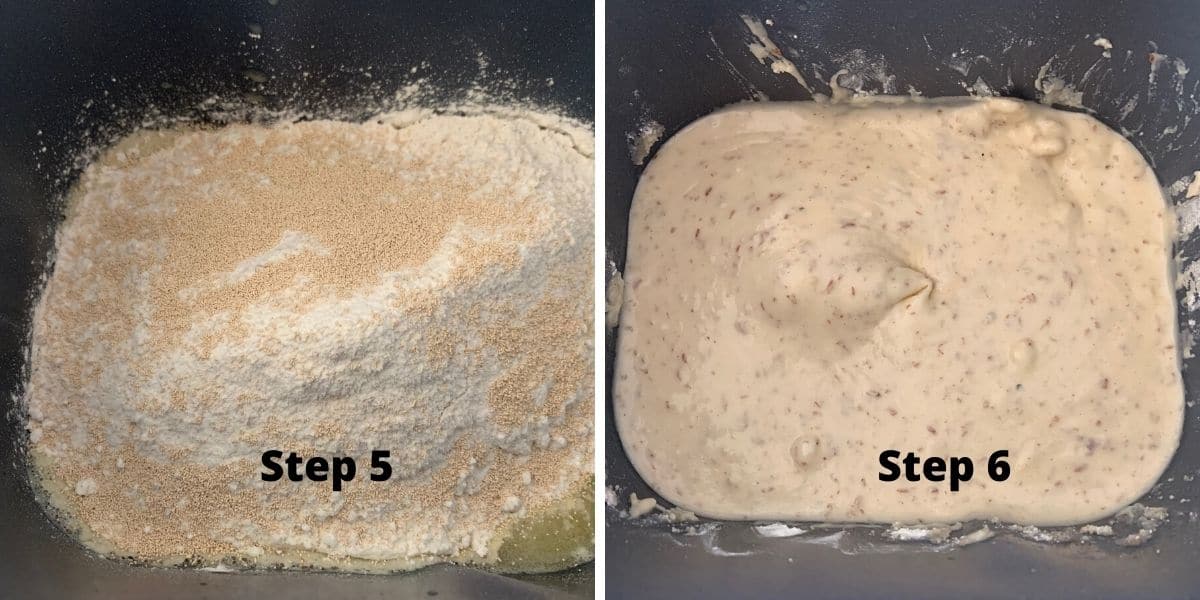
Step 5: Sprinkle the yeast evenly on top, then start the gluten-free setting. Use a homemade cycle if your machine doesn’t have one (see the Bread Machine Tips below).
Step 6: Do not skip the 5-minute scrape! Use a butter knife to scrape the flour down from the sides and corners of the bread machine. Gluten-free dough does not ‘self-clean’ the pan walls like wheat dough does. This step ensures you do not end up with crusty flour patches on your finished loaf.
Step 7: Let the bread sit for 10 minutes after baking is finished, then remove it from the pan to cool. This keeps the bottom from getting soggy.
Do not slice the bread too soon! Let the loaf cool completely (100%) so the crumb can set. This will prevent gumminess. The slices of bread should feel soft and springy. The crust should feel firm, but not hard like a crusty bread.
Store your freshly baked bread properly! Read How to Store Gluten-Free Bread so you can keep it fresh longer.
Bread Machine Troubleshooting:
Here are some tips to help you know which settings to use when baking this bread recipe. I use a Hamilton Beach machine, but bread machine settings vary by brand and model. Here’s how to get the best results:
Why is my bread underbaked?
If your bread is underbaked, it means your bread machine’s gluten-free setting is too short. You can tell if your bread is underbaked because it will be doughy in the middle, which can cause the top to sink. To fix this problem, run a short “bake-only” cycle to finish the browning.
What adjustments do I make if I live at a high altitude?
Yeast can be a lot more active at higher altitudes. This article explains how to adjust your ingredients so your recipe will work in a bread machine.
What if my bread machine doesn’t have a gluten-free cycle?
If you have an older bread machine or a machine without a gluten-free setting, these settings can be used. Use the Homemade setting:
- 20 min mix
- 45 min rise
- 90 min bake
Why didn’t my bread rise properly?
The most common reasons are inactive yeast, chlorine in tap water, or you used a gluten-free flour blend not designed for yeast baking. Bob’s Red Mill 1:1 and King Arthur Measure for Measure state on their websites that they do not work well in yeast recipes, yet many people try to use them anyway. Also, check your bread machine’s baking cycle length.
I have a lot more troubleshooting advice available for you. Read my Gluten-Free Bread Troubleshooting Guide. Also, check out my top recommendations for my favorite Gluten-Free Bread Making Tools.
New to gluten-free bread baking? Don’t miss my Ultimate Guide to Gluten-Free Bread Recipes That Work. It’s packed with all of my gluten-free bread baking tips, gluten-free flour advice, and reader-favorite recipes.
This post may contain affiliate links. Please read our Disclosure Policy.
Frequently Asked Questions:
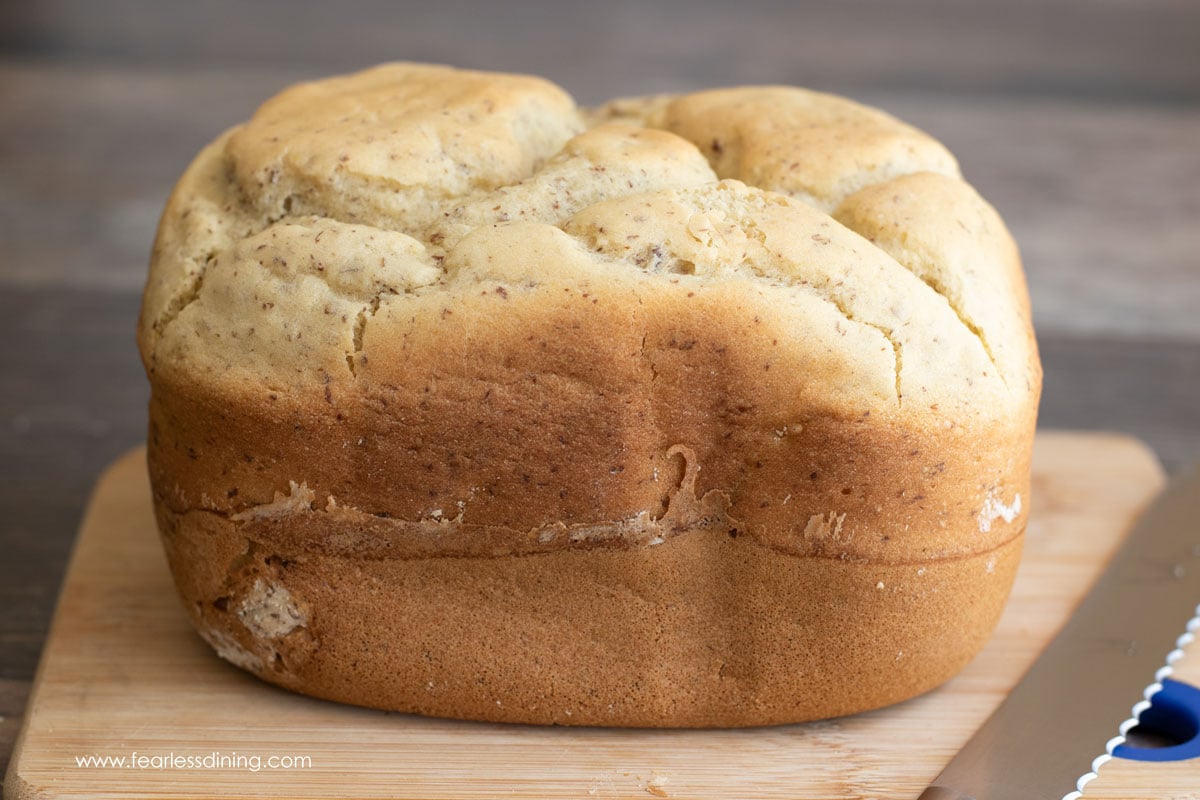
This gluten-free bread machine recipe makes a 1.5-pound loaf.
Always add the wet ingredients to the bread machine first. It helps prevent flour pockets at the bottom of your bread loaf. Note, I recommend always blending the wet and dry ingredients in mixing bowls first, then pouring them into the bread machine with the wet ingredients first and the dry ingredients on top.
Insert a toothpick into the center of the bread. If the toothpick doesn’t come out clean at the end of the cycle, immediately start a ‘Bake Only’ cycle for 10-minute increments. Once the machine cools down, you can not easily start it back up, so check it the second the timer beeps.
Thank you for coming up with this seriously easy, no-fail recipe. My wheat-eating husband said it’s his favorite bread ever, including regular gluten bread.”
Angela H., Facebook comment
More Gluten-Free Bread Machine Recipes:
I have several great bread machine recipes, and you can get all of these delicious gluten-free bread machine recipes in one place. If you prefer to bake bread in the oven, check out all of my delicious gluten-free bread recipes!
1. Gluten-Free Hawaiian Bread – This bread is easy to make in your bread machine or oven.
2. Gluten-Free Whole Grain Bread – This whole-grain blend is deliciously easy to make if you prefer a whole-grain sandwich bread.
3. Several readers have made my Gluten-Free Oat Bread in their bread machines.
Love This Recipe?
💬 Did you make this gluten-free bread machine sandwich bread recipe? Drop a comment below, and let me know how it turned out! ⭐⭐⭐⭐⭐ Please include which flour blend you used. This will help others know this recipe is delicious. Thank you!
The Best Gluten-Free Bread Machine Recipe (Fluffy Like Wonderbread!)
Ingredients
- 1 cup sorghum flour 156.09 grams
- ½ cup brown rice flour 88.1 grams
- 1 cup tapioca starch 143.4 grams
- ½ cup potato starch 93.4 grams
- 2 tablespoons ground flaxseed meal
- 2 tablespoons cane sugar
- 1 teaspoon xanthan gum
- 1 teaspoon sea salt
- 1 teaspoon baking powder aluminum free
- 2 large eggs
- ¼ cup light oil * see note
- 1 teaspoon apple cider vinegar
- 2 teaspoons active dry yeast rapid rise also works
- 1 ½ cups warm purified water * SEE NOTE
Equipment
Method
- In a large mixing bowl, add 1 cup sorghum flour, 1/2 cup brown rice flour, 1 cup tapioca starch, 1/2 cup potato starch, 2 tablespoons ground flaxseed meal, 2 tablespoons cane sugar, 1 teaspoon xanthan gum, 1 teaspoon sea salt, and 1 teaspoon baking powder and whisk to blend.
- TIP: Always blend the dry ingredients before adding them to the bread machine. Dumping everything in at once can lead to uneven mixing, which affects how well the bread turns out.
- In a smaller bowl, add 2 large eggs, 1/4 cup light oil, 1 teaspoon apple cider vinegar, 1 1/2 cups warm purified water, and whisk to and blend.
- Check that the paddle is securely attached to the bread machine's spinner and spins freely. Pour the mixed wet ingredients into the machine's bread pan.
- Pour the whisked dry ingredients on top of the wet ingredients, ensuring an even layer.
- Dump the 2 teaspoons active dry yeast (1 packet) on top of the dry ingredients. Close the lid, select the gluten-free setting, and press start. If your bread machine has no gluten-free cycle, refer to my notes below.
- If your bread machine has this setting, use it. After 5 minutes, take a soft rubber spatula and push the flour down from the sides of the pan. This tip will help prevent unmixed flour pockets on the side of your bread.
- The dough should look wetter than traditional bread dough and that’s exactly what you want. Once mixing stops, you can remove the paddle with long tongs or wait until the baking cycle is complete.

- When the cycle ends, let the bread sit in the pan for 5 minutes. Gently slide the bread out of the pan and place it on a cooling rack. This prevents the bread from overcooking and drying out from the residual heat in the bread pan.
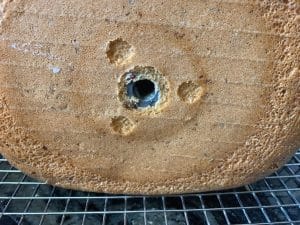
- The only downside to using a bread machine is the little paddle comes off into your bread. The bread stays hot for some time so I highly recommend you using tweezers or these pointed tongs to remove the paddle. It is easier to remove when the bread is hot.
- Do not slice the bread until it has fully cooled to room temperature!!! (I know it is tempting to eat warm bread, but this is critical!!) This helps the crumb set and prevents the bread from becoming gummy.
Nutrition
Notes
- Many bread machine recipe directions will say you can dump all of the ingredients into your bread maker. Do not do this! When you are mixing as many ingredients as are needed for gluten free bread, you risk the ingredients not getting mixed thoroughly, and that can affect how the bread turns out!
- Most yeast is gluten-free, except for Red Star Platinum. It has wheat. As always, check the ingredients label for any yeast you buy. Also, check the expiration date of the yeast to ensure it has not expired.
- Always use purified water when baking with yeast. Tap water often contains chlorine and other chemicals that can weaken or even kill your yeast, preventing your bread from rising properly. Choose filtered or bottled water free from these additives to get the best rise and texture.
- I prefer light oils, including avocado and canola oil. You can use other oils, but they may impart a flavor to the bread, which can be good or bad.
- Note: Cup4Cup recently changed its flour blend formulation to remove the dry milk powder. It behaves a little differently. I haven’t had a chance to retest this recipe with the new flour blend formulation, but two readers have and wrote to tell me the new blend works well. If you use Cup4Cup, add 3 cups Cup4Cup instead of the individual flour/starches. Omit the xanthan gum, vinegar, and flaxseed.
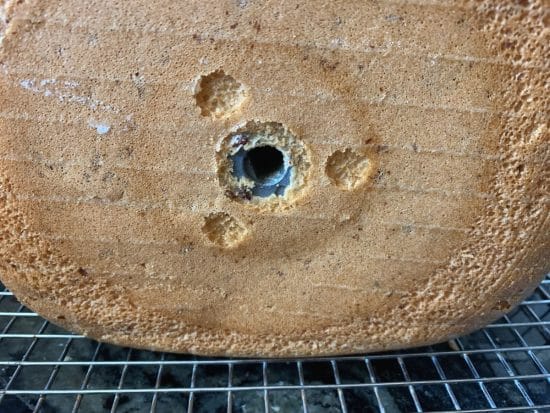
- WATER – For some reason, some readers have reported the middle caved from the batter being too wet, indicating there is too much water. Others don’t experience this. I am assuming it is the bread maker, they live at a high altitude, or if someone is using cup measurements. If you notice the bread sinks in the middle, use 1 1/4 cups of water.
- You can bake this bread in your oven. The full directions are here in my Gluten-Free Bread recipe.
- Store leftover bread in an airtight container. Gluten-free bread tends to spoil fast, so I recommend slicing the bread and freezing the slices. I flash freeze the slices, then put them in a freezer-safe zipper bag.
- Undercooked Bread: If the gluten-free setting underbakes, run a short “bake-only” cycle to finish browning. The gluten-free time/cycle settings differ for every machine and model number. I am not sure why this is, but I am noticing it. Here are things I noticed and some ideas to make your machine work in this recipe:
- High Altitude: Yeast can be more active. Use less yeast and consider baking in the oven instead.
- No Gluten-Free Cycle? If you have an older bread machine or one without a gluten-free setting, use the “Home Made” cycle: 20 min mix, 45 min rise, 90 min bake.
Private Notes
Tried this recipe?
Let us know how it was!
More Gluten Free Bread Recipes:
I truly hope you enjoy this recipe. I have been testing and creating gluten-free recipes for over 15 years. Creating gluten-free recipes that do not taste gluten-free is my goal for every recipe. Sometimes I only have to test a new recipe a couple of times, and others it takes multiple times. I do this so you get reliable, delicious results every time!


I am looking to make this bread as soon as possible (I just got a bread machine with a gluten-free bread option), but I have some questions about one ingredient listed above. It has been extremely helpful that you tagged the products with Amazon. The one listed for tapioca starch is discontinued. Can you please suggest another option? Also, is there a difference between starch and flour? The one listed is flour, but there are also tapioca starch options through Amazon.
Hi Kelly, you can use another brand of tapioca starch. I like Bob’s Red Mill, which should be in most grocery stores.
Hi Sandi,
I made the bread yesterday, my first-time ever making bread, and it was DELICIOUS!!! I was amazed on how the process was so easy because of your detailed instructions, thank you! My bf who is loves his regular bread LOVED this bread, too. He normally doesn’t care for gluten-free bread but he kept going back for more. So far we have enjoyed it by simplying warming it up and then adding a bit of vegan butter. This has ruined store brought gluten-free bread, thank you!
I love hearing non-gf folks love this recipe!! You absolutely made my day! Have a great rest of your weekend!
I made this in the Hamilton Beach Artisan Bread Maker (29985) on the GF setting following the recipe exactly. It fell a little in the middle, so I will use less water next time. The texture was still great! It was soft and airy. I have been gluten free for 15+ years, so I have gotten used to the store bought bread options and this was so much better.
My kids are newly diagnosed with Celiac and I have not found any breads that they like yet, despite shopping at a grocery store with many, many options. They thought this bread didn’t have much flavor, so they aren’t sold on it. Has anyone tried adding honey or butter to this recipe for a little more flavor?
Hi Laura, Humidity may be playing a factor, so I agree using a little less water is a good thing to try. As for flavors, my kids like a bit more salt. Honey or butter is also fine to add, just be sure to compensate if you add a lot of liquid ingredients.
I made this bread with Cup4cup as I am unable to get one of the flours. The taste was great! Although the bread was dense… I used my new bread maker machine and used the specific bread machine yeast. Reading the reviews I lowered the water a bit, but I will retry it with the exact water and a different type of yeast to see if that is the cause as it tastes so good!! Do you have any recommendations that I could do? I am unable to to get the sorghum flour is there a substitute for that?
Hi Martina, I am glad you enjoyed the recipe using Cup4Cup. I have never used bread machine yeast so it is hard for me to say how it affects the recipe. I would definitely try it with active dry yeast next. Just remember to avoid Red Star “Platinum” as it has wheat. Another reader asked me about a sorghum flour substitute. I will work on testing some options in the next couple of weeks after things quiet down from the holidays.
This looks really yummy! I’m needing to reduce carbs for health reasons on top of being gluten free, is there a way to reduce the carbs by using almond flour to replace some of the flours/starch? I know potato starch has a lot of carbs.
Thank you!
p.s. I love using my breadmaking to make homemade breads.
Hi Mo, I haven’t tested this recipe using almond flour or other flour blends, and I don’t want to advise you incorrectly on how to sub things unless I have tested them. There is a great Facebook group on baking bread. It is called Gluten Free Home Bread Bakers. The admin is amazing and can probably better advise you.
This bread was absolutely delicious. It was light and fluffy. Tasted normal. It was great.
I am so glad you loved the recipe, Debbie. Thank you so much.
The bread machine you recommended isn’t available on Amazon anymore. A brand new model by Hamilton Beach is there now. I want to buy one, but I want to be sure you get the commission. Do you think the link will still work and give it to you? Or do you recommend a different machine?
You are so thoughtful, thank you. I think Hamilton Beach revamped the bread machine, but it should still have the same features. If you click my link to Amazon, I should get a commission still. Thank you very much.
This bread is delicious! I am a first time bread maker user so nervously set out to make this a few days ago. Wonderful gf recipe – thank you!
I am so glad you tried the recipe, Kylie. Thank you!
Hi my parents brought me a bread machine for Christmas (early present yay) and I’ve never used one before quite excited to try your recipe.
Could I add some seeds in this e.g (poppy, sesame, chia) and how would I do that?
Also does your gf flour blend work for this? On that page it says it does but I’m not sure how I’d do this as it’s different measurements it’s got phylium husk aswell.
Hi Sarah, if you add seeds, you want to add ones that wonn’t affect the moisture level, specifically chia seeds. They absorb a lot of moisture and this can dry out your bread. My blend does work in this recipe, so you would add 3 cups of my blend with 1 teaspoon extra psyllium husk. Omit the xanthan gum and flaxseed meal.
I can’t get the recipe to print. The page keeps going blank
Hi Melissa, What browser are you using? I have heard it doesn’t always work on Safari. I know it works in Firefox and Chrome. Please let me know. Thank you!
OK! So we had good results with the basic recipe, oven baking style, and we wanted a bigger loaf. Broke out the 13” Pullman loaf pan, increased the basic ingredients by half based on pan measurements, and oh my! We had to increase cooking time by a bunch but didn’t keep track, probably close to 20 minutes?
I love the photos you emailed to me of the bread. I have never used a pullman but wow, your bread turned out so good.