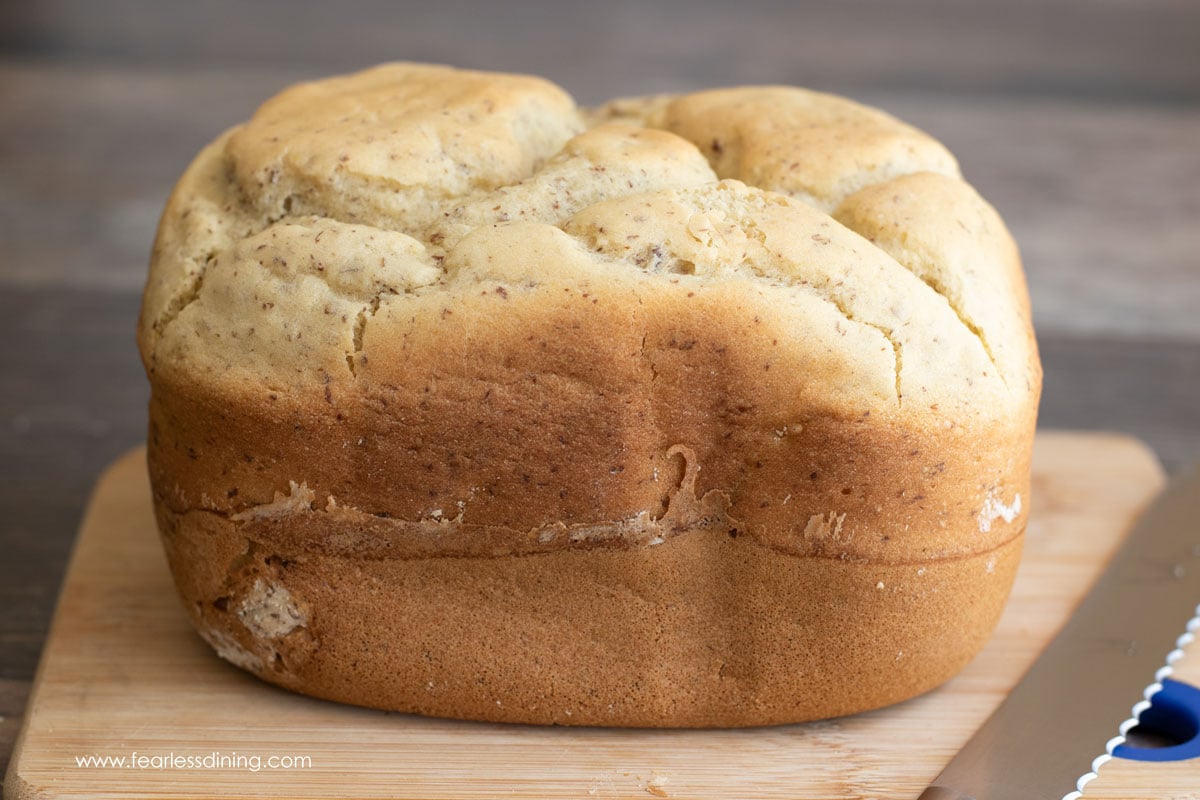
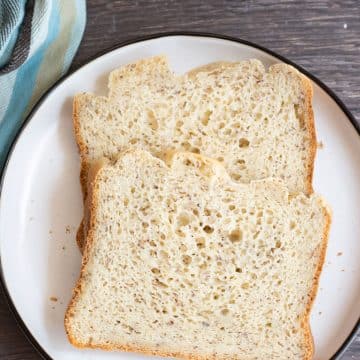
If you have longed to try making homemade gluten free bread, I have a really simple recipe you will love! This gluten free bread machine bread is light and fluffy and has the perfect texture for sandwiches. If you don’t have a bread machine, don’t worry because I include oven-baking instructions too!
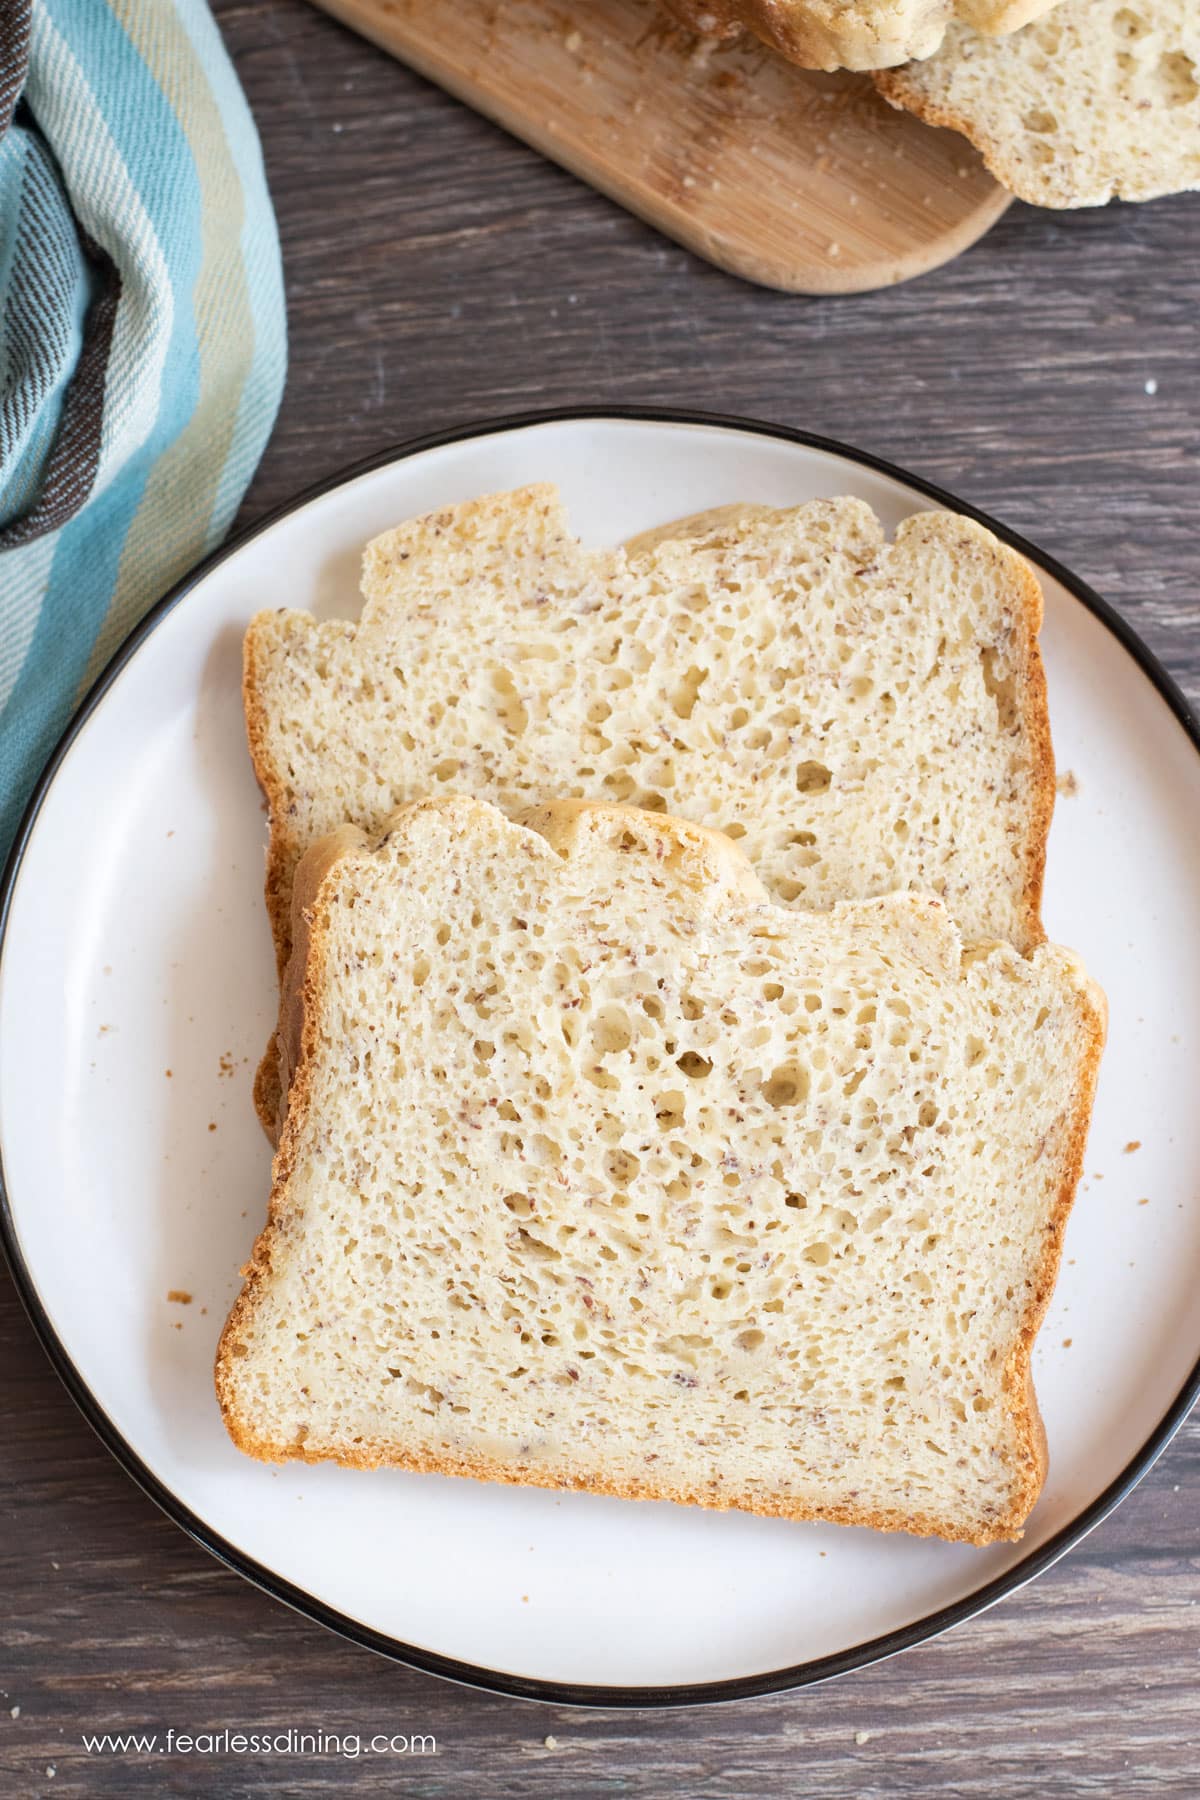
This is the best gluten free bread machine bread you will try! It is soft, and it sort of tastes like Wonder Bread. Do you remember Wonder Bread from way back before going gluten free? That bread was my favorite growing up. I didn’t know gluten was like poison to my body at that point in my life.
This post may contain affiliate links. Please read our Disclosure Policy.
Recipe At A Glance:
Allergen Information:
This homemade bread machine bread recipe is gluten-free, dairy-free, nut-free, and soy-free. As mentioned below in the Reader Rave, you can make this bread egg-free using the Just Egg brand egg replacer. Make it gum-free using my DIY Gluten-Free Flour Blend.
While you are visiting, you may want to check out all of my delicious gluten free bread recipes!
Made this recipe in my bread maker using Just egg substitute, and it came out AMAZING!! Thank you so much for making gluten-free bread that finally tastes delicious and holds up when used to make sandwiches. We will continue to make this bread and refer it to others searching for a great gluten free tasting bread. You’re the best!”
mia k., facebook comment
Why I love this gluten free bread machine bread recipe:
- I love this new bread recipe because it boils down to control. I can control the ingredients that go into this recipe with sorghum flour, and I realize that baking gluten free bread isn’t that hard.
- It is gluten free, dairy-free, soy-free, and corn-free! You can also use Just Egg to make this recipe egg-free.
- My secret to making the gluten free bread flour mix is to use more starch than usual. It keeps the bread fluffy and light. If you have been looking for that perfect sandwich bread, this is it!
- You can make it in the oven if you do not own a bread machine!
If you love sourdough, my loaf-style gluten free sourdough bread is really good too! If you want something sweeter, this gluten free lemon poppy seed bread is delicious.
If you need a yeast-free bread recipe, try this Gluten Free Bread (No Yeast!)
Ingredient Notes:
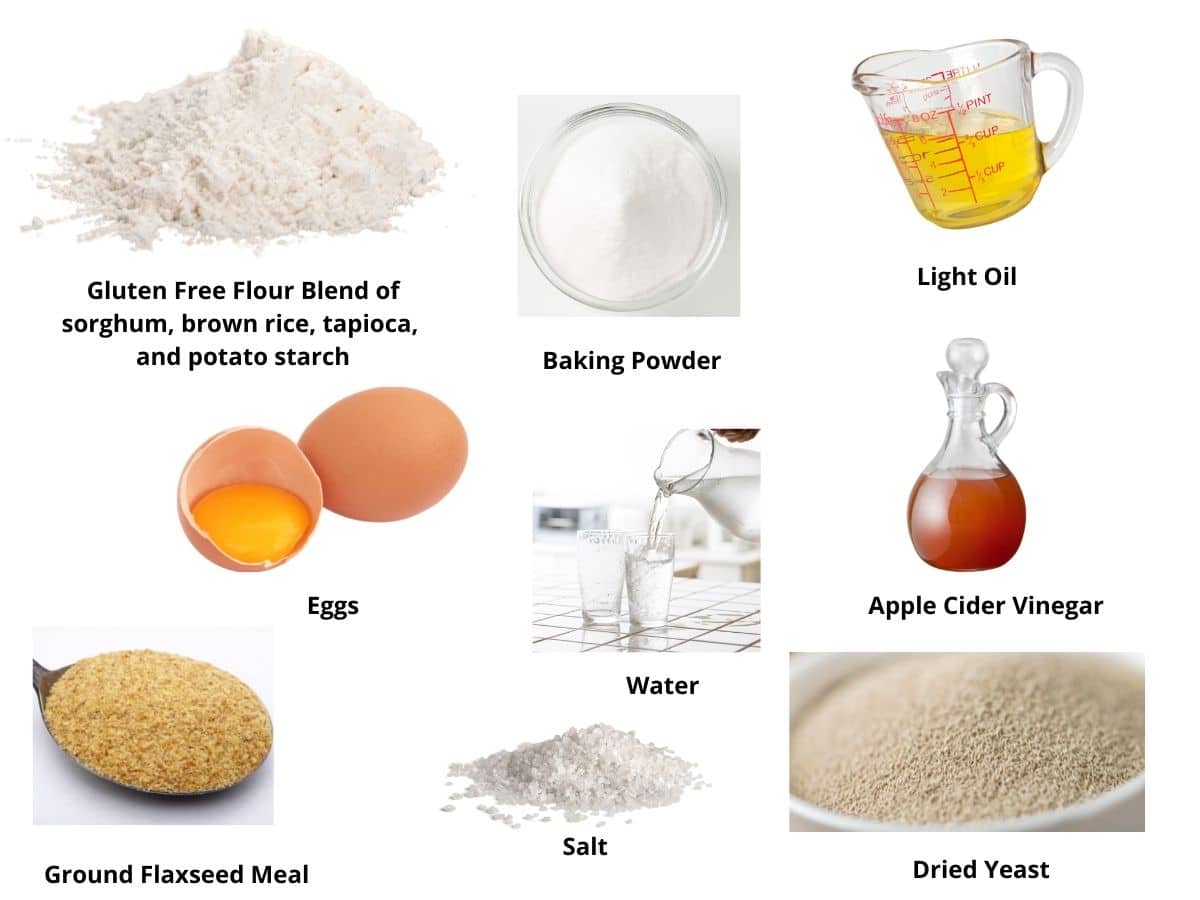
For the full list of ingredients and amounts, please go to the recipe card below.
- Gluten Free Flour Blend – I tested a few gluten free blends in my bread machine. I highly advise using my custom gluten-free bread flour blend or Cup4Cup for this recipe. You will need sorghum flour, brown rice flour, tapioca, and potato starch. See the FAQ to see what modifications you need if using Cup4Cup! Note my DIY Gluten Free All Purpose Flour Blend works very well in this recipe. It is gum-free.
- Flaxseed Meal – I recommend using a ground flaxseed meal. Do not use whole seeds. You can read more about how to make sure flaxseed is gluten free.
- Eggs – Use size large.
- Apple Cider Vinegar – This gives a little flavor and helps the bread poof up.
- Baking Powder – I use this to help give more rise. Use aluminum-free baking powder.
- Sugar – I use a couple of tablespoons to help the yeast activate.
- Salt – Use either sea salt or kosher salt.
- Yeast – I used active dry yeast. I have not tested rapid yeast. ALWAYS double-check the label to ensure your yeast brand is gluten free. (Note: Red Star Platinum Yeast is NOT gluten free!)
Why Water Quality Is Important:
I always use purified water when making sourdough or baking with yeast. Chlorine and chemicals in our tap water can kill your yeast and inhibit the rise. If you want the best rise, you must use purified water that doesn’t contain these chemicals.
Tips For Using A Breadmaker:
Before I go into the recipe steps, I want to discuss breadmakers. This recipe depends on your bread machine and the cycle type you run. I own a Hamilton Beach Machine. The gluten-free time/cycle settings differ for every machine and model number. I am not sure why this is, but I am noticing it. Here are things I noticed and some ideas to make your machine work in this recipe:
- If you are at a high altitude, your yeast may be much more explosive than at typical altitudes. I do not live at a high altitude, and I do not know what to do about this except to use less yeast and bake this bread in the oven.
- Some breadmakers do not have a gluten free cycle, or the cycle isn’t long enough. If this is the case, use the “Home Made” custom cycle, programming in about 20 minutes Mix, 45 minutes Rise, 90 minutes Bake.
- Often, the gluten free setting does not bake the bread long enough. If this happens, you can run a short “bake-only” cycle to brown the bread more.
Also, please read my post on Gluten Free Bread Troubleshooting for more tips and my top recommendations for the Best Gluten Free Bread Making Tools.
Step-By-Step Photos and Directions:
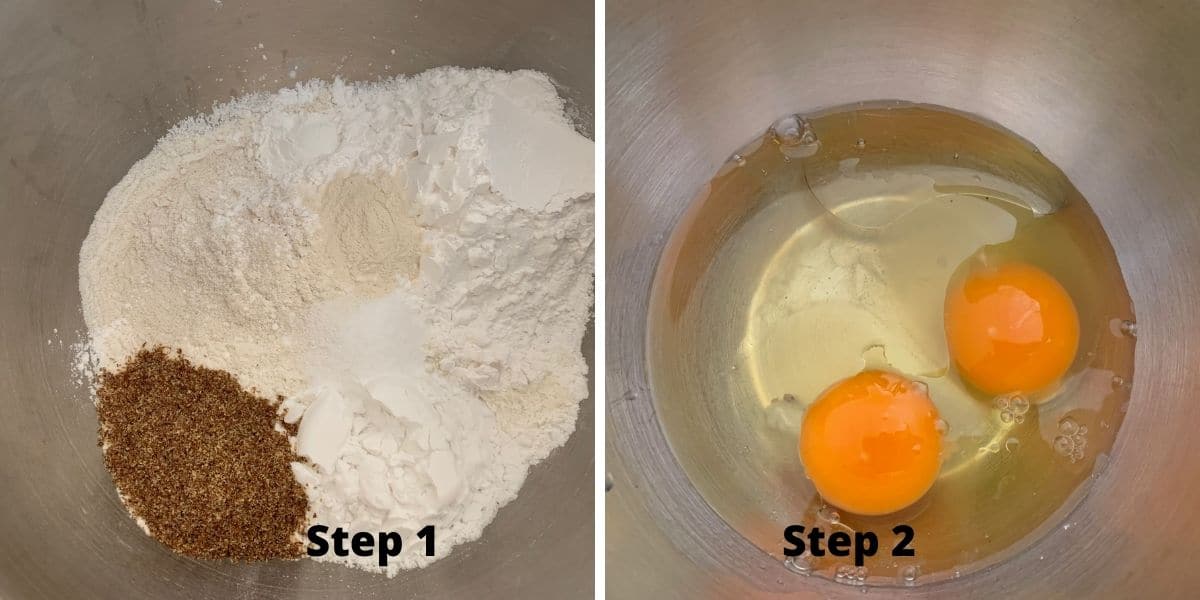
Step 1: Add the dry ingredients, including the flour and starches, baking powder, ground flaxseed meal, salt, and to a large
Step 2: Combine the wet ingredients and blend in a smaller bowl.
🔑 Sandi says: I have you blend the dry ingredients before adding them to your bread maker. Many bread recipe directions say you can dump all ingredients in the bread maker. Do not do this! When mixing many flour types, as are needed for gluten-free bread, you risk the ingredients not getting mixed thoroughly, which can affect how the bread turns out!
I now realize I’d forgotten the taste and texture of really good bread. Thank you for returning that pleasure to me.”
Lou J., Facebook comment
Best Gluten Free Flour For The Bread Machine
There are so many good gluten-free flour blends, and I tried a few while developing my recipe. Most didn’t perform well, so I created my own blend. I chose sorghum flour, brown rice flour, tapioca starch, potato starch, and ground flaxseed meal.
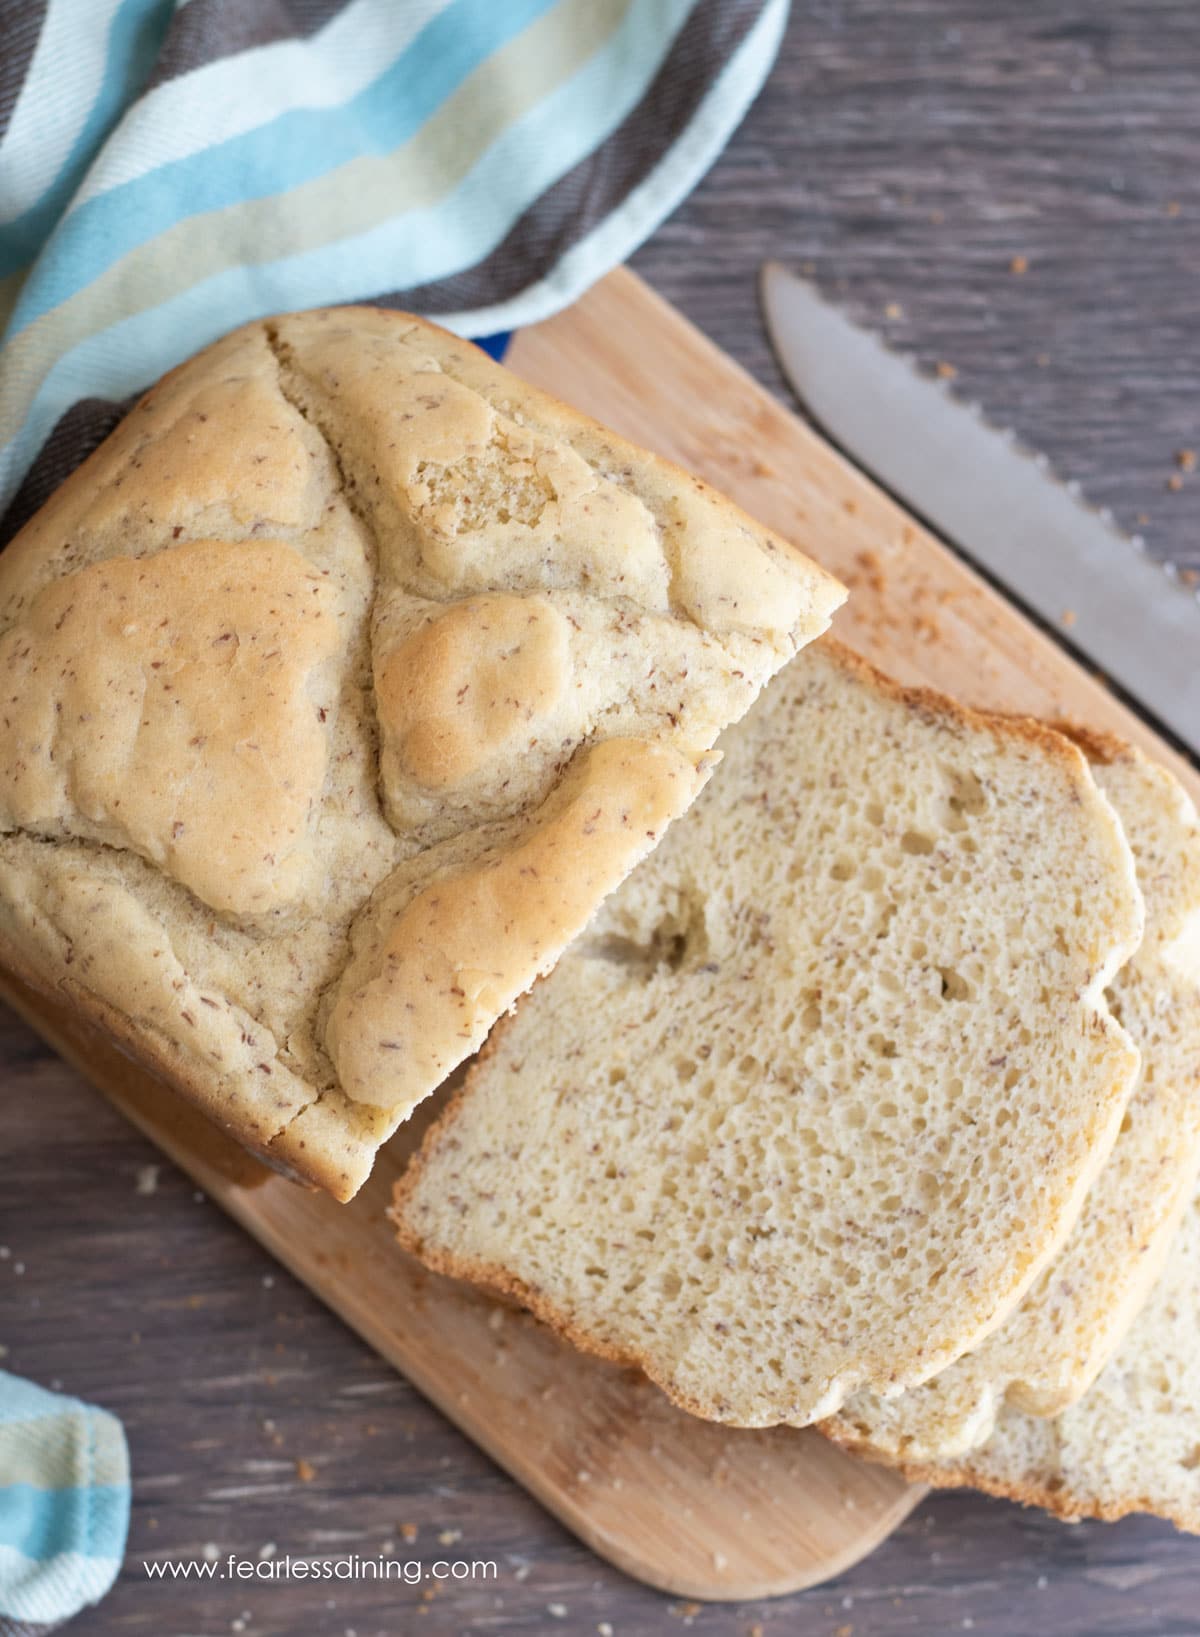
This combination of gluten free flours yielded the best results by far. This bread is a good gluten free sandwich bread. It holds up to peanut butter and jelly and a full lunchbox without breaking! The flavor and mouthfeel of the bread are light and fluffy.
NOTE: After two people reached out, I want to re-emphasize this recipe works with my custom flour blend or Cup4Cup, with a few modifications. See the FAQ for the modifications. Bob’s 1 to 1 and King Arthur Measure for Measure are not as good for yeast recipes.
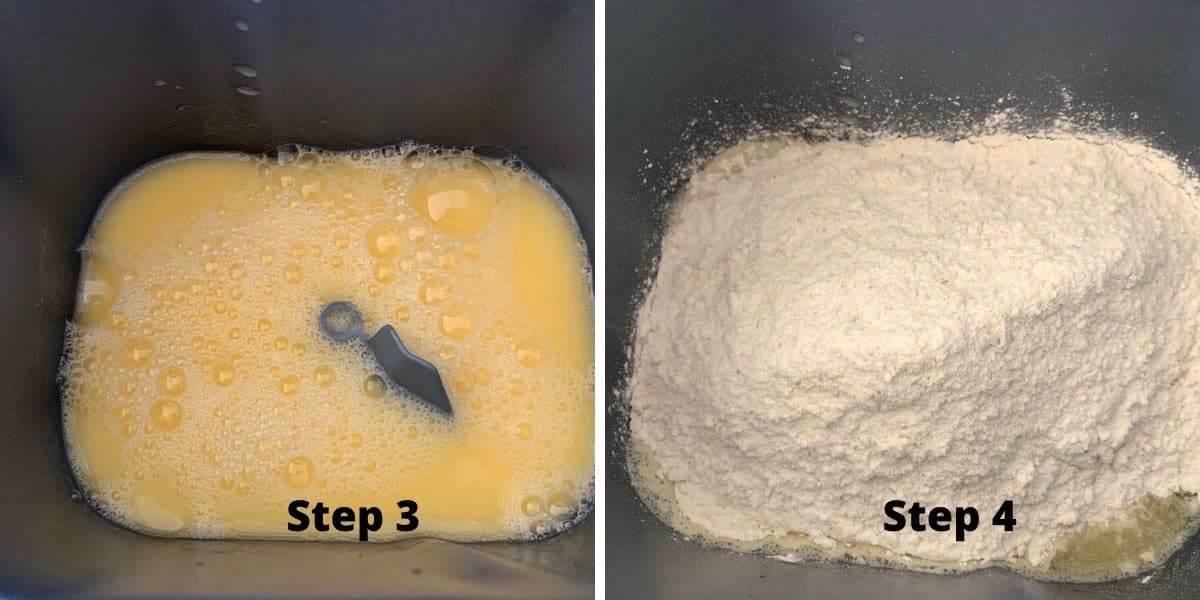
Step 3: Open your bread machine and make sure the paddle is on the spinner at the bottom of the bread maker. Pour in your mixed wet ingredients.
Step 4: Pour the whisked dry ingredients on top of the wet ingredients.
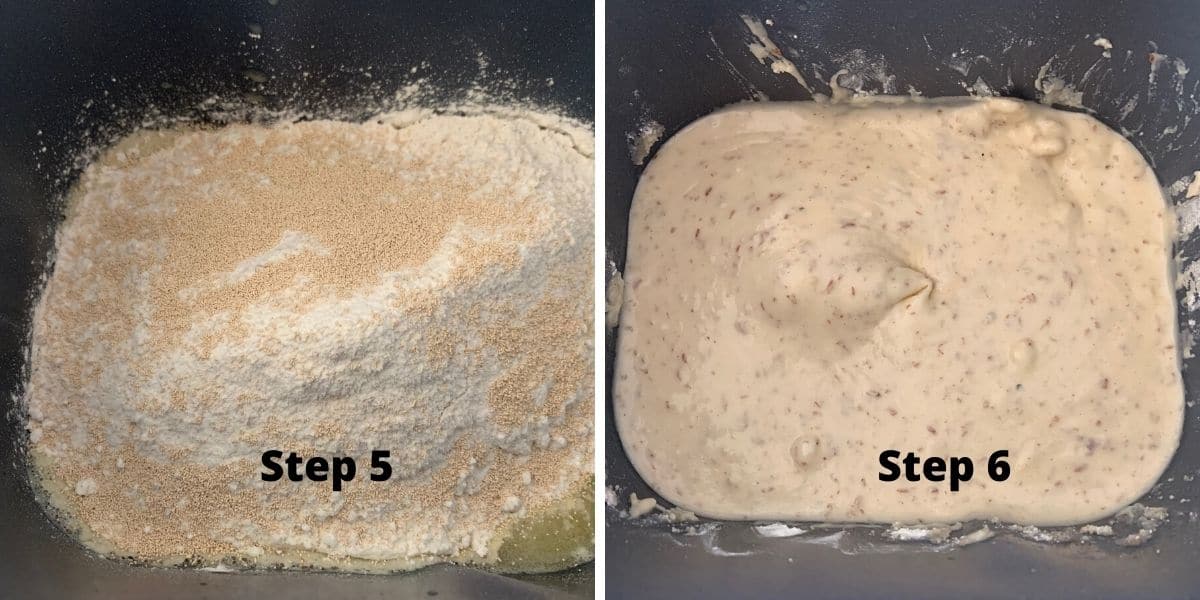
Step 5: Dump the yeast on top of the dry ingredients. Close the cover and press the button. My bread machine has a gluten free setting. If your bread machine has this setting, use it.
🔑 Sandi says: After 5 minutes, press the flour down from the sides with a soft rubber spatula. This tip will help prevent unmixed flour pockets on the side of your bread.
Step 6: This is what the batter looks like after the bread machine mixes the bread dough. You will see how wet this batter is compared to normal bread dough. This is what you want.
When the mixing has stopped, you can try to remove the paddle with the long pointy tongs I linked below or remove it when the bread is baked.
Step 7: Remove the bread from the bread machine when it is done. I gently slide my bread out of the pan and place it on a cooling rack. This helps prevent your bread from cooking longer in the hot pan.
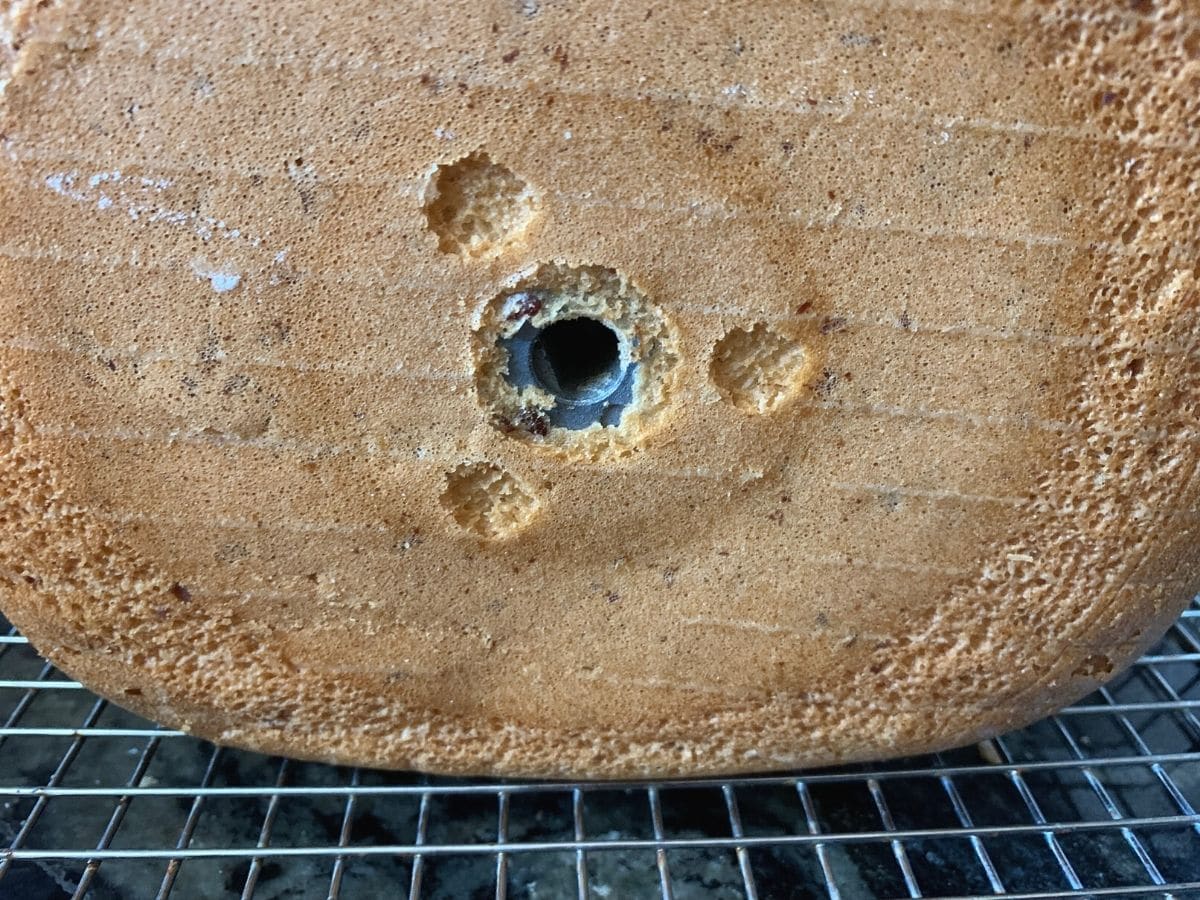
The only downside to using a bread machine is the little paddle comes off into your bread. The bread stays hot for some time, so I highly recommend you use tweezers or these pointed tongs to remove the paddle. It is easier to remove when the bread is hot.
Thank you for coming up with this seriously easy, no-fail recipe. My wheat-eating husband said it’s his favorite bread ever, including regular gluten bread.”
Angela H., Facebook comment
Oven Baking Directions:
- Proof your yeast in 1/2 cup of warm water and 1 tablespoon of sugar. Make sure the water temperature is no hotter than 120º F. Let this sit for 5 minutes until your yeast is frothy.
- Follow the directions to mix your wet and dry ingredients.
- Add the frothy yeast mixture to the wet ingredients. Mix, then pour into the dry ingredients.
- Preheat the oven to 200º F, then turn off the oven.
- Mix your batter, pour it into a greased loaf pan, cover it with plastic wrap, and allow it to rise in the warm oven for one hour.
- Preheat the oven to 350º F.
- Bake your bread for 35-40 minutes until the top of the loaf is golden.
- Test to see if it is done baking by sticking a long toothpick into the middle. If the toothpick comes out clean, the bread is done baking. The bread must be baked a little longer if you see batter or crumbs.
- Remove the bread from the oven and place it on a rack to allow cooling. Do not slice the bread when it is hot.
Flavor Variations:
Feel free to vary the flavors you add to this gluten free bread machine bread. Here are some fun ways to do this:
- Add dried herbs and seasonings.
- When the mixing cycle has stopped, swirl in a combination of sugar and cinnamon.
- Add roasted garlic, butter, and shredded parmesan.
- If you are rice-free, try my Gluten Free Bread Without Rice Flour.
- Use this bread to make my popular Gluten Free Pumpkin French Toast Casserole recipe!
Frequently Asked Questions:
Store your freshly baked bread the right way! Learn How to Store Gluten Free Bread so you can keep it fresh.
Most yeast is gluten free EXCEPT Red Star Platinum. As always, definitely check the ingredients label for any yeast you buy.
I didn’t think a bread machine could make great bread for a long time, but this recipe has completely changed my mind.
Always put your wet ingredients into the bread machine first. It helps prevent flour pockets at the bottom of your bread loaf.
If you are using a bread machine, the baking time is automatic. To test for doneness, insert a toothpick into the center of the bread. If the toothpick comes out clean, it is done baking. If you see batter or crumbs, the bread must be baked longer.
If your bread didn’t fully cook and you did cook it on the gluten free setting, it may be the machine brand. You should be able to lengthen the bake time. See the above section titled Bread Machine Notes.
If you can’t have potato starch, use arrowroot starch to replace the potato starch.
This gluten free bread machine bread recipe makes a 1.5-pound loaf.
To make this recipe with Cup4Cup, omit the separate flours/ingredients listed: flaxseed, vinegar, and xanthan gum. Use 3 cups of Cup4Cup. Note I tested the original Cup4Cup and not their whole-grain blend in this recipe.
What bread machines are best for gluten free bread?
There are several great brands of gluten free bread machines that have a gluten free setting. My friend, Jane, who wrote The Gluten Free Bread Machine Cookbook, likes to recommend the Cuisinart CBK-200 machine. I have an old Breadman Pro, but I do not think they even make it any longer. Many in my gluten free FB group like this Hamilton Beach model.
More Gluten Free Bread Recipes:
- Gluten Free Bagels
- Gluten Free Crescent Rolls
- Easy Gluten Free Dinner Rolls
- Gluten Free Zucchini Bread
- The Best Gluten Free Breadsticks
- Gluten Free Naan
- Fluffy, sweet Gluten Free Hawaiian Bread
Love This Recipe?
If you made and enjoyed this recipe, I would be incredibly grateful if you could leave a comment below. Please include which flour blend you used. This will help others know this recipe is delicious. Thank you!
The Best Gluten Free Bread Machine Bread Recipe
Ingredients
- 1 cup sorghum flour 156.09 grams
- ½ cup brown rice flour 88.1 grams
- 1 cup tapioca starch 143.4 grams
- ½ cup potato starch 93.4 grams
- 2 tablespoons ground flaxseed meal
- 2 tablespoons sugar
- 1 teaspoon xanthan gum
- 1 teaspoon sea salt
- 1 teaspoon baking powder aluminum free
- 2 eggs size large
- ¼ cup light oil * see note
- 1 teaspoon apple cider vinegar
- 2 teaspoons yeast
- 1 ½ cups water * SEE NOTE
Instructions
- In a large bowl, add the dry ingredients and whisk to blend. In a smaller bowl, add your wet ingredients and blend.
- Open your bread machine and make sure the paddle is on the spinner. Pour in your mixed wet ingredients.
- Pour the whisked dry ingredients on top of the wet ingredients.
- Dump the yeast on top of the dry ingredients. Close the cover and press the button. My bread machine has a gluten free setting.
- If your bread machine has this setting, use it. After 5 minutes, take a soft rubber spatula and press the flour down from the sides. This tip will help prevent unmixed flour pockets on the side of your bread.
- Remove the bread from the bread machine when it is done. I gently slide my bread out of the pan and place it on a cooling rack. This helps prevent your bread from cooking longer in the hot pan.
- The only downside to using a bread machine is the little paddle comes off into your bread. The bread stays hot for some time so I highly recommend you using tweezers or these pointed tongs to remove the paddle. It is easier to remove when the bread is hot.
Notes
- Many bread recipe directions will say you can dump all of the ingredients in the bread maker. Do not do this! When you are mixing as many ingredients as is needed for gluten free bread, you risk the ingredients not getting mixed thoroughly, and that can affect how the bread turns out!
- Most yeast is gluten free EXCEPT Red Star Platinum. As always, definitely check the ingredients label for any yeast you buy.
- I always recommend using filtered water when making yeast bread. Chlorine in tap water can kill yeast.
- Light oils include avocado and canola oil. You can use other oils, but they may impart a flavor to the bread, which can be good or bad.
- To use Cup4Cup, add 3 cups Cup4Cup instead of the individual flour. Omit the xanthan gum, vinegar, and flaxseed.
- WATER – For some reason, some have had the middle cave, indicating there is too much water. Others don’t experience this. I am assuming it is the bread maker. If you notice the bread sinks in the middle, use 1 1/4 cups of water.
Oven Baking Instructions:
- Proof your yeast in 1/2 cup of warm water and 1 tablespoon of sugar. Make sure the water temperature is no hotter than 120º F. Let this sit 5 minutes until your yeast is frothy.
- Follow the directions to mix your wet and dry ingredients.
- Add the frothy yeast mixture to the wet ingredients. Mix, then pour into the dry ingredients.
- Mix your batter, pour it into a greased loaf pan, cover it with plastic wrap, and allow it to rise one hour.
- Preheat the oven to 350º F.
- Bake your bread for 35-40 minutes until the top of the loaf is golden.
- Test to see if it is done baking by sticking a long toothpick into the middle. If the toothpick comes out clean, the bread is done baking. If you see batter or crumbs, the bread needs to bake a little longer.
- Remove the bread from the oven and place it on a rack to allow cooling. Do not slice the bread when it is hot.
Breadmaker Issues:
Before I go into the recipe steps, I want to discuss breadmakers. This recipe depends on the bread machine you use and the cycle type you run. The gluten free time/cycle settings differ on EVERY machine and model number. I am not sure why this is, but I am noticing it. Here are things I noticed and some ideas:-
- If you are at a high altitude, your yeast may be much more explosive than at typical altitudes. I do not live at a high altitude and do not know what to do about this except to use less yeast and bake this bread in the oven.
-
- Some breadmakers do not have a gluten free cycle, or the programmed gluten free cycle isn’t long enough. If this is the case, use the “Home Made” custom cycle, programming in about: 20 minutes Mix, 45 minutes Rise, 90 minutes Bake.
-
- Often, the gluten free setting does not bake the bread long enough. If this happens, you can run a short “bake-only” cycle to brown the top of the bread more.
SPECIAL NOTE
Please know that every gluten free flour blend has a different starch to grain ratio. If you use a blend I didn’t test, you may need to adjust your moisture levels in your baked goods.
Nutrition
Nutrition Disclaimer
Nutritional information is an estimate provided to you as a courtesy. You should calculate the actual nutritional information with the products and brands you are using with your preferred nutritional calculator.

Have made this bread twice now and both times turned out great. My machine is very old (40 yrs) and does not have GF or custom settings. I just set it on dough first and then after that cycle put it on the bake cycle. Was a little afraid that it would not work as the bake cycle is only 60 minutes. But both loafs are done and really good. Hubby says is a keeper recipe. Maybe time to buy a new bread maker. Ha, Ha
Thank you so much for the tips on the settings you used for your bread maker without GF settings.
I have a severely autistic child who has a gluten intolerance and extreme food aversion… he literally only eats GF grilled cheese for 99% of his meals. He is SO particular with the bread and I have tried so many homemade recipes in an attempt to get away from store brands and all of their preservatives. The recipe has been a god send… Thank you!! He loves it!!!
You absolutely made my day. I am very familiar with the struggle to find foods autistic children will eat. Thank you so much for writing to me to tell me how much he loves it.
My dad is a meat and potatoes kind of guy and he will even eat this bread. I am not gluten intolerant but this is my go-to bread recipe. It is a hit anytime I make it
You made my day, Kelly. I am so glad your dad loves this bread recipe. Thank you!
Hi Sandi! I have Krusteaz all-purpose gluten free one-to-one flour. I also have a Welbilt bread machine that I bought around 20 years ago, and it came with a user manual/recipe book that had a few gluten free bread recipes. The simple gf bread recipe was really good, but I’ve lost the book. I’ve tried to find it online but haven’t had any luck. Have you had any experience with either the flour or the Welbilt machine?
Hi Valerie, I am sorry for the delay. I was out of the country for a wedding. I haven’t heard of the Welbilt machine. I do keep track of flour blends readers use when they tell me, but I don’t see anything about someone using that flour blend. It is worth trying, if their website says their flour works with yeast…add more liquid or flour as needed so your batter consistency is similar to mine in the photos.