
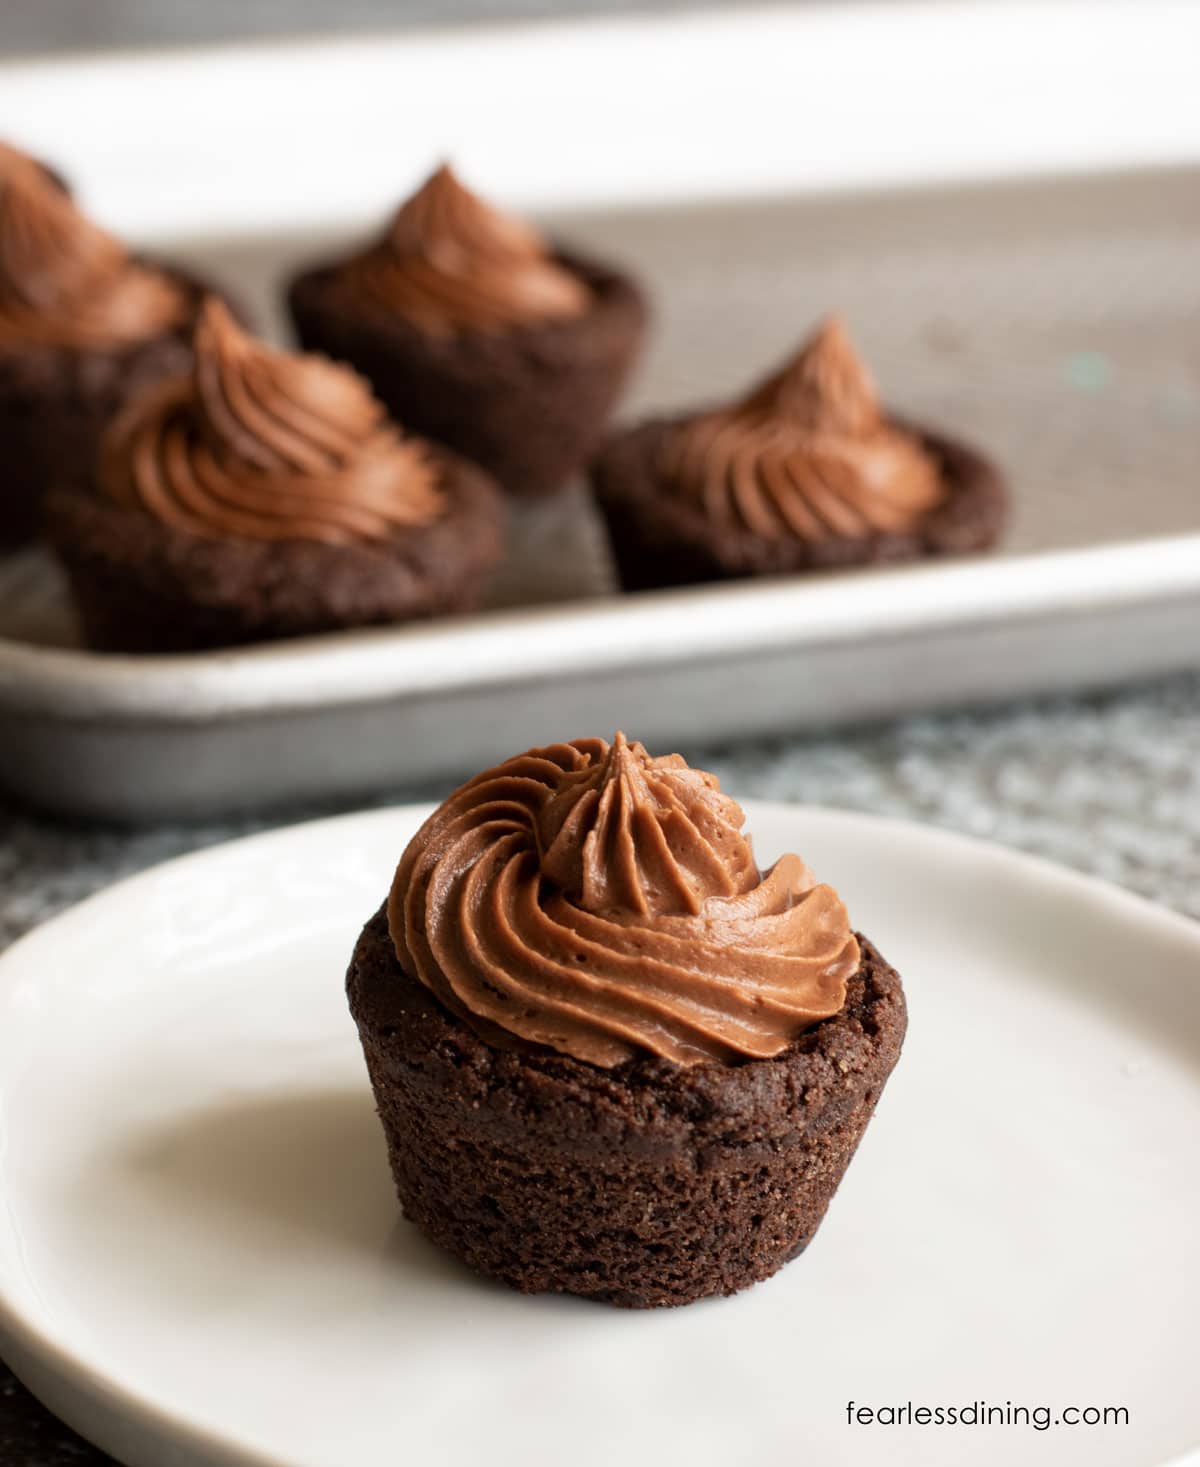
These deliciously chocolaty Gluten Free Chocolate Cookie Cups can be filled in so many ways. They can be adapted for any holiday, depending on the filling and sprinkles! The cookie is crisp and chewy. This is an easy gluten free dessert to make in under 30 minutes!
This post may contain affiliate links. Please read our Disclosure Policy.
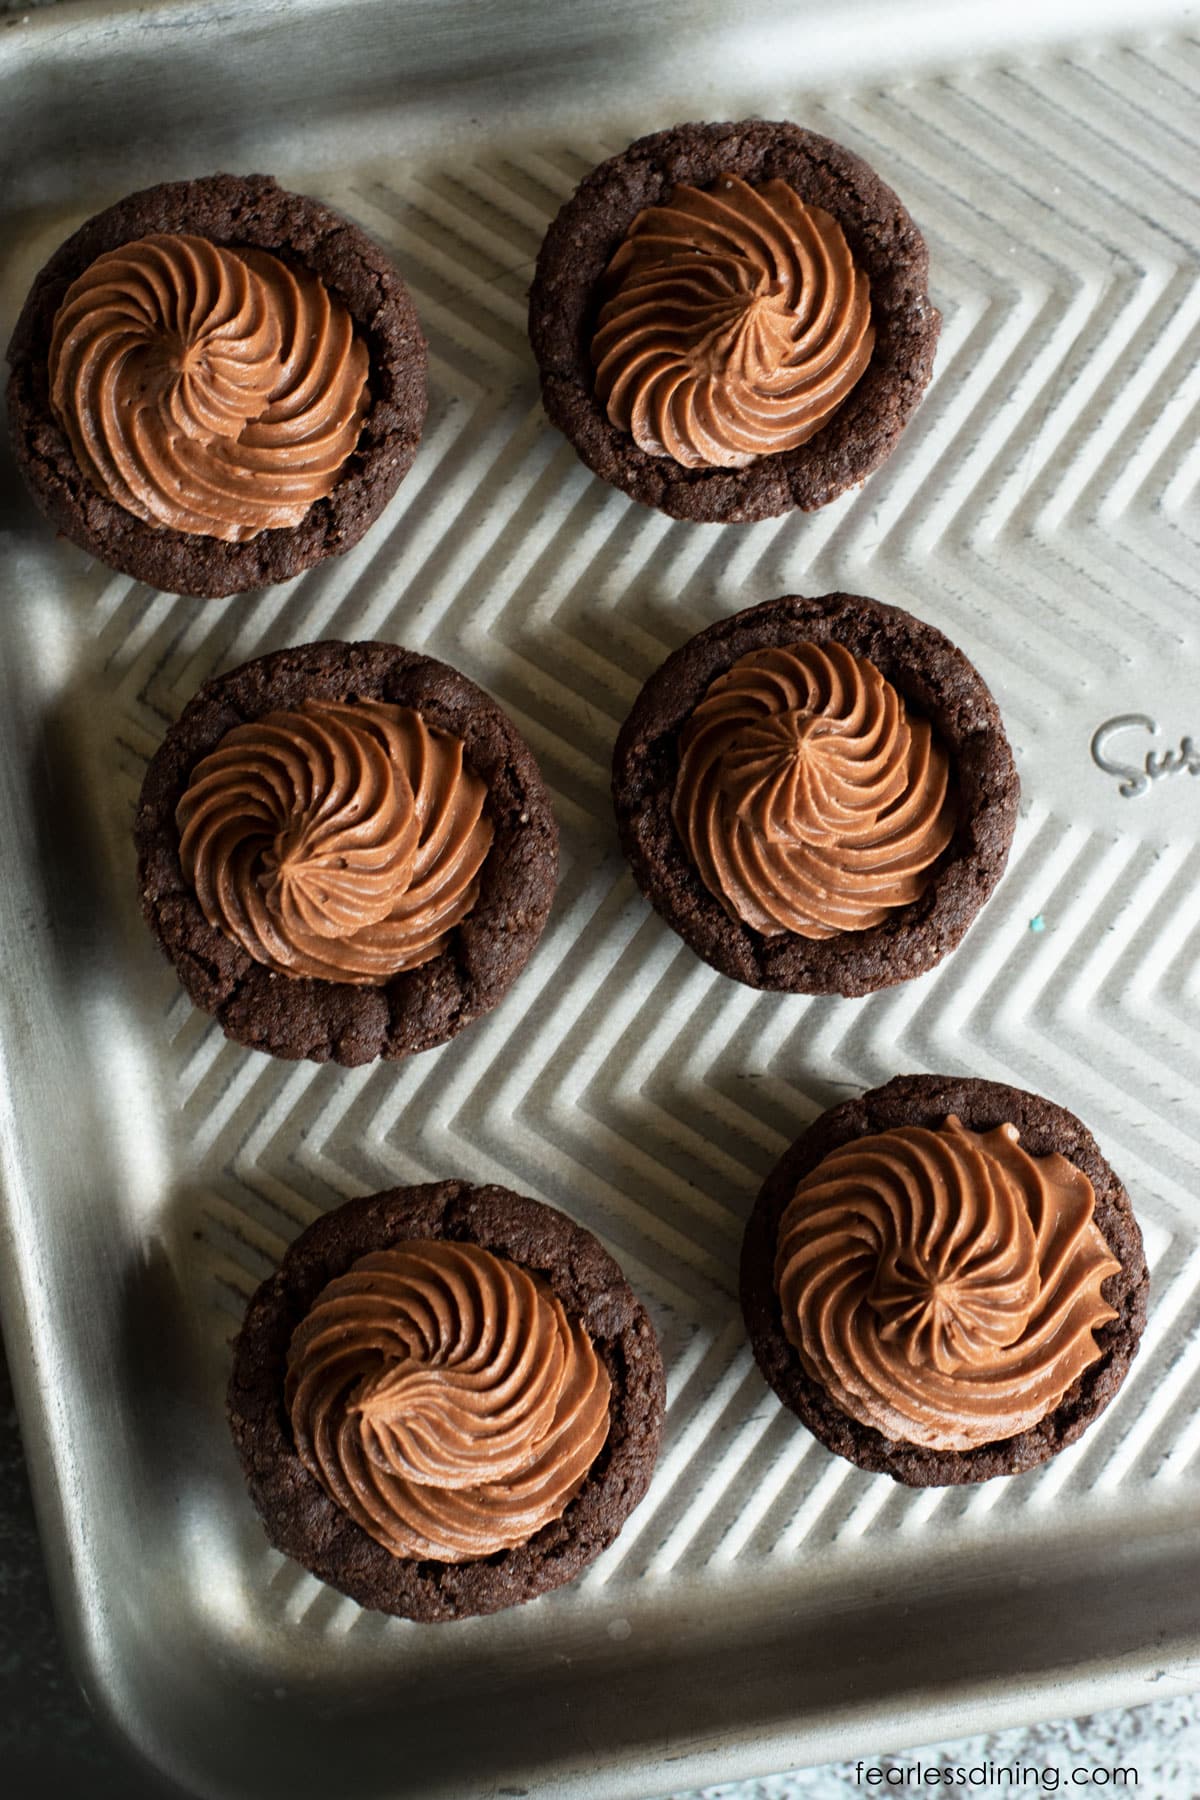
If you are looking for the perfect versatile gluten free cookie recipe, these Gluten Free Chocolate Cookie Cups are it! They are chocolaty, delicious, and can be filled and decorated for any holiday!
Fill these cookie cups with frosting, sweetened cream cheese with fruit, or any of the delicious flavor options I share below!
I have dozens of gluten free cookie recipes to try. Check them all out and let me know which were your favorites! Try these Gluten Free Funfetti Cookie Cups for a festive option.
Tasty without being overly sweet! I made these yesterday (used Bobs 1to1) for a Halloween treat, filled with chocolate pudding, and topped with piped frosting. Great balance of sweet,chocolate, crunchy & smooth. Adding it to our recipes as it is so versitile.”
Jennifer G., blog comment
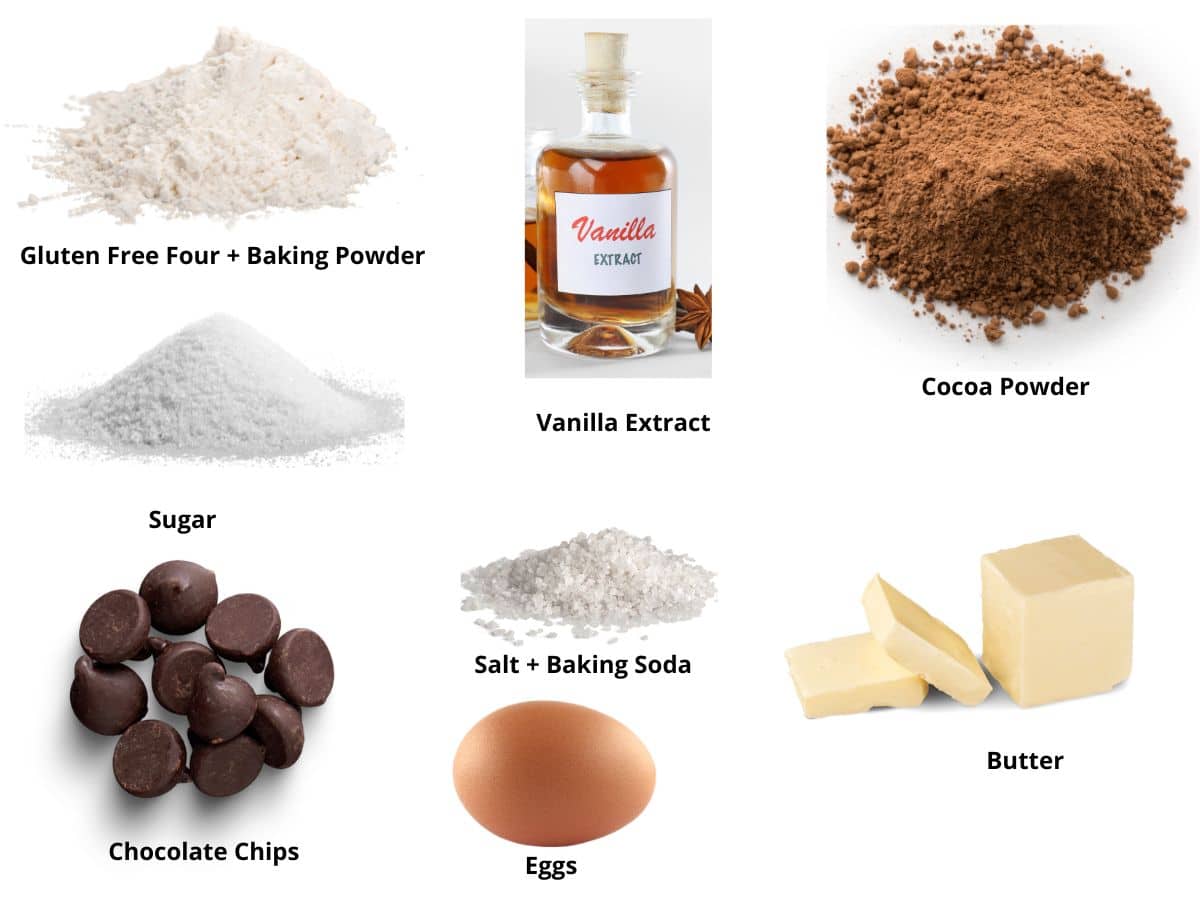
Ingredient Notes:
For the full list of ingredients and amounts, please go to the recipe card below.
- Gluten Free Flour Blend – I tested this recipe using Bob’s Red Mill 1 to 1 Gluten Free Flour Blend, Pillsbury Gluten Free Flour Blend, and King Arthur’s Measure for Measure Gluten Free Blend. That doesn’t mean others will not work; I just have not tested other flours, and I can not guarantee the recipe will work if you use other mixes.
- Xanthan Gum – If your blend doesn’t contain xanthan or guar gum, you will need to add one teaspoon.
- Cocoa Powder – There are many great brands of cocoa powder. Be sure to use one that is gluten free. I like Ghirardelli, Hershey’s, and Anthony’s Brand.
- Baking Soda – Most baking soda is gluten free, but it is important always to read the label to be sure it isn’t made in a facility with shared equipment.
- Salt – Use sea salt or kosher salt.
- Butter – Use unsalted butter. If you are dairy-free, use a dairy-free or vegan butter.
- Eggs – I used size large.
- Vanilla Extract – I recommend using pure vanilla extract, but imitation is okay in this recipe because the vanilla flavor is muted due to the chocolate.
- Food Coloring – If you are coloring frosting in the monster cookie cups pictured, as I did.
Always be sure to use the baking equipment. Here are some of my favorite cookie tools.
Step-By-Step Photos and Directions:
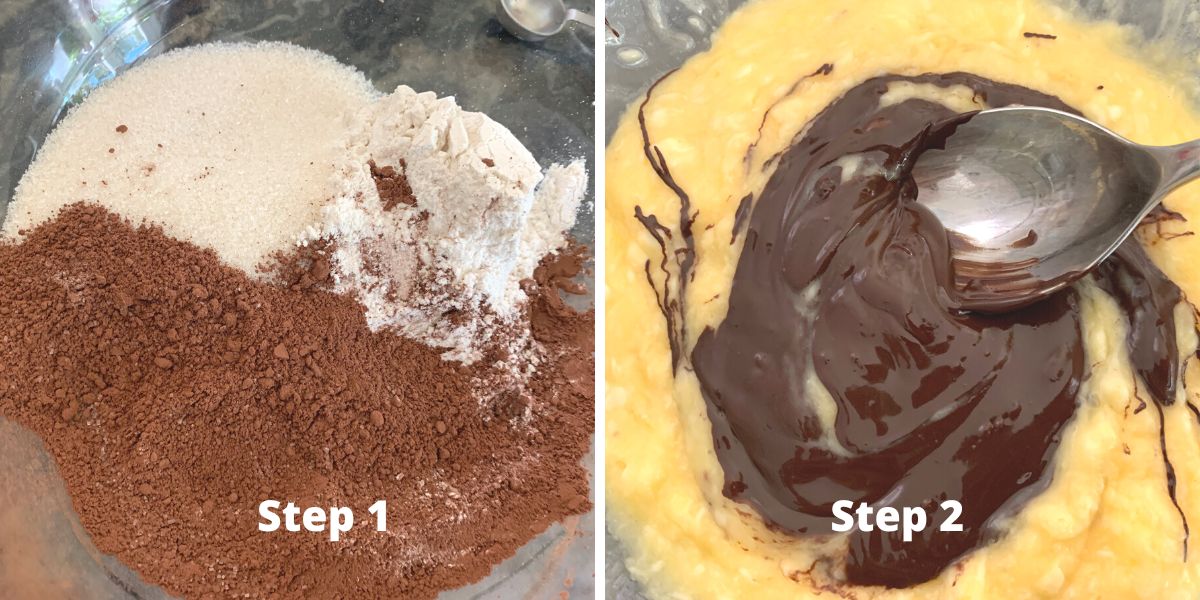
Step 1: Add your dry ingredients to a large
Step 2: Add the chocolate chips to a microwave-safe dish and microwave for 30 seconds. Add the butter and cook for an additional 20 seconds. Stir the two together. The melting time will vary depending on the size of the chocolate you are melting.
Allow the mixture to cool slightly, and then add the rest of the wet ingredients and stir. Do not add the eggs to a hot mixture, as this can cook them.
Preheat the oven to 350º F and ensure the rack is in the middle position.
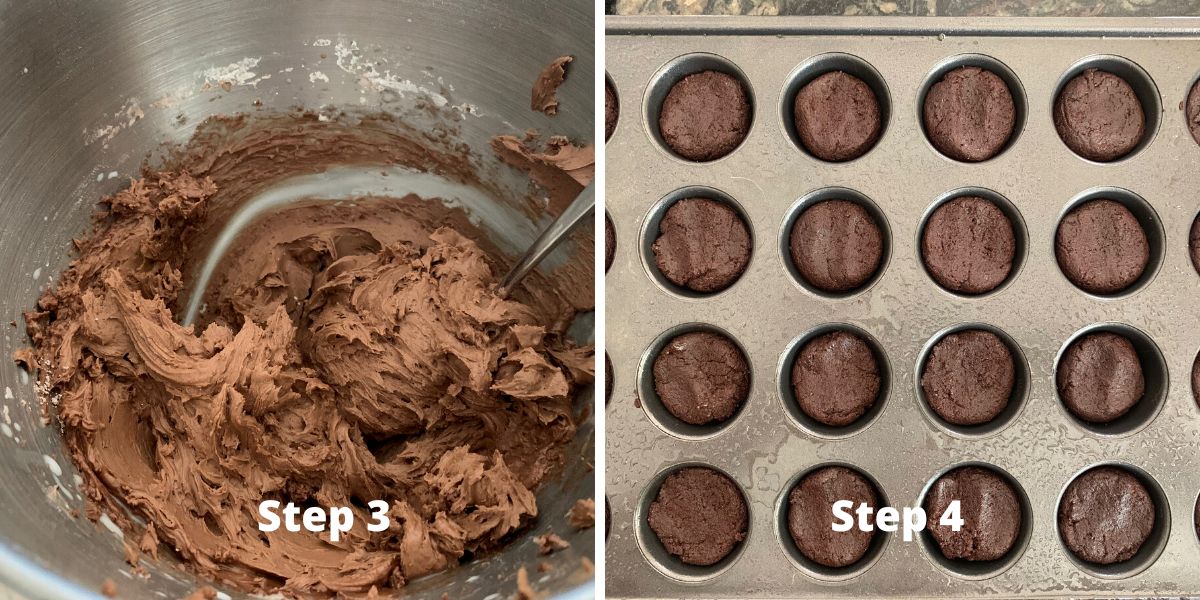
Step 3: Mix the wet ingredients into the dry ingredients.
If you prefer, you can use a standing mixer with a paddle attachment. If you do, add the wet ingredients first, then gradually add the dry ingredients.
Step 4: Spray a mini muffin pan with coconut or non-stick oil. Use a small
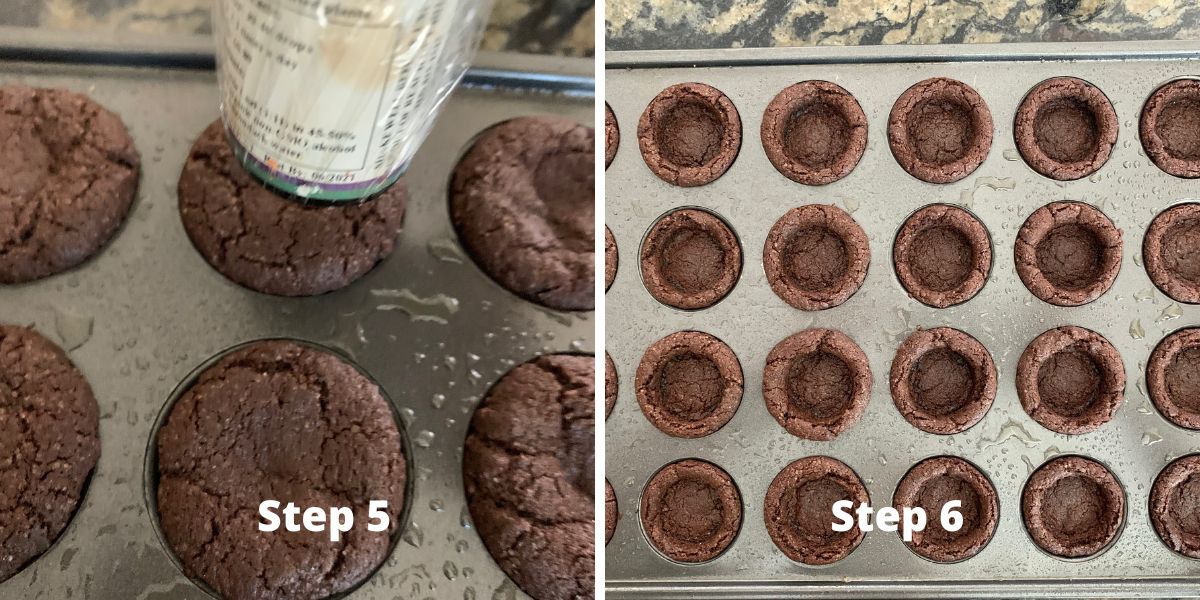
Step 5: Bake the mini muffins for 15 minutes until done. Remove the cookies from the oven and quickly use a small jar to press the middle down on each cookie.
Step 6: Let the cookie cups cool before trying to remove them. If they are too hot, they will fall apart when you try to lift them out. Let them sit for about 5-10 minutes.
Gently remove the cups to a wire cooling rack. I use a knife to lift each out of the pan gently.
Email This Recipe To Me!
Step 7: Prepare your filling! See below for a list of delicious filling options. If you are making frosting, I recommend making it now while the cookie cups are cooling. Note: do not fill the cookie cups until they are fully cooled!
Use food coloring to color your frosting if you make these cookie cups for a holiday or special occasion. You can also make a fun flavor like these Gluten Free Peppermint Cookie Cups.
Frosting Recipes:
If you are filling your cookie cups with frosting, I have several incredible gluten-free flavored frosting recipes in this How To Make Frosting Tutorial.

If you are decorating with sprinkles, verifying if your sprinkles are gluten-free is important. Some popular brands are made on shared equipment with wheat. Check on my Gluten Free Sprinkles List.
Filling and Holiday Decorating Options:
- St. Patrick’s Day Cookie Cups- Use green frosting and sprinkles.
- Valentine’s Day Cookie Cups – Fill the chocolate cookie cups with my homemade Raspberry Mousse and top with a fresh raspberry.
- Christmas Cookie Cups – Pipe green frosting up high like a mini Christmas Tree and top with sprinkles.
- Halloween Cookie Cups – You can use these cookie cups to make monsters, a witch’s cauldron, or even a mini graveyard with bone-shaped sprinkles. Use frosting or pudding to fill the cups.
- Hanukkah Cookie Cups – Fill with blue-colored frosting and top with blue sprinkles.
You may also love this Gluten Free Black Forest Cookie Cups recipe!
Frequently Asked Questions:
You can store these cookie cups in an airtight container for up to 4 days. I recommend storing them in the refrigerator so they don’t spoil.
I love to freeze cookie cups so I have them on hand for quick desserts. I recommend placing them in a large container and flash-freezing them. Once they are frozen, you can move them to a zipper bag.
More Gluten Free Cookie Recipes:
- Gluten Free Cookies and Cream Cookies
- Easy Gluten Free Chocolate Cupcake Cookies
- Gluten Free Peanut Butter Cookies
- Gluten Free Brookie Cookies (A cross between a cookie and a brownie!)
Love This Recipe?
If you made and enjoyed this recipe, I would be incredibly grateful if you could leave a comment below. Please include which flour blend you used. This will help others know this recipe is delicious. Thank you!
Gluten Free Chocolate Cookie Cups
Ingredients
- 1 cup gluten free flour blend * see note
- ½ cup cocoa powder
- 1 teaspoon baking soda
- ¾ cup can sugar
- 2 ounces chocolate chips
- ½ cup unsalted butter
- 1 large egg
- 1 teaspoon pure vanilla extract
- dash salt
Method
- Preheat the oven to 350º F. Set the oven rack to the middle position.
- In a large mixing bowl, combine 1 cup gluten free flour blend, ½ cup cocoa powder, 1 teaspoon baking soda, ¾ cup can sugar, and dash salt. Whisk to blend them together.
- In a microwave-safe dish, melt the 2 ounces chocolate chips for 30 seconds. Add the ½ cup unsalted butter and melt for an additional 20-25 seconds. Stir them together. Allow the mixture to cool slightly.
- Pour 1 large egg and 1 teaspoon pure vanilla extract, into the dry ingredients and mix it into a cookie dough.
- Spray a mini muffin pan with coconut oil. Drop a scoop of cookie dough into each cup and press it down.
- Bake for 15 minutes.
- Take a small jar and press it down into each cookie cup while the cookie dough is hot.
- Let the cookie cups cool in the pan for 10 minutes before trying to remove them.
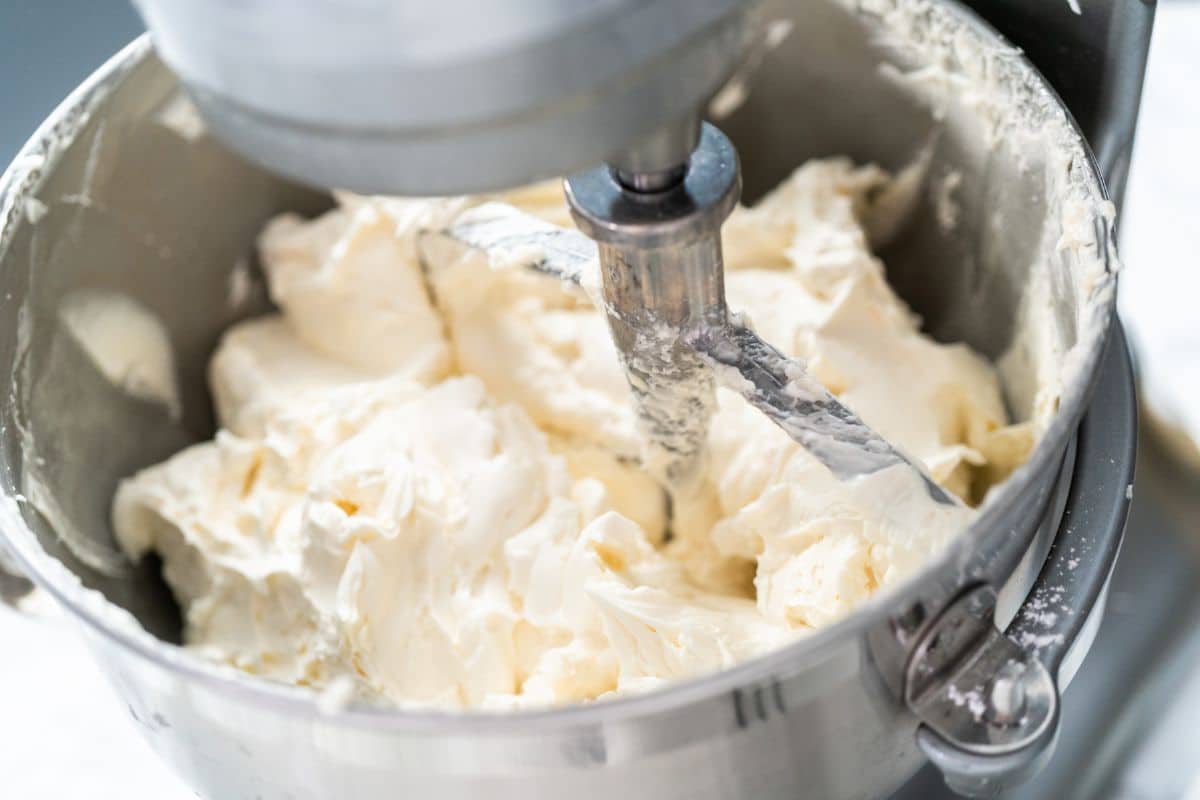
- Whip up frosting, mousse, pudding, or any filling you plan to use. See notes for ideas!
- When the cookie cups are cool, pipe your chosen filling into each cookie cup.
Nutrition
Notes
Filling and Holiday Decorating Options:
- St. Patrick’s Day Cookie Cups- Use green frosting and sprinkles.
- Valentine’s Day Cookie Cups – Fill the chocolate cookie cups with my homemade Raspberry Mousse and top with a fresh raspberry.
- Christmas Cookie Cups – Pipe green frosting up high like a mini Christmas Tree and top with sprinkles.
- Halloween Cookie Cups – You can use these cookie cups to make monsters, a witches cauldron, or even a mini graveyard with bone-shaped sprinkles. Use frosting or pudding to fill the cups.
- Hanukkah Cookie Cups – Fill with blue-colored frosting and top with blue sprinkles.
Private Notes
Tried this recipe?
Let us know how it was!
I truly hope you enjoy this recipe. I have been testing and creating gluten-free recipes for over 15 years. Creating gluten-free recipes that do not taste gluten-free is my goal for every recipe. Sometimes I only have to test a new recipe a couple of times, and others it takes multiple times. I do this so you get reliable, delicious results every time!

I made these cookies tonight, as cookies and not mini cups as I don’t have a mold this size. So I made them with a small cookie scoop and pressed them down as mentioned. These cookies are great just as they are, without the frosting, but also great with the frosting! I work in a bakery and have always enjoyed baking (prior to trying gluten-free), but these cookies are great and rank way up on the top of my favorites! I am so happy I have found this recipe and site!! I use King Arthur 1:1 flour.
I love your idea to make these as regular cookies!! Thank you very much, Nancy!
Tasty without being overly sweet! I made these yesterday (used Bobs 1to1) for a Halloween treat, filled with chocolate pudding, and topped with piped frosting. Great balance of sweet,chocolate, crunchy & smooth. Adding it to our recipes as it is so versitile.
I am so glad you made these with pudding! I love using it as well and the cookie cups hold up well to the moist filling.
The picture of the ingredients shows salt but when I followed the recipe at the bottom and the required amounts of ingredients salt was not mentioned. Also what about the egg?
I just use a dash and I clarified this in the recipe. The egg is part of the wet ingredients. Thank you.
I devoured them faster than I would like to admit. Very rich and chocolatey, I filled them with a cream cheese frosting.
LOL, they are good. I am so glad you enjoyed them Joree.