
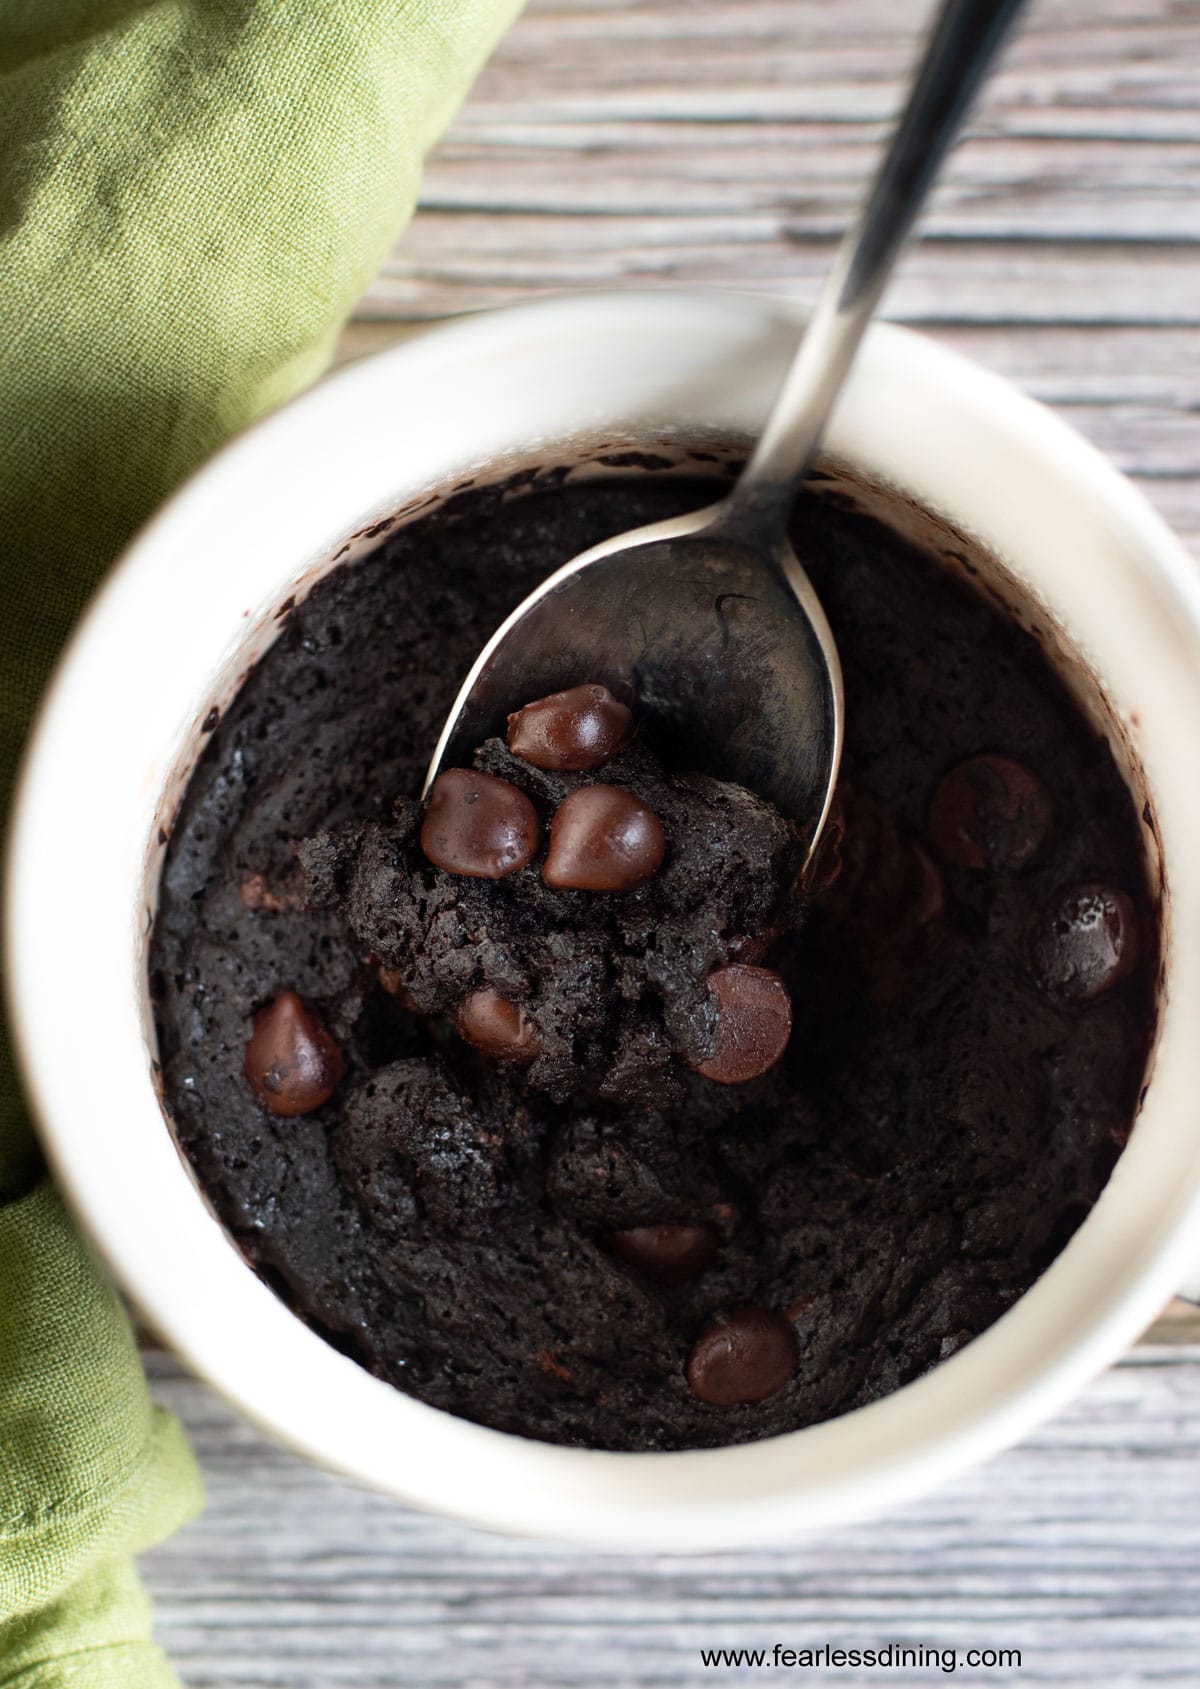
If you love chocolate as much as I do, this decadent gluten free mug brownie is cooked in a mug and makes the perfect treat. In just 3 minutes, you can have a homemade fudgy gluten-free chocolate brownie with minimal fuss and clean up.
This post may contain affiliate links. Please read our Disclosure Policy.
❤️ Sandi’s Recipe Summary
The Quick Bite: This gluten-free mug brownie is a single-serve chocolate dessert cooked in the microwave. It is made with cocoa powder, gluten-free flour, oil, and chocolate chips for a rich, fudgy texture. The recipe is dairy-free and is made without eggs, oats, soy, or nuts. It mixes quickly and cooks in minutes, making it ideal for fast cravings or hot days when you don’t want to use the oven.
This mug brownie recipe is perfect for those with food allergies. It is not only gluten-free, but it is also dairy-free and egg-free! All you need are a few simple ingredients, a microwave oven, and a coffee mug! This easy Gluten-Free Vanilla Mug Cake is another great microwave cake recipe!
I love making this recipe throughout the summer when it is too hot to use the oven. It is nice to enjoy cake without heating up the house!! For more mug cake inspiration, check out all of my easy gluten free mug cake recipes! I am also a huge fan of this easy Gluten-Free Blueberry Mug Muffin recipe.
This was perfect for dessert tonight with some whipped cream on top. I subbed the water with coffee. It was delicious.”
betty b., blog comment
Ingredient Notes:
For the full list of ingredients and amounts, please go to the recipe card below.
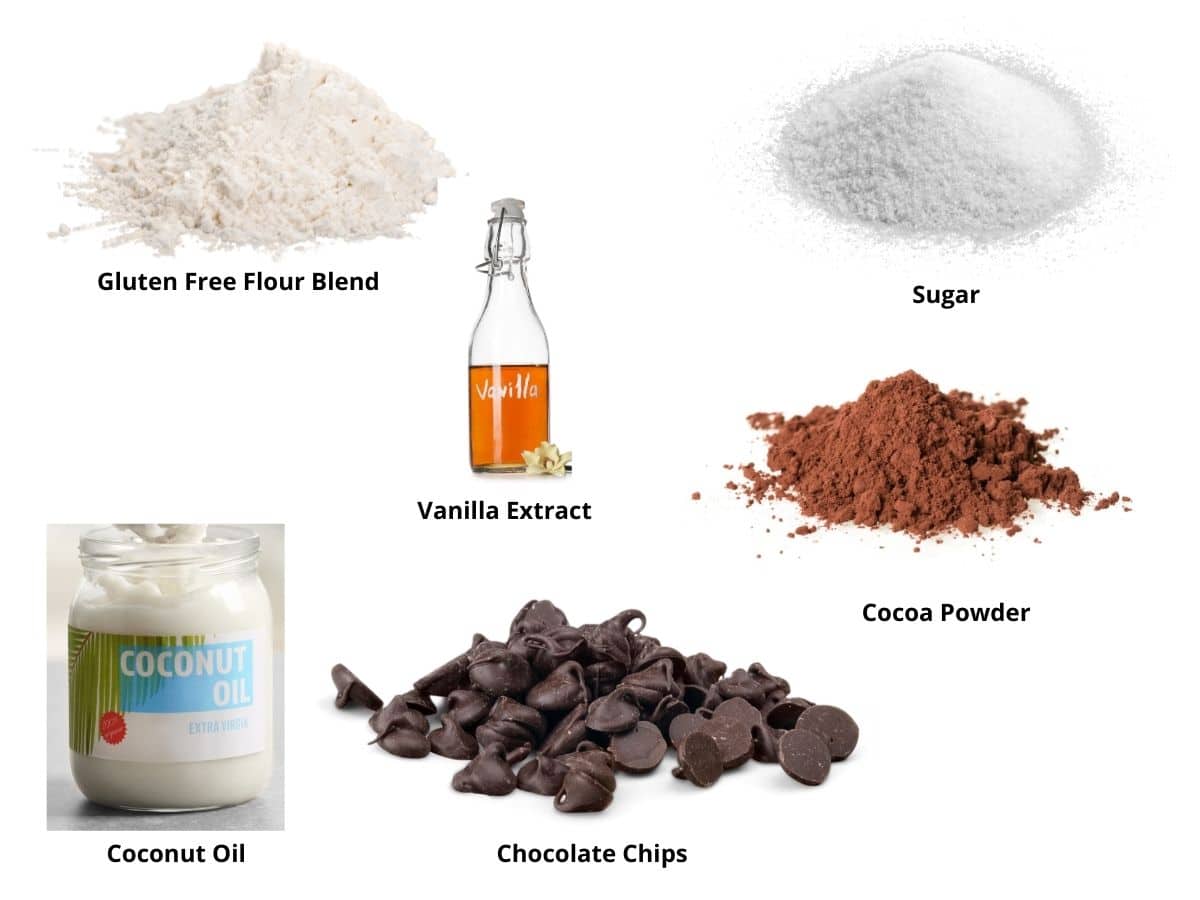
- Gluten-Free Flour Blend – I have tested this recipe with King Arthur Measure for Measure, my DIY Gluten-Free Flour Blend, and Bob’s Red Mill 1 to 1. That doesn’t mean others will not work; I just have not tested other flours.
- Xanthan Gum – If your gluten- free flour blend doesn’t contain a binder like xanthan gum or guar gum, please add 1/4 teaspoon. Read Why Binders are Important in Gluten-Free Baking to learn more about their importance.
- Cocoa Powder – Many great brands of cocoa powder are gluten-free. It is always a good idea to double-check the label.
- Chocolate Chips – Use any flavor of chocolate chips or even chocolate chunks!
- Coconut Oil – I love the flavor of coconut oil added to this gluten-free microwave brownie, but you can use any light oil.
- Vanilla Extract – Use pure vanilla extract or imitation. It won’t matter in this recipe.
Substitutions:
- Make it sugar-free – Swap the sugar for Monk Fruit Sweetener to make this gluten-free mug brownie sugar-free. It should be a 1:1 swap.
- Make it gum-free (no xanthan or guar gum) using my DIY Gluten Free Flour Blend.
- Swap the oil– For no off taste from the coconut oil, use Canola Oil.
If you prefer to make traditional gluten-free brownies, I have a fantastic gluten-free brownie recipe on my blog. For more mug cake recipes, read my Guide to Gluten-Free Mug Cakes.
How to Make a Gluten-Free Mug Brownie (Step-By-Step)

Step 1: Add the dry ingredients to a small bowl and mix well. Note that you can mix all of this up in your mug.
In my testing of this recipe, I found that the dry ingredients do not mix thoroughly, and some flour sticks to the edges of the mug when you eat the cake. I whisk the ingredients in a bowl and then add them to my mug to fix this.
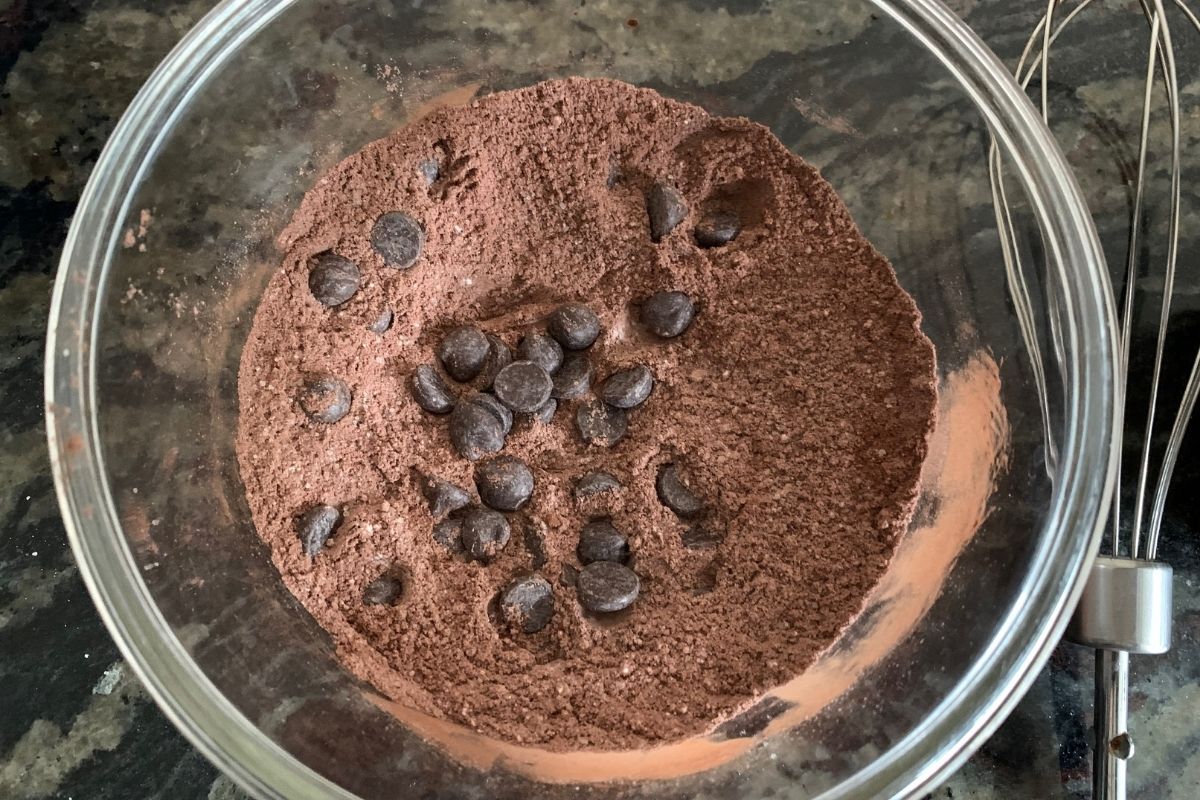
This is what your dry ingredients will look like mixed up. Add in the chocolate chips.
Email This Recipe To Me!
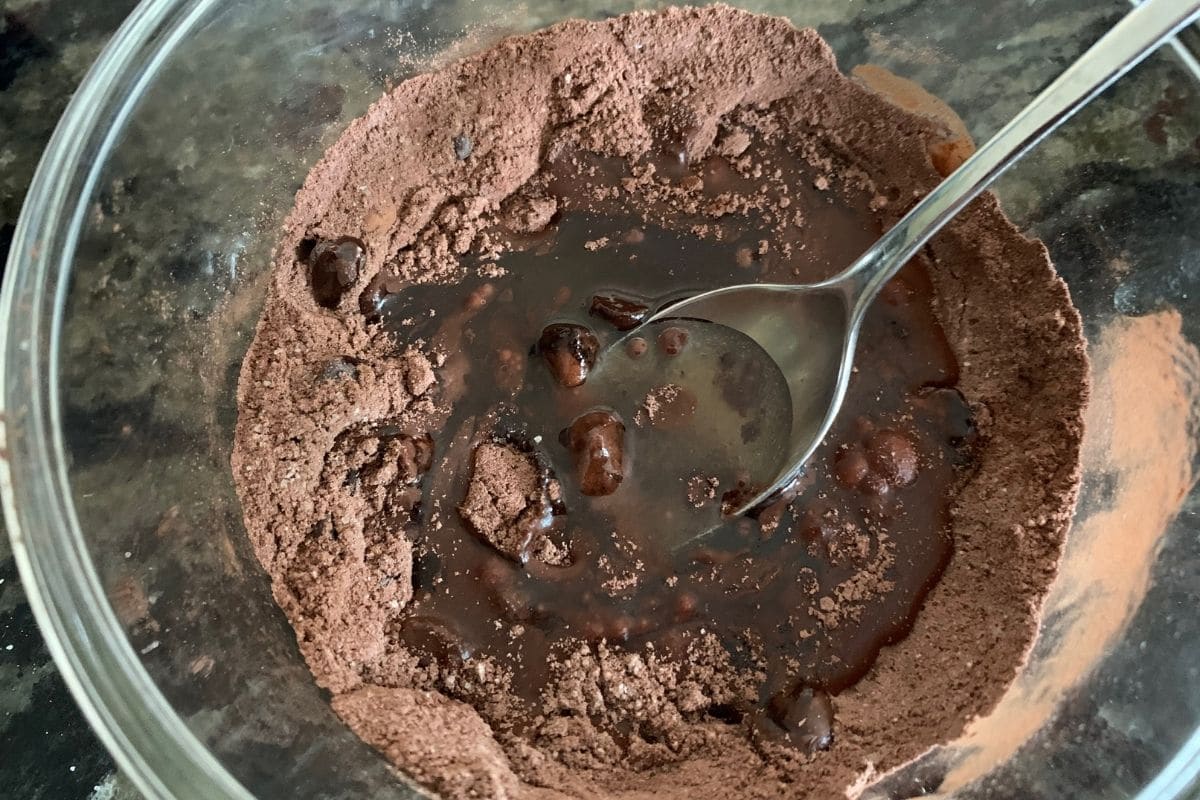
Step 2: Mix the wet ingredients with the dry ingredients.
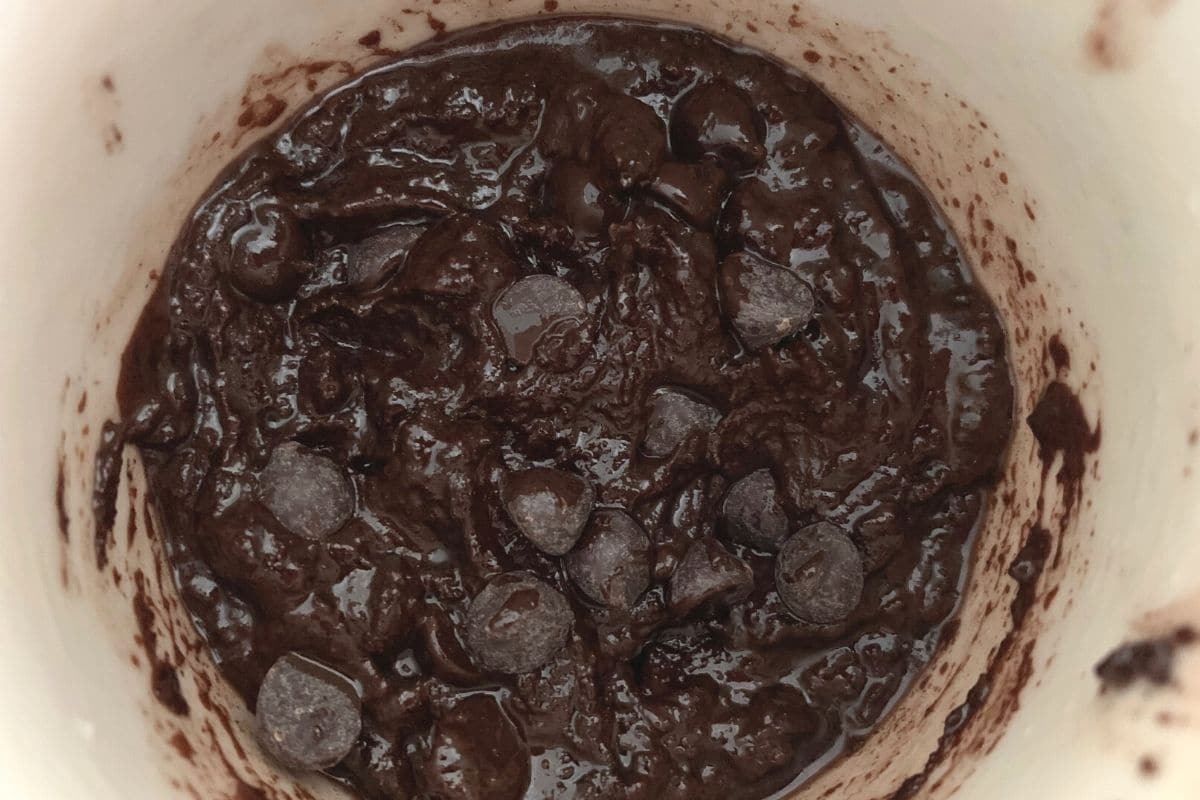
📢 Sandi says: Every gluten-free flour blend has a different starch-to-grain ratio. The brand of gluten-free flour you use will affect the moisture of the batter. If your cake batter is too runny, add a little more flour, and if it is too thick, add more liquid. Read Why Gluten-Free Flour Blends Vary to learn more about this.
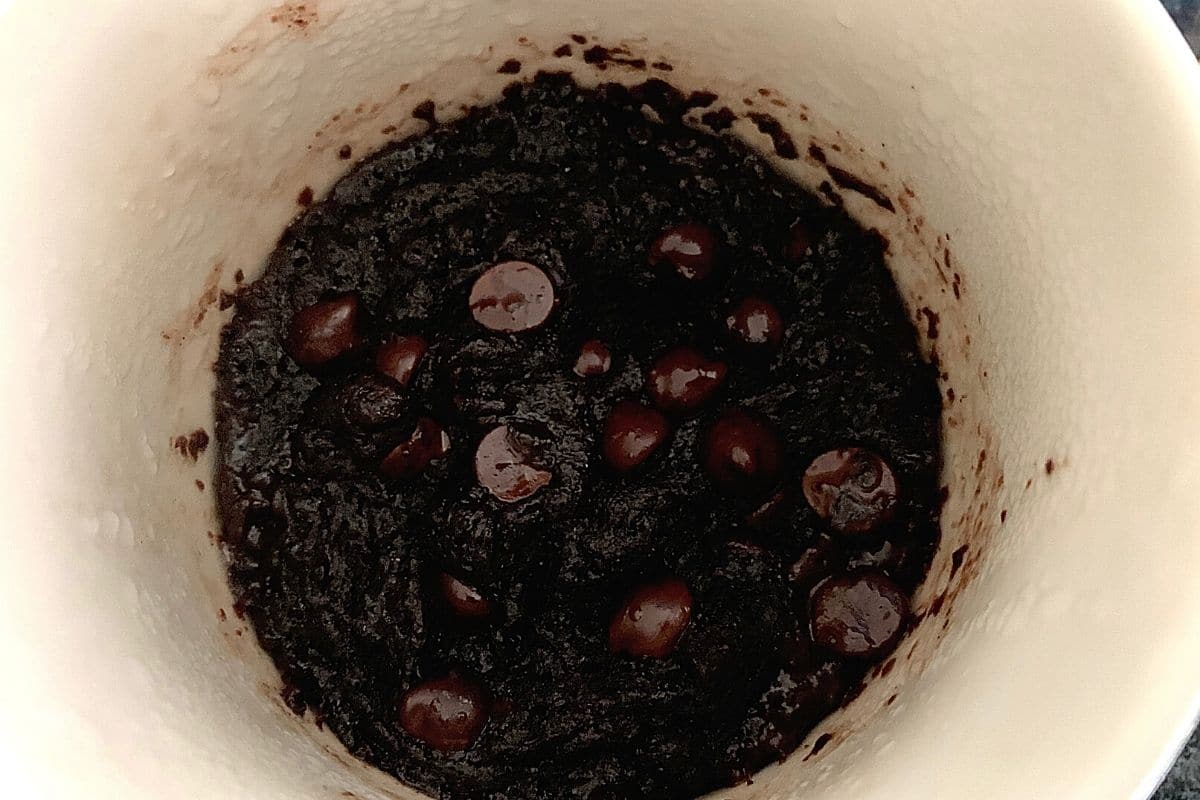
Step 3: Place the mug in the microwave and cook for 90 seconds on high. Actual cooking time will depend on the size of your mug, its depth, and the width of its base. You may need to cook it longer using a tall mug with a narrow base.
The mug cake will rise above the mug’s rim as it cooks. This is normal because the heat is cooking the cake so quickly, and this builds up gases in the batter. It will deflate as the cake cools.
You will know your gluten-free mug brownie is finished cooking when it is slightly firm to the touch. The mug cake will be hot. Let it cool for a few minutes before eating it.
Top with vanilla ice cream, hot fudge, or one of the following mix-ins and toppings.
Try these tasty mix-in ideas:
- Use different flavors of chocolate chips, like white chocolate and salted caramel chocolate chips.
- Add in walnuts or pecans.
- Why not add some M&Ms? It will add some fun color!
- Put a tablespoon of peanut butter in the middle of the cake batter for a gooey peanut butter middle.
Frequently Asked Questions:
I love to use Anthony’s and Ghirardelli brands of gluten-free cocoa powder because they give consistent, good chocolate flavor.
Usually, if your cake turns out gooey, it doesn’t cook long enough in the microwave. Cooking time will vary based on mug size and base width.
Your mug cake cooking time will vary depending on the size of your mug. The cake will be firm to the touch when it is done cooking.
These mug brownies will keep fresh for up to 3 days in an airtight container or up to 4 months in the freezer.

More Gluten-Free Mug Cakes:
If you love quick and easy desserts, you will want to check out all of my Gluten-Free Mug Cake Recipes!
- Gluten-Free Lemon Mug Cake
- Easy Gluten-Free Banana Microwave Cake
- Gluten-Free Cherry Cobbler Mug Cake
- Mr. Fearless Dining’s favorite, Gluten-Free Snickerdoodle Mug Cake
Love This Recipe?
If you made and enjoyed this recipe, I would be incredibly grateful if you could leave a comment below. Please include which flour blend you used. This will help others know this recipe is delicious. Thank you!
Gluten Free Mug Brownie In 3 Minutes
Ingredients
- 2 ½ tablespoons cocoa powder * see note
- 1 ½ tablespoons gluten free flour blend * see note
- 2 tablespoons cane sugar
- 2 tablespoons light oil * see note
- 2 ½ tablespoons water
- ½ teaspoon pure vanilla extract
- 1 tablespoon chocolate chips
Method
- In a small bowl, add 2 1/2 tablespoons cocoa powder, 1 1/2 tablespoons gluten free flour blend, and 2 tablespoons cane sugar and whisk to blend.
- Add 2 tablespoons light oil, 2 1/2 tablespoons water, and 1/2 teaspoon pure vanilla extract. Add the 1 tablespoon chocolate chips and mix well.
- Pour into your favorite coffee mug.
- Microwave on high for 90 seconds. If the brownie feels firm to the touch, it is ready!
- Top with vanilla ice cream.
Nutrition
Notes
- I have tested this recipe with King Arthur Measure for Measure GF, Bob’s Red Mill 1 to 1 GF blend, and Authentic Foods Multi Blend. That doesn’t mean others will not work. I just have not tested other flours.
- If your gluten free flour blend doesn’t contain xanthan gum or guar gum, please add 1/4 teaspoon.
- There are many gluten free brands of cocoa powder. I like Anthony’s and Ghirardelli brands. Always check the label to make sure the cocoa powder you choose is gluten free!
- This mug brownie will keep up to 4 days in an airtight container or up to 4 months in the freezer.
Private Notes
Tried this recipe?
Let us know how it was!
I truly hope you enjoy this recipe. I have been testing and creating gluten-free recipes for over 15 years. Creating gluten-free recipes that do not taste gluten-free is my goal for every recipe. Sometimes I only have to test a new recipe a couple of times, and others it takes multiple times. I do this so you get reliable, delicious results every time!

Made with my granddaughters. They had a great time making them. So good.
I am so glad you and your granddaughters had fun making this recipe :-).
Is it 90 seconds in the microwave or 3 minutes? I see both written here and that makes a big difference!
I looked through the entire post and it says both in the step by step directions and recipe card to cook the cake for 90 seconds. The title is 3 minutes because it includes the time to put the ingredients together to make it.
this was such a yummy treat. Instead of water I used leftover cold coffee. Topped with some coconut whipped topping, it was a decadent dessert, and so very easy.
I am so glad you love this mug brownie, thank you!
Excellent afternoon treat! I topped mine with salted Carmel ice cream!
I am so glad you loved the recipe. Thank you for coming back to let me know :-).
This is, indeed, a fast chocolate fix! Like a true addict. Hahahaha.
I loved making mug cakes when I still used eggs. But when i found out that that wasn’t possible anymore… The mug cakes where gone too.
So, i am really happy with your recipe!
It meets all dietary requirements.
Thank you for sharing!
You can most likely use an egg replacer like Just Egg in my mug cake recipes!!
Hi! Recipe looks delish! Do you think I can pre mix about 10 servings worth by just multiplying inged. by 10? Or do I need to adjust some measurements? Thanks!
Hi LeAnn, I assume you can. I haven’t tested increasing that much.
Very successful. I reduced the sugar a bit and added some caramel stevia instead. Also substituted half a tablespoon of flour for almond flour.
Wow, thank you for letting me know that reducing the sugar and using some caramel stevia works in this recipe. Thank you!
needs salt. 1/8 tsp added to dry ingredients.
Hi Lorri, I am glad you were able to add salt to your mug brownie.
This was the best mug brownie I’ve ever tried. Thanks for the great recipe! I’m going to have to stop myself from making it too often =)
I am really glad you loved it Julie!! Thank you so much for coming back to rate the recipe and leave a comment!
Yummy! So glad to enjoy this easy to make brownie. And just the right serving size too. I used Rodelle chocolate and it turned out absolutely perfect!