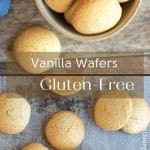
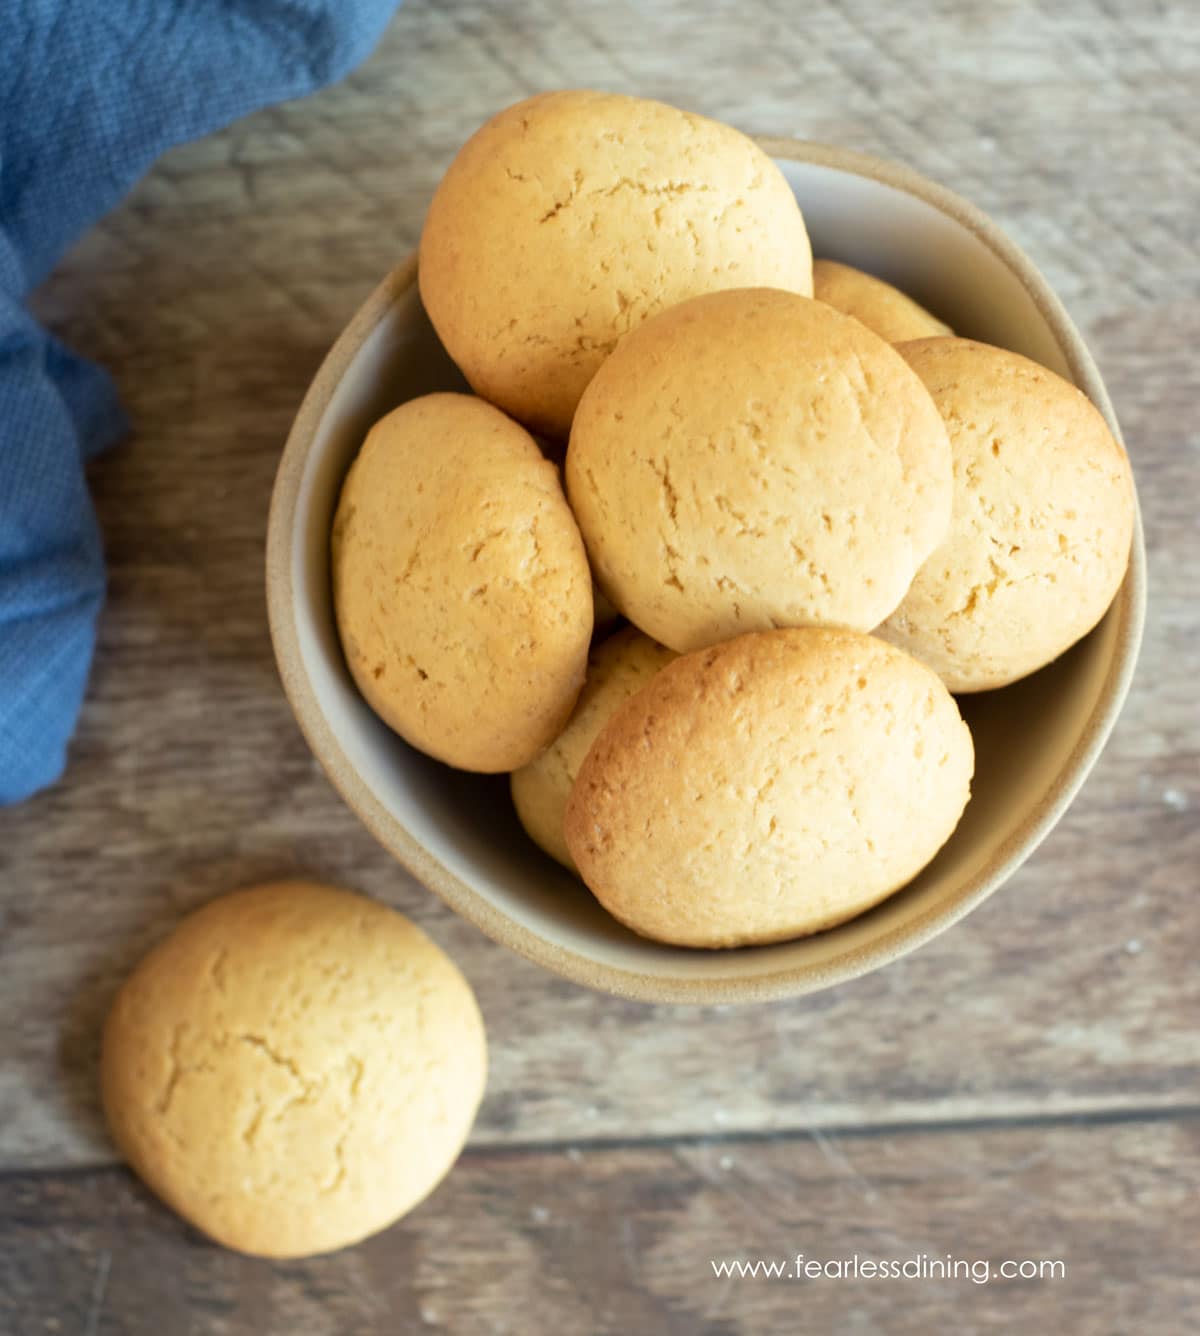
If you have missed the crispy bite of classic vanilla wafers, these homemade gluten-free vanilla wafers bring that nostalgic flavor back. They turn out buttery, lightly sweet, and have that perfect golden crunch that makes them great on their own or layered into banana pudding. You can make a batch in just 30 minutes, and I have tested a few different flour blends so you have options.
This post may contain affiliate links. Please read our Disclosure Policy.
❤️ Sandi’s Recipe Summary
The Quick Bite: My gluten-free vanilla wafers are crispy like the real thing. I tested this recipe multiple times to perfect it. I tested this recipe with Bob’s Red Mill 1:1 and King Arthur Measure for Measure, so you know what works. I also share easy swaps to make these corn syrup-free, egg-free, and dairy-free.
If you have wanted to make homemade vanilla wafer cookies to serve with your Gluten-Free Banana Cream Pie or vanilla pudding, these are the cookies you need! They are seriously that good!!
This has been one of those recipes that was difficult for me to perfect. Vanilla wafer cookies are crisper than other gluten-free cookies, and it took adding corn syrup to the dough to finally get the right texture. I can’t wait to hear what you think of this recipe!
My whole Fearless Dining family is big cookie fanatics. If you share this love, check out my delicious gluten-free cookie recipes on the blog.

Ingredient Notes and Easy Swaps:
For the full list of ingredients and amounts, please go to the recipe card below.
- Gluten-Free Flour Blend – I tested this recipe using Bob’s Red Mill 1 to 1. and King Arthur’s Measure for Measure. Reader Tested Blends – Pillsbury GF also worked well but resulted in wetter dough, pipeable with great results. You can add 1-2 TBSP of flour to firm it up.
- Xanthan Gum – If your gluten free flour blend doesn’t contain xanthan gum or guar gum, please add 3/4 teaspoon.
- Powdered Sugar – Sift before using to avoid lumps.
- Baking Powder – Use aluminum-free baking powder to avoid a metallic aftertaste.
- Corn Syrup – I include a little corn syrup in my recipe to enhance crispiness, but I share easy swaps above.
- Butter – Use unsalted butter. For dairy-free, gluten-free cookies, substitute with plant-based butter.
- Vanilla Extract – Use pure vanilla extract. In a cookie recipe that is all about vanilla flavor, you want to use the real thing.
Substitutions:
- Make them dairy-free using plant-based butter. I tested the Earth Balance brand,
- Make this recipe egg-free by using Bob’s Red Mill Egg Replacer.
- Reader Corn Syrup Swaps – Substitute the corn syrup for tapioca syrup. It still made the cookies crisp on the outside. Another reader wrote to let me know that agave with 1/2 teaspoon of gelatin worked as a substitute for corn syrup.
Want more help? Read my Gluten-Free Cookie Troubleshooting Guide. I also share tips using my favorite Cookie Making Equipment.

A Note From My Kitchen
I have been developing gluten-free recipes for nearly 15 years, and getting the perfect crisp cookie without gluten is one of the most common struggles I hear about. I tested this gluten-free vanilla wafer cookie recipe with two different flour blends to find options that actually hold their shape and get that light crunch you expect from a classic nilla wafer. Keep an eye on the cookie dough moisture and add more butter or flour to adjust the dough consistency.
How to Make Gluten-Free Vanilla Wafers (Step-By-Step)
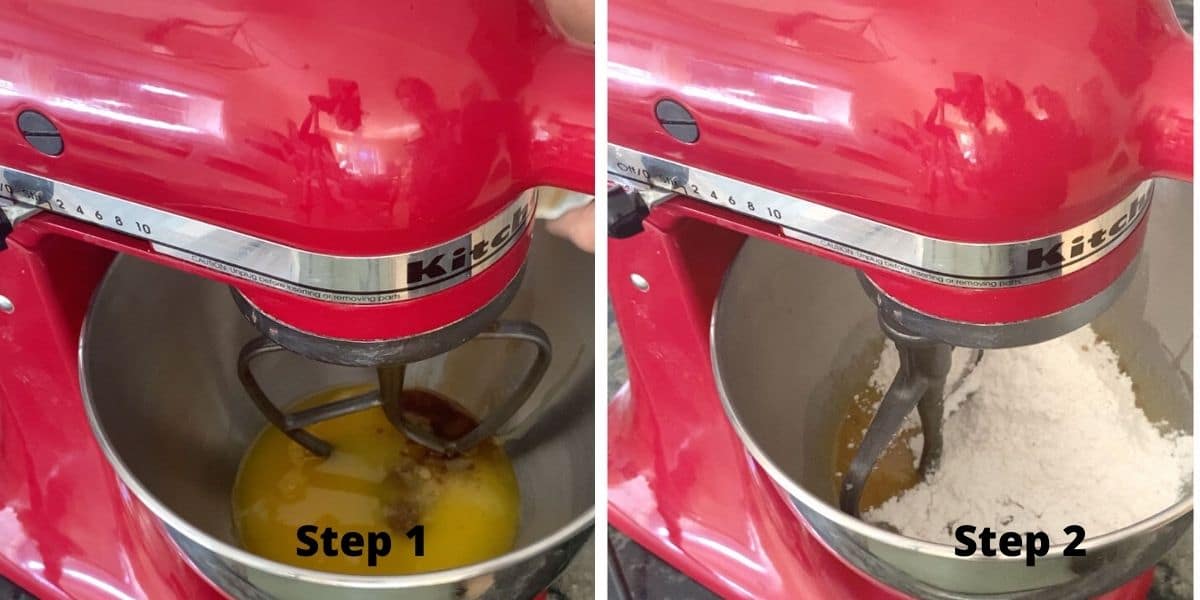
Step 1: Attach the paddle attachment to a standing mixer. Add the wet ingredients and blend at low speed. Increase the speed to medium for 15 seconds, then turn it off.
Step 2: Add your dry ingredients gradually flour blend, baking powder, xanthan gum (if needed). Scrape down the sides as you go. Sift the powdered sugar first to prevent lumps.
Email This Recipe To Me!
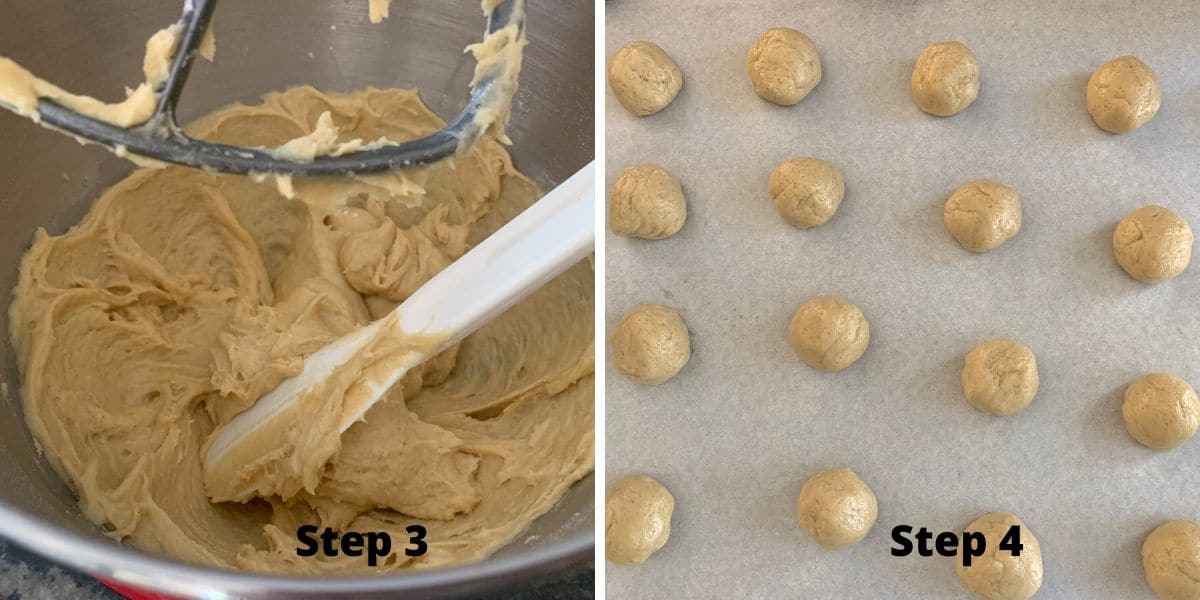
Step 3: The dough should be soft but not sticky. If it is too wet (especially with Pillsbury gf blend), rest it for 10 to 15 minutes or chill briefly. You can also pipe the dough if easier.
Step 4: Form little cookie balls. Take spoonfuls of cookie dough and roll them with your hands into little balls. You don’t need to chill the batter for this recipe. Place the dough balls onto a parchment paper-lined
Avoid PAM Baking Spray because it contains flour and is not gluten-free. You can also pipe the dough into balls on a macaron sheet and press the cookie dough down with your fingers if you prefer.
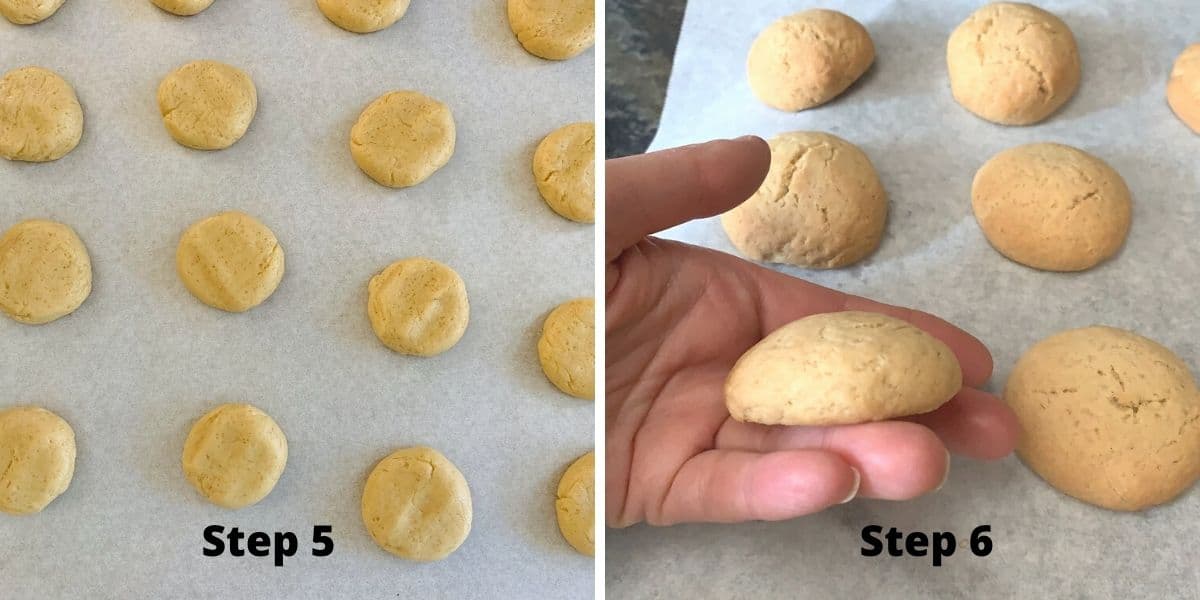
Step 5: Press each gluten-free nilla wafer down gently with your fingers to slightly flatten the cookies.
Step 6: Bake at 350ºF for 10 to 11 minutes, or until the edges are golden. Bake time may vary by flour blend and oven.
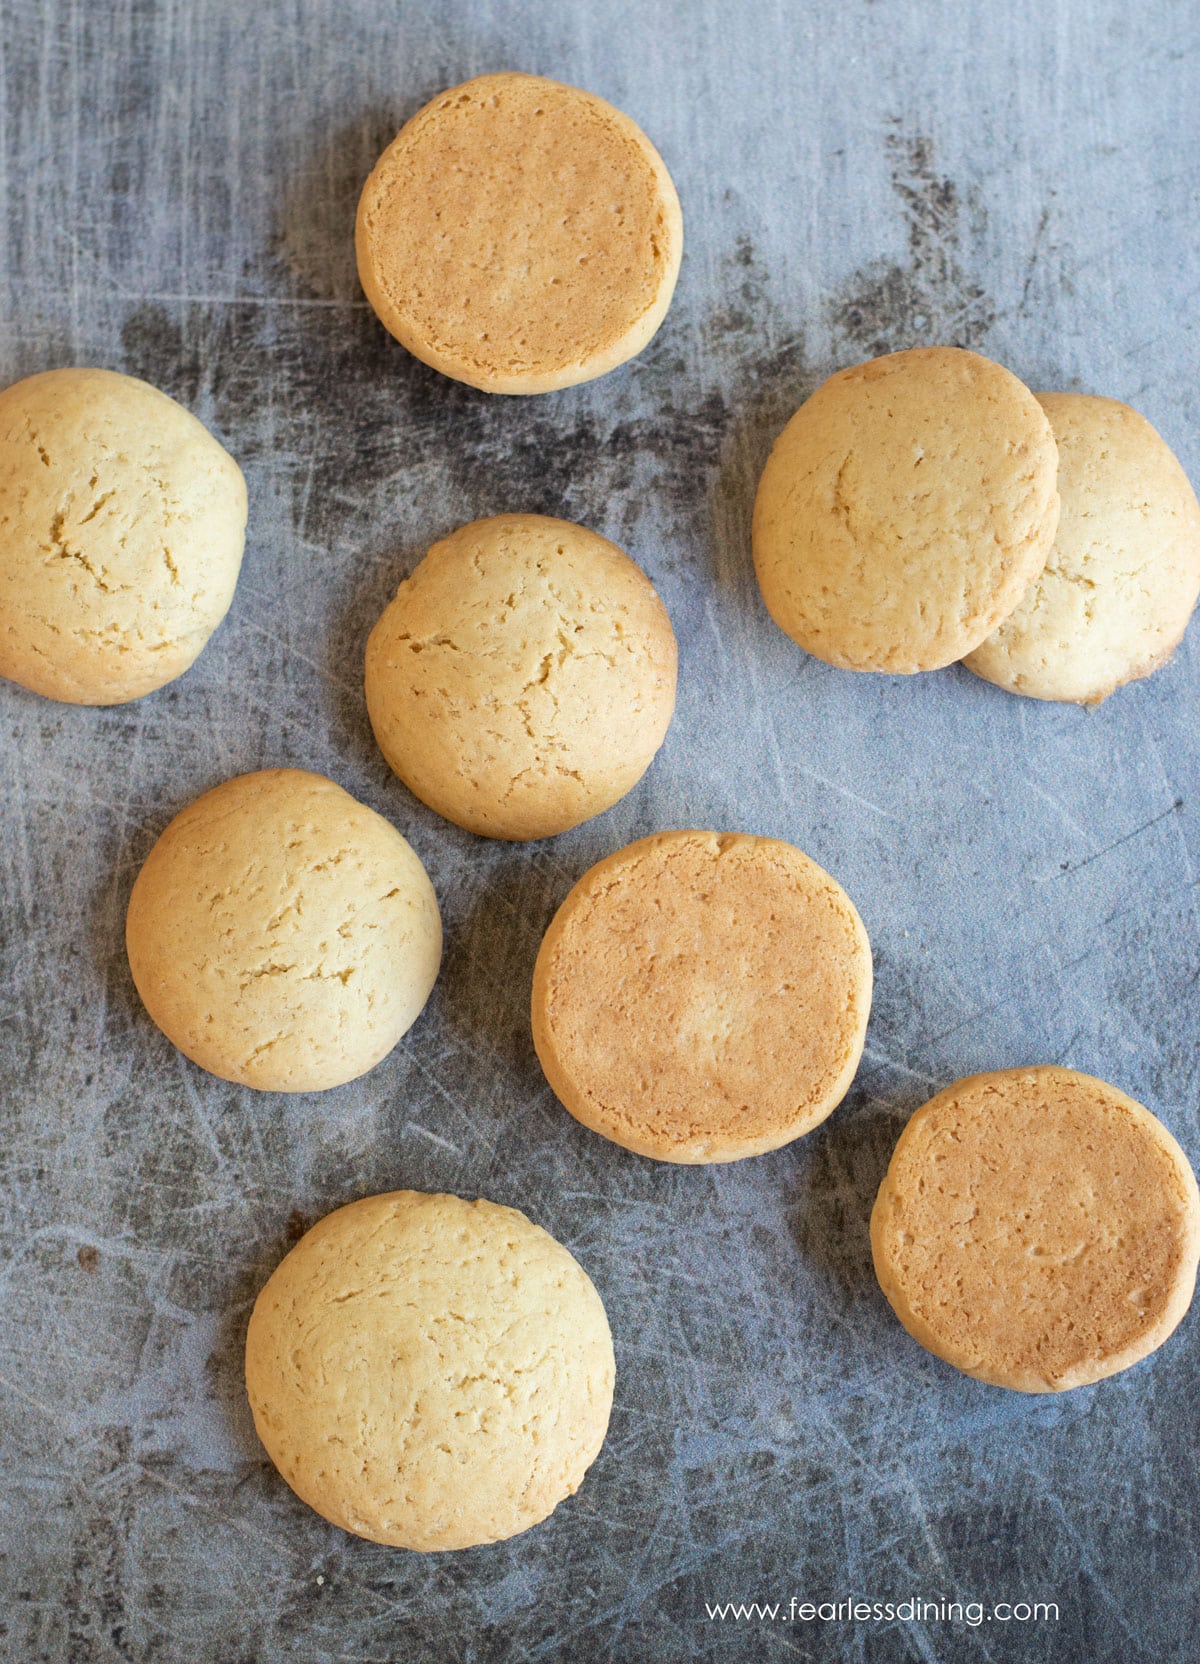
Step 7: Transfer the parchment to a wire rack. Cookies will crisp perfectly as they cool.
Storage and Freezing Instructions:
- Store cooled cookies in an airtight container for up to 2 days. Because gluten-free baked goods contain fewer preservatives, they can lose freshness quickly.
- I recommend freezing them in a large freezer bag if you are not eating or using them in the next day or two. To freeze the cookies, let them cool to room temperature, then place them into the freezer bag.
- Thaw on the counter or microwave them for 15 seconds.
Frequently Asked Questions and Troubleshooting:
Tapioca syrup or a mix of agave and gelatin both work well to maintain crispness.
Yes! These gluten-free vanilla wafers for banana pudding stay crisp and hold up beautifully.
The best way to ensure your cookies are the same size and look uniform is to use a cookie scoop. I really like my XOXO brand medium-sized cookie scoop. It is the only scoop I have used that has lasted a long time and hasn’t broken.
Let the dough rest 10 to 15 minutes before baking. This allows the rice flour to hydrate and soften, eliminating grit.
Try chilling the dough and adding 1 to 2 extra tablespoons of flour. Each blend absorbs moisture differently.
More Gluten-Free Cookie Recipes:
- Gluten-Free Shortbread – This shortbread has all of that famous buttery flavor!
- Gluten-Free Cardamom Sugar Cookies – These cookies are made for using cookie cutters!
- Gluten-Free Brookies Cookies – This is a great combo cookie if you can’t decide between brownies and cookies.
- Giant Gluten-Free M&M Cookies – For my M&M lovers.
- Homemade Gluten-Free Animal Cookies – These taste like the real deal, and you can also make them into circus cookies!
Love This Recipe?
💬 Did you make this gluten-free nilla wafer cookie recipe? I would love to hear how it turned out, and which pan or flour blend you used! Your feedback helps others (and helps me keep improving these recipes for you). ⭐⭐⭐⭐⭐
Homemade Gluten-Free Nilla Wafers (Copycat Recipe)
Ingredients
- ½ cup unsalted butter melted
- 1 large egg
- 2 tablespoons corn syrup
- 3 teaspoons pure vanilla extract
- 1 ½ cups gluten free flour blend * see note
- ½ cup powdered sugar
- ¼ cup cane sugar
- 1 teaspoon baking powder aluminum-free
- ⅛ teaspoon salt
Equipment
- parchement paper
Method
- Preheat the oven to 350º F. Use the bake and not convection bake setting.
- Add 1 1/2 cups gluten free flour blend, 1/2 cup powdered sugar, 1/4 cup cane sugar, 1 teaspoon baking powder, and1/8 teaspoon salt to a bowl and whisk to blend.
- In a standing mixer, add 1/2 cup unsalted butter (partially melted), 1 large egg, 2 tablespoons corn syrup, and 3 teaspoons pure vanilla extract. Mix on low speed and gradually increase the speed to medium. Whip for 15 seconds.
- Turn the mixer off and add the dry ingredients a cup at a time. Mix on low, turn it off and add more until you add in all of the dry ingredients.
- Use your hands to roll the cookie dough into small balls. Drop each onto a parchment paper-lined cookie sheet.
- Press each cookie down slightly.
- Bake 10 minutes until the cookies are golden.
- Remove the cookies from the oven and move them to a cooling rack. They will crisp up as they cool.
Nutrition
Notes
- I have tested this recipe with King Arthur Measure for Measure and Bob’s Red Mill 1 to 1. Reader tested: Pillsbury gf blend. Other blends will work, but you may need to add more flour if the cookie batter is too wet.
- If your gluten free flour blend does not contain xanthan gum or guar gum, please add 3/4 teaspoon.
- To make this recipe dairy-free, substitute the butter with vegan butter.
- These cookies will keep up to 2 days in an airtight container. I recommend freezing the cookies if you don’t eat them in a couple of days. Freeze room temperature cookies in a freezer-safe freezer bag.
Private Notes
Tried this recipe?
Let us know how it was!
This post was updated from an older May 2021 post with more recipe details.
I truly hope you enjoy this recipe. I have been testing and creating gluten-free recipes for over 15 years. Creating gluten-free recipes that do not taste gluten-free is my goal for every recipe. Sometimes I only have to test a new recipe a couple of times, and others it takes multiple times. I do this so you get reliable, delicious results every time!

So yummy! I made exactly as written using VitaCost gluten free flour blend. I didn’t change a thing beyond the flour I used. I have missed vanilla wafers so this was a real treat for me!
Now a word about corn syrup. We all know by now it is not good for us when consumed often or in large quantities. But once in a while, in a treat like this, it is not harmful at all. I never use corn syrup, but I bought a small bottle to make these cookies. This is not going to hurt me and it’s not going to hurt you. You can google it if you need more reassurance.
Thank you so much, Ella. I am so glad to hear VitaCost’s gf flour blend worked well. I haven’t experimented with that brand yet. Thank you again for your comment about corn syrup. It really is what gives these Nilla Wafers the right texture.
can we just omit the corn syrup?
Hi Jacqueline, I haven’t tested this recipe without corn syrup. It is what gives these the texture. I do have a couple of readers who used honey as a swap, maybe try this?
Will it still work out without the corn syrup?
Hi Meghan, The corn syrup is what gives these the right texture. The recipe will work, but you will need to replace it with something to keep the wet to dry ingredient ratio the same and I haven’t tested alternatives.
The nillas look yummy, but the sugar content is too high for me. Can I use maple syrup or honey instead of the sugar?
Hi Loretta, Swapping a wet sweetener for sugar will change the consistency and I haven’t tested how this would turn out.
First try, taste great, this recipe is a keeper
I am so glad you loved these. Thank you so much for coming back to let me know.
egg replacement?
Hi Merry, I haven’t tested an egg replacement in this recipe. I would try the Bob’s Egg Replacer since it doesn’t have any flavor. If you try this, please let me know how it turns out.
I used Bob’s egg replacer in the molasses cooky recipe and it worked great! should be OK in this recipe.
Hi Louise, I haven’t tested it, but if it worked in other cookie recipes of mine, it is worth trying! Thank you.
Made these using Pillsbury’s gluten free flour. The dough was wetter than what’s pictured, so I piped it, and they took longer to cook, but they were fabulous! They were absolutely perfect in dairy free banana pudding – they didn’t get mushy even after a couple of days. Thank you so much for the recipe! I’m about to go make some more!!
That is interesting the dough was wetter. I haven’t tested that flour in this recipe. I am guessing you can add a little more flour, or continue as you are since they turned out delicious for you.
Don’t have corn syrup.can I use honey?
Hi Lucy, I haven’t tested honey. The corn syrup makes the cookies a bit more crisp but I do not know if honey would do the same?
Being allergic to wheat (&cinnamon & Lactose intolerant) I’m now having to watch my Sugar & Carbs ( hopefully my Swerve Powdered Sugar will work ) ??? 🤗
I haven’t tested any of my recipes with Swerve so I am not sure how to advise you. If you try it, please come back and let us know how it turned out.