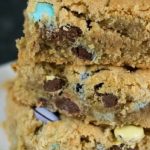
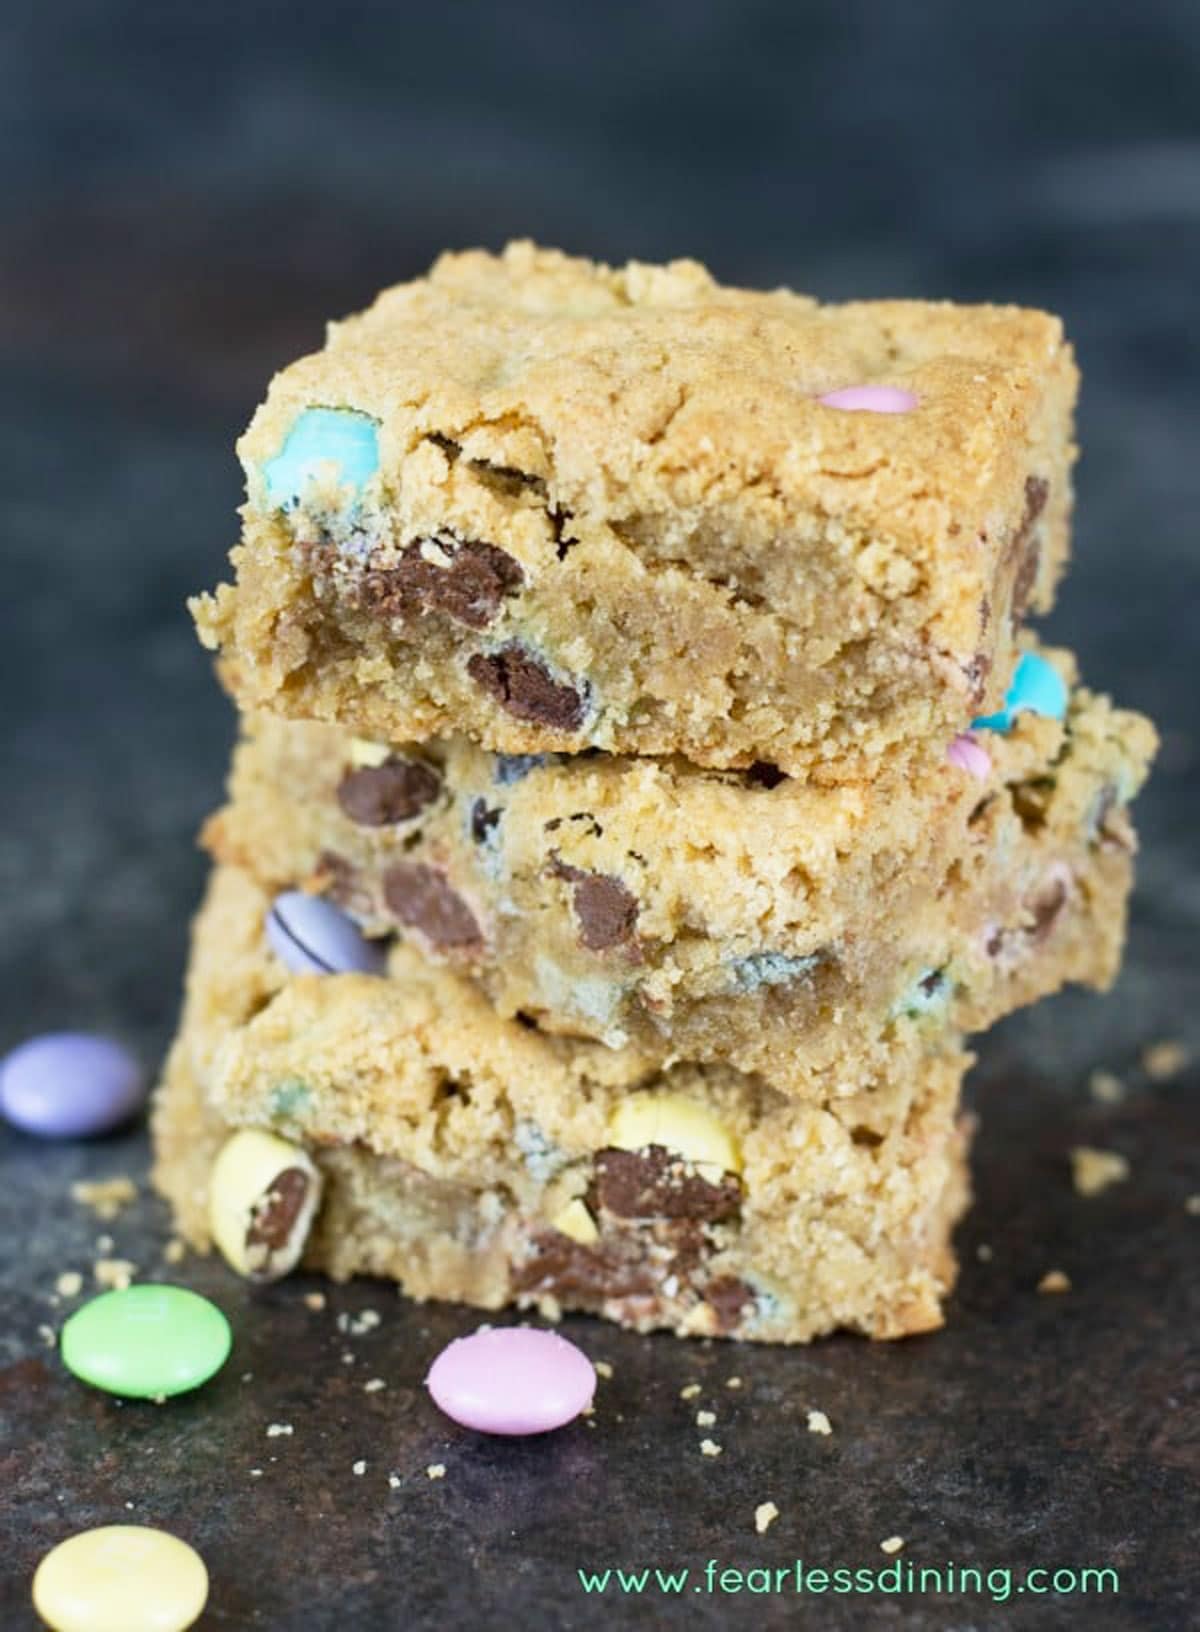
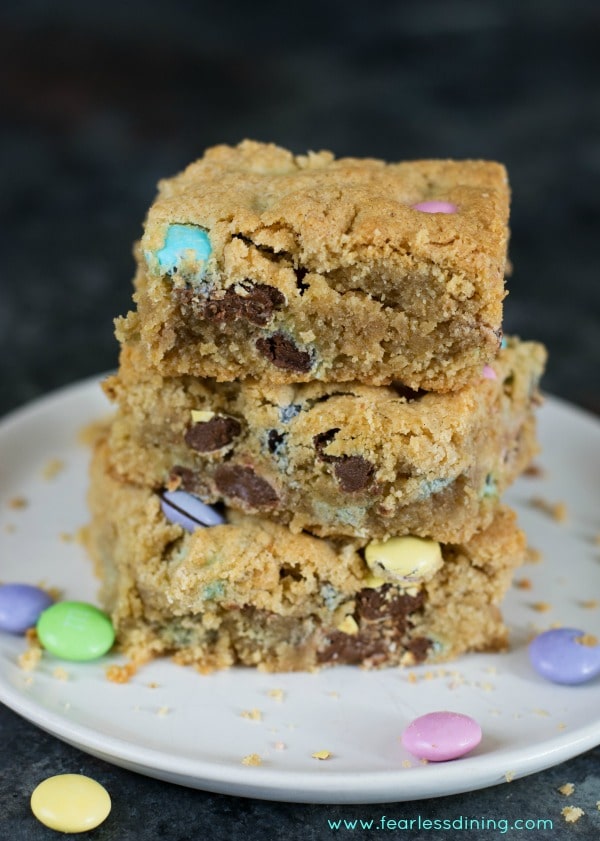
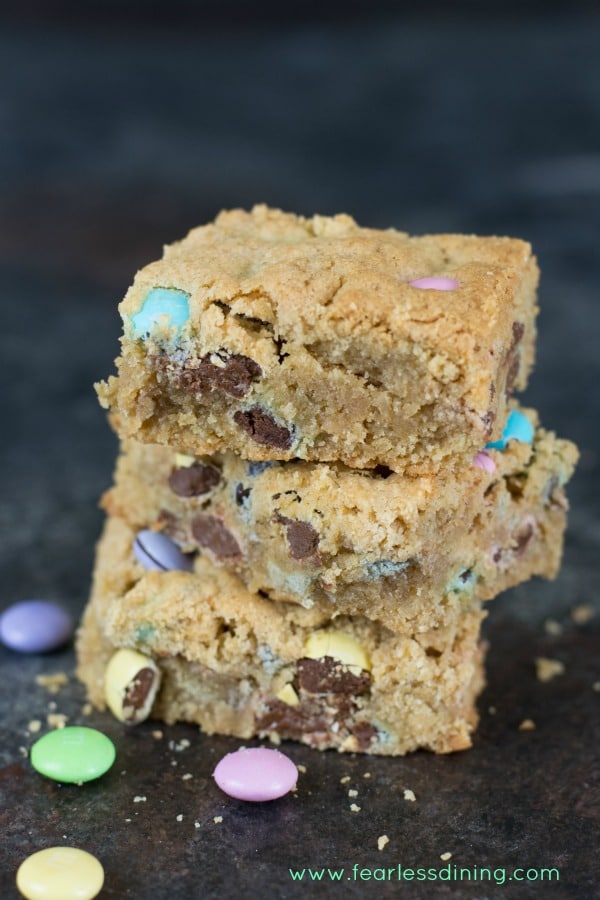
These gluten free peanut butter cookie bars have soft centers, slightly chewy edges, and a fudgy peanut butter texture. They are made with simple pantry ingredients and bake in an 8×8 pan in under 30 minutes. A tried and true recipe that is always a hit for any occasion.
This post may contain affiliate links. Please read our Disclosure Policy.
❤️ Sandi’s Recipe Summary
The Quick Bite: These gluten free peanut butter cookie bars are rich, chewy, and full of peanut butter flavor with chocolate in every bite. They bake in an 8×8 pan in under 30 minutes and are easy enough for beginner bakers. Perfect for bake sales, potlucks, or a quick family dessert.
If I had to choose one recipe to make repeatedly, this would be it. These peanut butter bars are easy to make and definitely satisfy my husband’s love of peanut butter. This is a beginner friendly recipe you can make in an 8×8 metal baking dish or in a 10 inch cast iron pan.
When creating this recipe, I included almond flour because it adds moisture and prevents dryness. Melting butter and the peanut butter together creates a delicious chewy texture.
If you love cookies as much as we do, try some of these gluten free cookie recipes! If your family loves peanut butter, you will want to try these, too. They are seriously the BEST Gluten Free Peanut Butter Cookies!
Love making your recipes! If you follow all the easy instructions the recipe turns out perfect every time. These bars are super delicious, I mean how can you go wrong with the peanut butter and chocolate combination!”
debbie, blog comment
Ingredient Notes:
For the full list of ingredients and amounts, please go to the recipe card below.
- Gluten Free Flour Blend – I tested this recipe using King Arthur Measure for Measure and Bob’s Red Mill 1:1. I really like the cookie texture from both. That doesn’t mean others will not work; I have not tested other flours. Note with Bob’s, you may need an extra tablespoon flour to make the cookies the right consistency. Every gluten free flour blend is different and absorbs liquid differently. Read Why Gluten Free Flour Blends Vary to learn more.
- Binder – If your gluten free flour blend doesn’t contain xanthan gum or guar gum, please add 1 teaspoon. Read Why Binders Are Important In Gluten Free Baking to learn more.
- Almond Flour – I recommend using almond flour and not almond meal. Almond meal is coarser and will make your cookie bars grainy. I like to use Anthony’s brand of almond flour best because they test it to verify it is gluten free. See the FAQ for a nut-free swap.
- Baking Powder – Use aluminum-free baking powder.
- Brown Sugar – You can use either dark or light brown sugar.
- Eggs – Use large eggs.
- Butter – I recommend using unsalted butter.
- Peanut Butter – Use creamy unsalted or crunchy if you like more texture. It is important to use blended peanut butter and not natural. Natural peanut butter is too oily and it makes these bars really crumbly.
- M&Ms – For my recipe, I used M&Ms. Feel free to use dark chocolate chips, milk chocolate chips, or even bittersweet chocolate chunks.
How to Make Gluten Free Peanut Butter Cookie Bars (Step-By-Step)
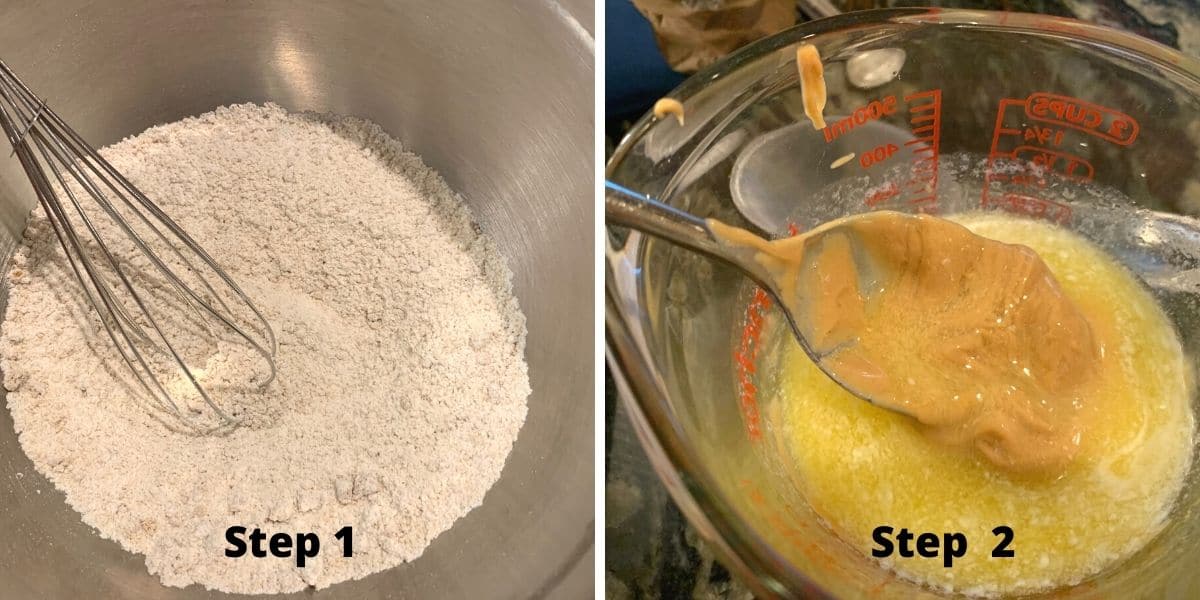
Step 1: Mix all of the dry ingredients in a bowl. (I like to use a whisk to ensure they are all blended.)
Step 2: Mix all wet ingredients in a microwave-safe bowl. (Melt my butter so the peanut butter blends a lot easier.)
👀 Sandi Says: If you prefer, you can use a stand mixer to mix your cookie dough.
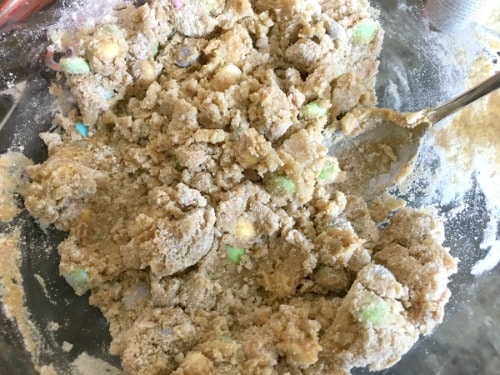
Step 3: Pour the wet ingredients into the dry ingredients. Add the mix-ins and mix well.
Email This Recipe To Me!
Top Tip: Every gluten-free flour blend has a different starch-to-grain ratio. The brand of gluten-free flour you use will affect the moisture of the batter. If your cake batter is too runny, add more flour, and if it is too thick, add more liquid.
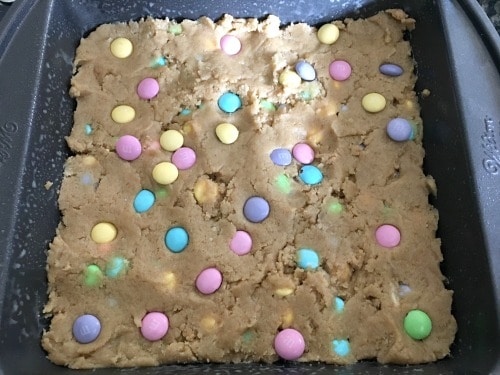
Step 4: Spread the peanut butter cookie batter into an 8×8 pan. You can use spray oil or line the pan with parchment paper.
Gluten free flour can be gritty due to rice flour in the blend. I recommend letting the cookie dough sit in the pan for 15 minutes to soften the rice flour. It makes a huge difference!
Step 5: Bake at 350ºF for 20 to 24 minutes until done. The actual baking time will depend on the size of the pan you use.
To test for doneness, insert a toothpick into the center of the bars. If the toothpick comes out clean, the cookies are done baking. If you see batter or crumbs, the cookies need to be baked longer.
Tips For Success
1. Ensure the oven rack is set to the middle position in the oven so your cookie bars bake evenly.
2. I recommend warming the butter and peanut butter together. This will help soften the peanut butter so it mixes easily into the cookie batter.
3. Use the right Cookie Baking Equipment so that your cookies turn out consistently.
4. Read my Gluten Free Cookie Troubleshooting Guide for more tips.
Frequently Asked Questions:
Surprisingly, yes, you can make this recipe nut-free. I used peanut butter to make these cookies. You can use Sun Butter if you are allergic to peanuts. Also, you can add 1/4 cup of additional gluten free flour to the recipe.
You can easily make this recipe dairy-free by using vegan butter.
These cookies will keep fresh for up to 4 days in an airtight container.
Cut out the cookie bars and gently place them into freezer bags. Lay them out in rows; do not stack them on each other.
More Gluten Free Cookie Bar Recipes:
You may also love this Gluten Free Peanut Butter Cookie Cake recipe. Check out all of my cookie recipes in this Gluten-Free Cookie Guide. Mr. Fearless Dining wants me to tell you that if you love peanut butter, you MUST check out these Gluten Free Peanut Butter Cinnamon Rolls!
- Gluten Free Cookie Cake
- Gluten Free Magic Bars
- Gluten Free Apricot Jam Bars
- Gluten Free Cranberry Shortbread Bars
Love This Recipe?
If you made and enjoyed this recipe, I would be incredibly grateful if you could leave a comment below. Please include which flour blend you used. This will help others know this recipe is delicious. Thank you!
Easy Gluten Free Peanut Butter Cookie Bars
Ingredients
- 1 ¼ cup gluten free flour blend * see note
- ½ cup almond flour * see note
- 1 cup brown sugar
- ¾ cup unsalted butter
- ½ cup peanut butter * see note
- 1 large egg
- 1 teaspoon baking powder aluminum-free
- ⅛ teaspoon salt
- 1 teaspoon pure vanilla extract
- ½ cup M&Ms or chocolate chips
Equipment
Method
- Preheat the oven to 350º F.
- In a large mixing bowl, combine 1 1/4 cup gluten free flour blend, 1/2 cup almond flour, 1 cup brown sugar, 1 teaspoon baking powder, 1/8 teaspoon salt, and whisk to blend.
- In a medium-sized bowl, partially melt 3/4 cup unsalted butter and 1/2 cup peanut butter. Stir in the peanut butter and whisk. Add 1 teaspoon pure vanilla extract and 1 large egg. Whisk until the mixture is creamy.
- Pour the wet ingredients into the dry ingredients. Add 1/2 cup M&Ms or chocolate chips or chocolate chips and mix well into a soft cookie dough.
- Use gluten free baking spray to grease an 8×8 baking pan.
- Pour the cookie dough into the pan and spread the cookie dough in the pan so it is flat.
- Bake the cookie bars for 22-24 minutes until done. The baking time can vary slightly depending on the material your pan is made of. The bars are done when the edges are golden and the middle is soft but not doughy.
- Remove the cookie bars from the oven and place the pan to a cooling rack. Allow them to cool and slice into bars.
Nutrition
Notes
- I have tested this recipe with King Arthur Measure for Measure and Bob’s Red Mill 1 to 1. That doesn’t mean others will not work; I just have not tested other flours. My rule of thumb is if your batter or dough is too runny, add more flour, and if it is too thick, add more liquids.
- If your gluten free flour blend doesn’t contain xanthan gum or guar gum, please add 3/4 teaspoon.
- To make this recipe dairy-free, substitute the butter with vegan butter.
- Do not use natural peanut butter. The oils in this type of peanut butter affect the texture of the cookie dough, making it a bit oily. If you like a more natural peanut butter, use Skippy Naturals.
- I highly recommend using almond flour rather than almond meal. Almond meal is coarser and will make your cookie bars grainy.
- Store leftover cookie bars in an airtight container. They will keep fresh for up to 4 days. You can also freeze the bars in a freezer-safe container or zipper bag.
Private Notes
Tried this recipe?
Let us know how it was!
This post was updated from an older June 2018 post with more recipe details.
I truly hope you enjoy this recipe. I have been testing and creating gluten-free recipes for over 15 years. Creating gluten-free recipes that do not taste gluten-free is my goal for every recipe. Sometimes I only have to test a new recipe a couple of times, and others it takes multiple times. I do this so you get reliable, delicious results every time!
