This gluten free chicken spaghetti is cooked to perfection in one pot! It makes a delicious, easy meal! If you are looking for a new family-friendly dinner recipe to make on a busy weeknight, try this one-pot gluten-free chicken spaghetti recipe!
This post may contain affiliate links. Please read our Disclosure Policy.
I am always trying to create easy recipes for the weeknights. If you are like us, the weekdays are crazy and busy, and it is hard to get a nutritious meal on the table. You will love this new gluten free chicken spaghetti recipe because you can make it in about 20 minutes.
This recipe was adapted from a NY Times Chicken Spaghetti recipe. I wanted to see how it fared using gluten free spaghetti. Honestly, it was not great. I think this is due to the starch of all the gluten-free pasta. I reworked the recipe, so be sure to read all of the tweaks to get the incredible flavors.
If you love quick and easy gluten free dinner recipes, this Gluten-Free Beef Stroganoff can be made in under 30 minutes! This Chicken Mexican Rice meal is another great recipe to try. Looking for more dinner ideas? Check out my gluten-free chicken dinners, many of which work great in the air fryer!
Why I love this easy gluten free chicken spaghetti recipe:
- All you need is one pot, making cleanup easy!
- This recipe is quick to make and works well on busy school nights.
- This recipe has a rich Italian flavor.
- You can use any gluten free pasta to make this recipe. You can still make this if you don’t have gluten-free spaghetti!
- As I mentioned above, it takes under 30 minutes to make this chicken pasta meal.
- You may also love this One Pot Italian GF Pasta Recipe.
Allergen Information:
This easy chicken spaghetti recipe is gluten-free, egg-free, soy-free, nut-free, and oat-free.
Ingredient Notes:
For the full list of ingredients and amounts, please go to the recipe card below.
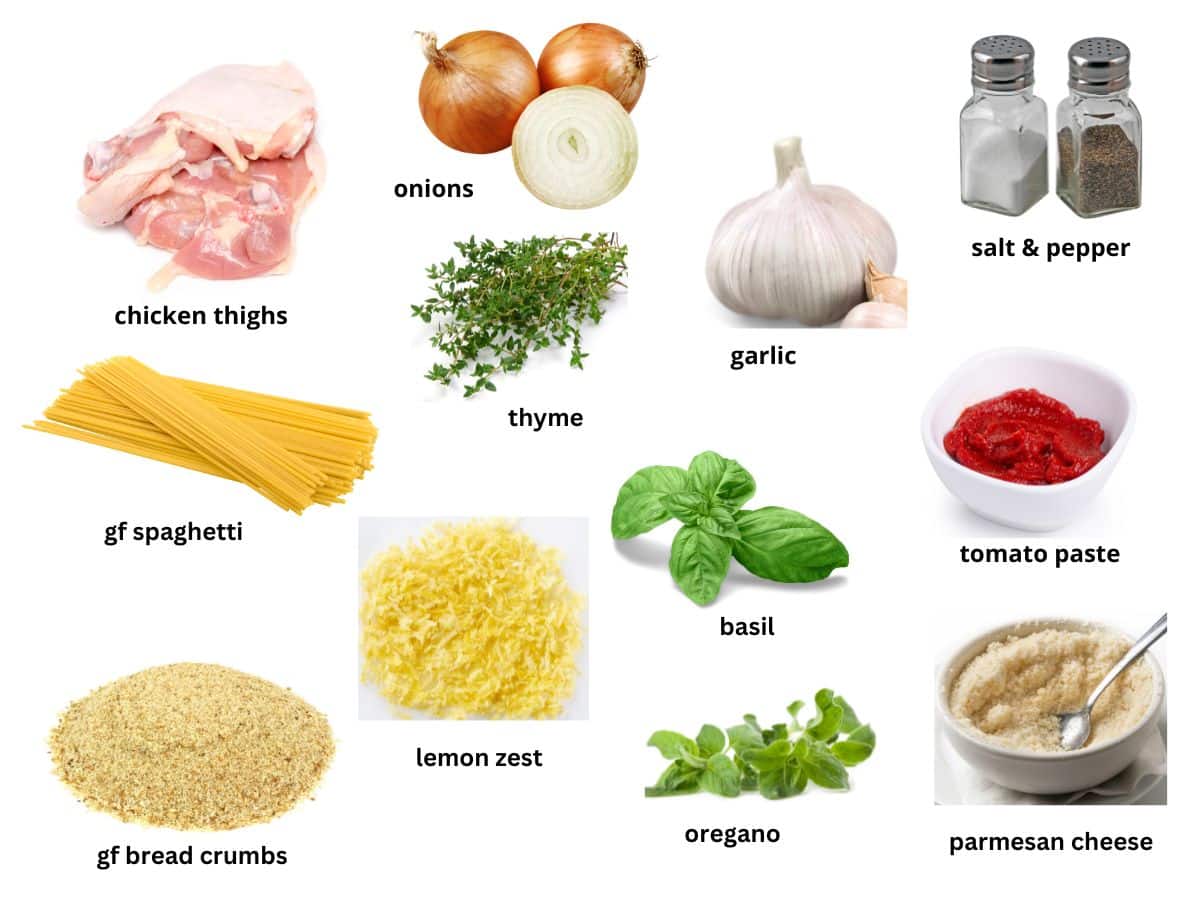
- Chicken – The NYT recipe says to use skin-on boneless chicken thighs. I can’t find anything boneless with the skin on. I couldn’t find chicken thighs with bones either this week, so I varied the recipe to use chicken tenders. I will specify directions using both in the recipe because they will differ.
- Gluten Free Spaghetti or Pasta – I like using Jovial, the brand I tested when creating this recipe. Any brand should work, but keep an eye on the cooking time listed on the box.
- Tomato Paste – The original NYT recipe calls for just tomato paste, but the flavor gets muted because of the gluten-free pasta starch. I still include tomato paste, but I change the quantity from the NYT recipe to use a whole can because it makes the flavors stand out more.
- Garlic – I recommend fresh garlic, but jarred garlic is also okay.
- Basil, Oregano, Parsley, and Thyme – The original recipe calls for just thyme, but I really think this recipe needs the extra flavor of basil and oregano. I am unsure if it is because of the starches…but use fresh or dried herbs.
- Parmesan Cheese – Use parmesan or a three-cheese blend.
- Bread Crumbs or Panko – You can find gluten free bread crumbs and panko at most grocery stores. You can also make homemade Gluten-Free Bread Crumbs. Do a coarser grind for a gluten free panko texture.
- Oil – Use any light cooking oil.
- Onion – I used yellow onions, but sweet Hawaiian onions will also taste very good in this recipe.
- Lemon Zest – I wasn’t sure about this recipe, but it gave the crispy topping great flavor!
Step-By-Step Photos and Directions
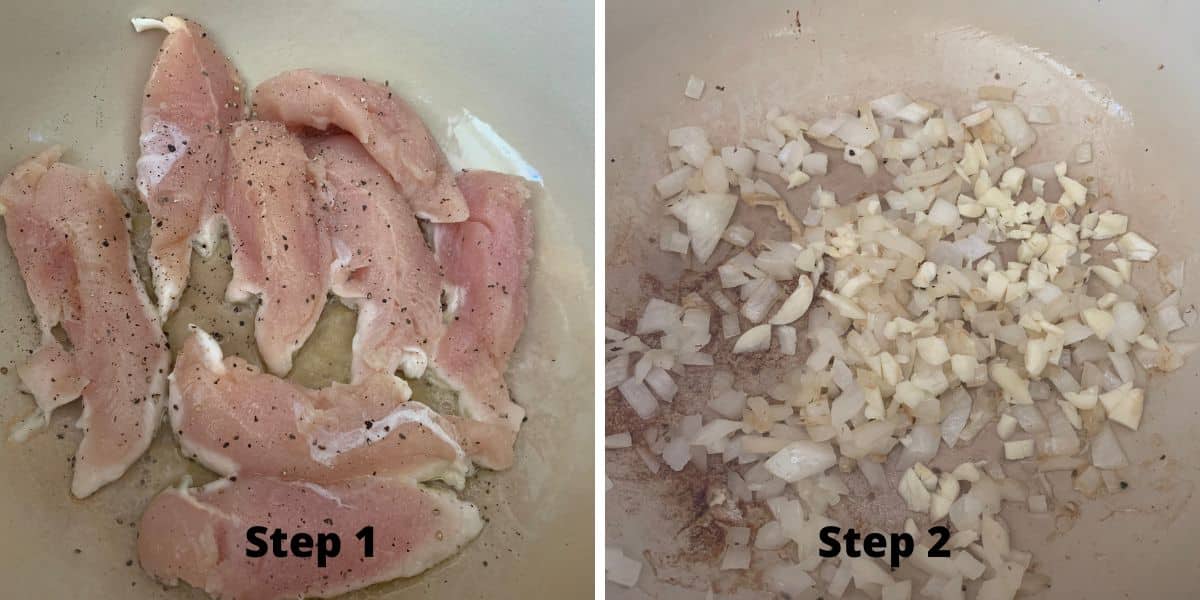
Step 1: With Boneless, Skinless Chicken—If you are using boneless, skinless chicken, you need to cook it and then remove it and set it aside. If you cook the chicken with the pasta, it will get tough and dry from overcooking.
Step 1: With Skin On, Boneless, or Bone-In Chicken – If you use chicken with the skin on, heat a Dutch oven on high heat with oil. Place the chicken skin side down and cook until the skin looks crisp about 5 minutes.
Step 2: Remove the chicken and set it aside in a bowl. Turn the heat down to medium and add the onion to the pan. Cook until the onion starts to become translucent. Add the garlic. Stir and cook for two minutes.

Step 3: Sorry I didn’t snap a photo before adding the dry spaghetti. Add the can of tomato paste, salt, pepper, and herbs to the onion and garlic. Top with gluten free spaghetti. Be sure you break the spaghetti in half.
Pour the boiling water over the spaghetti and toss to coat. Cover the pot and reduce the stove temperature to simmer. *If you are using chicken with skin, place the chicken in the pot, skin side up, on top of the spaghetti. Cook the chicken with the spaghetti. (don’t do this if you are using tenders!)
🔑 Sandi says: After 5 minutes of cooking, you must use tongs or a large fork to break up the gluten-free spaghetti. Gluten free spaghetti is notorious for sticking together, so you must break it up. If you don’t, you will have clumps of gluten free spaghetti all stuck together under the chicken.

Email This Recipe To Me!
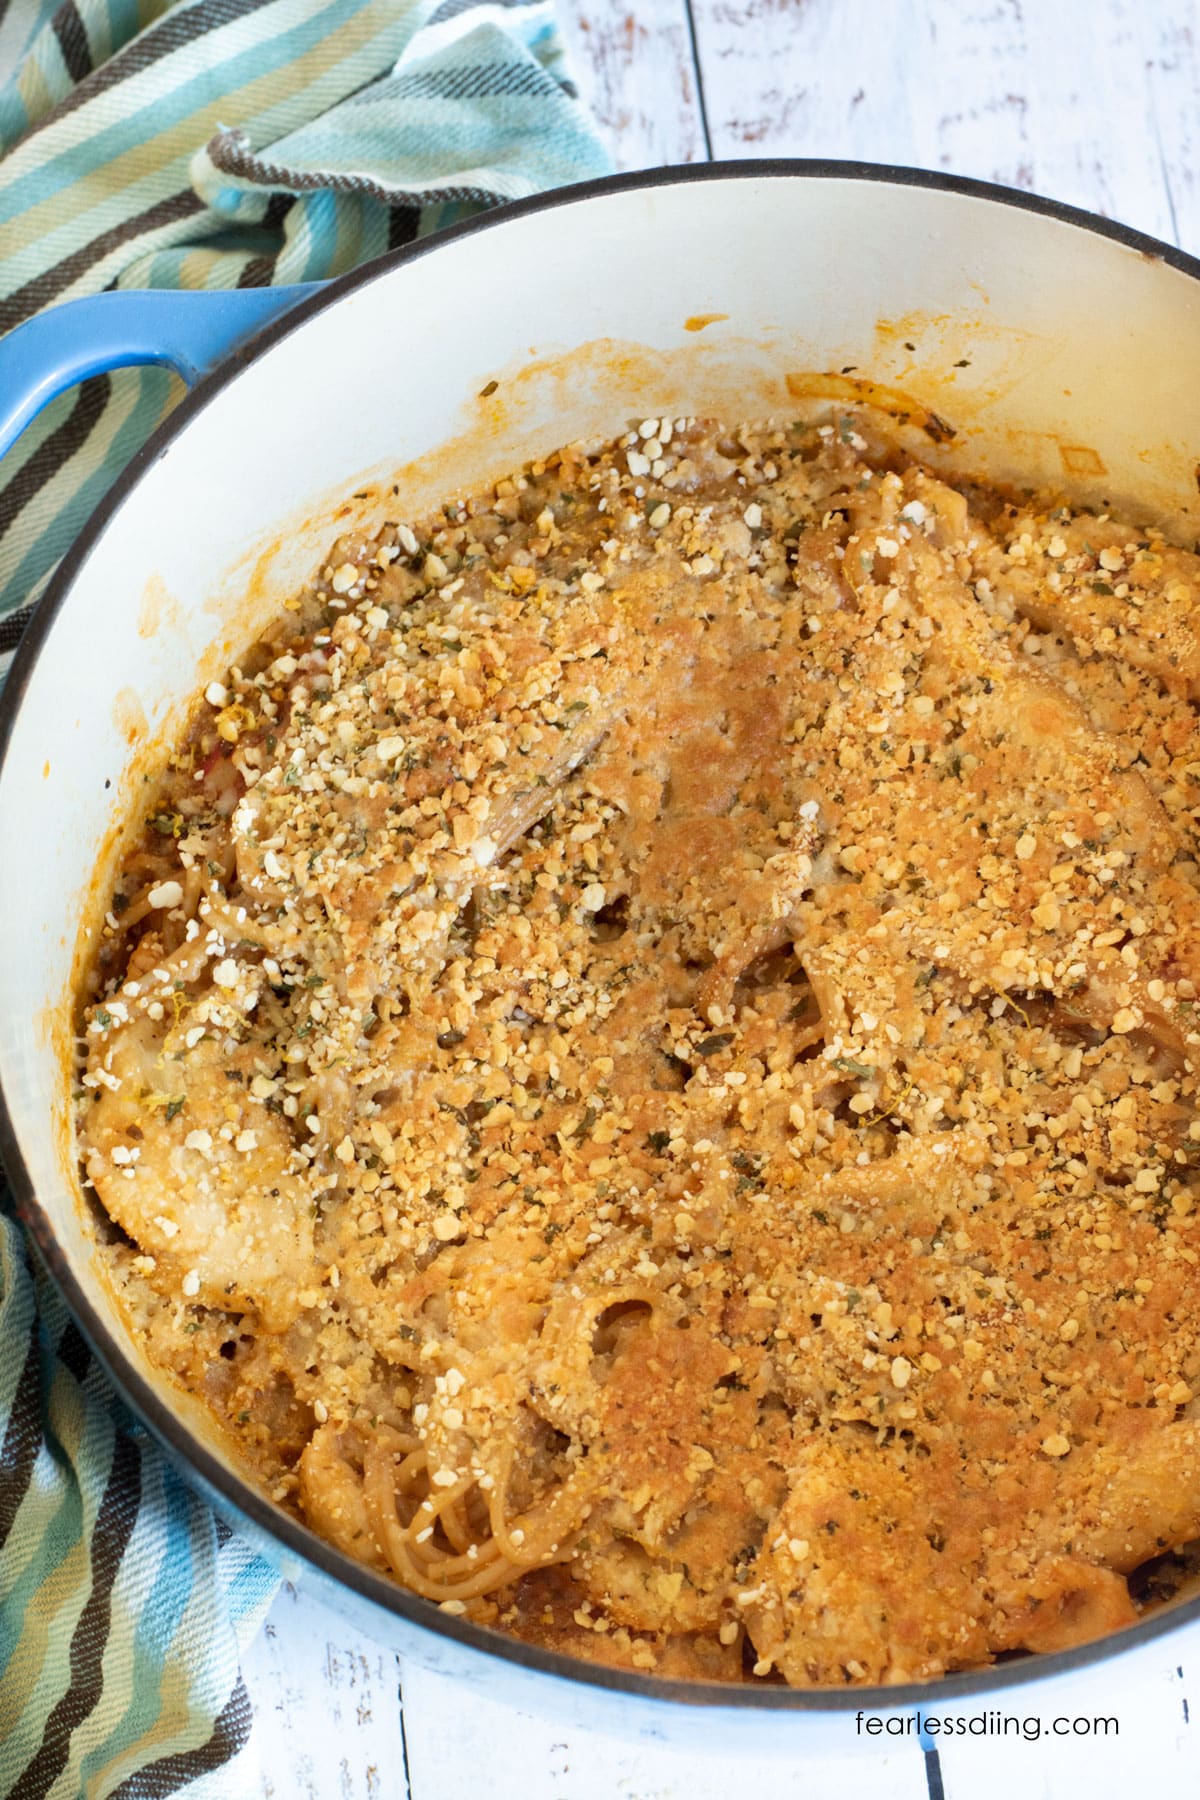
Step 4: In a small bowl, combine the gluten free bread crumbs, parmesan, parsley, and lemon zest. Mix well.
Step 5: Remove the pot cover, and if you were using no skin, boneless chicken, Place the chicken on top of the spaghetti. Next, sprinkle the crispy coating on top of the spaghetti and chicken.
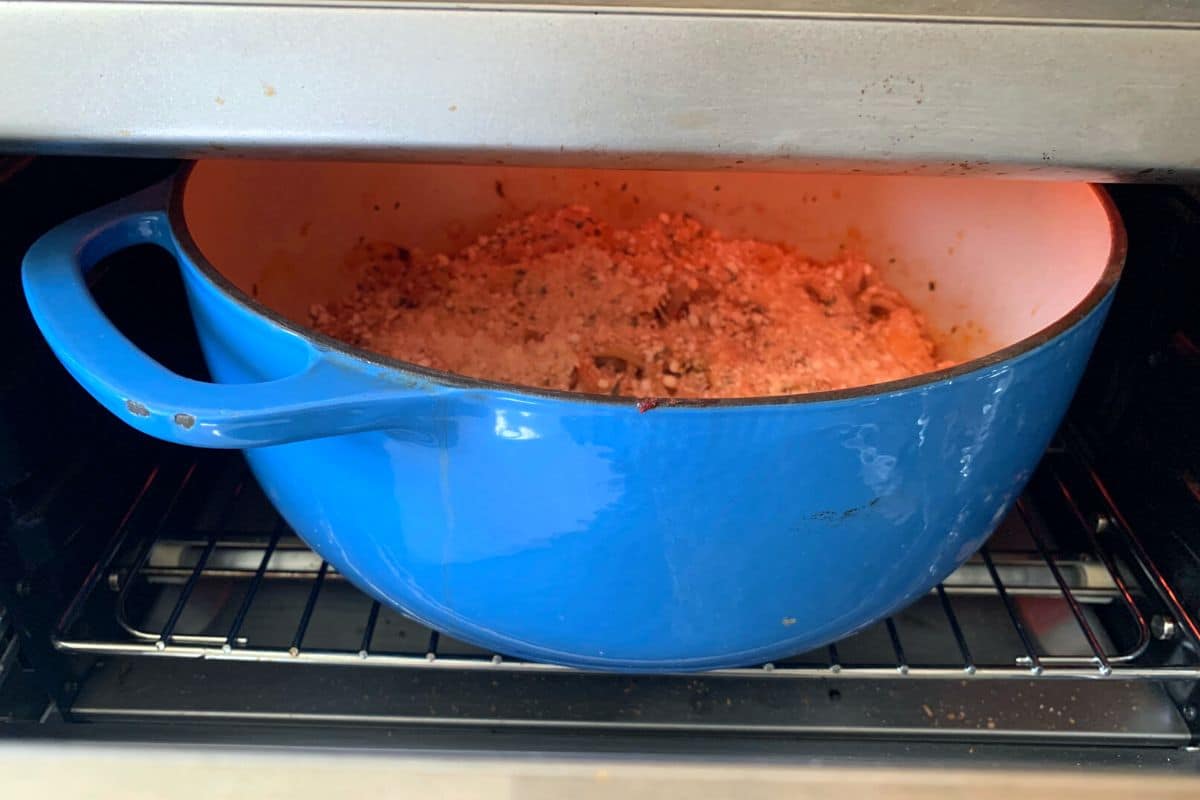
Step 6: Place the pot with the chicken pasta under the broiler for 5 minutes to crisp the coating on top of the spaghetti.
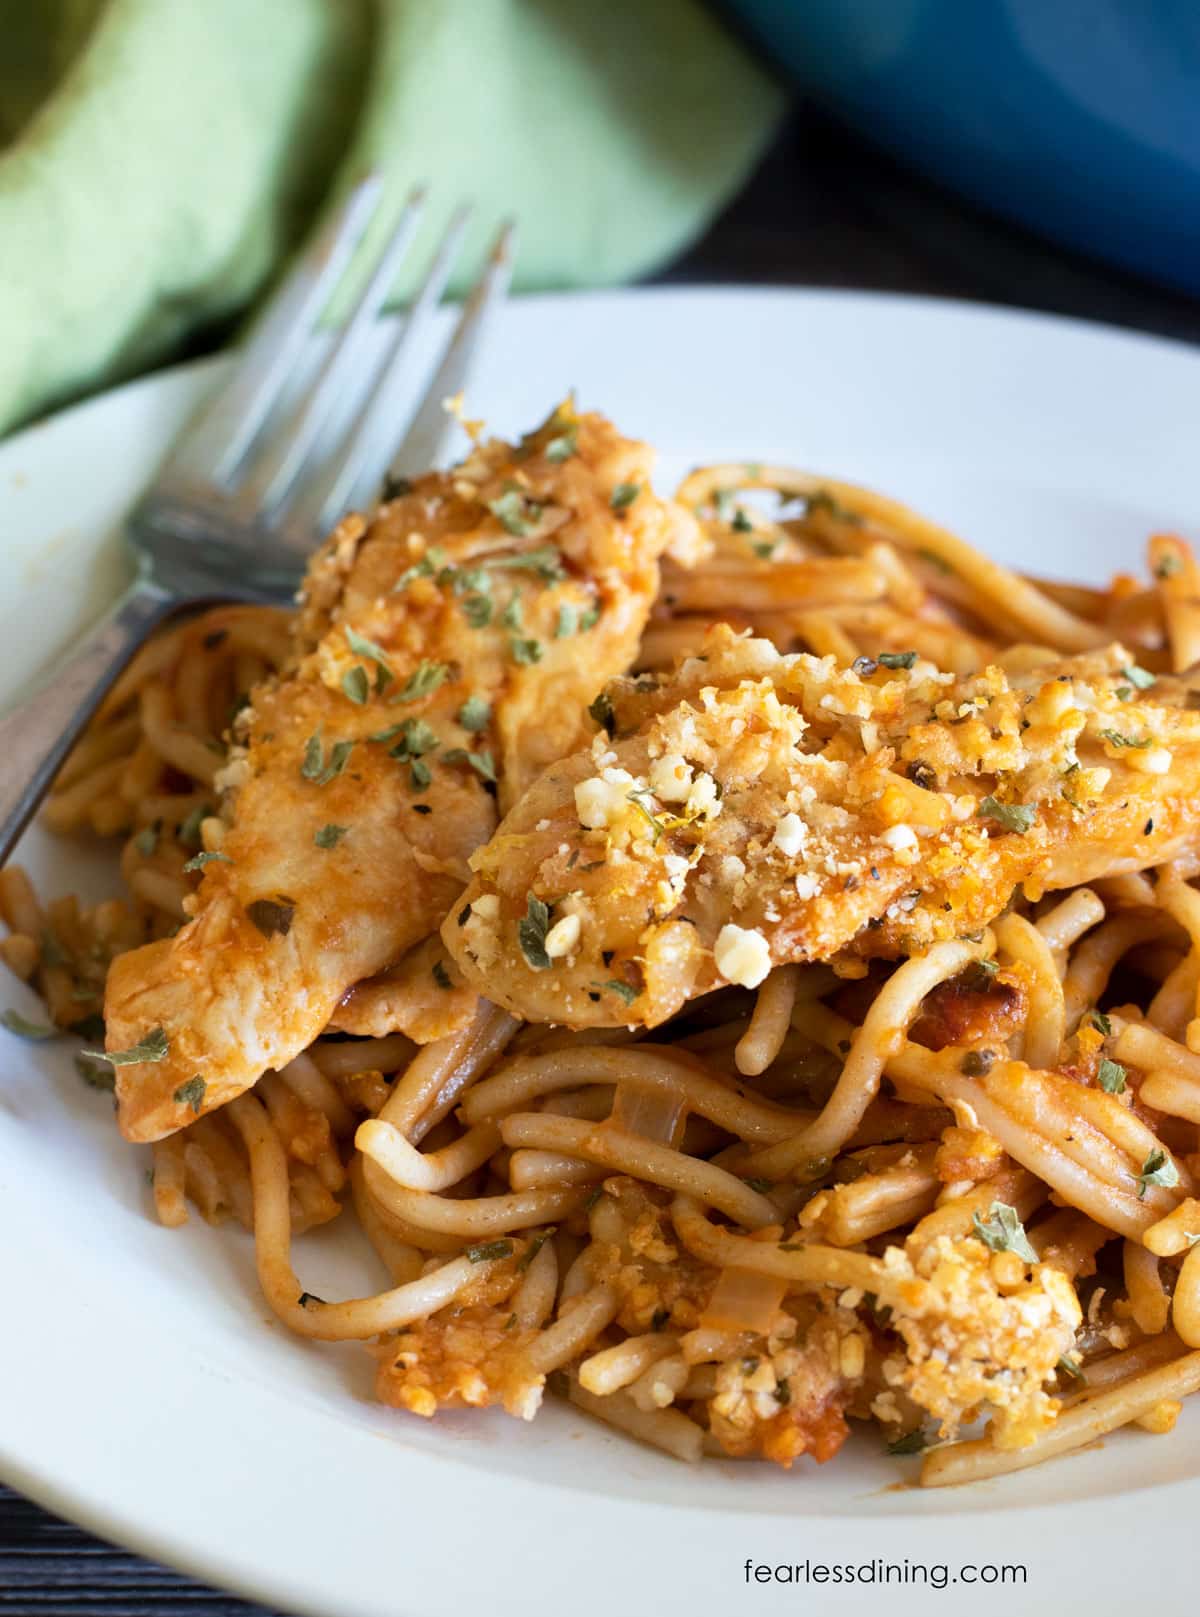
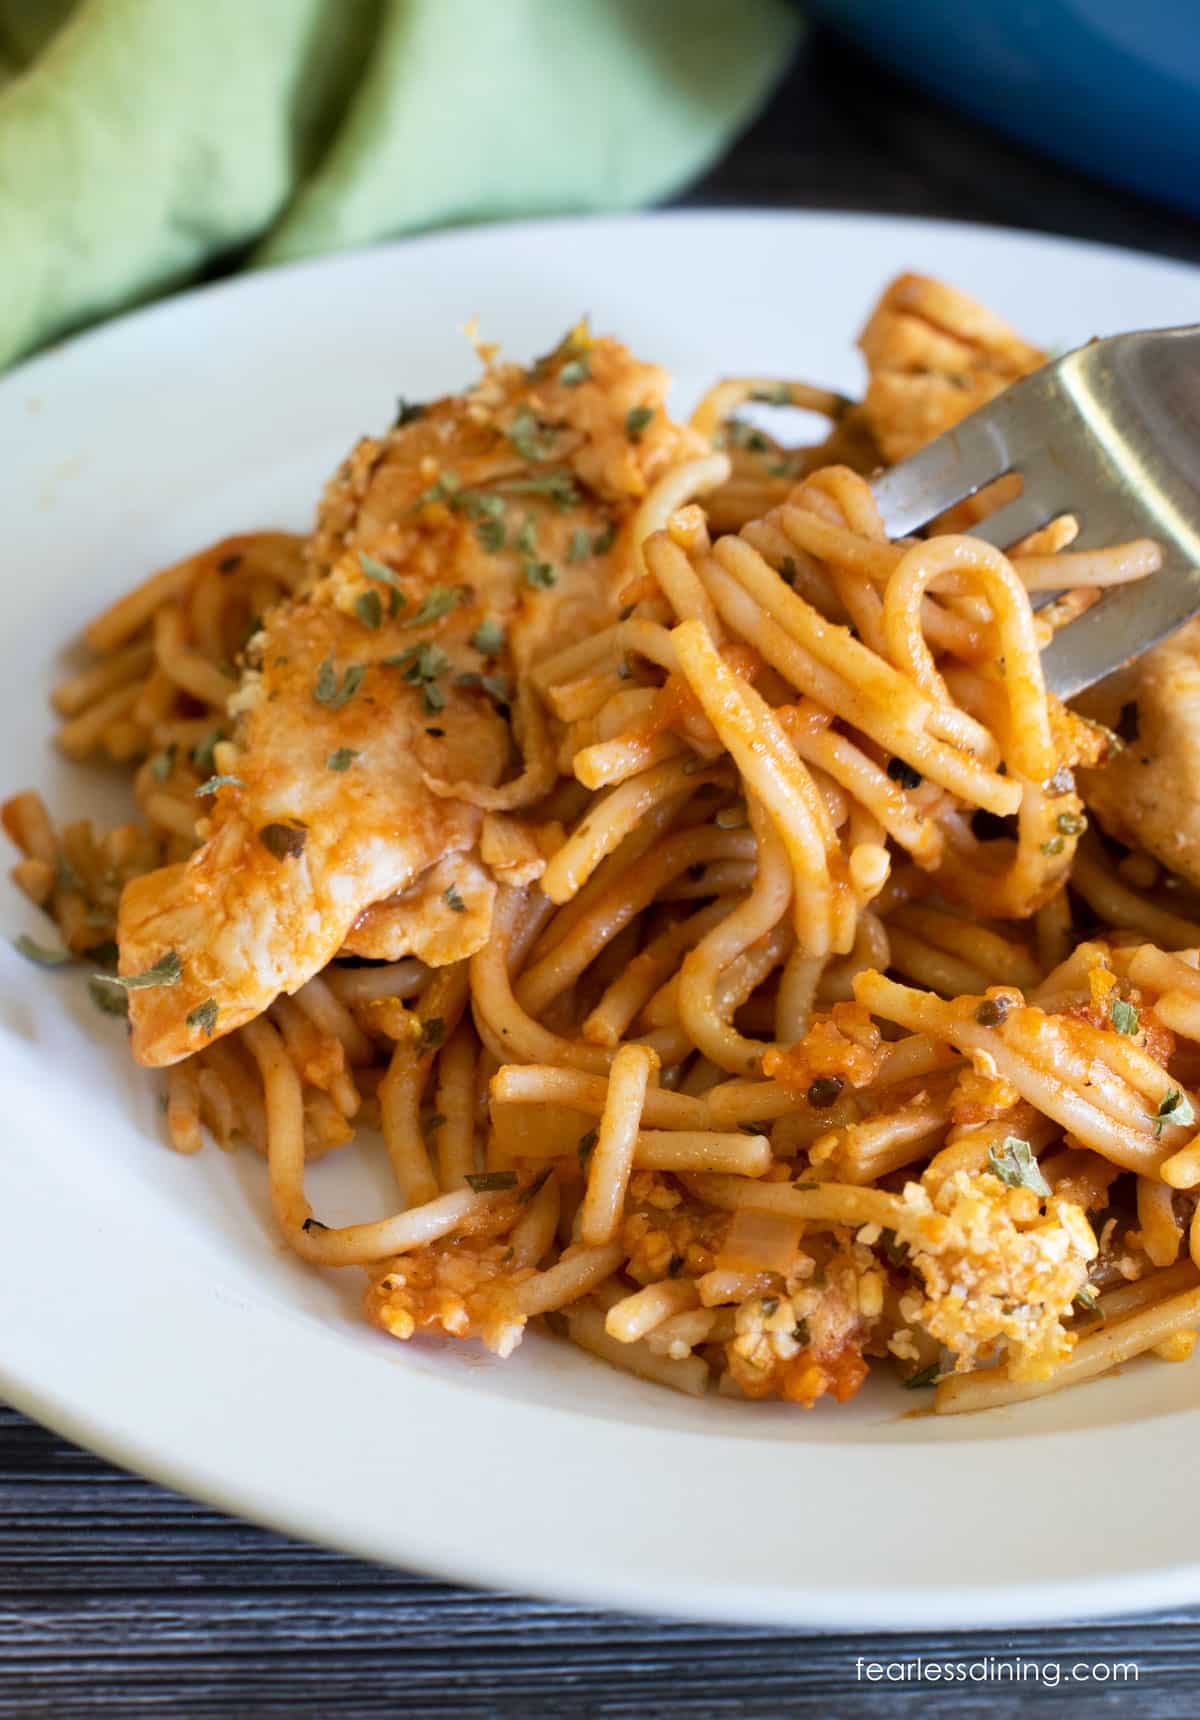
Serve this gluten free spaghetti chicken recipe hot with my Gluten Free Garlic Knots or my crispy Gluten Free Breadsticks!
Tips For Success
1. When you add the spaghetti to the pan, use a fork to really make sure it is separated. This will help prevent clumps of pasta.
2. If you like your pasta saucier, add 2 TBSP of additional tomato paste.
3. You can use fresh herbs if you prefer. This is handy if you love to grow your own fresh herbs.
You may also love these One Pot Gluten Free Hamburger Helper and One Pot Gluten Free Cheeseburger Pasta recipes.
Frequently Asked Questions:
I do not recommend freezing gluten free pasta. It will not thaw with the same texture or flavor.
You can use either dried, fresh herbs, or a combination in this recipe
Store the leftovers in an airtight container in the refrigerator. It will keep fresh for up to 3 days.
More Gluten Free Pasta Recipes:
- Gluten Free Feta Chicken Pasta
- The Creamiest Gluten Free Mac and Cheese
- Easy Gluten Free Skillet Lasagna
Love This Recipe?
If you made and enjoyed this recipe, I would be incredibly grateful if you could leave a comment below. This will help others know this recipe is delicious. Thank you!
Gluten Free Chicken Spaghetti Recipe (One Pot, 30 Minutes)
Ingredients
- 12 ounces gluten free spaghetti uncooked
- 1 ½ pounds chicken thighs *with the skin if you can find it.
- ½ cup diced onion
- 3 minced cloves garlic
- 6 ounces tomato paste
- 2 teaspoons dried thyme
- 2 teaspoons dried basil
- 1 teaspoon dried oregano
- 2 cups boiling water
- ⅓ cup parmesan
- 3 tablespoons gluten free bread crumbs
- 1 teaspoon lemon zest
Method
- With Boneless, Skinless Chicken – If you use boneless, skinless chicken, you need to cook your chicken and then remove it from the pan. Pour oil into a skillet and cook the chicken for 3-4 minutes on each side over medium heat.
- With Skin On, Boneless, or Bone-In Chicken – If you use chicken with the skin on, heat a Dutch oven on high heat with oil. Place the chicken skin side down and allow to cook until the skin looks crisp about 5 minutes. You don't have to cook the chicken all the way because it will cook the rest of the way in the pot with the pasta.
- Remove 1 ½ pounds chicken thighs from the fridge and set it aside in a bowl. Turn the heat down to medium and add ½ cup diced onion to the pan. Cook until the onion starts to become translucent. Add the 3 minced cloves garlic. Stir and cook for two minutes.
- Add the can of 6 ounces tomato paste, salt, pepper, 2 teaspoons dried thyme, 2 teaspoons dried basil, and 1 teaspoon dried oregano to the onion and garlic. Top with the uncooked 12 ounces gluten free spaghetti. Be sure you break the spaghetti in half.
- Pour the 2 cups boiling water over the spaghetti and toss to coat. Cover the pot and reduce the stove temperature to simmer. *If you are using chicken with skin, place the chicken in the pot, skin side up, on top of the spaghetti. Cook the chicken with the spaghetti. (don't do this if you are using tenders!)
- After 5 minutes of cooking, you must use tongs to break up the gluten-free spaghetti. Gluten free spaghetti is notorious for sticking together, so you must break it up. If you don't, you will have clumps of gluten free spaghetti all stuck together under the chicken.
- In a small bowl, combine the ⅓ cup parmesan, 3 tablespoons gluten free bread crumbs, parsley, and 1 teaspoon lemon zest. Mix well.
- Remove the pot cover, and if you were using no skin, boneless chicken, Place the chicken on top of the spaghetti. Next, sprinkle the crispy coating on top of the spaghetti and chicken.
- Place the pot with the chicken pasta under the broiler for 5 minutes to crisp the coating on top of the spaghetti.
Nutrition
Notes
- You can use store-bought gluten free panko or bread crumbs. You can also make it from scratch with this Gluten Free Bread Crumbs recipe.
- Store the leftovers in an airtight container in the fridge. It will keep fresh for up to 3 days.
Private Notes
Tried this recipe?
Let us know how it was!
I truly hope you enjoy this recipe. I have been testing and creating gluten-free recipes for over 15 years. Creating gluten-free recipes that do not taste gluten-free is my goal for every recipe. Sometimes I only have to test a new recipe a couple of times, and others it takes multiple times. I do this so you get reliable, delicious results every time!
