

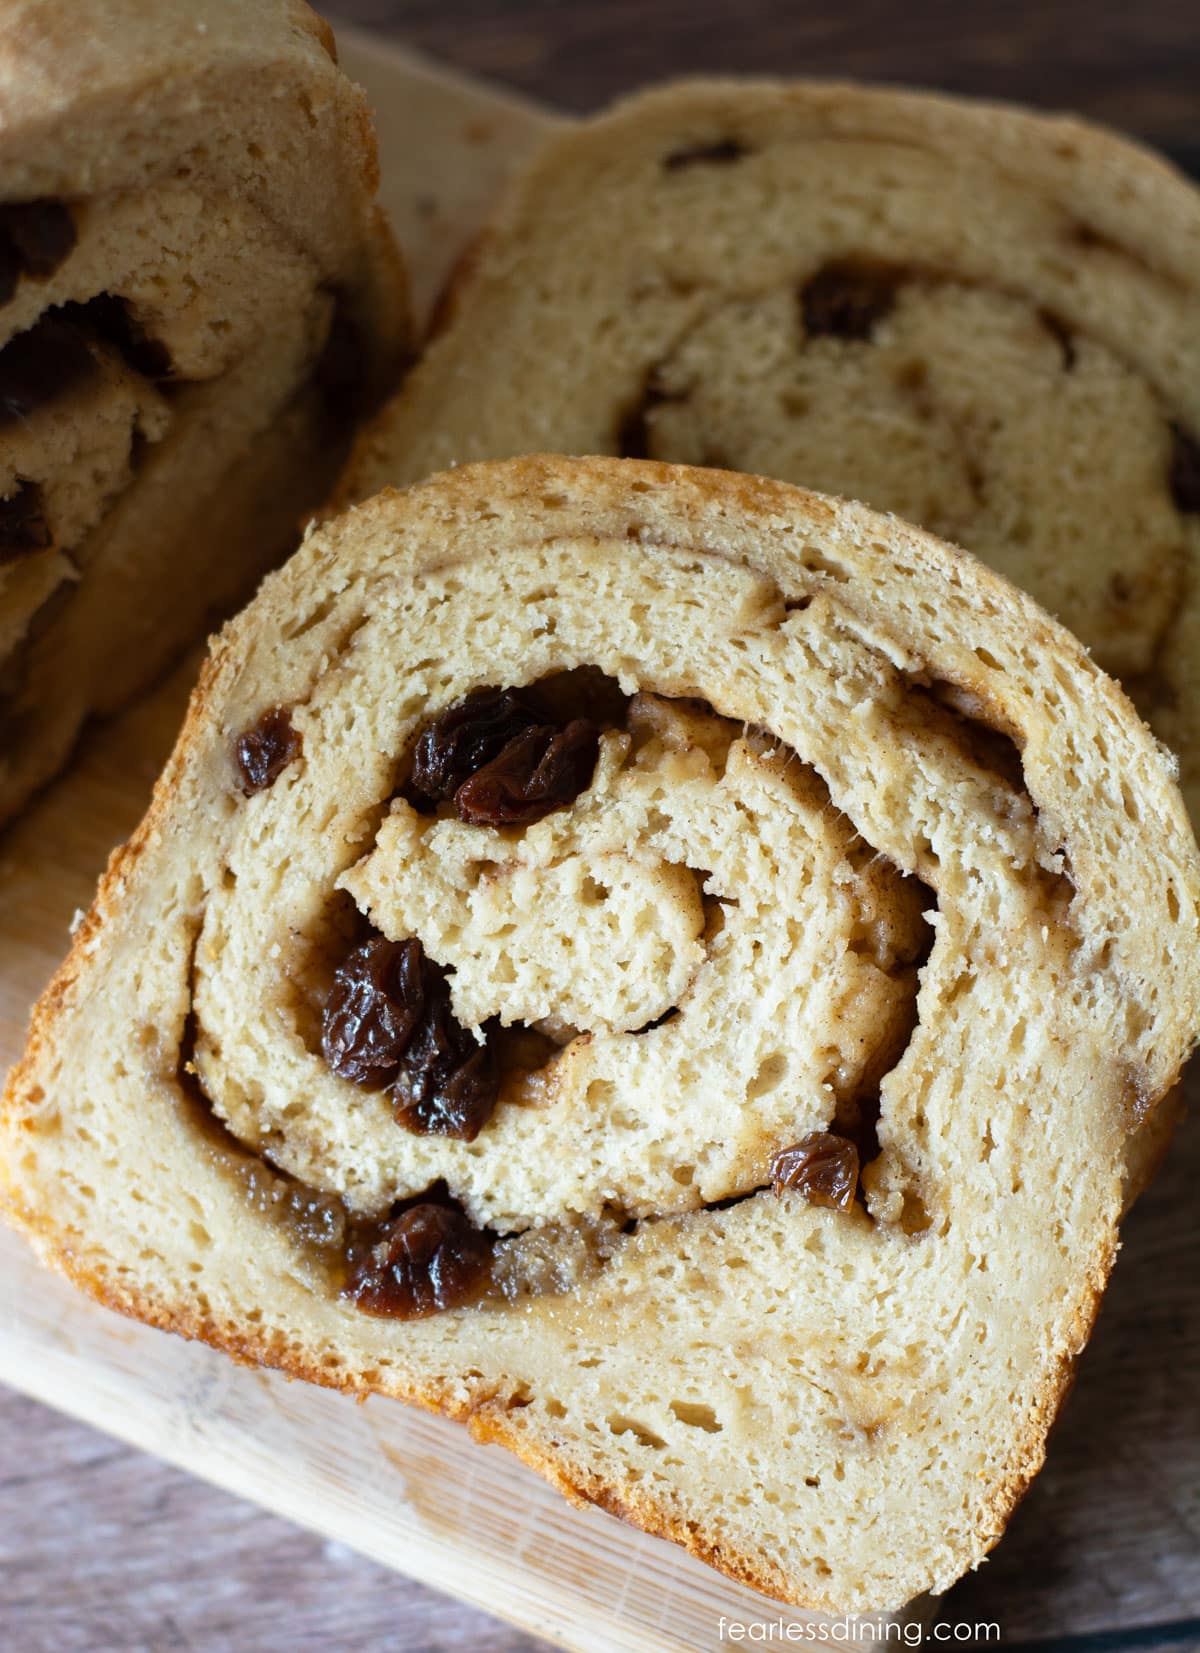
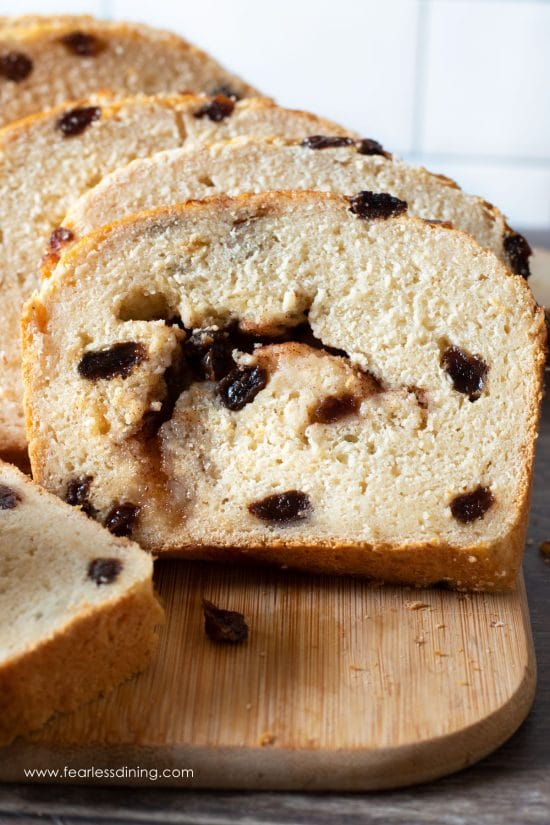
This gluten-free cinnamon raisin bread is fluffy, soft, and swirled with sweet cinnamon brown sugar. I have tested this recipe with several flour blends and share which ones performed best. Whether you swirl the raisins or mix them into the dough, this loaf brings back that nostalgic bakery flavor.
This post may contain affiliate links. Please read our Disclosure Policy.
❤️ Sandi’s Recipe Summary
The Quick Bite: This soft and fluffy gluten-free cinnamon raisin bread can be made in two delicious ways: with raisins baked into the dough, or swirled with cinnamon sugar. I tested two gluten-free flour blends, so you have easy options.
I just pulled mine out of the oven. I just so happened to use Steve’s GF flours. It smells so good, I can’t wait to taste it. The loaves are beautiful!! Thank you for sharing this recipe!” ❤️
Debi, Pinterest pin comment
When we had to go gluten free, I missed cinnamon raisin bread more than I expected. I have spent years testing and perfecting gluten-free bread recipes, and this recipe has finally brought that nostalgic flavor back to our Fearless Dining kitchen.
I tested several gluten free flour blends in this recipe, including Better Batter Artisan Blend, Authentic Foods Steve’s Gluten Free Bread Blend, and my DIY Gluten Free Flour Blend. Steve’s Bread Blend was the best. It is magic in a bag, and the loaf had the same texture as a fluffy non-GF bread. My blend worked really well, but it wasn’t quite as fluffy.
I do want to talk about Steve’s Blend. It has vegetable fiber, which gives bread that super fluffy texture. You do not need to add xanthan gum or another binder. This blend uses the vegetable fiber as the binder. Also, this blend has a much higher moisture need than typical gluten free flour blends. Be sure to read the entire recipe card to the notes section so you can see how to adjust the moisture for this blend.
Check out ALL of my bread and roll recipes using Authentic Foods Steve’s Gluten-Free Bread Blend. If you love bread on the sweeter side, try my Gluten-Free Hawaiian Bread recipe; it also makes great Hawaiian rolls! Baking is my passion, and I have so many great gluten-free bread recipes to try on the blog.
Ingredient Notes:
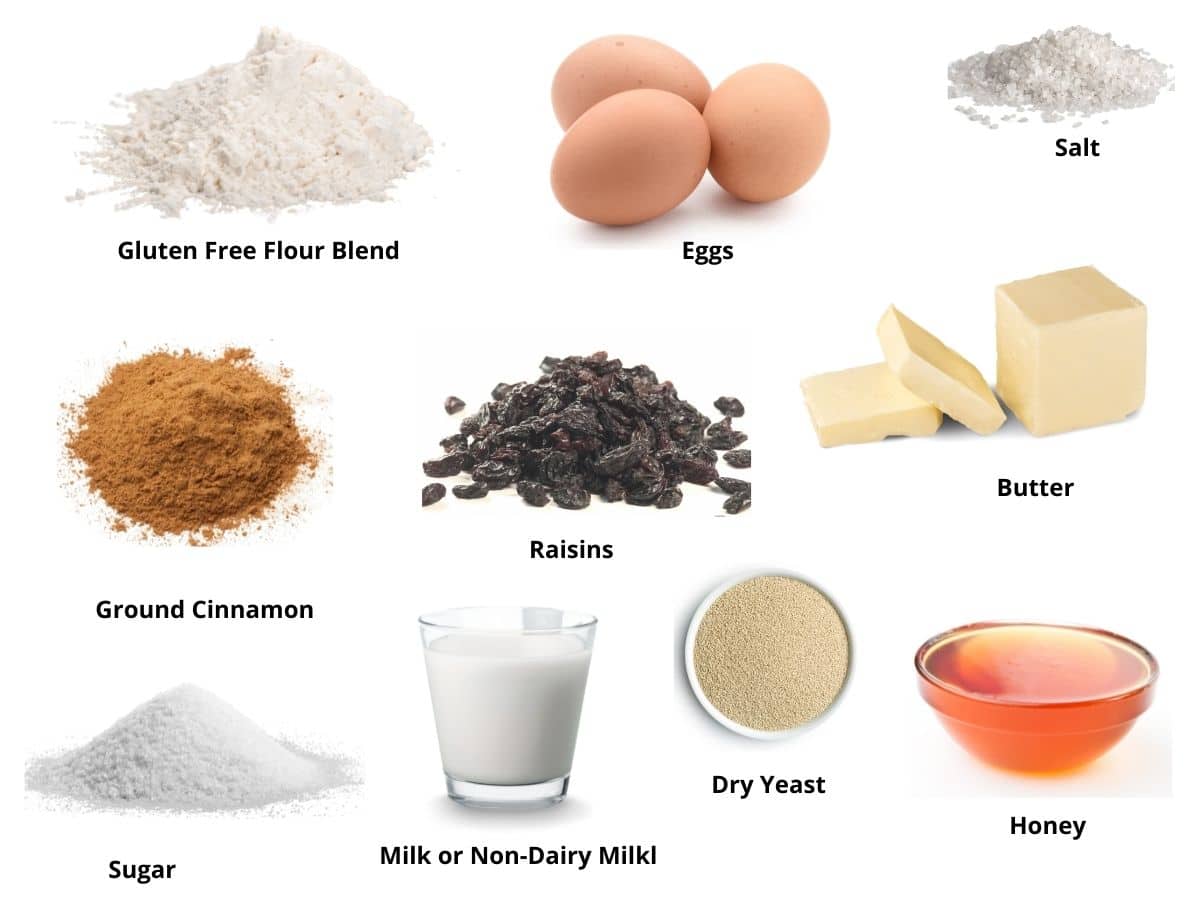
For the full list of ingredients and amounts, please go to the recipe card below.
- Gluten-Free Flour Blend – I tested this recipe with both Better Batter Artisan Blend and Authentic Foods Steve’s GF Bread Flour. My favorite gluten free flour blend was the Authentic Foods Steve’s Gluten-Free Bread Flour. There is no better flour for making fluffy, soft gluten-free bread. Read Why Gluten Free Flour Blend Vary to learn more. Also note, many 1:1 blends do not work in yeast recipes. Make sure you are using a blend that works with yeast. Read Gluten Free Flour Blend Types to learn more.
- Steve’s GF Blend Note: If you use this flour blend, it has a higher moisture need than others and needs more water. That is why there is more of a range in the recipe card.
- My flour blend was also tested – Make it gum-free using my DIY Gluten-Free All Purpose Flour Blend.
- Yeast – I used active dry yeast, but rapid yeast also works in this bread recipe. Always double-check to ensure the brand you use is gluten free. Red Star “Platinum” is NOT gluten free!
- Binder – Binders are very important to hold gluten free baked goods together. It acts like the glue of wheat flour. Read Why Binders are Needed in Gluten Free Baking to learn more.
- Raisins – You can use black or yellow raisins or leave them out for cinnamon bread.
- Milk – You can use regular milk or non-dairy milk like almond milk. If you use non-dairy milk, be sure to choose one that is unflavored.
- Butter – If you are dairy-free, use a dairy-free butter. I tested Earth Balance, but other brands should also work.
- Eggs – Be sure to use room-temperature large eggs. It really makes a difference in the texture of the bread! Reader tested egg-free version – One reader wrote to say Just Egg worked well.
You may also love these Gluten-Free Cinnamon Raisin Bagels. If you love dessert bread, try my Gluten-Free Chocolate Banana Bread recipe. We are fans of this new recipe, Gluten-Free Pumpkin Raisin Bread, as well. If you prefer a crusty artisan loaf, try this Gluten-Free Artisan-Style Cinnamon Raisin Bread recipe.
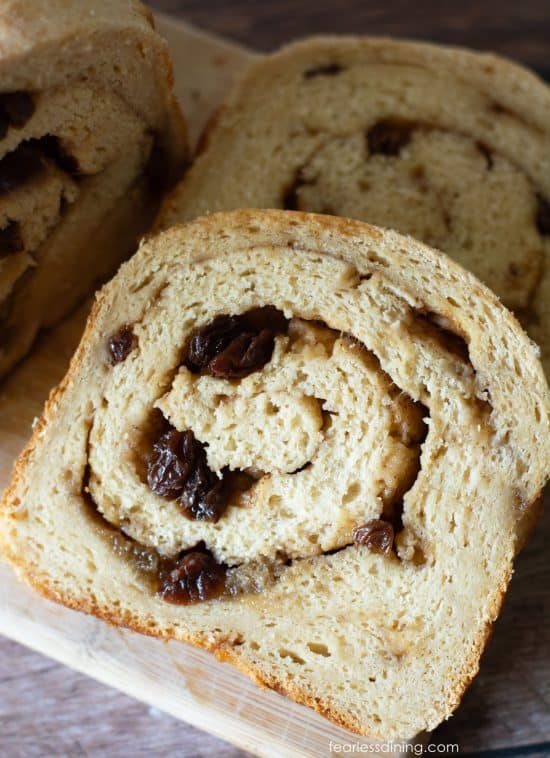
🔑 Sandi says: I include a ton of tips and tricks to help ensure your gluten-free cinnamon raisin bread turns out great. Please read through the whole post.
Two Ways to Make It!
Make this gluten-free raisin bread recipe two ways! With the raisins mixed into the bread dough, or make it with the raisins in the brown sugar cinnamon swirl!
How to Make Gluten-Free Cinnamon Raisin Bread (Step-By-Step Photos)
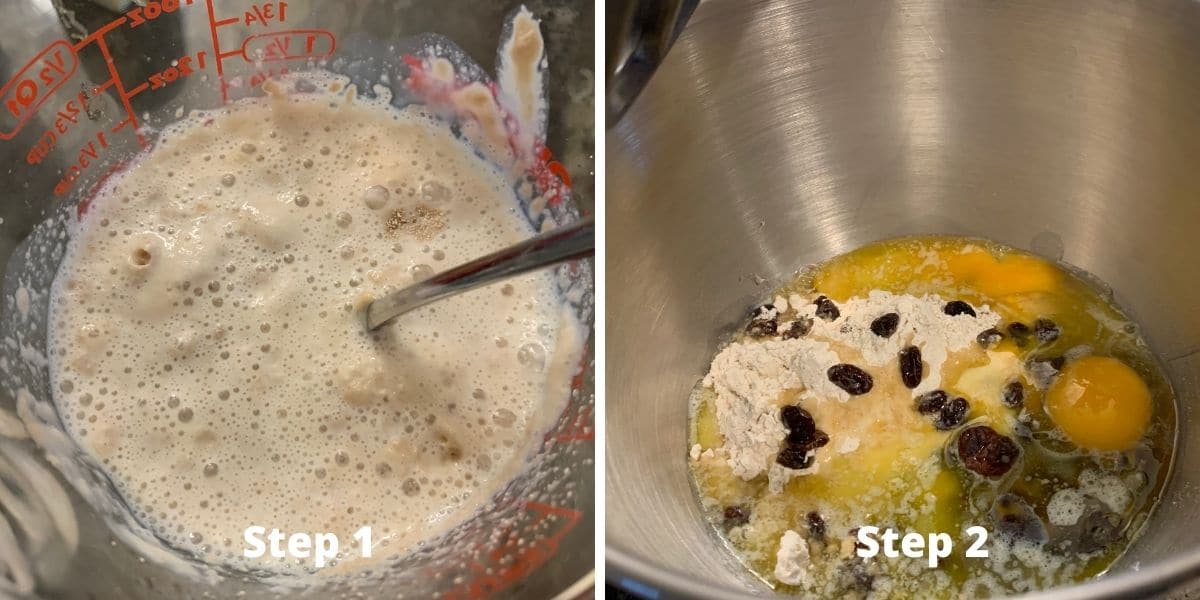
Step 1: Heat your milk (or non-dairy milk) to 110º F. I usually microwave it for about 25 to 30 seconds, then check with a digital thermometer. Temperature matters! If the yeast is too hot, it kills the yeast. Too cold, and it won’t activate.
Whisk in the honey or sugar until dissolved, then sprinkle the yeast on top and stir. Let this mixture sit for 5 to 10 minutes until it becomes foamy. If it does not foam, your yeast may have expired, or the liquid temperature was off.
Raisin Tip: If you want extra plump raisins, soak them in hot water for 20 minutes, then pat them dry before adding them to the dough or swirl.
Step 2: Attach the paddle or dough hook to your stand mixer. Add the yeast mixture, eggs (at room temperature for best emulsification), and melted butter or dairy-free butter to the mixer bowl.
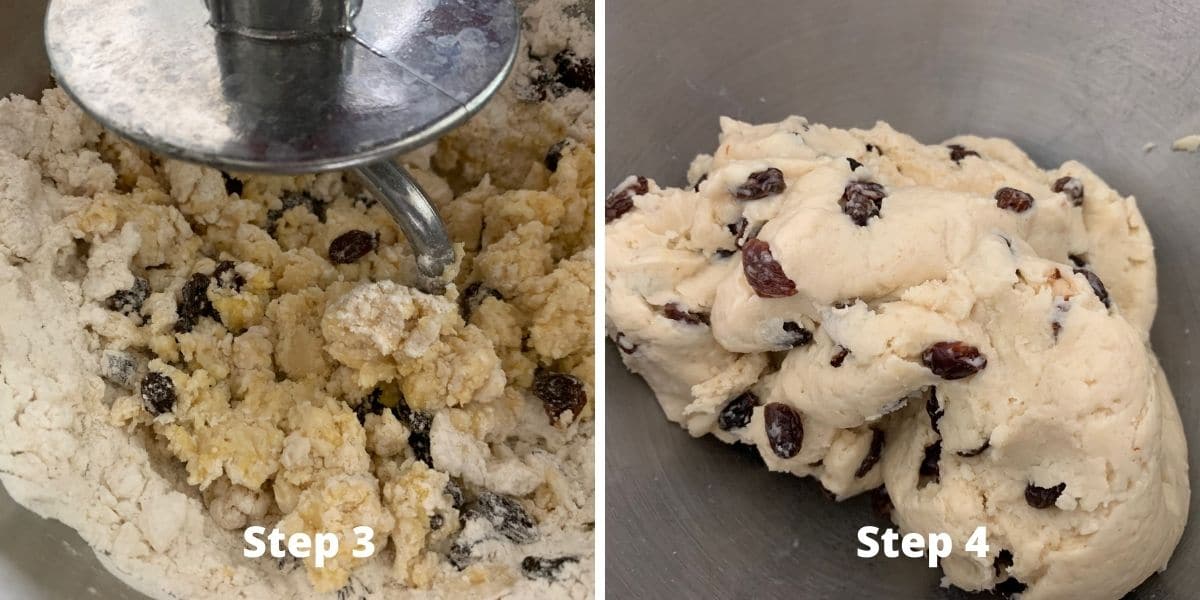
Step 3: In a large bowl, whisk together the gluten-free flour blend and salt. If your flour blend doesn’t contain a binder such as xanthan gum or psyllium husk, add it here. (Steve’s Bread Flour uses psyllium-based vegetable fiber, so there is no need to add extra if you use this blend.)
Slowly add the dry ingredients to the mixer bowl while it runs on low speed. Once incorporated, increase the speed and mix for about 2 minutes to hydrate the flour.
🔑 Sandi says: As I mentioned in the ingredient notes, Steve’s bread blend absorbs more liquid than most blends. If the dough feels too stiff or dry, add 1 tablespoon of warm milk at a time until it becomes soft and pliable. If it’s overly wet, add more flour 1 tablespoon at a time.
Step 4: This is what your mixed gluten-free cinnamon bread dough with raisins will look like when it is mixed. Move the bread dough to a bowl and cover it with plastic wrap. Put it into the warm oven and let it rise.
Sandi’s Dough Rising Hack:
Step 5: I preheat my oven to 175°F, turn it off, then place the bowl inside with the light on. I rise the dough with the oven door cracked open. It creates the perfect proofing environment, especially for delicate gluten-free doughs.
Email This Recipe To Me!
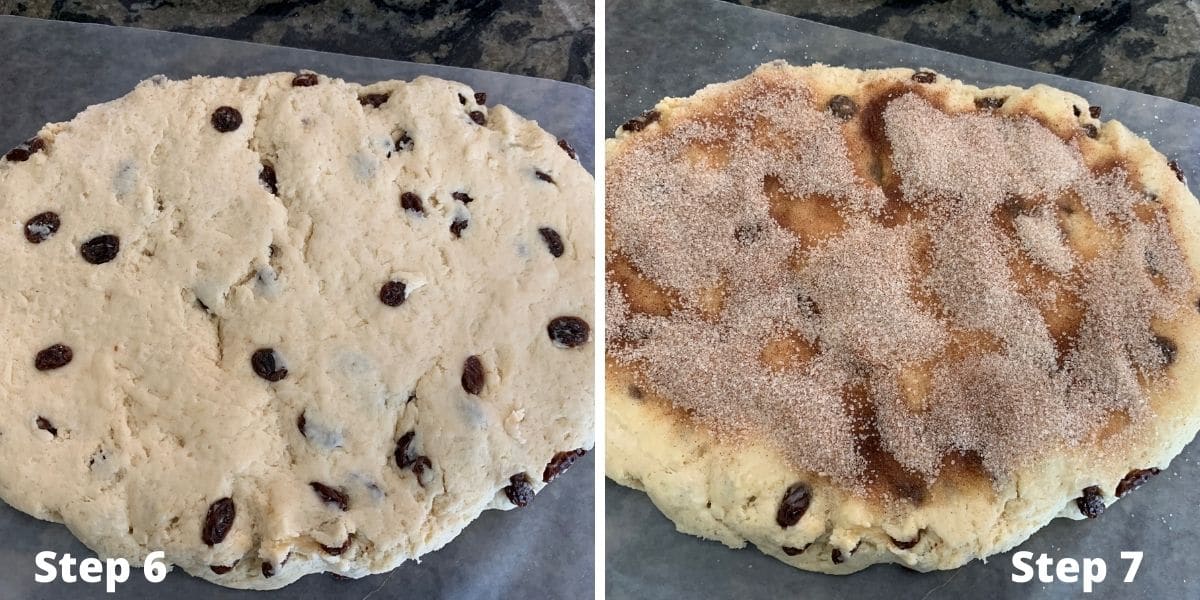
Step 6: Gently transfer the dough onto parchment paper or a silicone mat. Lightly press it into a rectangle that matches the length of your loaf pan.
Why this step matters: Pressing instead of rolling keeps the structure intact while setting up the swirl layering for even baking.
Do NOT punch down the dough. Gluten-free dough typically gets only one good rise. Deflating it now means you lose most of your lift.
Step 7: Mix your cinnamon and sugar in a small bowl. If you’re adding the raisins here instead of the dough, mix them into the cinnamon sugar now.
Melt the butter in a separate bowl and brush it over the surface of the dough. Even coverage helps the swirl stick and melt into the bread as it bakes.
Then sprinkle the cinnamon sugar mixture evenly over the dough. Use your hands to gently press it in. Roll the dough up tightly into a log, sealing the edges as best you can. (Note: It may look like too much sugar, but don’t worry, some will melt into the loaf and some will create those signature dark swirls.)
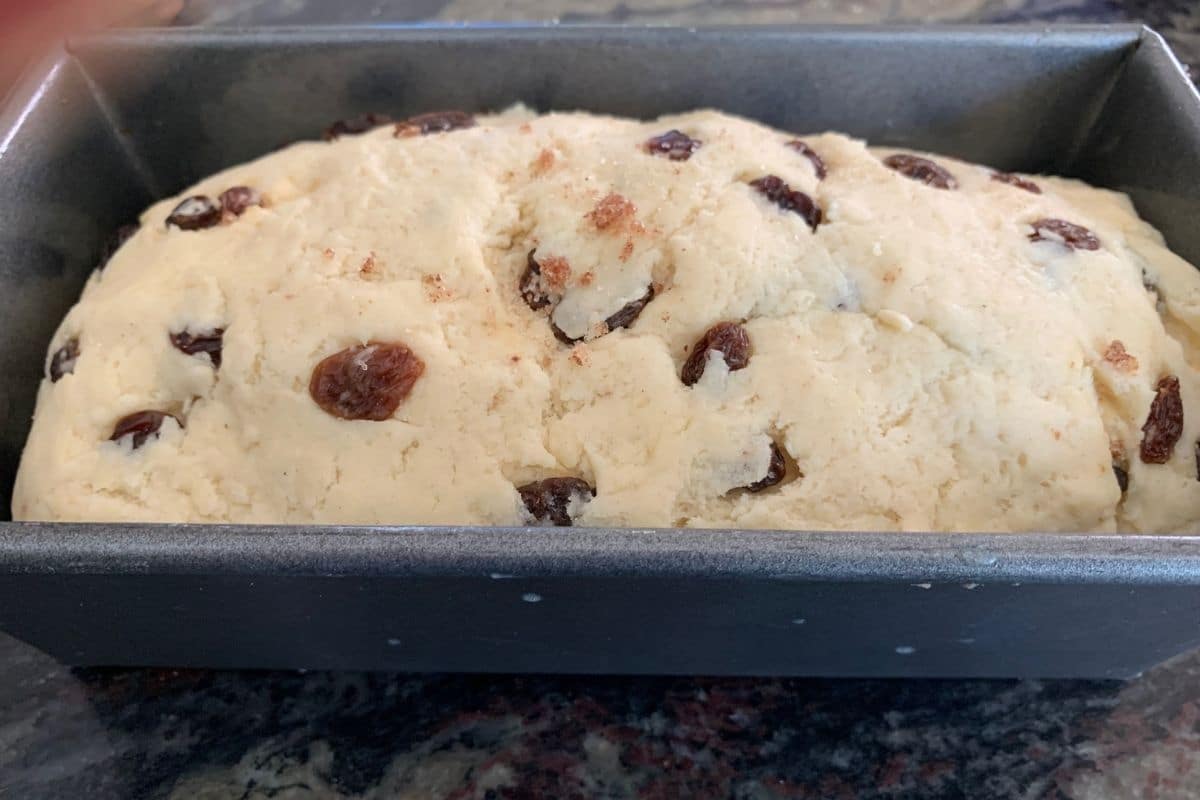
Step 8: Place the rolled cinnamon raisin bread dough into a greased loaf pan. Cover with plastic wrap and let it rest at room temperature for 30 minutes. This helps the dough relax into the shape of the pan.
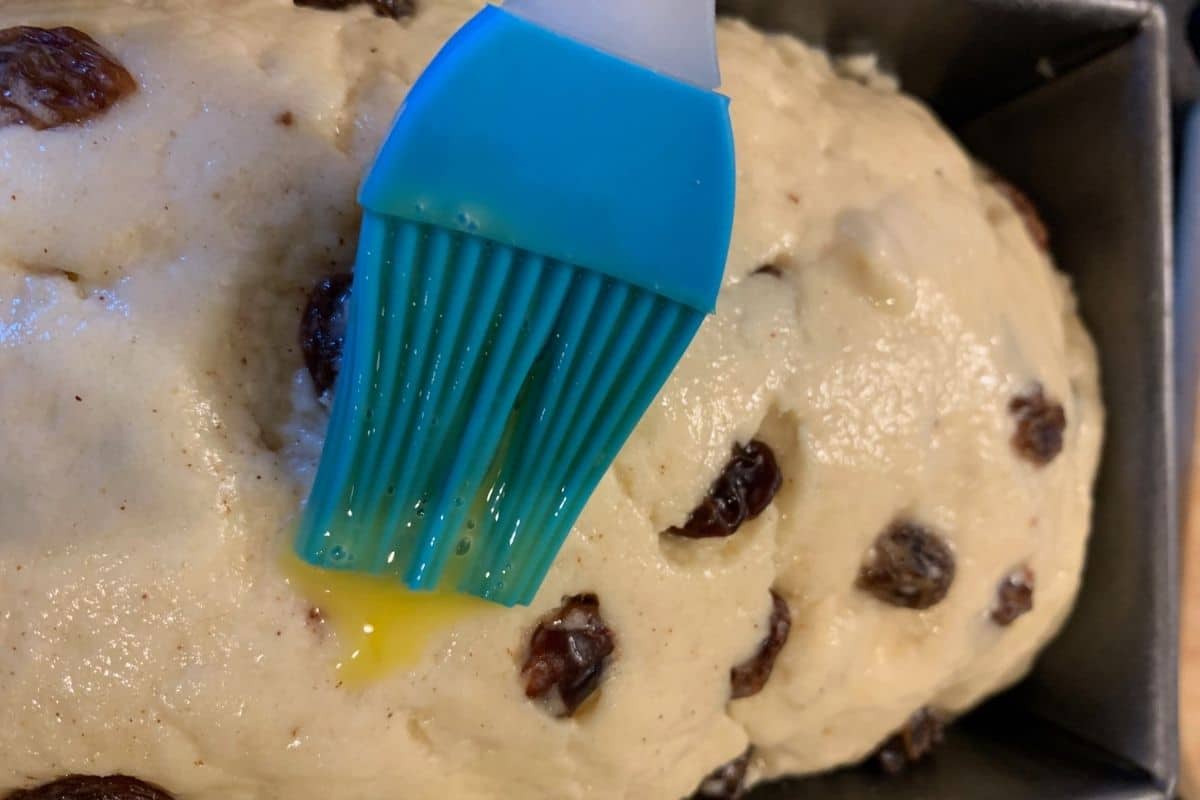
Step 9: Whisk an egg and gently brush it over the top of the loaf if you want a golden crust. This is optional but gives the bread a glossy, bakery-style finish.
Step 10: Bake the bread at 350°F for 45 to 50 minutes. About 10 minutes before it’s done, check the internal temperature with a digital thermometer. You’re looking for 190°F in the center of the loaf.
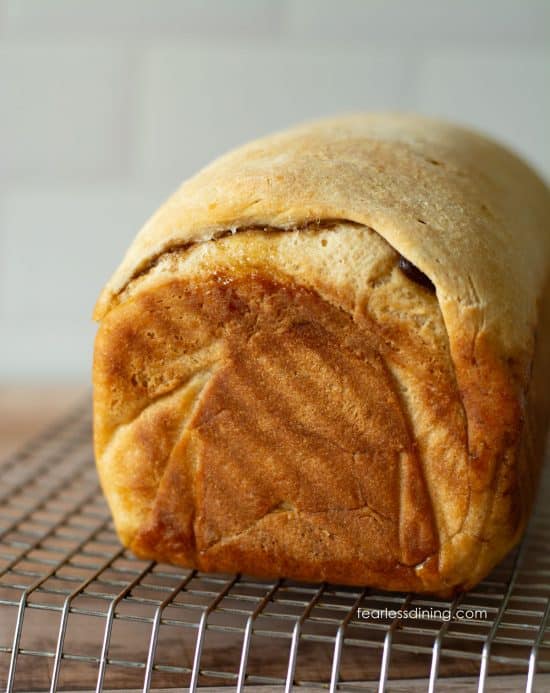
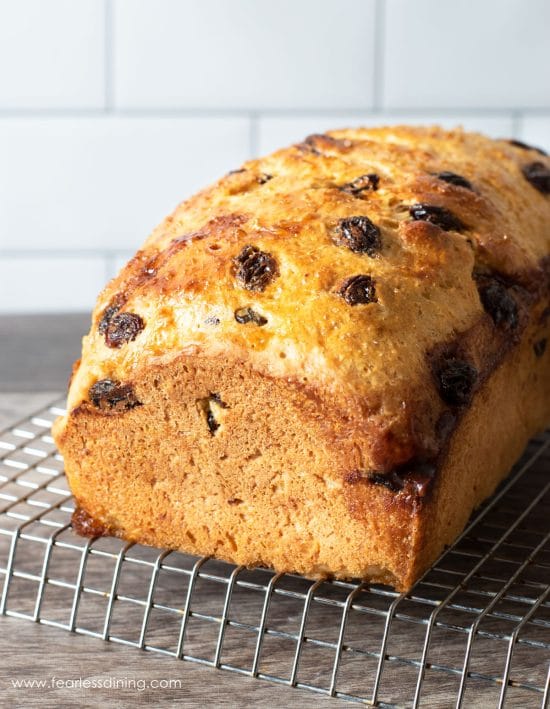
Step 11: Remove the pan from the oven and place it on a wire rack. Leave the bread in the pan for 15 to 20 minutes to help it firm up, then carefully lift it out. Let it cool for at least 2 hours before slicing. I know, it smells incredible, and you are really tempted to slice it now, but slicing too early can cause the structure to collapse inside.
If you want to use Steve’s Bread Flour in another recipe, try this Gluten-Free Monkey Bread!
Storage and Freezing Tips:
Gluten-free bread is more sensitive to moisture and spoilage than traditional wheat bread. For best results, allow your bread to cool completely, then store it in an airtight container in the refrigerator for up to 4 days. Read How to Store Gluten Free Bread to learn more.
This cinnamon raisin bread freezes beautifully and makes a great make-ahead option for busy mornings. Here’s how I freeze it:
- Let the loaf cool fully (this helps avoid ice crystals and sogginess).
- Slice the bread and place wax paper or parchment between slices. Separating the slices with wax paper makes it easy to pull out just one piece at a time—perfect for toasting straight from the freezer.
- Store slices in a freezer-safe zip-top bag or airtight container.
- Label and freeze for up to 3 months.
- To reheat: Toast from frozen or microwave gently for 15–20 seconds, then toast if desired.
Troubleshooting Tips:
It is optional in this recipe. Soaking in hot water for 20 minutes will make the raisins plumper and juicier. Pat them dry before adding.
Usually, this happens if there is too much liquid or the bread was not baked long enough. It can also happen if you slice the bread before it is fully cooled. To fix sticky dough: Add a spoonful of flour at a time. To fix gummy bread: Use a digital thermometer to measure the internal temperature of the bread. It should reach 190°F inside.
The flour blend you used may be missing a binder like xanthan gum, psyllium husk, or guar gum. Check your flour blend. If it does not include one, add it to the recipe.
Common reasons for gluten-free bread not rising include:
1. The yeast was not active or had expired.
2. The dough was not warm enough during proofing and needed a longer rise time.
3. You used cold eggs or milk, which can slow the rise.
For more bread troubleshooting, read my Gluten-Free Bread Troubleshooting Guide for more information and tips.
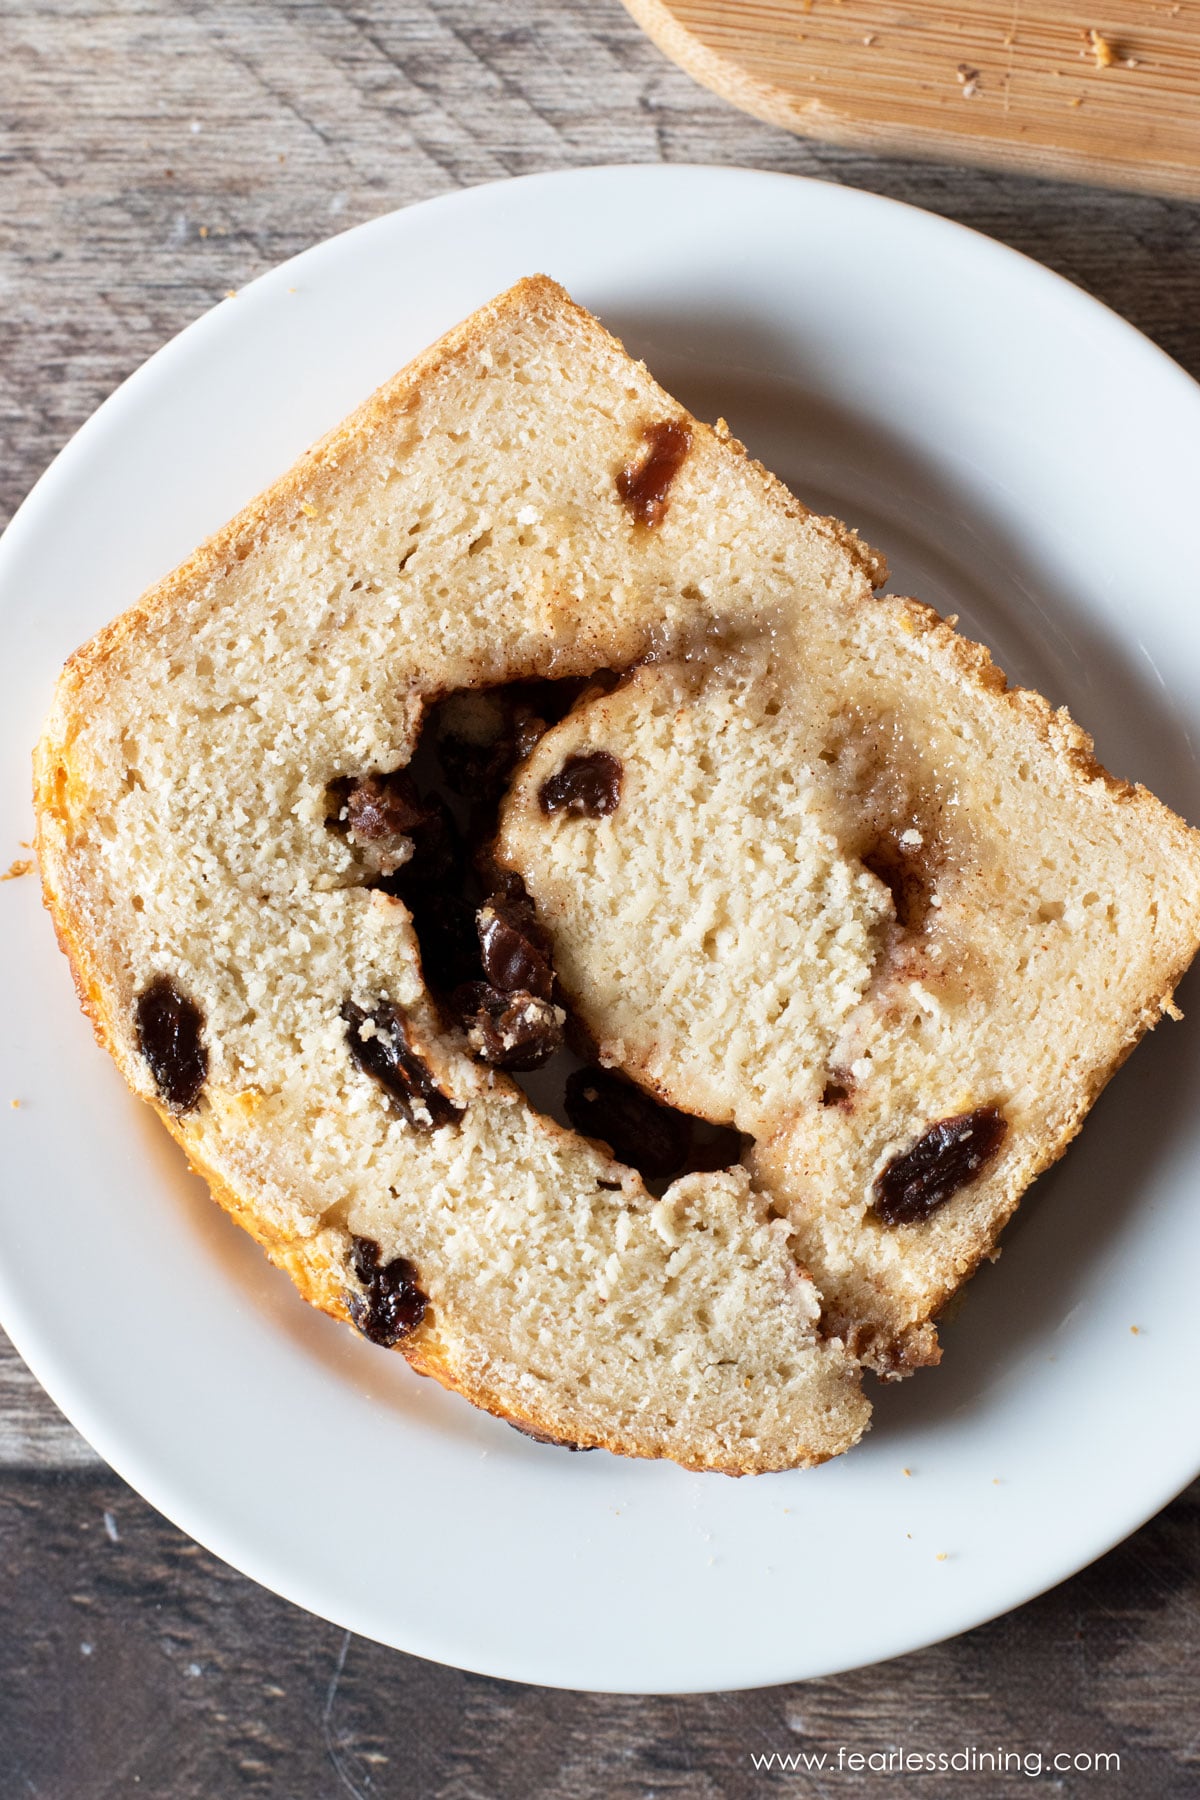
Followed recipe as written with Steve’s flour. It came out amazing! Texture is sooo close to gluten bread. The tips were very helpful too.” Mary, Blog Comment
More Gluten-Free Bread Recipes:
You may also enjoy this Gluten-Free Whole Grain Bread recipe! You may also love this fluffy Gluten-Free Boston Brown Bread recipe! Here are more favorites:
Love This Recipe?
💬 Did you make this gluten-free cinnamon raisin bread recipe? I would love to hear how it turned out, and which flour blend you used! Your feedback helps others (and helps me keep improving these recipes for you). ⭐⭐⭐⭐⭐
The Fluffiest Gluten-Free Cinnamon Raisin Bread
Ingredients
- 2 ½ teaspoons active dry yeast rapid yeast also works
- 3 tablespoons honey or sugar
- 1 ⅓ cups milk * see notes
- 3 cups gluten free flour blend * See notes
- ½ teaspoon sea salt
- 4 tablespoons melted unsalted butter
- 2 large eggs
- ½ cup raisins feel free to use more!
- 1 small egg for egg wash!
- ¼ cup brown sugar white or brown sugar is okay to use
- 1 tablespoon ground cinnamon
- 3 tablespoons unsalted butter
Equipment
Method
- The first thing you need to do to make this recipe is proof your yeast. Heat the 1 1/3 cups milk to 110º F. I put mine into the microwave oven for 30 seconds. Use a thermometer to check the temperature of the milk. If your liquid is too hot, it will kill the yeast, and the bread will not rise.
- Add in the 3 tablespoons honey or sugar and stir to help the honey dissolve into the milk. Add 2 1/2 teaspoons active dry yeast. Let these wet ingredients sit for 10 minutes until it is frothy. If your yeast doesn't get bubbly, check the expiration date to make sure it is still good.
- Add the 3 cups gluten free flour blend, 1/2 teaspoon sea salt, and 1/2 cup raisins to the large mixing bowl of your standing mixer. Add in the 4 tablespoons melted unsalted butter, 2 large eggs, and yeast mixture.
- Mix the ingredients together at low speed with the paddle attachment. Gradually increase the speed as the flour gets mixed in. Mix for 3 minutes.
- Move the bread dough to a bowl and cover it with plastic wrap. Put it into the warm oven (175º F) and let it rise with the door cracked open.
- If you are like me, it is often a struggle to rise gluten free dough. After many fails, I now only use my oven for rising my gluten free yeasted dough. See how puffy this dough got? Rise the dough for 45-60 minutes. As the dough rises, it should double in size in the bowl.
- Remove the raisin bread dough from the mixing bowl and place the dough on a silicone mat or parchment paper. (Note: Don't use wax paper because it will stick to the dough!)
- Don't punch down the dough. GENTLY press down the dough into a rectangle. Try to match the width of your bread pan. You do not want to deflate your dough, so do this step carefully. Gluten-free dough doesn't undergo a significant second rise; try to preserve as much air in your dough as possible.
- Mix the 1/4 cup brown sugar and 1 tablespoon ground cinnamon together in a bowl. In another small bowl, melt the 3 tablespoons unsalted butter. Use a pastry brush to spread melted butter over the dough. Sprinkle the cinnamon-sugar mixture over the dough.
- This is how you will make the cinnamon sugar swirls in the bread! Also, don't worry there is too much sugar. Some of the sugar cooks into the bread so you need a lot to get the big swirls this bread is famous for.
- Gently roll the dough and place it into a greased prepared bread pan. I used a bottle with coconut oil to grease my pan. Cover with the loaf with plastic wrap and allow it to rise on the counter for 30 minutes.
- Preheat the oven to 350º F. Use the bake setting, not the convection bake setting. Optional: If you would like your bread to have a golden top, whisk 1 small egg in a small bowl and brush the egg over the top of the loaf. This will help the loaf get golden on top.
- Put your loaf tin into the preheated oven. Set a timer for 45 minutes baking time. Check the internal temperature of the bread without removing it from the oven. Push the digital instant-read thermometer all the way to the bottom of the bread. When your bread is ready, it will have an internal temperature of 190º F.
- Make sure your oven rack isn't too far up. I place my oven rack further down, closer to the bottom. If your rack is too close to the top of the oven, your bread will get very brown and the bottom will not cook all of the way through.
- Remove the gluten free cinnamon raisin bread from the oven. I cool the bread gradually. I put the pan on a wire rack and leave the bread in the pan for the first 20 minutes.
- Let the bread cool for 2 hours before slicing it. This helps the inside finish cooking and set up. This is going to be hard. Your whole house is going to smell incredible and everyone in your family will be circling to try to get some of the bread. Stay strong, it will be worth it if you wait.
Nutrition
Notes
- Gluten free flour blend – I tested this recipe with both Better Batter Artisan Blend and Authentic Foods Steve’s GF Bread Flour. I did not test this recipe with King Arthur Measure for Measure or Bob’s Red Mill 1 to 1 because neither are really great in yeast recipes. My favorite gluten free flour blend was the Authentic Foods Steve’s GF Bread Flour. There is no better flour for making fluffy, soft bread.
- NOTE: Steve’s GF blend needs more water than other blends because it is starchier. My recipe includes extra milk to ensure this blend is at its best. If you use another blend and feel your batter is too wet, add more flour.
- Xanthan Gum – If your gluten free flour blend doesn’t contain xanthan gum or guar gum, please add 3/4 teaspoon. NOTE: The flour blends above are gum-free and do NOT need xanthan gum.
- You can use milk or non-dairy milk in this recipe. If you use non-dairy milk, be sure to use one with no flavor or sweetener.
- Yeast – Double-check the brand you use is gluten-free. Red Star Platinum is NOT gluten free!
- This bread will keep fresh for up to 4 days in an airtight container in the refrigerator. You can also freeze the bread. Allow the bread to cool and slice it. Place a small piece of wax paper between each slice. Place into a freezer bag.
Private Notes
Tried this recipe?
Let us know how it was!
I truly hope you enjoy this recipe. I have been testing and creating gluten-free recipes for over 15 years. Creating gluten-free recipes that do not taste gluten-free is my goal for every recipe. Sometimes I only have to test a new recipe a couple of times, and others it takes multiple times. I do this so you get reliable, delicious results every time!

Could you make this in a bread machine?
Looks amazing.
Hi Sheryk, I haven’t tested this recipe in a bread machine. I know the Steve’s Bread Blend I used is not made for bread machines.
Question: you say to let it rise on the counter for 30 minutes. Then later below you say to heat oven to 200 F., shut oven off and let bread rise in the oven for 1-2 hrs.
That is a lot of difference. Which one do you use?
Hi Patricia, you rise the dough in the warm oven (175º F until it doubles in size, which can take 45 minutes to a over an hour depending on where the person rises their dough.) After making the cinnamon swirl, it does a short rise on the counter.
I have been wanting a raisin bread for so long. I do have Steve’s Flour blend but my problem is the eggs. I am allergic to eggs. Is there some way that I can sub for them?
Do you have other egg free bread recipes ?
Thank you
Hi Patricia, I haven’t tested any egg replacers, but my feeling is Just Egg (at grocery stores where the eggs are kept) is the best to try with this flour blend.
Hello, I use the Pillsbury Gluten Free AP Flour and it does contain Xanthan Gum. Also, which kind of yeast packet do you use, rapid rise, active dry or instant yeast? Please let me know. Thanks.
Hi, I used active dry yeast, but rapid yeast will work as well. (If you use rapid yeast, mix it in with the dry ingredients.(I haven’t tried Pillsbury, but I hear it works in yeast recipes. Be sure to monitor the moisture of the dough. If it is wet, add more flour. If it is dry, add more liquids. I am not sure how the starch-to-grain ratio will be in comparison to the Steve’s blend.
Followed recipe as written with Steve’s flour. It came out amazing! Texture is sooo close to gluten bread. The tips were very helpful too.
I am so glad my baking tips helped. I think that flour is magic!!
I tried this recipe using 5 cups of flour and 4 cups. the 3 cups was not workable and very soupy, with no way of shaping the dough at all. I wonder if the amount of flour could be reviewed? Also, what is this tip about putting plastic wrap in the oven? It of course immediately melts. How would you get that to work?
Hi Tanya, What flour blend did you use? It sounds super frustrating to have soupy dough, and I am sure you used a flour blend I haven’t tested in this recipe. I was pretty clear in this recipe I had tested it with Steve’s GF Bread Blend and that you would need a lot more flour with other blends. This blend is special and uses a LOT less flour than other blends. As for the plastic wrap, if you preheat the oven to 200º F, then turn the oven off to rise your dough, you put plastic wrap very loosely over the pan. It prevents the dough from drying out and will not melt. Did you bake it with the plastic wrap? I don’t see any instruction to do that.
May I ask what kind of yeast you used?
Hi Asheley, I use Fleischman’s yeast brand. Most are gluten free, do not use Red Star Platinum. It isn’t gluten-free.
So yea I tried this with King Arthur’s measure for measure.. epic fail… it only rose about 1/2 and basically turned into a brick in the oven.. so I’ve cubed it all up added a ton of eggs, milk, vanilla, and sliced bananas in an attempt to use it up. Just ordered the Steve’s GF bread flour and will try again.
Hi Tina, King Arthur Measure for Measure states on their website it doesn’t work with yeast, which is probably why you had a fail. Most 1:1 blends don’t work in yeast recipes, but most put it on the back of their bag, like Bob’s 1:1. I wish King Arthur would put it on their bag so people don’t waste flour. That being said, you will love the Steve’s blend :-).
Jumping in here… I just bought King Arthur’s bread flour. Do you have any knowledge of using it with your bread recipes? Specifically does it work with yeast? And is there enough Xanthum gum in the mix? I hate trying to make bread, I waste time and money. I have 3 gf bread cookbooks! Help!
Thank you!
Hi Anita, KA gluten free bread flour is made with wheat starch, and it makes me really sick, so I can’t try this. I understand the waste of time and money making gluten free bread and wanting to be sure. I wish I had advice, but I can’t work with that flour blend.
Turned out delicious very soft and not dry.
Next time a plan to add more cinnamon with the raisins.
I am so glad you loved this bread. I think I will add more cinnamon sugar next time too.
Best recipe I have found and so delicious and fluffy! I used the recommended flour (had to order it) and it was worth the wait!
I am so glad you loved the bread! That gluten free flour blend is definitely life-changing in my opinion. I really appreciate your coming back to let me know!
Just ate a piece of your raisin bread. It was wonderful. I used a flour blend which I’ve mixed for years and I had to add a little extra flour in order for my bread to look like the pictures you posted showing how the dough should look. I also added a little more cinnamon and sugar. Thanks for the recipe. It does take a little time to reach the final product, but the wait is well worth it. (I couldn’t wait 2 hours to have the first slice!)
I am so glad your flour blend worked in my recipe. Thanks again for coming back to tell me the recipe was loved.