
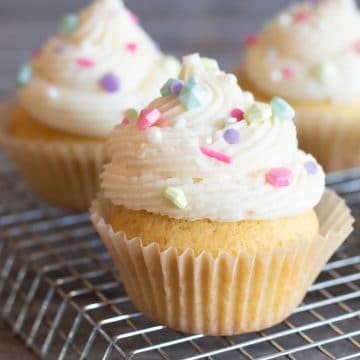
This gluten-free vanilla cupcake recipe was created to rise evenly, stay light and fluffy, and avoid the dense, gummy texture that often occurs with gluten-free cupcakes. It is made with simple ingredients, including gluten free flour, sugar, butter, vanilla, and milk. The crumb is soft and delicate, with a pure vanilla flavor that makes a great cupcake base for any frosting. There is also a dairy-free version.
This post may contain affiliate links. Please read our Disclosure Policy.
❤️ Sandi’s Recipe Summary
The Quick Bite: These gluten-free vanilla cupcakes bake up light and fluffy with a soft crumb. I share includes specific mixing and resting guidance to help gluten-free flour blends hydrate properly, which helps prevent dense or gummy cupcakes. This recipe works as a reliable cupcake base for any frosting, with a dairy-free option included.
Cupcakes have always been one of my family’s favorite desserts. They are individually portioned and made with simple gluten-free ingredients. I have tested this recipe multiple times to make sure it consistently yields cupcakes that rise beautifully and remain light and airy, whether you are baking for a birthday, a party, or simply because you are in the mood.
Vanilla cupcakes may seem simple to make, and I tested this cupcake recipe multiple times to remove that guesswork so you get fluffy cupcakes every time.
Want more delicious gluten-free cupcakes? Curious about what other flavors of cupcakes I have on the blog? You can find 20 different gluten-free cupcake flavors. Top your cupcakes with my creamy gluten-free frosting recipe, or choose another flavor. I share lots of options!
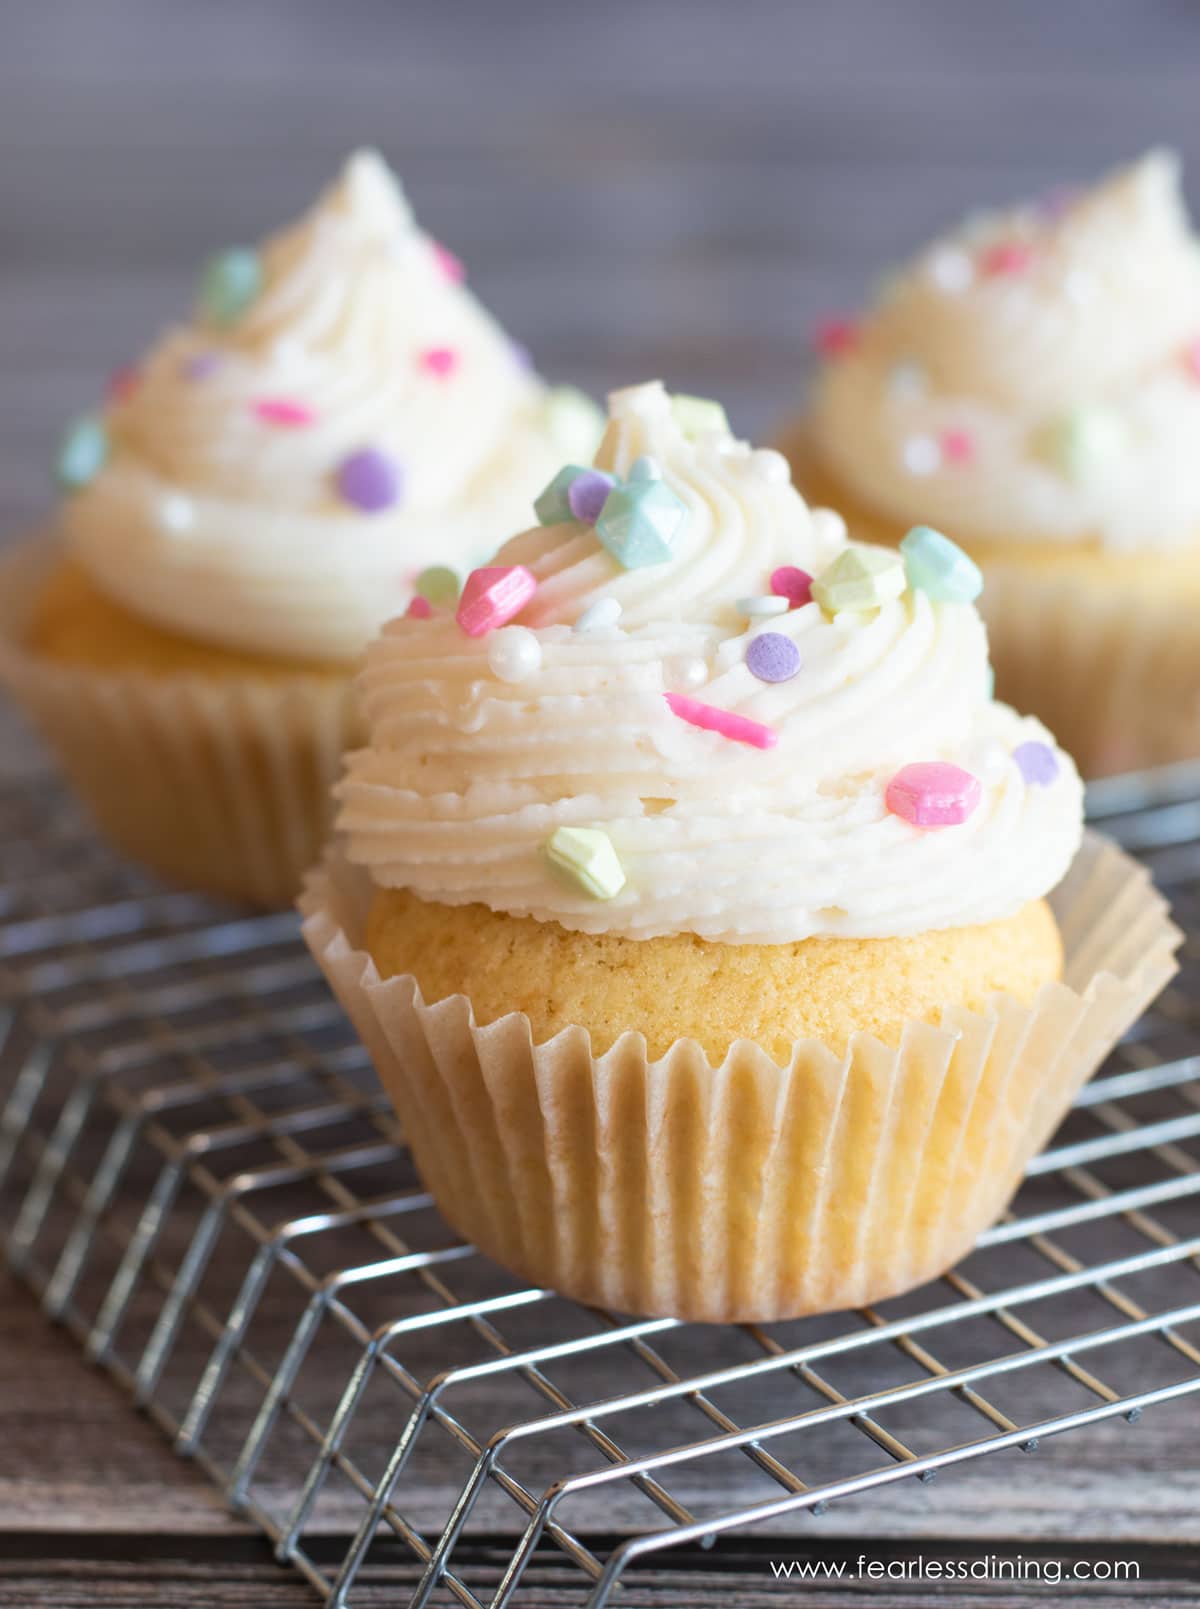
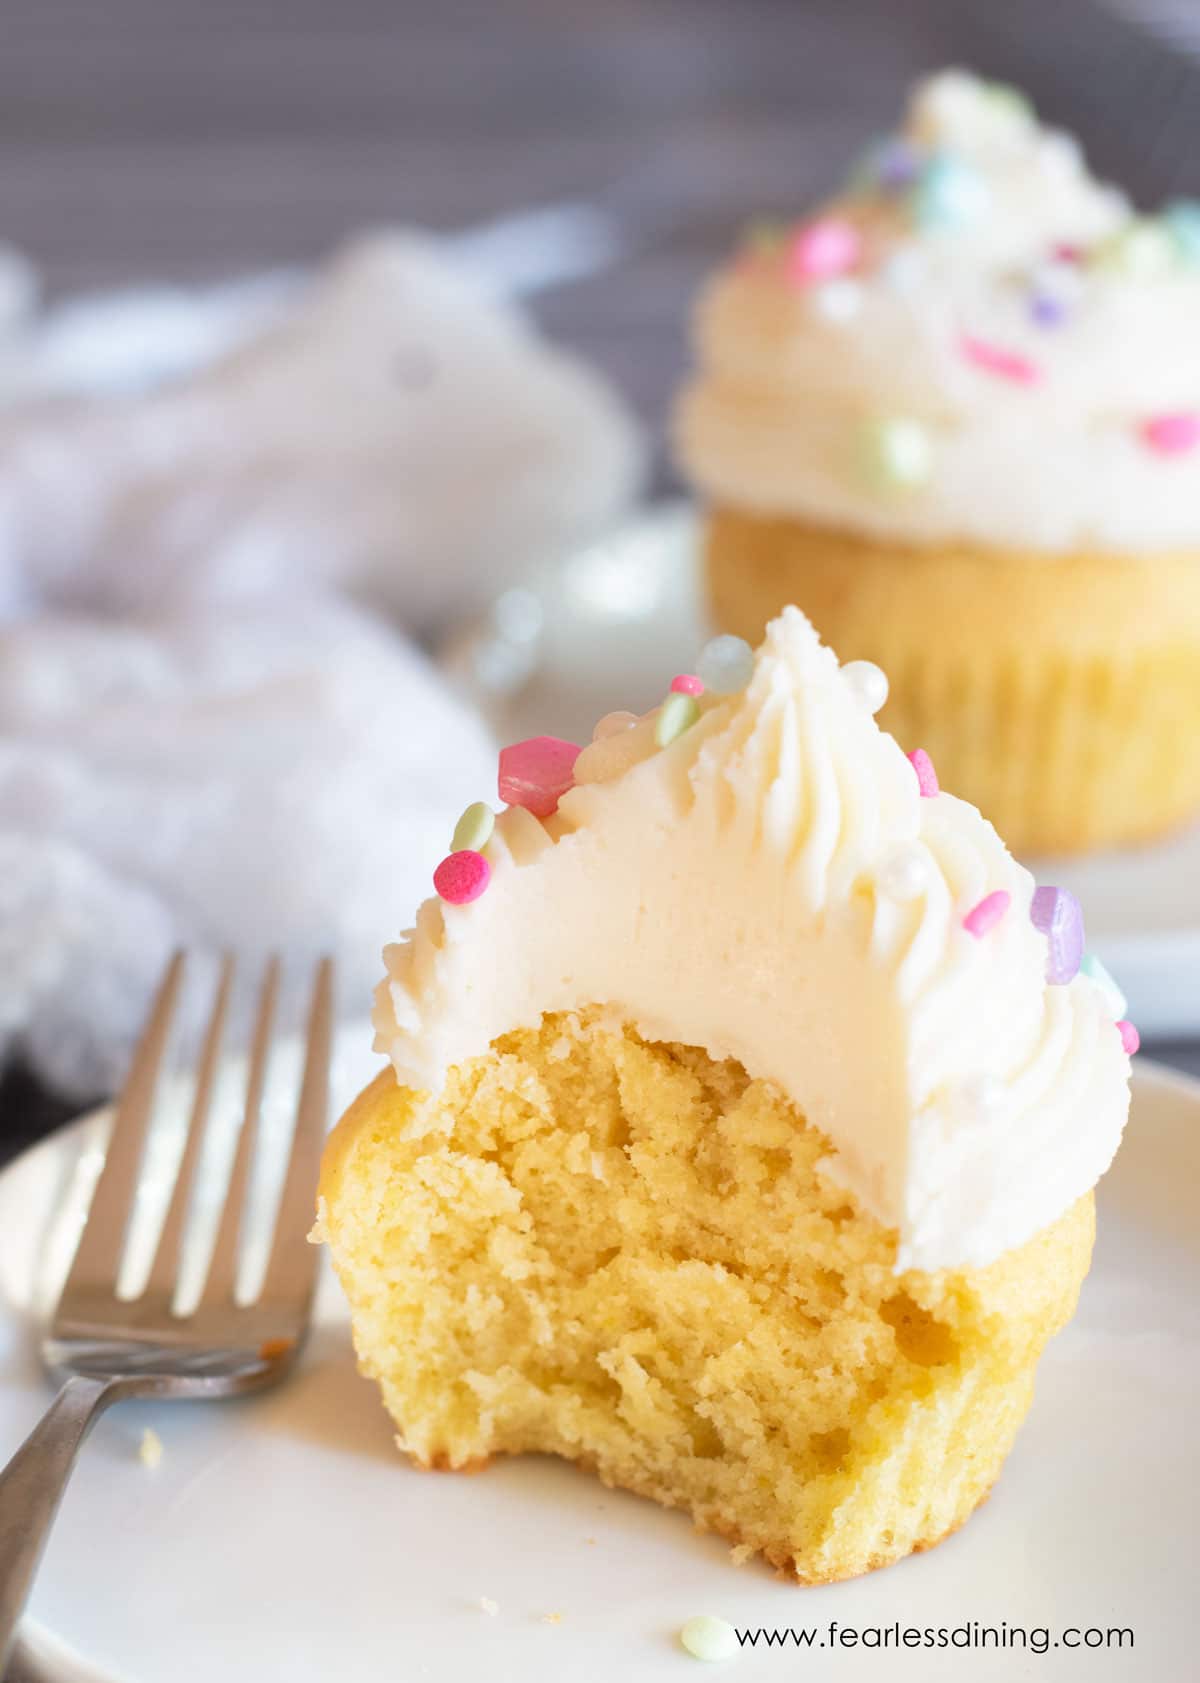
(Here are photos of the cupcakes when I first created this recipe in 2018.)
Ingredient Notes:
For the full list of ingredients and amounts, please go to the recipe card below.
- Gluten-Free Flour Blend – I tested this recipe using Bob’s Red Mill 1:1 Blend and King Arthur Measure for Measure. Other gluten-free flour blends will work, but gluten-free cupcakes are sensitive to flour blend differences. If you use a different blend, you may need to adjust the moisture slightly by adding additional milk or flour, depending on the batter consistency.
- Xanthan Gum – If your gluten free flour blend doesn’t contain Xanthan Gum or Guar Gum, please add 3/4 teaspoon. Read more about why binders are important in gluten-free baking to learn more.
- Baking Powder – Use aluminum-free for the best rise and no metallic aftertaste.
- Eggs – Use large eggs.
- Dairy-Free Milk – I used almond milk when testing this recipe; other types of plant-based milk and regular milk also work. I do not recommend canned coconut milk because it can make the cupcakes denser.
- Butter – Use unsalted butter or light oil if you are dairy-free.
- Pure Vanilla Extract – I do not recommend using imitation vanilla. Because this is a vanilla-forward recipe, the quality of the vanilla makes a noticeable difference in flavor.

A Note From My Kitchen
I tested this gluten-free vanilla cupcake recipe with both Bob’s Red Mill 1:1 and King Arthur Measure for Measure, and both produced light, fluffy cupcakes.
Resting the batter for 15 to 20 minutes is an important step. This allows the rice flour in gluten-free blends time to hydrate and soften, which helps prevent a gritty texture in the finished cupcakes.
If your batter looks slightly thicker or thinner than the photos, you may need to make a minor adjustment. Gluten-free flour blends vary depending on the starch-to-grain ratio. You can easily make small adjustments with milk or flour, one tablespoon at a time, to add more liquid or flour. Focus on a smooth, spoonable batter rather than exact visual matching.
How to Make Gluten-Free Vanilla Cupcakes (Step-By-Step)
Email This Recipe To Me!
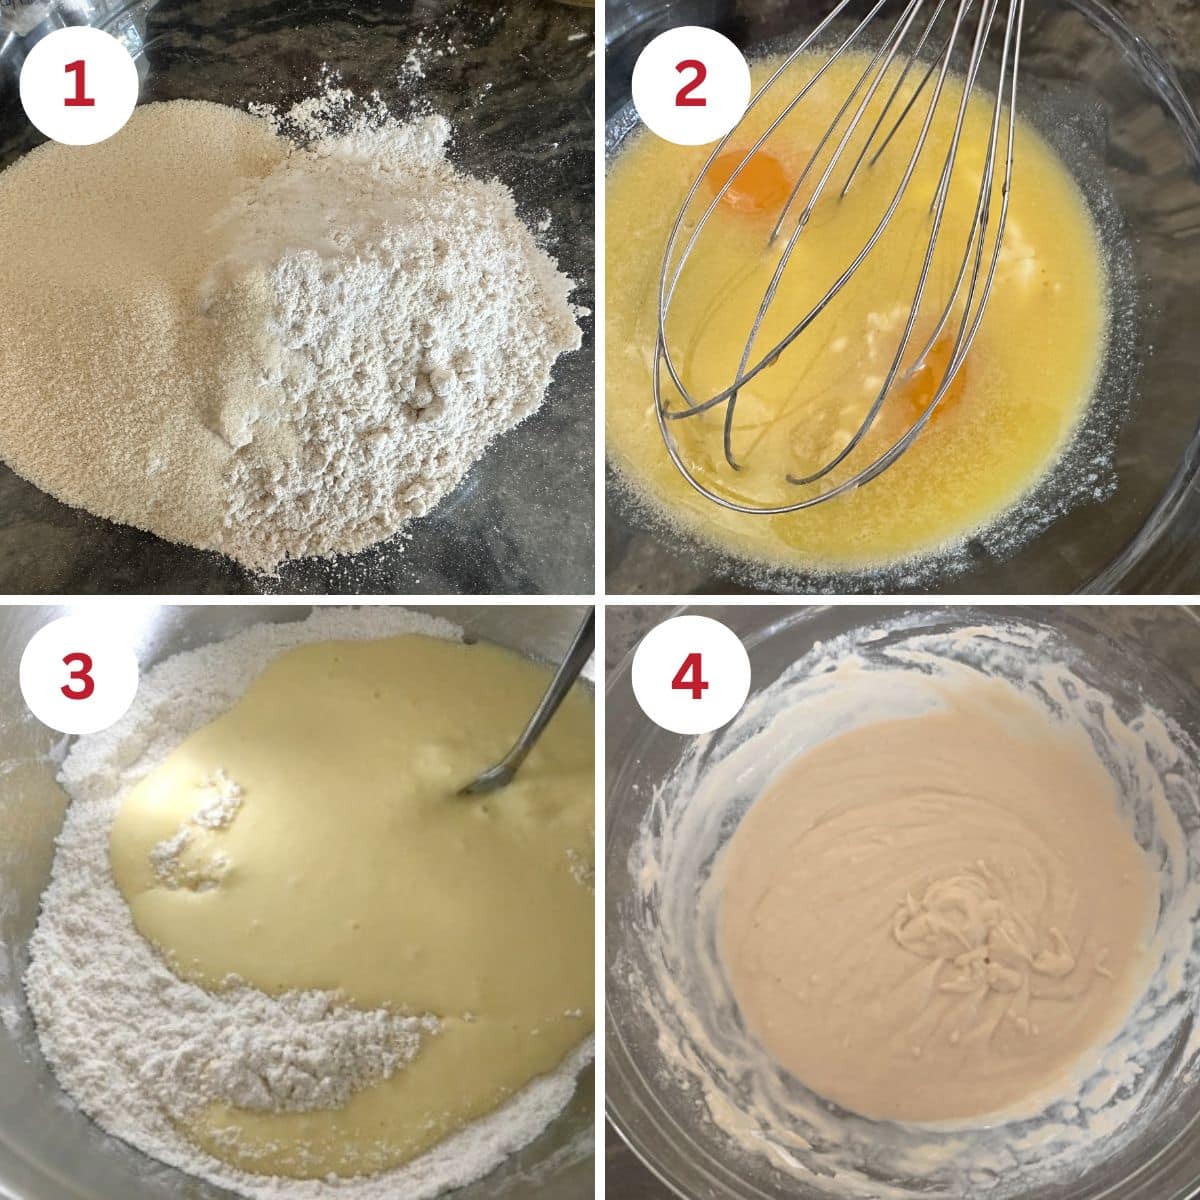
Step 1: Whisk the dry ingredients together. Whisking helps distribute the leavening evenly, so you get a consistent rise.
Step 2: Mix the wet ingredients. If you use butter or coconut oil that is solid, heat it in the microwave for 15-20 seconds to partially melt it.
Step 3: Combine the wet and dry ingredients. Don’t overmix the batter; your cupcakes will turn out dense. (For this reason, I do not recommend using a stand mixer to make this cupcake recipe.)
Step 4: Your batter should have a smooth consistency, as shown in the photo above. The batter should be smooth and spoonable, not stiff or runny. Small adjustments with milk or flour are normal.
Sandi’s tip to avoid gritty cupcakes: Let the batter rest for 15 to 20 minutes. This step allows the gluten-free flour to hydrate fully and helps prevent a gritty texture.
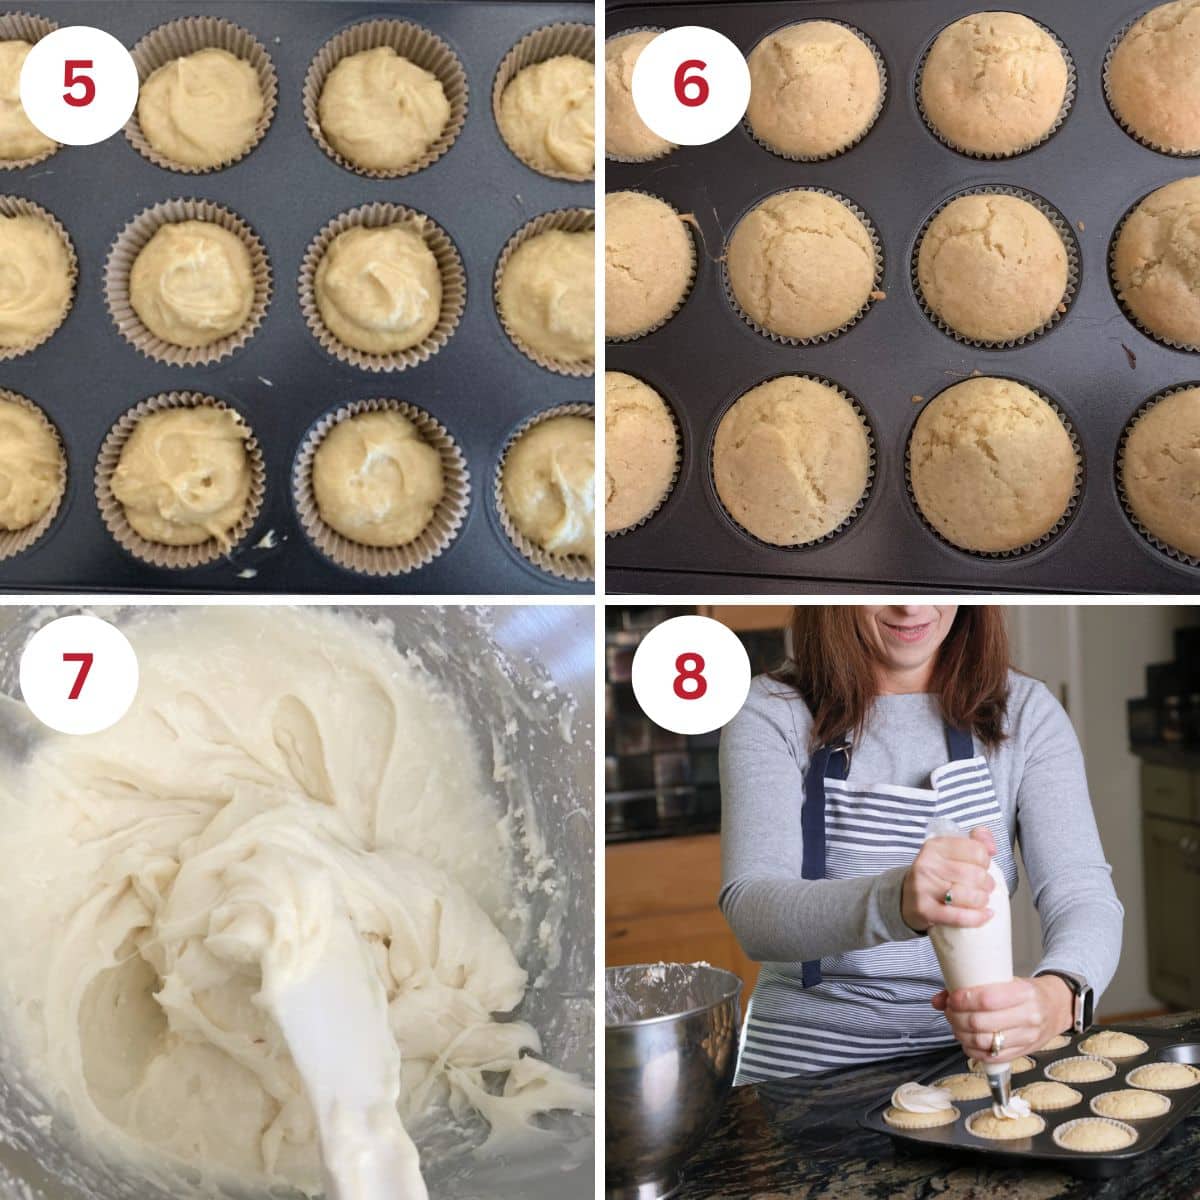
Step 5: Line a muffin tin with parchment paper cupcake liners and fill each cup with cake batter. Parchment liners help prevent sticking and make cupcakes easier to remove after baking.
Step 6: Bake the gluten free vanilla cupcakes. Remove the cupcakes from the oven and let them sit in the pan for 5 minutes. After, use a knife to gently lift each cupcake out of the pan onto a cooling rack. Do not frost the cupcakes until they are cool!
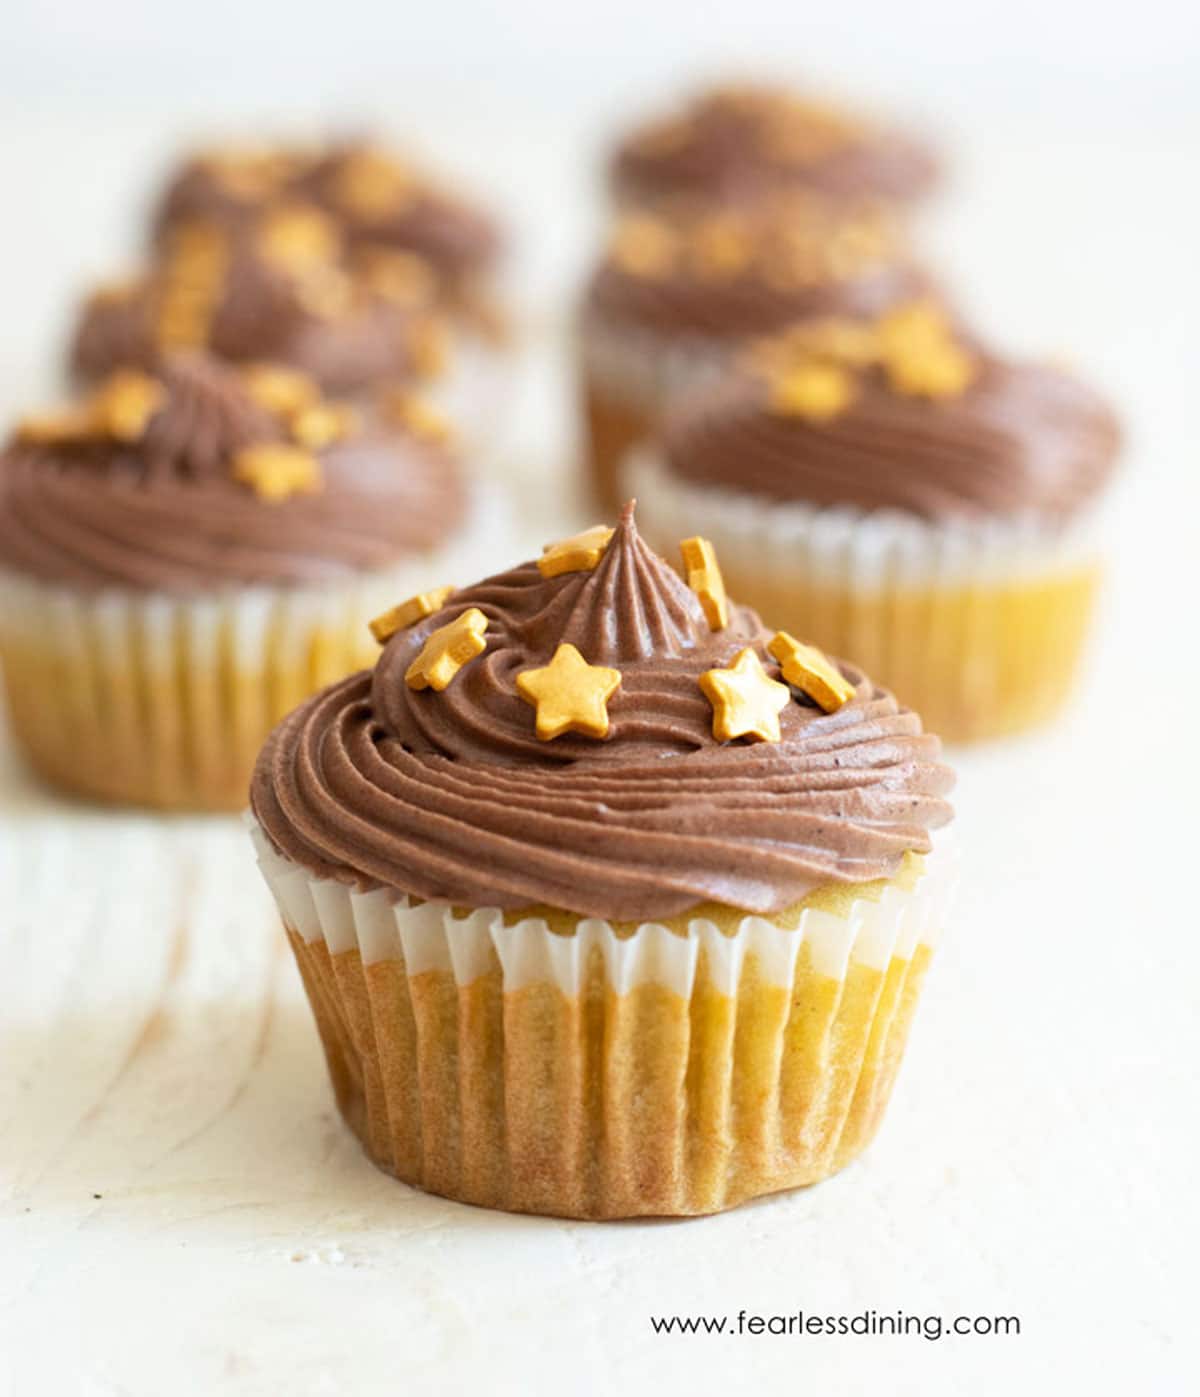
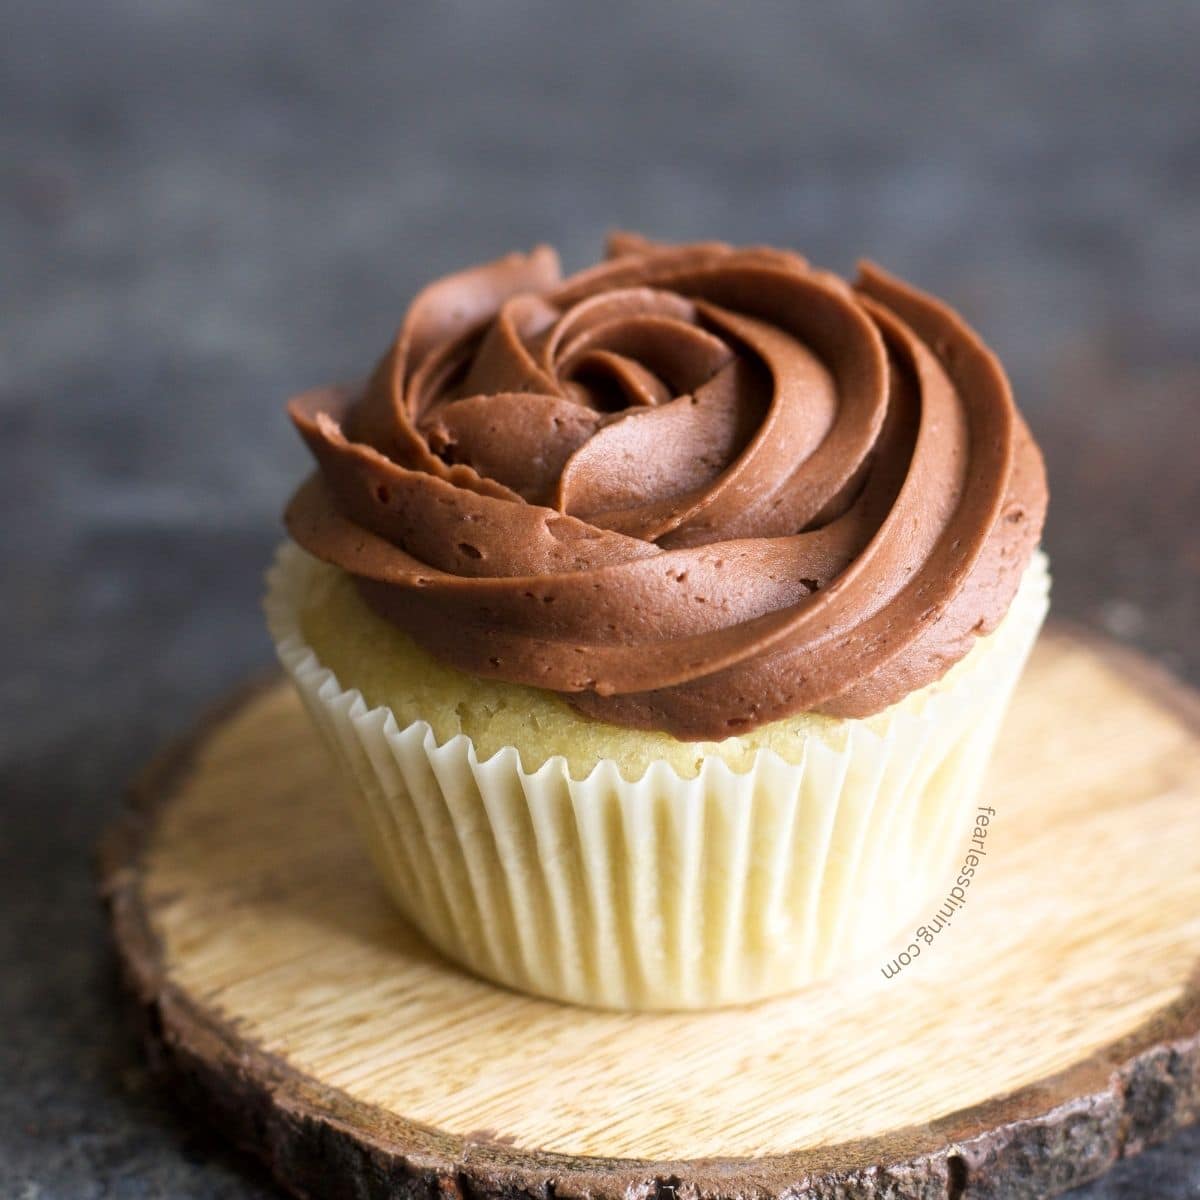
Step 7: Mix the frosting ingredients in a stand mixer with a whisk attachment. I like to make the frosting while the cupcakes are cooling. If you want to add color or flavor to your frosting, check out my Gluten-Free Frosting Guide for instructions and tips! Be sure to use one of these gluten-free sprinkles brands!
If you genuinely love vanilla, you MUST give this Gluten-Free Vanilla Cake a try. It makes a great birthday cake or even a wedding cake! Or, if you also love chocolate, you can make these delicious Gluten-Free Chocolate Cupcakes and serve both flavors!!
Tips for Fluffy Cupcakes:
- 1. Do not overmix the cupcake batter. I do not recommend using a stand mixer to make gluten-free cake or cupcakes. Overmixing the batter will lead to denser cupcakes.
2. Use these parchment paper cupcake liners to prevent the cupcakes from sticking to the paper.
3. Have patience…don’t frost the cupcakes until they are fully cooled!
4. I recommend using the bake oven setting and not the convection setting for a more even bake.
Frequently Asked Questions:
Cupcakes usually sink if the oven door is opened too early or if the batter contains too much liquid. Gluten-free batters rely on a precise moisture balance, so even small changes in flour blend or milk amount can affect structure. Be sure to bake them fully and avoid opening the oven until the cupcakes are set.
This usually happens if you didn’t bake the cupcakes long enough or if you didn’t use enough flour. Every gluten-free flour blend has a different starch-to-grain ratio, affecting the liquid levels.
Dense cupcakes are most often caused by overmixing or using a flour blend that doesn’t hydrate properly. Mix the batter gently and allow it to rest before baking so the gluten-free flour has time to absorb moisture and soften.
A gritty texture usually means the rice flour in the blend did not have enough time to hydrate. Resting the batter for 15 to 20 minutes before baking helps prevent this issue and improves the overall crumb.
Store frosted or unfrosted cupcakes in an airtight container at room temperature for short storage, or freeze unfrosted cupcakes for longer storage. Gluten-free cupcakes tend to dry out faster than regular cupcakes, so airtight storage is important.
Need more baking help? I wrote up all of my gluten-free baking tips to help you! Read my Gluten-Free Cake Troubleshooting Guide. It applies to cupcakes as well! You can also learn a lot from my Gluten-Free Muffin Troubleshooting Guide.
Easy Gluten-Free Cake Recipes:
If you need more baking ideas, I have lots of fun gluten-free cake recipes you can use to make cupcakes. Here are some favorites:
- The ultimate cake, we made this Gluten-Free Chocolate Cake with Raspberries for Mr. Fearless Dining’s birthday!
- One of the best cake recipes, this Gluten-Free Lemon Bundt Cake is perfect for a party.
- This fluffy Gluten-Free Carrot Cake is delicious with cream cheese frosting.
Love This Recipe?
💬 Did you make this gluten-free vanilla cupcake recipe? I would love to hear how it turned out, and which pan or flour blend you used! Your feedback helps others (and helps me keep improving these recipes for you).⭐⭐⭐⭐⭐
Homemade Gluten-Free Vanilla Cupcakes
Ingredients
- 1 ¾ cups gluten free flour blend * see note
- 1 cup sugar
- 1 teaspoon baking powder aluminum-free
- ½ teaspoon baking soda
- ⅛ teaspoon salt
- ½ cup unsalted butter (or coconut oil)
- 2 large eggs
- 2 teaspoons pure vanilla extract
- ¾ cups milk or non-dairy milk * see note
For Chocolate Frosting
- 3 cups powdered sugar
- ½ cup unsalted butter softened
- 1 teaspoon pure vanilla extract
- ½ cup cocoa powder
- 4-5 tablespoons milk or non-dairy milk Add 1 tablespoon more if your frosting is too thick.
For Vanilla Frosting
- 3 cups powdered sugar
- ½ cup unsalted butter softened
- 1 ½ teaspoons pure vanilla extract
- 2-3 tablespoons milk or non-dairy milk
Instructions
- Preheat the oven to bake 350º F and make sure the oven rack is in the middle of the oven so the cupcakes bake evenly. I recommend using the bake oven setting and not the convection setting for an even bake.
- Combine 1 3/4 cups gluten free flour blendhe flour, sugar, baking powder, baking soda, and salt in a large mixing bowl and whisk to blend. I prefer to use a whisk to blend the dry ingredients because it mixes them more thoroughly.
- Add the partially melted butter, eggs, vanilla extract, and milk to a separate mixing bowl and whisk to combine. If you use butter or coconut oil and they are solid, heat them in the microwave for 20 seconds to partially melt them.
- Pour the wet ingredients into the dry ingredients and mix until the batter is "just barely mixed." If you overmix the batter, your cupcakes will turn out dense.
- Optional: Some flour blends are grainier than others. If you use a grainy flour blend, let the batter sit for 15 minutes so the rice flour can absorb the liquid.
- Line a muffin tin with parchment paper cupcake liners and fill each cup 3/4 full with the cake batter. You can use a large cookie or batter scoop to add the cupcake batter evenly.
- Bake the gluten free vanilla cupcakes at 350º F for 25-30 minutes. The best way to test whether cupcakes are baked is to insert a toothpick into the middle of one. If the toothpick comes back clean, the cupcakes are finished baking. If you see batter or crumbs, they must be baked a little longer.
- Cool the cupcakes on a cooling rack. Do not frost them until they are finished baking.
Make the Frosting:
- Add the powdered sugar, butter, vanilla, and milk to a stand mixer bowl. Mix the frosting ingredients in a stand mixer with a whisk attachment for 3-4 minutes until the buttercream frosting is fluffy. I like to make the frosting while the cupcakes are cooling.
- Put the frosting into a frosting pastry bag with a frosting tip. Fold the top edge of the bag over 2-3 inches and add the frosting with a large spoon to the bag. Unfold the top edge and twist the open end of the bag. Squeeze the bag to pipe frosting onto each cupcake.
- Store them in the refrigerator until you are ready to serve them.
Notes
- I have tested this recipe with King Arthur Measure for Measure GF and Bob’s Red Mill 1 to 1 GF blend. Other blends will work, but every blend has a different grain-to-starch ratio, and you may need to adjust the moisture level by adding additional flour or liquid.
- If your gluten free flour blend does not contain Xanthan Gum or Guar Gum, please add 3/4 teaspoon.
- I used almond milk, but other dairy-free kinds of milk will work. I do not recommend canned coconut milk.
- Be very careful not to overmix the batter. Overmixing will make your cupcakes turn out heavy and dense. I do not recommend a stand mixer.
- Use parchment paper cupcake liners to prevent the cupcakes from sticking to the paper.
- These cupcakes will keep fresh for up to 4 days in an airtight container or up to 4 months in the freezer. I recommend freezing the cupcakes without frosting and adding frosting when they are thawed.
Email This Recipe To Me!
SPECIAL NOTE
Please know that every gluten free flour blend has a different starch to grain ratio. If you use a blend I didn’t test, my rule of thumb is to add more flour if your dough or batter is wet and add more liquid if the dough or batter is too dry!
Nutrition
Nutrition Disclaimer
Nutritional information is an estimate provided to you as a courtesy. You should calculate the actual nutritional information with the products and brands you are using with your preferred nutritional calculator.
I truly hope you enjoy this recipe. I have been testing and creating gluten-free recipes for over 15 years. Creating gluten-free recipes that do not taste gluten-free is my goal for every recipe. Sometimes I only have to test a new recipe a couple of times, and others it takes multiple times. I do this so you get reliable, delicious results every time!

Can you use cream instead of milk in this recipe?
Also, I followed all of your tips and I want the texture of the cupcakes to be more moist… they get a bit grainy the day after. Would a little apple sauce help?
Hi Kelly, I don’t recommend using cream, and I haven’t tested it to know if it will work. The graininess is from the rice flour in your blend. Let the batter sit for 15-20 minutes. This allows the rice flour to soften before baking.
Being new to GF baking this recipe is amazing, I was not able to tell the difference between these and “regular” cupcakes. I have made them many times with rave reviews. Thank you for putting recipes together for us. I used King Arthur Gluten Free Measure for Measure flour. I use this recipe for pineapple upside down cupcakes.
Hi Amy, Thank you so much for coming back to leave a review on these cupcakes. i am so glad you loved them and that you are gaining confidence in your gluten-free baking.
Another fab recipe. Every one of her recipes are amazing and fool proof!!
You are so kind to say that, thank you! I am really glad you loved these cupcakes.
This is a really good cupcake recipe. I was worried that I might have over mixed the batter, but it still came out tender. I also used whole milk. I will definitely make this my go to recipe. Thank you so much.
I am so glad you loved these vanilla cupcakes, thank you so much for writing to tell me.
can I use regular milk for this recipe?
Hi Angela, regular milk is fine. Enjoy!
My go to recipe for cupcakes!!! Love these! Quick, easy, and delicious!!
I am so glad you love these cupcakes. They are one of my favorites as well. I also love that I can change up the flavor by using almond extract and other flavored extracts.
These are great.
I am so glad you loved these cupcakes. Thank you so much!
Hi, I made these cupcakes, doubled the batch because the liners I’m using are bigger than normal. My butter was in the freezer so I had to microwave it. I was very careful to not make it too hot and stirred it until I thought it was cool enough to use. As soon as I added it to the cold milk and eggs, it clumped up. When I took the cupcakes out of the oven, the wells had a lot of melted butter in them making the liners very greasy. I really hope they aren’t ruined as doubling the batch used a LOT of expensive ingredients. Can this recipe be made with canola oil instead of coconut oil? Thank you.
Hi Kathy, You mentioned that you used butter, but asked me about coconut oil, so I am not sure which you meant. The answer is yes, you can definitely use canola instead of coconut oil in this recipe.
Hi. Could I make this receipe into a 9 by 13 inch cake ? What adjustments would be needed?
Yes you can. You will need to bake it longer…I haven’t made this cake in that size pan so after 20 minutes you will need to do the toothpick test.
Do you melt the butter or cream it?
I soften the butter, but I am careful not to melt it 100% because I don’t want it to be too hot for the eggs.